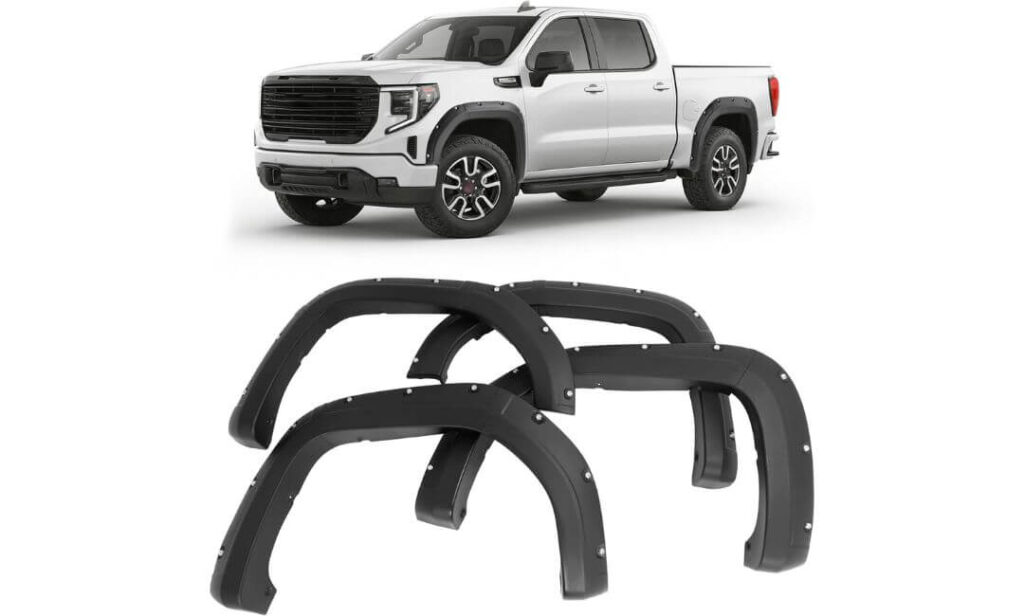
7 Best Fender Flares for GMC Sierra 1500 in 2026: Perfect Fit, Aggressive Style, Zero Guesswork
Owning a GMC Sierra 1500 teaches you one thing fast—your truck looks incomplete the moment you throw on wider tires or even slightly aggressive wheels. That exposed tire poke? It’s not just ugly, it throws mud all over your paint, chips your doors, and honestly makes the truck feel half-built.
I’ve seen guys waste money buying “universal” flares that don’t sit right, fade in six months, or worse—don’t match the body lines at all. Sierra isn’t that kind of truck. It needs proper, year-specific fender flares that actually follow the factory curves, add real tire coverage, and hold up under sun, mud, and daily abuse.
So instead of throwing random options at you, these are 7 fender flares that actually make sense—fit right, look right, and don’t fall apart after one season.
Top Picks Most Sierra Owners End Up Choosing
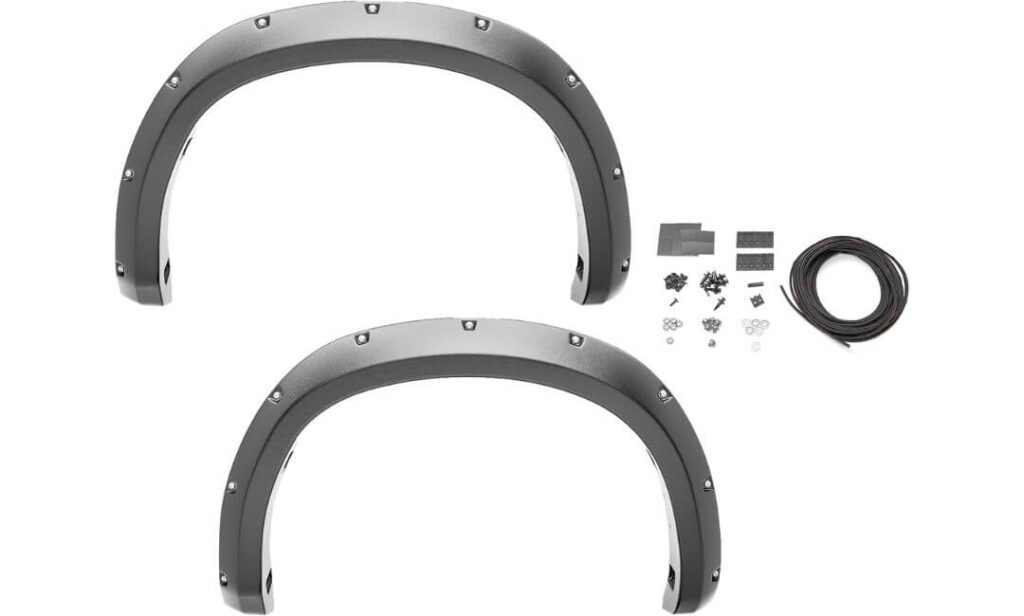
- Rough Country Pocket Fender Flares (2019–2026) — Best aggressive pocket style with real coverag
2” tire coverage + 6.5” height means your wider tires finally look intentional, not accidental. Rivet-style bolts give that proper off-road stance, while UV-resistant ABS doesn’t chalk out like cheap plastic. Matte black is clean out of the box, but you can paint it if you’re picky about color match. This is what most lifted Sierra builds end up running for a reason. - Husky Liners DRT Style Fender Flares (2019–2026) — Best OEM+ clean look with durability
If you don’t want that over-the-top riveted look, this hits the sweet spot. Tight body fit, subtle extension, and solid all-weather construction. It’s the kind of flare that looks factory—but better. No weird gaps, no cheap edges—just clean protection that actually blends with the Sierra’s lines.
Most people fall into one of these two camps—bold off-road stance or clean factory+ finish. Once you figure that out, choosing gets a lot easier. The rest of this list covers both ends, plus older Sierra models that most guides completely ignore.
Best GMC Sierra 1500 Fender Flares: Top 2026 Picks with 2” Coverage, No-Drill Fit & ABS Build
#1. Rough Country Pocket Fender Flares — Best Pocket Style Fender Flares for GMC Sierra 1500 (2019–2026)
#2. Husky Liners DRT Style Fender Flares — Best OEM Style Fender Flares for GMC Sierra 1500 (2019–2026)
#3. Bushwacker Pocket/Rivet Style Rear Flares — Best Rear Fender Flares for Wide Tires Sierra 1500
#4. JMTAAT Pocket Style Fender Flares — Best Budget Fender Flares for GMC Sierra 1500 (Full Set)
#5. BALOCEO Pocket Style Fender Flares — Best Value Fender Flares for Sierra 1500 Daily Use
#6. Spec-D Tuning Pocket Rivet Flares — Best Fender Flares for GMC Sierra 1500 (2016–2018 Models)
#7. G-PLUS Factory Style Fender Flares — Best OEM Replacement Flares for GMC Sierra 1500 (2007–2013 Short Bed)
Expert Tip (From Someone Who’s Seen These Installed, Not Just Listed)
Don’t start with the brand—start with your tire setup and truck year. Most Sierra owners get this backwards. If your tires sit even slightly outside the fender, you need real coverage (around 2″), not just looks. That’s why options like Rough Country actually solve a problem, not just change appearance.
And here’s the part nobody tells you—cheap flares don’t fail immediately. They look fine for a few weeks, then the edges start lifting, the texture fades, and suddenly your truck looks worse than stock. A good flare should sit tight to the body, follow factory lines, and still look the same after a full summer. If it can’t do that, it’s not worth installing.
How We Chose These Fender Flares for GMC Sierra 1500
This list wasn’t built by scrolling Amazon ratings. It’s based on what actually works on a Sierra—how these flares fit, age, and look once they’re on a real truck.
First thing we filtered was year-specific fitment. Sierra 1500 isn’t a one-size truck. A flare that fits a 2019 model won’t sit right on a 2016, and forcing it always ends in gaps or uneven edges. That’s why every product here is tied to a specific generation—2019+, 2016–2018, and 2007–2013. No guesswork, no “almost fits.”
Then we looked at real-world tire coverage, not marketing claims. Some brands say “wide coverage,” but when you mount them, they barely extend past stock. Products like Rough Country and JMTAAT actually give that true 2-inch extension, which matters if you’re running wider wheels or a mild lift. Without that, you’re still throwing mud and road grime all over your paint.
Material quality was non-negotiable. Cheap polypropylene or thin ABS might look fine in pictures, but under sun and heat, they fade, warp, or turn chalky. The flares in this list—especially Husky Liners and Bushwacker—hold their texture and structure over time. That’s the difference between something that lasts years vs. one season.
We also paid attention to how these flares sit on the truck. This is where most people get disappointed. If the edges don’t align with factory body lines, the whole truck looks off. Husky Liners stands out here because it blends like OEM, while pocket-style options like Rough Country and Bushwacker give that aggressive look without looking oversized or awkward.
Installation matters more than people admit. No one wants to drill into a clean Sierra unless it’s absolutely necessary. So we prioritized options that offer bolt-on or minimal-drill installs, with proper hardware and alignment points. If a flare fights you during install, it’s a bad design—simple as that.
Finally, we balanced use case. Not every Sierra owner wants the same thing. Some want a clean daily driver look, others want that aggressive off-road stance. That’s why this list isn’t one-sided—you’ll find OEM-style, pocket-style, and budget-friendly options, but all of them meet the same baseline: they fit right, look right, and last.
At the end of the day, these aren’t just “top-rated” picks—they’re the ones that actually make sense once they’re on your truck. And that’s the only thing that matters.
#1. Rough Country Pocket Fender Flares
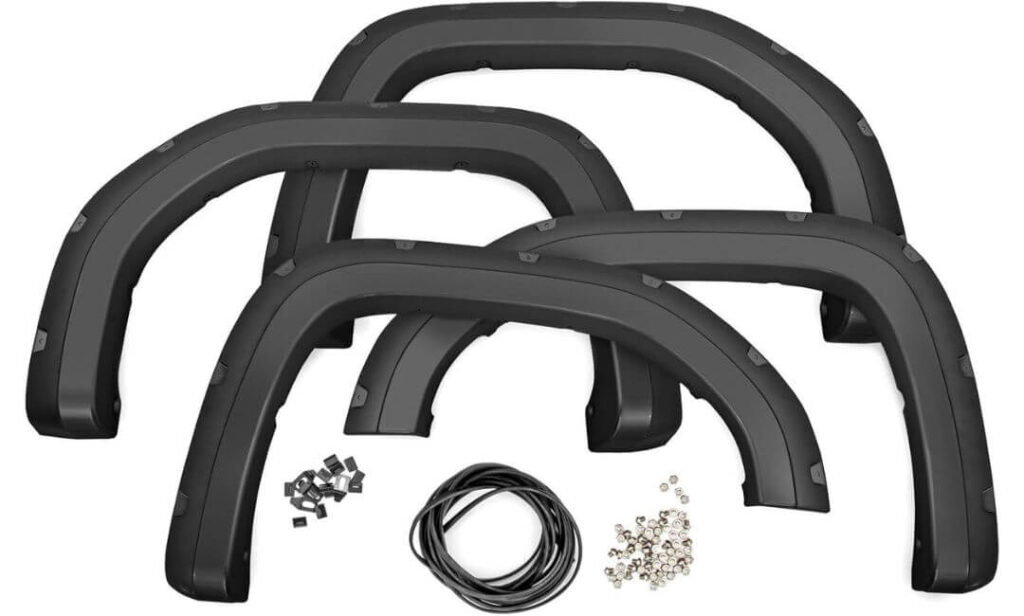
Quick Specs:
- 2″ real tire coverage — not cosmetic, actually hides tire poke
- 6.5″ flare height — fills the wheel arch properly, no awkward gaps
- Tri-Blend ABS build — holds shape under heat, doesn’t flex cheap
- UV-resistant matte black — won’t fade into grey after one summer
- No-drill, factory mount install — bolts on clean, no damage
- Full 4-piece setup — balanced front + rear coverage (no mismatch look)
The moment you bolt these onto a Sierra, the truck stops looking “almost right” and finally feels complete. That extra 2 inches of coverage isn’t just a number—it fixes the exact problem most Sierra owners deal with after upgrading wheels. No more exposed tire edge, no more dirt blasting down the doors. It just looks planted, like it came this way from factory—but tougher.
What really hits is the stance. The rivet-style design gives that proper off-road presence, but without turning your truck into something overdone or fake-looking. It’s aggressive, but controlled. And because the rivets are simulated, you get the look without drilling into your body—something most people regret later. This is one of those rare upgrades where you step back after install and actually say, “yeah, this was worth it.”
Material-wise, this isn’t that thin plastic that flexes when you touch it. The Tri-Blend ABS holds its shape, even in heat and rough use. The matte black finish stays consistent instead of fading patchy like cheaper flares. And if you’re particular about your build, you can paint-match it—but honestly, most people leave it as is because it just works.
(once installed, it doesn’t feel like an add-on—it feels like the truck finally makes sense)
What Stands Out in Real Use
- True 2″ coverage — actually solves wide tire poke, not just visual
- Clean bolt-on install — no drilling, no regret later
- Rivet look done right — aggressive without looking cheap
- Strong ABS build — doesn’t warp or loosen over time
- Matte finish that lasts — no chalking, no weird fading patches
Where It Falls Slightly Short
- Not compatible with AT4X / AEV trims, so double-check before ordering
Sierra 1500 Compatibility (Real Talk)
These are built for the 2019–2026 Sierra 1500 (new body style), and the fit shows it. The edges sit flush, the curves match the body lines, and there’s no weird overhang or gaps. This isn’t one of those “close enough” fits—it’s clearly molded for this generation.
Just be careful with older models or the 2019 Classic version (old body style). That’s where most people mess up. If your truck is the newer shape, you’re good—if not, don’t force it.
Installation Notes (What You’ll Actually Experience)
This is one of the few upgrades where you don’t need to overthink the install. Everything lines up with factory mounting points, hardware is included, and you’re not drilling into anything. Take your time, align properly, and it goes on clean.
Big plus—the design is removable, so if you ever want to go back to stock, you’re not stuck with permanent mods. That alone makes it a safer upgrade compared to most rivet-style options.
#2. Husky Liners DRT Style Fender Flares
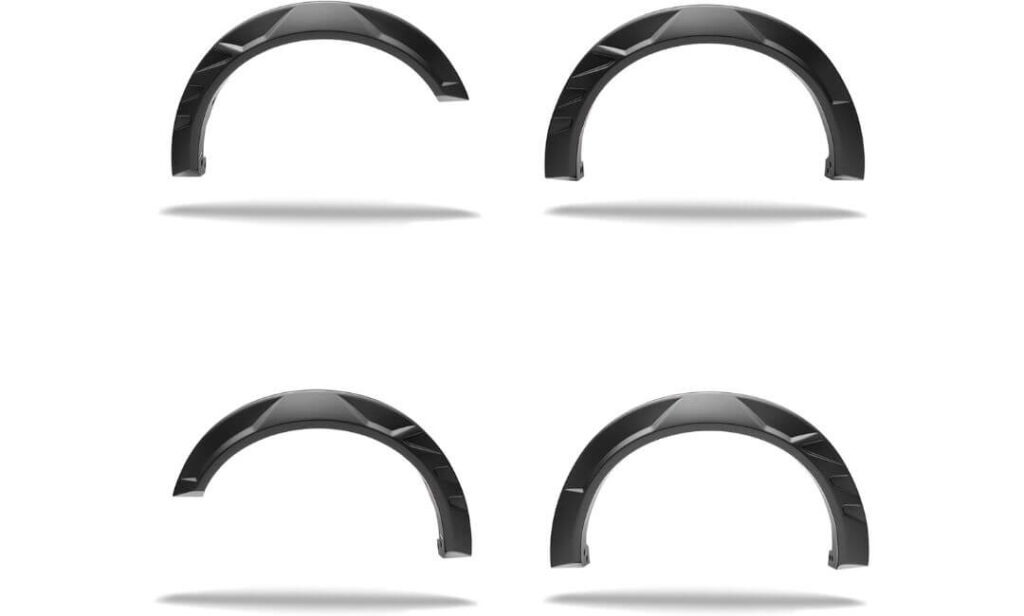
Quick Specs:
- Up to 3″ tire coverage — handles wider setups without overdoing it
- Dura-Flex 2000 ABS — flexible, impact-resistant, doesn’t crack under stress
- 1000+ hours UV tested — no fading, no chalky finish later
- Smooth OEM-style finish — clean, factory-like appearance
- No-drill bolt-on install — everything included, no modifications
- Full 4-piece kit — front + rear matched perfectly
If the first option was about going bold, this is where things get seriously refined. The moment these go on a Sierra, the truck doesn’t scream for attention—it earns it. The smooth DRT design flows with the body lines so naturally, it feels like something GMC should’ve done from factory.
But don’t confuse clean with weak. These carry up to 3 inches of tire coverage, which is more than enough for most wider wheel setups. The difference is how it delivers that coverage—no bulky edges, no fake rivets, just a tight, controlled extension that protects your paint without messing up the truck’s proportions. It’s the kind of upgrade that makes people look twice, not because it’s loud, but because it’s right.
Where this really separates itself is the material. The Dura-Flex 2000 ABS doesn’t feel brittle or cheap—it flexes slightly under pressure, which means no cracking over time. Add in 1000+ hours of UV testing, and you’re not dealing with fading or discoloration after a few months. This is built to stay consistent, whether your truck sits in sun all day or sees rough roads regularly.
(this is the one you choose when you don’t want “aftermarket”—you want factory, just done better)
What Stands Out in Real Use
- Clean OEM+ look — blends perfectly with Sierra body lines
- Up to 3″ coverage — handles wider tires without looking bulky
- Flexible ABS build — resists cracks, holds shape long-term
- UV-tested finish — stays deep black, no fading issues
- Straightforward install — everything included, no guesswork
Where It Falls Slightly Short
- Not for those wanting an aggressive rivet/off-road look
Sierra 1500 Compatibility (Real Talk)
Made specifically for the 2019–2026 Sierra 1500, and it shows in the way it sits. No awkward edges, no uneven gaps—just a tight, factory-level fit across both front and rear.
This isn’t something you “adjust” to make work. If your truck falls in this generation, it lines up clean. If not, it’s not even worth trying—this design is too precise for mismatched models.
Installation Notes (What You’ll Actually Experience)
This is about as stress-free as it gets. No cutting, no drilling, and all hardware comes in the box. Follow the guide, take your time aligning, and you’re done in about 1–2 hours.
It’s a true bolt-on upgrade, which means no permanent changes to your truck. You install it once, and it just stays right—no re-adjusting, no loosening, no headaches later.
#3. Bushwacker Pocket/Rivet Style Rear Fender Flares
Quick Specs:
- Rear-only 2-piece kit — fixes the most exposed area (where dirt hits hardest)
- ~1.5″ rear tire coverage — cleans up rear tire poke without overdoing it
- 7″ flare height — fills the rear arch properly, no empty gaps
- ABS thermoplastic build — strong, weather-resistant, holds shape
- Recessed stainless-style rivets — clean, premium pocket look
- No-drill bolt-on install — mounts using factory points
Most Sierra owners don’t realize this until later—the rear wheels are where your truck actually looks unfinished. Wider tires, slight offset, and suddenly the back looks messy while the front still feels fine. This is exactly where this setup comes in. It fixes the rear stance, not just the overall look.
The coverage sits around 1.5 inches, which might sound less on paper, but in real life—it’s balanced. It pulls the rear tires back under the body just enough to clean up that exposed edge without making the truck look bulky or uneven. And with a 7-inch flare height, it fills the arch properly, so you don’t get that awkward “half-covered” look that cheaper flares leave behind.
Then there’s the finish. The pocket-style rivets here aren’t oversized or fake-looking—they’re subtle, recessed, and actually look premium once installed. Combined with the smooth black ABS thermoplastic, it gives that proper off-road touch without clashing with the truck’s design. This is the kind of rear upgrade that makes the whole truck feel more dialed in.
(once the rear sits right, the whole truck suddenly looks complete—it’s that noticeable)
What Stands Out in Real Use
- Fixes rear tire poke cleanly — where most trucks look off
- Balanced 1.5″ coverage — not too wide, not too subtle
- Premium rivet detailing — clean, not oversized or cheap
- Strong ABS build — handles weather, doesn’t deform
- Quick bolt-on setup — no drilling, no complicated steps
Where It Falls Slightly Short
- It’s a rear-only kit, so front flares are needed for full matching setup
Sierra 1500 Compatibility (Real Talk)
Designed for the 2019–2026 Sierra 1500, and the rear fit is exactly where it should be—tight, aligned, and properly shaped around the arch. No weird overhang, no gaps at the edges.
But this only handles the rear section. If your front is still stock, you’ll notice the difference. Best setup is pairing it with matching front flares for a complete, balanced look.
Installation Notes (What You’ll Actually Experience)
This is one of the easiest installs in the whole list. It comes ready with hardware and instructions, and everything lines up with factory mounting points.
No drilling, no cutting—just position, align, and bolt it down. Take a few extra minutes to align both sides evenly, and you’ll get that clean, factory-level finish without any hassle.
#4. JMTAAT Pocket Style Fender Flares
Quick Specs:
- Full 4-piece setup — front + rear included, complete coverage
- 2″ tire coverage — properly hides mild-to-wide tire setups
- Textured black PP material — doesn’t show scratches easily
- Pocket-style design — aggressive look without overspending
- Screw-in installation — secure fit, not loose clip-on type
- Split rear design — needs proper alignment during install
Not everyone wants to drop premium money just to fix tire poke or upgrade the look—and that’s where this setup actually makes sense. The moment these go on, your Sierra stops looking stock-basic and starts leaning toward that proper off-road stance, without hitting your wallet hard.
The 2-inch coverage does exactly what most people need—it pulls those slightly wider tires back under control, cuts down mud spray, and protects your paint where it matters. It’s not overbuilt, not oversized—just enough to clean up the truck visually and functionally. And because it’s a full 4-piece kit, you’re not dealing with mismatched front and rear like some cheaper options.
Material-wise, it uses textured PP plastic, which is actually a smart choice at this price. It hides minor scratches, doesn’t show swirl marks, and holds up decently against daily use. The pocket-style design gives that aggressive look most Sierra owners want, and from a distance—it honestly doesn’t feel like a “budget” setup.
(this is the kind of upgrade where you spend less—but still get that “yeah, it looks right now” feeling)
What Stands Out in Real Use
- Complete front + rear setup — no need to mix brands
- True 2″ coverage — handles everyday wide tire setups well
- Textured finish — hides wear better than smooth plastic
- Aggressive pocket look — solid visual upgrade on a budget
- Good value overall — delivers more than expected for the price
Where It Falls Slightly Short
- Requires careful alignment during install due to split rear design
Sierra 1500 Compatibility (Real Talk)
Built for the 2019–2025 Sierra 1500 (2WD & 4WD), and it fits well if installed properly. The shape matches the newer body style, but this isn’t a “throw it on and done” type fit—you need to align it carefully, especially at the rear.
Also important—this does not fit 2026 models, so if you’ve got the latest Sierra, skip this and go for updated options. For 2019–2025 trucks though, it does the job without overcomplicating things.
Installation Notes (What You’ll Actually Experience)
This is a screw-in installation, not a simple clip-on. You’ll need basic tools, and in some cases, light drilling depending on alignment.
Start with the front for easier positioning, then move to the rear. Don’t rush tightening—get the alignment right first. Once set properly, it holds solid. It’s not difficult, but it does require a bit more attention than no-drill options.
#5. BALOCEO Pocket Style Fender Flares
Quick Specs:
- Full 4-piece kit — complete front + rear coverage
- Durable PP construction — handles daily abuse and rough use
- Textured black finish — hides scratches, stays consistent
- Pocket-style design — rugged look without premium pricing
- Bolt-on installation — mounts to factory points, no cutting
- 3-piece split per flare — easier handling during install
If you want something that does the job properly without overthinking brands or paying extra for a name—this is exactly where this setup fits. It’s not trying to be flashy or premium, but once installed, your Sierra instantly gets that clean, rugged presence it was missing.
The design leans into that pocket-style look, giving your truck a stronger stance without going overboard. It’s the kind of setup that works equally well on a daily-driven Sierra and one that sees rough roads on weekends. The real win here is balance—you’re getting protection, improved look, and decent build quality, all without stretching your budget.
Material plays a big role here. The PP construction is tougher than it looks—it handles road debris, minor hits, and weather exposure without cracking easily. And the textured finish does something most people overlook—it keeps the flares looking fresh even after months of use. No constant cleaning, no worrying about small scratches—it just holds up.
(this is the kind of upgrade you install once and stop thinking about—it just keeps doing its job quietly)
What Stands Out in Real Use
- Strong value for money — covers all basics without cutting corners
- Full set included — no need to hunt matching front/rear
- Textured finish advantage — hides wear better than smooth flares
- Rugged styling — adds presence without looking oversized
- Reliable daily performance — handles real-world use easily
Where It Falls Slightly Short
- Multi-piece design needs extra attention during alignment
Sierra 1500 Compatibility (Real Talk)
Made for the 2019–2025 Sierra 1500 (2WD & 4WD), and it fits well when installed correctly. The shape follows the newer body style, but because of the split design, getting that perfect alignment matters more here than with single-piece flares.
Also, don’t try fitting these on a 2026 model—they’re not designed for it. Stick to the correct year, and you’ll get the result you expect.
Installation Notes (What You’ll Actually Experience)
This uses a bolt-on setup, so no cutting or drilling headaches. Everything comes in the box, and basic tools are enough.
The difference here is the 3-piece per flare design—it actually makes handling easier, but you’ll need to align each section carefully before tightening. Take your time during setup, and once locked in, it sits solid and looks properly fitted.
#6. Spec-D Tuning Pocket Rivet Fender Flares
Quick Specs:
- Full 4-piece kit — front + rear complete coverage
- Fits all bed lengths — 69.3″, 78.8″, 97.8″ Fleetside
- Polypropylene build — flexible, doesn’t crack under stress
- Smooth black finish — clean base, can be paint-matched
- Pocket rivet style — aggressive look without heavy bulk
- Bolt-on install — minimal to no modification needed
Let’s be honest—finding good fender flares for the 2016–2018 Sierra isn’t as easy as newer models. Most options either look outdated or don’t sit right. This one fixes that gap. Once installed, your truck doesn’t feel like an older model anymore—it feels properly updated.
The first thing you notice is how balanced the design is. It’s got that pocket-style aggression, but the smooth finish tones it down just enough so it doesn’t look overdone. That matters more than people think—especially on this generation, where too much bulk can ruin the body lines. This setup keeps it sharp without trying too hard.
The polypropylene construction is another quiet win here. It flexes slightly instead of cracking, which is exactly what you want for daily use and rough roads. And since the finish is smooth, you’ve got the option to paint-match if you’re building something cleaner—or just leave it black for contrast. Either way, it doesn’t feel cheap once it’s on the truck.
(this is the kind of upgrade that makes an older Sierra feel current again—without forcing a new-truck look)
What Stands Out in Real Use
- Rare proper fit for 2016–2018 models — not easy to find done right
- Clean + aggressive balance — doesn’t overpower the truck
- Flexible polypropylene build — handles stress without cracking
- Paintable surface — works for custom builds too
- Full kit coverage — no mismatch, complete setup
Where It Falls Slightly Short
- Requires removal of factory mudflaps before installation
Sierra 1500 Compatibility (Real Talk)
Built strictly for the 2016–2018 Sierra 1500 Fleetside, and it fits exactly how it should—tight along the edges, clean around the arches, and no awkward spacing.
Important—this does not work on 2019+ models. Different body shape completely. But if you’re running this generation, this is one of the few options that actually respects the truck’s original design.
Installation Notes (What You’ll Actually Experience)
Installation is mostly straightforward—bolt-on with minimal modification. Hardware is included, and everything lines up well with factory points.
The only real step you need to plan for is removing factory mudflaps before starting. Once that’s done, the rest is simple—align, mount, tighten. Take your time with positioning, and it sits clean without needing rework later.
#7. G-PLUS Factory Style Fender Flares
Quick Specs:
- One-piece factory-style design — no joints, no weak points
- ABS thermoformed build — strong, flexible, long-term durability
- UV-resistant finish — no fading, no chalking over time
- OE-standard fit — replaces stock look without mismatch
- Precision clip + bolt-on install — tight, zero movement fit
- Short bed only (69.3″) — exact compatibility, no guessing
Most people with a 2007–2013 Sierra aren’t looking for aggressive upgrades—they’re trying to fix what time has already worn out. Faded, cracked, or missing flares ruin the whole truck’s look. This setup doesn’t try to change your truck—it brings it back to how it should’ve always looked.
The biggest difference here is the one-piece construction. No segments, no joins, no weak points that loosen over time. That means no rattling, no dirt getting trapped behind sections, and no constant re-adjustment. Once it’s on, it sits tight and clean, just like a proper factory part should.
Material quality also stands out more than expected. The ABS thermoforming process gives it strength without making it brittle. It handles heat, sun, and daily use without cracking or warping. And the smooth black finish keeps it simple—either leave it as is for that clean OEM look, or paint it if you want a perfect match.
(this isn’t an upgrade for attention—it’s the one that quietly restores your truck to how it should feel)
What Stands Out in Real Use
- True factory-style fit — blends in perfectly, no aftermarket feel
- One-piece advantage — no loosening, no dirt traps, no noise
- Strong ABS build — holds shape even after years of use
- Clean smooth finish — ideal for stock or paint-match builds
- Low maintenance setup — install once, forget about it
Where It Falls Slightly Short
- Only fits short bed (69.3″) models, so not for all Sierra variants
Sierra 1500 Compatibility (Real Talk)
Designed specifically for the 2007–2013 Sierra 1500 short bed Fleetside, and the fit reflects that. It lines up exactly with factory mounting points and follows the original body shape without forcing adjustments.
If you’ve got a long bed or a different configuration, this won’t work. But for the correct model, it’s as close to OEM replacement quality as you’ll get without going through dealership pricing.
Installation Notes (What You’ll Actually Experience)
This is one of the simplest installs in the entire list. The one-piece design makes positioning easier, and the precision clips + bolt-on setup keep everything locked in place.
No drilling, no cutting—just align, secure, and you’re done. And because there are no multiple sections, you don’t deal with alignment issues or future loosening. It goes on clean and stays that way.
Best GMC Sierra 1500 Fender Flares Compared: Real Coverage, Fit & Style Breakdown
| Product | Best For | Coverage | Style | Material | Fit Years | Install |
|---|---|---|---|---|---|---|
|
Top Pick Rough Country |
Aggressive build + wide tires | 2″ | Pocket Rivet | Tri-Blend ABS | 2019–2026 | No Drill |
|
OEM+ Clean Husky Liners DRT |
Clean factory look | Up to 3″ | Smooth / Vented | Dura-Flex ABS | 2019–2026 | No Drill |
|
Rear Fix Bushwacker Rear |
Rear tire poke correction | 1.5″ | Pocket Rivet | ABS | 2019–2026 | No Drill |
|
Budget Pick JMTAAT |
Full kit under budget | 2″ | Pocket Style | PP Plastic | 2019–2025 | Screw-In |
|
Best Value BALOCEO |
Daily use + rugged look | ~2″ | Pocket Style | PP Plastic | 2019–2025 | Bolt-On |
|
2016–18 Fit Spec-D Tuning |
Older Sierra upgrade | Moderate | Smooth Rivet | Polypropylene | 2016–2018 | Bolt-On |
|
OEM Restore G-PLUS |
Factory replacement look | Stock+ | Smooth OEM | ABS | 2007–2013 | Bolt-On |
Why Fender Flares Actually Matter on a GMC Sierra 1500 (What Most Buyers Miss)
Most people think fender flares are just a styling upgrade. That’s the biggest mistake. On a GMC Sierra 1500, especially once you move beyond stock wheels, they become part of how the truck functions—how it protects itself, how it looks from every angle, and how well everything fits together long-term.
It Starts with Protection — Not Looks
The first time you run slightly wider tires or even a mild offset, you’ll notice it immediately—road spray hitting your doors, mud collecting behind the rear panels, and small stones chipping paint near the wheel arch. That’s not cosmetic damage, that’s long-term wear.
Good fender flares solve that by adding real tire coverage, not just visual extension. That’s why options in this list with 2-inch or more coverage actually matter—they stop debris before it reaches your paint, not after the damage is done. Over time, that alone saves your truck from looking worn out.
Style Isn’t Just Looks — It’s Proportion
A Sierra without proper flare coverage (especially with wider tires) always looks slightly off. Either the tires stick out too much, or the wheel arches look empty after a lift.
Fender flares fix that balance.
- Pocket-style flares give that aggressive, off-road stance
- OEM-style flares keep things clean and factory-like
But the real point is proportion. When the flare matches your tire width and wheel setup, the truck finally looks intentional, not modified halfway.
Fitment Is Where Most People Get It Wrong
This is where buyers lose money.
A flare that “almost fits” will:
- Leave gaps near edges
- Sit uneven across panels
- Start loosening over time
The Sierra 1500 has different body generations, and each one needs a specific design. That’s why this guide separates:
- 2019–2026 (new body)
- 2016–2018
- 2007–2013
Even within the same year, trims and bed lengths can change fitment. If the product isn’t made for your exact setup, it won’t sit right—no matter how good it looks online.
Material Quality Decides How Long They Last
This is something you don’t notice on day one—but you will after a few months.
- ABS (like Rough Country, Husky, Bushwacker) → holds shape, resists UV, doesn’t crack easily
- Polypropylene (budget options) → decent durability, better for daily use, slightly less rigid
- Cheap plastics → fade, chalk, or warp under sun and heat
The difference shows up later, not immediately. A good flare should still look the same after a full summer—not turn grey or start loosening at the edges.
Installation Isn’t Just About Ease — It’s About Risk
There are two types of installs:
- No-drill / bolt-on (factory mounting points)
Clean, reversible, no damage to the truck - Screw-in / modified installs
More secure sometimes, but requires precision
For most Sierra owners, no-drill options are the safest choice. You get a solid fit without risking permanent changes. And if you ever want to remove them, you can go back to stock without issues.
What People Don’t Talk About — Long-Term Fit
Some flares look perfect on day one, but after a few weeks:
- Edges start lifting
- Gaps appear near corners
- Dirt gets trapped behind panels
This usually comes from poor design or multi-piece construction done badly. That’s why one-piece or well-engineered multi-piece designs matter—they stay tight, don’t rattle, and don’t need constant adjustment.
One Quick Thing Most Buyers Ignore (But Shouldn’t)
If your tires extend beyond the fender line, in many places that’s actually not road-legal. Fender flares aren’t just for looks—they help bring your setup back within legal coverage limits.
At the same time, they act as a paint protection layer, especially if you drive on highways, rough roads, or construction areas regularly.
The Bottom Line
On a Sierra 1500, fender flares aren’t an accessory—they’re part of how the truck finishes itself. The right set:
- Protects your paint
- Fixes your stance
- Matches your build
- And stays solid for years
The wrong set?
You’ll notice it every single time you walk up to your truck.
Fit, Finish & Compatibility Checklist for GMC Sierra 1500 (Zero Guesswork Before You Buy)
This is the part most people skip—and it’s exactly why they end up returning parts or living with flares that never sit right. On a GMC Sierra 1500, getting the fit correct isn’t about luck. It’s about checking a few things before you click buy so everything lines up clean the first time.
Start with Your Exact Truck — Not Just the Name
“GMC Sierra 1500” isn’t enough. You need to know:
- Model year (generation matters more than anything)
- Trim level (Denali, AT4, SLE, etc.)
- Bed type (short bed vs standard vs long bed)
- Special variants (like AT4X or refresh models)
Two trucks can look similar but have different mounting points or body lines. That’s why a flare made for 2019–2026 models won’t sit properly on a 2016, even if the listing “almost” matches. The products in this guide are already split by generation for that reason—follow that structure and you avoid 90% of fitment issues.
Check the Mounting Style Before You Commit
Every flare attaches differently, and this directly affects how clean it will look once installed.
- Factory mounting point designs (no-drill)
These line up with existing holes and clips—cleanest fit, safest option - Screw-in or hybrid designs
Slightly more work, but can feel more secure if installed properly
The key thing to check is whether the flare uses your truck’s existing mounting structure. If it doesn’t, you’re forcing a fit—and that’s where gaps and misalignment start.
Visual Fit Matters More Than Specs
You can tell a good flare just by how it follows the truck’s shape.
Look for:
- Even curvature along the wheel arch — no sharp breaks or flat spots
- Tight edge alignment — especially near the door line and bumper
- Consistent spacing — no sections sitting higher or lower
When installed correctly, a good flare should look like it was always part of the truck. If it looks “added on,” something is off—either the design or the install.
Finish Quality — What You See After 3 Months Matters More
Right out of the box, most flares look fine. The real difference shows later.
- Textured finishes hide scratches and daily wear better
- Smooth finishes look cleaner but need more care (and are ideal for paint-matching)
If you’re planning to paint:
- Make sure the surface is paintable (ABS or polypropylene usually is)
- Use proper prep — primer → sealer → color → clear coat
- Don’t skip prep, or the paint won’t hold long-term
A badly painted flare peels fast—and it ruins the whole truck visually.
Installation Reality — What You’ll Actually Deal With
Most listings say “easy install,” but here’s what that actually means in real use.
- Time: Usually 1 to 2 hours if you take your time
- Tools: Basic hand tools (socket set, screwdriver, maybe a drill for some models)
- Process: Align first, tighten later—never rush this step
The biggest mistake people make is tightening everything too early. That’s how you end up with uneven gaps. Proper install is about alignment first, then locking it in place.
Small Details That Make a Big Difference
These are the things experienced owners check instinctively:
- Does it clear your current tire setup without rubbing?
- Will it still look right if you upgrade wheels later?
- Does the rear match the front, or will it look uneven?
- Is it removable, or are you committing permanently?
These aren’t dealbreakers individually—but together, they decide whether your truck looks clean or unfinished.
Final Thought (Before You Click Buy)
If the flare:
- Matches your exact Sierra generation
- Uses proper mounting points
- Follows the body lines cleanly
- And fits your tire setup logically
—you’re not guessing anymore. You’re choosing right the first time.
And that’s the difference between a truck that looks “modified”… and one that looks like it was built that way from day one.
Installation Roadmap for GMC Sierra 1500 Fender Flares (Do It Right Once, No Rework)
Installing fender flares on a Sierra isn’t complicated—but it’s one of those jobs where small mistakes show up every single day after. Crooked alignment, uneven gaps, loose edges—none of that comes from bad products, it comes from rushed installs.
This roadmap is built so you don’t guess anything. Follow it once, and your flares will sit clean, tight, and stay that way.
Step 1 — Prep the Truck Properly (This Decides Everything Later)
Before touching the flares, clean the mounting area like you actually care about the result.
- Wash around the wheel arches thoroughly
- Remove dirt, wax, and grease (use alcohol wipe if needed)
- Check for old clips, mudflaps, or debris stuck in mounting points
If you install over dirt or uneven surfaces, the flare won’t sit flush. That’s where gaps and vibrations start. A clean surface gives you a true, factory-level fit.
Step 2 — Test Fit One Side First (Never Skip This)
Don’t install everything at once. Take one flare—usually the front—and dry fit it without tightening anything.
What you’re checking:
- Does it align with factory holes?
- Are the edges sitting flush along the arch?
- Any interference with tires or mudguards?
This step tells you immediately if something’s off. If it doesn’t sit right now, tightening bolts won’t fix it later.
Step 3 — Mounting & Fastening (Where Most People Mess Up)
Now comes the actual install—but this is where patience matters.
- Start attaching using factory mounting points or provided hardware
- Keep everything slightly loose at first
- Align the entire flare visually before tightening
If your setup requires screw-in or light drilling, do it carefully:
- Mark positions first
- Drill slowly to avoid cracking plastic
- Never over-tighten screws (this causes stress marks or warping)
The goal isn’t just to attach it—it’s to make it sit even across the entire arch.
Step 4 — Final Alignment & Tightening (The Make-or-Break Moment)
Once everything is loosely mounted:
- Step back and visually inspect both sides
- Check symmetry between left and right
- Adjust before fully tightening
Only after you’re satisfied, go ahead and tighten gradually—not all at once. This keeps pressure even and prevents distortion.
Step 5 — Sealing & Finishing Touches (What Separates Clean vs Average Install)
This is optional—but it’s what experienced owners do.
- Add edge trim or seal (if included) to prevent dirt entry
- Wipe down fingerprints and dust
- Double-check all bolts after 10–15 minutes
A properly sealed flare:
- Doesn’t trap dirt behind it
- Doesn’t rattle over time
- Keeps your paint safer long-term
Tools & Safety Gear (What You Actually Need)
You don’t need a garage setup—just the basics done right.
Tools:
- Socket set / wrench
- Screwdriver (Phillips & flathead)
- Drill (only if required)
- Measuring tape or marker (for alignment)
Safety (don’t ignore this):
- Gloves (protect hands during drilling/handling)
- Safety glasses (especially if drilling)
- Stable parking surface (no uneven ground)
Skipping safety sounds small—until one slip damages your truck or worse.
DIY vs Professional Install (What Makes More Sense?)
Most of the flares in this guide are designed for DIY installation, especially the no-drill options. If you’ve got patience and basic tools, you can absolutely do it yourself.
Go DIY if:
- You’re using bolt-on / factory mount flares
- You’re comfortable taking your time for alignment
- You want to avoid unnecessary labor costs
Consider a professional if:
- The setup requires drilling or modifications
- You’re not confident about alignment
- You want a perfect, no-risk finish
But here’s the truth—this isn’t a complex job. The difference between a bad install and a perfect one is just time and attention, not skill level.
Final Thought
Installing fender flares isn’t about speed. It’s about doing it once and never thinking about it again.
Take your time, align properly, and respect the process—
and your Sierra will look like those flares were meant to be there from day one.
Keeping Your Fender Flares Looking Right for Years (Maintenance & Longevity Guide)
Most fender flares look great on day one. The real difference shows three months later, when some still look deep black and tight—while others fade, loosen, or start collecting dirt around the edges.
On a GMC Sierra 1500, especially if you actually drive it the way it’s meant to be driven, maintenance isn’t optional. It’s what keeps your truck looking intentional instead of worn out.
Regular Cleaning Isn’t About Shine — It’s About Preventing Damage
Dust and mud don’t just sit on the surface—they slowly wear down the finish, especially on textured plastics.
A proper routine looks like this:
- Rinse off loose dirt first (never wipe dry dust directly)
- Use a mild car shampoo, not harsh detergents
- Soft brush or microfiber for textured flares
- Dry properly to avoid water spots
If you skip this and let dirt sit for weeks, it starts dulling the finish. That’s when flares go from deep black to that faded grey look people hate.
UV Protection Is What Separates Good Flares from Great Ones
Even UV-resistant materials need support—especially under constant sun.
What works:
- Use a trim restorer or UV protectant every few weeks
- Apply evenly, don’t over-saturate
- Let it bond properly before driving
This keeps the surface:
- Dark and consistent
- Free from chalking
- Resistant to cracking over time
Without this step, even good ABS flares can slowly lose their original finish.
After Off-Road or Rough Use — Always Do a Quick Check
If your Sierra sees mud, gravel, or rough terrain, don’t just wash and forget.
Take a minute to check:
- Edges near mounting points — any lifting or gaps
- Bolts or clips — still tight and secure
- Inner edges — dirt buildup behind the flare
This isn’t about paranoia—it’s about catching small issues early. A slightly loose edge today becomes a rattling flare next month if ignored.
What Causes Most Long-Term Problems (And How to Avoid Them)
From real-world use, most flare issues come from:
- Dirt trapped behind edges → causes paint wear
- Over-tightened screws → leads to cracks over time
- Ignored loosening → creates uneven fit later
Simple fix:
- Don’t overtighten during install
- Clean behind edges occasionally
- Re-check hardware after a few weeks of driving
It’s not constant work—it’s just being aware of how the flare sits over time.
Painted vs Textured Flares — Different Care, Different Results
If you’ve gone with:
- Textured black → easier to maintain, hides wear naturally
- Paint-matched flares → need proper washing + waxing like body panels
Painted flares look cleaner—but they demand more attention. Skip maintenance, and imperfections show faster.
Seasonal Reality Most People Ignore
Heat, rain, dust—everything affects flares differently depending on season.
- Summer → UV exposure, fading risk
- Rain/mud → dirt buildup behind flares
- Cold conditions → plastic becomes slightly more rigid
That’s why occasional checks matter. Materials expand and contract—it’s normal. You just need to make sure everything stays aligned and secure.
Fender flares aren’t something you install and forget completely. But they’re also not high-maintenance if you do things right.
A few minutes of cleaning, occasional protection, and quick checks after rough use—
and they’ll stay tight, clean, and sharp for years.
Because at the end of the day, it’s not just about having flares—
it’s about your Sierra still looking just as right months later as it did the day you installed them.
FAQs About GMC Sierra 1500 Fender Flares
Will adding fender flares fix my GMC Sierra 1500’s “tire poke” issue—or just hide it visually?
This depends entirely on the coverage measurement, not the design. A lot of flares look wide but only extend visually, not physically. On a Sierra 1500, if your tires are sticking out 1.5–2 inches, you need real measured coverage (like Rough Country’s 2″)—otherwise you’re just masking the problem from certain angles.
The right flare doesn’t just hide tire poke—it brings the tire back under the body line, which affects legality, cleanliness, and overall stance. If your setup is aggressive, always match flare width to your actual wheel offset—not what looks good in photos.
Why do some fender flares on GMC Sierra 1500 start looking uneven after a few weeks—even when installed correctly?
Because “installed correctly” and “designed correctly” are two different things.
On Sierra builds, uneven fit usually comes from:
- Poor multi-piece design (sections shift over time)
- Low-grade plastic expanding under heat
- Mounting points that don’t match factory stress zones
That’s why flares like Husky or Bushwacker hold their shape—they’re engineered to flex slightly without losing alignment. Cheaper flares might sit perfect on day one, but after heat cycles and driving vibration, they start pulling away at edges.
Real fix? Choose flares that are molded for your exact generation, not “compatible with multiple years.”
If I upgrade wheels later on my GMC Sierra 1500, will my current fender flares still work—or will I need new ones?
This is where most people lose money.
If your current flares only give minimal coverage, and you later switch to wider wheels or lower offset, you’ll outgrow them. That’s why it’s smarter to choose flares with slightly more coverage than your current setup needs.
Think ahead:
- Planning bigger wheels later? Go 2″ coverage now
- Staying close to stock? OEM-style is enough
Because swapping flares twice costs more than just choosing the right size once.
Do no-drill fender flares actually stay secure long-term on a Sierra 1500, or do they loosen over time?
Good no-drill flares don’t loosen—bad designs do.
On a properly designed Sierra flare:
- Factory mounting points handle load correctly
- Clips and bolts distribute pressure evenly
- Material flex absorbs vibration instead of cracking
Where people run into problems is:
- Overtightening during install
- Misalignment (causing uneven stress)
- Cheap clips or hardware
A well-installed no-drill setup will stay just as tight after months as it was on day one. The key isn’t drilling—it’s how the flare is engineered to mount.
What’s the one mistake most GMC Sierra 1500 owners make when choosing fender flares—and regret later?
They choose based on looks first, fit second.
It’s easy to get pulled into aggressive styles or cheaper full kits—but if the flare doesn’t:
- Match your exact model year
- Provide enough coverage for your tires
- Sit flush with your body lines
—you’ll notice it every single day.
The right approach is always:
fit → coverage → material → style
Get those first three right, and the look takes care of itself. Do it the other way around, and you end up replacing them within a year.
Final Verdict: What Actually Makes Sense for Your GMC Sierra 1500
At this point, it’s not about “which fender flare is best.”
It’s about which one makes your Sierra finally feel right.
Because once you’ve seen the difference—how proper coverage cleans up tire poke, how the right design follows the body lines, how a solid install makes everything sit tight—you realize this isn’t a small upgrade. It’s one of those changes that redefines how your truck looks every single day.
If you’re running wider wheels or planning to, something like Rough Country just makes sense. It fixes stance, adds real protection, and gives that aggressive presence without second-guessing.
If you want a cleaner, factory-level finish, Husky Liners is the move—it blends in so well, it doesn’t even feel aftermarket.
And if you’re working with an older Sierra or tighter budget, the right pick isn’t about compromise—it’s about choosing something that still fits properly, holds up over time, and doesn’t look out of place six months later.
That’s really what separates a good build from an average one.
Here’s the truth most people realize too late
A bad set of fender flares doesn’t just disappear—you notice it every time you walk up to your truck.
The gaps, the fading, the uneven edges… it stays in your head.
But the right set?
You stop thinking about it completely—because everything just looks right.
So before you close this…
Ask yourself:
- Do your tires sit exactly how you want them to?
- Does your Sierra look complete from every angle?
- Or does something still feel slightly off?
Because this is one of those upgrades where you don’t need months of research.
You just need to choose once—and choose right.
And once you do, you’ll see it immediately.
Not in specs.
Not in listings.
But in the way your Sierra finally looks like it was meant to.
Also Check: