6 Best Fender Flares for Toyota Tacoma in 2026: No-Drill Fit, Rugged ABS & Wide Tire Coverage
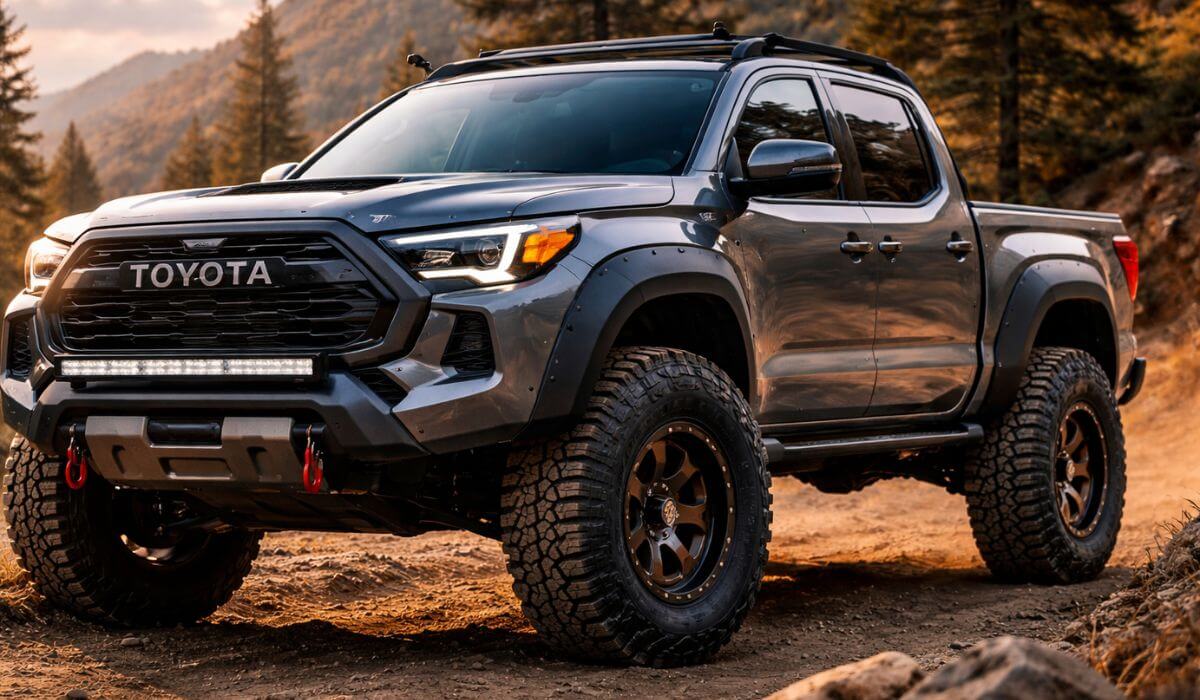
If you’ve spent even a week driving a 2024–2026 Toyota Tacoma on real roads—not showroom asphalt—you already know the problem. Stock arches look clean, sure, but the moment you step up tire size or hit loose gravel, the truck starts throwing everything back at itself. Paint chips, mud spray, and that unfinished stance… it just doesn’t feel right for a truck built to go harder.
The new-gen Tacoma (this one’s a different beast compared to older models) needs flares that actually match its wider, sharper body lines—not those cheap universal kits that never sit flush. And right now, most people are guessing because these products are still fresh on the market with limited long-term reviews. That’s exactly where things go wrong.
So instead of hype, this list is built around what actually matters on this Tacoma: fitment on 2024–2026 models, real material quality (ABS vs PP), coverage for wider tires, and whether you can install it without turning your truck into a drilling project. If a flare doesn’t sit right, doesn’t protect enough, or fades in a few months—it’s out.
This is the kind of shortlist you make after actually understanding how Tacoma owners use their trucks—not just reading spec sheets.
Best Toyota Tacoma Fender Flares: Top 2026 Picks for SR, SR5 & TRD Sport Builds
#1. Rough Country Sport Fender Flares
Best No-Drill ABS Fender Flares for Toyota Tacoma (2024–2026) Wide Tire Coverage
#2. FREEMOTOR802 Pocket Style Fender Flares
Best Budget Pocket Style Fender Flares for Toyota Tacoma (2024–2026) Bolt-On Look
#3. IKON MOTORSPORTS Pocket Style Fender Flares
Best Affordable Tacoma Fender Flares (2024–2026) OEM Fitment Style
#4. Tyger Auto Bolt-Riveted Fender Flares
Best Bolt-On Fender Flares for Toyota Tacoma (2024–2026) Smooth Riveted Style
#5. Husky Liners Pocket Style Fender Flares
Best Durable Pocket Style Fender Flares for Toyota Tacoma (2024–2026) Long-Term Protection
#6. HYPER GLORY Pocket Style Fender Flares
Best Value Wide Body Fender Flares for Toyota Tacoma (2024–2026) Full Coverage
Expert Tip (From Real Tacoma Use, Not Spec Sheets)
If you’re upgrading your Tacoma with bigger tires, don’t just chase the most aggressive-looking flares. What actually matters is how much coverage you’re getting vs how clean the fit sits on the body line. A lot of people install pocket-style flares expecting a wider stance—but if the flare doesn’t extend enough, you’ll still get mud spray and stone chips.
On the flip side, going too wide with cheap PP flares can ruin fitment—gaps, uneven edges, and that “aftermarket mismatch” look shows up fast, especially on the new 2024+ Tacoma body.
The sweet spot?
Go for balanced coverage (1–2 inch range), solid mounting (no-drill if possible), and material that doesn’t fade in 6 months. That’s what actually holds up when you’re driving daily, not just parked for photos.
How We Chose These Fender Flares for Toyota Tacoma (2024–2026)
This list isn’t pulled from random catalogs or copied reviews. These are filtered based on how the new-gen Tacoma actually behaves on-road and off-road, and what owners realistically need right now—especially when most of these products are still fresh with limited long-term feedback.
First thing we locked in was true 2024–2026 fitment. The latest Tacoma has sharper lines and wider arches compared to older models. A lot of generic or “universal-fit” flares simply don’t sit right here. Every option listed above is designed specifically around this new body—no awkward overhangs, no weird gaps.
Then we focused on real-world tire coverage. Not marketing claims—actual usable coverage. The Rough Country, for example, gives measurable extension that actually helps with wider setups. Others like HYPER GLORY and FREEMOTOR802 offer visual width, but we looked at whether they genuinely help with debris control or just add looks.
Material was a big filter. We prioritized ABS where durability matters—because it handles impact and UV exposure better over time. At the same time, we included some PP-based options where the value makes sense, but only if the design and fitment hold up. Cheap plastic that warps or fades didn’t make the cut.
Installation also played a major role. Most Tacoma owners don’t want to drill into a new truck. So we gave preference to no-drill or clean bolt-on setups that align with factory mounting points. If something complicates install without adding real benefit, it’s not worth it.
Finally, we looked at how each flare actually complements the Tacoma’s stance. This truck isn’t soft—it’s aggressive by design. So every pick here either enhances that look (pocket/bolt style) or keeps it clean (OEM-style fit), without making it look forced or out of place.
Bottom line—this selection is built around fitment, coverage, material honesty, and real usability, not hype. If a flare didn’t check all four, it didn’t make this list.
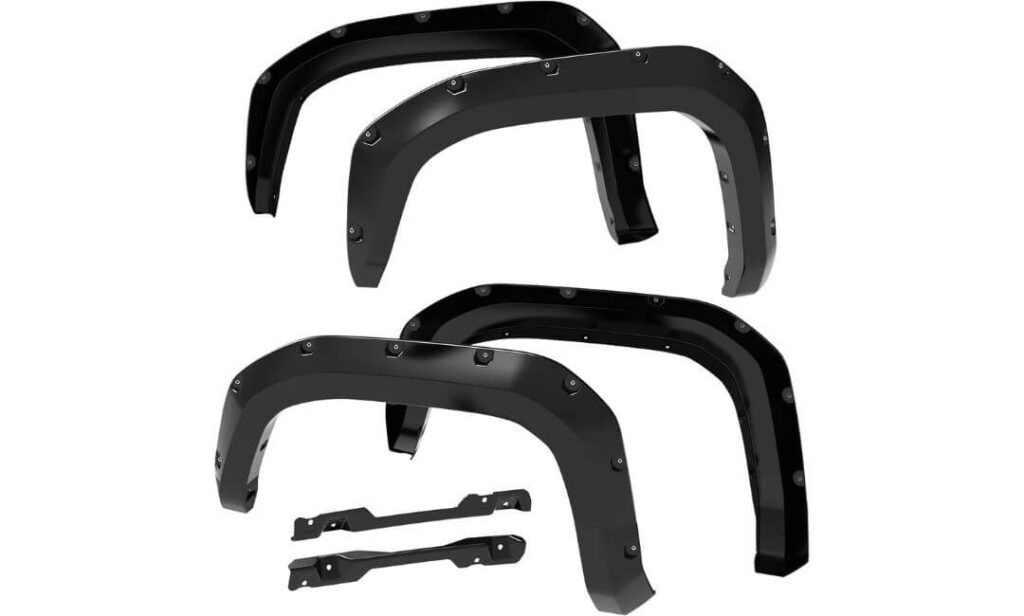
#1. Rough Country Sport Fender Flares
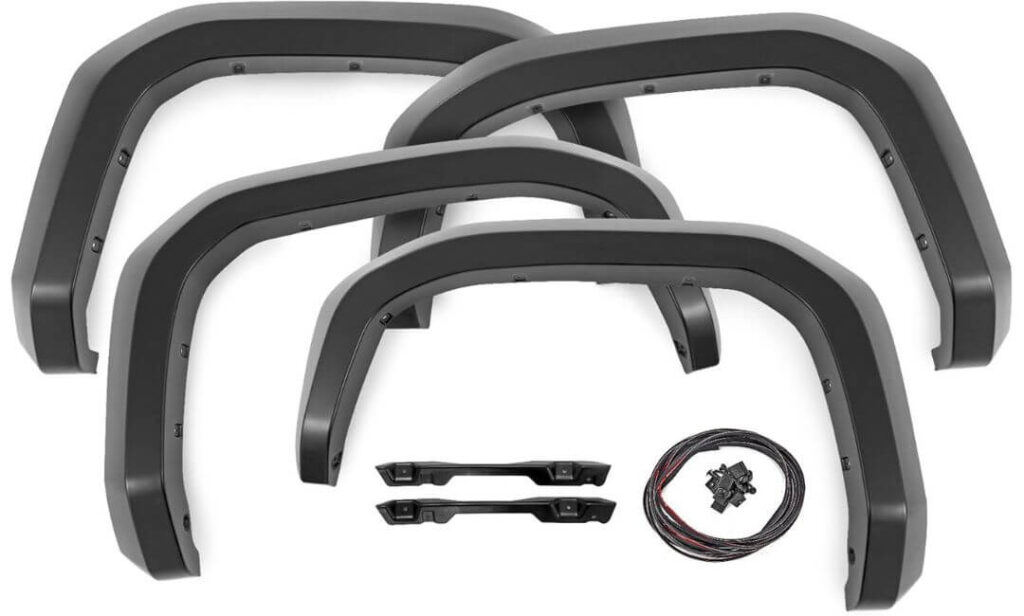
Quick Specs:
- Up to 1.75″ real tire coverage (SR/SR5) — actually helps with wider setups
- 5.75″ flare height — fills the arch properly, not that half-covered look
- Tri-Blend ABS build — impact-resistant, doesn’t feel flimsy like cheap PP
- UV-stable matte black — won’t chalk out after one summer
- No-drill mounting — factory points, clean install, reversible
- Paint-ready surface — can match body color if you want OEM+ finish
You notice it the moment bigger tires go on a 2024+ Tacoma—the stock arches just can’t keep up. This setup fixes that gap properly. Not just visually, but where it actually matters: real coverage where your tires throw debris. That 1.75-inch extension isn’t marketing fluff—it’s enough to stop the constant spray hitting your doors and rear panels.
Material-wise, this is where it separates itself. That tri-blend ABS doesn’t feel like those lightweight plastic flares that flex too much or fade in a few months. It has that slightly dense, solid feel when you handle it. Add the UV protection, and you’re not dealing with that ugly grey fade later. It stays black, stays clean.
Fitment is where most flares fail on the new Tacoma—but here, it actually lines up with the body. No weird spacing, no forced alignment. And since it uses factory mounting points, you’re not drilling into a new truck (which honestly, most owners regret later). It just sits right, like it should’ve been there from factory.
(this is one of those rare setups that improves both protection and stance without creating new problems)
Why It Stands Out in Real Use
- Coverage that actually works — not just for looks, but real debris control
- Solid ABS feel — doesn’t flex or feel cheap when installed
- No-drill install — keeps your Tacoma untouched underneath
- Matte finish holds up — no quick fading or chalking issues
- Sits flush with body lines — no awkward gaps on the new-gen design
Where It Falls Short (Fair Truth)
- Not compatible with TRD Pro / Trailhunter trims due to different fender design
Tacoma Fitment Reality (2024–2026)
Designed specifically around the new-gen Tacoma body, and that matters more than people think. The arches on this model are sharper and slightly wider, so generic flares usually miss the alignment. This one doesn’t—it follows the contour properly across SR, SR5, TRD Sport, Off-Road, and Limited.
Coverage also varies slightly depending on trim (more on SR/SR5, slightly less on TRD variants), but in both cases, it’s enough to handle larger tire setups without looking underdone. That balance is what most setups miss.
Installation Notes (What Owners Should Know)
Install is straightforward if you take your time. Clean the surface properly, line everything up first, and hand-tighten before final torque—that’s what keeps the fit clean and even. No drilling, no cutting, just factory points doing their job.
If you’re running bigger tires, just double-check clearance before locking everything down. And one small pro move—adding a thin trim seal along the top edge helps keep dust and water from sneaking in over time.
Overall, this is a 1–2 hour job max, even if you’re doing it the first time.
#2. FREEMOTOR802 Pocket Style Fender Flares
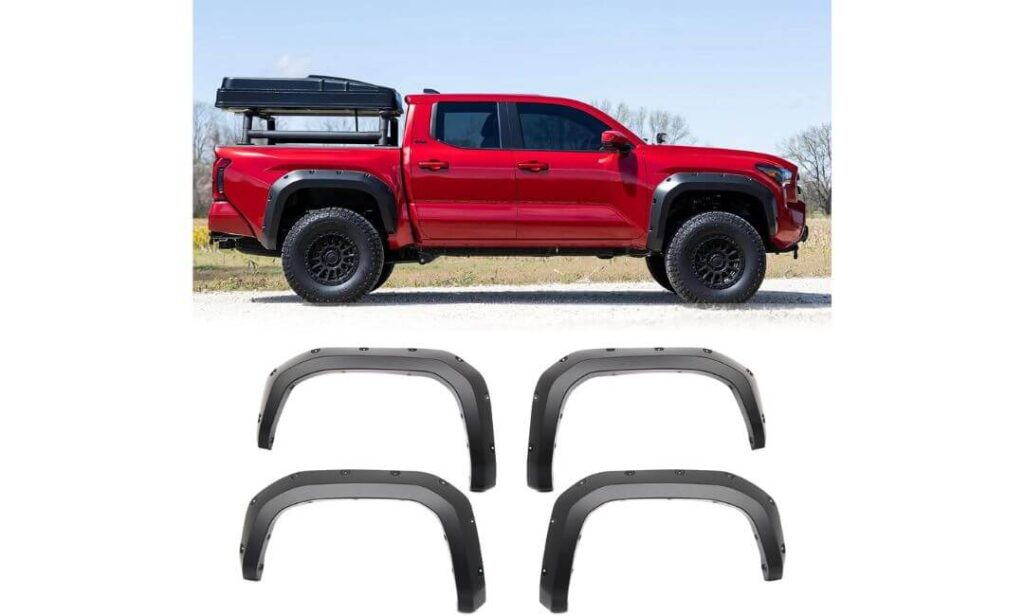
Quick Specs:
- Pocket-style wide design — gives that aggressive, bolt-on stance instantly
- Polypropylene (PP) build — flexible, impact-tolerant for daily + light off-road use
- Full 4-piece kit — front + rear included, no guesswork
- Lightweight (~8 lbs set) — easier handling during install
- Black textured finish — hides scratches better than glossy plastics
- Designed for wider tires — adds visual and functional arch coverage
Not everyone wants to drop premium money on flares—and honestly, for a lot of Tacoma builds, you don’t need to. This one hits that sweet spot where you get the aggressive pocket-style look without overpaying, and more importantly, it actually fits the 2024+ Tacoma shape properly.
The first thing you notice is the stance change. That pocket-style design with exposed bolt look instantly makes the truck feel wider and more planted. It’s not subtle—and that’s the point. If your Tacoma is running slightly bigger tires or you just want that off-road presence, this setup delivers it visually without trying too hard.
Material is polypropylene, which is different from ABS—but not in a bad way here. It’s lighter, slightly flexible, and handles everyday impacts well (stones, minor hits, etc.). You won’t get that ultra-rigid premium feel, but you do get durability where it counts for daily driving and occasional trails. And the black finish holds up decently against dirt and scratches, which matters more than people admit.
(this is the kind of setup you go for when you want the look and protection without overspending upfront)
Why It Makes Sense for Most Tacoma Builds
- Aggressive pocket-style look — instantly upgrades the truck’s stance
- Budget-friendly without looking cheap — rare in this segment
- Flexible PP material — handles daily abuse better than brittle plastics
- Covers wider tires visually — improves overall balance of the build
- Full kit included — no extra parts hunting
Where It Falls Short (Fair Truth)
- Installation isn’t as beginner-friendly (no instructions included)
Tacoma Fitment Reality (2024–2026)
Built specifically for the new Tacoma body, and that shows in how it sits. The edges follow the arch fairly well, especially for a budget option—which is usually where most brands cut corners. It doesn’t look like a forced universal fit.
Coverage is more visual + functional combo—it helps with debris to an extent, but it’s really about giving your Tacoma that wider, off-road-ready profile without going extreme. For most daily-driven builds, that balance actually works better.
Installation Notes (What to Expect Realistically)
This isn’t a “blind install and done” type setup. Since instructions aren’t included, you’ll need to take your time aligning everything properly. Most mounting still uses factory points, but test fitting before tightening is key—that’s what keeps gaps clean.
If you’re not confident, getting it installed professionally isn’t a bad call. Otherwise, just prep properly, align carefully, and don’t rush the final tightening. Once it’s on right, it sits solid.
#3. IKON MOTORSPORTS Pocket Style Fender Flares
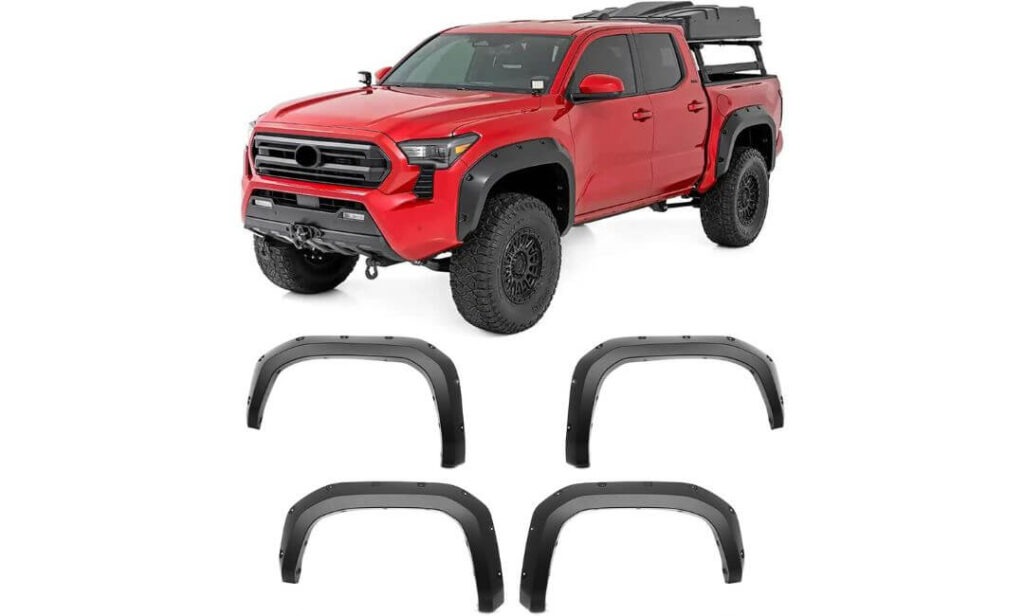
Quick Specs:
- Custom-molded 2024–2026 fit — follows new-gen arch lines properly
- Pocket-style wide coverage — adds real visual width + debris protection
- Polypropylene (PP) build — impact-resistant, flexible under stress
- UV-stable finish — avoids early fading and chalking
- 4-piece full set — front + rear included with hardware
- Bolt + tape mounting combo — more secure than basic clip-on kits
This is where things get interesting—because not every budget flare gets the fit right on the new Tacoma. Most either sit too flat or look forced. This one doesn’t. The custom-molded design actually follows the body lines, and once it’s on, it doesn’t scream aftermarket—it blends in like it belongs there.
The pocket-style design is aggressive, but controlled. You get that wide, off-road stance without going overboard, and the added coverage does its job when you’re running slightly bigger tires. Mud, road grime, small debris—it handles it better than stock arches, especially in daily use where that stuff builds up fast.
Material is polypropylene again, but here it feels a bit more refined. It’s not overly stiff, not too soft—just enough flexibility to handle minor hits without cracking. Plus, the UV resistance helps maintain that black finish, so you’re not dealing with faded grey flares after a few months. It’s one of those setups that quietly does everything right without trying too hard.
(this fits the kind of Tacoma build where you want clean fitment, added protection, and a proper stance—without overspending or overdoing it)
Why It Works So Well on Tacoma
- Clean OEM-like fitment — doesn’t look forced or oversized
- Balanced pocket-style design — aggressive but still daily-friendly
- Better mounting setup — bolt + tape combo gives a tighter hold
- Flexible PP material — handles real-world use without cracking
- Consistent finish — doesn’t fade quickly like low-grade plastics
Where It Falls Short (Fair Truth)
- Requires removing factory flares before install (adds extra effort)
Tacoma Fitment Reality (2024–2026)
Designed specifically for the latest Tacoma shape, and that’s why it sits right across the arches. No weird overhangs, no misalignment across doors or panels—it lines up clean from front to rear.
Coverage is enough for moderate tire upgrades, not extreme wide builds—but for most Tacoma owners running practical setups, it’s exactly where it should be. It improves protection without making the truck look exaggerated.
Installation Notes (What to Expect Realistically)
This install takes a bit more patience compared to no-drill options. Since you’ll need to remove factory flares first, it adds an extra step—but it also means the new set sits more flush afterward.
The bolt + tape setup works well, but only if you align everything properly before locking it in. Take your time with test fitting, apply the weather stripping cleanly, and don’t rush tightening. Done right, it holds firm and looks factory-level clean.
#4. Tyger Auto Bolt-Riveted Fender Flares
Quick Specs:
- 5’ bed specific fitment — designed only for short-bed Tacoma (important)
- Injection-molded PP build — stronger structure, less warping over time
- UV-resistant textured finish — holds color, no chalky fade
- Bolt-riveted style (recessed) — aggressive look without sticking out too much
- Full hardware + gasket included — cleaner seal against body
- Limited lifetime warranty — rare at this price point
Some flares go all-in on aggression… and then start looking overdone. This one takes a different route. It gives your Tacoma that bolt-riveted off-road presence, but keeps the finish clean and controlled—nothing exaggerated, nothing cheap-looking.
The first thing that stands out is the smooth textured finish. It’s not rough, not overly matte—just a balanced texture that blends well with factory panels. Combined with those recessed rivets, it adds depth without making the flare look bulky. So instead of shouting for attention, it upgrades the truck in a more refined way.
Build quality is where it quietly wins. That injection-molded polypropylene isn’t your typical thin plastic—it’s structured better, feels more consistent, and holds shape under stress. Add UV resistance, and you’re not dealing with early fading or surface cracking. Plus, the included rubber gasket seal actually helps keep dirt and water from sneaking behind the flare—small detail, big difference over time.
(this is the kind of setup you go for when you want aggressive styling, but still want your Tacoma to look clean and well put together)
Why It Hits the Right Balance
- Refined bolt-riveted design — aggressive without overdoing it
- Better structural build — injection molding adds strength and consistency
- UV-stable finish — stays black, doesn’t wash out quickly
- Included gasket seal — cleaner install, less dirt buildup behind flares
- Warranty backing — adds confidence for long-term use
Where It Falls Short (Fair Truth)
- Only fits 5’ bed Tacoma (not compatible with 6’ bed models)
Tacoma Fitment Reality (2024–2026)
This one is very specific on fitment, and that’s actually a good thing. Built for the 5’ bed Tacoma, it aligns properly with the shorter rear proportions—no stretching, no awkward rear flare mismatch.
Coverage is balanced—not extreme wide-body, but enough to handle slightly larger tires while keeping the truck proportional. It’s more about enhancing stance cleanly rather than going full aggressive.
Installation Notes (What to Expect Realistically)
This is one of the more complete kits in the list. You get hardware, instructions, and even a rubber trim gasket, which makes install smoother if you follow the process properly.
Start with a clean surface, align everything loosely first, and then tighten in sequence. The gasket helps seal things up, so don’t skip that step. Expect around 2 hours for a clean install, even if you’re doing it the first time.
#5. Husky Liners Pocket Style Fender Flares
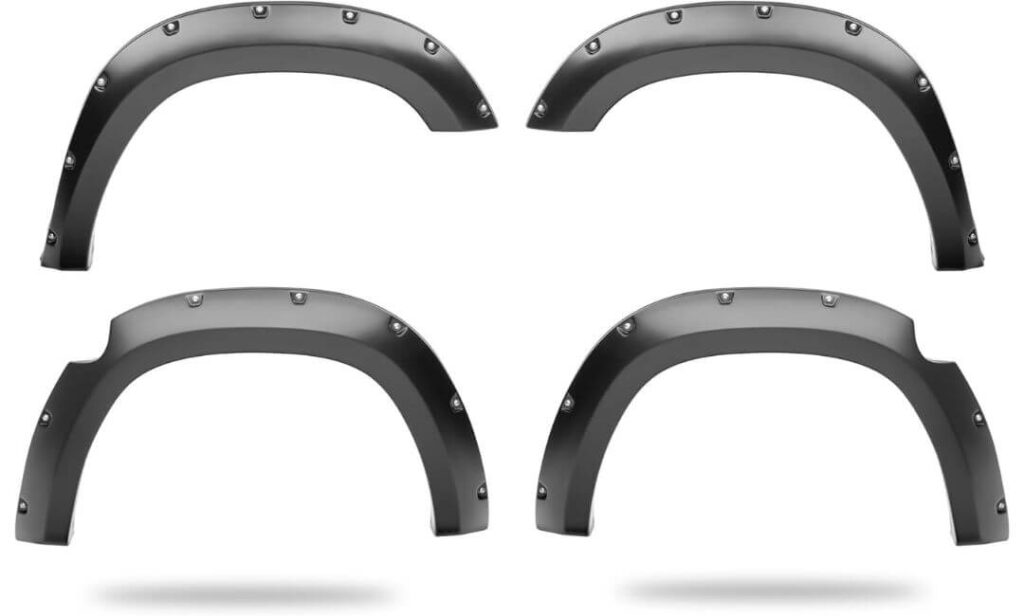
Quick Specs:
- Dura-Flex 2000 ABS — proprietary material, tested for long-term UV exposure
- Full-width tire coverage — works well with oversized & low-offset wheels
- No-drill install (most models) — uses factory holes, fast setup
- Smooth paintable finish — can go OEM color match if needed
- Pocket style with recessed rivets — aggressive but controlled look
- 4-piece complete kit — front + rear with hardware included
This is the kind of setup you pick when you’re done experimenting with cheap flares. When your Tacoma starts seeing real use—bigger tires, rough roads, daily abuse—you need something that doesn’t just look good for a few weeks but actually holds up. That’s where this one separates itself.
The biggest difference here is the material. That Dura-Flex 2000 ABS isn’t just marketing—it’s been pushed through serious UV testing (we’re talking long exposure, not just basic resistance). So instead of fading into that dull grey like most plastics, it keeps its color and structure intact. No warping, no cracking when weather changes.
Coverage is also on point. It’s not just “adds width”—it actually gives full-width protection, especially if you’re running low-offset wheels or slightly aggressive tires. Road debris, mud spray, random chips—it cuts that down noticeably. And the design keeps things balanced: pocket-style aggression with a smooth finish, so it doesn’t look overdone or cheap.
(this is the kind of flare setup you install once and don’t think about again for years)
Why It Earns Its Spot
- Proven ABS durability — built to last, not just look good initially
- Real full-width coverage — ideal for bigger or offset tire setups
- No-drill convenience — quick install without modifying your truck
- Balanced design — aggressive style with clean finish
- Paintable option — easy to match factory body color
Where It Falls Short (Fair Truth)
- Slightly higher price compared to basic PP flare options
Tacoma Fitment Reality (2024–2026)
Built specifically for the latest Tacoma generation, and you can tell from how clean it sits across the arches. No uneven gaps, no forced alignment—it follows the body lines naturally.
Coverage works especially well if you’re running oversized or low-offset wheels, where stock arches usually fall short. It adds protection without making the truck look bulky or disproportionate.
Installation Notes (What to Expect Realistically)
This is one of the easier installs in this lineup. Since it uses existing factory holes, there’s no drilling involved on most setups, and the process feels straightforward even if you’re doing it yourself.
Clean the surface, align properly, bolt it down—that’s pretty much it. Most people can finish it in under an hour if done carefully. Just take a moment to check alignment before tightening, and you’re good.
#6. HYPER GLORY Pocket Style Fender Flares
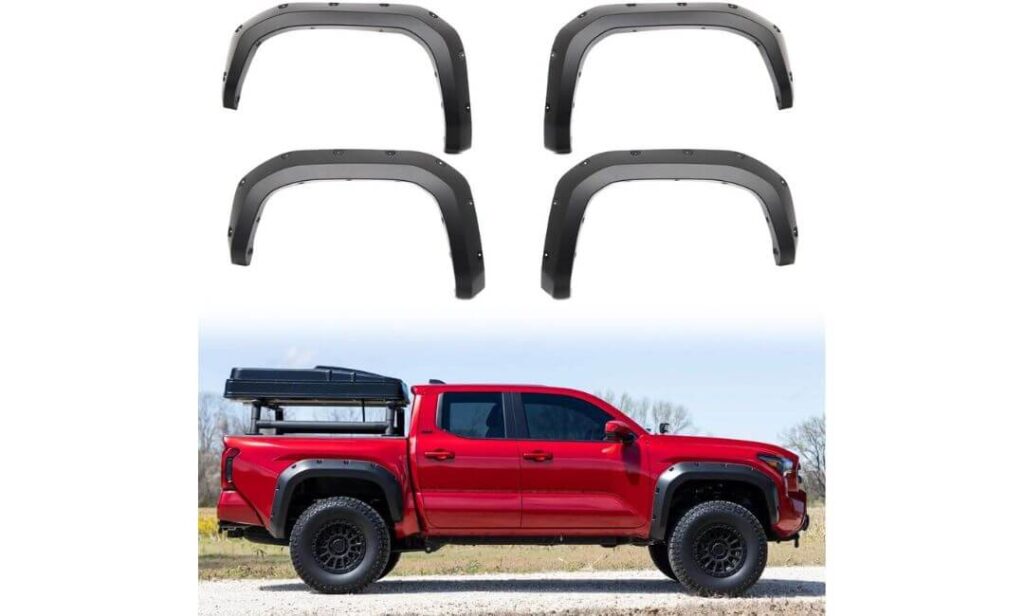
Quick Specs:
- Custom 2024–2026 fitment — aligns clean with new-gen body lines
- Pocket-style wide design — adds aggressive stance + visual width
- Polypropylene (PP) build — flexible, impact-absorbing structure
- Gap-free fit design — sits tight against fender edges
- 4-piece full set — front + rear included
- Mud guard integration — replaces stock guards for cleaner look
This is the one you go for when your Tacoma needs that full transformation without overthinking specs and pricing. The moment these go on, the truck doesn’t look stock anymore—it looks built. That pocket-style wide-body feel hits instantly, especially on the new Tacoma shape where the lines are sharper and more defined.
What stands out here is the fit. For a value-focused setup, it doesn’t leave those annoying gaps or uneven edges. The design is tight, clean, and follows the arch properly, which is where most budget flares fail. And since it integrates with the mud guard area, it gives a more complete, finished look instead of looking like an add-on.
Material is polypropylene, but tuned more toward flexibility. That means it can absorb minor hits, vibrations, and daily abuse without cracking or losing shape. It’s not trying to be ultra-premium—it’s built to last in real conditions. Add in the resistance to fading, warping, and chalking, and it holds up better than most people expect at this level.
(this is the kind of setup that gives your Tacoma that aggressive, wide stance instantly—without draining your budget or compromising daily usability)
Why It Makes Sense for Real Builds
- Strong visual upgrade — transforms stance instantly
- Clean, gap-free fitment — rare at this price level
- Flexible PP build — handles real-world use without issues
- Integrated mud guard design — more complete look
- Full kit included — everything needed in one box
Where It Falls Short (Fair Truth)
- No installation instructions included (requires extra attention or pro install)
Tacoma Fitment Reality (2024–2026)
Designed specifically for the latest Tacoma body, and it shows in how naturally it follows the arches. It doesn’t look stretched or misaligned—even across front and rear panels.
Coverage is more on the wide-body visual side with functional protection, making it ideal for Tacoma owners who want that bold look while still getting basic debris protection for daily and light off-road use.
Installation Notes (What to Expect Realistically)
This isn’t a plug-and-play beginner install. Since you’ll need to remove factory mud guards first, it takes a bit more effort upfront. After that, it mounts using factory points, but alignment is key.
Take your time with positioning, test fit before tightening, and make sure everything sits flush. If done properly, it locks in clean and holds firm. If rushed, you’ll notice it—so patience matters here.
Best Toyota Tacoma Fender Flares for SR, SR5 & TRD Sport: Side-by-Side Comparison
| Product | Material | Coverage | Install | Best For | Verdict |
|---|---|---|---|---|---|
| Rough Country Top Pick |
ABS | 1.75″ | No-Drill | Wide Tires | Best Overall Balance |
| FREEMOTOR802 Budget Pick |
PP | Medium | Moderate | Budget Builds | Best Value Look |
| IKON Motorsports Clean Fit |
PP | Balanced | Moderate | OEM Style | Best Fitment Feel |
| Tyger Auto Premium Style |
PP | Balanced | Easy | Clean Builds | Refined Look |
| Husky Liners Most Durable |
ABS | Full | No-Drill | Long-Term Use | Built to Last |
| HYPER GLORY Wide Look |
PP | Wide | Moderate | Aggressive Style | Best Visual Upgrade |
Buying Guide for Toyota Tacoma Fender Flares (2024–2026): What Actually Matters Before You Buy
If you’ve reached this point, you’re already ahead of most buyers. The mistake people make with Tacoma fender flares isn’t choosing the wrong brand—it’s choosing without understanding how the flare will behave on their actual truck setup. The new-gen Tacoma isn’t forgiving with fitment or proportions, so small decisions here make a big difference in how your truck looks and holds up long term.
Let’s break it down the way a real Tacoma owner would—no fluff, just what actually impacts your decision.
No-Drill Fit vs Drill-Required: What You’re Really Signing Up For
On paper, “no-drill” sounds like the obvious choice—and for most people, it is. Using factory mounting points means you keep your truck untouched, and if you ever want to remove the flares, you’re not dealing with permanent holes or resale issues.
But here’s the nuance. No-drill setups (like Rough Country or Husky Liners) are perfect for daily drivers and clean builds, where you want solid fitment without complications. They’re quicker, safer, and honestly enough for 90% of Tacoma owners.
Drill-required setups (not in this list, but worth knowing) are usually for extreme off-road builds where maximum hold matters. They sit tighter under stress, but you’re committing to that setup permanently. For a new 2024+ Tacoma, most owners don’t want to go that route—and rightly so.
Material Reality: ABS vs Polypropylene (PP) vs Others
This is where most people get misled.
ABS (like Rough Country, Husky Liners) is the more premium option. It’s rigid, holds shape better, and handles UV exposure longer without fading or cracking. If you want something that still looks good after a couple of years, ABS is the safer bet.
Polypropylene (PP)—used in options like IKON, FREEMOTOR802, HYPER GLORY, Tyger—is more flexible. It absorbs minor impacts better (like small stones or vibrations), which is actually useful for daily driving. But lower-quality PP can fade or feel lighter if not built properly.
Fiberglass and polyurethane exist, but for Tacoma flares in this category, they’re not practical. Fiberglass cracks too easily for real use, and polyurethane setups are rare and expensive.
So the real decision is simple:
Go ABS for long-term durability, or PP for budget-friendly flexibility—but only if the fitment is right.
Coverage: Looks vs Actual Protection
This is where expectations need to be realistic.
Some flares are designed to look wide, and some actually extend enough to protect your truck. The difference shows up the moment you hit wet roads or gravel.
- If you’re running stock or slightly bigger tires, a balanced flare (IKON, Tyger) works fine.
- If you’ve upgraded wheels or offset, you need real extension (1–2 inches) like Rough Country or Husky Liners.
- Wide-body styles (HYPER GLORY, FREEMOTOR802) give strong visual presence, but not all of them provide true debris coverage.
The key is not just width—it’s where that width sits relative to your tire edge.
Tire Clearance & Offset Compatibility (Most Ignored, Most Important)
This is the part people skip—and regret later.
If your tires stick out past the stock fender line, you need flares that actually cover that poke, not just sit above it. Otherwise, you’ll still get mud spray and stone hits along the doors.
Low offset wheels + bigger tires = you need more aggressive coverage.
Stock wheels + mild upgrades = you can go with cleaner, OEM-style flares.
Also check vertical clearance. Some flares look good but sit too close to larger tires, especially during turns or suspension compression.
Finish Options: More Than Just Looks
Matte black, textured, smooth—this isn’t just styling.
- Textured finishes (Tyger, FREEMOTOR802) hide scratches and dirt better—great for daily use
- Smooth finishes (Husky) look cleaner and can be painted, but show scratches more
- Matte ABS finishes (Rough Country) strike a balance—clean but still practical
If your Tacoma is a daily driver, textured finishes usually age better. If you’re going for a show-quality build, paintable smooth flares make more sense.
Installation Reality: What It Actually Takes
Most listings say “easy install”—but that depends on the product.
- No-drill kits (Rough Country, Husky) → straightforward, 1–2 hours, beginner-friendly
- Bolt + tape setups (IKON, FREEMOTOR802, HYPER GLORY) → require alignment patience
- Flares requiring factory removal → extra time, more effort, but cleaner final fit
Basic tools are enough in most cases, but the real difference is how carefully you align before tightening. That’s what separates a clean install from something that looks off every time you see your truck.
One small pro tip that makes a big difference:
Adding a thin seal (or using included gasket) prevents dust and water buildup behind the flare over time.
Final Reality Check Before You Buy
At the end of the day, the right flare isn’t the one with the most aggressive design—it’s the one that matches your Tacoma’s actual use.
If your truck is:
- Daily + occasional rough roads → go balanced (IKON, Tyger)
- Lifted / bigger tires → go for real coverage (Rough Country, Husky)
- Style-focused build → go wide-body look (HYPER GLORY, FREEMOTOR802)
Because once installed, you’ll see it every day—and if it doesn’t sit right or protect properly, you’ll notice that too.
Installation & Maintenance Guide for Toyota Tacoma Fender Flares (2024–2026): Do It Right Once
Most people think installing fender flares is the easy part—and that’s exactly why so many Tacoma builds end up with uneven gaps, loose edges, or rubbing issues later. The truth is, these flares (especially on the new-gen Tacoma) reward patience more than skill. If you slow down and do it right, the result looks factory. If you rush it, it always shows.
Let’s walk through this the way it actually works in real use—not just “bolt it on and done.”
Step-by-Step No-Drill Installation (What Actually Matters)
For flares like Rough Country and Husky Liners, the process is straightforward—but only if you respect the sequence.
Start with a completely clean surface. Not just a quick wipe—use proper soap and water, dry it fully, and make sure there’s no dust sitting near the mounting edges. That’s what causes long-term gaps and trapped debris.
Before touching any bolts, test-fit every piece. Hold it in place, check alignment across the wheel arch, and look at it from a distance. This step alone saves you from that “something feels off” look later.
When mounting, always hand-tighten first. Don’t lock anything down immediately. Get all bolts loosely in place so the flare can adjust naturally along the body line. Once everything sits flush, then tighten gradually—preferably in a cross pattern so pressure stays even.
If your kit includes rubber gasket or trim, don’t skip it. That thin layer is what prevents water, mud, and dust from getting trapped behind the flare over time. It’s a small detail that makes a big difference after a few months of driving.
Tools You’ll Actually Use (No Overkill)
You don’t need a full workshop setup, but having the right basics makes everything smoother:
- Socket wrench set (most important)
- Screwdrivers (Phillips + flathead)
- Trim removal tool (for factory clips or mud guards)
- Microfiber cloth + cleaning solution
- Masking tape (helps with alignment marks)
If you’re working alone, patience matters more than tools. If you have a second pair of hands, alignment becomes much easier.
Paint & Finish Care (Where Most Flares Start Aging)
This is where people lose that “fresh install” look faster than expected.
For matte or textured finishes, avoid harsh cleaners or anything with shine enhancers. These surfaces are meant to stay natural—using the wrong product can make them look patchy.
For smooth or paintable flares, if you’ve color-matched them, treat them like your body panels. Regular washing, occasional wax or sealant—that’s what keeps them looking consistent with the truck.
The biggest mistake? Ignoring buildup along the edges. Dirt and moisture collect where the flare meets the body. Cleaning that area occasionally keeps both the flare and your paint in better condition long term.
Preventing Tire Rub & Clearance Issues (Critical for Tacoma Builds)
This is the part most people only think about after installation—and by then, the damage is done.
If you’re running larger tires or lower offset wheels, check clearance before final tightening. Turn the steering fully left and right, compress the suspension slightly if possible, and see how close the tire gets to the flare.
Rubbing doesn’t just damage the flare—it can loosen mounts over time.
If clearance feels tight:
- Adjust flare alignment slightly outward if possible
- Consider minor trimming (only if absolutely needed)
- Double-check wheel offset and tire size compatibility
Also remember—what clears while parked might not clear under real driving conditions (bumps, turns, load).
Long-Term Maintenance (What Keeps It Looking Right)
Once installed properly, these flares don’t need constant attention—but ignoring them completely isn’t ideal either.
Every few weeks, just take a quick look:
- Are all edges still sitting flush?
- Any buildup behind the flare?
- Bolts still tight?
If something feels loose early, fix it immediately. Small adjustments early prevent bigger issues later.
Final Reality Check
Installing fender flares on a Tacoma isn’t complicated—but doing it properly is what separates a clean build from something that always feels slightly off.
Take your time with alignment, respect the material, and check clearance before calling it done. Because once everything sits right, you won’t have to think about it again—and that’s exactly how it should be.
Real-World Testing on Toyota Tacoma (2024–2026): What Actually Happens After Installation
Most guides stop at specs and install—but that’s not where the real story is. What actually matters is how these fender flares behave once your Tacoma leaves the garage. Because that’s when small differences in material, coverage, and fitment start showing up.
This isn’t theory—this is how these types of flares perform when the truck is used the way it’s meant to be used.
Off-Road Clearance & Trail Abuse (Where Weak Flares Get Exposed)
The first real test comes the moment your Tacoma hits uneven terrain—rocks, dips, side articulation. This is where you find out if your flares are just for looks or actually built right.
Flares with rigid ABS structure (Rough Country, Husky) tend to hold their shape better when the body flexes slightly. They don’t wobble or shift under stress. On the other hand, PP-based flares (IKON, FREEMOTOR802, HYPER GLORY) flex more—which is good for absorbing minor hits—but lower-quality ones can feel slightly loose if not installed perfectly.
Clearance also matters here. If your flare sits too tight to the tire edge, you’ll hear it first—light rubbing during articulation. That’s why proper alignment during install isn’t optional. A well-installed flare won’t interfere, even under flex.
Daily Driving with Wider Tires (The Real Everyday Test)
Most Tacoma owners aren’t rock crawling every day—they’re dealing with city roads, highway speeds, rain, and dust. And this is where the difference between “looks good” and “works properly” becomes obvious.
With wider tires, without proper flares, your truck starts throwing:
- mud along the doors
- small stones against the rear panels
- water spray during rains
Flares like Rough Country and Husky (with real extension) noticeably reduce this. You’ll see cleaner door panels even after bad roads.
More style-focused flares (like HYPER GLORY or FREEMOTOR802) still help, but their effectiveness depends on how far your tires stick out. If your setup is aggressive, visual width alone won’t fully solve the problem.
Another thing people notice over time—wind noise and vibration. Poorly fitted flares start to hum or slightly vibrate at highway speeds. A properly mounted flare sits tight and stays silent.
Rain, Mud & Long-Term Dirt Build-Up (The Hidden Test)
This is the part nobody talks about—but every owner notices after a few weeks.
When driving in wet or muddy conditions, debris doesn’t just hit the outside—it starts collecting behind the flare edges. If your flare doesn’t sit flush or lacks proper sealing, you’ll eventually see:
- dirt lines forming along the edge
- moisture sitting between flare and body
- potential paint wear over time
That’s why setups with gaskets or tighter fitment (Tyger, Husky) tend to age better. They reduce that internal buildup.
Regular cleaning helps—but more importantly, choosing a flare that sits properly from day one saves you from this issue altogether.
Heat, Sun & Material Fatigue (What Happens After Months)
After installation, everything looks good. The real test is 3–6 months later, especially under strong sun.
Lower-quality materials start to:
- fade into a dull grey
- lose that deep black finish
- feel brittle in extreme heat
This is where UV-stable ABS (Rough Country, Husky) clearly outperforms. It holds color longer and keeps its structure intact.
PP flares can still perform well—but only if they’re well-made. Cheap ones tend to show aging faster, especially if constantly exposed to sun and dust.
Winter, Snow & Load Conditions (Where Stress Builds Up)
In colder conditions, materials behave differently.
Rigid plastics can become slightly more brittle, while flexible materials handle cold better—but may feel softer under pressure. Snow, ice, and slush also add extra weight and moisture exposure, especially around mounting points.
Flares that are:
- properly sealed
- securely mounted
- made from stable material
…handle this without issues.
Loose installs, on the other hand, start showing problems here first—small gaps widen, edges loosen, and that clean fit disappears.
Final Reality (What You Notice After Living With Them)
After weeks of driving, you stop noticing the design—and start noticing the behavior.
A good flare setup:
- stays tight
- keeps your truck cleaner
- doesn’t fade or loosen
- feels like part of the truck
A bad one:
- starts showing gaps
- collects dirt
- fades unevenly
- makes you question the install
That’s the difference between choosing based on specs… and choosing based on how your Tacoma actually lives day to day.
FAQs About the Toyota Tacoma Fender Flare
Will fender flares actually fix mud spray issues on a 2024–2026 Toyota Tacoma with wider tires?
Only if the flare extends beyond your tire edge—and most don’t as much as people expect. On the new Toyota Tacoma, even a slightly aggressive offset pushes the tire outward enough that basic pocket-style flares become more “visual” than functional.
If your tires poke out, you need measurable coverage (around 1–1.75 inches) like Rough Country or Husky. Otherwise, you’ll still see mud lines along your doors after a single rainy drive.
Real talk—flares reduce spray, but only the right ones actually solve it.
Do no-drill fender flares stay secure long-term on a Toyota Tacoma, or do they loosen over time?
They stay solid—if installed properly.
The problem isn’t the no-drill design, it’s rushed installs. If bolts aren’t evenly tightened or alignment is slightly off, that’s when you start seeing:
- small gaps
- slight vibration at highway speed
- edges lifting over time
But a correctly installed no-drill setup (especially ABS ones) will hold just as well for daily and moderate off-road use. Most Tacoma owners never need drilled flares unless they’re doing extreme builds.
On the new Toyota Tacoma, do pocket-style fender flares actually add real width or just visual bulk?
This is where most buyers get misled.
Pocket-style flares give you that aggressive, bolt-on look, but not all of them add true functional width. Some sit higher on the arch instead of extending outward enough.
So yes—they add presence. But if your goal is tire coverage, you need to check actual extension specs, not just design.
In simple terms:
Some flares make your Tacoma look wider.
Very few actually protect like a wider truck.
Why do some fender flares start looking faded or chalky within months, even if they claim UV resistance?
Because “UV-resistant” isn’t the same across all materials.
Lower-grade plastics (especially cheap PP blends) might resist cracking, but they still lose that deep black finish quickly. That’s when you see that dull, washed-out grey look.
Higher-quality ABS (like Dura-Flex or tri-blend) is different—it’s tested for long exposure and holds color much longer.
So the issue isn’t UV resistance as a feature—it’s how well the material is actually engineered to handle it.
Is it normal for fender flares to slightly shift or feel uneven after a few weeks of driving?
It can happen—but it’s usually a sign of installation, not the product itself.
After a few drives, especially on rough roads, mounting points settle slightly. If bolts weren’t tightened evenly or alignment wasn’t perfect, you might notice:
- one edge sitting slightly higher
- a small gap appearing near corners
The fix is simple—recheck and retighten. But here’s the key:
A well-installed flare on a Tacoma should look the same after 3 months as it did on day one.
If it doesn’t, something wasn’t set right during install—not that the flare “wore out.”
Final Verdict: What Actually Makes Sense for Your Toyota Tacoma
At this point, it’s not about which fender flare looks the most aggressive on screen—it’s about which one still feels right after weeks of driving your Tacoma in real conditions.
Because once they’re installed, you stop thinking about specs. You start noticing things like:
- how clean your doors stay after a rainy drive
- whether the flare still sits tight after rough roads
- if the finish still looks deep black or already fading
That’s where the real difference shows up.
If you want something that just works without second-guessing, go with Rough Country or Husky—they solve the actual problem (coverage + durability) without creating new ones. If your focus is more on stance and visual upgrade, options like IKON, Tyger, or HYPER GLORY give you that presence—just make sure your tire setup matches what they can actually cover.
And here’s the part most guides won’t tell you—on the new Toyota Tacoma, fitment matters more than brand. A perfectly aligned mid-range flare will always look better than a premium one installed slightly off. This truck’s body lines are sharp, and anything even a little misaligned stands out immediately.
So don’t rush the decision, and definitely don’t rush the install.
Pick the one that matches how you actually use your truck, install it with patience, and once it’s on right—you won’t think about it again.
(and that’s exactly how a good upgrade should feel)
Also Check:


