

Best 10-Inch Subwoofers for Deep Bass in 2026: Extreme RMS, Low-End Impact & Competition Builds
If you want deep bass from a 10-inch subwoofer, do not start by chasing the highest wattage printed on the box. What you actually hear from a driver depends on how its RMS power, voice-coil configuration, motor strength, excursion, and enclosure work together. That matters even more with high-output models, because a subwoofer capable of serious power can expose weaknesses in the amplifier, wiring, electrical system, or box just as quickly as it can deliver stronger bass.
I’ve focused this list on 10-inch car subwoofers built for genuine low-frequency performance, not simply impressive peak-power numbers. The lineup covers everything from a manageable daily-driver option to substantially more demanding high-RMS designs, with models suited to sealed and ported enclosures. Before choosing one, look at your amplifier’s RMS output at the intended impedance, available mounting depth, required enclosure volume, and the amount of electrical power the complete system can realistically support.
A 10-inch subwoofer can work extremely well in cars, trucks, SUVs, and custom audio builds, but the driver is only part of the installation. A high-excursion competition sub in the wrong box will not magically produce better bass, while a correctly matched moderate-power setup can sound far more convincing than its specification sheet suggests. That is where these five models separate themselves, and why I would judge them by the complete system rather than peak wattage alone.
Best 10-Inch Subwoofers for Deep Bass in 2026: DVC, Excursion and Enclosure Picks
#1. Sundown Audio SA-10 v.2 D4 Competition
Competition Grade 10 Inch Car Subwoofer for Deep Bass, 1,250W RMS Power, High Excursion and Serious Low-End Output
#2. Alpine R2-W10D4 R-Series
Best 10 Inch Subwoofer for Bass with 750W RMS, Dual 4-Ohm Voice Coils, High Excursion and Controlled Low-Frequency Response
#3. Skar Audio EVL-10 D4
High Power 10 Inch Car Subwoofer for Deep Bass, 1,000W RMS, 23.5mm Xmax and Hard-Hitting Low-End Performance
#4. American Bass XFL 10
High RMS 10 Inch Subwoofer for Loud Bass, 1,500W RMS Power, 3-Inch Voice Coil and High-Output Car Audio Builds
#5. Rockford Fosgate P2D4-10 Punch
Dual Voice Coil 10 Inch Car Subwoofer for Deep Bass, 300W RMS Power, Compact Enclosures and Daily-Driver Audio Systems
Expert Tip
One thing I would not do is choose a 10-inch subwoofer by the largest wattage number printed on the product page. That number can look impressive while telling you very little about what the sub will actually do in your vehicle.
Look at the RMS rating first, then match the subwoofer to an amplifier that can deliver appropriate power at the correct impedance. After that, pay attention to the enclosure. A serious driver such as the Sundown or American Bass can be capable of far more output than a factory system was designed to handle, while a lower-powered option such as the Rockford Fosgate can make more sense when you want a strong bass upgrade without turning the entire vehicle into a competition build.
I would also check mounting depth, final impedance, available electrical capacity and the recommended box design before ordering. Those details are easy to overlook, but they are often what separates a subwoofer that sounds genuinely deep from one that simply looks powerful on paper.
How We Choose These 10 Inch Subwoofers
We did not build this list by taking five popular names and putting them beside a wattage figure. The goal was to find 10-inch subwoofers that make sense for different levels of serious car audio, while keeping deep bass as the common thread.
The first filter was continuous RMS power. This matters because RMS gives you a much more useful indication of the power a subwoofer is designed to handle during normal operation. That is why the Sundown SA-10 v.2 and American Bass XFL 10 sit naturally toward the high-output end of this selection, while the Rockford Fosgate P2D4-10 occupies a completely different position. We did not treat their power ratings as interchangeable simply because all five are 10-inch drivers.
We then looked at the voice-coil configuration and impedance. The Dual 4-Ohm designs in this list give an amplifier more wiring possibilities, but they also mean the buyer needs to understand the final load before choosing an amplifier. That is a small detail on a specification sheet that can become a very expensive mistake if it is ignored.
Next came excursion and low-frequency capability. Deep bass is not created by wattage alone. The Alpine R2-W10D4, for example, has substantial excursion capability, while the Rockford Fosgate P2D4-10 has a different power and performance profile. We considered these differences rather than pretending every subwoofer produces the same type of bass simply because it has a 10-inch cone.
We also considered enclosure compatibility because the same subwoofer can behave very differently depending on the box behind it. The Sundown SA-10 v.2 is particularly interesting here because it can be used in both sealed and ported applications, giving the builder more freedom to decide whether the system should lean toward controlled response or greater output. That flexibility matters far more to a real installation than another large number printed on a marketing graphic.
Finally, we looked at who each subwoofer actually makes sense for. The Skar EVL-10 and American Bass XFL 10 are aimed at buyers building considerably more powerful systems. The Alpine R2-W10D4 offers a different balance between output and controlled response, while the Rockford Fosgate P2D4-10 makes sense for someone who wants a substantial bass upgrade without stepping into the power requirements of the bigger competition-oriented drivers.
That is also why this list is not ranked simply from the highest advertised wattage to the lowest. The best 10-inch subwoofer is the one that matches your amplifier, enclosure, electrical system and listening goal. A subwoofer that is technically more powerful is not automatically the right choice for every vehicle.
Because several of these are newer or performance-focused models with less long-term consumer feedback than older mainstream favorites, we have also avoided making claims that cannot be supported by their specifications. Where the numbers matter, we use the manufacturer’s stated specifications; where installation decisions matter, we explain the practical consequence instead of turning a specification into a marketing promise.
In other words, the list is built around what the subwoofer can realistically contribute to a complete system, not which product has the most impressive-looking box or the biggest peak-power number.
#1. Sundown Audio SA-10 v.2 D4 Competition
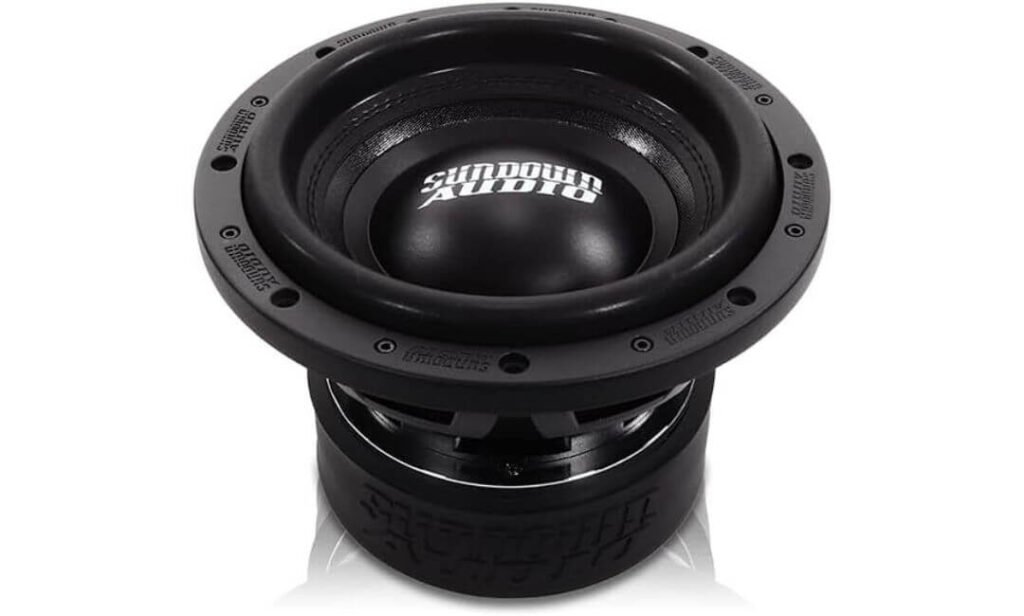
Quick Specs:
- Power Handling: 1,250W RMS / 2,500W Peak
- Voice Coils: Dual 4-Ohm
- Xmax: 19 mm
- Mechanical Excursion: 35+ mm
- Resonant Frequency: 36.14 Hz
- Enclosure: Sealed or Ported
If your idea of a 10-inch subwoofer is something that simply adds a little weight to the factory bass, this is a completely different proposition. The 1,250W RMS rating puts it into serious aftermarket territory, and the 19 mm Xmax with more than 35 mm of mechanical excursion gives the cone plenty of room to move when a properly matched amplifier starts pushing the low end. That matters when the music drops into the lower frequencies where lightly built subs can start sounding strained.
The Dual 4-Ohm voice coils are another detail worth paying attention to. They give you useful wiring options, but they also mean you need to choose the amplifier and final load together rather than buying the sub first and figuring out the electrical side afterward. This is not a driver I would casually connect to an undersized amplifier and expect it to show what it can really do.
There is also a lot going on mechanically that you will never notice from a product thumbnail. The vented magnetic gap and high-velocity frame spacer help move heat away during sustained use, while the high-temperature voice-coil construction is intended for repeated high-power operation. The cast aluminum frame, double-layer spider and tied/doubled XL tinsel leads give the motor and suspension a much more serious foundation than a basic 10-inch replacement sub. The large aluminum Faraday ring is another thoughtful touch, helping reduce electromagnetic distortion rather than simply adding another headline specification.
(For a serious 10-inch deep-bass build, pay particular attention to the enclosure before ordering: this driver can work in either a sealed or ported design, but box volume and tuning will have a major effect on how it actually performs in your vehicle.)
What We Like About This Deep Bass Setup
- 1,250W RMS gives it genuine headroom for a high-power system rather than relying on an inflated peak figure.
- 19 mm Xmax and 35+ mm mechanical excursion provide substantial cone movement for demanding low-frequency playback.
- Vented motor cooling is useful when the sub is driven hard for extended periods.
- Dual 4-Ohm coils give experienced installers flexibility when choosing the final amplifier load.
- Cast aluminum construction and heavy-duty suspension suit the demands of a high-output installation.
The One Thing to Think About First
The only real catch is that the rest of the system has to be ready for it. A 1,250W RMS subwoofer can expose weaknesses in your amplifier, wiring, electrical supply or enclosure very quickly. If your vehicle has a modest factory electrical system and you are not planning a proper amplifier installation, there are easier 10-inch options to live with. That is not a weakness of the driver; it is simply the reality of putting a competition-oriented sub into a normal daily driver.
Where This 10 Inch Subwoofer Makes the Most Sense
This is the kind of driver I would look at when deep bass is the project, rather than an afterthought. The combination of high RMS handling, substantial excursion and thermal management gives it the ingredients needed for a system that can produce genuine physical low-end presence.
A ported enclosure can make particular sense when maximum low-frequency output is the priority, while a sealed build gives you a different balance and can be easier to package depending on the vehicle. Either way, the important part is not blindly copying somebody else’s box dimensions. The enclosure needs to be designed around the driver’s requirements, your available space and the amplifier you intend to use.
The Insider Pro-Tip
Here is where I would slow down before clicking the buy button: do not purchase the amplifier, wiring kit and enclosure separately based only on their individual wattage claims. Build the system backward from the final impedance and RMS requirement. With the Dual 4-Ohm coils, your wiring choice affects the load your amplifier sees, and that affects the amplifier’s actual output. Get that relationship right first.
And if this is going into a truck such as a Toyota Tundra, remember that having physical room for a large box does not automatically mean every enclosure is a good match. Measure the available depth, account for the driver’s mounting depth and leave enough clearance for the vented structure and terminals. For a subwoofer built this seriously, the enclosure is part of the product—treating it as an afterthought is one of the easiest ways to spend serious money and still miss the deep bass you were trying to achieve.
#2. Alpine R2-W10D4 R-Series
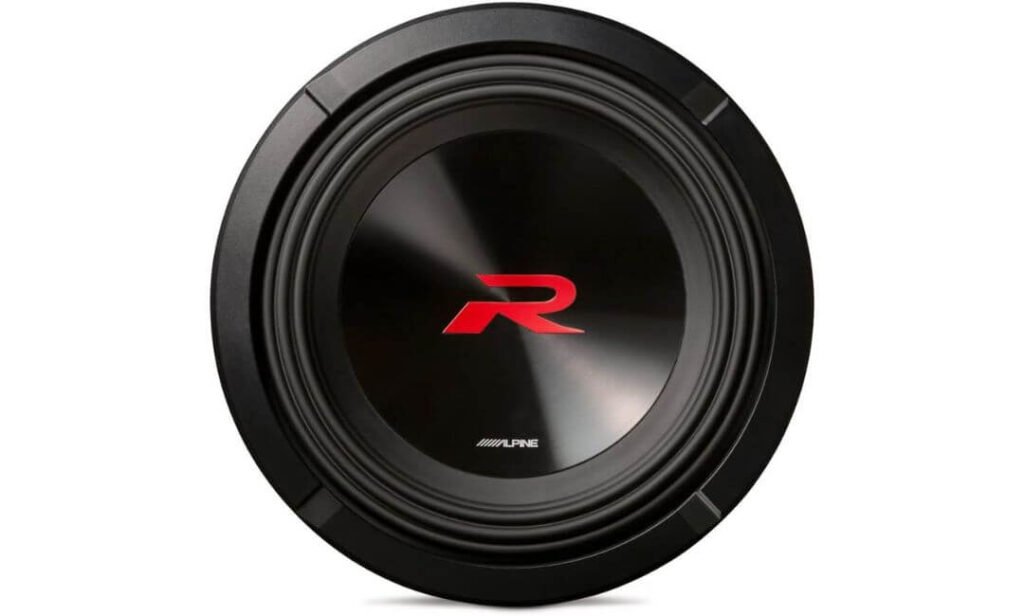
Quick Specs:
- Power Handling: 750W RMS / 2,250W Peak
- Voice Coils: Dual 4-Ohm
- Xmax: 20 mm
- Frequency Response: 26–200 Hz
- Motor: Double-Stacked Magnet Structure
- Surround: HAMR High Amplitude Multi-Roll
- Enclosure: Sealed or Ported
There is a difference between a subwoofer that simply gets loud and one that can move serious air while keeping the bass under control. That is where this R-Series driver gets interesting. Its 750W RMS handling and 20 mm Xmax give it plenty of room for substantial cone movement, while the larger double-stacked motor structure is designed to provide stronger motor force and better control over that movement. For a buyer chasing deep bass without wanting every note to turn into one long boom, that balance matters.
The Dual 4-Ohm configuration also gives you practical flexibility when matching the sub to a monoblock amplifier. But I would not treat that as a reason to buy a more powerful amplifier than the system needs. The useful combination here is the amplifier’s actual RMS output, the final impedance and the enclosure working together. Get those three right and the driver has a much better chance of producing the deep, controlled bass it was designed for.
The less obvious part is Alpine’s HAMR surround. Its multi-roll construction is designed to let the cone make substantial excursions while efficiently moving air, and the oversized poly-ceramic composite dust cap adds rigidity while damping unwanted vibration. Those details do not make the subwoofer magically deeper by themselves, but they help explain why this model is aimed at buyers who want authoritative low frequencies without giving up control and definition.
(The 26 Hz lower response figure is useful context, but I would not use it as a promise that every installation will play cleanly to 26 Hz. Your enclosure, amplifier, vehicle cabin and tuning all influence what you actually hear.)
What We Like About This Deep Bass Setup
- 20 mm Xmax is a standout figure for a 10-inch driver and gives the cone considerable movement for low-frequency playback.
- 750W RMS handling makes it suitable for a serious aftermarket system without requiring the extreme power demands of the highest-output drivers.
- Double-stacked magnets provide a stronger motor structure aimed at improving authority and control.
- HAMR surround technology is designed around high excursion while helping the cone move air efficiently.
- The poly-ceramic composite dust cap adds rigidity and internal damping rather than being purely cosmetic.
The One Thing to Think About First
The main thing I would check before buying is the amplifier and enclosure match. This is a 750W RMS driver, so pairing it with a weak amplifier will leave performance on the table, while simply throwing excessive power at it is not a smarter approach. The enclosure matters just as much: a properly designed sealed box can keep the response tight, while a correctly tuned ported enclosure can emphasize the deeper, more forceful side of the driver’s character.
Where This 10 Inch Subwoofer Fits Best
This one makes the most sense when you want deep bass with some restraint behind it. The combination of 20 mm Xmax, a larger motor structure and Alpine’s surround design gives it a different personality from a sub chosen purely for maximum SPL numbers.
That makes it particularly appealing for a daily-driven car, truck or SUV where you still want to hear the character of the music. Hip-hop and electronic tracks can benefit from the low-end authority, while the added control is useful when the recording contains more than one bass note competing for attention. It is a more balanced approach to a high-output 10-inch system.
The Insider Pro-Tip
I would pay close attention to the 20 mm Xmax rather than getting distracted by the 2,250W peak number. Peak power is not what you will continuously feed this driver. The 750W RMS rating is the number that should guide your amplifier choice, while the Dual 4-Ohm coils determine how you can configure the final load.
And if you are installing it in a daily driver, do not assume that a bigger ported box automatically means better deep bass. The wrong enclosure can make an otherwise excellent driver sound loose or one-dimensional. Build the enclosure around the driver’s actual requirements and your listening goal, then let the motor, excursion and cabin do their work. That approach will tell you far more about this subwoofer than the biggest number on its specification sheet.
#3. Skar Audio EVL-10 D4
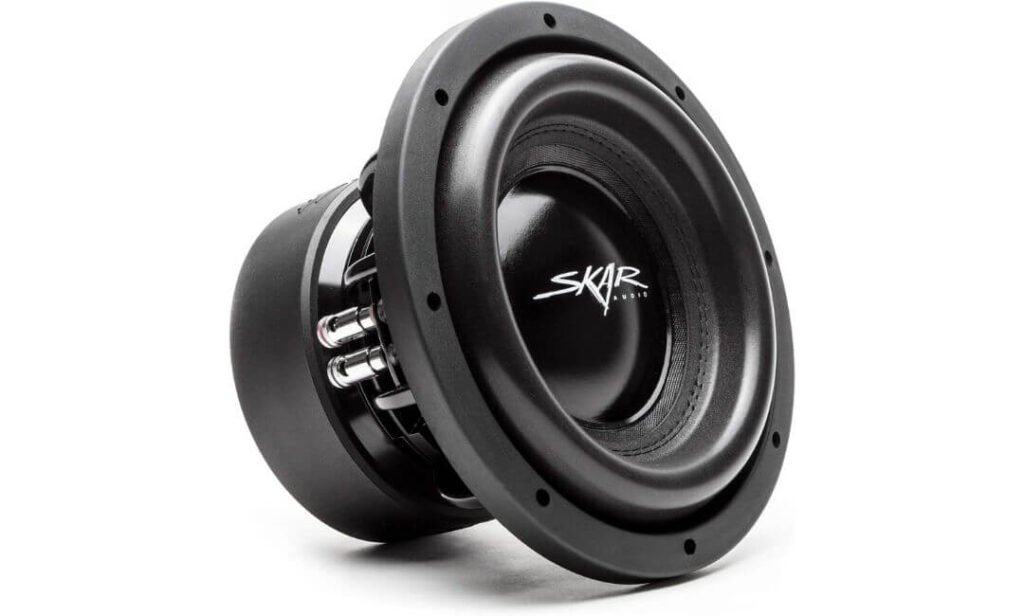
Quick Specs:
- Power Handling: 1,000W RMS / 2,000W Peak
- Voice Coils: Dual 4-Ohm
- Xmax: 23.5 mm One-Way
- Voice Coil: 3-Inch High-Temperature
- Frequency Response: 28–300 Hz
- Sensitivity: 81.9 dB
- Cone: Competition-Grade Pressed Paper
The EVL-10 is interesting because it does not try to win this comparison by simply carrying the biggest number on the label. Its 1,000W RMS rating and 23.5 mm one-way Xmax tell you much more about its intended use. That amount of excursion gives the cone considerable room to move, which is exactly what you want when the goal is strong low-frequency output from a 10-inch driver.
The 3-inch high-temperature Dual 4-Ohm voice coil is another reason this sub belongs in a serious deep-bass lineup. You get useful wiring flexibility, while the larger coil is designed to cope with the demands of a high-power system. The important part, though, is matching the final impedance to an amplifier that can deliver the appropriate RMS power. I would rather see this driver correctly powered than connected to an oversized amplifier simply because the product page advertises 2,000W peak.
The construction also makes its purpose pretty clear. The pressed paper competition-grade cone, high-roll foam surround and two-layer spider are built around substantial cone movement, while the motor and basket incorporate cooling features intended to manage heat. That combination gives the EVL-10 a very different proposition from a basic replacement sub: it is designed to be part of a properly built aftermarket bass system, not just a drop-in factory upgrade.
(The 28 Hz lower end of the published frequency-response range is useful when comparing the driver, but your actual low-frequency response will still depend heavily on the enclosure, amplifier, vehicle cabin and system tuning.)
What We Like About This Deep Bass Setup
- 23.5 mm one-way Xmax gives this 10-inch driver impressive excursion capability for producing substantial low-end movement.
- 1,000W RMS handling puts it comfortably into serious aftermarket territory without reaching the extreme power requirements of the largest competition drivers.
- 3-inch high-temperature voice coil is appropriate for a system designed around sustained high-power use.
- Dual 4-Ohm configuration gives you practical options when deciding the amplifier’s final load.
- Competition-style cone and suspension make the driver suited to an installation where output and physical bass impact are priorities.
The One Thing to Think About First
The important thing here is system matching. With 1,000W RMS capability, this is not a subwoofer I would pair with a small factory-powered amplifier and expect to hear its full potential. You also need to account for the amplifier, power wiring and enclosure together. If the electrical side of the vehicle is not ready for a high-power subwoofer, adding a bigger driver will not magically solve the problem.
Where This 10 Inch Subwoofer Fits Best
This is a strong fit for someone who wants hard-hitting 10-inch deep bass without immediately stepping into the most expensive competition-oriented hardware. The high excursion, 1,000W RMS capability and 3-inch voice coil give it the basic ingredients for a serious bass-focused build.
It can make sense in a daily-driven car, truck or SUV, particularly when the owner wants noticeably more physical bass than a conventional 10-inch replacement sub can provide. The Dual 4-Ohm design also gives the installer some freedom when configuring the amplifier load, which becomes useful if the system grows later.
The Insider Pro-Tip
Do not let the 2,000W peak figure decide your amplifier purchase. Start with the 1,000W RMS rating, decide what final impedance you actually need, and then choose an amplifier that can deliver sensible power at that load. That approach will keep the system easier to tune and far less stressful on the electrical side of the vehicle.
One more thing I would take seriously is the enclosure. With 23.5 mm of one-way excursion, this driver is capable of moving a lot of air, so the box needs to be properly designed and braced for the job. If your goal is deep bass rather than simply maximum noise, don’t copy a random enclosure size from another EVL installation. The right box can make this sub sound powerful and controlled; the wrong one can make all that excursion work against you.
#4. American Bass XFL 10
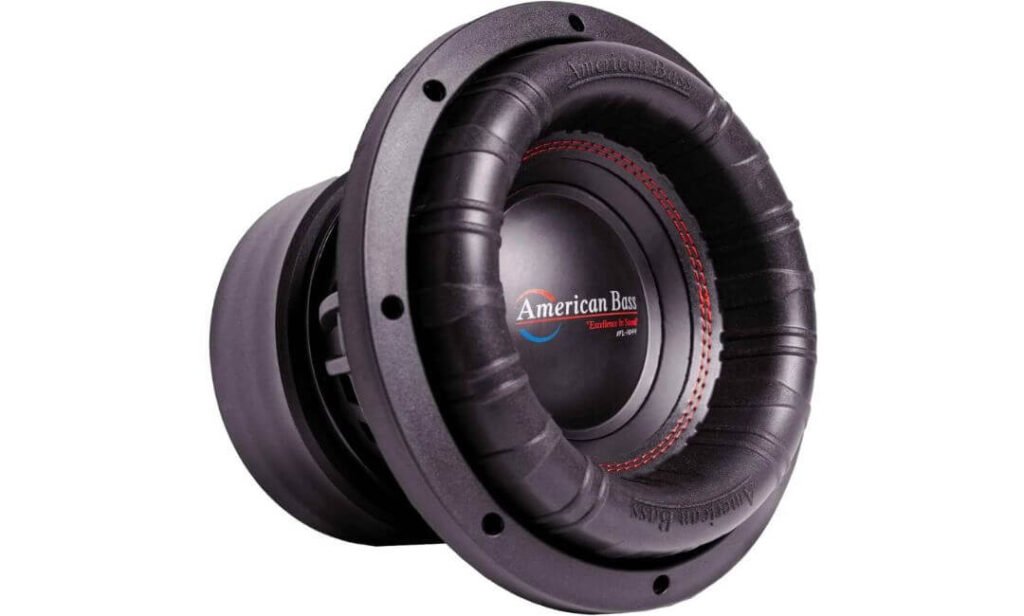
Quick Specs:
- Power Handling: 1,500W RMS / 3,000W Peak
- Voice Coil: 3-Inch
- Magnet: 200 oz
- Xmax: 17 mm
- Frequency Response: 32.4 Hz
- Enclosure: Ported 1.25–1.5 cu. ft. recommended
The XFL 10 is built around a very straightforward idea: give a 10-inch driver enough motor strength and power handling to make serious bass without pretending the peak number is the whole story. At 1,500W RMS, this is one of the more demanding subwoofers in this lineup, and that immediately tells me it belongs in a properly planned aftermarket system rather than a casual factory upgrade.
The 200 oz motor and 3-inch voice coil are important here because they support the kind of high-power application this driver is intended for. The 17 mm Xmax is not the largest excursion figure in this group, so I would not choose this one simply because you want the highest possible cone travel. Its appeal is the combination of high RMS handling, substantial motor structure and a bass-focused enclosure design.
The enclosure deserves particular attention. A ported box around the 1.25–1.5 cubic-foot range can make sense for someone prioritizing stronger low-frequency output, but the exact design should follow the manufacturer’s requirements rather than treating that range as a universal recipe. Put this driver in the wrong box and the impressive hardware underneath it will not automatically translate into better bass.
(This is a subwoofer for a serious installation: amplifier capacity, electrical supply, enclosure construction and final impedance all need to be considered before you order the driver.)
What We Like About This Deep Bass Setup
- 1,500W RMS capability gives it substantial headroom for a high-powered bass system.
- 200 oz motor structure reflects the heavy-duty approach behind this driver.
- 3-inch voice coil is appropriately sized for a high-power application.
- 17 mm Xmax provides meaningful cone movement for strong low-frequency output.
- Ported enclosure compatibility makes it attractive when the priority is pronounced, physical bass rather than a compact sealed installation.
The One Thing to Think About First
The biggest consideration is how much system you are willing to build around it. A 1,500W RMS subwoofer can demand a serious amplifier and electrical setup, particularly when you are actually trying to use its available power. If your vehicle still has a completely stock electrical system, I would budget for the installation as a whole rather than treating the subwoofer as the only purchase that matters.
Where This 10 Inch Subwoofer Fits Best
This is a natural choice for a bass-focused truck, SUV or custom car audio build where space for a properly designed enclosure is available. It makes particular sense for listeners who want the physical impact of low-frequency music rather than a subtle improvement over factory bass.
The combination of high RMS power, large motor structure and ported-box potential gives it a different character from the Alpine R2-W10D4. The Alpine puts more emphasis on controlled excursion and accuracy, while the XFL makes more sense when the build is being planned around substantial output and a dedicated bass enclosure.
The Insider Pro-Tip
With a driver like this, I would resist the temptation to buy the biggest amplifier you can afford simply because the subwoofer says 1,500W RMS. The smarter route is to decide your final impedance, choose an amplifier that delivers appropriate RMS power at that load, and then make sure the vehicle can actually supply it.
And if this is going into a Tundra, RAM or F-150, use the available cabin space intelligently. A larger enclosure is not automatically a better enclosure. Measure the usable area first, account for the subwoofer’s mounting depth and port requirements, and leave enough room for proper bracing. When a 10-inch sub is capable of this much power, the enclosure stops being a box around the speaker and becomes part of the acoustic system.
#5. Rockford Fosgate P2D4-10 Punch
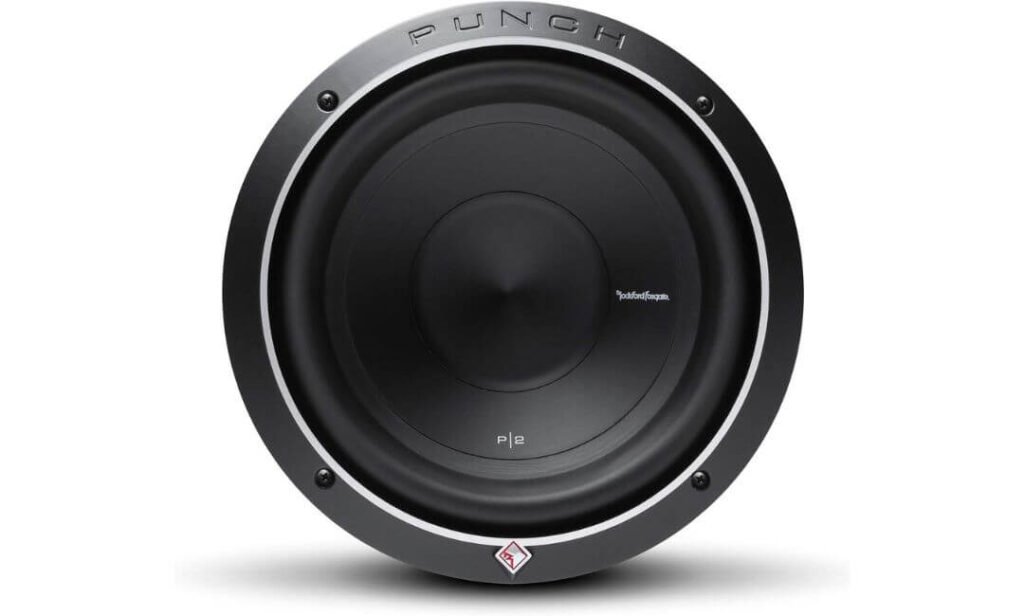
Quick Specs:
- Power Handling: 300W RMS / 600W Max
- Voice Coils: Dual 4-Ohm
- Cone: Kevlar Fiber-Reinforced Paper
- Mounting Depth: 5.92 Inches
- Sealed Enclosure: 0.59 cu. ft.
- Vented Enclosure: 1.4 cu. ft.
- Terminals: 10-AWG Nickel-Plated Push Terminals
Not every buyer looking for deep bass needs a 1,000W-plus subwoofer. That is exactly where the P2D4-10 makes sense. Its 300W RMS power handling puts it well below the high-output drivers in this list, but that can actually be an advantage if you are upgrading a daily-driven vehicle without wanting to build an entirely new electrical system around the subwoofer.
The Kevlar fiber-reinforced paper cone is one of the more useful details here because the cone needs to stay controlled as it moves. Rockford also uses its spider plateau venting design to help move air around the voice-coil area, while the 10-AWG nickel-plated push terminals give the installation a more substantial connection point than you might expect from a lower-powered driver.
Then there is the physical size. With a 5.92-inch mounting depth, this is considerably easier to package than some of the heavier competition-oriented 10-inch drivers above. The manufacturer also provides specific sealed and vented enclosure volumes, which is useful when you are trying to build a predictable system rather than guessing at box dimensions.
(This is the subwoofer I would consider when deep bass needs to fit into an everyday vehicle without turning the entire audio system into a high-current project.)
What We Like About This Deep Bass Setup
- 300W RMS handling makes it much easier to match with a moderate-power amplifier.
- Kevlar fiber-reinforced paper cone is designed to balance rigidity with controlled bass reproduction.
- Spider plateau venting helps with voice-coil cooling during normal high-output use.
- 5.92-inch mounting depth gives installers more flexibility when space behind the enclosure is limited.
- Defined sealed and vented enclosure volumes make it easier to build around the manufacturer’s intended application.
The One Thing to Think About First
The limitation is straightforward: this is not the driver to buy if maximum SPL is your priority. Its 300W RMS rating is a fraction of what the Sundown, Skar and American Bass can handle. If you already have a powerful monoblock and a large electrical system, stepping down to this model simply for the name may not make sense. Its strength is being a more manageable, everyday bass upgrade.
Where This 10 Inch Subwoofer Fits Best
This is the most approachable option in this particular lineup for a daily-driven car, truck or SUV where you want noticeably deeper and stronger bass without going straight into competition-level hardware.
A sealed installation can be attractive when space and controlled response matter, while the manufacturer’s 1.4 cu. ft. vented enclosure specification gives you a route toward greater output when you have the room. The relatively shallow mounting depth is especially useful in installations where the available enclosure depth is limited.
The Insider Pro-Tip
This is one of those cases where less power can actually make the buying decision easier. If your amplifier comfortably matches the 300W RMS requirement and your vehicle’s electrical system is otherwise healthy, you may not need to redesign the entire charging and power setup just to add meaningful low end.
Before ordering, measure the enclosure location rather than assuming every 10-inch sub fits because the cone diameter is the same. At 5.92 inches of mounting depth, this driver gives you more packaging freedom than several high-output alternatives, but you still need clearance behind the magnet, enough enclosure volume and room for the terminals. A correctly sized box with sensible amplifier power will do more for this subwoofer than chasing a larger wattage number ever will.
Best 10 Inch Subwoofers for Deep Bass in 2026: High-RMS Models Compared
| 10-Inch Subwoofer | Power You Can Actually Use | Deep-Bass Hardware | Voice Coil | Box Direction | Best Fit | What Sets It Apart |
|---|---|---|---|---|---|---|
| Sundown Audio SA-10 v.2 D4 Competition Grade | 1,250W RMS 2,500W peak |
19 mm Xmax
35+ mm mechanical excursion 36.14 Hz Fs |
Dual 4-Ohm Flexible amplifier-load options | Sealed or Ported Ported builds suit maximum low-end output | High-power daily builds Serious aftermarket systems and SPL-focused installations | The heavy hitter Exceptional excursion, thermal management and rigid cast construction make it the most demanding driver here. |
| Alpine R2-W10D4 Controlled Deep Bass | 750W RMS 2,250W peak | 20 mm Xmax 26–200 Hz published response | Dual 4-Ohm Useful for amplifier matching | Sealed or Ported Choose according to response and available space | Daily performance systems Drivers wanting deep bass with stronger emphasis on control | The balanced performer Large motor structure, HAMR surround and 20 mm Xmax give it a strong output-to-control balance. |
| Skar Audio EVL-10 D4 High-Excursion Bass | 1,000W RMS 2,000W peak | 23.5 mm Xmax 28–300 Hz published response | Dual 4-Ohm 2-Ohm or 8-Ohm final load possibilities | Dedicated aftermarket box Build around the driver’s enclosure requirements | Hard-hitting daily systems Cars, trucks and SUVs needing substantial low-end impact | The excursion specialist 23.5 mm one-way Xmax and a 3-inch high-temperature coil make cone movement a major part of its appeal. |
| American Bass XFL 10 Extreme Output | 1,500W RMS 3,000W peak |
17 mm Xmax
32.4 Hz published response 200 oz motor |
3-Inch Coil High-power-oriented construction | Ported 1.25–1.5 cu. ft. range supplied for the intended application | High-output truck & SUV builds Bass-focused systems with adequate electrical support | The power-first choice Its 1,500W RMS capability and large motor structure make system planning especially important. |
| Rockford Fosgate P2D4-10 Daily-Driver Friendly | 300W RMS 600W max | Kevlar-Reinforced Cone Designed for controlled bass response | Dual 4-Ohm Flexible system integration | Sealed or Vented 0.59 cu. ft. sealed / 1.4 cu. ft. vented | Everyday cars & trucks A more manageable route to stronger bass | The easy-to-live-with option Lower power demand and 5.92-inch mounting depth make it easier to integrate into tighter installations. |
Buying Guide: How to Choose the Best 10 Inch Subwoofer for Deep Bass Without Wasting Money
A 10-inch subwoofer is small enough to fit into a wide range of vehicles, but that does not mean every 10-inch driver will give you the same kind of bass. The five models above are a good example: their power requirements, excursion, enclosure needs and overall design philosophy are noticeably different. If you are choosing one for deep bass, I would look at the complete system rather than buying the subwoofer with the biggest number on the specification sheet.
Start With RMS Power, Not the Peak Number
The first specification I would check is RMS power handling. Peak or maximum wattage can be useful as a reference, but it should not be the number you use to choose your amplifier.
For example, a 1,500W RMS driver belongs in a very different installation from a 300W RMS model. That difference affects the amplifier, power wiring, fuse requirements and, depending on the vehicle and system, the electrical supply.
A sensible approach is:
- Around 300W RMS: More manageable for a daily-driver bass upgrade.
- Around 750–1,000W RMS: A serious aftermarket setup with a properly matched monoblock.
- 1,250–1,500W RMS: High-output territory where the amplifier, wiring, enclosure and vehicle electrical system all need to be planned together.
I would also avoid the common mistake of buying a 2,000W or 3,000W amplifier simply because the subwoofer has a similar peak-power rating. The amplifier should be selected around the driver’s RMS requirement and final impedance.
Xmax Tells You More About Bass Movement
If deep bass is the reason you are shopping, Xmax deserves more attention than many buyers give it.
Xmax describes the driver’s approximate linear one-way cone travel. More excursion can allow a subwoofer to move more air, but it is not a magic “deeper bass” measurement on its own. Motor strength, suspension, enclosure, power and the vehicle cabin all influence the final result.
That distinction matters with this lineup. The EVL-10’s 23.5 mm Xmax is a major part of its appeal, while the Alpine R2-W10D4 offers 20 mm Xmax. The Sundown combines 19 mm Xmax with more than 35 mm of mechanical excursion, which gives it considerable physical movement capability.
The practical takeaway is simple: look at Xmax as part of the whole design, not as a standalone ranking number.
Impedance and Voice Coils Need to Match the Amplifier
Most serious 10-inch car subwoofers in this category use dual voice coils, and that is not just a technical detail.
A Dual 4-Ohm subwoofer can be wired in different ways to create different final loads, depending on the amplifier and system configuration. That gives you flexibility, but it also means you should decide the amplifier and wiring configuration before installation.
Before buying, confirm:
- The subwoofer’s voice-coil impedance.
- The final impedance you intend to run.
- The amplifier’s RMS output at that impedance.
- Whether the amplifier is designed for that load.
- Whether your power and ground wiring are appropriate for the amplifier.
Do not assume that “Dual 4-Ohm” automatically means the subwoofer is better or louder. It simply gives you more options for building the system correctly.
Frequency Response Is Useful, But Do Not Shop by One Number
You will often see a subwoofer advertised with a low frequency such as 26 Hz, 28 Hz or 32 Hz, and it is tempting to assume the lowest published number automatically means the deepest real-world bass.
It does not.
Frequency response is affected by the enclosure, crossover settings, amplifier, vehicle acoustics and measurement conditions. A published 26 Hz figure does not mean the subwoofer will produce the same output at 26 Hz in every vehicle.
For deep bass, I would consider the published frequency range alongside:
- Xmax
- Motor structure
- RMS power
- Enclosure design
- Suspension
- Voice-coil construction
- Vehicle cabin response
That gives you a much more realistic picture than comparing the lowest frequency number alone.
Sealed vs Ported: The Box Changes the Personality
The enclosure is not just something you put the subwoofer into after buying it. The enclosure is part of the acoustic system.
A sealed enclosure is generally the cleaner, more compact route. It can give you controlled bass and is often easier to package in a daily driver. It is attractive when you care about a tighter response and have limited space.
A ported enclosure can produce more output around its tuning range and is often the direction to consider when the priority is strong, physical low-end impact. But it takes more space and requires considerably more care with volume and tuning.
| Enclosure Type | What It Usually Favors | What To Watch |
|---|---|---|
| Sealed | Controlled, tight bass and easier packaging | Requires the correct internal volume |
| Ported | Greater output and stronger low-end impact | Box volume and tuning become critical |
| Loaded Subwoofer Box | Easier installation when correctly matched | Verify the box is actually designed for that specific driver |
This is also why I would not automatically search for the “best 10 inch subwoofer with box.” A preloaded enclosure can be convenient, but convenience is only useful if the enclosure volume, airspace and tuning actually suit the driver.
Match the Enclosure to the Driver, Not the Other Way Around
This is one of the easiest places to make an expensive mistake.
A large, powerful driver does not automatically need the biggest box you can fit into the vehicle. Likewise, shrinking a recommended enclosure just to save trunk space can change the way the subwoofer behaves.
Before ordering the box, check:
- Recommended net internal airspace
- Sealed or ported suitability
- Port dimensions and tuning frequency
- Driver mounting depth
- Cutout diameter
- Available trunk or cargo space
- Internal bracing
- Clearance around the magnet and terminals
The XFL 10, for example, is much more naturally suited to a bass-focused installation where there is room for a properly designed enclosure. The P2D4-10 is easier to package, with a published 5.92-inch mounting depth and specific sealed and vented enclosure volumes.
That is the sort of difference that matters in a real vehicle.
Do Not Ignore Mounting Depth and Physical Fit
A 10-inch subwoofer is not simply “10 inches” once you start planning the installation.
The cone diameter tells you the basic driver size. It does not tell you whether the magnet will clear the back of the enclosure, whether the terminals will be accessible or whether the completed box will fit behind a seat.
Measure the actual installation area before buying.
For trucks and SUVs, also consider whether the enclosure will interfere with:
- Seat travel
- Cargo-floor access
- Storage compartments
- Tailgate clearance
- Factory trim
- Rear-seat folding
- Spare-tire access
This becomes particularly important with heavy competition-oriented drivers, which can require substantially more enclosure depth and construction than a conventional replacement sub.
Your Amplifier and Electrical System Are Part of the Purchase
This is where I would be especially careful with the 1,000W-plus models in this comparison.
A high-power subwoofer does not create power by itself. The amplifier needs to deliver it, and the vehicle needs to supply the amplifier.
Depending on the system, a serious installation may require:
- Correct-gauge power cable
- Proper ground connection
- Appropriate fuse protection
- A suitable monoblock amplifier
- Adequate charging-system capacity
- Correct speaker wiring
- Proper gain and crossover setup
Do not automatically assume you need a second battery just because you bought a powerful subwoofer. The requirement depends on the entire electrical system, amplifier demand, vehicle and how aggressively the system will be used. The sensible approach is to size the electrical side around the actual amplifier installation rather than adding hardware based on the subwoofer’s peak wattage.
Pay Attention to Cooling When You Want Sustained Bass
High-power bass creates heat, and the voice coil is one of the areas that has to deal with it.
That is why features such as vented motor structures, voice-coil cooling and ventilated baskets are worth paying attention to. They are not glamorous specifications, but they become much more important when the driver is being pushed for extended periods.
The Sundown, Alpine, Skar and American Bass designs all take different approaches to managing the mechanical and thermal demands of high-output use. That does not mean any one cooling feature guarantees that a subwoofer cannot overheat. It simply means the engineering deserves consideration when comparing drivers designed for substantially different power levels.
Installation Setup Matters More Than Most Buyers Expect
Once the hardware is selected, installation quality can make or break the result.
A good installation should include:
- A solidly constructed enclosure with no unwanted air leaks.
- Correct mounting hardware so the driver remains secure.
- Proper polarity and wiring.
- Appropriate amplifier gain rather than using gain as a volume control.
- A suitable low-pass crossover.
- Correct subsonic filtering where required for a ported setup.
- Adequate clearance around the driver.
- Secure power and ground connections.
If you are using a ported enclosure, the subsonic filter deserves particular attention because very low frequencies below the enclosure’s tuning point can cause excessive cone movement without producing useful output.
Common Deep-Bass Buying Mistakes to Avoid
Buying by peak watts: A 3,000W peak label does not automatically make one 10-inch subwoofer better than a 1,000W RMS driver.
Assuming the lowest Hz number wins: Published frequency response is not a guarantee of equal real-world output at that frequency.
Ignoring impedance: A Dual 4-Ohm subwoofer needs to be wired correctly for the amplifier you are using.
Using a random box: Even an excellent driver can perform poorly when the enclosure volume or port tuning is wrong.
Underpowering and overdriving: A small amplifier pushed into clipping is not a safe substitute for a properly matched amplifier.
Ignoring mounting depth: A 10-inch cone can fit while the motor assembly does not.
Treating every 10-inch subwoofer as interchangeable: The Sundown, Alpine, Skar, American Bass and Rockford are built around noticeably different power levels and installation goals.
What I Would Check Before Ordering
If I were standing beside the vehicle with the purchase page open, these are the questions I would answer before spending the money:
- How much RMS power can my amplifier actually provide at the required impedance?
- Can my vehicle’s electrical system comfortably support that amplifier?
- Do I have enough space for the correct enclosure?
- Do I want sealed-bass control or the higher output potential of a ported design?
- Does the driver’s mounting depth work in my planned location?
- Is the final impedance compatible with my amplifier?
- Am I buying the subwoofer for daily listening, strong low-end impact, or a genuinely high-output build?
If those seven answers line up, the actual subwoofer choice becomes much easier. Deep bass is a system result, not a specification-sheet result. The driver, amplifier, enclosure and vehicle all have to work together, and that is ultimately more important than choosing the model with the biggest number on the box.
10 Inch Subwoofer Types for Deep Bass: Sealed, Ported and Specialized Builds
A 10-inch subwoofer does not have one universal enclosure or installation style that works best for every vehicle. The same driver can behave very differently in a sealed enclosure compared with a properly designed ported box, and a competition-oriented build has very different priorities from a daily-driver system.
That is why I would decide how you want the bass to behave before deciding which 10-inch subwoofer to buy. If you want controlled low-end for everyday listening, enclosure choice matters one way. If you want maximum output and physical impact, the amplifier, enclosure tuning, excursion capability and electrical system become much more important.
Sealed 10 Inch Subwoofers for Controlled and Accurate Bass
A sealed enclosure is usually the simpler approach when you want a compact installation with controlled low-frequency behaviour. The back of the driver operates against the enclosed air volume, which acts as part of the suspension system.
That makes a sealed setup particularly useful when your priorities are clean bass, predictable response, compact packaging and easier installation rather than extracting every possible decibel from the system.
A properly designed sealed box can work extremely well in a car because the vehicle cabin naturally reinforces low frequencies. You also avoid the port dimensions and tuning requirements that come with a vented enclosure.
Where a Sealed Enclosure Makes the Most Sense
I would consider sealed first when:
- You have limited trunk, cargo or under-seat space.
- You want a relatively compact enclosure.
- Your priority is controlled bass rather than maximum SPL.
- You listen to a wide range of music and want the subwoofer to integrate naturally with the rest of the system.
- You do not want to spend as much time calculating port dimensions and tuning.
- The particular driver has a suitable sealed-box recommendation.
The important point is that sealed does not mean weak bass. A properly powered 10-inch driver in a correctly sized sealed enclosure can still produce substantial low-frequency output. It simply approaches the job differently from a high-output ported system.
Ported 10 Inch Subwoofers for Higher Output and Stronger Low End
A ported enclosure adds a tuned opening, or port, that works with the enclosure and driver to reinforce a particular range of low frequencies.
This is why ported systems are popular with people searching for the best 10 inch subwoofer for loud bass. When the driver, enclosure volume, port area and tuning frequency are properly matched, a vented design can produce considerably more output around its tuning region than a comparable sealed setup.
But there is a trade-off: ported does not mean automatically better.
A badly designed ported box can create unwanted noise, poor response or excessive cone movement outside the intended operating range. The enclosure has to be designed around the driver rather than simply placing the subwoofer in the largest vented box that fits.
What to Check Before Choosing a Ported Box
For a serious ported installation, pay attention to:
- Net internal enclosure volume
- Port area
- Port length
- Tuning frequency
- Driver displacement
- Port clearance
- Amplifier power
- Subsonic filter settings
- Available physical space
The distinction between gross box volume and net internal volume is important here. The driver, port and internal bracing take up space, so the airspace the subwoofer actually operates in can be considerably smaller than the external box dimensions suggest.
Sealed vs Ported: Which Design Fits Your Goal?
| Factor | Sealed | Ported |
|---|---|---|
| Bass character | Controlled and generally smooth | Stronger output around the tuned region |
| Maximum output potential | Generally lower for the same driver and power | Generally higher around tuning |
| Box size | Usually easier to package | Usually requires more space |
| Design complexity | Relatively straightforward | Requires careful port and tuning design |
| Installation tolerance | More forgiving | More sensitive to incorrect design |
| Deep-bass applications | Excellent when space and control matter | Excellent when output and low-end impact are priorities |
| Daily-driver use | Very practical | Practical when properly designed |
| Competition-oriented use | Possible, depending on the goal | Common for high-output applications |
There is no universal winner between the two. The correct choice depends on the driver, vehicle, amplifier, available space and the type of bass you actually want.
High-Output 10 Inch Subwoofers for Competition-Style Builds
A competition-style setup changes the buying equation considerably.
If your goal is to build around a high-power 10-inch driver such as the Sundown Audio SA-10 v.2 D4 or American Bass XFL 10, you should stop thinking about the subwoofer as an isolated component. At this level, the enclosure, amplifier, electrical system and installation are effectively one system.
The SA-10 v.2 D4, for example, is rated at 1,250 watts RMS, while the XFL 10 is specified at 1,500 watts RMS. Those power levels are far beyond what I would treat as a casual factory-system upgrade.
A build around this type of driver may require:
- A properly matched high-power monoblock amplifier.
- Heavy-gauge power and ground wiring.
- Appropriate fuse protection.
- An enclosure constructed to handle substantial mechanical movement.
- Correct port design if using a vented enclosure.
- Adequate charging-system capacity.
- Correct impedance configuration.
- Proper gain, crossover and subsonic-filter settings.
The mistake I see most often in high-output builds is spending heavily on the subwoofer while treating the enclosure and electrical system as secondary parts. That is backwards.
A strong motor and high excursion capability cannot compensate for an unsuitable box or an amplifier that cannot supply clean, controlled power.
When a 10 Inch Subwoofer for Loud Bass Actually Makes Sense
A high-output setup makes sense when you specifically want the system to produce strong physical bass and high sound-pressure levels, rather than simply filling in the bottom end missing from the factory speakers.
Typical applications include:
- Custom car audio builds.
- Truck and SUV systems with sufficient enclosure space.
- Competition-oriented installations.
- High-output aftermarket sound systems.
- Builds where bass impact is more important than keeping the enclosure extremely small.
For a daily driver, however, you do not necessarily need a 1,500W RMS driver. A lower-powered design can be considerably easier to integrate while still delivering the bass most listeners actually want.
Daily-Driver Builds Need a Different Approach
A daily vehicle often benefits from balance rather than maximum output.
The Rockford Fosgate P2D4-10 Punch, for example, is rated at 300 watts RMS, which puts it in a completely different category from the high-power drivers in this comparison. That does not make it unsuitable for deep bass. It simply means the rest of the system can be built around a substantially lower power requirement.
For someone upgrading a factory system, this can be a more practical direction because the amplifier, wiring and enclosure can remain more manageable.
The Alpine R2-W10D4 sits further toward the high-output side while still being designed around controlled performance. Its 750W RMS rating gives you considerably more headroom than a 300W driver, without moving all the way into the 1,250–1,500W RMS territory of the most demanding models here.
Specialized Builds: Shallow Mount, Loaded Boxes and Space-Limited Installations
Not every vehicle gives you room for a deep, competition-style subwoofer and a large enclosure.
Trucks, compact cars and under-seat installations can force you to work around strict depth and height limitations. This is where shallow-mount 10-inch subwoofers become relevant.
A shallow design can make installation possible where a conventional high-excursion driver simply will not fit. But there is an important trade-off: you should not expect every shallow driver to behave like a large-motor competition subwoofer simply because both are 10 inches.
Before choosing a shallow-mount model, check:
- Total mounting depth.
- Cutout diameter.
- Available enclosure depth.
- Recommended enclosure volume.
- RMS power handling.
- Voice-coil configuration.
- Whether the enclosure can physically accommodate the magnet and terminals.
The same principle applies to a loaded 10-inch subwoofer box. A preloaded enclosure can save installation work, but you still need to verify that the driver and enclosure are properly matched.
Competition Bass and Daily Bass Are Not the Same Target
It is worth separating these two goals because they are often mixed together in product searches.
A daily-driver bass system usually needs good integration, sensible power consumption, manageable enclosure size and reliable operation.
A competition-style system may prioritise maximum output, high excursion, amplifier power, enclosure efficiency and the ability to produce very high sound-pressure levels.
Neither approach requires the same hardware.
A driver designed for a serious high-power build may be unnecessary for someone who simply wants deeper bass from factory door speakers. Likewise, a compact 300W RMS installation is not the obvious starting point for someone intentionally building a high-output competition system.
How Enclosure Choice Changes the Same 10 Inch Subwoofer
One of the most important things to understand is that the driver does not determine the final sound by itself.
The enclosure changes how the system behaves.
For example, a sealed setup may be preferable when you want controlled response and easier packaging. Move the same driver into a correctly designed ported enclosure, and you can change its output characteristics substantially around the enclosure’s tuning frequency.
That is why I would never buy the driver first and then randomly choose a box later.
The better order is:
- Decide how you want the bass to sound and perform.
- Check the driver’s recommended enclosure types.
- Confirm the available vehicle space.
- Select the enclosure volume and design.
- Choose an amplifier that matches the driver’s RMS rating and impedance.
- Plan the wiring and electrical requirements.
- Set the system up correctly after installation.
The Real Difference Between Deep Bass and Loud Bass
These terms are often used as if they mean the same thing, but they do not.
Deep bass refers primarily to the reproduction of lower frequencies.
Loud bass refers to how much acoustic output the system can produce.
A subwoofer can produce impressive output without necessarily delivering the deepest extension you are looking for. Conversely, a system can reproduce low frequencies without being designed to produce competition-level sound-pressure levels.
For this reason, I would not use “loudest” as a substitute for “deepest” when shopping for a 10 inch subwoofer for deep bass.
Which Type of Build Should You Choose?
Use the following as a practical starting point rather than treating it as a rigid ranking:
- Choose sealed if space, controlled response and everyday usability are important.
- Choose ported if you have the space and want greater low-frequency output from a properly tuned system.
- Choose a high-output competition-oriented driver if you are prepared to build the amplifier, enclosure and electrical system around it.
- Choose a shallower design when mounting depth is the main limitation.
- Choose a loaded enclosure when installation simplicity matters, but verify the enclosure is genuinely matched to the driver.
- Choose a moderate-power daily-driver setup if you want meaningful bass without turning the entire vehicle’s electrical system into a major project.
The biggest takeaway is that there is no meaningful “best 10-inch subwoofer” without defining the installation first. A 300W RMS daily-driver system and a 1,500W RMS competition build are solving completely different problems. For deep bass, the smartest purchase is the driver whose power handling, enclosure requirements, excursion capability and physical dimensions actually fit the system you are building.
Installation Playbook: From Box to Bass – 10 Inch Subwoofer Installation Tips
A good 10-inch subwoofer can sound completely different depending on how it is installed. The driver itself is only one part of the system; amplifier matching, enclosure volume, wiring, polarity, crossover settings and even small air leaks can change the result.
For a deep-bass installation, I would treat the job as a complete system rather than simply mounting the driver, connecting two wires and turning the gain up. This becomes especially important with high-power models such as the Sundown Audio SA-10 v.2 D4, Skar Audio EVL-10 D4 and American Bass XFL 10, where the amplifier and electrical system have to support substantially more power than a conventional daily-driver setup.
Start With the Vehicle, Amplifier and Enclosure Before Installing Anything
Before cutting a wire or drilling a mounting hole, confirm that the three major components actually belong together:
- The subwoofer’s RMS power rating.
- The amplifier’s RMS output at the intended impedance.
- The enclosure’s recommended volume and design.
Then measure the physical installation area.
Check the available:
- Mounting depth.
- Enclosure width and height.
- Seat and cargo clearance.
- Driver cutout diameter.
- Terminal clearance.
- Port clearance if using a vented box.
- Access to the amplifier.
- Route for power and signal cables.
This is particularly important with high-excursion, high-power 10-inch drivers. A box can technically accept a 10-inch driver while still being too shallow for the motor structure, terminals or required internal clearance.
Build a Clean Installation Checklist Before Connecting Power
A professional-looking installation is usually the result of preparation rather than expensive hardware.
Use this sequence:
- Confirm the final impedance you want from the subwoofer.
- Verify the amplifier’s RMS output at that impedance.
- Confirm the enclosure volume and design are suitable for the driver.
- Inspect the enclosure for air leaks, loose panels and weak joints.
- Mount the enclosure securely so it cannot move during driving.
- Route the main power cable separately from sensitive signal cables where practical.
- Install the appropriate fuse close to the battery according to the amplifier and wiring requirements.
- Create a short, secure and properly prepared ground connection.
- Connect the remote turn-on and signal wiring.
- Wire the voice coils according to the intended final impedance.
- Verify polarity before powering the system.
- Set amplifier controls conservatively before the first test.
- Test the system at low volume.
- Check for rattles, distortion, air leaks or abnormal mechanical noise.
- Only then increase the output gradually.
That sequence may seem slower than simply installing everything at once, but it makes troubleshooting considerably easier.
Wire a Dual Voice Coil Subwoofer for the Correct Final Load
Dual voice coils give you wiring flexibility, but this is also where many installations go wrong.
A Dual 4-Ohm subwoofer can commonly be wired in either series or parallel, producing different final impedance configurations. The correct choice depends on the amplifier.
For a typical single Dual 4-Ohm subwoofer:
PARALLEL WIRING
Voice Coil 1: 4 Ω
Voice Coil 2: 4 Ω

4 Ω + 4 Ω in parallel = 2 Ω final load
And:
SERIES WIRING
Voice Coil 1: 4 Ω
Voice Coil 2: 4 Ω

4 Ω + 4 Ω in series = 8 Ω final load
The important part is not memorising those numbers. It is checking the amplifier’s rated output at the final impedance you create.
Do not connect a configuration simply because it produces the lowest possible resistance. If the amplifier is not designed to operate safely at that load, you can create excessive heat, protection shutdowns or equipment damage.
Dual Voice Coil Wiring Diagram for a Single 10 Inch Subwoofer
For a typical Dual 4-Ohm configuration wired in parallel:
             +-------------------+
             |                   |
AMP + -------+----> VC1 (+)      |
             |                   |
             +----> VC2 (+)      |
                                 |
AMP - -------+----> VC1 (-)      |
             |                   |
             +----> VC2 (-)      |
Both positive terminals connect to the amplifier’s positive output, and both negative terminals connect to the amplifier’s negative output.
For series wiring:
AMP + --------> VC1 (+)

VC1 (-) ------> VC2 (+)

VC2 (-) ------> AMP -
These diagrams apply to the basic single-DVC arrangement shown. Always verify the actual terminal layout and amplifier requirements before making the final connection.
Bridging an Amplifier Is Not the Same as Wiring a DVC Subwoofer
This distinction is important.
Bridging is an amplifier configuration that combines output from two amplifier channels. Series or parallel wiring is how you configure the subwoofer’s voice coils.
They are separate parts of the installation.
If you are using a mono subwoofer amplifier, there is normally no reason to talk about “bridging” it. If you are using a multi-channel amplifier, consult its documentation to determine whether bridging is supported and what minimum impedance is allowed in bridged operation.
For high-RMS installations, never assume that two channels can simply be bridged because the amplifier has two outputs. Check the manufacturer’s rated bridged RMS output and minimum bridged impedance first.
High-RMS Systems Need Amplifier Matching, Not Just More Watts
This is especially important with the models higher in the power range.
A 1,500W RMS subwoofer does not mean you should blindly purchase a 1,500W amplifier and assume the installation is finished. The amplifier’s actual output, efficiency, impedance and available electrical supply all matter.
For a high-power setup, check:
- RMS amplifier output at the subwoofer’s final impedance.
- Amplifier efficiency.
- Recommended power and ground cable size.
- Fuse requirements.
- Battery and alternator capacity.
- Voltage stability under load.
- Subwoofer RMS rating.
- Enclosure requirements.
If the amplifier cannot deliver clean power, increasing the gain does not solve the problem. It can simply push the amplifier into clipping.
Set Gain Correctly Instead of Using It as a Volume Control
The gain control is one of the most misunderstood adjustments in a car audio installation.
It is not a “bass strength” control and it should not simply be turned up until the subwoofer sounds loud.
A better setup is to establish the source unit’s clean maximum volume, configure the amplifier appropriately and then increase gain only until the system reaches the desired output without audible distortion.
For a more precise installation, an installer can use a multimeter, oscilloscope or dedicated audio measurement equipment to set the amplifier output more accurately.
The exact voltage target depends on the amplifier’s rated power and the impedance being used, so I would not recommend using one universal voltage number for every amplifier.
Set the Low-Pass Filter Around the Rest of the Audio System
The subwoofer should handle the low-frequency portion of the music without unnecessarily reproducing higher frequencies that belong to the main speakers.
A common starting point is a low-pass filter somewhere around 70–100 Hz, but the correct setting depends on the vehicle, front-speaker crossover and how well the subwoofer integrates with the rest of the system.
Listen for the point where the bass stops sounding like it is coming from a separate box in the vehicle.
If the crossover is set too high, the subwoofer can become easier to locate and may make the system sound disconnected. If it is set too low, you may create an unnecessary gap between the subwoofer and the main speakers.
Port Tuning Is Critical With a Vented Enclosure
If you are using a ported enclosure, the port is not decorative. Its dimensions directly influence the tuning of the box.
The main variables are:
- Net internal box volume.
- Port area.
- Port length.
- Port shape.
- Tuning frequency.
- Driver displacement.
- Port clearance.
Do not randomly shorten a port because the box does not fit where you planned to install it. Changing port length changes the tuning frequency.
Likewise, adding a small decorative vent to a sealed box does not turn it into a properly designed ported enclosure.
For a serious high-output system, the enclosure should ideally be designed specifically around the driver rather than adapting a random box that happens to have a 10-inch cutout.
Do Not Confuse Box Volume With External Dimensions
A manufacturer’s enclosure recommendation normally refers to internal air volume, not the outside dimensions of the finished cabinet.
You also have to account for:
- Subwoofer displacement.
- Port displacement.
- Bracing.
- Internal panels.
- Terminal structures.
This is why a box that looks large from the outside may still provide substantially less net airspace than expected.
For the Rockford Fosgate P2D4-10 Punch, for example, the supplied enclosure recommendations include approximately 0.59 cubic feet for sealed and 1.4 cubic feet for vented applications. Those numbers are far more useful for planning the enclosure than simply measuring the outside of a generic box.
Use Damping Material With a Purpose
Damping material can be useful, but more is not automatically better.
For a sealed enclosure, appropriate acoustic material can help modify the enclosure’s apparent acoustic behaviour and reduce internal reflections. The exact material and quantity should follow the enclosure design and driver’s requirements.
For a ported enclosure, be much more careful around the port. Do not block the port or heavily stuff the area immediately around it with material.
The port needs to move air freely. Restricting it can change performance and introduce unwanted turbulence.
Also distinguish between:
- Acoustic stuffing or lining, used inside an enclosure.
- Panel damping, used to reduce vibration from enclosure walls.
- Vehicle sound-deadening material, used on doors, floor panels and bodywork to reduce rattles and resonance.
They solve different problems.
Seal the Enclosure Properly
A tiny air leak can become surprisingly obvious once the subwoofer starts moving significant amounts of air.
Inspect the enclosure around:
- Driver mounting surface.
- Terminal cup or terminal plate.
- Box joints.
- Port construction.
- Removable panels.
- Screw holes.
The driver should sit against a properly sealed mounting surface, and the enclosure itself should be structurally sound.
If you hear a hissing or chuffing sound from somewhere other than the port, investigate it. That can indicate an unwanted air leak.
Secure the Box Before You Chase More Bass
A heavy subwoofer enclosure should never be allowed to slide around in the trunk or cargo area.
Apart from being a safety problem, movement can place stress on the wiring and enclosure.
Use appropriate mounting hardware and make sure the installation does not interfere with seat movement, airbags, factory wiring or other vehicle safety equipment.
This is especially important with large ported enclosures and heavy high-power drivers. A substantial enclosure can become dangerous cargo during sudden braking or a collision.
Keep Power and Signal Wiring Properly Planned
A clean installation should avoid unnecessary cable routing problems.
Where possible:
- Keep the main power cable away from sensitive signal cables.
- Protect cables wherever they pass through metal.
- Use appropriate grommets through the firewall.
- Secure cables so they cannot rub against sharp edges.
- Keep connections tight and protected.
- Avoid unnecessary cable length.
- Make sure the amplifier has adequate ventilation.
If you hear a high-pitched whine that changes with engine speed, do not immediately blame the subwoofer. That can be related to grounding, signal routing, charging-system noise or other electrical issues.
Watch for Voltage Drop in High-Power Systems
With a high-RMS amplifier, voltage matters.
If the electrical supply cannot maintain the voltage required by the amplifier under heavy load, the amplifier may enter protection or produce less output than expected.
If you notice:
- Headlight dimming,
- Amplifier protection shutdowns,
- Significant voltage drops,
- Repeated clipping,
- Unusual amplifier heat,
stop increasing the system output and investigate the electrical side.
Do not treat a second battery or upgraded alternator as an automatic requirement for every subwoofer installation. Those decisions should be based on the amplifier’s actual demand and the vehicle’s charging system.
Common Installation Mistakes and the Quick Fix
| Installation Mistake | What It Can Cause | Better Fix |
|---|---|---|
| Using peak watts to choose the amplifier | Poor power matching | Match RMS output at the final impedance |
| Incorrect DVC wiring | Wrong load or poor amplifier performance | Verify series/parallel wiring before powering up |
| Random enclosure volume | Weak or uncontrolled bass | Follow the driver’s recommended net airspace |
| Incorrect port length | Wrong tuning frequency | Build or modify the port according to the intended tuning |
| Air leaks around the driver | Hissing and reduced enclosure performance | Reseal the mounting surface and joints |
| Gain turned fully up | Clipping and distortion | Set gain according to the amplifier and signal |
| Blocked port | Turbulence and reduced output | Maintain sufficient port clearance |
| Loose enclosure | Rattles and safety concerns | Secure the enclosure properly |
| Poor grounding | Noise or unstable amplifier operation | Create a short, solid chassis ground |
| Undersized or poorly protected wiring | Excessive voltage drop or safety risk | Use appropriately sized cable and fuse protection |
| Ignoring mounting depth | Physical interference | Measure the complete driver and enclosure before installation |
Final Installation Check Before Turning the Volume Up
Before the first serious listening session, I would run through the entire system one more time.
Check:
- Subwoofer mounting screws are tight.
- Enclosure is secure.
- All speaker terminals are tight.
- Voice coils are wired correctly.
- Amplifier power and ground connections are secure.
- Fuse protection is installed correctly.
- Signal cables are connected properly.
- No wires can rub against sharp metal.
- Port is unobstructed.
- Amplifier has adequate ventilation.
- Gain is set conservatively.
- Crossover settings are appropriate.
- There are no obvious air leaks or rattles.
Then start at low volume and gradually increase output.
The Real-World Test: Listen for the Problems Before Chasing More Output
The first test should not be about seeing how loud the subwoofer can get.
Listen for distortion, mechanical noise, port noise, rattling panels, loose trim and signs of amplifier clipping. If something sounds wrong at moderate output, increasing the volume will not fix it.
Once the system is clean, properly integrated and stable, you can gradually increase the output.
That is the difference between simply installing a 10-inch subwoofer and actually building a good bass system. The driver provides the potential, but the enclosure, amplifier, wiring and installation determine how much of that potential you can use safely and consistently.
Maintenance, Care, and Longevity: How to Keep a 10 Inch Subwoofer Performing at Its Best
A good 10-inch subwoofer should not need constant attention, but a high-output car audio system does benefit from sensible maintenance. This becomes even more important when you are running a driver such as the Sundown Audio SA-10 v.2 D4, Skar Audio EVL-10 D4, or American Bass XFL 10 at substantial power levels.
The biggest threats are usually not normal music playback. They are excessive heat, amplifier clipping, incorrect enclosure conditions, mechanical over-excursion, poor electrical connections and continuously operating the system beyond what the amplifier or subwoofer can realistically handle.
Proper care is therefore less about treating the subwoofer delicately and more about keeping the entire system within its intended operating range.
Break-In Is About Mechanical Compliance, Not a Magic Performance Upgrade
New subwoofers have moving components, including the cone, surround and spider, that may become somewhat more compliant after being used.
You do not need to perform an elaborate “break-in ritual” or play the subwoofer for a fixed number of hours at a specific frequency.
A sensible approach is simply to use the new driver normally at moderate output during the first several listening sessions. Let the suspension components move through their operating range without immediately subjecting the system to prolonged maximum-output sessions.
During this period:
- Avoid intentionally running the driver at maximum excursion for long periods.
- Do not use extreme test tones simply to accelerate break-in.
- Pay attention to unusual mechanical noises.
- Gradually increase output as you become familiar with the system.
- Make sure the amplifier and enclosure are already configured correctly.
Realistically, correct installation and amplifier setup matter far more than trying to force a particular break-in procedure.
Do Not Confuse Break-In With Conditioning
“Conditioning” is sometimes used in car audio discussions to describe gradually familiarising the driver with normal operating conditions.
There is no special conditioning treatment that turns an ordinary subwoofer into a substantially more powerful one.
What does make sense is allowing the system to reach its normal operating temperature gradually, especially during the first few listening sessions, while checking that the amplifier and driver behave normally.
If the subwoofer develops a new scraping sound, unusual mechanical noise or obvious distortion, stop increasing the volume and investigate the cause rather than assuming it is part of the break-in process.
Temperature Management Matters More as Power Increases
Heat is one of the biggest concerns in a high-power subwoofer system.
When you continuously send substantial power into a voice coil, some of that electrical energy becomes heat. As the temperature rises, the voice coil’s resistance changes and the system can become less efficient.
That is why the cooling design of a high-output driver matters.
Depending on the model, you may see features such as:
- Vented motor structures.
- Airflow openings around the basket.
- High-temperature voice coils.
- Vented pole pieces.
- Cooling paths around the motor assembly.
- Designs intended to improve heat dissipation during sustained operation.
These features help, but they do not make a subwoofer immune to overheating.
Give the System Time to Breathe During Long Listening Sessions
If you are running a powerful system for an extended period, especially in a hot vehicle, pay attention to heat rather than simply watching the volume level.
The amplifier needs adequate ventilation, and the subwoofer enclosure should not be installed in a way that creates unnecessary heat or blocks equipment cooling.
For long listening sessions, occasional reductions in output give the amplifier and voice coil an opportunity to shed heat.
You should be particularly cautious when:
- The vehicle interior is already very hot.
- The amplifier is installed in a confined location.
- You are playing bass-heavy music continuously.
- The system is operating close to its maximum output.
- You notice the amplifier becoming unusually hot.
- The subwoofer begins sounding different after extended use.
A subwoofer that performs perfectly for five minutes is not necessarily operating comfortably after an hour at high output.
Maintain RMS Headroom Instead of Running at the Limit
One of the smartest ways to improve longevity is to leave some RMS headroom in normal operation.
If the subwoofer is rated for 1,000 watts RMS, that does not mean you should attempt to keep it at 1,000 watts continuously.
Music is dynamic. The actual power delivered varies constantly, and short peaks are different from sustained continuous output.
For example, the Skar Audio EVL-10 D4 is rated at 1,000 watts RMS, while the Sundown Audio SA-10 v.2 D4 is rated at 1,250 watts RMS. Those ratings tell you what the drivers are designed to handle under specified conditions; they are not instructions to operate the system continuously at that level.
A sensible system gives you enough amplifier capability to reach your desired output without requiring the amplifier to remain severely strained.
Amplifier Clipping Is More Dangerous Than a Simple Volume Number
One of the biggest misconceptions in car audio is that distortion only becomes a problem when the subwoofer itself is too powerful for the amplifier.
In reality, an amplifier that is driven beyond its clean operating range can clip the signal and produce a heavily distorted waveform.
That can generate substantial heat in the voice coil and create mechanical stress, even if the amplifier’s advertised power number looks reasonable.
Watch for:
- Bass becoming harsh rather than clean.
- A noticeable change in sound as the volume increases.
- The amplifier entering protection.
- Excessive heat.
- The subwoofer sounding compressed or strained.
- Mechanical noises appearing during heavy bass passages.
If the system sounds worse when you keep increasing the volume, turning the gain higher is not the solution.
Gain Setting Is Part of Long-Term Subwoofer Protection
The gain control should be set to match the amplifier to the source signal, not used to compensate for an inadequate system.
If the gain is excessively high, the amplifier can reach clipping much earlier in the volume range.
A proper setup should give you enough usable volume without requiring the amplifier to be driven into obvious distortion.
For serious installations, an installer can use measurement equipment such as an oscilloscope or distortion detector to identify clipping more accurately.
For everyday users, the important rule is simpler: if the bass becomes noticeably distorted as you increase the volume, back it down rather than trying to extract more output.
Watch Cone Movement, Especially With a Ported Box
Excessive cone movement is another sign that the system is being pushed outside its comfortable operating range.
Some movement is completely normal. A high-excursion subwoofer is designed to move.
The problem is uncontrolled movement that approaches the driver’s mechanical limits repeatedly.
This is particularly important with a ported enclosure. Below the enclosure’s tuning frequency, the enclosure provides less acoustic loading to the driver, and cone excursion can increase rapidly.
That is why the correct subsonic filter setting can be important in a high-output ported system.
If you hear obvious mechanical knocking, bottoming or other abnormal noises, reduce the volume immediately and investigate the setup.
Keep the Enclosure in Good Condition
The enclosure should not be treated as maintenance-free just because it does not contain electronics.
Over time, inspect:
- Driver mounting screws.
- Terminal connections.
- Enclosure joints.
- Port construction.
- Gaskets.
- Carpet or covering material.
- Internal and external damage.
- Any signs of water exposure.
A loose mounting screw can eventually create vibration or an air leak. A damaged port can change the enclosure’s behaviour. A cracked panel can produce unwanted noise and reduce the effectiveness of the enclosure.
For a ported box, also make sure the port remains unobstructed.
Check for Air Leaks When the Bass Suddenly Changes
If a system that previously sounded good suddenly becomes weaker, do not immediately assume the subwoofer has failed.
Check the enclosure first.
Possible causes include:
- Loose driver screws.
- Damaged gasket material.
- Loose terminal hardware.
- A separated enclosure joint.
- Cracked MDF or plywood.
- Damage around the port.
A small leak can create an audible hiss or change the way the enclosure loads the driver.
Repair the enclosure before changing amplifier settings or replacing components.
Inspect Wiring and Terminals Periodically
High-current audio systems deserve occasional visual inspection.
Check the power and ground connections for looseness, corrosion or signs of overheating. Do the same for the speaker terminals and amplifier connections.
Look for:
- Discoloured terminals.
- Melted insulation.
- Loose connections.
- Corrosion.
- Frayed cable strands.
- Damaged cable insulation.
- Unusual heat around high-current connections.
If a connection is becoming hot, do not simply tighten it and continue using the system without finding the underlying problem.
A poor electrical connection can create resistance and heat, which is exactly what you do not want in a high-current amplifier installation.
Protect the Subwoofer From Water and Excessive Moisture
Most automotive subwoofers are designed for vehicle interiors, not direct exposure to water.
If the enclosure is installed in an area where water can enter, such as an exposed truck-bed setup, make sure the driver and enclosure are appropriately protected for that environment.
Do not assume that a coated cone or treated material makes the entire subwoofer weatherproof.
Moisture can affect:
- Cone materials.
- Surrounds.
- Spiders.
- Voice-coil assemblies.
- Terminals.
- Enclosure materials.
For normal trunk and cabin installations, simply keeping the enclosure dry and avoiding unnecessary moisture exposure is usually sufficient.
Safe Volume Practices for Long-Term Use
You do not have to keep the subwoofer quiet to make it last.
The goal is to avoid sustained operation beyond the system’s clean mechanical, thermal and electrical limits.
For long listening sessions:
- Use clean source material.
- Avoid excessive bass boost.
- Keep amplifier gain correctly adjusted.
- Pay attention to distortion.
- Give the system breaks during extended high-output sessions.
- Reduce output if the amplifier becomes excessively hot.
- Stop if the driver develops abnormal mechanical noise.
- Do not repeatedly force the cone to its mechanical limits.
A properly configured system can play loudly without being abused.
Be Careful With Bass Boost and Equalisation
Bass boost can be particularly demanding because it asks the amplifier to provide substantially more output in a specific frequency range.
For example, if you apply a large boost at 40 Hz, the amplifier may need considerably more power at that frequency than it did with a flat signal.
That can reduce your available headroom and make clipping or excessive cone excursion more likely.
This does not mean you should never use equalisation. It means large boosts should be treated as a system-level adjustment, especially with high-power subwoofers.
Often, improving the enclosure, crossover and overall system response is a better solution than simply adding more bass boost.
Know the Difference Between Normal Mechanical Noise and a Problem
A high-excursion subwoofer can make you aware of mechanical movement that a smaller driver never produced.
Normal operation can include substantial cone movement, particularly at higher output.
Abnormal signs include:
- Scraping sounds.
- Repeated mechanical knocking.
- Sudden buzzing.
- Rattling from the driver itself.
- Distortion that was not previously present.
- A burnt or unusual smell.
- Sudden loss of output.
- One voice coil behaving differently from the other.
If you smell an overheated voice coil, hear serious mechanical noise or notice a sudden change in performance, reduce the output immediately.
Do not keep testing it at maximum volume to “see if it clears up.”
Seasonal and Vehicle-Specific Considerations
Temperature can affect how a vehicle audio system behaves.
In very cold conditions, suspension components and materials can behave differently until they warm up. In extreme heat, voice-coil and amplifier temperatures can rise considerably faster.
There is no need for an elaborate warm-up procedure, but sensible use matters.
During very hot weather, especially if the vehicle has been sitting in direct sunlight, give the cabin and equipment some time to return toward normal operating temperature before immediately demanding maximum output.
Likewise, if the system is installed in a truck or SUV where the enclosure receives direct sunlight or has limited ventilation, consider that when choosing the installation location.
When a Subwoofer Should Be Inspected or Replaced
Not every performance change means the driver is damaged.
Start by checking the entire system:
- Source signal.
- Amplifier settings.
- Speaker wiring.
- Voice-coil configuration.
- Enclosure condition.
- Port condition.
- Electrical supply.
- Amplifier temperature.
- Mechanical movement.
If those areas are correct and the driver still produces abnormal noise, distortion or significantly reduced output, then the subwoofer itself may need inspection.
A professional car audio technician can test the voice coils and amplifier rather than guessing which component has failed.
The Long-Term Rule for a Deep-Bass System
The best way to extend the life of a 10-inch subwoofer is surprisingly simple: build the system correctly and stop treating maximum output as the normal operating level.
Use an enclosure designed for the driver, match the amplifier to the actual impedance, maintain clean electrical connections, keep the amplifier ventilated, avoid sustained clipping and pay attention to unusual sounds or heat.
For everyday listening, you should be able to enjoy strong deep bass without constantly operating at the edge of the driver’s mechanical or thermal limits.
That approach is particularly important with the high-RMS models in this guide. Their ability to handle serious power is useful when the rest of the system is built accordingly, but power handling is headroom, not a target you need to hit every time you turn up the volume.
FAQs About 10 Inch Subwoofers for Deep Bass
Is a 10 inch subwoofer actually enough for deep bass in a Toyota Tundra or other full-size truck?
Yes, but the enclosure and system design matter more than the 10-inch diameter by itself. A properly powered 10-inch driver can produce genuinely deep bass in a Tundra, F-150, Silverado or Ram, but you should not expect every 10-inch setup to reproduce low frequencies with the same authority.
In a truck, available enclosure space is often the limiting factor. A high-excursion driver in a correctly sized ported enclosure can produce surprisingly serious low-end output, while a poorly matched box can make an expensive subwoofer sound ordinary.
For a truck installation, I would check these before buying:
- Available enclosure depth and width behind or beneath the seats.
- Net internal airspace after accounting for the driver and port.
- Final impedance and amplifier output.
- Whether a sealed or ported design actually fits the intended location.
- Whether the electrical system can comfortably support the amplifier.
The real-world truth is that a well-designed 10-inch system can outperform a poorly designed larger system. If the box is wrong, adding another subwoofer or buying a higher-wattage driver does not automatically solve the underlying problem.
Would an Alpine R2-W10D4 in a sealed box produce deeper bass than a higher-RMS 10 inch subwoofer in the wrong enclosure?
It can, and this is exactly why comparing subwoofers purely by RMS wattage is misleading.
The Alpine R2-W10D4 is rated at 750 watts RMS and has substantial excursion capability, but its actual low-frequency performance still depends on the enclosure, amplifier, crossover and vehicle cabin. A 1,250W or 1,500W RMS driver does not automatically reproduce deeper bass simply because it can handle more power.
There is also an important distinction between low-frequency extension and maximum output. A system may reach very low frequencies but not produce enormous sound pressure at those frequencies. Another system may create much higher output in a narrower range while sounding less impressive on extremely low notes.
That is why I would judge the complete setup using:
- Driver capability and excursion.
- Recommended enclosure alignment.
- Actual amplifier power at the final impedance.
- Cabin response of the vehicle.
- Crossover and equalisation settings.
If your goal is deep, usable bass rather than simply the biggest specification number, the enclosure deserves almost as much attention as the driver itself.
Why can a 10 inch subwoofer sound weaker after upgrading to a much more powerful amplifier?
Because amplifier power does not automatically equal better bass, and a more powerful amplifier can expose problems that were previously hidden.
If the new amplifier is capable of substantially more output, you may now be driving the enclosure harder, reaching excessive excursion, running into thermal limitations or exposing rattles and air leaks that were not obvious with the previous setup.
There is also the possibility of incorrect gain structure. If the gain is simply turned up because the amplifier is more powerful, the system can reach clipping sooner than expected.
A sudden reduction in perceived bass after an upgrade is therefore worth investigating rather than assuming the new amplifier is defective.
Check:
- Final subwoofer impedance.
- Amplifier output at that impedance.
- Gain and crossover settings.
- Polarity and phase.
- Enclosure air leaks.
- Port tuning and obstruction.
- Electrical voltage under load.
- Whether the amplifier is entering protection.
Real talk: if a powerful amplifier makes the system sound worse, adding even more power is usually the wrong next step. The first job is finding out what changed in the signal chain or enclosure.
How do you know when a 10 inch subwoofer is being overpowered even if it is rated for the amplifier’s RMS output?
The RMS numbers alone cannot tell you what is happening in the vehicle.
A subwoofer rated for 1,000 watts RMS can still be mechanically or thermally stressed by an improperly configured system. Conversely, an amplifier with a similar RMS rating does not necessarily deliver that power continuously during normal music playback.
Watch for physical and audible warning signs rather than relying solely on the wattage labels:
- Mechanical knocking or bottoming.
- Scraping from the driver.
- Severe cone movement on very low notes.
- Audible distortion during bass peaks.
- A noticeable burnt or overheated smell.
- The subwoofer becoming unusually hot.
- Amplifier protection activating.
- Output changing noticeably after prolonged high-volume use.
A particularly important point is ported enclosure behaviour. Below the enclosure’s tuning frequency, the driver can lose much of the enclosure’s acoustic loading, allowing excursion to rise quickly. That is one reason a correctly configured subsonic filter can be important for high-output ported systems.
And there is a useful distinction here: hearing distortion is not the only warning sign. A system can be under considerable thermal stress before the listener notices an obvious change in sound.
Is a 10 inch subwoofer with a ported box always the better choice for loud bass?
No. A correctly designed ported enclosure can provide higher output around its tuning range, but the word correctly is doing most of the work.
The port has to be designed around the driver and enclosure volume. If the port is too small, airflow can become turbulent. If the tuning is inappropriate, the response may not match what you actually want. If the box is built around the wrong net airspace, the driver’s behaviour can change substantially.
For a high-output system, I would pay attention to:
- Net enclosure volume, not just external box dimensions.
- Port area and length.
- Tuning frequency.
- Driver displacement.
- Port clearance.
- Subsonic-filter settings.
- Available amplifier power.
A sealed enclosure can still be the more sensible choice when the vehicle has limited space or when controlled bass is more important than extracting maximum output around a particular frequency.
The twist is that “ported” is not a performance guarantee. A badly tuned ported box can make an expensive 10-inch subwoofer perform worse than a properly designed sealed installation.
Can a 300W RMS 10 inch subwoofer be the smarter choice than a 1,500W RMS model for a daily driver?
Absolutely, depending on what the vehicle and owner actually need.
The Rockford Fosgate P2D4-10 Punch, at 300 watts RMS, belongs to a very different type of installation from the 1,500W RMS American Bass XFL 10. That difference is not simply about loudness. It affects the amplifier size, electrical requirements, enclosure construction, wiring and the amount of space the complete system may consume.
If the goal is to add meaningful low-end authority to a daily driver, a moderate-power system can be easier to integrate and live with. A 1,500W RMS setup makes more sense when the owner is intentionally building around high output and is prepared for the supporting hardware that comes with it.
The mistake is assuming that more RMS automatically means a better everyday system.
For a daily vehicle, I would rather have:
- Correct enclosure volume.
- Clean amplifier power.
- Proper impedance matching.
- Good crossover integration.
- Minimal unwanted rattles.
- Adequate electrical capacity.
- A system that can play loudly without constantly operating at its limits.
That is what makes the bass enjoyable over years of use, rather than impressive for the first five minutes of a parking-lot demo.
Final Verdict: Build the System Around the Bass You Actually Want
After looking at power handling, excursion, enclosure design, impedance, installation and long-term use, the biggest lesson from these 10-inch subwoofers is fairly simple: deep bass does not come from the subwoofer alone.
A 10-inch driver can have an impressive RMS rating, a large motor and substantial excursion capability, but those numbers only describe what the driver is capable of doing under the right conditions. Put that same driver in the wrong enclosure, pair it with an unsuitable amplifier or run it with poor gain structure, and much of that potential disappears.
That is why I would not make the purchase decision by asking which model has the biggest wattage number. I would start with the vehicle, available enclosure space and amplifier, then work backwards to the driver.
Match the Subwoofer to the Entire Installation
For a serious high-output build, models such as the Sundown Audio SA-10 v.2 D4 and American Bass XFL 10 make sense when the rest of the system is capable of supporting their power requirements. They are not the kind of drivers I would casually drop into an existing factory system and expect everything else to handle the upgrade without changes.
The Skar Audio EVL-10 D4 also sits firmly in the high-power category, while the Alpine R2-W10D4 takes a more balanced approach for someone who wants substantial output without making the entire system revolve around maximum power.
The Rockford Fosgate P2D4-10 Punch is a different proposition altogether. Its 300W RMS rating makes it much easier to build around for a daily-driver installation where sensible power requirements and packaging matter more than extreme output.
None of those differences make one design universally right. They simply make each one better suited to a different type of system.
The Enclosure Is Where Many Good Subwoofers Go Wrong
If there is one part of this guide I would not skip, it is the enclosure.
A properly designed sealed box can give you controlled, well-integrated bass in a vehicle where space is limited. A properly designed ported box can extract considerably more output around its tuned range. But neither approach works properly when the box is chosen as an afterthought.
Pay particular attention to:
- Net internal airspace.
- Port dimensions and tuning.
- Driver displacement.
- Mounting depth.
- Available vehicle space.
- Mechanical clearance.
- Enclosure construction.
- Subsonic filtering for ported systems.
This is also why a loaded subwoofer box should not be judged simply by convenience. The fact that a 10-inch driver physically fits into a box does not mean the box is acoustically correct for that driver.
Do Not Build a 1,500W System When You Only Need 500W of Bass
There is nothing wrong with wanting a serious system, but the supporting hardware should follow the actual goal.
If you mainly want deeper bass in a daily-driven SUV, sedan or truck, you may not need a competition-oriented driver and a massive amplifier. A properly matched moderate-power system can deliver a much more satisfying result while taking less space and putting less demand on the vehicle’s electrical system.
On the other hand, if your goal is genuine high-output bass, do not underestimate the supporting equipment. High RMS power means the amplifier, wiring, electrical supply and enclosure all become part of the project.
Real talk: the most expensive component in the system cannot compensate for a badly planned installation.
What Actually Makes a 10 Inch Subwoofer Worth Buying
I would narrow the decision down to four things:
First, the driver has to suit the amplifier. RMS power and final impedance need to make sense together.
Second, the enclosure has to suit the driver. Sealed and ported designs are not interchangeable, and enclosure volume matters.
Third, the vehicle has to suit the enclosure. A theoretically excellent subwoofer is not useful if the required box does not fit where you need it.
Finally, the system has to stay within its limits. Clean power, sensible gain settings, adequate cooling and proper installation will do more for long-term performance than chasing another few hundred watts on a specification sheet.
That is ultimately the difference between buying a 10-inch subwoofer and building a proper 10-inch bass system. The driver gives you the foundation, but the enclosure, amplifier, electrical system and installation determine whether that foundation turns into genuinely deep, clean and repeatable bass.