
Loudest 6×9 Speakers for Bass and Sound Quality in 2026: Deep Punch, Refined Audio
If you want a 6×9 speaker that actually makes a difference from the driver’s seat, I would not choose it by peak wattage or by counting how many tweeters are built into the grille. A 6×9 has more cone area than a typical 6.5-inch speaker, but that alone does not guarantee deeper bass or better sound. The real difference comes from how the woofer, motor, sensitivity, crossover and available power work together. That is why two 6×9 speakers with similar power ratings can sound completely different once they are installed in the same car.
That matters whether you are replacing tired factory speakers, upgrading a newer vehicle with a factory amplifier, or building a system around an aftermarket amp. Some 6x9s are easy to drive from a factory radio, while others make far more sense when you can give them cleaner, stronger power. The Hertz Mille Pro MPX-6903, for example, is built around high output and a 130W RMS rating, while the Morel Tempo Ultra Integra 692 MKII takes a more refined approach with 150W RMS power handling, 92dB sensitivity and a point-source design.
I selected these best 6×9 speakers for bass and sound quality based on output, midbass control, tonal detail, driver design and genuine upgrade potential rather than simply choosing the biggest number on a specification sheet. One fit warning before you buy: 6×9 is the speaker size, not a guarantee of vehicle compatibility. Mounting depth, cutout dimensions, grille clearance, wiring and your car’s factory amplifier all need to be checked before ordering. The right 6×9, properly installed and powered, can make a factory system sound like a completely different car.
Best 6×9 Speakers for Bass and Sound Quality (2026): Power and Performance Picks
#1. HERTZ Mille Pro MPX-6903 6×9 Speakers
Best 6×9 Speakers for Bass, High Output, Strong Midbass, Crisp Highs and Full-Range Car Audio
#2. Morel Tempo Ultra Integra 692 MKII 6×9 Speakers
Best 6×9 Car Speakers for Sound Quality, Natural Vocals, Deep Midbass, Smooth Highs and Refined Detail
#3. Alpine R2-S69 R-Series 6×9 Speakers
Best Sounding 6×9 Speakers for Punchy Midbass, High-Resolution Detail, Clean Vocals and Controlled Output
#4. Focal ACX690 Auditor EVO 6×9 Speakers
Best 6×9 Car Speakers for Balanced Sound, Clear Highs, Solid Midbass and Detailed Full-Range Listening
#5. Rockford Fosgate T1692 Power 6×9 Speakers
Best 6×9 Car Audio Speakers for Punchy Bass, Strong Volume, Dynamic Sound and Powerful Everyday Upgrades
Expert Tip
If you are replacing factory 6×9 speakers, do not buy the speaker with the biggest wattage number and assume it will play louder. Your factory radio, amplifier output, speaker sensitivity and mounting space all affect the result. A high-powered model can actually feel underwhelming if the source cannot feed it properly.
I would also check mounting depth and rear-deck clearance before ordering, especially on vehicles where the factory 6×9 sits close to the trunk, seatback or trim. And if your goal is bass, remember that a 6×9 can give you stronger midbass, but it is not a substitute for a dedicated subwoofer when you want very low-frequency output. That is one of the easiest ways to avoid spending money on the wrong upgrade.
How We Choose These 6×9 Speakers
We did not choose these speakers simply because they are expensive, popular or carry impressive-looking specifications. The five models in this list have different strengths, and that matters more than putting every speaker into the same ranking box.
First, we looked at usable power and sensitivity. A speaker rated for serious power needs an appropriate source behind it, while a more sensitive design can produce stronger output from limited amplifier power. That is why the Hertz Mille Pro and Morel Tempo Ultra Integra stand out differently from a basic factory replacement. Their power handling gives them considerably more headroom when paired with a capable amplifier.
Next came the part that is often missing from 6×9 buying guides: how the speaker is actually designed to reproduce sound. The Hertz uses a three-way arrangement with dedicated high-frequency drivers, the Morel uses its Integra point-source approach, Alpine combines a glass-fiber-reinforced woofer with its HAMR surround and high-resolution tweeter, while Focal and Rockford Fosgate take different two- and three-way approaches. We considered these designs because more drivers do not automatically mean better sound.
We also paid close attention to midbass behaviour, vocal clarity and high-frequency control. That is important with a 6×9 because many buyers are looking for more impact from the rear of the vehicle without turning the cabin into a harsh, tiring listening environment. A speaker can produce plenty of volume and still sound unpleasant once you turn it up. We therefore gave more weight to models that offer a sensible balance between output, detail and control.
Another filter was real-world installation. Every speaker here is a 6×9, but that does not mean every one will drop directly into every vehicle. Mounting depth, cutout dimensions, grille clearance, factory connectors and amplifier compatibility can change the buying decision completely. We would rather point that out before you order than call a speaker “universal” simply because its advertised size matches your factory speaker.
Finally, we looked at what each model is genuinely good at instead of forcing them into identical categories. The Hertz is here for buyers chasing serious output and impact. Morel earns its place for its refined presentation and power capability. Alpine brings a strong combination of output and high-resolution detail. Focal is a sensible choice for a more balanced three-way presentation, while Rockford Fosgate remains compelling for buyers who want punchy, energetic full-range performance.
That is also why this list is not ranked by price alone or peak wattage alone. A speaker only becomes the “best” choice when its characteristics match the rest of your car-audio system. If you already have an amplifier, your shortlist can look very different from someone trying to get the most from a factory head unit.
The goal of this list is simple: help you choose the 6×9 that makes sense for your actual system, rather than convincing you that the most expensive speaker is automatically the right one.
#1. HERTZ Mille Pro MPX-6903 6×9 Speakers
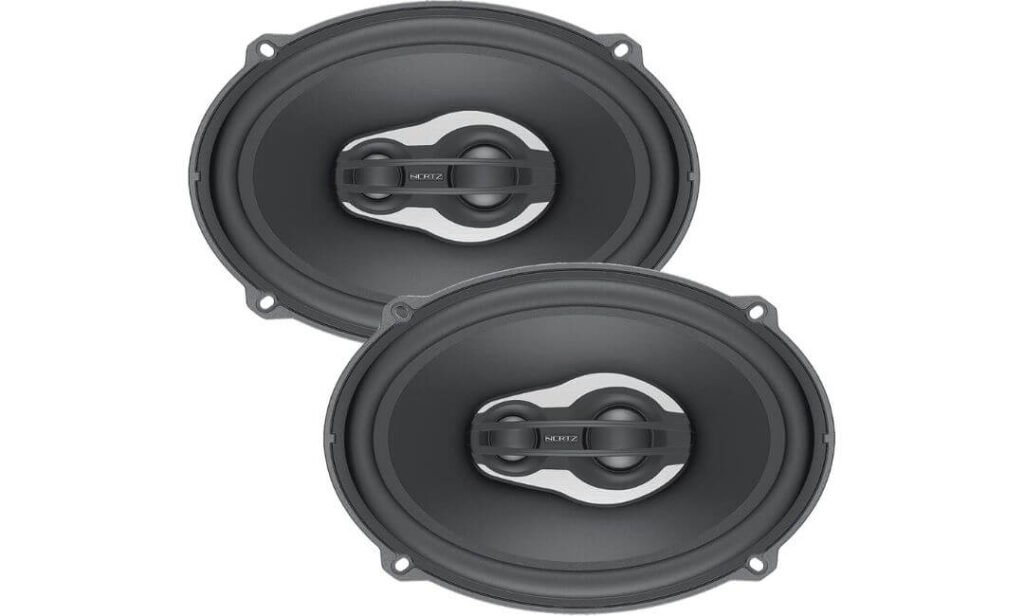
Quick Specs:
- Type: 3-way coaxial
- Size: 6×9 inches
- Power Handling: 130W RMS / 260W peak
- Impedance: 4 ohms
- Sensitivity: 94 dB
- Frequency Response: 30Hz–24kHz
- Woofer Cone: Pressed pulp with cotton fibers
- Woofer Voice Coil: 38mm pure copper
- Tweeter: 28mm Tetolon with neodymium magnet
- Supertweeter: 20mm Tetolon with neodymium magnet
- Weight: 5.03 lb per speaker
- Mounting Depth: 1.52 inches
- Grilles: Included
The first thing I would notice about this speaker is not the 260-watt peak number. It is the combination of 130W continuous power handling and 94dB sensitivity. That tells you much more about where this 6×9 belongs: it is designed to stay composed when the system is being pushed, rather than simply looking impressive on a specification sheet. Hertz also specifically optimizes the MPX 690.3 for rear-deck installation, where its off-axis tweeter geometry becomes particularly useful.
The woofer is where the bass story gets interesting. You get a 38mm copper voice coil, a pressed-pulp cone reinforced with cotton fibres and a large rubber surround designed for long excursion and damping. In practical terms, that is the sort of combination I want in a 6×9 being asked to produce strong midbass repeatedly. It is not claiming to replace a subwoofer; rather, it gives the rear stage considerably more authority before you reach for one.
Then there is the unusual part of the design: instead of stopping at a conventional coaxial tweeter, Hertz adds a 20mm Tetolon supertweeter alongside the 28mm Tetolon tweeter. The company says the supertweeter helps compensate for high-frequency roll-off caused by horizontal installation, while the faceplate geometry is optimized for off-axis response. That is a genuinely relevant feature for a rear-deck 6×9, because you are rarely sitting directly in front of these speakers.
(Italian engineering, rear-deck focus, high-efficiency output and a serious three-way design make this much more than a routine factory-speaker replacement.)
What We Like About Its Design
- 94dB sensitivity gives it a useful efficiency advantage when amplifier power is limited.
- The 38mm copper voice coil is a serious choice for sustained power rather than short bursts.
- 30Hz–24kHz response gives the speaker plenty of bandwidth, although I would not mistake that 30Hz figure for subwoofer-level bass.
- The Tetolon tweeter + supertweeter combination is particularly well suited to a horizontal rear-deck installation.
- The radial basket venting is a small detail that matters when you are listening loudly for long periods because it helps manage operating temperature.
The One Thing to Know Before Buying
The main catch is not really the speaker itself—it is the system around it. Although 94dB sensitivity makes it easier to drive than many power-hungry designs, I would still pair it with a properly matched amplifier if you want to exploit its 130W continuous capability. Also check the physical installation first: Hertz lists approximately 9.49 × 8.74 inches overall dimensions and 1.52 inches mounting depth, so “6×9” alone is not enough to guarantee clearance in your vehicle.
Why This 6×9 Makes Sense for a Bass-Focused System
This is the kind of 6×9 I would choose when the goal is stronger rear-stage impact without turning the entire system into a one-note bass machine. Its low-end specification gets attention, but the more important combination is the efficient 94dB output, long-throw surround, substantial woofer motor and 130W continuous rating. That gives it the ingredients to deliver hard midbass while keeping the rest of the music present.
There is also a practical advantage to the three-way layout. With a rear deck installation, the speaker is firing from a less-than-ideal angle toward the cabin. Hertz has specifically designed the high-frequency section and faceplate around that situation rather than treating the speaker as a generic 6×9 that happens to fit a rear deck.
The Insider Pro-Tip
If you are installing these in a truck or SUV, do not judge the upgrade during the first five minutes with the EQ turned up. Start flat, set the gain correctly and listen to the midbass around normal driving volume first. The useful test is whether kick drums, bass guitar and lower vocals remain defined when you turn the system up—not whether the door panel or rear trim starts vibrating.
And one installation detail is easy to overlook: because these are 1.52 inches deep, measure the actual clearance behind the factory 6×9 opening before buying adapters or spacers. The included grilles give you flexibility, but they do not solve a depth or trim-clearance problem. Hertz itself lists this model as optimized for rear-deck mounting, so that is where I would expect it to make the most sense when the vehicle physically accommodates it.
#2. Morel Tempo Ultra Integra 692 MKII 6×9 Speakers
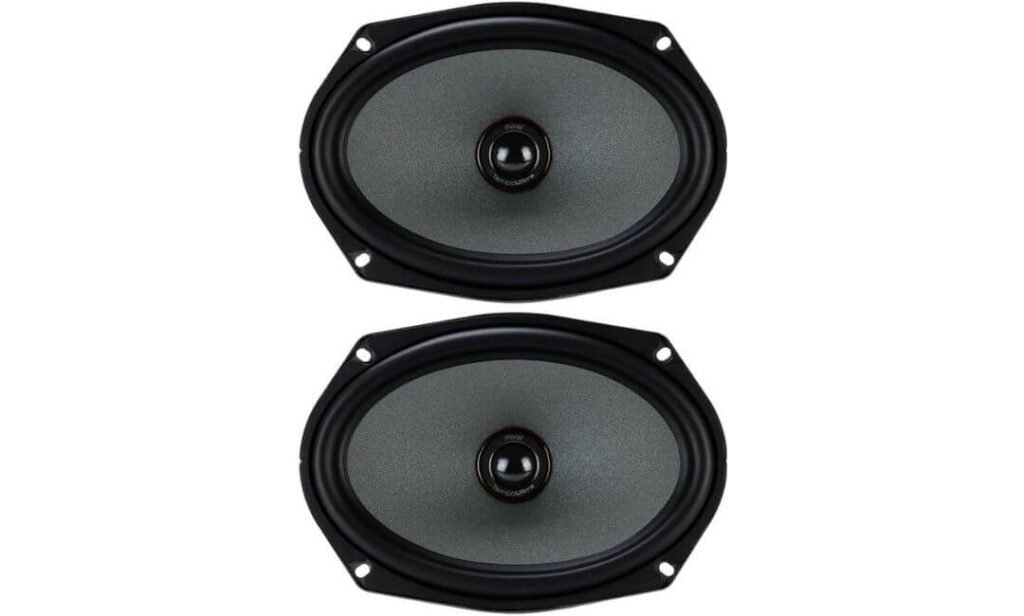
Quick Specs:
- Type: 2-way coaxial / Integra point-source
- Size: 6×9 inches
- Power Handling: 150W RMS / 250W peak per speaker
- Impedance: 4 ohms
- Sensitivity: 92dB
- Frequency Response: 35Hz–22kHz
- Tweeter: 1-inch soft dome
- Tweeter Magnet: Neodymium
- Mounting Depth: 3.35 inches / 85mm
- Configuration: Pair
At first glance, 150W RMS and 92dB sensitivity make this look like another high-power 6×9, but that is not really the reason I would put it on this list. The interesting part is Morel’s Integra architecture. Instead of positioning the tweeter above the woofer like a conventional coaxial, Morel places it concentrically within the woofer structure. The idea is simple: keep the two sound sources more closely aligned so their output behaves more consistently as you move away from the direct listening axis.
That matters in a car because you are almost never sitting perfectly in front of the rear speaker. One speaker may be several feet away and firing across the cabin at an angle, while the other is doing the same from the opposite side. Morel’s point-source approach is specifically intended to keep the tonal balance more predictable in those real-world positions. That is a much more meaningful feature than simply adding another small tweeter to the grille.
The other number worth noticing is the 3.35-inch mounting depth. This is not a shallow 6×9, and I would check the clearance behind the factory opening before ordering it. If your vehicle has enough room, the deeper chassis and substantial power capability make it a particularly interesting choice for an amplified system where you want the rear stage to sound substantial without becoming overly aggressive.
(Morel’s Israeli-built Integra philosophy is the real story here: controlled dispersion, coherent driver integration and serious power handling rather than specification-sheet theatrics.)
What We Like About This Design
- Integra point-source layout is the standout feature, giving the woofer and tweeter a much more controlled acoustic relationship.
- 150W RMS per speaker gives this pair plenty of headroom for a properly powered aftermarket system.
- 92dB sensitivity means it is not an especially difficult load to get moving, despite its high power capability.
- The 1-inch soft-dome neodymium tweeter fits the model’s more refined sound-quality focus rather than chasing an overly sharp top end.
- 35Hz–22kHz response gives it broad bandwidth for a 6×9, while the actual low-frequency result will still depend heavily on enclosure space, installation and system tuning.
One Installation Detail You Should Not Ignore
The 85mm mounting depth is the thing I would verify before anything else. A 6×9 opening may be large enough for the frame while still leaving insufficient room behind the speaker for the motor structure. That is particularly important in rear decks with metalwork, trunk clearance or factory acoustic panels close behind the speaker.
I would also avoid assuming that 150W RMS means you need a 150-watt amplifier. What matters is clean, appropriately matched power. If the factory radio cannot provide anything close to the speaker’s potential, an amplifier becomes much more relevant than simply buying the speaker and expecting its full capability to appear automatically.
Where This One Fits in a Serious 6×9 Setup
This is the model I would look toward when sound quality matters just as much as volume. The 2-way configuration is deliberately simpler than the Hertz three-way approach, but the Integra arrangement gives it a different advantage: the woofer and tweeter behave more like a single acoustic source.
That can be especially useful in a rear-deck installation where listening angles are rarely ideal. Morel says its Integra design is intended to reduce phase error and maintain a more consistent sound field across different listening positions.
And there is a useful reality check here: 35Hz on the specification sheet does not turn this into a subwoofer. It can contribute meaningful low-end weight and midbass authority, but if you want the kind of very-low-frequency pressure that you physically feel in the cabin, a properly integrated subwoofer remains the right tool. I actually consider that a strength of this speaker’s positioning—it is built to make the main system sound fuller, not pretend to replace every other part of the system.
The Insider Pro-Tip
If you are putting these into a vehicle that already has a decent amplifier, I would spend more time on gain, crossover and installation quality than chasing another upgrade afterward. A good 6×9 can sound noticeably worse when the amplifier is clipping or the factory mounting leaks air around the frame.
For the cleanest result, make sure the mounting surface is solid, seal any meaningful gaps around the adapter, and give the speaker the power it can use without forcing it into distortion. With this particular design, the whole point of the Integra architecture is to keep the presentation coherent—so there is little benefit in ruining that advantage with a sloppy mounting job. The speaker is the last thing you should compromise on after choosing it carefully.
#3. Alpine R2-S69 R-Series 6×9 Speakers
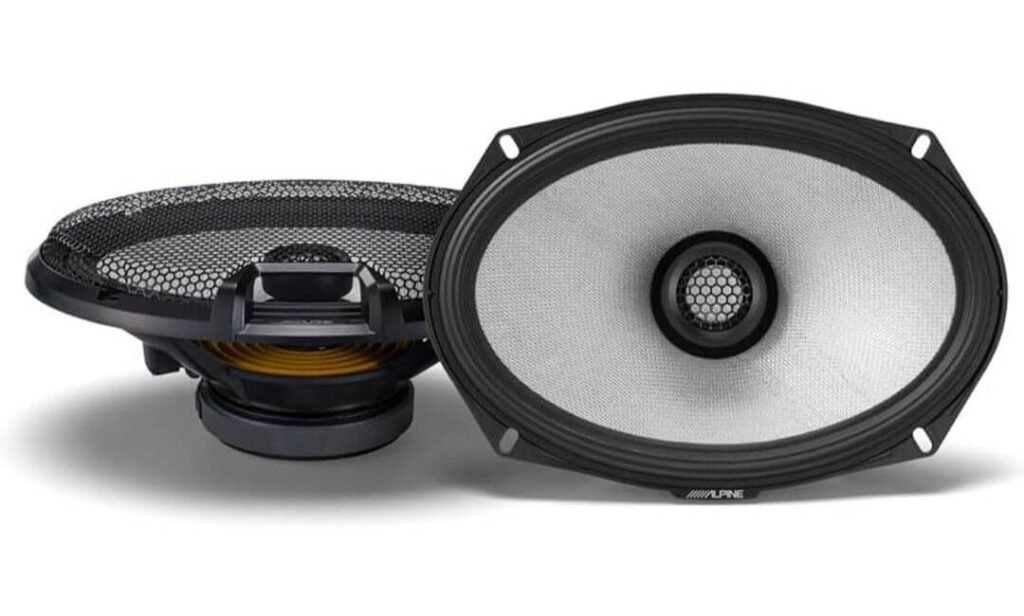
Quick Specs:
- Type: 2-way coaxial
- Size: 6×9 inches
- Power Handling: 100W RMS / 300W peak
- Impedance: 4 ohms
- Sensitivity: 88dB
- Frequency Response: 65Hz–40kHz
- Woofer Cone: Glass-fiber reinforced
- Tweeter: 4.3cm magnesium hard-dome
- Basket: Composite
- Audio Certification: Hi-Res Audio
- Configuration: Pair
The R2-S69 takes a different route from the Hertz and Morel. Its biggest talking point is the glass-fiber reinforced woofer cone. It is light and rigid, which is exactly the combination you want when a speaker has to start and stop quickly rather than letting the cone keep moving after the musical note has already changed. With a 6×9 driver, that matters particularly in the midbass, where a loose or overly soft cone can make drums and bass lines sound less defined.
Alpine also gives this model a 100W RMS / 300W peak rating, so there is useful headroom for an amplified system. The 88dB sensitivity is lower than the Hertz and Morel, though, and that is worth knowing if you are planning to run it directly from a modest factory head unit. It can work in a stock system, but I would not expect the same effortless output that a more sensitive 6×9 can produce from limited power.
The other major difference is the 4.3cm magnesium hard-dome tweeter. Alpine extends the claimed response to 40kHz and gives the R2-S69 Hi-Res Audio certification. You will not personally hear 40kHz, of course, but the important part is the tweeter’s material and construction: it is designed to deliver a fast, detailed top end without relying on an oversized, harsh-sounding peak to create the impression of clarity.
(Japanese R-Series engineering, a lightweight glass-fiber woofer and magnesium high-frequency driver give this 6×9 a distinctly fast and detailed character.)
What We Like About This Design
- The glass-fiber cone is the feature I like most for this particular application because it prioritizes speed and rigidity without making the woofer excessively heavy.
- 100W RMS power handling gives it enough headroom for a properly matched aftermarket amplifier.
- The magnesium hard-dome tweeter gives the speaker a more premium high-frequency section than the basic coaxials found in many factory replacements.
- The 40kHz claimed upper response and Hi-Res certification make it a sensible choice for high-resolution sources and modern lossless music.
- The tweeter assembly can be downsized by removing the installation frame and trim ring, which can be useful when factory clearance is tight.
The Detail I Would Check Before Ordering
The 88dB sensitivity is the one specification I would not ignore. If your car has a weak factory radio and you want maximum volume without adding an amplifier, there are more efficient choices in this list. The R2-S69 makes more sense when you care about controlled output and detail and have enough clean power available to take advantage of its 100W RMS capability.
I would also check the factory opening carefully rather than assuming the 6×9 label guarantees an easy installation. Alpine specifically gives you a way to reduce the tweeter’s installation footprint, which is useful, but the vehicle’s mounting depth, adapter and surrounding trim still need to be verified before ordering.
Why This 6×9 Works for Bass and Sound Quality
The R2-S69 is not trying to win this comparison by quoting the lowest frequency number. Its published 65Hz lower response tells you that its strength is more realistically midbass impact and overall musical accuracy, rather than pretending a door or rear-deck coaxial can replace a dedicated subwoofer.
That actually suits a lot of real car-audio systems. Kick drums can have more definition, bass guitar can sound tighter, and vocals remain separated from the low-frequency energy instead of everything becoming one thick sound. The rigid glass-fiber cone helps here, while the magnesium tweeter gives the upper range enough detail to keep the presentation lively when the volume goes up.
For someone building a system around an amplifier, I would consider this one of the more interesting all-round sound-quality choices in the list. It has enough power capability to grow with the system, but its real appeal is the balance between fast midbass response and a more sophisticated high-frequency section.
The Insider Pro-Tip
If you are installing these in a vehicle with a factory amplifier, do not immediately compensate for the new speakers by adding excessive treble or bass in the EQ. Give the glass-fiber woofer and magnesium tweeter a clean signal first. If the system is properly powered and mounted, you should be able to hear the difference in separation and attack without forcing it through aggressive EQ.
And if your priority is bass, concentrate on the mounting seal. A small air leak around a 6×9 adapter can rob the woofer of the authority you were expecting, no matter how impressive the speaker itself is. A rigid adapter, secure mounting and a properly sealed interface can do more for the perceived punch of this speaker than another specification on the box.
#4. Focal ACX690 Auditor EVO 6×9 Speakers
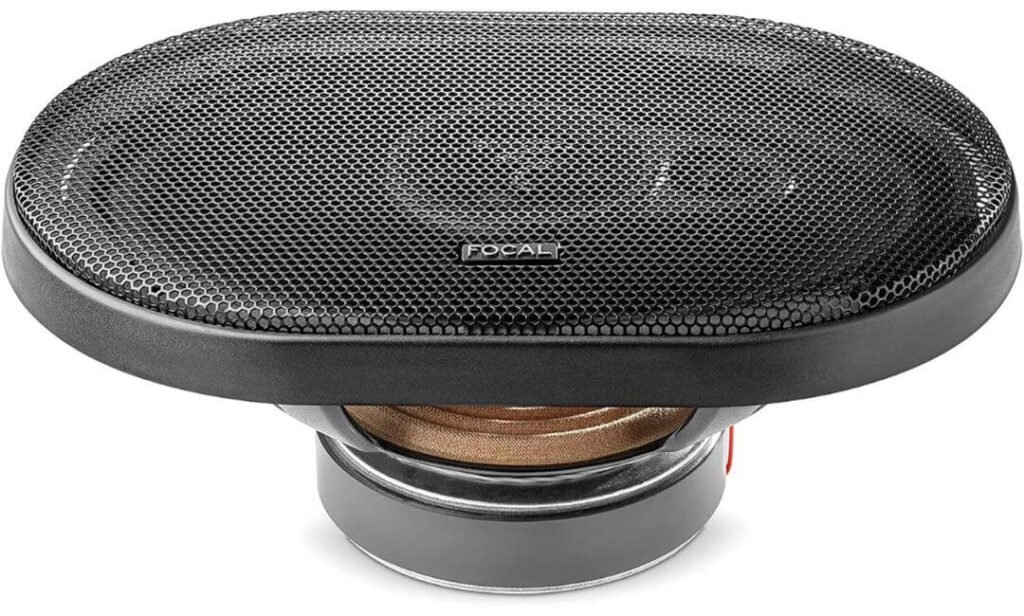
Quick Specs:
- Type: 3-way coaxial
- Size: 6×9 inches
- Power Handling: 80W RMS / 160W peak
- Impedance: 4 ohms
- Sensitivity: 92dB
- Frequency Response: 50Hz–20kHz
- Woofer Cone: Polypropylene
- Suspension: Butyl rubber
- Tweeter: Inverted dome
- Voice Coil: 35mm
- Magnet: Ferrite
- Crossover: Integrated
- Development: France
- Configuration: Pair
The ACX690 deserves attention because it is the only three-way model in Focal’s Auditor range. But I would not automatically call a three-way speaker better than every two-way design. The real advantage here is how the extra driver divides the job: the larger woofer handles the lower range, while the dedicated midrange and inverted-dome tweeter can concentrate on the information above it. In a car, that can make vocals, guitars and percussion easier to separate when the system is playing loudly.
The 80W RMS rating and 92dB sensitivity also tell you something useful. This is not an extremely demanding speaker. It can make good use of factory-radio power, while a clean aftermarket amplifier gives it more headroom rather than being an absolute requirement. For someone replacing factory 6×9s and wanting a noticeable improvement without immediately building an entire audio system around the speakers, that is a sensible combination.
Focal uses a polypropylene woofer with a butyl-rubber surround, a 35mm voice coil and a ferrite magnet. The published 50Hz–20kHz response is more conservative than some competitors’ numbers, but I actually prefer looking at it that way. A specification claiming 30Hz does not automatically mean the speaker will produce meaningful 30Hz output inside your vehicle. Here, the more realistic expectation is stronger midbass, cleaner vocals and a more complete full-range presentation rather than subwoofer replacement.
(French-developed Focal engineering, a three-way layout and the company’s inverted-dome tweeter give this 6×9 a more refined approach than a basic factory replacement.)
What We Like About This Design
- Three-way architecture gives the midrange its own driver instead of asking the woofer to cover too much of the vocal region.
- 92dB sensitivity makes it relatively easy to drive from a factory system.
- The 35mm voice coil gives the woofer useful thermal and power-handling headroom.
- Butyl-rubber suspension is a practical choice for a car speaker that has to cope with repeated movement and changing cabin conditions.
- The integrated crossover keeps the installation straightforward while directing the appropriate frequencies to the different drivers.
The One Reality Check Before You Buy
The 3-way layout is the attraction, but do not buy it purely because “three-way” sounds better than “two-way.” A well-designed two-way can outperform a mediocre three-way. What makes this Focal interesting is the combination of its three-way architecture, 92dB sensitivity and relatively easy amplification—not the driver count by itself.
Also check the physical opening and mounting arrangement in your vehicle before ordering. A 6×9 designation tells you the speaker class, not that the factory brackets, terminals and clearance will automatically match.
Where This Focal Fits Best
I would put this one toward the balanced end of this comparison. If your priority is simply the hardest possible bass hit, there are more aggressive choices here. But if you want the rear speakers to contribute meaningful low-end weight while keeping vocals and instruments intelligible, the dedicated three-way layout makes a strong case.
The 50Hz lower specification is another reason I would position it honestly. It is capable of useful bass and midbass, but it should be treated as part of a full-range car-audio system rather than a replacement for a subwoofer. Add a properly crossed-over sub later and these can concentrate on what they do well—midbass, vocals and upper detail—without asking one driver to reproduce the entire low-frequency spectrum.
There is also a practical advantage for factory-system upgrades: at 92dB sensitivity, you do not have to build a huge amplifier system just to make the speaker come alive. That makes it an easier recommendation for someone who wants a meaningful 6×9 upgrade now and may add amplification later.
The Insider Pro-Tip
If you install these into a rear deck, pay attention to where the tweeter and midrange are pointing, not just whether the speaker physically fits. A three-way design can give you excellent separation, but a poor mounting angle or a loose adapter can undermine that advantage. Keep the mounting solid and make sure the frame seals properly against the mounting surface.
I would also resist the temptation to boost the bass heavily just because you bought a larger 6×9. Start with a flat EQ, set the amplifier gain correctly if you are using one, and then make small adjustments. The best result should sound fuller without making the rear of the car announce itself as the source of every sound.
#5. Rockford Fosgate T1692 Power 6×9 Speakers
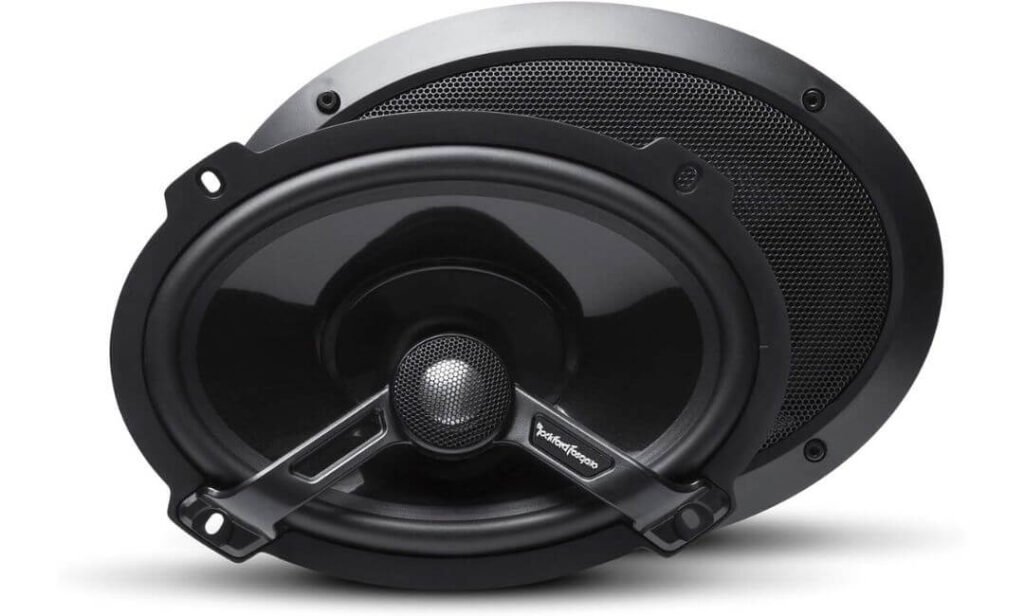
Quick Specs:
- Type: 2-way coaxial
- Size: 6×9 inches
- Power Handling: 100W RMS / 200W peak
- Impedance: 4 ohms
- Sensitivity: 90dB
- Frequency Response: 50Hz–22kHz
- Woofer Cone: Carbon fiber & polypropylene
- Surround: Butyl rubber
- Tweeter: Aluminum dome
- Tweeter Suspension: Polyurethane
- Crossover: Integrated concealed crossover
- Basket: Vented
- Configuration: Pair
The T1692 takes a different approach from the three-way Focal above it. Instead of adding a dedicated midrange driver, Rockford keeps the design two-way and focuses heavily on the woofer and tweeter combination. The carbon fiber and polypropylene cone gives the woofer a rigid structure while keeping its response quick enough for punchy kick drums, bass guitar and the kind of midbass you actually notice from a 6×9.
Its 100W RMS power handling and 90dB sensitivity also make the T1692 a sensible choice for an upgraded system. It is efficient enough to work with a decent factory source, but the speaker has considerably more room to breathe when paired with a clean aftermarket amplifier. I would pay more attention to the RMS figure here than the 200W peak number because that tells you much more about how the speaker will behave during sustained listening.
Rockford also uses an aluminum-dome tweeter with polyurethane suspension and its ICC concealed crossover. That keeps the crossover hardware tucked into the speaker rather than leaving a separate box to find space for during installation. The result is a straightforward full-range upgrade that leans toward punch, clarity and lively dynamics rather than an overly soft or laid-back presentation.
(Rockford Fosgate’s Power Series approach is built around strong output, robust driver construction and an energetic sound that suits listeners who want their 6×9 upgrade to feel immediately more powerful than stock.)
What We Like About This Design
- Carbon fiber and polypropylene cone gives the woofer a rigid platform for controlled midbass.
- 100W RMS handling makes it a good match for a properly amplified system.
- 90dB sensitivity keeps it reasonably easy to drive compared with less efficient high-power designs.
- Aluminum-dome tweeter adds a more immediate, energetic character to vocals and upper-frequency detail.
- ICC concealed crossover keeps the installation cleaner without requiring an external crossover box.
The One Thing to Keep in Mind
The T1692 is still a 2-way design, so it does not separate the midrange into its own dedicated driver like the Focal ACX690. That is not automatically a disadvantage—the woofer/tweeter combination can sound extremely good—but if your priority is maximum separation between vocals, instruments and the upper frequencies, the three-way layout of the Focal has an inherent advantage.
Also, don’t judge this speaker by the 200W peak rating alone. If you are planning to amplify it, focus on supplying clean power and setting the gain correctly rather than chasing the biggest amplifier number.
Why This Rockford Makes Sense for a 6×9 Upgrade
This is the speaker I would look at if you want your 6×9 upgrade to have a more energetic, punchy character without moving into a complicated component-style setup. The woofer construction is particularly relevant because 6×9 speakers often spend much of their useful life handling midbass rather than true sub-bass.
The 50Hz–22kHz response also gives you a realistic full-range target for a coaxial speaker. It can add weight and impact to the system, but I would still let a properly installed subwoofer handle the lowest bass if you eventually build a more serious system. That leaves the T1692 doing what it is good at—punchy midbass, vocals and high-frequency detail.
The Insider Pro-Tip
If you are powering these with an amplifier, don’t immediately turn up the bass boost. Get the gain and crossover settings right first, then listen for whether the speaker is actually missing low-end information. Excessive bass boost can make a 6×9 work harder without necessarily producing better bass.
Installation matters just as much. Make sure the adapter or mounting bracket is rigid, the speaker is properly sealed against the mounting surface, and there is enough clearance around the basket and tweeter. A solid mounting surface can make the difference between tight midbass and a loose, underwhelming result.
Best 6×9 Speakers for Bass and Sound Quality (2026): Power, Sensitivity and Sound Compared
| What Actually Matters | Top Pick Hertz Mille Pro MPX-6903 Output Focus 130W RMS | Refined Choice Morel Tempo Ultra Integra 692 MKII Sound Quality 150W RMS | Detail Focus Alpine R2-S69 R-Series Hi-Res Audio 100W RMS | Balanced Pick Focal ACX690 Auditor EVO 3-Way 92dB | Punchy Option Rockford Fosgate T1692 Power Punchy 100W RMS |
|---|---|---|---|---|---|
| Core Character | High-output, forceful and dynamic The strongest choice when you want the 6×9 stage to feel bigger and more immediate. |
Controlled, natural and refined More focused on coherent presentation than simply making the rear deck louder. |
Fast, detailed and crisp A more resolution-oriented presentation with a rigid glass-fiber woofer and magnesium tweeter. |
Balanced three-way presentation The dedicated midrange driver gives it a different approach to vocals and upper detail. |
Energetic and punchy A strong choice for listeners who want an immediately lively factory-system upgrade. |
| Bass & Midbass Behaviour | 9.5/10 Strongest emphasis on output and rear-deck midbass impact. |
9.0/10 Powerful, controlled low-end character without chasing exaggerated bass. |
8.4/10 More about tight, defined midbass than deep low-frequency output. |
8.3/10 Useful bass and midbass, with the three-way layout prioritising overall balance. |
8.9/10 Punchy midbass is one of the reasons this Power Series model stands out. |
| Sound Quality Priority | Dynamic Strong attack and high efficiency Less about subtlety, more about getting the system to sound alive. |
Refined Coherent point-source presentation One of the strongest options here when tonal integration matters most. |
Detailed High-resolution presentation The glass-fiber woofer and magnesium tweeter favour clarity and transient detail. |
Balanced Separate midrange duties A convincing choice when you want more driver separation without going to components. |
Lively Strong full-range punch Designed to sound immediately more energetic than a typical OEM speaker. |
| Driver Architecture | 3-way coaxial Woofer + 28mm tweeter + 20mm supertweeter. |
2-way Integra coaxial Concentric point-source layout keeps the woofer and tweeter closely integrated. |
2-way coaxial Glass-fiber woofer paired with a 4.3cm magnesium hard-dome tweeter. |
3-way coaxial Woofer + dedicated midrange + inverted-dome tweeter. |
2-way coaxial Carbon fiber/polypropylene woofer with aluminum-dome tweeter. |
| Power Handling | 130W RMS / 260W peak Highest sensitivity here, making its power handling particularly useful in real-world systems. |
150W RMS / 250W peak Highest RMS rating in this group. |
100W RMS / 300W peak Plenty of headroom, but sensitivity is lower than the most efficient options here. |
80W RMS / 160W peak The easiest one to position as a straightforward factory-system upgrade. |
100W RMS / 200W peak A solid amplifier-friendly rating for a performance-oriented coaxial. |
| Sensitivity | 94dB The standout for efficient output. |
92dB Good efficiency with substantial RMS capacity. |
88dB Benefits more from clean amplifier power. |
92dB Well suited to factory-radio upgrades. |
90dB A useful middle ground between efficiency and power handling. |
| Published Frequency Response | 30Hz–24kHz Broad published range, with the design strongly suited to rear-deck output. |
35Hz–22kHz Broad response, but its real strength is controlled and coherent presentation. |
65Hz–40kHz More revealing at the top end; do not confuse the 40kHz figure with audible bass capability. |
50Hz–20kHz A realistic full-range target for a coaxial used with a complete car-audio system. |
50Hz–22kHz Well aligned with the speaker’s punchy full-range character. |
| Installation Reality | 1.52″ mounting depth Relatively manageable, but still verify rear-deck clearance and grille fit. |
3.35″ / 85mm depth The deepest installation consideration in this group. Measure before buying. |
Fitment needs checking The removable tweeter frame/trim ring can help with installation flexibility. |
Check vehicle-specific clearance 6×9 sizing does not guarantee factory-bracket or terminal compatibility. |
3.43″ mounting depth Check basket clearance carefully, particularly in tight rear-deck applications. |
| Best Match For | Maximum Output Listeners who want powerful rear-stage impact and strong midbass without relying on a low-sensitivity speaker. |
Sound Quality Listeners who care about tonal coherence, natural vocals and a refined presentation. |
Detail Listeners who value high-frequency resolution, fast midbass and a more revealing character. |
Balanced Upgrade Drivers wanting a three-way speaker that can work well from a factory system and improve later with amplification. |
Punch Listeners who want a lively, muscular sound and a noticeable step up from OEM speakers. |
| What I Wouldn’t Ignore | System matching 94dB efficiency is a major advantage, but installation and clean signal still matter. |
85mm depth Excellent speaker on paper, but a bad fitment can ruin the upgrade. |
88dB sensitivity Don’t expect the same effortless output from a weak factory source. |
Don’t overvalue “3-way” Driver count alone does not determine sound quality. |
Amplifier setup Clean gain and sensible EQ will do more than simply adding bass boost. |
| My Take for This Article | Best Overall Fit The strongest blend of efficiency, power handling, midbass authority and rear-stage impact. |
Best for Refined Sound The pick I would favour when sound quality matters more than simply getting louder. |
Best for Detail A strong alternative when you prefer fast, crisp and high-resolution character. |
Best Balanced 3-Way Makes the most sense for listeners who specifically want three-way separation in a coaxial format. |
Best for Punch A convincing choice when you want your upgrade to sound immediately more energetic than stock. |
Buying Guide for 6×9 Car Speakers for Bass and Sound Quality
A good 6×9 speaker upgrade is not simply about finding the model with the highest wattage, the biggest magnet, or the lowest published frequency number. Those specifications can tell you something about a speaker, but they do not tell you how it will behave in your particular car.
The first thing I would decide is what you actually want the rear speakers to improve. If your factory system sounds thin and lifeless, you may want stronger midbass and more output. If the system already has enough volume but vocals and instruments sound congested, a more refined driver and better tweeter design may matter more. And if you already have an amplifier, power handling and installation quality become much more important.
There is also one expectation worth setting before you spend the money: a 6×9 can produce impressive midbass, but it is not a subwoofer. A speaker can make kick drums, bass guitar and lower vocals sound substantially fuller without reproducing the deepest sub-bass with the authority of a dedicated woofer.
Start With the Sound You Want From the Upgrade
Before comparing cones, magnets and wattage, identify the problem with your current system.
For a factory system that sounds weak, a higher-sensitivity 6×9 can be particularly useful because it can produce more output from the limited power available from the head unit. That is one reason specifications such as 92–94dB sensitivity can be more meaningful for a factory-radio upgrade than simply choosing the speaker with the largest peak-power number.
If you already have a capable amplifier, the decision changes. You can take advantage of speakers with higher RMS handling and give them enough clean power to maintain control when the volume rises. In that situation, the difference between a 100W and 130W RMS speaker matters, but so do the speaker’s efficiency, impedance, installation and tonal character.
For sound quality, I would listen for three things:
- Midbass control: Kick drums and bass guitar should have impact without becoming loose or boomy.
- Midrange clarity: Vocals should remain easy to understand when the music gets busy.
- High-frequency control: Cymbals, guitars and vocal detail should remain clear without becoming sharp or tiring.
A speaker that simply sounds louder during the first few seconds is not necessarily the better speaker. Good car audio should sound fuller and more controlled, not merely louder.
Budget Tiers and What You Should Expect
With 6×9 speakers, spending more can buy better materials, driver engineering and power handling, but there is no guarantee that the most expensive option will suit your system best.
A sensible way to think about the budget is by the type of upgrade you are building rather than by price alone.
| Budget / System Level | What You Should Expect | What Matters Most | Where the Money Should Go |
|---|---|---|---|
| Entry-level replacement | Noticeably cleaner than worn or basic factory speakers, with improved midbass and treble | Sensitivity, fitment, basic driver quality | Good speaker + proper installation |
| Mid-range upgrade | Stronger output, better control and clearer vocals at higher volume | Cone construction, suspension, tweeter quality, RMS handling | Better drivers rather than cosmetic extras |
| Premium coaxial | Greater refinement, stronger dynamics and more controlled output | Driver architecture, materials, crossover design, power matching | Speaker engineering + amplifier if needed |
| Amplified premium system | Much greater headroom, stronger midbass and cleaner performance at high volume | RMS handling, amplifier matching, installation and tuning | Speakers + clean amplifier power + proper setup |
| Full system with subwoofer | 6×9s handle midbass and midrange while the subwoofer handles deep bass | Crossover points, front/rear balance and amplifier setup | Spend according to each driver’s job |
The important distinction is that premium speakers cannot compensate for an unsuitable installation or weak electrical setup.
For example, putting a high-power speaker into a poorly sealed factory location and then adding aggressive EQ is not a premium upgrade. You can spend considerably more and still end up with less satisfying bass than someone who bought a moderately priced speaker and installed it properly.
Woofer Material Matters, But Not in the Way Marketing Makes It Sound
The woofer is responsible for most of what you perceive as bass and midbass, so its construction deserves attention.
Different materials can produce excellent results. There is no single cone material that automatically wins.
Polypropylene is popular in automotive speakers because it offers a good combination of durability, moisture resistance, controlled response and predictable performance. It is particularly sensible for a daily-driven vehicle where the speaker may see heat, humidity and temperature changes.
Glass-fiber reinforced cones can provide a useful combination of stiffness and low mass. In a design such as the Alpine R-Series speaker used in this comparison, that construction is part of the reason the speaker has a fast, defined character rather than simply trying to create a large amount of low-end output.
Carbon-fiber and polypropylene construction can provide additional rigidity while maintaining a relatively light moving structure. The Rockford approach is aimed more toward a punchy, energetic presentation.
And then there are traditional paper-based cones, which should not automatically be dismissed as cheap. A properly engineered paper or pressed-pulp cone can have excellent damping characteristics and can sound extremely natural. The Hertz driver in this comparison uses pressed pulp with cotton fibres, and its performance comes from the entire driver design rather than the cone material alone.
So I would never choose a 6×9 by reading “carbon fiber,” “glass fiber” or “polypropylene” on the box and assuming one material is automatically superior.
The engineering around the material matters more than the material name itself.
Pay Attention to the Surround
The surround controls how the cone moves while helping it return to its neutral position. It is therefore directly relevant to bass performance and durability.
Butyl rubber is particularly common in quality automotive speakers because it offers good durability and controlled movement. It also handles the demanding environment inside a vehicle better than many inexpensive foam surrounds.
A larger or more flexible surround can allow greater cone movement, but more excursion does not automatically mean deeper or better bass. If the rest of the motor structure, cone and suspension are not properly matched, excessive movement can simply produce distortion.
This is why I would rather have a well-controlled woofer with sensible excursion than chase a specification claiming enormous bass output.
Magnet Size Is Not a Quality Score
This is one of the most common traps when shopping for speakers.
A large magnet can indicate a serious motor structure, but magnet size by itself tells you very little about how good the finished speaker will sound.
What matters is how the magnetic motor, voice coil, cone, suspension and basket work together. A smaller but efficiently designed motor can outperform a visually larger magnet in the right application.
The same applies to claims about “high power” based purely on magnet size. If the speaker has poor sensitivity, an unsuitable voice coil or inadequate thermal management, a large magnet does not magically fix those limitations.
When comparing two models, look at sensitivity, RMS power handling, voice-coil design and the overall driver architecture before worrying about which magnet looks bigger.
RMS Power Is More Useful Than Peak Power
If there is one specification I would tell buyers to prioritise over marketing numbers, it is RMS power handling.
Peak or maximum wattage represents a short-term limit under specified conditions. It is not a realistic description of how much continuous power you should expect the speaker to handle during normal listening.
RMS gives you a much more useful indication of sustained power capability.
For example, a speaker rated at 100W RMS / 300W peak should not automatically be considered more powerful than a speaker rated at 130W RMS / 260W peak simply because its peak number is higher.
The RMS figures tell a different story.
More importantly, your amplifier should be matched to the speaker’s actual RMS capability, not its largest number printed on the packaging.
Sensitivity Can Matter More Than Extra Wattage
Sensitivity is particularly important when you are keeping the factory head unit.
A speaker with higher sensitivity can generally produce more acoustic output from the same amount of amplifier power. That makes a 92–94dB speaker potentially much easier to drive loudly than a lower-sensitivity model.
This is why a 94dB speaker can make a lot of sense in a factory system even if another model has a higher RMS rating.
The Alpine R-Series example in this comparison illustrates the opposite situation. Its 88dB sensitivity means I would be more interested in pairing it with a capable amplifier rather than expecting a basic factory radio to extract everything it can offer.
That does not make 88dB bad. It simply means system matching matters.
Two-Way vs Three-Way: Don’t Buy the Extra Driver Blindly
Three-way speakers are attractive because they divide the frequency range between more drivers.
A typical three-way 6×9 may use:
- A larger woofer for lower frequencies and midbass
- A dedicated midrange driver for vocals and instruments
- A tweeter for high frequencies
That can help reduce the workload placed on the woofer and can improve separation when the design is properly engineered.
The Focal ACX690 and Hertz Mille Pro in this comparison both use three-way configurations, but they approach the idea differently.
A good two-way can still sound excellent. The Morel, Alpine and Rockford options prove why driver count should not be treated as a ranking system. A carefully integrated woofer and tweeter can deliver better coherence than a poorly implemented three-way.
Three-way is a design advantage only when the drivers, crossover and dispersion are properly integrated.
Crossover Design Is More Important Than Most Buyers Realise
The crossover determines which frequencies are sent to each driver.
In a two-way coaxial, it helps separate the woofer’s duties from the tweeter’s. In a three-way design, it becomes even more important because the system has another driver that needs to be integrated correctly.
A good crossover should help the drivers work together rather than simply preventing them from reproducing frequencies they cannot handle.
Integrated or concealed crossovers can also make installation easier, particularly when you are replacing factory speakers and do not have much room for additional hardware.
But do not assume that a speaker with a visible or elaborate crossover is automatically better. The quality of the crossover design and how it interacts with the drivers matter far more than how impressive the component looks.
Check Your Head Unit Before Buying a High-Power 6×9
This is where many otherwise good speaker upgrades go wrong.
A factory head unit may advertise a certain output figure, but the actual power reaching the speaker can be much lower than what a premium 6×9 is capable of handling.
That does not mean you cannot install a high-quality speaker without an amplifier. It simply means you should understand what you are giving up.
With a sensitive speaker, a factory system can still deliver a worthwhile improvement.
With a lower-sensitivity, higher-power speaker, an amplifier may be needed to get the volume, dynamics and control you were expecting.
Before buying, check:
- Factory head-unit output
- Speaker impedance
- Whether the vehicle uses a factory amplifier
- Whether the factory amplifier has unusual impedance requirements
- Whether the new speaker’s sensitivity suits the available power
- Whether your vehicle uses active crossover processing
- Whether replacing the factory speaker will affect the vehicle’s existing audio tuning
If the vehicle has a factory premium audio system, do not assume the speaker wiring behaves like a simple aftermarket stereo installation.
Amplifier Power: More Is Not Automatically Better
Adding an amplifier can be one of the best upgrades you make, but only if it is installed and tuned properly.
The goal is not to give a 100W RMS speaker a massive amplifier and turn everything up.
The goal is to provide clean, controlled power with enough headroom that the amplifier is not clipping when you listen loudly.
A properly matched amplifier can improve:
- Dynamic headroom
- Midbass control
- Vocal stability at higher volume
- Overall output
- Resistance to audible distortion
A badly adjusted amplifier can do the opposite.
If you hear harshness when turning the system up, do not immediately assume the speaker cannot handle the volume. The amplifier may be clipping, the EQ may be excessive, or the factory signal may already be heavily processed.
Installation Is Part of the Speaker
This is probably the most overlooked part of a 6×9 upgrade.
A speaker is only as good as the environment it is installed into.
Before ordering, measure:
- Mounting depth
- Cutout dimensions
- Overall basket clearance
- Magnet clearance
- Grille clearance
- Screw-hole pattern
- Factory connector position
- Adapter-bracket requirements
Depth is particularly important.
The Morel Tempo Ultra Integra 692 MKII, for example, has a mounting depth of around 85mm, while the Hertz model is considerably shallower. Both can be excellent choices, but they do not have the same installation requirements.
Never assume that because your car currently has a 6×9 speaker, every aftermarket 6×9 will physically fit.
Seal the Speaker Properly for Better Midbass
If you want stronger bass, do not immediately reach for the EQ.
First make sure the speaker is properly mounted and sealed.
Any significant air leakage around the speaker mounting surface can reduce the acoustic effectiveness of the woofer. A loose adapter, thin mounting plate or gap between the speaker and mounting surface can make the bass sound weaker and less controlled.
A rigid mounting adapter and proper sealing can make a surprisingly large difference.
This is one of those upgrades that does not appear on a specification sheet, but you can hear it.
Electrical Upgrades Only When the System Actually Needs Them
You do not automatically need a new battery, upgraded alternator or heavy-gauge wiring just because you installed better 6×9 speakers.
For a simple speaker replacement using the factory head unit, the existing electrical system is usually not the part I would worry about first.
Electrical upgrades become more relevant when you are adding multiple amplifiers, a powerful subwoofer or a high-current audio system.
At that point, the amplifier’s current requirements, wiring length, fuse protection, battery condition and alternator capacity all need to be considered.
Do not spend money upgrading the vehicle’s electrical system before establishing that your new audio system actually requires it.
How to Get More Bass Without Creating Distortion
If you want stronger bass from your 6×9 speakers, I would follow this order rather than simply increasing the bass EQ:
- Make sure the speakers are mounted securely.
- Seal the mounting surface properly.
- Confirm the speakers are receiving the correct polarity.
- Check that the factory or aftermarket amplifier is not clipping.
- Set the gain correctly instead of using gain as a volume control.
- Use a sensible high-pass filter when the system is being pushed hard.
- Add only modest EQ after the basic setup is correct.
- Keep the loudness enhancement or bass boost functions under control.
- Let a dedicated subwoofer reproduce the deepest bass if your system includes one.
The high-pass filter deserves particular attention. If you ask a 6×9 to reproduce frequencies below what it can comfortably handle at high volume, cone excursion increases rapidly. That can create distortion and reduce the speaker’s ability to produce clean midbass.
Removing unusable deep bass can actually make the system sound stronger, because the speaker has more headroom for the frequencies you can actually hear and feel from the cabin.
Do’s and Don’ts for a Cleaner 6×9 Upgrade
Do:
- Match the speaker’s RMS capability to the amplifier.
- Pay attention to sensitivity when using a factory head unit.
- Measure mounting depth before ordering.
- Use rigid adapters where required.
- Seal the speaker against the mounting surface.
- Check factory amplifier compatibility.
- Use clean power and sensible gain settings.
- Give the front stage proper attention instead of making the rear speakers excessively loud.
- Add a subwoofer if you want genuine deep-bass authority.
Don’t:
- Choose purely by peak wattage.
- Assume a bigger magnet automatically means better bass.
- Assume a three-way is automatically better than a well-designed two-way.
- Boost the bass heavily to compensate for poor installation.
- Run an amplifier into clipping because you want more volume.
- Assume every 6×9 will fit simply because the factory speaker is also a 6×9.
- Expect a coaxial 6×9 to reproduce subwoofer-level low bass.
- Ignore factory audio processing in premium OEM systems.
The Real Bottom Line
For this type of upgrade, I would make the decision in this order: vehicle fitment first, available power second, desired sound character third, and specifications fourth.
If you want maximum efficiency and strong rear-stage impact, the Hertz makes a lot of sense. If refinement and coherent sound are more important, the Morel is the more interesting direction. The Alpine is better suited to a listener who values detail and has enough clean power to drive a lower-sensitivity speaker. The Focal is compelling if you specifically want a three-way architecture with a balanced full-range presentation, while the Rockford is a strong choice for a more energetic, punchy character.
That is the important point: there is no universally “best” 6×9 speaker once the installation and audio system are taken into account. The best choice is the one whose sensitivity, power handling, driver design and physical fit actually match the car you are putting it into.
6×9 Car Speaker Installation Guide for Better Bass and Sound Quality
Installing a new pair of 6×9 speakers is not particularly difficult, but getting them to sound right is a different story. A speaker can have excellent power handling, a good woofer and a well-designed tweeter, yet still sound weak if it is mounted loosely, wired incorrectly or installed into a leaking mounting surface.
For bass and sound quality, I would treat the installation as part of the speaker upgrade itself. The goal is not simply to make the new speaker physically fit. You want a rigid mounting surface, correct polarity, proper electrical connection, adequate clearance and a good seal around the speaker.
The procedure below covers the typical sedan, SUV and hatchback installation, but the exact mounting location varies considerably between vehicles. Some 6×9s sit in rear decks, some are mounted in rear doors, and some vehicles require an adapter bracket because the factory opening is not designed for an aftermarket speaker.
Before You Remove the Factory Speakers
Do not start by pulling panels apart. Spend a few minutes checking what you are actually working with.
You should confirm:
- The factory speaker size and mounting location
- The new speaker’s mounting depth
- Cutout diameter and overall frame dimensions
- Factory screw-hole pattern
- Whether an adapter bracket is required
- Factory connector type
- Whether the vehicle has a factory amplifier
- Whether the speaker location contains wiring for airbags, sensors or other vehicle systems
- Whether the factory grille or trim will clear the new tweeter
- Whether the speaker terminals have enough clearance from the metalwork
For a rear-deck installation, also check the space below the deck. A speaker can physically fit through the opening while the magnet or basket hits the structure underneath.
This is particularly important with deeper 6×9 designs. Never assume that two speakers with the same 6×9 dimensions will have the same installation requirements.
Tools and Parts Worth Having
You do not need a professional workshop full of equipment, but having the right basics makes the installation considerably cleaner.
Useful tools and materials include:
- Trim-removal tools
- Screwdriver or socket set
- Torx bits if your vehicle uses them
- Multimeter
- Wire stripper and crimping tool
- Heat-shrink tubing
- Quality speaker wire where required
- Vehicle-specific speaker adapter harness
- Speaker mounting adapters or brackets
- Closed-cell foam speaker gasket
- Thread-locking compound where appropriate
- Sound-deadening material if you are treating the mounting area
- Electrical tape for temporary identification, not as the primary connection method
I strongly prefer a vehicle-specific adapter harness over cutting the factory wiring whenever one is available. It keeps the installation reversible and reduces the chance of damaging the original harness.
Step 1: Disconnect the Battery When Appropriate
Before working on the wiring, switch the vehicle off and disconnect the negative battery terminal when the manufacturer’s service procedure permits it.
This is particularly important when removing interior panels around systems that may contain airbags or other electrical components.
Do not blindly disconnect battery power on a modern vehicle without considering its electronic systems. Some vehicles have specific procedures for battery disconnection, memory retention and airbag-related work.
If you are not comfortable identifying those systems, follow the vehicle’s service information rather than guessing.
Step 2: Remove the Factory Speaker Carefully
Remove the grille or trim surrounding the speaker and expose the factory mounting screws.
Once the screws are removed, do not immediately pull the speaker away with force.
Check whether:
- The factory connector is clipped into the speaker
- Additional wiring is attached to the basket
- The speaker is sealed to the mounting surface
- A factory bracket is holding the speaker in place
- The wiring is unusually short
Disconnect the factory connector and keep the original hardware if it may be useful for returning the vehicle to stock.
This is also a good time to photograph the original wiring before changing anything. A thirty-second photo can save a frustrating troubleshooting session later.
Step 3: Check the New Speaker Against the Opening
Before connecting anything, place the new 6×9 into the opening without tightening it.
Do not force it.
Check:
- Frame clearance
- Magnet clearance
- Mounting-hole alignment
- Terminal clearance
- Grille clearance
- Tweeter clearance
- Adapter-bracket alignment
- Clearance underneath the mounting surface
If an adapter bracket is required, test-fit the bracket first and then test-fit the speaker into the bracket.
This dry-fit step is one of the easiest ways to catch an installation problem before you have wires, screws and sealing material in the way.
Step 4: Use the Correct Wiring Adapter
The easiest installation is normally:
Factory speaker connector → vehicle-specific adapter → aftermarket speaker
This avoids cutting the factory harness.
If you do need to modify wiring, identify the positive and negative conductors carefully. Wire colour conventions vary between manufacturers, so do not assume red is positive or black is negative simply because that is common elsewhere.
Use the vehicle’s wiring information or verify the connections with a reliable method.
Step 5: Understand Impedance Before Connecting an Amplifier
This is where speaker upgrades become more technical.
Most aftermarket 6×9 speakers in this category use a 4-ohm nominal impedance, which is straightforward for many aftermarket amplifiers.
But you should never assume that every car-audio speaker is 4 ohms.
The amplifier must be capable of safely driving the connected load.
For a normal single-speaker connection:
AMPLIFIER CHANNEL
      │
      ├──── +  ───────────► Speaker +
      │
      └──── -  ───────────► Speaker -
That is the simple arrangement you want.
Avoid connecting two speakers to one amplifier channel unless you understand the resulting impedance and the amplifier’s minimum supported load.
Series vs Parallel Wiring
This becomes important if you are connecting multiple speakers or additional drivers to an amplifier.
For two identical 4-ohm speakers:
Series connection:
Amplifier +
    │
    ▼
Speaker 1 +
Speaker 1 -
    │
    ▼
Speaker 2 +
Speaker 2 -
    │
    ▼
Amplifier -
The approximate total load becomes:
4Ω + 4Ω = 8Ω
A higher impedance generally means the amplifier delivers less power.
For a parallel connection:
              ┌── Speaker 1 ──┐
Amplifier + ──┤               ├── Amplifier -
              └── Speaker 2 ──┘
Two identical 4-ohm speakers in parallel produce an approximate:
4Ω ÷ 2 = 2Ω
That can allow considerably more amplifier output, but only if the amplifier is designed to safely operate at 2 ohms.
Never choose parallel wiring simply because it produces a lower number. If the amplifier is not rated for that load, you can create excessive heat, protection-mode shutdowns or permanent damage.
Step 6: Check Speaker Polarity
Polarity is one of the easiest things to get wrong and one of the most annoying problems to diagnose afterward.
Each speaker has a positive and negative connection.
For a basic installation:
Amplifier +  ───────────►  Speaker +
Amplifier -  ───────────►  Speaker -
If one speaker is wired backward relative to the other, the two drivers can move in opposite directions.
That can cause bass cancellation, particularly around the lower frequencies where both speakers are reproducing similar information.
The result can be strange: the system may sound loud enough, but the bass seems unusually thin or hollow.
Step 7: Phase Alignment Matters More Than People Think
There are two related concepts that often get confused: electrical polarity and acoustic phase.
Start by making sure the electrical polarity is correct at every speaker.
Then consider how the speakers are positioned in the vehicle.
The front speakers and rear 6×9s are not all the same distance from the driver’s ears. Their acoustic arrival times can therefore differ. Modern DSP-equipped systems can compensate for this with time alignment, but a basic factory system may not give you that level of control.
If your system includes DSP or an aftermarket head unit with time alignment, do not simply leave every speaker at zero delay.
Set the driver’s position as the reference and adjust the other speakers according to their measured distance.
The objective is not to make the rear speakers sound like they are sitting beside your head. The objective is to create a coherent soundstage from the driver’s seat.
Step 8: Seal the Speaker Against the Mounting Surface
If you care about bass, this is one of the most important installation steps.
The speaker needs a stable mounting surface and a reasonably airtight interface with that surface.
Use a suitable foam speaker gasket or sealing material between the speaker frame and mounting adapter where appropriate.
The basic arrangement should look like:
Speaker frame
████████████████
   FOAM GASKET
────────────────
Mounting adapter
════════════════
Vehicle mounting surface
The exact material depends on the installation, but the principle is simple: do not leave unnecessary gaps around the speaker frame.
Air leakage can reduce the woofer’s effectiveness and make the bass sound softer or less controlled.
Step 9: Make the Mounting Surface Rigid
A speaker does not only move air; its motor also creates mechanical forces.
If the mounting surface flexes, some of that energy is wasted moving the mounting structure instead of controlling the cone.
For a rear-deck installation, check whether the factory metal is thin or the aftermarket adapter is flexible.
A good mounting adapter should be:
- Rigid
- Properly supported
- Securely fastened
- Free from vibration
- Correctly sealed
If you can physically move the speaker by hand after installation, the mounting is not finished.
Step 10: Add Sound Deadening Where It Actually Helps
Sound deadening can improve a 6×9 installation, but you do not need to cover every square inch of the vehicle with material.
The most useful areas are usually the surfaces immediately surrounding the speaker and panels that are prone to vibration.
A properly installed layer can help reduce:
- Panel resonance
- Buzzing
- Rattles
- Unwanted vibration
- Energy being lost through a poorly controlled mounting surface
But sound deadening is not a substitute for a good speaker enclosure.
For a rear deck, identify what is actually rattling before adding material. If the problem is a loose trim panel, adding heavy material somewhere else will not magically solve it.
Treat the source of the vibration, not the entire car.
Step 11: Connect the Speaker and Secure Everything
Once the dry fit, wiring and sealing are confirmed, connect the speaker.
Keep the wiring away from:
- Sharp metal edges
- Moving mechanisms
- Window regulators
- Seat mechanisms
- Hot components
- Areas where trim clips can crush the wire
Secure excess wiring so it cannot vibrate against the vehicle structure.
A speaker installation that sounds perfect in the driveway but develops a rattle three days later is not a successful installation.
Step 12: Test Before Reinstalling Every Trim Panel
Do not put the entire interior back together before testing.
Reconnect the system and start at a low volume.
Check each speaker individually if your head unit or amplifier allows it.
Listen for:
- Sound from both channels
- Correct left/right balance
- Normal bass
- No obvious distortion
- No rattling
- No buzzing
- No intermittent connection
- No amplifier protection mode
Then slowly increase the volume.
If the system suddenly loses bass when both rear speakers are playing together, stop and check polarity before changing the EQ.
Step 13: Set the Amplifier Correctly
If you are using an aftermarket amplifier, installation does not end when the RCA cables and speaker wires are connected.
Start with the gain low.
Set the head unit to a sensible maximum listening level without aggressive EQ or bass boost. Then increase amplifier gain gradually until the system reaches the desired output without audible clipping.
Do not treat the gain control as an additional volume knob.
If the amplifier has crossover controls, use them according to the role of the 6×9.
For example, if a dedicated subwoofer is handling the deepest bass, a sensible high-pass filter on the 6×9s can reduce unnecessary cone excursion and give the speakers more usable headroom.
Factory Head Unit vs Aftermarket Amplifier Setup
The correct approach depends heavily on your system.
| Setup | What to Prioritize | Typical Approach |
|---|---|---|
| Factory radio + new 6×9s | Sensitivity, fitment, correct polarity | Use efficient speakers and avoid aggressive EQ |
| Factory radio + factory amplifier | Impedance and OEM compatibility | Confirm replacement speaker requirements before installation |
| Aftermarket head unit + 6×9s | Clean signal and correct gain structure | Use the head unit’s crossover and EQ carefully |
| 4-channel amplifier + 6×9s | RMS matching, gain and crossover | Give each speaker its own properly matched channel |
| Amplifier + subwoofer | Crossover integration | Let the subwoofer handle deep bass and protect the 6×9s with a high-pass filter |
| DSP-based system | Time alignment, crossover and equalisation | Tune from the driver’s seat after mechanical installation is complete |
Common Installation Problems and Quick Fixes
The new 6×9 sounds weaker than the factory speaker
First check polarity and mounting.
If the speaker is wired backward or the mounting surface leaks heavily, the result can be surprisingly weak.
Also check whether the factory system is applying equalisation designed specifically for the original speaker.
The bass disappeared after installing two speakers
Check whether one of the speakers is electrically reversed.
This is one of the first things I would investigate when a new pair sounds thin despite producing plenty of treble and midrange.
The speaker sounds harsh at high volume
Do not immediately blame the tweeter.
Check:
- Amplifier clipping
- Excessive treble EQ
- Incorrect gain
- Factory signal processing
- Tweeter orientation
- Poor-quality source material
If the system sounds fine at moderate volume but becomes harsh as you turn it up, clipping or excessive processing should be high on your troubleshooting list.
The speaker produces bass but the panel rattles
The speaker may be working perfectly.
Locate the actual source of the vibration and treat that panel, trim piece or mounting point.
Do not keep increasing the bass EQ to overcome a mechanical rattle.
The amplifier keeps shutting down
Check:
- Speaker impedance
- Wiring shorts
- Loose terminals
- Amplifier ventilation
- Minimum amplifier load
- Whether multiple speakers have been connected to one channel incorrectly
A protection shutdown is a warning that something in the electrical system needs attention. Do not repeatedly reset the amplifier and continue turning the volume up.
The speaker physically fits but the grille will not go back on
This is usually a clearance problem rather than a speaker-quality problem.
Check tweeter height, grille depth and mounting adapter thickness before permanently modifying factory trim.
One Final Installation Check Before You Put the Interior Back Together
Before reinstalling every panel, play several different types of music at moderate volume.
Use something with:
- Male and female vocals
- Kick drums
- Bass guitar
- Acoustic instruments
- Cymbals
- Dense music with multiple instruments
You are listening for balance, not just bass.
The 6×9 should add weight without making the rear of the vehicle sound disconnected from the front stage. Vocals should remain natural, cymbals should not become painfully bright, and kick drums should have impact without sounding like the speaker is struggling.
Only after that should you reinstall the remaining trim.
The Real-World Rule for Getting the Most From a 6×9
If I had to reduce the entire installation process to a few priorities, they would be simple:
Fit it correctly. Mount it rigidly. Seal it properly. Wire it in the correct polarity. Match the impedance to the amplifier. Give it clean power. Then tune the system.
That order matters.
A more expensive 6×9 installed poorly can easily sound worse than a less expensive model installed correctly. For bass in particular, installation quality, enclosure behaviour and system tuning can matter just as much as the speaker’s published frequency response.
And if you eventually add a subwoofer, do not keep forcing the 6×9s to reproduce the lowest bass. Let each speaker do the job it was designed to do. That is usually how you get the louder, cleaner and more natural system you were actually trying to build.
Maintenance and Care for Long-Lasting 6×9 Speaker Performance
A good pair of 6×9 speakers should not need constant attention, but how you use and maintain them has a direct effect on how long they continue to sound clean. The biggest problems usually do not come from normal listening. They come from excessive heat, moisture, distorted amplifier output, loose mounting, damaged surrounds, and repeatedly asking the speakers to reproduce frequencies or volume levels they were never designed to handle.
This becomes even more important with higher-powered aftermarket speakers. A stronger voice coil and better suspension give you more headroom, but they do not make the speaker indestructible.
If you want the same punchy midbass and clean high-frequency response several years from now, the best maintenance strategy is mostly about preventing damage before it becomes audible.
Keep the Voice Coil Away From Excessive Heat
The voice coil is one of the most important parts of a speaker and one of the easiest to abuse without immediately realising it.
When you play a speaker loudly for extended periods, electrical energy is converted into mechanical movement and heat inside the voice coil. Some heat is normal. The problem starts when the coil is repeatedly pushed beyond what the speaker can thermally handle.
This is why RMS power handling matters more than peak wattage for long-term use.
A speaker rated at 100W RMS does not mean you should continuously feed it an arbitrary 100W under every condition. The actual thermal load depends on the music, enclosure or mounting environment, crossover settings, amplifier behaviour and how long you listen at high volume.
Watch for warning signs such as:
- A noticeable change in sound after prolonged high-volume listening
- Compression where the speaker seems to stop getting louder despite more volume
- Harsh or distorted vocals
- A burnt or unusual smell
- Intermittent output after the system becomes hot
- A noticeable reduction in bass after extended use
If any of these appear, turn the system down and let the speakers cool rather than continuing to test how far they can be pushed.
Distortion Can Be More Dangerous Than High Volume
This is an important point that is often misunderstood.
People sometimes assume that a speaker is safe as long as the amplifier is not rated above the speaker’s maximum power. That is not necessarily true.
An underpowered amplifier driven into clipping can produce a heavily distorted signal. That distorted signal can contain substantial high-frequency energy and can create excessive heat in the tweeter’s voice coil.
So an amplifier with a lower power rating is not automatically safer.
A properly matched amplifier that has enough clean headroom can actually be easier on the speakers than a small amplifier being pushed beyond its limits.
If the sound becomes harsh as you approach the top of the volume range, do not keep turning it up simply because the speakers have a high peak-power number.
Distortion is a warning, not an invitation to turn the volume higher.
Give the Speakers a Sensible Crossover
If you have a subwoofer, use it to handle the frequencies it was designed to reproduce.
A 6×9 can provide excellent midbass, but asking it to reproduce extremely low frequencies at high volume increases cone excursion and places additional mechanical stress on the suspension and voice coil.
A properly configured high-pass filter can reduce that unnecessary workload.
This does not mean setting an extremely high crossover point and removing all of the useful bass. The correct setting depends on the speaker, subwoofer, amplifier and vehicle.
The goal is simply to prevent the 6×9 from wasting excursion on frequencies that a dedicated subwoofer can reproduce more effectively.
Keep Bass Boost Under Control
Bass boost is one of the easiest ways to make a new speaker sound impressive during a quick test and one of the easiest ways to make it work harder than necessary.
A moderate EQ adjustment is one thing.
A large boost at a low frequency is very different because the amplifier has to deliver substantially more energy in that region, while the woofer has to move farther.
If you feel that the system needs an enormous bass boost to sound satisfying, investigate the installation first.
Check:
- Speaker mounting
- Air sealing
- Polarity
- Amplifier gain
- Crossover settings
- Factory audio processing
- Subwoofer integration
Fix the underlying problem before adding more EQ.
Protect the Speakers From Moisture
Moisture is particularly important in vehicles because the cabin environment can change dramatically.
Door-mounted speakers are naturally more exposed to moisture than speakers installed in a protected rear deck. Water can enter a door through the window seal and factory drainage system, so the fact that a speaker is technically inside the vehicle does not mean it is operating in a completely dry environment.
For door installations:
- Make sure the factory moisture barrier remains properly installed.
- Do not block factory door drainage paths.
- Check that the speaker mounting adapter does not create a water trap.
- Use appropriate sealing around the mounting surface.
- Avoid spraying cleaning products directly onto the speaker.
- Check the condition of the factory door seal if water is reaching the speaker.
For rear-deck speakers, moisture may be less obvious but can still become a problem if the vehicle has a leaking rear window, trunk seal or other body seal.
If a speaker suddenly begins sounding different after heavy rain, investigate the possibility of water intrusion before assuming the driver has failed.
Do Not Clean the Cone Like Interior Trim
A speaker cone is not a dashboard surface.
Avoid using household cleaners, glass cleaner, aggressive interior products or excessive moisture directly on the cone, surround or tweeter.
For normal dust, a soft, dry brush or gentle air movement is usually sufficient.
Be particularly careful around:
- The tweeter dome
- The woofer surround
- Exposed cone edges
- Vent openings
- Speaker terminals
Never press down on a tweeter dome just to see whether it moves. Some tweeter materials can be damaged surprisingly easily.
Inspect the Surround Periodically
The surround is the flexible material connecting the moving cone to the speaker frame.
Its job is extremely important because it helps control cone movement while maintaining the correct relationship between the moving assembly and the basket.
Depending on the speaker, the surround may be made from butyl rubber, foam or another flexible material.
During a visual inspection, look for:
- Cracks
- Tears
- Separation from the cone
- Separation from the basket
- Hardened or unusually brittle material
- Visible deformation
- Signs of chemical damage
- Areas where the surround has become detached
Do not poke or stretch the surround during inspection.
A healthy surround should look evenly attached around the circumference.
Check the Mounting Hardware
A speaker can gradually develop unwanted movement even when nothing has technically “broken.”
Vibration from the vehicle, road movement and repeated bass can loosen mounting hardware over time.
Every so often, inspect whether:
- Mounting screws remain secure
- The adapter has cracked
- The speaker frame is sitting flat
- The sealing gasket remains compressed
- Wiring has become loose
- Terminals are still secure
If you hear a new buzzing or rattling sound, check the physical installation before blaming the speaker driver.
A loose screw, trim panel or adapter can easily sound like a damaged speaker.
Pay Attention to New Rattles
A new rattle is useful information.
If the speaker suddenly produces a buzzing sound at one particular bass note, the speaker itself may not be the problem.
The vibration could be coming from:
- Door trim
- Rear-deck trim
- Grille panels
- Loose wiring
- License-plate hardware
- Seat components
- Speaker adapters
- Body panels
Play the same section of music at moderate volume and locate the source of the vibration.
Do not simply increase the volume to determine whether the speaker is responsible. That can turn a small mechanical rattle into a much bigger problem.
Keep the Electrical Connections Clean and Secure
Speaker terminals do not normally require regular maintenance, but they should remain clean and secure.
If you are experiencing intermittent sound, crackling or a speaker that cuts out when the vehicle moves, inspect the connection before replacing the driver.
Look for:
- Loose terminals
- Corrosion
- Damaged connectors
- Pinched wiring
- Broken conductor strands
- Poor aftermarket crimps
- Wiring rubbing against metal
A quality connection should be mechanically secure before it is insulated.
For installations exposed to moisture, appropriate heat-shrink and protected connectors are preferable to relying on a loose twist connection or excessive electrical tape.
Give High-Power Systems Some Thermal Headroom
If you regularly listen at high volume, remember that the speaker’s thermal behaviour is affected by how much power it receives and how long it receives it.
Continuous heavy bass is particularly demanding because low-frequency content can require substantial cone movement and amplifier output.
If you are running an amplified system for a long road trip, do not assume that because the speakers have survived one loud session they can be operated indefinitely at the same level.
If the system starts sounding compressed, harsh or unusually warm, back the volume down and give it a break.
You are not losing performance by allowing the equipment to cool. You are protecting it.
When Should You Re-Foam a 6×9 Speaker?
Re-foaming is mainly relevant to speakers that use foam surrounds and have developed deterioration over time.
If the foam has become brittle, cracked, crumbled or separated from the cone, the speaker may still produce sound, but its mechanical performance will no longer be correct.
A re-foam can sometimes restore an otherwise healthy driver.
However, I would not automatically re-foam every damaged speaker.
First inspect the rest of the driver.
Re-foaming may make sense when:
- The voice coil is still healthy
- The cone is undamaged
- The spider is in good condition
- The basket is not bent
- The surround is the primary failure
- A suitable replacement surround is available
- The repair cost makes sense compared with replacement
A re-foam becomes much less attractive when the speaker has voice-coil damage, corrosion, a damaged cone or multiple failing components.
Do Not Re-Foam a Butyl-Rubber Surround
This distinction matters.
Many modern automotive speakers use butyl-rubber surrounds, which do not require the same type of foam replacement associated with older speakers.
If the rubber surround is damaged, replacing the surround may be possible depending on the speaker, but the repair process and replacement material must match the original driver’s mechanical characteristics.
Do not buy a random foam repair kit simply because it is advertised as fitting a 6×9.
The surround’s dimensions, compliance and attachment method all matter.
When It Makes More Sense to Replace the Speaker
Sometimes replacement is simply the more sensible option.
I would lean toward replacement when:
- The voice coil is rubbing
- The speaker produces a persistent scratching sound
- The cone is cracked or severely damaged
- The basket is distorted
- The magnet structure has shifted
- The spider is damaged
- The speaker has suffered significant water damage
- Replacement parts are unavailable
- Repair costs approach the price of a replacement pair
A damaged voice coil is particularly important.
With the amplifier switched off, very gently moving the cone inward can sometimes reveal a scraping sound, but do not force the cone or use excessive pressure. A rubbing voice coil generally indicates a mechanical problem that EQ or amplifier adjustment cannot fix.
How to Tell Whether the Problem Is the Speaker or the System
Before replacing a speaker, swap the left and right channels if the installation and vehicle wiring allow you to do so safely.
If the problem moves with the speaker, the driver is more likely to be responsible.
If the problem stays with the same side of the vehicle, investigate:
- Wiring
- Amplifier channel
- Factory processing
- Connector
- Mounting
- Signal source
This simple diagnostic approach can save you from replacing a perfectly good speaker.
A Simple Maintenance Schedule
You do not need to remove your door panels every month.
A sensible routine is enough:
Every few months:
Listen for new rattles, distortion, intermittent output or changes in tonal balance.
Twice a year:
If the installation is accessible, inspect the mounting screws, wiring, adapter and visible surround.
After heavy rain or water exposure:
Check door speakers and rear-deck areas for signs of moisture intrusion.
After installing a new amplifier:
Recheck gain, crossover and speaker connections rather than assuming the previous settings are still appropriate.
After any interior work:
Confirm that trim panels, speaker grilles and wiring are not touching the driver or creating new vibration.
The Real Secret to Long-Lasting Performance
You do not need to baby a quality 6×9 speaker every time you listen to music.
What you need to avoid is repeated abuse disguised as normal listening.
Run clean power, keep the amplifier out of clipping, avoid excessive bass boost, protect the speaker from moisture, keep the mounting secure and give the driver a sensible crossover when a subwoofer is doing the deep-bass work.
And when something suddenly sounds different, investigate it instead of turning the volume higher.
A well-installed speaker with a properly matched system can remain consistent for years. In my view, good maintenance is less about regularly repairing the speaker and more about preventing the conditions that make repair necessary in the first place.
FAQs About 6×9 Car Speakers for Bass and Sound Quality
Are 6×9 speakers actually better for bass in a Toyota Tundra, or does the amplifier matter more?
The amplifier and installation can matter more than the 6×9 size itself. A good 6×9 has a larger cone area than many 6.5-inch speakers, so it can produce strong midbass, but that advantage only becomes useful when the speaker is properly mounted and receiving a clean signal.
In a Toyota Tundra, I would not choose a speaker simply because it has a 200W or 300W peak rating. I would look at sensitivity, RMS handling, mounting depth and the factory audio system first. A 94dB speaker running from limited factory power can sound more authoritative than a lower-sensitivity speaker that technically handles much more wattage.
If an amplifier is already installed, the equation changes. Clean power, correct gain and a sensible high-pass filter can give the woofer considerably more control. If the system still lacks genuine low bass after that, the answer usually is not another EQ boost—it is a properly integrated subwoofer.
What should I choose for a Subaru Crosstrek if I want better bass without making vocals and cymbals sound harsh?
For a Subaru Crosstrek, I would start by deciding whether you want more impact or better overall balance, because those are not always the same thing.
A speaker that produces an immediate punch can be exciting during a short test, but if the tweeter is aggressive or the upper midrange is poorly controlled, that excitement can turn into listening fatigue on a long drive. For everyday use, I would rather have a 6×9 that gives the kick drum some weight while keeping vocals natural and cymbals controlled.
A few things are particularly worth checking:
- Sensitivity, especially if the factory head unit remains.
- Tweeter design, because excessive brightness is difficult to fix with EQ.
- Mounting and sealing, because weak installation can make you compensate with unnecessary bass boost.
- Factory audio processing, particularly if the Crosstrek has a premium or amplified system.
Real talk: if the front speakers are already bright, putting an extremely aggressive tweeter in the rear can make the whole cabin sound worse even if the new 6×9 itself sounds impressive.
Is a 3-way 6×9 automatically better than a 2-way speaker for sound quality?
No, and this is one of those areas where the marketing description is easier to understand than the actual engineering.
A three-way design gives the speaker another driver to work with, which can make it easier to divide the midrange and high-frequency duties. That can be useful for vocals, instrument separation and overall clarity. But the additional driver does not guarantee better sound.
A well-designed two-way can have excellent coherence because the woofer and tweeter are carefully integrated. That is particularly relevant in a car, where the speakers are installed off-axis and the cabin itself becomes part of the acoustic environment.
I would judge a three-way against a two-way by looking at:
- How the drivers are integrated.
- The crossover design.
- Off-axis behaviour.
- Sensitivity and amplifier requirements.
- Whether the extra driver actually improves the part of the frequency range you care about.
That is why I would not choose a speaker just because “3-way” appears in larger letters on the box.
Why can an expensive 6×9 speaker sound worse than the factory speaker after installation?
This happens more often than people expect, and the speaker itself is not necessarily the problem.
Factory audio systems are frequently specifically tuned around the original speakers. The head unit or factory amplifier may apply equalisation, filtering, time alignment or other processing that was designed around the original driver’s characteristics.
Then there is the physical installation.
If the new speaker is mounted on a flexible adapter, the mounting surface leaks air, the polarity is reversed, or the new tweeter interacts badly with the factory tuning, the upgrade can sound thinner or harsher despite the aftermarket speaker being technically superior.
There is also a psychological trap: people expect an expensive speaker to produce dramatically more bass immediately. A quality speaker may actually sound cleaner and tighter rather than simply louder.
If a new installation sounds disappointing, I would troubleshoot it in this order:
- Check polarity.
- Check the mounting seal.
- Check amplifier or head-unit compatibility.
- Check gain and crossover settings.
- Check factory equalisation.
- Only then decide whether the speaker itself is the problem.
Do I need a subwoofer if I buy high-end 6×9 speakers specifically for deep bass?
If by “deep bass” you mean strong kick drum, bass guitar and convincing midbass, a good 6×9 can do a lot without a subwoofer.
If you mean the lowest frequencies in modern electronic music, hip-hop, cinematic tracks and other bass-heavy recordings, I would still use a subwoofer.
The important distinction is between midbass and sub-bass. A 6×9 can give the cabin a substantial sense of impact, but asking it to reproduce very low frequencies at high volume increases cone excursion and consumes amplifier headroom.
A properly crossed-over subwoofer allows the 6×9s to concentrate on their useful range. That often makes the entire system sound louder and cleaner because the door or rear-deck speakers are no longer being forced to reproduce information they cannot handle efficiently.
So my honest answer is:
Buy the best 6×9 you can reasonably match to your system if you want stronger midbass. Add a subwoofer when you want genuine low-frequency authority.
That combination is usually much more satisfying than trying to turn a pair of 6×9s into something they were never designed to be.
Final Thoughts on Choosing the Right 6×9 Speakers for Bass and Sound Quality
After looking at the speakers, installation requirements, power matching and the things that actually affect long-term performance, I would not make this decision by asking “Which 6×9 has the biggest bass?” That is too simple for a car-audio upgrade.
The better question is: Which speaker will give my particular system the kind of improvement I am actually missing?
That distinction matters because these five speakers are not trying to do exactly the same thing. The Hertz Mille Pro is the more convincing choice when output, efficiency and strong midbass impact are high on the list. The Morel takes a more refined approach, with its point-source architecture making it particularly interesting for someone who cares about coherence and natural presentation. The Alpine is aimed more toward detail and fast, controlled response, especially when you have enough clean power to take advantage of its lower sensitivity.
The Focal makes sense for someone specifically attracted to a three-way coaxial design and balanced full-range presentation, while the Rockford Fosgate is the more energetic option if you want a lively, punchy upgrade that feels noticeably different from a typical factory speaker.
The biggest mistake is buying the speaker before understanding the system
A 6×9 does not exist in isolation.
Your head unit, factory amplifier, aftermarket amplifier, wiring, mounting location, adapter, enclosure environment, crossover settings and even the way the vehicle’s factory audio system processes the signal all influence what you eventually hear.
That is why I would take a 94dB speaker with sensible power handling very seriously for a factory-powered system, while being equally comfortable recommending a lower-sensitivity model when the car already has a capable amplifier.
Likewise, I would never choose a speaker simply because it advertises an enormous peak-power figure. Peak numbers look impressive on a product page, but they tell you much less about sustained real-world performance than RMS handling, sensitivity and system matching.
Don’t use EQ to fix an installation problem
This is probably the most useful lesson in the entire guide.
If the new speakers sound thin, do not immediately add more bass.
If they sound harsh, do not immediately turn the treble down.
If they are not loud enough, do not immediately increase the amplifier gain.
First ask whether the speaker is mounted correctly, sealed properly, wired in the correct polarity and receiving a clean signal.
A badly mounted 6×9 can lose the very midbass you bought it for. A reversed speaker can make the entire rear stage sound strangely hollow. An amplifier driven into clipping can make an otherwise excellent tweeter sound unpleasant.
Those are system problems, not speaker problems.
And be realistic about what “deep bass” means
A high-quality 6×9 can produce impressive midbass. It can give kick drums more authority, make bass guitar more physical and make a factory system feel substantially fuller.
But there is a point where chasing deeper bass from the 6×9 stops making sense.
If you want the kind of low-frequency pressure that you can physically feel from the lowest notes in bass-heavy music, use a subwoofer. Let the 6×9 handle the range where it can remain controlled, and let the subwoofer take responsibility for the bottom end.
That is not admitting that the 6×9 is weak.
That is building the system correctly.
My final buying rule
If this were my own car, I would make the decision in this order:
Fitment → available power → sensitivity → sound character → RMS handling → installation quality → tuning.
Price would come after those considerations, not before them.
Because the most expensive speaker on the shelf is not automatically the one that will sound best in your car.
The right 6×9 is the one that fits properly, works with the power you actually have, gives you the tonal character you enjoy, and remains controlled when you turn the system up.
And if you get those fundamentals right, you may be surprised by how much a well-installed pair of 6×9 speakers can change the personality of an entire car without turning the cabin into a competition-style audio build.
Also Check:


