

Best 5-Channel Amps in 2026: Car Audio Power, Deep Bass & Pro-Level Control
If you are building a car audio system around four full-range speakers and a subwoofer, a 5-channel amplifier is one of the cleanest ways to power the whole system without installing separate amplifier chassis. The catch is that five-channel amplifiers are far from identical once you look past the channel count.
The models below differ significantly in real RMS output, subwoofer impedance capability, chassis size, crossover control, and installation requirements. The compact AudioControl EPICFIVE measures just 13.35 × 6.1 × 2.01 inches while producing 4 × 150W plus 500W at 2 ohms, with its fifth channel reaching 700W at 1 ohm. The Hertz ML Power 5 takes up more physical space but delivers 100W × 4 and 550W × 1 at 2 ohms. Those differences matter when the amplifier has to match your actual speakers, subwoofer, available mounting space, and vehicle electrical system rather than simply the largest wattage figure on the box.
I have also included the Alpine R-A90S because its 6-channel architecture gives it a different kind of flexibility when configured for five-channel use. Older designs such as the Rockford Fosgate T1000X5ad remain relevant too, with compact Class-AD architecture and serious output that still makes sense in a demanding system. This list is therefore based on how each amplifier works in a real car-audio setup, not simply how new the model is or how impressive its headline specifications look.
Best 5-Channel Car Amplifiers Of 2026 With High RMS Power, Deep Bass and Advanced Controls
#1. Rockford Fosgate T1000X5ad Power 5-Channel Amplifier
Best 5-Channel Car Amp for High-RMS Speakers, 1-Ohm Subwoofer Power and Compact Installations
#2. AudioControl EPICFIVE 5-Channel Amplifier
Best 5-Channel Car Amp for 150W Speaker Output, 1-Ohm Subwoofer Drive and Precision Tuning
#3. Hertz Mille Legend ML Power 5 Amplifier
Best 5-Channel Amp for Premium Car Audio, Balanced Speaker Power and Detailed Subwoofer Performance
#4. KENWOOD X802-5 eXcelon 5-Channel Amplifier
Best 5-Channel Car Amp for 4 Speakers and Subwoofer, OEM Integration and Everyday Listening
#5. Alpine R-A90S R-Series Amplifier
Best Flexible 5-Channel Amp for High-Output Speakers, Subwoofer Power and Expandable Car Audio Systems
#6. Stinger Audio MT-1000.5 5-Channel Amplifier
Best Compact 5-Channel Amp for Car Speakers, 1-Ohm Subwoofer Power and Space-Saving Installations
Expert Tip
A 5-channel amplifier only makes sense when its five outputs actually match the system you are building. I would not choose one simply because it claims 1,000 or 1,200 watts. Look at the RMS output of the four main channels, then look separately at the subwoofer channel and the impedance at which that power is available.
There is another detail that gets overlooked: installation space. A powerful amplifier that cannot breathe properly under a seat or inside a tight cargo-area mounting point is not a better upgrade. That is why compact designs such as the Rockford Fosgate T1000X5ad and AudioControl EPICFIVE deserve attention alongside physically larger premium options like the Hertz ML Power 5. The right amplifier is the one whose power, load capability, physical footprint and controls make sense together.
How We Chose These 5-Channel Car Amplifiers
We did not rank these amplifiers by maximum wattage, brand reputation or whichever model happened to have the most impressive-looking specification sheet. The goal was more practical: which amplifier gives you the strongest match for a real four-speaker-and-subwoofer car-audio system?
1. We started with usable RMS power
Maximum wattage can make an amplifier look impressive, but it tells you very little about how it will perform in a properly matched system. Our first comparison was therefore the RMS output of the four full-range channels and the dedicated subwoofer channel.
That immediately separates these models.
The Rockford Fosgate T1000X5ad combines 100 watts per channel for the four main speakers with a substantially stronger subwoofer section, making it a particularly compelling single-chassis solution when both cabin volume and bass output matter.
The AudioControl EPICFIVE goes even further on paper, with 150 watts × 4 at 2 ohms and 500 watts for the subwoofer channel at 2 ohms, with the fifth channel capable of reaching 700 watts at 1 ohm. That is a meaningful advantage for someone building around a more demanding subwoofer rather than a small factory replacement.
The Hertz ML Power 5 takes the premium route with 100 watts × 4 and 550 watts × 1 at 2 ohms. It does not need the biggest headline number to make sense; its appeal is the combination of output, configuration flexibility and its position in Hertz’s Mille Legend range.
2. We looked at the subwoofer channel separately
This is one of the biggest reasons we did not simply arrange the list according to total wattage.
A five-channel amplifier is effectively doing two jobs. Four channels need to provide clean power to the cabin speakers, while the fifth has to handle the much heavier demands of the subwoofer.
That makes subwoofer impedance support and available RMS power important when comparing these amplifiers.
For a system using a stronger aftermarket subwoofer, the difference between a fifth channel designed around 300, 500, 550 or 600-plus watts can be significant. It can determine whether the amplifier feels properly matched or becomes the limiting component of the system.
3. We considered the amplifier’s physical footprint
This matters more than most buying guides admit.
A five-channel amplifier is often chosen specifically to save installation space compared with running separate amplifiers for the speakers and subwoofer. So we paid attention to chassis dimensions rather than treating physical size as an afterthought.
The Rockford Fosgate and AudioControl are particularly interesting here because they pack serious output into relatively compact chassis. The Hertz ML Power 5 is considerably larger, but that is not automatically a disadvantage. If you have a proper mounting location and want its particular combination of power and controls, the larger chassis can be a perfectly sensible trade-off.
In other words, compact does not automatically mean better, and large does not automatically mean more capable.
4. We checked how each model fits different installation scenarios
Not every buyer is replacing the same system.
Some are starting with a factory head unit. Others already have aftermarket component speakers. Some want a single amplifier hidden under a seat, while others are building a dedicated system in an SUV or truck where installation space is less restrictive.
That is why the KENWOOD X802-5 eXcelon remains relevant despite the much higher-output models above it. Its speaker-level input capability and practical power delivery make it a sensible choice for a more conventional daily-driver upgrade.
The Stinger MT-1000.5, meanwhile, earns its place because compact installation can be the deciding factor. It is not here pretending to outperform every amplifier on the list; it is here because there are builds where available space is the problem, not a lack of amplifier wattage.
5. We did not ignore the Alpine’s unusual configuration
The Alpine R-A90S needed a different evaluation because calling it a conventional five-channel amplifier would be misleading.
It is a six-channel amplifier that can be configured for five-channel use, with Alpine using staggered power across its channels. That makes it interesting for someone who wants more flexibility than a fixed five-channel layout provides.
We kept it in the list because that flexibility can genuinely matter in a growing system. We did not move it higher simply to make the list look uniform.
6. We valued control as much as output
Power alone does not make a good car-audio installation.
We also looked at crossovers, filtering options, impedance flexibility, input compatibility and system-control features because these determine how easily the amplifier can be integrated with the speakers and subwoofer you actually own.
This is particularly important when replacing a factory system. A high-powered amplifier with limited integration options can create more installation work than expected, while a slightly less powerful model with the right inputs and controls can produce a much cleaner overall installation.
7. We avoided judging an amplifier by its age
There is a strange habit in car audio of treating an older amplifier as automatically inferior to a newer one.
That does not hold up.
A model can remain relevant for years if its power architecture, reliability, size and system compatibility still make sense. The Rockford Fosgate T1000X5ad is a good example: it is not included because it is a new 2026 release. It is included because its compact high-output design still solves a real installation problem.
The same principle applies to the KENWOOD and Alpine models. Model year was not used as a shortcut for quality.
8. Finally, we asked one practical question
Before placing each amplifier on this list, we came back to the same question:
If this were going into a real vehicle today, what type of system would it make the most sense for?
That is why there is no single amplifier here that is presented as perfect for everyone.
The Rockford is positioned around high output in a compact package. AudioControl brings strong speaker power and serious subwoofer capability. Hertz targets a more premium installation. KENWOOD makes sense for balanced everyday integration. Alpine offers unusual multi-channel flexibility, while Stinger addresses the buyer who is working with a tighter installation footprint.
That distinction is intentional. A good five-channel amplifier should not win because its specification sheet looks impressive in isolation. It should win because its output, controls, size and intended role line up with the rest of the car-audio system.
#1. Rockford Fosgate T1000X5ad Power 5-Channel Amplifier

Quick Specs:
- RMS output: 100W × 4 + 400W × 1 @ 4Ω
- RMS output: 100W × 4 + 600W × 1 @ 2Ω
- Subwoofer load: 600W × 1 @ 1Ω
- Amplifier design: Class-AD full-range + Class-BD subwoofer section
- Dimensions: 12 × 4.3 × 1.6 inches
- Crossover: Variable 50Hz–250Hz, 12dB/octave
- Punch EQ: Up to +18dB at 45Hz
- Operating voltage: 9–16V DC
- Fuse requirement: 100A
The first thing that stands out here is not the 1,000-watt name on the box. It is the fact that Rockford managed to put four full-range channels and a genuinely serious subwoofer channel into a chassis only 1.6 inches tall. At 12 × 4.3 inches, it is small enough to change where you can realistically install the amplifier rather than forcing you to redesign the vehicle around it.
That matters in a daily driver. If the available mounting area is under a seat, behind an interior panel or in another restricted location, a conventional five-channel amplifier can quickly become the awkward part of the build. This one was clearly designed around the opposite idea: keep the footprint tight without turning the subwoofer channel into an afterthought.
The power figures also deserve to be read properly. You get 100 watts per channel for the four main channels and 400 watts to the sub at 4 ohms, while a 2-ohm subwoofer receives 600 watts. The sub channel can also operate at 1 ohm at 600 watts. That makes it much more interesting for a properly matched aftermarket system than an amplifier whose advertised wattage depends mostly on peak figures. Rockford’s documentation lists these as continuous RMS ratings and states that its power ratings follow CEA-2006 standards.
There is some useful tuning hardware built into the amplifier too. The Punch EQ provides up to +18dB at 45Hz, while the crossover section gives you a variable 50Hz–250Hz range with a 12dB/octave slope. High-level auto turn-on is another practical advantage if you’re retaining a factory radio instead of replacing the entire dash system.
(The real attraction here is simple: serious five-channel output in a chassis that is easier to hide than most high-power alternatives.)
What We Like About It
- Tiny 1.6-inch height — this is genuinely useful when mounting space is the limiting factor.
- 100W × 4 RMS — enough output to make the amplifier a serious match for higher-power aftermarket front and rear speakers.
- 600W subwoofer channel at 2Ω — gives the bass section considerably more headroom than many compact five-channel designs.
- Class-AD + Class-BD architecture — the four speaker channels and subwoofer section are designed around different power demands rather than treating every channel identically.
- High-level auto turn-on and CLEAN circuitry — particularly useful when integrating with a factory head unit.
The One Thing to Know Before Buying
The 100A fuse requirement is the part I would not overlook. This is not an amplifier I would pair with undersized power and ground wiring simply because its chassis is small. Rockford itself stresses proper cabling, grounding and voltage when installing high-output amplifiers.
Where This Amplifier Makes the Most Sense
Think of this as a complete-system amplifier rather than simply a powerful subwoofer amp. Its four 100-watt channels make sense with aftermarket speakers that can actually use that power, while the dedicated subwoofer section gives you enough output to build a serious low-end stage without adding another chassis.
The other big advantage is installation freedom. A 12-inch-long, 1.6-inch-tall amplifier gives an installer considerably more options than a large conventional chassis. That can be especially valuable in compact cars, trucks, SUVs and factory-radio upgrades where every inch behind the trim matters.
The Insider Pro-Tip
Do not buy this amplifier first and then try to find speakers and a subwoofer that fit it. Build the system around the speaker and subwoofer RMS ratings first. If your four speakers are comfortable around the 75–100W RMS range and your subwoofer is properly matched to the available 2Ω or 1Ω load, this amplifier starts making a lot more sense.
And there is one installation detail worth being honest about: small does not mean thermally invisible. Rockford specifically recommends giving amplifiers room to dissipate heat and avoiding mounting them under carpet or covering them. So if you are planning an under-seat installation, measure the available height and leave proper ventilation instead of treating the 1.6-inch chassis height as the entire installation requirement.
#2. AudioControl EPICFIVE 5-Channel Car Audio Amplifier
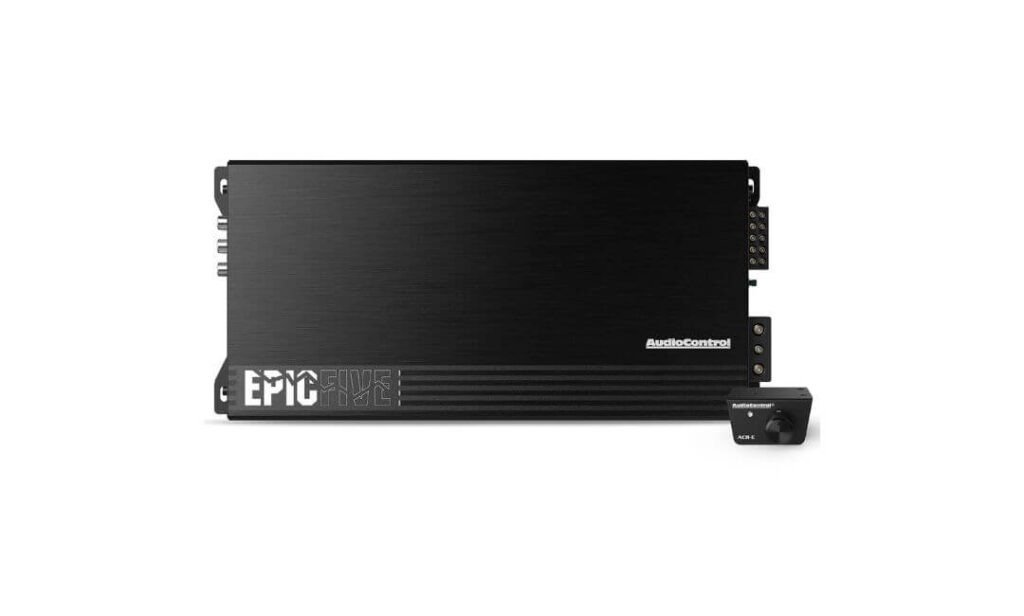
Quick Specs:
- RMS power: 150W × 4 + 500W × 1 @ 2Ω
- Subwoofer output: Up to 700W × 1 @ 1Ω
- Amplifier design: Class D
- Signal-to-noise ratio: 91dB+
- Dimensions: 13.35 × 6.1 × 2.01 inches
- Crossover: 12dB/octave Linkwitz-Riley
- Filters: High-pass, low-pass and subsonic
- Bass control: 0–12dB variable EPIC Bass Boost
- Remote control: ACR-E bass knob included
- Power connections: 4-gauge power / 8-gauge speaker terminals
- Recommended fuse: 150A
The interesting thing about this amplifier is that AudioControl did not try to make it impressive only by putting “1100W” on the front. The useful part of that number becomes clearer when you break the channels apart: you are getting 150 watts for each of four speaker channels at 2 ohms, alongside 500 watts for the subwoofer channel at the same load. If you run a 1-ohm subwoofer, that fifth channel can reach 700 watts.
That makes it a particularly strong option for someone building a system where the four cabin speakers are not just there for background volume. There is enough output available to properly drive demanding aftermarket speakers while still leaving the fifth channel with a meaningful amount of power for the low end.
The chassis is also worth paying attention to. At 13.35 inches long, 6.1 inches wide and only 2.01 inches high, it is still relatively easy to package compared with many traditional multi-amplifier installations. You get the benefit of one amplifier handling the complete system without automatically giving up a large amount of mounting space.
The included ACR-E remote bass control is genuinely useful rather than just another accessory to mention in a specification list. Once installed within reach of the driver, you can adjust subwoofer level from the cabin instead of reaching for the amplifier or changing settings on the head unit.
Then there are the high-pass, low-pass and subsonic filters, all using 12dB/octave Linkwitz-Riley filtering. That gives you considerably more control over where the door speakers stop working and where the subwoofer takes over. The variable 0–12dB EPIC Bass Boost adds another layer for someone who wants more low-frequency emphasis without immediately reaching for an external equalizer.
(This is the sort of amplifier that makes sense when you care about how the entire system is tuned, not just how loud the subwoofer gets.)
What We Like About It
- 150W × 4 at 2Ω gives the main speaker channels unusually strong output for a compact five-channel design.
- 700W at 1Ω on the fifth channel gives you useful headroom if the subwoofer is correctly matched for that load.
- ACR-E remote bass control is included, so there is no need to buy a separate bass knob just to make the subwoofer level adjustable from the driver’s seat.
- Linkwitz-Riley filtering plus a dedicated subsonic filter gives the installer meaningful control over the handoff between speakers and subwoofer.
- 4-gauge power terminals and a recommended 150A fuse make it clear that this is a serious-current installation rather than a small plug-and-play amplifier.
The One Thing We Would Keep in Mind
The 150A fuse recommendation tells you something important: despite the low-profile chassis, this is not a casual installation. You need appropriately sized power and ground wiring and a charging system that can comfortably support the amplifier when it is being pushed hard.
Where This Amplifier Fits Best
This is particularly attractive for a high-output four-speaker-plus-subwoofer build where you want strong power on both sides of the system. It is not simply a “small amp with five channels”; the 150W × 4 rating gives the main speaker section enough authority to become the centre of a serious aftermarket system.
It also makes sense when tuning flexibility matters. The combination of separate filtering, variable bass boost and the included remote level control means you can adjust the system around the music you actually listen to instead of settling for whatever crossover arrangement came preset on the amplifier.
The Insider Pro-Tip
If you are choosing between this and another five-channel amplifier, look at your subwoofer’s final impedance before looking at the 1,100W headline figure. A properly wired 1-ohm load opens up the 700W fifth-channel rating, while a 2-ohm configuration gives you 500W. Neither is automatically “better”; the correct choice depends on the subwoofer’s voice-coil configuration and the load it is designed to handle.
And I would take the 13.35 × 6.1 × 2.01-inch dimensions seriously before buying. The amplifier is compact for its output, but it still needs sensible ventilation and accessible wiring. If you can give it a properly ventilated mounting position and feed it with the right-size cable, this is one of the more convincing ways to run a genuinely powerful five-channel system from a single chassis.
#3. Hertz Mille Legend ML Power 5 D-Class Amplifier
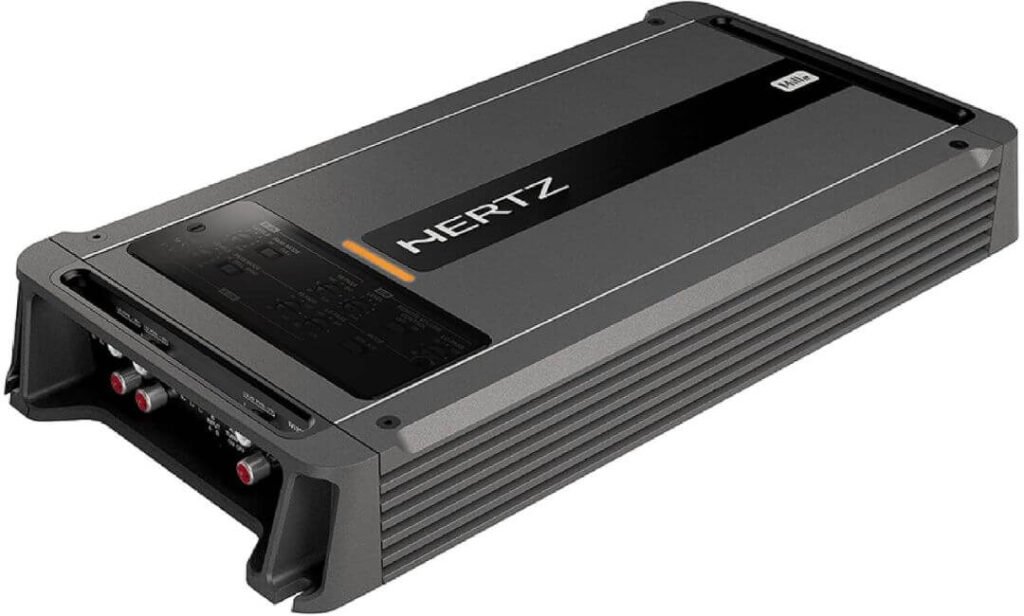
Quick Specs:
- RMS output: 100W × 4 + 550W × 1 @ 2Ω
- Total RMS output: 950W
- Amplifier design: D-Class
- CEA compliant: Yes
- Fuse rating: 2 × 40A
- Weight: 6.8 lbs
- Thermal protection: Yes
- Inputs: High-level and low-level
- Remote turn-off: Automatic
- Subwoofer channel: 550W × 1 @ 2Ω
The Hertz is the amplifier I would look at when the goal is not simply to chase the biggest wattage figure. Its 950W RMS rating comes from a straightforward 100W × 4 speaker section and 550W subwoofer channel at 2 ohms. That is enough power to build a genuinely serious five-channel system without turning the amplifier into a numbers game.
The Mille Legend name also tells you where this model sits in the Hertz range. It is aimed at systems where the amplifier is expected to complement higher-quality speakers rather than simply make everything louder. The D-Class design keeps the chassis relatively efficient, while the amplifier’s thermal protection gives it some reassurance when it is being worked for extended periods.
I also like the fact that the power specification is CEA compliant. When you are comparing five-channel amplifiers with wildly different headline wattages, having a standardized power figure gives you something much more useful to compare. Here, 100W × 4 plus 550W × 1 at 2 ohms tells you far more about the actual system match than a large peak-power number would.
What We Like About It
- 100W × 4 + 550W × 1 at 2Ω gives you a properly balanced speaker-and-subwoofer setup.
- CEA-compliant ratings make the advertised continuous power easier to take seriously when comparing it with competing amplifiers.
- High-level and low-level inputs give you flexibility with both factory and aftermarket audio systems.
- Thermal protection is useful for a premium amplifier that may see long listening sessions at higher output.
- 6.8-pound chassis keeps the installation relatively manageable despite its substantial five-channel capability.
One Point Worth Knowing
The main trade-off is simple: 950W RMS is not the biggest output figure in this group. If your only goal is to extract maximum subwoofer output from a five-channel amplifier, some competitors offer more power. This model makes more sense when the rest of the system is equally important.
Where It Makes the Most Sense
This is a particularly natural fit for a premium component-speaker system paired with a properly matched subwoofer. The four 100-watt channels give you enough room to build around capable front and rear speakers, while the 550-watt sub channel provides a substantial dedicated bass section.
The high-level input capability also makes it useful when you want to improve an existing factory system without immediately replacing the head unit. That flexibility matters because a high-end amplifier is not much help if installing it requires rebuilding the entire vehicle’s audio architecture.
The other advantage is balance. You are not buying an amplifier where nearly all the attention goes to the subwoofer channel while the four cabin channels feel secondary. The 100W × 4 configuration makes the amplifier a complete-system component, which is exactly what a five-channel design should be.
The Insider Pro-Tip
If your priority is sound quality and system balance rather than the biggest possible bass number, do not automatically skip this one because another amplifier advertises more total watts. The 550W sub channel is already substantial, and the 100W × 4 section can be more important than many buyers realize when pairing the amplifier with serious aftermarket speakers.
Also, pay attention to the 2 × 40A fuse arrangement before installation. The amplifier may be relatively light at 6.8 pounds, but its electrical requirements are still those of a serious multi-channel system. Give it correctly sized power and ground wiring, a solid mounting surface and enough airflow around the chassis. That is the kind of detail that lets a premium amplifier behave like one instead of making the installation the weakest part of the system.
#4. KENWOOD X802-5 eXcelon 5-Channel Amplifier
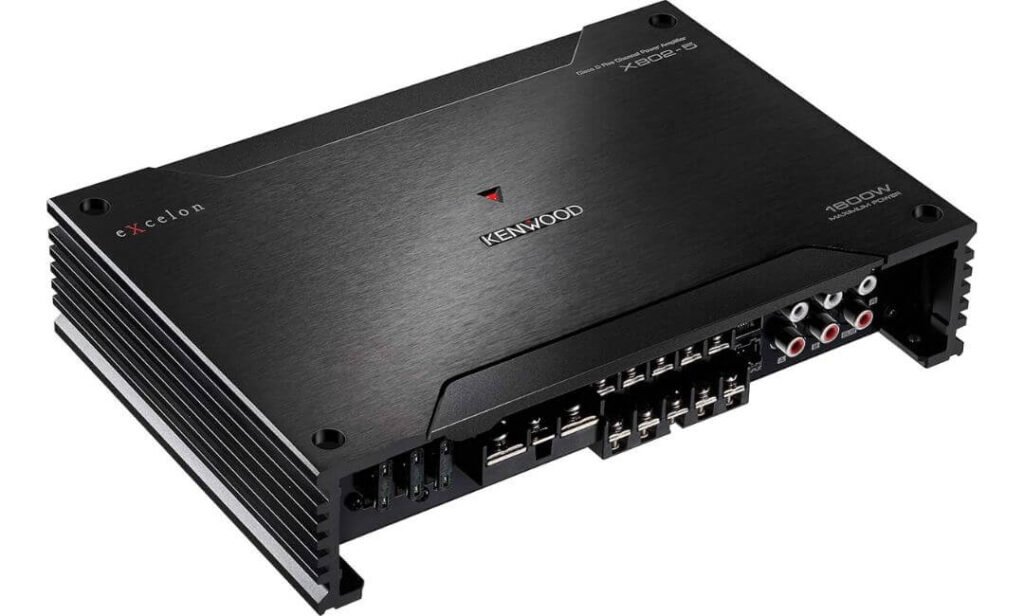
Quick Specs:
- RMS output: 50W × 4 + 300W × 1 @ 4Ω
- RMS output: 75W × 4 + 500W × 1 @ 2Ω
- Amplifier design: Class D
- Maximum power: 1,600W
- Subwoofer channel: 300W @ 4Ω / 500W @ 2Ω
- Inputs: RCA line-level + speaker-level
- Audio support: High-Resolution Audio
- Bass boost: 0–12dB
- Filters: High-pass and low-pass
- Installation: All terminals positioned on one side
- OEM integration: Speaker-level input harness included
The X802-5 is the kind of five-channel amplifier that makes more sense once you stop looking at the 1,600W maximum-power figure and start looking at how it is actually divided. At 4 ohms, you get 50 watts to each of the four main channels and 300 watts to the subwoofer. At 2 ohms, those figures rise to 75 watts × 4 and 500 watts × 1.
That is a sensible configuration for a daily-driver system where the goal is to give the cabin speakers a worthwhile upgrade while adding a proper dedicated subwoofer channel. It does not try to compete with the most aggressive high-output amplifiers here; instead, it offers a more approachable balance between speaker power, bass capability and installation flexibility.
One detail I particularly like for factory-radio builds is the included speaker-level input harness. You can retain the vehicle’s original head unit and feed the amplifier from the factory speaker wiring instead of immediately replacing the radio. For someone upgrading an OEM system in stages, that can save both money and unnecessary dashboard work.
What We Like About It
- 500W RMS at 2Ω on the sub channel gives the bass section enough output for a serious daily-driver system.
- 75W × 4 at 2Ω makes the four main channels useful with a wide range of aftermarket speakers.
- Speaker-level input harness included makes factory-radio integration much easier.
- High-Resolution Audio support is a nice fit for listeners who care about retaining detail from higher-quality music sources.
- All terminals on one side makes cable routing cleaner and can make a cramped installation considerably less frustrating.
One Point Worth Knowing
The 50W × 4 rating at 4Ω is more modest than the speaker-channel output of the Rockford, AudioControl and Hertz options above. If you are installing particularly power-hungry component speakers, check their RMS requirements carefully before choosing this amplifier.
Where This Amplifier Fits Best
This is a strong match for a factory-radio upgrade that needs to remain straightforward. You can keep the original head unit, send its speaker-level signal into the amplifier and use the four main channels for the front and rear speakers while reserving the fifth for a subwoofer.
It also makes sense for a system where you want the amplifier to remain relatively easy to live with after installation. The high-pass and low-pass filters let you establish a cleaner division between the cabin speakers and subwoofer, while the 0–12dB bass boost gives you some room to adjust the low end without immediately adding another processing unit.
The 2-ohm subwoofer rating is another useful advantage. A compatible subwoofer configuration can make use of the 500W fifth-channel output, but the final impedance needs to match the amplifier rather than simply being chosen for the largest possible number.
The Insider Pro-Tip
If you are keeping your factory stereo, this is one of the models on the list I would examine early rather than treating OEM integration as an afterthought. The included speaker-level harness means you can build around the original radio and put your money into the speakers and subwoofer where you will actually hear the difference.
One more thing: don’t let the 1,600W maximum-power claim decide the purchase. For this amplifier, the numbers worth comparing are the continuous RMS figures—especially 75W × 4 plus 500W × 1 at 2Ω. Those are the figures that should be matched against your speakers and subwoofer when planning the system.
#5. Alpine R-A90S R-Series 6-Channel Amplifier

Quick Specs:
- RMS output: 75W × 4 + 150W × 2 @ 4Ω
- RMS output: 100W × 4 + 250W × 2 @ 2Ω
- Bridged output: 200W × 2 + 500W × 1 @ 4Ω
- Amplifier design: Class D
- Channels: 6
- Configuration: 6/5/4/3-channel operation
- Turn-on: GTO signal sensing
- Inputs: Speaker-level + RCA
- Recommended wiring: 4-gauge power and ground
- Crossover controls: Individual channel adjustment
The R-A90S is the amplifier on this list that needs a little more explanation before you can judge it fairly. It is not a conventional five-channel amplifier. Alpine built it as a six-channel unit with staggered power, but those channels can be configured for a five-channel system. That distinction is important, because its real advantage is flexibility rather than simply competing against the dedicated five-channel models on wattage.
At 4 ohms, the amplifier produces 75W × 4 plus 150W × 2. At 2 ohms, that increases to 100W × 4 plus 250W × 2. Bridge the appropriate channels and you can create 200W × 2 plus 500W × 1 at 4 ohms. That opens up several useful system layouts depending on whether you are running front/rear speakers, multiple subwoofer channels or an active front stage.
That is also why I would not buy this simply because you searched for a “5-channel amp.” If your plan is a straightforward four-speaker-plus-one-subwoofer installation and you have no interest in expanding it, one of the dedicated five-channel designs here may be easier to justify. The Alpine becomes much more interesting when you want room to experiment with the system later.
What We Like About It
- Six channels with staggered power give you considerably more configuration freedom than a fixed five-channel design.
- 500W bridged at 4Ω provides a useful dedicated subwoofer option without needing another amplifier.
- 100W × 4 at 2Ω gives the main speaker section enough output for a serious aftermarket setup.
- Individual crossover and gain controls make it especially attractive for custom active-system tuning.
- GTO signal sensing can simplify integration when the factory head unit does not provide a conventional remote-turn-on connection.
One Point Worth Knowing
The biggest consideration is simply complexity. There are more ways to configure this amplifier, but that also means more decisions during installation. If you only need four speaker channels and one subwoofer channel, you may not benefit from everything the sixth channel provides.
Where This Amplifier Fits Best
The R-A90S makes the most sense in a custom system where the speaker layout may change or become more sophisticated. Alpine specifically positions the staggered-power design for applications such as a three-way front stage, where different channels can be assigned to tweeters, midrange drivers and other parts of the system.
It can also work very well as a front/rear/subwoofer amplifier. Four channels can handle the main speakers while the remaining channels can be configured for the subwoofer section. That gives you a level of layout freedom that a fixed five-channel amplifier simply cannot provide.
The speaker-level input on channels 1 and 2 is another useful detail for factory-radio installations. You can retain the original head unit rather than replacing it solely to obtain an amplifier signal, provided the vehicle’s signal levels and integration requirements are suitable.
The Insider Pro-Tip
I would choose this one because of the system you plan to build next, not only the system you have today. If you know you may move toward an active front stage, add more dedicated channels or experiment with different speaker arrangements, those extra channels can save you from replacing the amplifier later.
For a simple five-channel setup, however, be honest about whether you actually need that flexibility. The R-A90S is at its best when you use its staggered power and channel allocation as a feature, rather than paying for six channels and then treating it like an ordinary five-channel amplifier. Also plan the installation around 4-gauge power and ground wiring and adequate airflow, especially if you intend to run it hard for long periods.
#6. Stinger Audio MT-1000.5 Compact 5-Channel Amplifier
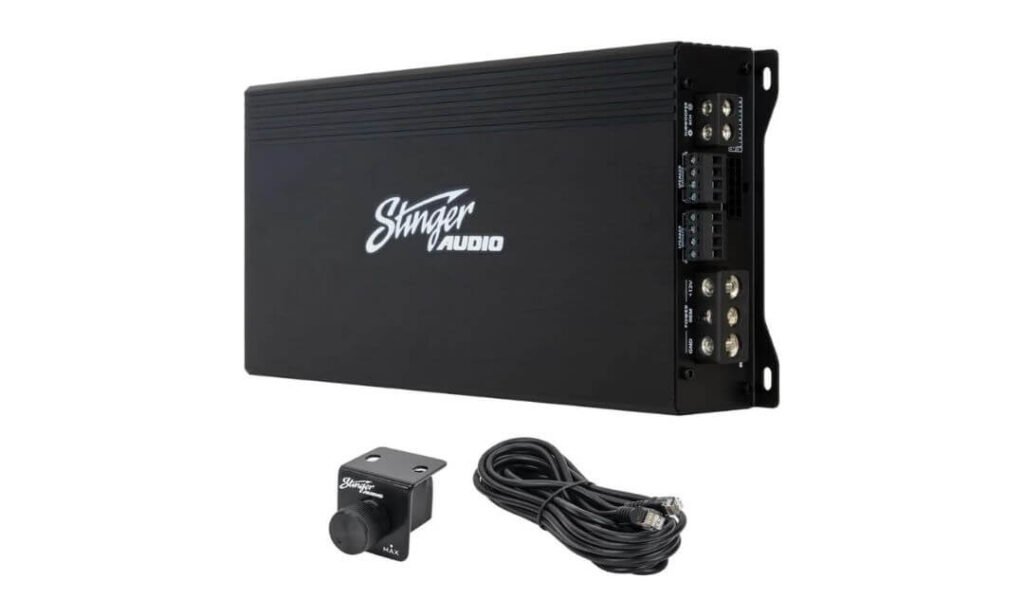
Quick Specs:
- RMS output: 75W × 4 + 300W × 1 @ 4Ω
- RMS output: 150W × 4 + 500W × 1 @ 2Ω
- Subwoofer output: 700W × 1 @ 1Ω
- Amplifier design: Class D
- Signal-to-noise ratio: -90dB
- Dimensions: 13.23 × 6.1 × 2.09 inches
- Bass boost: 0–12dB
- Inputs: High-level and low-level
- Filters: High-pass, low-pass and subsonic
- Remote: Bass knob included
- Technology: HEXFET MOSFET power supply
- Power connections: Direct-insert terminals
The MT-1000.5 is easy to underestimate because the chassis is compact and the amplifier sits at the bottom of this particular ranking. I would not read that as “weak.” Its actual numbers tell a different story: 150W × 4 plus 500W × 1 at 2 ohms, with the fifth channel capable of reaching 700W at 1 ohm.
That is a lot of output from a five-channel amplifier that measures only 13.23 × 6.1 × 2.09 inches. More importantly, the power is distributed in a way that makes sense for a complete system. The four main channels can handle considerably more demanding aftermarket speakers than a basic factory upgrade amp, while the dedicated fifth channel has enough capacity for a properly matched subwoofer.
The installation flexibility is another reason it deserves attention. You can use low-level RCA signals from an aftermarket head unit, or configure the inputs for a factory system using speaker-level signals. That makes it useful for someone who wants to keep the OEM radio rather than replacing it just to add more amplifier power.
What We Like About It
- 150W × 4 at 2Ω gives the speaker channels serious headroom for an aftermarket system.
- 500W at 2Ω or 700W at 1Ω makes the fifth channel genuinely useful for a stronger subwoofer setup.
- High-level and low-level input capability gives you flexibility with factory and aftermarket stereos.
- Included remote bass knob lets you adjust subwoofer level from the driver’s seat.
- 13.23-inch chassis length and 2.09-inch height keep the installation reasonably compact for the amount of power available.
One Point Worth Knowing
The impressive 150W × 4 + 500W × 1 figures are 2-ohm ratings, so your speakers and subwoofer need to be properly matched to those loads. Do not choose a lower-impedance configuration simply because it produces a larger number on the specification sheet.
Where This Amplifier Fits Best
This is a particularly practical choice for a complete four-speaker-and-subwoofer upgrade where you want plenty of output without moving to multiple amplifiers. The Class D architecture keeps the package compact, while the dedicated fifth channel lets the subwoofer have its own power instead of sharing the same channels as the door speakers.
It is also well suited to OEM-to-aftermarket upgrades. If the factory radio is staying in the vehicle, the high-level input capability means you can build the amplifier into the existing system instead of replacing the entire head unit first.
The adjustable 0–12dB Bass Boost, high-pass and low-pass filtering, plus the subsonic filter give you enough control to shape the system around the speakers and subwoofer you actually install. That is much more useful than simply having a large wattage figure with limited adjustment.
The Insider Pro-Tip
The best reason to consider this amplifier is its power-to-footprint ratio, not the 1,200W marketing number. If you have limited mounting space but still want 150W available to each of four 2-ohm speaker channels and up to 500W for a 2-ohm subwoofer, the combination is genuinely useful.
One thing I would not compromise on is the installation. With this level of output, use properly sized power and ground wiring, make sure the amplifier has ventilation around its 2.09-inch-high chassis, and set the gains against the actual speaker and subwoofer RMS ratings. Do that correctly and the compact enclosure becomes an advantage rather than a limitation.
Best 5 Channel Car Amplifiers Compared (2026)
| Amplifier | Real RMS Power | Subwoofer Capability | What Sets It Apart | Best System Match | Installation Reality |
|---|---|---|---|---|---|
|
Rockford Fosgate T1000X5ad
Best Overall
|
100W × 4 + 400W × 1 @ 4Ω 100W × 4 + 600W × 1 @ 2Ω |
600W @ 2Ω 600W @ 1Ω |
Class-AD + Class-BD architecture, Constant Power design, Punch EQ and an exceptionally low 1.6-inch chassis height. | High-output 4-speaker + subwoofer builds | Excellent when mounting space is tight. Requires serious power wiring and sensible ventilation. |
|
AudioControl EPICFIVE
High-Output Pick
|
150W × 4 + 500W × 1 @ 2Ω |
500W @ 2Ω 700W @ 1Ω |
91dB+ S/N, Linkwitz-Riley filtering, 0–12dB EPIC Bass Boost and included ACR-E remote bass control. | Powerful speakers with a serious subwoofer | Low-profile at 2.01 inches high, but the 150A recommended fuse tells you this is a substantial installation. |
|
Hertz Mille Legend ML Power 5
Premium Sound
|
100W × 4 + 550W × 1 @ 2Ω | 550W @ 2Ω | CEA-compliant output, D-Class architecture, thermal protection and high/low-level input flexibility. | Premium speakers where system balance matters | The larger physical design needs more mounting room, but the 6.8-lb weight keeps it manageable. |
|
KENWOOD X802-5 eXcelon
Best OEM Upgrade
|
50W × 4 + 300W × 1 @ 4Ω 75W × 4 + 500W × 1 @ 2Ω |
300W @ 4Ω 500W @ 2Ω |
Speaker-level harness included, High-Resolution Audio support and one-sided terminal layout. | Factory-radio 4-speaker + subwoofer upgrades | One-sided connections make cable routing cleaner and OEM integration more approachable. |
|
Alpine R-A90S R-Series
Most Flexible
|
75W × 4 + 150W × 2 @ 4Ω 100W × 4 + 250W × 2 @ 2Ω |
500W bridged @ 4Ω | Six-channel architecture with staggered power, individual crossover control and multiple system configurations. | Active front stages and expandable systems | More configuration freedom means more setup decisions. Best used when the extra channels have a purpose. |
|
Stinger Audio MT-1000.5
Compact Power
|
75W × 4 + 300W × 1 @ 4Ω 150W × 4 + 500W × 1 @ 2Ω |
500W @ 2Ω 700W @ 1Ω |
HEXFET MOSFET design, high/low-level inputs, 0–12dB Bass Boost and included remote bass knob. | Space-conscious high-output builds | Compact 2.09-inch height, but the available power still calls for properly sized wiring and airflow. |
5-Channel Amp Buying Guide: How to Match Power, Speakers, Subwoofers and Installation
A 5-channel amplifier looks straightforward on paper: four channels for the main speakers and one channel for the subwoofer. In practice, choosing the right one is much more about how those five channels work together than simply finding the amplifier with the largest wattage number.
The important questions are fairly specific. How much continuous RMS power do your speakers actually need? What impedance will the subwoofer present to the fifth channel? Are you keeping the factory radio? Do you have enough room for the amplifier and adequate ventilation? And can the vehicle’s electrical system comfortably support the amplifier when it is working hard?
That is why the six amplifiers above are not interchangeable despite all serving broadly the same purpose. Some are better when space is limited, some make more sense for factory-radio integration, some provide substantially more speaker power, and the Alpine takes a different approach altogether with six channels that can be configured for a five-channel system.
Start With RMS Power, Not the Big Wattage Number
The first specification I look at is RMS power, because that is the number that tells you how much continuous power the amplifier is designed to deliver under a specified load.
Maximum, peak, or headline wattage can be useful for understanding the product category, but it should not decide your purchase.
For example, an amplifier advertised with 1,600W maximum power can be a poorer match for your system than another amplifier with a lower headline figure if its actual RMS output does not suit your speakers and subwoofer.
For a conventional four-speaker plus subwoofer system, think about the amplifier as two separate jobs:
- Channels 1–4: power the front and rear speakers.
- Channel 5: provides dedicated power to the subwoofer.
- Speaker RMS: determines how much power the main channels should realistically provide.
- Subwoofer RMS: determines whether the fifth channel has enough usable output.
- Impedance: determines how much power the amplifier can actually deliver at that load.
A useful match is not necessarily an amplifier that can deliver the maximum possible wattage. You want enough clean power to drive the system properly without making the amplifier or speakers the weak link.
How Much RMS Power Do Your Speakers Really Need?
There is no universal number that makes a speaker-and-amplifier combination correct.
A factory replacement speaker might be perfectly happy with substantially less power than a high-performance component set. Likewise, a speaker rated for 150W RMS does not automatically require an amplifier capable of delivering exactly 150W.
What matters is the relationship between the speaker’s continuous rating and the amplifier’s real output.
As a practical starting point:
| Speaker type | Typical amplifier target | What matters most |
|---|---|---|
| Factory replacement speakers | 40–75W RMS per channel | Clean power and proper gain setting |
| Quality aftermarket coaxials | 50–100W RMS per channel | Matching RMS and impedance |
| Higher-output component speakers | 75–150W RMS per channel | More amplifier headroom |
| High-performance speakers | 100W+ RMS per channel | Strong electrical system and careful tuning |
These are matching guidelines, not hard rules. Speaker sensitivity, impedance, enclosure design, crossover points and the actual listening level all affect how much amplifier power is useful.
This is also where some of the models in this article separate themselves. An amplifier capable of 150W × 4 at 2 ohms gives you considerably more headroom for demanding aftermarket speakers than one producing 75W × 4 at the same load.
The Fifth Channel Is a Different Job
The subwoofer channel should not be evaluated the same way as the four speaker channels.
A subwoofer generally benefits from substantially more power, which is why a good five-channel amplifier can have something like 75–150W available on each main channel while offering 300–700W on the dedicated subwoofer channel.
The important figure is not simply the highest number. Look at RMS power at the subwoofer’s final impedance.
For example:
- A subwoofer wired to 4 ohms may receive considerably less power.
- The same amplifier may provide more power at 2 ohms.
- Some amplifiers are designed to operate down to 1 ohm, allowing considerably more output from the subwoofer channel.
- The subwoofer itself must be capable of handling the resulting power.
This is why the 700W at 1 ohm capability of some amplifiers in this list is meaningful only if your subwoofer’s final wiring actually presents a 1-ohm load and the amplifier is rated for that load.
Do not wire a subwoofer to a lower impedance simply to chase a larger wattage figure.
Understanding a 5-Channel Amplifier for 4 Speakers and a Subwoofer
For a conventional setup, the layout is simple:
Front Left + Front Right + Rear Left + Rear Right + Subwoofer
The four main channels remain separate so you can control the front and rear speakers independently, while the fifth channel is normally a mono output designed for the subwoofer.
A sensible system might look like this:
Head Unit
   │
   ├── Channel 1 → Front Left Speaker
   ├── Channel 2 → Front Right Speaker
   ├── Channel 3 → Rear Left Speaker
   ├── Channel 4 → Rear Right Speaker
   └── Channel 5 → Subwoofer
This is one of the biggest advantages of a five-channel amplifier: one amplifier chassis handles the entire system.
That can simplify installation compared with using one four-channel amplifier for the speakers and another mono amplifier for the subwoofer.
However, a five-channel amplifier is not automatically the best solution for every build. If you are planning an active front stage, multiple subwoofers, or a more elaborate system with separate processing, multiple amplifiers may give you more flexibility.
Impedance Is Where Many Amplifier Purchases Go Wrong
The amplifier’s impedance rating and your speakers’ impedance need to be considered together.
A 2-ohm load is not the same electrical demand as a 4-ohm load. Many Class D amplifiers can produce considerably more power at 2 ohms, and some dedicated subwoofer channels are designed to operate at 1 ohm.
The mistake is assuming that lower impedance always means better performance.
Lower impedance generally allows more output from an amplifier designed for it, but it also increases current demand. That means your wiring, electrical system, amplifier cooling and subwoofer configuration all become more important.
Before buying, confirm:
- The nominal impedance of each speaker.
- The final impedance of the subwoofer.
- Whether the amplifier supports that impedance.
- The RMS power available at that exact impedance.
- The RMS power handling of the speakers and subwoofer.
Single-Voice-Coil vs Dual-Voice-Coil Subwoofers
Subwoofer voice-coil configuration becomes particularly important when you are trying to use the fifth channel efficiently.
A dual-voice-coil subwoofer does not automatically mean it should be wired to the lowest possible impedance. The final load depends on the impedance of each voice coil and how the coils are connected.
For example, a dual-voice-coil subwoofer can often be wired in series or parallel, producing different final impedance options.
That gives you flexibility, but the final configuration must stay within the amplifier’s rated operating range.
Real-world rule: decide the subwoofer’s final impedance before deciding how much power you need from the fifth channel. Do not buy the amplifier first and try to make the subwoofer wiring work afterward.
Signal-to-Noise Ratio and Distortion Actually Matter
Power gets most of the attention in amplifier shopping, but it is not the entire story.
Signal-to-noise ratio tells you how far the desired audio signal sits above the amplifier’s own noise floor. A higher S/N figure is generally preferable because it indicates a cleaner signal path under the specified measurement conditions.
That does not mean a 91dB amplifier will automatically sound better than an 89dB amplifier in every vehicle. The rest of the audio chain matters too, including the head unit, source quality, signal processing, speakers and installation.
Distortion should also be considered, but published distortion figures need context. A THD number without knowing the test power, frequency, impedance and measurement conditions does not tell the whole story.
This is why I would put proper system matching and gain setup ahead of chasing tiny differences in laboratory specifications.
Damping Factor Is Useful, But Do Not Shop by It Alone
Damping factor is often presented as an important indicator of an amplifier’s ability to control the speaker, particularly at lower frequencies.
It can matter, but it is frequently overemphasized in product marketing.
In an actual vehicle installation, the amplifier’s output impedance, speaker impedance, cable resistance and the rest of the electrical path all affect the effective damping seen by the speaker.
For a normal car-audio upgrade, I would prioritize:
- Appropriate RMS power.
- Correct impedance.
- Low noise.
- Proper crossover control.
- Stable operation.
- Good installation.
- Correct gain setting.
Those factors are far more useful when deciding between real-world amplifiers than choosing the model with the most impressive damping-factor number.
Class D Efficiency and Why It Matters in a Car
Most modern five-channel amplifiers use Class D technology, and there is a good reason for that.
A Class D design can deliver substantial output while wasting less energy as heat than a traditional linear design. That is especially useful in a vehicle because space is limited and the amplifier may be installed under a seat, behind interior panels or in a cargo area.
The advantage becomes even more obvious when an amplifier has to power both four speakers and a subwoofer.
That does not mean Class D amplifiers run cold.
A 5-channel amplifier producing hundreds of watts still generates heat. Efficiency reduces wasted energy; it does not eliminate thermal management.
Amplifier Size Is Part of the System Design
Before ordering an amplifier, measure the actual mounting area.
Do not measure only the amplifier body. Allow room for:
- Power and ground cables.
- Speaker wiring.
- RCA or signal connections.
- Ventilation.
- Fuse and distribution hardware.
- Access to gain and crossover controls.
- Removal of the amplifier for future servicing.
This matters because two amplifiers with similar output can have very different installation requirements.
The Rockford Fosgate T1000X5ad, for example, has a particularly low 1.6-inch height, while the AudioControl and Stinger are also relatively compact for their output. That can be valuable when mounting space is the limiting factor.
On the other hand, the physically larger Hertz design may make more sense when you have enough room and want its particular power balance and premium-system orientation.
Heat Management Is Not Optional
An amplifier should never be treated like a component that can simply be buried underneath carpeting.
Restricted airflow can cause thermal protection to activate, reduce reliability and potentially shorten component life over time.
Avoid mounting the amplifier:
- Directly against a heat-producing surface.
- Where carpet completely blocks ventilation.
- In a sealed compartment with no way for heat to escape.
- Where luggage or cargo can cover the cooling area.
- In a location exposed to water or excessive moisture.
A compact amplifier is easier to install, but compact does not mean heat-proof.
Factory Radio vs Aftermarket Head Unit
Your head unit determines how the amplifier receives its audio signal.
With an aftermarket radio, RCA preamp outputs are usually the straightforward route.
With a factory radio, you may need high-level speaker inputs or another appropriate integration method.
This is an important distinction because replacing the factory head unit is not always necessary just to add amplifier power.
For an OEM-focused build, look for an amplifier that can accept speaker-level signals and has an appropriate turn-on method. Models with both high-level and low-level input options give you more flexibility when the vehicle’s audio system changes later.
Wiring and Installation Checklist
A powerful amplifier is only as good as the installation supporting it.
Before installation, make sure you have:
- Correctly sized power cable for the amplifier’s current demand and cable length.
- A properly sized ground cable, kept short and connected to a solid chassis point.
- An appropriate inline fuse near the battery.
- Proper speaker wire for the output channels.
- Suitable RCA or high-level signal wiring.
- Secure connections at the amplifier.
- Adequate ventilation around the chassis.
- Correct grounding with clean, bare-metal contact.
- A protected route through the vehicle’s firewall.
- Correct speaker and subwoofer impedance.
- Gains set according to the source and speaker/subwoofer capabilities.
Fuse Placement Matters More Than Many First-Time Installers Realize
The main fuse near the battery protects the power cable, not the amplifier itself.
That distinction is important.
If the power cable develops a short circuit somewhere between the battery and amplifier, the battery can supply enormous current. A correctly positioned fuse interrupts that current before the cable becomes a serious hazard.
The basic arrangement should be:
Battery → Main Fuse → Power Cable → Amplifier
Keep the fuse as close to the battery as practical, while following the amplifier and wiring manufacturer’s recommendations.
Do not simply install the largest fuse that will fit. Fuse selection needs to be appropriate for the wiring and system.
What Gauge Power Wire Should You Use?
There is no honest answer that says every five-channel amplifier requires one specific wire gauge.
The correct size depends on current demand, cable length, amplifier efficiency, installation conditions and the manufacturer’s recommendation.
Higher-output amplifiers can require substantially more current. The AudioControl EPICFIVE, for example, has a recommended 150A fuse, which should immediately tell you that it belongs in a different electrical category from a small low-power amplifier.
For a serious installation, do not save money by using undersized power cable. Excessive voltage drop can reduce amplifier performance and create unnecessary heat.
A proper installation should be based on the amplifier’s current requirements and the cable run, not simply whatever wire happens to be left over from another build.
Gain Is Not a Volume Control
This is one of the most important setup points in the entire buying guide.
The gain control is used to match the amplifier’s input sensitivity to the signal coming from the head unit or processor.
It is not there to make the amplifier “more powerful.”
Turning the gain all the way up does not unlock additional rated RMS power. It increases the amplifier’s sensitivity to the incoming signal and can make clipping much more likely if it is set incorrectly.
A better approach is to establish a sensible source level, configure the crossover points, and then set the amplifier gains to achieve the desired output without introducing audible clipping.
Crossover Settings Should Match the Speakers
A five-channel amplifier becomes much more useful when its filtering is set correctly.
For the four main speakers, a high-pass filter can prevent them from trying to reproduce deep bass that is better handled by the subwoofer.
For the subwoofer channel, a low-pass filter keeps higher frequencies out of the subwoofer.
A subsonic filter can also be useful in certain subwoofer installations, particularly where extremely low frequencies provide little useful output but create substantial cone movement.
There is no universal crossover frequency that works perfectly for every vehicle. Speaker size, enclosure type, door treatment, subwoofer enclosure and listening preference all influence the final settings.
One More Thing: The Alpine Is Not a Conventional 5-Channel Amp
The Alpine R-A90S deserves a separate mention because calling it a normal five-channel amplifier would be misleading.
It is a six-channel amplifier with multiple configuration options, including five-channel use.
That makes it interesting for someone who wants more flexibility than a conventional four-speaker-plus-subwoofer layout provides. You can use its channel arrangement for more advanced system configurations rather than treating it as simply another five-channel model.
If your only goal is a straightforward four-speaker plus one-subwoofer installation, a dedicated five-channel amplifier may be simpler.
If you are planning future expansion or a more sophisticated front-stage setup, the additional channels can become an advantage.
The Electrical System Should Not Be an Afterthought
Once amplifier power gets into the high-output range, the vehicle’s electrical system becomes part of the audio system.
A powerful amplifier demands current. If the vehicle cannot supply that current reliably, you can encounter voltage drop, dimming lights, amplifier protection or inconsistent performance under heavy load.
Before installation, consider:
- Battery condition.
- Alternator capacity.
- Main power and ground connections.
- Amplifier current demand.
- Cable length and gauge.
- Whether multiple amplifiers will share the electrical system.
You do not automatically need a high-output alternator just because you installed a five-channel amplifier. But the more powerful the system becomes, and the harder you drive it, the more important the vehicle’s charging system becomes.
The Simple Way to Choose Between Them
If you have narrowed your choices down to the six amplifiers in this guide, I would make the final decision based on the system you are actually building rather than the ranking alone.
Choose around the installation first, then the power requirement.
If space is extremely limited, a compact design can be more valuable than a few additional watts. If you have high-power aftermarket speakers, look for stronger RMS output on channels 1–4. If the subwoofer is the priority, pay close attention to the fifth channel’s RMS output at your subwoofer’s final impedance.
And if you are keeping the factory radio, make sure the amplifier supports the signal integration method you actually need.
The best five-channel amplifier is ultimately the one that matches the speakers, subwoofer, impedance, electrical system and physical installation as a complete package. That is a much better way to choose than buying the amplifier with the biggest number printed on the box.
Deep Dive: Pro-Level Control and Tuning for a 5-Channel Car Audio System
A powerful five-channel amplifier can give you plenty of output, but power alone does not determine how good the finished system sounds. The difference between a system that is simply loud and one that sounds balanced usually comes down to crossover settings, gain structure, speaker integration, subwoofer blending, and installation.
This is also where amplifiers with similar RMS ratings can behave very differently in a real vehicle. One may give you better crossover control, another may include a useful remote bass controller, while a more advanced system may rely on an external DSP for equalization and time alignment.
The goal is not to use every adjustment available. The goal is to make each adjustment serve a specific purpose.
Set the Crossovers Before You Start Chasing Sound
The crossover network determines which frequencies each section of the system is allowed to reproduce.
For a conventional four-speaker and subwoofer setup, you generally want the main speakers to handle the midrange and upper frequencies while the subwoofer takes over the deepest bass.
That normally means:
- High-pass filter on the front and rear speakers: removes very low frequencies that can cause unnecessary cone movement.
- Low-pass filter on the subwoofer: prevents the subwoofer from reproducing unnecessary midrange information.
- Subsonic filter: can reduce extremely low frequencies when the subwoofer enclosure and system design benefit from it.
- Bass boost: should be treated as a finishing adjustment rather than a substitute for proper crossover selection.
The exact crossover point depends on the speakers, subwoofer, enclosure and vehicle. There is no magic “80 Hz” setting that automatically works for every car.
As a starting point, something around 60–100 Hz for the main speakers and a similar region for the subwoofer low-pass filter can be reasonable, but the final settings should be adjusted by ear and, ideally, with measurement.
High-Pass Filtering Protects More Than Your Speakers
A door speaker is usually not the best place to reproduce the lowest bass in the system.
When you apply a high-pass filter, you reduce the amount of deep bass reaching those speakers. That can provide several practical benefits:
- Less unnecessary cone excursion.
- Lower mechanical stress.
- More usable headroom.
- Cleaner midrange at higher volume.
- Better division of work between the speakers and subwoofer.
This becomes particularly useful with smaller aftermarket speakers or factory-style door locations where there is limited acoustic enclosure control.
Do not interpret this as “remove all bass from the door speakers.” The crossover should create a smooth handoff between the speakers and subwoofer rather than making one section of the system disappear.
Low-Pass Filtering Makes the Subwoofer Part of the Music
A subwoofer should normally reinforce the bottom end rather than announce that there is a separate speaker in the vehicle.
That is why the low-pass filter matters.
If it is set too high, the subwoofer can start reproducing frequencies that belong more naturally to the front stage. The result can sound thick, localized or disconnected.
If it is set too low, you can create a gap between the main speakers and subwoofer.
The ideal setting depends on the rest of the system, which is why the crossover should be treated as a system integration control, not simply a specification to check when buying the amplifier.
Bass Boost Is Not a Replacement for Proper Subwoofer Tuning
Several amplifiers in this guide provide adjustable bass boost, including controls reaching 0–12dB.
That sounds attractive, but there is a major difference between having bass boost available and actually needing to use it.
If the subwoofer already has enough output, adding a large amount of boost can consume amplifier headroom and increase the chance of clipping at higher listening levels.
I would start with the bass boost at or near its minimum setting, get the crossover and gain structure right first, and then add only as much additional boost as the system genuinely needs.
If you find yourself needing a large amount of bass boost just to make the subwoofer sound balanced, that is a reason to investigate the subwoofer enclosure, placement, crossover and system gain rather than simply turning the control farther.
Separate Front and Rear Channels Give You Better System Balance
A proper five-channel amplifier gives you four independently amplified main channels rather than treating the entire front and rear stage as one speaker group.
That allows you to control the front and rear sections more intelligently.
In a typical setup:
- Front left and right handle the primary listening stage.
- Rear left and right provide rear fill.
- The fifth channel handles the subwoofer.
For most music-focused systems, the front stage should remain the priority. The rear speakers should support the cabin rather than overpower the front speakers.
This is an important point because more rear volume does not necessarily mean better sound.
If the rear speakers are significantly louder than the front stage, vocals and instruments can appear to come from behind you. A properly balanced system usually keeps your attention toward the front.
Do Not Treat the Subwoofer as a Separate Sound System
One of the biggest tuning mistakes is setting the subwoofer level independently until it sounds impressive, then leaving it there.
A subwoofer should integrate with the front stage.
Play familiar recordings containing kick drums, bass guitar and sustained low-frequency notes. Gradually increase the subwoofer level until the bass feels complete, then reduce it slightly if you can clearly identify where the subwoofer is located.
That last step is important.
When the integration is right, you should generally notice more complete low-frequency reproduction, not simply hear a loud box producing bass somewhere behind you.
Built-In DSP vs External DSP
Not every five-channel amplifier has a full DSP, and that distinction matters.
A basic amplifier may provide:
- High-pass filtering.
- Low-pass filtering.
- Bass boost.
- Gain adjustment.
- Phase or subwoofer-related controls.
A more advanced external DSP can provide much deeper control, including:
- Parametric equalization.
- Multiple crossover slopes.
- Time alignment.
- Individual channel level adjustment.
- Phase control.
- Presets.
- More precise frequency shaping.
That does not make a basic amplifier inadequate.
For a straightforward four-speaker and subwoofer system, good amplifier crossovers can be completely sufficient. If you are building a serious front stage, using active speakers, or trying to correct difficult cabin acoustics, an external DSP becomes much more useful.
Remote Bass Knobs Are Useful When Used Correctly
A remote bass controller can be genuinely convenient, particularly if your music varies significantly from track to track.
Several amplifiers in this guide include a remote bass control.
The important distinction is that a remote bass knob should normally function as a level adjustment, not as a replacement for the amplifier’s initial setup.
Set the amplifier so the subwoofer integrates correctly at the normal position of the remote control. Then use the knob for modest adjustments when you want a little more or less low-frequency output.
Do not configure the system with the amplifier gain excessively high and then rely on the remote knob to keep the system under control.
Time Alignment Can Change the Front Stage Completely
A vehicle is an acoustically difficult environment.
The driver’s seat is not centered between the left and right speakers. One speaker may be significantly closer to you than the other, while the subwoofer can be several feet away and located somewhere behind or beside the cabin.
This creates timing differences.
Time alignment compensates for those differences by delaying selected channels so sound from different speakers reaches the listening position more coherently.
For a front stage, the basic principle is simple:
- Measure the distance from the driver’s listening position to each speaker.
- Identify which speaker is closest.
- Use the DSP or compatible processor to delay the closer channels relative to the farther channels.
- Fine-tune by listening and, ideally, measuring.
The objective is to make the left and right front stage appear more balanced from the driver’s position.
Front Stage Time Alignment and Subwoofer Integration Are Different Problems
Do not assume that setting the front speakers correctly automatically means the subwoofer is perfectly integrated.
The subwoofer has its own physical distance and acoustic behavior.
Depending on the system, subwoofer phase and timing can affect the transition around the crossover region. This is one reason an advanced DSP can be valuable in a higher-end system.
However, if your amplifier does not provide time alignment, you can still achieve a very good result through proper crossover selection, phase adjustment where available, subwoofer placement and careful level matching.
You do not need a DSP simply to make a normal five-channel system sound good.
Gain Structure Is More Important Than Turning the Gain Up
The gain control is one of the most misunderstood controls on an amplifier.
It does not represent a volume setting.
It adjusts the amplifier’s input sensitivity so that the amplifier can work appropriately with the signal being supplied by the head unit or processor.
If the gain is set too high, the amplifier can reach clipping earlier than expected. If it is set excessively low, you may lose useful system output before the head unit reaches its practical maximum.
A sensible gain-setting process looks more like this:
- Establish a clean maximum listening level from the head unit or processor.
- Set the amplifier’s crossover configuration first.
- Start the gain low.
- Increase it gradually while monitoring the output.
- Stop before audible clipping or other signs of overload.
- Repeat separately for the main speaker channels and subwoofer channel.
For the most accurate setup, an oscilloscope, distortion detector or suitable measurement equipment can help identify clipping rather than relying entirely on your ears.
Why Clipping Is So Dangerous to a Properly Matched System
Clipping occurs when an amplifier is asked to produce a waveform beyond what its available voltage allows.
The result is a distorted signal.
The common mistake is assuming that distortion only happens when an amplifier is “too weak.” An incorrectly adjusted gain can cause clipping even when the amplifier has plenty of rated power for the speakers.
That is why buying a high-output amplifier and immediately turning every control upward is not a professional setup.
A well-matched amplifier operating within its limits can sound considerably cleaner than a more powerful amplifier that has been poorly adjusted.
Input Sensitivity Depends on the Signal Source
A factory radio and aftermarket head unit can produce very different signal levels.
That is why the amplifier’s input sensitivity range matters.
If you are retaining the factory stereo, pay particular attention to the amplifier’s high-level input capability and the way its input stage handles the vehicle’s factory signal.
If you are using an aftermarket processor or head unit with stronger RCA output, the gain should be adjusted around that signal rather than assuming the same setting used for a factory system will work.
This is another reason there is no universal gain position such as “set it halfway.”
The correct setting depends on the actual signal reaching the amplifier.
Grounding Is Part of the Audio System
A poor ground can create noise, instability and voltage-drop problems.
The amplifier ground should be:
- Short.
- Appropriately sized.
- Securely attached.
- Connected to clean chassis metal.
- Free from paint, rust, heavy undercoating and other insulating material.
A bolt screwed into painted sheet metal is not automatically a good amplifier ground.
For a high-current amplifier, the quality of the ground connection becomes even more important because the amplifier can draw substantial current during heavy playback.
Mount the Amplifier for Stability, Not Just Appearance
A professional installation should leave the amplifier securely mounted and accessible.
Avoid mounting it where:
- It can move or vibrate.
- Wiring connections are under constant mechanical stress.
- Water can reach the chassis.
- Cargo can strike the amplifier.
- Carpet or insulation completely blocks airflow.
- The amplifier cannot be removed without dismantling half the vehicle.
A clean installation is not simply about hiding every cable. It should also make future inspection and servicing possible.
Leave Room Around the Chassis
The dimensions listed for these amplifiers are useful, but they should not be interpreted as the exact amount of installation space required.
You need additional room for connectors, wiring and airflow.
This is especially important with compact models. A 1.6-inch or 2-inch-high chassis may physically fit beneath a seat, but that does not mean it should be pressed tightly against the floor or covered with insulation.
Small footprint does not remove thermal requirements.
Keep Power Wiring Away From Signal Wiring
When possible, route the main power cable separately from RCA signal cables.
This is a basic installation practice that can help reduce the possibility of unwanted electrical noise entering the audio signal.
Also pay attention to:
- Secure cable routing.
- Proper firewall protection.
- Avoiding sharp metal edges.
- Keeping signal cables away from major electrical noise sources where practical.
- Protecting connections from moisture and accidental contact.
Good wiring is not glamorous, but it is one of the areas where a professional installation differs from a quick amplifier fit.
Final Tuning Should Happen With the Vehicle Finished
Do not perform the final tuning while the vehicle is half disassembled.
Seats, trim panels, door treatments, enclosure placement and even the position of the listening seat can influence the final result.
Once everything is installed:
- Verify polarity on every speaker.
- Confirm the subwoofer’s final impedance.
- Set the crossover points.
- Set gains conservatively.
- Balance the front and rear levels.
- Adjust the subwoofer level.
- Check for rattles and unwanted vibrations.
- Listen to several familiar recordings.
- Make small adjustments rather than changing everything at once.
That last point is important. If you change the crossover, gain, bass boost and subwoofer level simultaneously, you will not know which adjustment actually improved the system.
The Pro-Level Approach Is About Restraint
The best tuning is rarely the one with every control pushed toward maximum.
A well-set five-channel system should have enough headroom that you can listen loudly without the speakers sounding strained, while the subwoofer should blend into the front stage rather than dominate it.
If the system needs aggressive bass boost, excessive gain or unusually high rear-speaker levels to sound impressive, something else may be wrong.
Use the amplifier’s controls to correct the system, not to compensate for a poor speaker match or installation.
That is ultimately what separates a genuinely well-tuned five-channel car audio system from one that simply produces a lot of sound.
Installation How-To: From Box to a Properly Tuned 5-Channel System
A five-channel amplifier installation is not difficult because there are five outputs. It becomes difficult when the power, signal, speaker wiring, grounding and final tuning are treated as separate jobs instead of one system.
The safest approach is to complete the installation in stages. Mount the amplifier first, plan the cable routes, establish the main power and ground connections, connect the signal and remote-turn-on wiring, then connect the speakers and subwoofer. Only after everything is electrically checked should you start tuning.
For a typical four-speaker and subwoofer system, the basic signal and power path looks like this:
                         FRONT LEFT  ───────► CH 1
                        FRONT RIGHT  ───────► CH 2
HEAD UNIT / FACTORY ───► 5-CHANNEL AMP
                        REAR LEFT   ───────► CH 3
                        REAR RIGHT  ───────► CH 4
                              │
                              └────────────► CH 5 ─────► SUBWOOFER

BATTERY ──► MAIN FUSE ──► +12V AMPLIFIER
CHASSIS ─────────────────► GROUND
HEAD UNIT ───────────────► REMOTE TURN-ON
The exact input connections depend on whether you are using an aftermarket head unit with RCA outputs or retaining the vehicle’s factory audio system.
Step 1: Plan the Installation Before Removing Anything
Before drilling holes or running cable, decide where every component will live.
You should know:
- Where the amplifier will be mounted.
- Where the battery connection will be made.
- Where the main fuse will be positioned.
- Where the ground point will be located.
- Where the RCA or high-level signal cables will run.
- Where the remote-turn-on wire will run.
- Where the speaker cables will enter and leave the amplifier.
- Where the subwoofer cable will terminate.
- How the amplifier will receive enough airflow.
This planning stage is particularly important with compact amplifiers. A chassis that physically fits under a seat may still leave insufficient space for wiring and ventilation.
Measure the installation area twice before drilling once.
Step 2: Disconnect the Battery Before Wiring
Disconnect the vehicle’s negative battery terminal before beginning the main electrical installation.
This reduces the chance of accidentally shorting the power cable while working and protects the vehicle’s electrical system during installation.
Do not connect the amplifier’s main power cable to the battery and leave the other end exposed while you continue working. Keep the cable secured and properly insulated until the installation is ready for the final connection.
If the vehicle has special battery-management or electrical-system procedures, follow the manufacturer’s requirements rather than assuming every vehicle can be treated identically.
Step 3: Mount the Amplifier Securely
Choose a solid mounting surface that keeps the amplifier protected and reasonably accessible.
Good locations can include:
- A properly ventilated cargo-area mounting panel.
- A secure trunk or hatch-area mounting surface.
- A suitable under-seat location with sufficient clearance.
- A custom amplifier board.
Avoid mounting directly against areas that can become excessively hot or wet.
The amplifier should not be loose enough to vibrate, move or pull on its own wiring.
Leave sufficient space around the chassis for heat to escape. Do not cover the amplifier with carpet or insulation simply to make the installation look cleaner.
Step 4: Run the Main Power Cable From the Battery
The main positive cable should run from the battery to the amplifier’s positive power terminal.
The basic path is:
Battery Positive
      │
      ▼
Main Fuse
      │
      ▼
Power Cable
      │
      ▼
Amplifier +12V
The main fuse should be installed close to the battery, following the amplifier and wiring manufacturer’s recommendations.
The purpose of this fuse is primarily to protect the power cable if it becomes shorted between the battery and amplifier.
Do not install the fuse several feet away from the battery simply because it is easier to reach.
Step 5: Choose the Power Cable Based on Current Demand
Do not select the power cable based solely on the amplifier’s physical size.
Look at its electrical demand, recommended fuse rating, installation length and manufacturer requirements.
A high-output five-channel amplifier can demand substantial current, especially when the subwoofer channel is being driven hard.
For example, an amplifier with a recommended 150A fuse should immediately tell you that it requires a much more serious electrical installation than a small low-power amplifier.
Longer cable runs also increase voltage drop, so cable sizing should account for the actual distance between the battery and amplifier.
Step 6: Create a Proper Chassis Ground
The amplifier ground should connect to a solid chassis point using appropriately sized cable.
A good ground connection should have:
- Short cable length.
- Appropriate cable gauge.
- Clean bare-metal contact.
- A secure fastener.
- No paint, rust or thick coating between the terminal and chassis.
- No unnecessary bends or extensions.
A common mistake is attaching the ground to a convenient bolt without checking what it is actually connected to.
If the bolt is threaded into painted metal or attached to a weak body panel, the connection may not provide the low-resistance path the amplifier needs.
Step 7: Connect the Remote Turn-On Lead
The remote-turn-on connection tells the amplifier when the audio system is switched on.
With a traditional aftermarket head unit, this is usually connected to the head unit’s remote output.
The basic arrangement is:
Head Unit Remote Output
          │
          ▼
   Remote Turn-On Wire
          │
          ▼
     Amplifier REM
Do not confuse the remote wire with the main power cable. The remote terminal does not supply the amplifier’s operating current; it provides the switching signal that tells the amplifier when to activate.
Some factory-radio installations use signal sensing or other turn-on methods, depending on the amplifier and vehicle. Use the method specifically supported by the amplifier rather than improvising a connection.
Step 8: Connect the Audio Signal
This is where the installation differs depending on your head unit.
With an aftermarket head unit that provides RCA preamp outputs:
Head Unit RCA Outputs
      │
      ├── Front RCA ──► Amplifier Front Inputs
      ├── Rear RCA ───► Amplifier Rear Inputs
      └── Sub RCA ────► Amplifier Sub Input
The exact input arrangement varies by amplifier, so follow its channel-labeling and input-routing instructions.
If the vehicle retains its factory radio, use the amplifier’s high-level input capability when supported, or use an appropriate signal interface if the amplifier requires one.
Do not cut factory wiring simply because an internet diagram shows it. Identify the correct speaker outputs and confirm polarity before making permanent connections.
Step 9: Connect the Four Main Speakers
The four main amplifier channels normally correspond to:
CH 1 ──► Front Left
CH 2 ──► Front Right
CH 3 ──► Rear Left
CH 4 ──► Rear Right
Maintain consistent polarity.
A reversed speaker can still produce sound, which makes this mistake easy to miss. The problem is that the speaker’s movement is now out of phase with the other speakers, which can reduce bass and weaken the stereo image.
Label your speaker wires before connecting them. It is much easier to identify Front Left Positive during installation than to troubleshoot an unknown pair of wires afterward.
Step 10: Connect the Subwoofer to Channel Five
The fifth channel is normally the dedicated subwoofer output.
Amplifier CH 5
      │
      ▼
Subwoofer + / -
Before connecting it, confirm the subwoofer’s final impedance.
This is particularly important with dual-voice-coil subwoofers. The way the voice coils are wired can change the final load presented to the amplifier.
For example, an amplifier that supports 1-ohm operation on its subwoofer channel can produce substantially more power at 1 ohm than at 4 ohms. But that does not mean every subwoofer should be wired to 1 ohm.
The amplifier, subwoofer voice coils and wiring configuration must all agree.
Step 11: Keep Signal and Power Wiring Organized
Where practical, avoid running RCA signal cables directly alongside the main high-current power cable for the entire length of the vehicle.
A clean installation typically separates major power and signal paths.
Also:
- Protect cables where they pass through metal.
- Use grommets at firewall openings.
- Secure cables so they cannot rub against sharp edges.
- Keep wiring away from pedals, hinges and moving mechanisms.
- Avoid leaving excess cable loosely bundled near hot components.
- Keep amplifier terminals mechanically supported.
Good cable management is not only about appearance. It reduces the chance of damaged insulation, intermittent connections and unwanted electrical noise.
Step 12: Check Every Connection Before Applying Power
Before reconnecting the battery, inspect the entire installation.
Check:
- Battery positive cable is connected to the correct amplifier terminal.
- Main fuse is correctly installed.
- Ground connection is secure.
- Remote-turn-on connection is correct.
- RCA or high-level inputs are connected to the correct channels.
- Speaker polarity is consistent.
- No speaker wire is touching another speaker terminal.
- Subwoofer impedance is within the amplifier’s rating.
- No exposed power conductor can contact the chassis.
- Amplifier mounting hardware is secure.
This is the point where a few minutes of inspection can save hours of troubleshooting.
Step 13: Perform a Basic Voltage Check
After the installation has been inspected, reconnect the battery and check the amplifier’s supply voltage.
With the vehicle off, the battery should show a normal resting voltage appropriate to the vehicle’s battery state and type.
With the engine running, the charging system should normally produce a higher voltage than the resting battery.
The exact value varies by vehicle, charging strategy and operating conditions, so do not assume one fixed voltage applies to every modern vehicle.
More importantly, check whether the voltage remains reasonably stable when the audio system is operating at higher output.
If the voltage drops excessively under load, investigate the battery, charging system, wiring and grounds before blaming the amplifier.
Step 14: Perform a Speaker Continuity and Polarity Check
Before serious listening, confirm that every channel is connected to the intended speaker.
Test the system one channel at a time:
- Front left only.
- Front right only.
- Rear left only.
- Rear right only.
- Subwoofer only.
This quickly reveals channel swaps and wiring mistakes.
Also verify speaker polarity. If the front left and front right are wired with opposite polarity, the system can lose substantial bass around the crossover region and the stereo image can become strangely diffuse.
Step 15: Start With Conservative Crossover Settings
Do not begin by maximizing every control.
Start with reasonable high-pass filtering on the main speakers and low-pass filtering on the subwoofer.
Keep bass boost at its minimum initially.
Then listen.
Once the basic system is balanced, make one adjustment at a time.
This approach is slower than turning everything up immediately, but it tells you what each control is actually changing.
Step 16: Set Gains Before You Judge the System
Start with the amplifier gains low.
Set the head unit to a known clean listening level, then increase each amplifier gain gradually until the desired output is reached without audible clipping.
Do not use the gain to compensate for a speaker that is too quiet because of an incorrect crossover or poor system balance.
For the subwoofer channel, resist the temptation to turn the gain high simply because you want more bass.
If the subwoofer needs substantially more output, first determine whether the issue is:
- Subwoofer sensitivity.
- Enclosure design.
- Subwoofer impedance.
- Crossover setting.
- Phase.
- Gain.
- Speaker/subwoofer level balance.
Step 17: Check the Subwoofer Phase
Subwoofer phase problems are among the easiest issues to overlook.
If the subwoofer and front speakers are working against each other around the crossover region, bass can become surprisingly weak even though the amplifier and subwoofer are both functioning correctly.
A simple test is to listen to familiar bass-heavy material and compare the available phase settings, if your equipment provides them.
You are looking for the setting that produces stronger, smoother bass around the crossover region, not necessarily the setting that simply sounds louder at one frequency.
If the amplifier does not offer phase control, check the subwoofer wiring polarity and investigate placement and processing options.
Step 18: Watch for Ground Loops and Electrical Noise
A ground loop can produce a whining or buzzing sound that changes with engine speed.
If you hear noise, do not immediately assume the amplifier is defective.
Check the installation methodically.
Potential causes include:
- Poor amplifier grounding.
- Poor head-unit grounding.
- Damaged or poorly routed signal cables.
- Incorrect grounding of aftermarket audio components.
- Signal cables running through a noisy electrical path.
- Vehicle electrical-system issues.
The first response should be to find the source, not randomly add a noise filter.
Adding an RCA noise filter can sometimes mask a symptom without fixing the underlying installation problem.
Step 19: A Simple Ground-Noise Troubleshooting Sequence
If engine-speed-related noise appears, use a systematic approach.
First, verify the amplifier’s ground connection.
Then inspect the signal wiring and routing.
Next, determine whether the noise exists with the signal cables disconnected from the amplifier. If the noise disappears, the problem is likely somewhere upstream in the signal path or grounding arrangement.
If the noise remains, investigate the amplifier’s power and ground installation and the vehicle’s electrical system.
This kind of isolation test is much more useful than replacing components randomly.
Common Installation Mistakes That Cause Problems
Using the Wrong Impedance
Connecting a subwoofer configuration below the amplifier’s supported impedance can cause excessive current demand, overheating or protection shutdown.
Always calculate the final load, particularly with dual-voice-coil subwoofers.
Assuming More Power Is Always Better
An amplifier capable of much more power than the speaker can safely handle is not automatically an upgrade.
More amplifier headroom can be useful, but gains must be set correctly and the speaker’s continuous power handling still matters.
Under-Powering the Front Stage
The opposite mistake is choosing an amplifier that cannot provide enough useful power for demanding speakers and then running the amplifier hard to achieve the desired volume.
Look at the actual RMS requirement rather than buying based on channel count alone.
Reversing One Speaker’s Polarity
One incorrectly wired speaker can significantly change the way the front stage behaves.
If the system sounds unusually thin or loses bass after installation, check polarity before changing amplifier settings.
Setting Bass Boost Too High
Bass boost can increase demand on the amplifier and subwoofer rapidly.
Start flat, establish a proper crossover and gain structure, then add only modest boost if the system genuinely benefits from it.
Mounting the Amplifier With No Airflow
A compact amplifier still produces heat.
Do not install it in a completely enclosed cavity just because it physically fits there.
Skipping the Main Fuse
Never treat the main battery-to-amplifier cable as if the amplifier’s internal protection replaces the need for an appropriately positioned battery-side fuse.
The cable needs protection close to its source.
Final Installation Test
Before considering the installation finished, run through this short checklist:
- Power: amplifier turns on and off correctly.
- Voltage: supply remains stable under normal operation.
- Front stage: left and right channels play from the correct locations.
- Rear stage: rear channels are correctly assigned and balanced.
- Subwoofer: fifth channel plays cleanly at the intended impedance.
- Polarity: speakers and subwoofer are wired consistently.
- Crossovers: main speakers are not being forced to reproduce unnecessary deep bass.
- Gain: no obvious clipping at the intended listening level.
- Noise: no engine-speed whine or unwanted buzzing.
- Thermal management: amplifier has adequate ventilation.
- Security: all wiring and mounting hardware are firmly secured.
The Final Sound Check Should Be Done With Familiar Music
Do not use a random bass-heavy test track as the only test of the installation.
Use recordings you know well.
Listen for vocals staying in front of you, cymbals and instruments remaining clear, bass blending naturally with the front stage, and the system maintaining its character as you increase the volume.
If the system becomes harsh, muddy or excessively boomy as the volume rises, do not automatically assume you need a bigger amplifier.
The problem may be gain structure, crossover settings, speaker limits, subwoofer phase, enclosure design or installation.
That is the real advantage of taking the installation step by step: when something does not sound right, you can identify the specific part of the system that needs attention instead of simply turning another control and hoping for the best.
Tuning and Real-World Use Cases for a 5-Channel Car Audio System
A five-channel amplifier becomes genuinely useful when it is tuned around the way you actually use the vehicle. The same amplifier can sound completely different in a daily commuter, a truck with a factory radio, or a system built around aftermarket component speakers and a dedicated subwoofer.
The mistake is trying to create one “perfect” setting and leaving everything there. Your speakers, subwoofer, cabin acoustics, source signal and even the type of music you play all affect the final result. A good setup should have a solid neutral baseline, then allow small adjustments when you want more bass, a different tonal balance, or a different listening experience.
Start With a Neutral Baseline for Four Speakers and One Subwoofer
Before creating music-specific settings, establish one balanced configuration.
For a conventional four-speaker and subwoofer installation, start with the main speakers on a sensible high-pass filter and the subwoofer on a low-pass filter. Keep bass boost and aggressive equalization off initially.
A practical starting point is:
| System section | Starting approach | Why |
|---|---|---|
| Front speakers | High-pass around 60–100Hz | Removes deep bass they may struggle to reproduce |
| Rear speakers | High-pass around 70–100Hz | Keeps rear fill clean without asking too much from smaller speakers |
| Subwoofer | Low-pass around 60–100Hz | Creates a smoother transition into the front stage |
| Bass boost | Start at 0dB | Preserves amplifier headroom |
| Main speaker gain | Set conservatively | Prevents unnecessary clipping |
| Subwoofer gain | Increase gradually | Matches bass level to the front stage |
These are starting points, not universal settings. A large component speaker in a properly treated door may work well with a lower high-pass point, while a small factory-style speaker may benefit from being crossed higher.
The correct setting is the one that produces a smooth transition without making either section of the system work unnecessarily hard.
Set the Gains in the Correct Order
For a four-speaker and subwoofer system, I would tune the main speakers before trying to make the subwoofer impressive.
A sensible sequence is:
- Set the head unit to a clean maximum listening level.
- Disable or neutralize excessive EQ and bass enhancement.
- Set the front and rear high-pass filters.
- Set the subwoofer low-pass filter.
- Bring the main speaker gains up gradually.
- Check for audible distortion.
- Add the subwoofer channel.
- Increase subwoofer gain until it blends naturally.
- Check phase and crossover integration.
- Only then make small tonal adjustments.
This gives you a stable reference point.
If you start with the subwoofer gain extremely high, you can easily end up tuning the rest of the system around excessive bass rather than building a balanced system.
Front and Rear Speakers Should Not Necessarily Be Equally Loud
The rear speakers are not usually the primary listening stage for the driver.
If you turn the rear channels up until they are as prominent as the front speakers, vocals and instruments can appear to move behind you.
For many systems, a better approach is to let the front speakers establish the soundstage while the rear speakers provide controlled fill.
That does not mean the rear channels should be almost silent. It means their level should support the front stage rather than compete with it.
This becomes especially noticeable when you use higher-output front components and relatively basic rear speakers.
Rock Music: Keep the Midrange Alive
Rock recordings often depend heavily on guitars, vocals, snare hits and kick drums.
For this type of music, I would avoid an exaggerated subwoofer setting.
A useful starting approach is:
- Keep the front-stage high-pass reasonably low if the speakers can handle it cleanly.
- Use a moderate subwoofer low-pass point.
- Keep bass boost close to flat.
- Let the front speakers carry the important guitar and vocal information.
- Add only enough subwoofer output to give the kick drum and bass guitar weight.
If the bass guitar sounds like it is coming from the rear of the vehicle, the subwoofer level or crossover may be too aggressive.
Hip-Hop: Let the Subwoofer Work, But Keep It Controlled
Hip-hop can contain deep bass that benefits considerably from a capable subwoofer and a strong fifth channel.
This is where the extra subwoofer power available from models such as the Rockford Fosgate, AudioControl and Stinger becomes useful, provided the subwoofer and final impedance are matched correctly.
For this type of music:
- Allow the subwoofer to play deeper material.
- Keep the low-pass transition smooth.
- Increase subwoofer level modestly.
- Use bass boost sparingly.
- Make sure the amplifier is not clipping on heavy bass passages.
A system that sounds impressive for one minute can become tiring if the subwoofer is simply overpowering the front stage.
EDM: Pay Attention to Speed and Control
EDM can expose poor tuning very quickly because it often contains sustained bass, kick drums and synthesized low-frequency information.
The goal is not just maximum bass.
You want the subwoofer to start and stop cleanly enough that the kick remains distinct instead of becoming one continuous low-frequency rumble.
If the system sounds slow or bloated, experiment with:
- Slightly lower subwoofer level.
- A more appropriate low-pass point.
- Less bass boost.
- Phase adjustment where available.
- Better time alignment if you are using a DSP.
The right setting will depend heavily on the subwoofer enclosure and vehicle cabin.
Do Not Create Extreme EQ Curves for Different Genres
It is tempting to create a completely different EQ curve for every type of music.
I would not.
A good audio system should sound reasonably balanced without requiring extreme equalization.
Instead, think in terms of small adjustments.
For example:
| Listening preference | Sensible adjustment |
|---|---|
| Rock | Keep bass controlled, preserve vocal and guitar presence |
| Hip-hop | Slightly stronger subwoofer level, maintain clean low-end extension |
| EDM | Strong but controlled subwoofer output, avoid excessive bass boost |
| Acoustic | Reduce unnecessary bass emphasis, prioritize vocal clarity |
| Classical | Keep the system relatively neutral and preserve dynamic range |
The vehicle itself has a much larger influence on the sound than many people realize. Door reflections, glass, seats and cabin shape can all create peaks and dips that no simple “rock EQ” or “hip-hop EQ” can completely solve.
Factory Head Unit Integration Requires a Different Approach
Keeping the factory radio is increasingly common, particularly when the vehicle’s original head unit controls climate functions, vehicle settings, cameras or other integrated features.
You do not necessarily need to replace it to install a five-channel amplifier.
Depending on the amplifier and vehicle, you may use:
- Built-in high-level inputs.
- A line-output converter.
- A dedicated factory-integration interface.
- A DSP with high-level inputs.
- An amplifier specifically designed to accept OEM signals.
The important point is to understand what signal the factory radio is actually providing.
Some modern factory systems use extensive signal processing, equalization and active speaker channels. Simply tapping a speaker wire does not always give you a flat, full-range signal.
Line-Output Converters Are Not All the Same
A basic line-output converter can convert a high-level speaker signal into a lower-level RCA signal suitable for an amplifier.
That can be perfectly adequate for a relatively simple factory system.
However, a more complicated OEM audio system may require something more sophisticated because the factory radio can apply:
- Equalization.
- Bass roll-off.
- Volume-dependent processing.
- Active crossover filtering.
- Factory-specific signal correction.
If you find yourself constantly fighting the factory signal, a DSP-based integration solution can be much more effective than simply adding a basic converter.
DSP-Enabled Head Units and External DSPs
If you are building a more advanced system, a DSP gives you substantially more control over the final result.
Depending on the equipment, you may gain:
- Parametric equalization.
- Individual channel level control.
- Time alignment.
- Multiple crossover options.
- Phase adjustment.
- Presets.
- OEM signal correction.
That can be particularly valuable in vehicles where the factory audio system has unusual signal processing.
But there is no reason to buy a complicated DSP simply because it sounds professional.
For a straightforward aftermarket head unit, four speakers and one subwoofer, a good five-channel amplifier with properly adjusted crossovers and gains can already produce an excellent result.
Remote Bass Control Is Best Used as a Fine Adjustment
An included remote bass controller can be one of the most useful features in a five-channel system.
It lets you make a small subwoofer-level adjustment from the driver’s seat without reaching for the amplifier.
Use it as a trim control, not as a substitute for setting the amplifier correctly.
For example, you might establish the normal system with the remote around its neutral position. If a particular recording has very little low-end energy, a modest increase can make it more enjoyable.
Then return it toward the normal position for other recordings.
Mobile App Control Can Be Useful, But It Is Not Essential
Some modern audio systems provide app-based control over settings such as:
- Gain or level adjustments.
- Equalization.
- Crossover settings.
- Presets.
- Source selection.
- DSP configuration.
This can be genuinely useful when the processor supports it properly, particularly for people who want multiple listening presets.
But app control should not become a reason to choose a weaker amplifier.
I would rank the priorities roughly like this:
Correct power → correct impedance → installation quality → crossover and tuning control → integration features → convenience features.
An app cannot compensate for an amplifier that is badly matched to the speakers.
Create Presets Around the System, Not Just the Music
If your equipment supports multiple DSP presets, you can make the presets meaningfully different without creating ridiculous EQ curves.
For example:
Daily: neutral front stage, moderate subwoofer level.
Bass: slightly higher subwoofer level with no unnecessary increase in main-speaker gain.
Long Drive: smoother treble and moderate bass for comfortable extended listening.
OEM: settings designed around the factory signal and its particular processing.
The exact names do not matter. The principle does: change a few meaningful variables rather than completely rebuilding the system every time.
Summer Heat Deserves More Attention in a Car
An amplifier installed in a vehicle experiences much harsher temperature conditions than an amplifier sitting in a climate-controlled room.
A parked vehicle can become extremely hot in direct sunlight, particularly in summer.
That makes amplifier ventilation important even if the amplifier normally runs reliably.
Try to:
- Keep ventilation openings unobstructed.
- Avoid completely sealed mounting locations.
- Keep the amplifier away from unnecessary heat sources.
- Avoid covering the chassis with carpet or insulation.
- Give the cooling system room to move heat away.
- Check that wiring is not pressing against hot components.
- Avoid mounting directly against surfaces that retain excessive heat.
Class D efficiency helps, but it does not eliminate heat.
What to Do If the Amplifier Gets Hot
Warm is not automatically a problem.
A powerful amplifier working hard will generate heat.
The concern is excessive temperature combined with performance problems, such as thermal protection, repeated shutdowns, obvious output changes or other abnormal behavior.
If that happens, investigate:
- Mounting location.
- Airflow.
- Speaker and subwoofer impedance.
- Power and ground wiring.
- Voltage under load.
- Gain settings.
- Whether the amplifier is being pushed continuously beyond the intended operating conditions.
Do not immediately assume the solution is another amplifier.
Long-Term Care Is Mostly About Installation Quality
A properly installed amplifier generally does not require constant attention.
The most useful maintenance is occasional inspection.
Check the installation periodically for:
- Loose power terminals.
- Loose ground connections.
- Damaged insulation.
- Corrosion.
- Water exposure.
- Blocked ventilation.
- Loose mounting hardware.
- Signs of excessive heat.
If the amplifier is installed in a cargo area, also make sure luggage or other equipment cannot press against the chassis or its wiring.
Real-World Rule: Tune for the Vehicle, Not the Specification Sheet
The specification sheet can tell you how much power the amplifier can produce, the loads it supports and what controls it offers.
It cannot tell you exactly how your vehicle will sound.
That comes from the interaction between the head unit, amplifier, speakers, subwoofer, enclosure, cabin acoustics, installation and tuning.
That is why I would rather see a properly installed 5-channel amplifier running moderate gains and sensible crossover settings than a much larger system with every bass and gain control turned up.
For a daily-driven vehicle, the best setup is usually the one you can listen to for an hour without the bass becoming tiring, the vocals disappearing behind the subwoofer, or the speakers sounding strained.
The amplifier provides the hardware. The tuning determines how well that hardware actually works together.
FAQs About 5-Channel Car Amplifiers
Is a 5-channel amplifier a good choice for a Toyota Tundra or other truck with four upgraded speakers and a subwoofer?
Yes, but the important question is how the amplifier’s RMS power and impedance ratings line up with the actual speakers and subwoofer, not whether the amplifier is simply labeled “5-channel.”
A Tundra, for example, can easily end up with four aftermarket door speakers plus a subwoofer, which makes the five-channel layout extremely convenient. You get four dedicated channels for the main speakers and a separate mono channel for the subwoofer without installing two amplifier chassis.
Where people get into trouble is choosing based on the headline wattage. An amplifier advertising 1,200W maximum output may have very different real-world capability from another amplifier rated around 1,000W. Look at the continuous RMS output at the exact impedance you will use.
For a serious truck build, I would also pay attention to mounting space and electrical demand. A compact amplifier can be easier to hide under a seat, but a compact chassis does not mean it can be installed without ventilation or proper power wiring.
Would a 5-channel amplifier work well in a Subaru Crosstrek if I want to keep the factory head unit?
It can, and this is actually one of the situations where a five-channel amplifier can make more sense than replacing the entire stereo system.
The catch is that modern factory audio systems are not always sending a simple, untouched full-range signal to the speakers. The factory head unit may apply equalization, crossover filtering, bass compensation or other processing before the signal reaches the original speakers.
That means there are two very different levels of OEM integration:
- Simple factory system: an amplifier with suitable high-level inputs may be enough.
- Heavily processed factory system: a proper line-output interface or DSP-based integration device may produce a much better result.
I would not replace a factory head unit just because you want more amplifier power. If the original radio controls important vehicle functions, keeping it and integrating the amplifier properly can actually be the cleaner solution.
The real question is what signal the factory system is providing, not whether the vehicle has an OEM radio.
Can a 5-channel amplifier run four 2-ohm speakers and a 1-ohm subwoofer at the same time?
Yes, if that particular amplifier is explicitly rated for those loads on the corresponding channels.
This is an important distinction because the four main channels and the subwoofer channel do not necessarily have identical impedance capabilities. A five-channel amplifier may be rated for 2-ohm operation on channels 1–4 and 1-ohm operation on channel 5, but you should never assume that from the channel count alone.
For example, an amplifier that produces 150W × 4 at 2 ohms and 700W × 1 at 1 ohm is designed around a very different electrical load from one that only supports a 2-ohm minimum subwoofer load.
Before wiring the system, verify:
- The nominal impedance of each speaker.
- The final impedance created by the subwoofer’s voice coils.
- The amplifier’s minimum rated impedance for each section.
- The RMS output available at that exact load.
- The power handling of the speakers and subwoofer.
If those five things line up, the configuration can work extremely well. If they do not, do not use the amplifier’s lower-impedance rating as an invitation to rewire the system simply to obtain more watts.
Why can a more powerful 5-channel amplifier sound worse than a lower-powered one in the same car?
Because more amplifier power does not automatically solve the problems that determine sound quality.
A higher-output amplifier can actually expose weaknesses elsewhere in the system. If the gain is incorrectly set, the signal clips. If the crossover is wrong, the door speakers may be trying to reproduce bass they cannot handle. If the subwoofer is out of phase with the front stage, increasing its power can simply make the cancellation more obvious.
There is also the issue of system balance. An amplifier capable of 150W per main channel is not automatically a better match for speakers designed around 50–75W RMS. It may be excellent hardware, but the installation still needs proper gain structure.
A genuinely good five-channel setup should pass a few basic tests:
- Vocals should remain anchored toward the front.
- The subwoofer should not sound like it is coming from a separate box.
- Increasing volume should not suddenly make the front stage harsh.
- Bass should remain controlled rather than becoming one-note.
- The amplifier should remain stable without repeatedly entering thermal protection.
That is why I would choose system compatibility over the biggest RMS number every time.
Is it better to use a 5-channel amplifier with built-in tuning controls or add a separate DSP?
For a normal four-speaker and one-subwoofer system, the amplifier’s built-in crossover and level controls can be completely sufficient. You do not need a separate DSP simply because you want good sound.
A separate DSP becomes worthwhile when you have a specific problem that basic amplifier controls cannot solve, such as:
- Significant factory-radio processing.
- Difficult cabin frequency response.
- An active front stage.
- The need for individual channel equalization.
- Precise time alignment.
- Multiple listening presets.
- More sophisticated phase and crossover control.
The difference is control depth. A typical five-channel amplifier may give you high-pass, low-pass, gain and bass adjustment. A dedicated DSP can let you independently manipulate individual channels, delay them to the listening position and correct specific frequency problems.
So I would not buy a DSP because it sounds “more professional.” Buy one when the system actually needs the additional control.
For many daily-driver systems, a properly installed five-channel amplifier with sensible crossover settings, accurate gains and a correctly matched subwoofer will outperform a more complicated setup that has never been properly tuned.
Final Verdict: What Actually Matters When Choosing a 5-Channel Amp
A 5-channel amplifier is one of those car-audio upgrades that looks easier to choose than it really is. On paper, the formula is simple: four channels for the speakers, one for the subwoofer. In a real vehicle, the better choice comes down to power at the correct impedance, integration with the head unit, physical installation, electrical demand, and how well the amplifier can be tuned around the rest of the system.
After looking at these six options as complete system components rather than simply comparing their biggest wattage numbers, there is no single amplifier that makes sense for every build. The Rockford Fosgate T1000X5ad stands out when compact dimensions and serious output need to coexist. The AudioControl EPICFIVE makes a strong case when you want substantial speaker power, a capable subwoofer channel and useful control. The Hertz ML Power 5 takes a more premium, balanced approach, while the Kenwood X802-5 is particularly sensible for a factory-radio-oriented upgrade. The Alpine R-A90S is the unusual option here because its six-channel architecture is really about flexibility rather than being a conventional five-channel design. The Stinger MT-1000.5, meanwhile, offers a compelling combination of compact size and high output when the installation and impedance match make sense.
The most important thing I would take away from this comparison is that the highest-rated amplifier is not automatically the best amplifier for your car. A 150W-per-channel amplifier can be unnecessary with modest speakers, while a lower-output model can be the smarter choice if it integrates better with the factory system and fits the available mounting space. Likewise, 700W at 1 ohm only matters if your subwoofer is actually designed to operate at that final impedance.
There is also no substitute for installation quality. Correct power and ground wiring, a battery-side fuse, adequate ventilation, proper speaker polarity, sensible crossover points and correctly set gains will have a much greater effect on the finished system than another few hundred watts on a product specification sheet.
If you are building a straightforward four-speaker plus subwoofer system, a good five-channel amplifier remains one of the cleanest ways to get substantial power from a single chassis. Just choose it from the bottom up: start with your speakers and subwoofer, determine their impedance and RMS requirements, check the vehicle’s electrical and mounting limitations, then choose the amplifier that fits those requirements.
That is the approach that avoids buying twice, avoids chasing meaningless maximum-power figures, and gives you a system that still sounds right after the excitement of the installation has worn off.
Also Check:


