
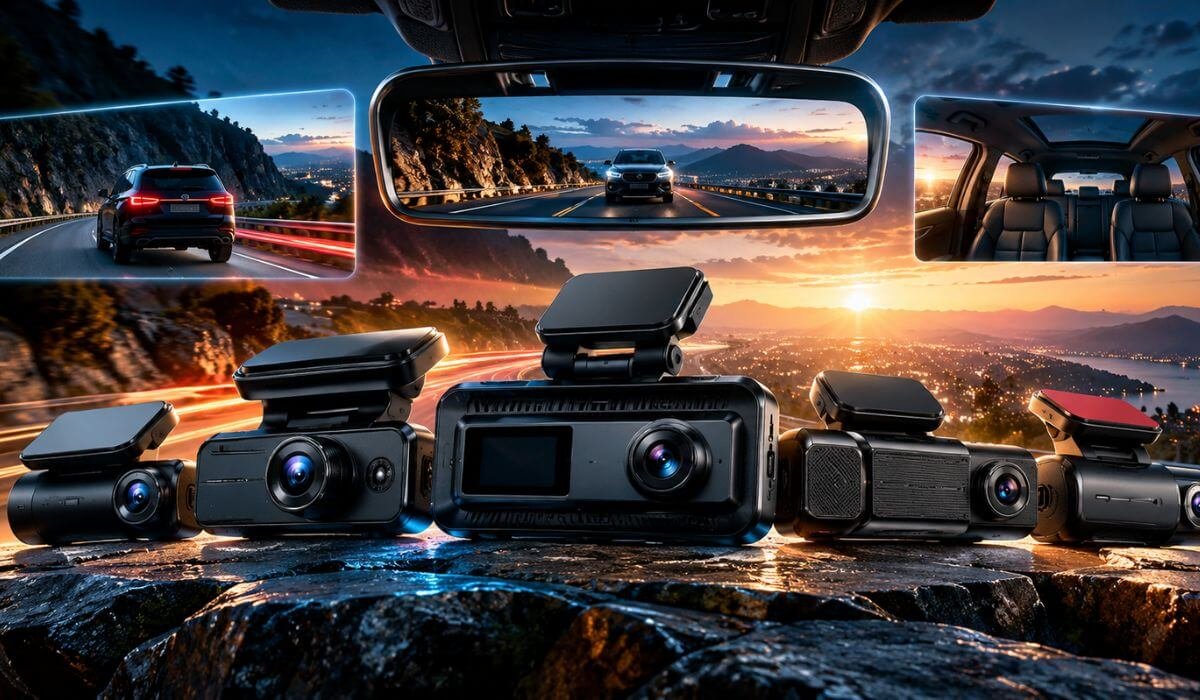
Best 3-Channel 4K Dash Cams in 2026: Telephoto Zoom, Triple STARVIS 2 & LTE
If you want one camera to keep an eye on the road ahead, what is happening behind you, and a third view that adds useful detail beyond a standard wide-angle recording, a 3-channel system makes far more sense than buying a front camera and adding pieces later. That is also why the term best 3 way dash cam is increasingly used for these triple-camera setups. But the important part is not simply having three lenses: 4K on the front camera does not automatically mean all three channels are equally useful. The VIOFO A329T takes a more evidence-focused approach, combining 4K front recording with a 2K rear camera and a dedicated 2K telephoto camera with 4× optical zoom for capturing distant road details.
For this guide, I focused on current 3-channel systems rather than simply picking the most advertised model. The five cameras below were selected around the details that actually matter after installation, including 4K front recording, rear and third-camera image quality, Sony STARVIS 2 sensors, Wi-Fi performance, connected features, parking coverage and storage capacity. More importantly, each system handles that third camera differently, so the comparison looks beyond resolution numbers to see how the cameras actually expand the coverage around your vehicle.
One more thing worth checking before you buy is your car’s interior, mounting space and the type of third view you actually need. A cabin camera serves a very different purpose from a telephoto lens, while an externally mounted camera can add another useful angle around the vehicle. The rear camera also needs a clean cable route through the vehicle, so I have kept camera placement, vehicle compatibility, installation and real-world recording needs in mind throughout this comparison.
Top 5 Best Three Way Dash Cams (2026): 4K Recording, STARVIS 2 & Smart Features
#1. VIOFO A329T 4K 3CH Dash Cam
Best 3 Way Dash Cam With 4K Front Recording, 2K Rear & 2K Telephoto Camera, 4x Optical Zoom, Triple STARVIS 2, HDR & Wi-Fi 6
#2. Vantrue N4 Pro S 4K 3 Channel Dash Cam
Best Three Channel Dash Cam With 4K Front, 2.5K Rear, 1080P Infrared Cabin Camera, Triple STARVIS 2, HDR, IP67 Rear & 5GHz Wi-Fi
#3. WOLFBOX G900 TriPro 3 Channel 4K Mirror Dash Cam
Best 3 Channel Dash Cam With 4K IMX678 Front, 2.5K Rear, 1080P Bumper Camera, 12-Inch Mirror Display, 5.8GHz Wi-Fi & GPS
#4. 70mai 4K T800 3 Channel Dash Cam
Best 3 Way Dash Cam With Dual 4K IMX678 Front & Rear Recording, 1080P Cabin Camera, Wi-Fi 6, 4G LTE Connectivity, GPS & 24H Parking Mode
#5. REDTIGER F17 Elite 4K 3 Channel Dash Cam
Best 3 Channel WiFi Dash Cam With 4K IMX678 Front, 2.5K IMX675 Rear, 1080P Full-Color Cabin Night Vision, Wi-Fi 6, GPS & Parking Mode
Expert Tip
Before choosing a 3-channel dash cam, look beyond the 4K label on the front camera. That number tells you only part of the story. If the rear camera produces a weak image at night or the cabin lens struggles with reflections, you can still end up with a system that looks impressive on paper but is less useful when you actually need the footage.
I would also check how the camera handles heat, storage and parking recording before worrying about small convenience features. A 3-channel system records considerably more video than a basic front dash cam, so a camera that gives you good image quality but poor storage management can become frustrating surprisingly quickly. The best choice is the one whose hardware makes sense for how you actually drive and where you park.
How We Choose These 3 Channel Dash Cams
We did not choose these cameras simply because they advertise 4K recording. There are plenty of 3-channel dash cams that can put “4K” on the box. The harder part is finding models where the rest of the system is good enough to make that resolution useful.
First, we looked at the camera system as a whole. A proper 3-channel setup needs to cover the front, rear and cabin without turning one of those views into an obvious weak point. That is why the five models here are not ranked by front-camera resolution alone. Sensor quality, HDR performance, rear-camera capability and interior recording all matter when the footage is actually needed.
Image sensors were a major part of the selection. Models using Sony STARVIS 2 sensors have an advantage in the situations where dash-cam footage is often hardest to capture clearly: darkness, headlights, shadows and rapidly changing light. The VIOFO A329T, Vantrue N4 Pro S, 70mai T800 and REDTIGER F17 Elite all bring particularly interesting sensor hardware to the comparison, while the WOLFBOX G900 stands out with its 8MP IMX678 front camera.
We also paid attention to what happens behind the vehicle, because rear footage is easy to overlook when shopping. The A329T is particularly unusual here because of its telephoto rear camera, giving it a different approach to capturing distant detail than a conventional wide-angle rear camera. Vantrue takes another route with its IP67 rear camera, which matters if the rear unit is exposed to the outside environment.
The cabin camera was another deciding factor. A 3-channel dash cam is supposed to give you something a normal front-and-rear system cannot: a dedicated view of the occupants and interior. That makes the position, field of view and low-light performance of the inside camera important, especially for rideshare drivers, family vehicles and anyone who wants a complete record of what happened inside the car.
Connectivity also had to earn its place. Wi-Fi, Wi-Fi 6 and 4G LTE are not interchangeable features. Wi-Fi is mainly about moving footage to your phone without removing the card. LTE can provide a much more connected setup when supported services and a suitable data plan are available. That is why the 70mai T800 gets attention for its 4G LTE connectivity, while the VIOFO A329T brings Wi-Fi 6 into the equation. We treated these as practical differences rather than simply counting them as extra features.
Storage capacity matters more on a 3-channel camera than many buyers realise. Recording three views simultaneously can consume considerably more space than a single front camera. We therefore considered models that offer substantial storage support, including the 512GB capability of the 70mai T800, while also considering how the camera’s overall recording setup makes use of that storage.
Parking recording was another area where we refused to treat a specification as proof of real-world performance. A camera advertised with 24-hour parking mode still needs the right installation, power supply and settings to make that feature useful. We included parking capability in the selection because a dash cam should not become useless the moment the engine is switched off.
Finally, we looked at what makes each camera genuinely different. The A329T brings a telephoto rear camera and Wi-Fi 6. The N4 Pro S uses a triple-STARVIS 2 approach. The WOLFBOX G900 combines an IMX678-based system with a mirror-style design. The 70mai T800 adds 4G LTE and high-capacity storage support, while the REDTIGER F17 Elite combines IMX678 and IMX675 sensors with GPS, 5GHz Wi-Fi and full-color night recording.
That is the reason these five made the list. They are not five copies of the same dash cam with different logos. Each one takes a slightly different approach to three-channel recording, and those differences are much more useful to a buyer than another generic list of Wi-Fi, GPS and “4K” badges.
#1. VIOFO A329T 4K 3CH Dash Cam
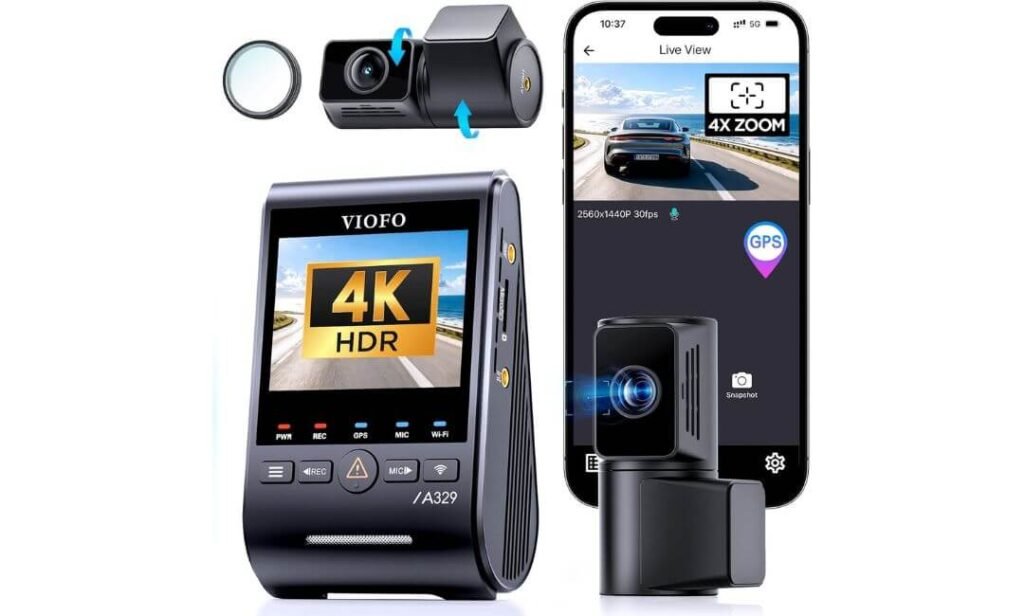
Quick Specs:
- Front Camera: 4K at 30fps with Sony STARVIS 2 IMX678
- Telephoto Camera: 2K with Sony STARVIS 2 IMX675 and 4x optical zoom
- Rear Camera: 2K with Sony STARVIS 2 IMX675
- Recording: 3-channel recording with HDR across all channels
- Night Performance: Triple STARVIS 2 sensors for improved low-light detail
- Connectivity: Wi-Fi 6 with up to 30MB/s transfer speed on 5GHz
- Storage: Up to 512GB microSD or 4TB external SSD
- Parking Protection: Ultra-low-power impact detection parking mode
- GPS: GPS, BeiDou, Galileo and GLONASS
- Other Useful Features: Voice control, CPL filter and slim 2.8mm coaxial cables
- Installation: HK6 hardwire kit required for parking mode and sold separately
A lot of 3-channel dash cams simply add an interior camera to a good front-and-rear setup. This one takes a more interesting route. The 2K telephoto camera sits between the front and rear views as a dedicated long-distance detail camera, with genuine 4x optical zoom rather than simply enlarging the image digitally. That matters when something happens farther ahead than your main camera can comfortably resolve — particularly a distant plate, road sign or vehicle that you want to examine later.
The front camera records 4K at 30fps through the IMX678 STARVIS 2 sensor, while both the telephoto and rear cameras use IMX675 STARVIS 2 sensors. That gives the three channels a much more consistent hardware foundation than a setup where the cabin or rear camera is treated as an afterthought. 3-channel HDR also helps when the scene contains bright headlights, deep shadows or strong sunlight, which is exactly where dash-cam footage can otherwise lose useful detail.
Then there is the practical side. Wi-Fi 6 can reach up to 30MB/s on the 5GHz band, so pulling an important clip onto your phone does not have to become a five-minute exercise. The system also supports up to 512GB microSD storage or a massive 4TB external SSD, which is particularly useful here because three cameras generate a lot of footage. For parking protection, the ultra-low-power mode can wake on impact, but the HK6 hardwire kit is required and is sold separately.
What Stands Out in Daily Use
- The 4x optical telephoto camera is the real reason to consider it. It gives you a dedicated way to examine distant details instead of relying entirely on the wide front view.
- STARVIS 2 is used across all three channels, rather than reserving the better sensor only for the front.
- Wi-Fi 6 makes large 4K clips considerably less annoying to retrieve.
- The 4TB SSD option is unusually generous for anyone who records frequently or takes long trips.
- The included CPL filter is a genuinely useful addition because windshield reflections can ruin otherwise good footage.
The One Compromise Worth Knowing
The setup is not cheap, and you should also budget for the hardwire kit if parking protection is important to you. That is less a flaw in the camera than something buyers should know before ordering; the premium hardware only makes sense if you are prepared for the installation properly.
How the 3 Channel Camera Setup Works Together
The interesting part here is that the three lenses are not simply doing the same job from different positions. The front 4K camera handles the main road view, the telephoto camera concentrates on distant detail, and the 2K rear camera watches traffic behind you. That division of work makes the system feel purpose-built rather than like a standard dual-channel camera with an interior lens added afterward.
For installation, expect to route two slim coaxial cables through the cabin, with the supplied rear cable measuring 6m and the telephoto cable 1m. The miniature 2.8mm connectors make a cleaner hidden installation easier, but the exact cable path will still depend on your vehicle’s headliner, trim and rear-camera position.
The Insider Pro-Tip
If you regularly drive on busy highways, multi-lane roads or unfamiliar routes, I would pay particular attention to the telephoto camera rather than getting distracted by the headline 4K number. Its real value appears when the important object is farther away than you would normally expect. Optical zoom gives you something fundamentally different from simply cropping a wide-angle recording later.
One other thing: if you live somewhere that gets genuinely hot inside the parked car, installation and heat management deserve attention. Keep the camera away from unnecessary direct heat exposure, use a suitable high-endurance memory card or SSD, and don’t treat the parking feature as a simple plug-and-forget function. With a system this capable, getting the installation right is part of getting the camera’s full value.
(The standout here is not another “4K” badge — it is the combination of telephoto optical zoom, three STARVIS 2 sensors and unusually serious storage support.)
#2. Vantrue N4 Pro S 4K 3 Channel Dash Cam
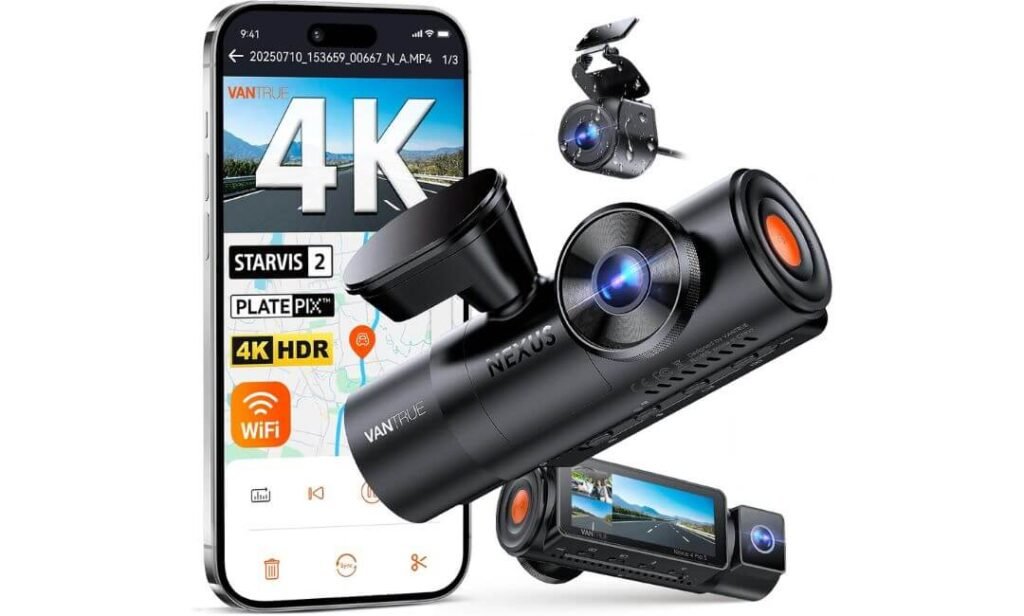
Quick Specs:
- Front Camera: 4K with Sony STARVIS 2 IMX678
- Cabin Camera: 1080P infrared
- Rear Camera: 2.5K with Sony STARVIS 2 IMX662
- Recording Modes: 4K + 1080P + 2.5K three-channel or 4K + 2.5K front/rear
- Image Technology: Triple STARVIS 2, adaptive HDR, PlatePix and Night Vision 4.0
- Rear Camera Protection: IP67 waterproof with supercapacitor
- Wi-Fi: 5GHz for wireless video transfers
- Parking Protection: 24/7 buffered motion and impact detection
- Storage: Supports up to 1TB
- Other Useful Features: Voice control, OTA firmware updates and 18-month warranty
- Installation: Hardwire kit required for 24/7 parking mode
This is the kind of 3-channel setup that makes sense when reliability matters as much as resolution. The front camera uses the Sony STARVIS 2 IMX678 for 4K recording, while the rear camera steps up to 2.5K with an IMX662 sensor and the cabin camera records in 1080P infrared. More importantly, Vantrue has put STARVIS 2 sensors across all three views, rather than making the front camera the only genuinely high-end part of the system.
The rear camera is where this setup becomes particularly interesting for larger vehicles. Its IP67 rating and supercapacitor design make it better suited to an externally mounted rear position where water, dust and temperature swings are unavoidable. Vantrue specifies an operating range from -4°F to 140°F, which gives the hardware considerably more breathing room for trucks, SUVs and RVs than a basic interior-mounted rear unit.
There is also a useful choice hidden inside the recording modes. If you do not need the cabin view on a particular trip, you can switch to 4K front + 2.5K rear recording, which the manufacturer says runs around 30% cooler and provides longer recording time. That is a genuinely practical option for long highway drives. For parked protection, buffered motion recording can capture 10 seconds before an event, but full 24/7 parking operation requires the appropriate hardwire kit.
What Stands Out When You Actually Use It
- Triple STARVIS 2 gives all three recording angles a stronger low-light foundation.
- The IP67 rear camera is a major advantage for vehicles where the rear unit sits outside the cabin.
- 4K + 2.5K front/rear mode lets you drop the cabin recording when you simply want road coverage.
- 5GHz Wi-Fi makes transferring clips to your phone much easier than removing the memory card every time.
- Buffered parking recording is more useful than a basic motion trigger because the camera can retain footage from before the event.
The One Thing I Would Keep in Mind
The rear camera’s weather protection is a genuine strength, but installation quality matters. Make sure the mounting surface is clean and dry, press the adhesive bracket firmly for around 30 seconds, and allow the adhesive to cure for 24 hours before hanging the camera on it. That small bit of patience can prevent an expensive camera from becoming a loose camera later.
Why This 3 Channel System Works Beyond the Front Camera
The three views have clearly different jobs. The 4K IMX678 front camera is responsible for the main road evidence and distant detail, the 1080P infrared cabin camera keeps the interior visible in low light, and the 2.5K IMX662 rear camera handles what is happening behind the vehicle.
That makes this particularly sensible for rideshare cars, trucks, SUVs and RVs, where the rear camera may face harsher conditions and the cabin view can actually have a purpose. The ability to switch to front/rear-only recording is another thoughtful touch: you are not forced to record the cabin simply because you bought a 3-channel system.
The Insider Pro-Tip
If your vehicle spends a lot of time outside, I would give the rear-camera construction more weight than another small jump in front-camera resolution. An IP67 rear unit with a supercapacitor is solving a real installation problem, especially on an SUV, pickup or RV where the rear camera may be exposed to rain and temperature changes.
And if you are doing long-distance driving, try the front + rear recording mode when you do not need the cabin. You still retain 4K front and 2.5K rear footage while reducing the workload on the camera. That is the sort of feature that sounds minor when reading a specification sheet but makes much more sense after several hours on the road.
(The real strength here is the combination of triple STARVIS 2, an IP67 rear camera and a useful front/rear-only recording mode rather than simply another 4K claim.)
#3. WOLFBOX G900 Tripro Bumper 3 Channel 4K Mirror Dash Cam
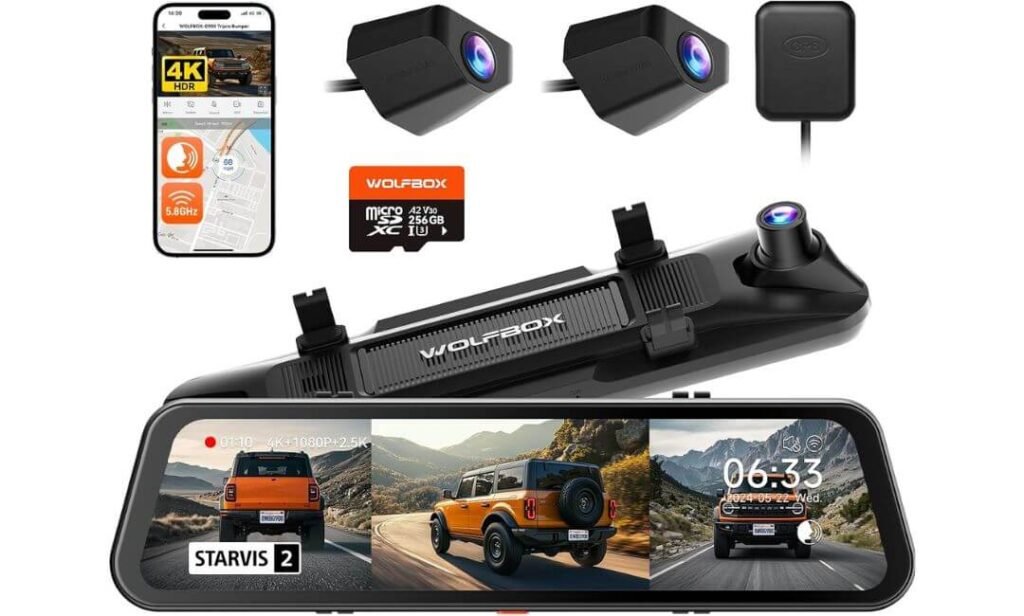
Quick Specs:
- Front Camera: 4K at 30fps with Sony STARVIS 2 IMX678
- Rear Camera: 2.5K at 30fps with a large 1/1.88-inch sensor
- Bumper Camera: 1080P dedicated forward-facing bumper view
- Display: 12-inch mirror-style screen
- Coverage: Front, rear and bumper/terrain views
- Connectivity: 5.8GHz Wi-Fi and voice control
- Storage: 256GB memory card included
- Parking Protection: Parking monitoring with optional hardwire kit
- Rear Camera: Waterproof design for exterior mounting
- Other Useful Features: Loop recording and smartphone app access
- Installation: Separate hardwire kit needed for parking monitoring
Most three-channel dash cams put the third camera inside the cabin. This one does something much more unusual: it puts that third viewpoint down at the front bumper. The result is a 4K front view, a 2.5K rear view and a 1080P low-mounted camera looking at the area directly around the front of the vehicle. If you drive a truck or SUV, particularly on rough roads, that is not just another camera angle — it can show parts of the road and terrain that a windshield-mounted camera naturally misses.
The main camera uses Sony’s STARVIS 2 IMX678 and records 4K at 30fps, while the 2.5K rear camera uses a relatively large 1/1.88-inch sensor with 2.9μm pixels. That rear hardware is worth noting because low-light performance is not determined by resolution alone. The bumper camera records at 1080P, so I would not buy this expecting it to provide the same level of detail as the front camera. Its value is the position of the view, not the number on the resolution line.
The other big difference is the mirror-style design. The 12-inch display gives you a much larger digital rear-view image than a conventional dash cam screen, while 5.8GHz Wi-Fi and voice control make everyday operation easier. A 256GB card comes pre-installed, so you can start recording without immediately shopping for storage. Parking monitoring is available too, but as with the other cameras in this list, a proper hardwire installation is required if you want the parked-vehicle function.
What Stands Out Behind the Wheel
- The bumper camera is the genuine differentiator — it gives trucks and SUVs a low front perspective that a normal 3-channel system cannot provide.
- The 4K IMX678 front camera gives the main road-facing view the resolution it deserves.
- The 2.5K rear camera uses a large sensor, giving it a better hardware foundation for difficult lighting than a basic rear unit.
- The 12-inch mirror display changes how the system feels in everyday use, particularly when using the digital rear view.
- A 256GB card is already included, which removes one of the usual first-day setup jobs.
The Trade-Off That Actually Matters
The third camera is not a cabin camera. That is either a major advantage or the wrong choice depending on what you need. If your priority is recording passengers, rideshare activity or the inside of the vehicle, this layout does not replace a traditional front/cabin/rear system. If you care more about terrain, bumper clearance and the road immediately ahead, the unusual placement becomes the reason to consider it.
What Makes This 3 Channel Layout Different
Think of the three cameras as covering three different distances. The 4K front camera records the normal driving scene, the 2.5K rear camera keeps traffic behind you in view, and the 1080P bumper camera looks much lower and closer to the vehicle. That makes the setup particularly interesting for pickup trucks, SUVs and off-road vehicles, where the front bumper can hide obstacles or changes in terrain from the driver’s normal line of sight.
The long cable arrangement also makes more sense once you consider where this camera is going. The rear and bumper cameras have to reach positions that are considerably farther from the mirror unit than a simple cabin camera would, so installation will involve more cable routing and careful placement. Waterproofing and cable protection at the bumper are worth taking seriously, especially if the vehicle regularly sees mud, rain or rough trails.
The Insider Pro-Tip
I would not buy this one simply because it says “3-channel 4K.” Buy it because you specifically want the third viewpoint at bumper level. That is the feature that changes what you can actually see. On a large SUV or pickup, it can give you useful context around the front of the vehicle that a conventional windshield camera simply cannot capture.
Also, give the bumper-camera installation more attention than you would give a normal rear camera. Keep the lens clear of mud, road spray and anything that can obstruct its low viewing angle, and route the cable so it is protected from movement and abrasion. When installed properly, this setup becomes much more than a mirror dash cam with an extra lens — it becomes a genuinely different way of recording the vehicle’s surroundings.
(The important distinction is simple: the third channel is aimed at the bumper and terrain, not the cabin. That makes this a specialist 3-channel setup rather than another copy of the usual front/interior/rear formula.)
#4. 70mai 4K T800 3 Channel Dash Cam
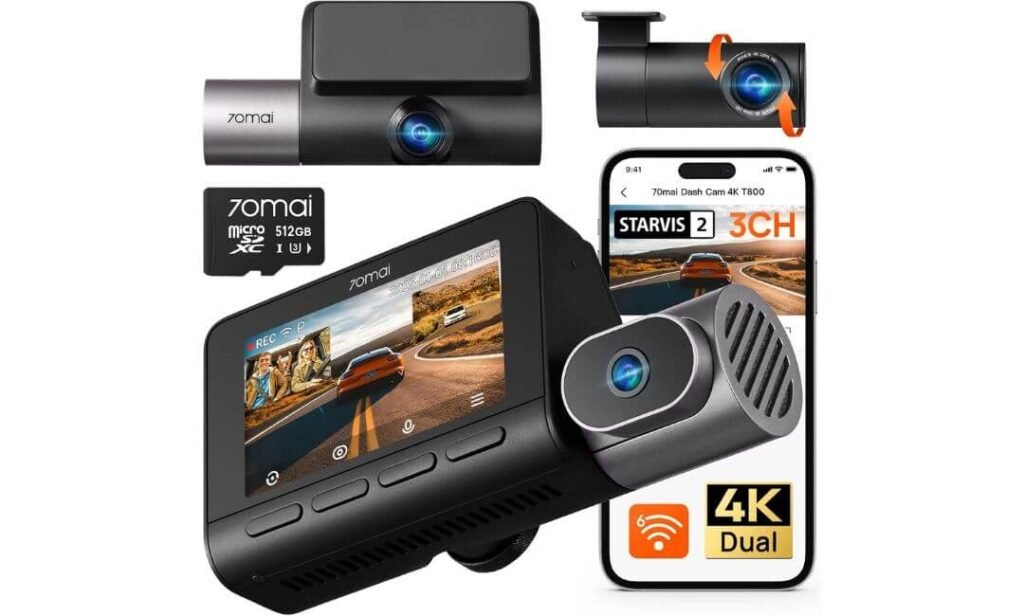
Quick Specs:
- Front Camera: 4K at up to 60fps with Sony STARVIS 2 IMX678
- Rear Camera: 4K with Sony STARVIS 2 IMX678
- Cabin Camera: 1080P with infrared night vision
- Recording: Dual 4K front/rear + 1080P interior
- Image Technology: 3-channel HDR, MaiColor Vivid+ and Night Owl Vision
- Connectivity: Wi-Fi 6 / 5GHz and optional 4G LTE
- Transfer Speed: Up to 40MB/s over Wi-Fi
- Parking Protection: 24/7 parking monitoring, AI detection and time-lapse recording
- Storage: 512GB card included
- Smart Features: GPS, ADAS, voice control and OTA updates
- Power: Supercapacitor, rated for 14°F to 140°F
- Installation: Hardwire or 4G hardware required for the full parking/connected setup
The big story here is not simply that this is another 4K three-channel camera. It puts 4K recording at both the front and rear, while keeping a separate 1080P infrared cabin camera running at the same time. That makes the T800 particularly interesting for drivers who want the rear recording to retain more detail instead of accepting the usual drop to 2.5K or 1080P.
Both the front and rear cameras use Sony IMX678 STARVIS 2 sensors, while the cabin camera uses infrared illumination for darker interiors. The three-channel HDR processing is designed to deal with the awkward lighting dash cams regularly face — bright headlights, tunnels, direct sunlight and deep shadows. The MaiColor Vivid+ processing is also aimed at preserving details such as plates and road signs rather than simply making the picture look more colourful.
The connected features are where this model starts to separate itself from a conventional dash cam. Wi-Fi 6 can reach up to 40MB/s, while optional 4G LTE connectivity can enable features such as remote alerts and live access. GPS records route and speed information, ADAS adds driver alerts, and OTA updates allow the firmware to be updated through the app. A 512GB card is included, which is a useful touch considering how quickly dual-4K recording can consume storage.
What Makes It Interesting in Everyday Driving
- Dual 4K front and rear recording is the biggest hardware advantage here.
- Both main road-facing cameras use Sony IMX678 STARVIS 2, rather than giving the rear camera a much weaker sensor.
- The IR cabin camera makes the third channel genuinely useful for rideshare and family vehicles, including when the interior is dark.
- Wi-Fi 6 and optional 4G LTE give you two very different ways to access footage and connected functions.
- The included 512GB card means you can start using the three-channel system without immediately buying additional storage.
The Important Ownership Detail
The T800’s feature list is impressive, but parking mode needs more planning than normal recording. The required hardwire or 4G accessories are sold separately, and anyone intending to leave the vehicle parked for long periods should pay attention to the vehicle’s power setup rather than assuming 24-hour monitoring is simply plug-and-play.
Why This 3 Channel Setup Is Different
Here the three cameras have a very straightforward division of responsibility. The 4K front camera records the main road, the 4K rear camera preserves substantially more detail behind the vehicle, and the 1080P IR cabin camera watches the occupants. That is a particularly logical arrangement for rideshare drivers, family vehicles and anyone who wants strong evidence from both directions rather than prioritising only the front view.
The dual-4K approach also makes this different from the VIOFO and Vantrue systems above. Those cameras use their third channel in more specialised ways, while this one puts its strongest hardware into the front and rear road views. If rear-camera detail is high on your buying list, that distinction is worth noticing before you compare headline specifications.
The Insider Pro-Tip
If you regularly need to read details behind the vehicle, pay attention to the T800’s dual-4K design rather than getting distracted by the extra ADAS and app features. A high-resolution rear recording can be far more useful after an incident than another convenience feature you may rarely touch.
I would also treat the 4G parking system as a separate installation decision, not an automatic reason to buy the camera. If you want remote alerts and extended parked monitoring, plan the power solution before installation and check exactly which 70mai accessories your configuration requires. The camera itself is feature-rich; getting the connected and parking hardware right is what determines whether those features are genuinely useful.
(Its defining advantage is the combination of dual 4K road coverage, an infrared cabin channel and optional 4G connectivity in one three-camera system.)
#5. REDTIGER F17 Elite 4K 3 Channel Dash Cam
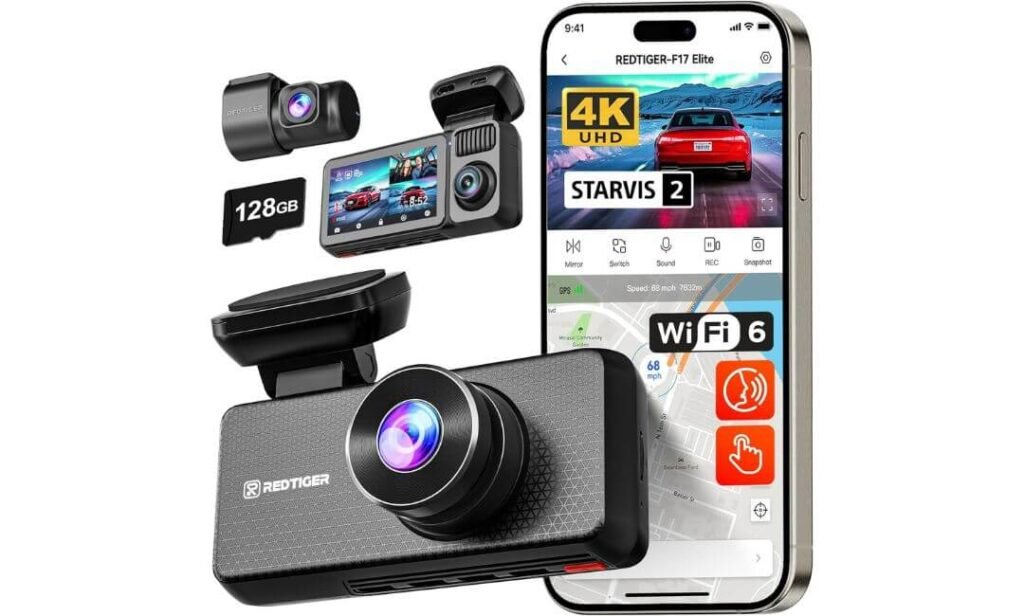
Quick Specs:
- Front Camera: 4K with 8MP Sony STARVIS 2 IMX678
- Rear Camera: 2.5K with 4MP Sony STARVIS 2 IMX675
- Cabin Camera: 1080P with full-color night recording
- Recording: 4K + 2.5K + 1080P three-channel setup
- Image Technology: STARVIS 2, HDR and full-color night vision
- Connectivity: 5.8GHz Wi-Fi 6 with up to 30MB/s downloads
- Parking Protection: Time-lapse and G-sensor event detection
- Storage: 128GB card included, expandable up to 512GB
- GPS: Location, speed and route recording
- Controls: Voice commands and touchscreen
- Power: Supercapacitor
- Installation: Hardwire kit required for 24/7 parking monitoring
What makes this one interesting is not a higher resolution number than the cameras above it. It is the way REDTIGER has approached night recording across the front and cabin views. The front camera uses an 8MP IMX678 STARVIS 2 sensor for 4K footage, while the rear gets a 4MP IMX675 sensor for 2.5K recording. The cabin camera stays at 1080P, but the system is designed to preserve color rather than relying solely on the typical black-and-white infrared look in darker conditions.
That combination makes sense for someone who wants more than a basic road recorder. The 4K front camera is there for plates and road details, the 2.5K rear camera provides a useful second road-facing view, and the interior camera gives you a separate record of what is happening inside. HDR helps when headlights and dark surroundings appear together, while the ability to toggle the cabin camera is a thoughtful touch if you do not want the interior recorded on every drive.
The practical feature set is solid too. 5.8GHz Wi-Fi 6 can reach around 30MB/s for transferring footage, GPS records location and speed information, and the included 128GB card means the camera is ready to use out of the box. You can expand storage to 512GB if three-channel recording starts filling the card too quickly. Parking recording is available through time-lapse and G-sensor modes, but continuous parked monitoring requires the appropriate hardwire installation.
What Makes It Worth a Look
- Full-color night recording gives the footage a more natural appearance than conventional monochrome cabin footage.
- The IMX678 front + IMX675 rear pairing gives both road-facing cameras capable STARVIS 2 hardware.
- The cabin camera can be switched off, which is useful when interior recording is not wanted.
- 5.8GHz Wi-Fi 6 makes moving large recordings to your phone much less tedious.
- The included 128GB card lets you start recording immediately, while 512GB expansion leaves room for longer three-channel recording.
The One Thing I Would Not Ignore
If the vehicle regularly sits in very high temperatures, I would be more careful with this model’s installation than I would with the headline specifications. A dash cam can produce excellent footage and still become frustrating if its mounting or electronics do not cope well with a hot parked cabin. Use a suitable high-endurance card, mount it securely, and pay attention to the manufacturer’s operating limits rather than assuming every vehicle environment is the same.
Where This 3 Channel System Fits Best
The three cameras have a sensible division of work: 4K front for the road ahead, 2.5K rear for traffic behind, and 1080P inside for the cabin. That makes it a straightforward choice for daily driving, family vehicles and rideshare use without introducing an unusual camera layout like the bumper-focused WOLFBOX.
The privacy control is also worth mentioning. You can turn the interior camera off when you do not need it, while still retaining the front and rear road views. For drivers who want three-channel coverage but do not want the cabin lens running on every trip, that flexibility is more useful than it might initially sound.
The Insider Pro-Tip
If your main reason for buying a 3-channel camera is nighttime evidence, don’t judge this one from the 4K label alone. Look at how the system handles the three different scenes: headlights and road signs in front, moving traffic behind, and people or activity inside the cabin. That is where the STARVIS 2 hardware and color-focused processing actually earn their place.
For installation, I would also spend a little extra time on mounting and cable routing rather than rushing the first setup. The rear camera has a long cable suitable for larger vehicles, but the cleanest result comes from routing it behind the trim and keeping connections away from areas that become excessively hot or wet. A well-installed 3-channel camera is far more useful than one that looks impressive on the specification sheet but is poorly mounted.
(Its real appeal is the combination of 4K IMX678 front recording, 2.5K STARVIS 2 rear coverage and full-color cabin recording, with enough control to decide when the interior camera should actually be active.)
Best 3 Channel 4K Dash Cams (2026) Compared for Front Rear and Cabin Coverage
| What Actually Matters |
VIOFO A329T
Telephoto-focused 3-channel setup
DISTANT DETAIL
|
Vantrue N4 Pro S
Road + cabin + weather-ready rear
ALL-WEATHER
|
WOLFBOX G900 Tripro
Mirror display + bumper perspective
BUMPER VIEW
|
70mai 4K T800
Dual-4K road coverage + connected features
DUAL 4K + LTE
|
REDTIGER F17 Elite
Color-focused night coverage
COLOR NIGHT
|
|---|---|---|---|---|---|
| Front recording |
4K @ 30fps Sony STARVIS 2 IMX678 |
4K Sony STARVIS 2 IMX678 |
4K @ 30fps Sony STARVIS 2 IMX678 |
4K Sony STARVIS 2 IMX678 |
4K 8MP Sony STARVIS 2 IMX678 |
| Third camera |
2K telephoto IMX675 + 4x optical zoom |
1080P cabin Infrared interior recording |
1080P bumper Low-mounted terrain view |
1080P cabin Infrared interior recording |
1080P cabin Full-color night recording |
| Rear recording |
2K Sony STARVIS 2 IMX675 |
2.5K Sony STARVIS 2 IMX662 |
2.5K 1/1.88″ sensor, 2.9μm pixels |
4K Sony STARVIS 2 IMX678 |
2.5K Sony STARVIS 2 IMX675 |
| What separates it |
4x optical telephoto Designed to pull distant road details closer without relying on digital enlargement. |
IP67 rear camera A more weather-conscious design for exposed rear mounting. |
Bumper perspective Adds a low front view instead of another cabin angle. |
Dual 4K road views Keeps the highest resolution on both major road-facing cameras. |
Color-focused night recording Gives the cabin and front views a more natural night image. |
| Low-light hardware |
Triple STARVIS 2 IMX678 front + IMX675 telephoto/rear |
Triple STARVIS 2 Adaptive HDR + Night Vision 4.0 |
STARVIS 2 front Large rear sensor with PureCel Plus technology |
Dual IMX678 STARVIS 2 + 3-channel HDR |
IMX678 + IMX675 STARVIS 2 + HDR + color-focused night processing |
| Storage approach |
512GB microSD Up to 4TB external SSD LONG-RECORDING EDGE |
Up to 1TB Useful for extended three-channel recording |
256GB included Ready to record without an immediate card purchase |
512GB included Particularly useful for dual-4K recording |
128GB included Expandable up to 512GB |
| Wireless access |
Wi-Fi 6 Up to 30MB/s on 5GHz |
5GHz Wi-Fi Fast phone transfers + OTA updates |
5.8GHz Wi-Fi App access and voice control |
Wi-Fi 6 + optional 4G LTE Up to 40MB/s; connected remote features with compatible hardware MOST CONNECTED |
5.8GHz Wi-Fi 6 Up to 30MB/s + app control |
| Parking protection | Ultra-low-power parking mode with impact detection HK6 hardwire kit required |
Buffered parking 10-second pre-event recording + impact detection Hardwire kit required |
Parking monitoring with G-sensor Hardwire kit required |
24/7 monitoring AI detection + time-lapse + optional 4G alerts Additional hardware required |
Time-lapse + G-sensor event detection Hardwire kit required |
| GPS & smart controls | GPS + voice control GPS, BeiDou, Galileo & GLONASS | Voice control + OTA updates GPS-equipped system | Voice control Mirror-style interface |
GPS + ADAS + voice control OTA updates and route/speed information |
GPS + voice + touchscreen Flexible cabin-camera controls |
| Installation reality | Slim 2.8mm coaxial cables Premium hidden-install potential; parking kit separate | Conventional front/rear/cabin routing Rear installation benefits from IP67 protection | More involved routing Bumper camera needs protected exterior cable placement | Standard multi-camera routing Connected parking setup requires additional planning | Long rear-camera cable Hardwire required for continuous parking protection |
| Best match for |
Drivers who care about distant detail Particularly useful when telephoto coverage has a real purpose. |
Rideshare, trucks, SUVs & RVs Especially where rear weather protection matters. |
Pickup & off-road vehicles Best suited to drivers who actually need the low bumper view. |
Connected daily drivers Strong fit when dual-4K road coverage and LTE features matter. |
Daily, family & rideshare driving A flexible front/rear/cabin combination with color-focused night recording. |
| The honest takeaway |
The unusual choice. You buy it for the telephoto capability, not merely because it says 4K. |
The weather-conscious choice. Triple STARVIS 2 and the IP67 rear unit make the layout particularly practical for larger vehicles. |
The specialist choice. The bumper camera is genuinely useful for the right vehicle and largely irrelevant for the wrong one. |
The feature-heavy choice. Dual 4K plus LTE gives it a different focus from conventional 3-channel systems. |
The night-focused choice. Its strongest argument is the color-oriented low-light recording rather than simply another 4K front camera. |
Why Choose a 3-Channel 4K Dash Cam Instead of a Dual-Channel Setup?
A dual-channel dash cam gives you the two views most drivers immediately think about: the road ahead and what is happening behind the vehicle. That is useful, but it leaves a blind spot inside the vehicle. A 3-channel system adds a third camera, and that extra viewpoint can become valuable when an incident involves something happening inside the cabin, alongside the vehicle, or at a distance ahead.
The important point is that adding a third camera does not automatically make a dash cam better. The third channel needs to provide useful coverage, and the cameras need to maintain enough image quality to make the footage useful later. That is why the five cameras in this guide are not identical in design. The VIOFO A329T, for example, uses its third channel as a telephoto camera, while the Vantrue, 70mai, and REDTIGER use an interior camera, and the WOLFBOX uses a bumper-facing camera.
Front, Rear and Interior Coverage Gives You a Much More Complete Record
With a conventional dual-channel setup, an incident in front of your vehicle can usually be documented from the front camera, while a rear-end collision or vehicle approaching from behind can be captured by the rear camera. The problem starts when the important part of the incident happens inside the vehicle.
A third interior camera can record the cabin, passengers, interactions with the driver, and events that a forward-facing camera simply cannot see. That becomes particularly relevant for rideshare drivers, family vehicles, and anyone who regularly carries passengers.
There is also a practical benefit during disputed incidents. Instead of trying to explain what happened from one forward-facing angle, you may have footage showing the road, the vehicle behind you, and what was happening inside the cabin at roughly the same time.
That is a much more complete record than simply adding another camera because it happens to be labelled “3-channel.”
4K Resolution Helps, But Resolution Alone Is Not the Whole Story
It is easy to look at a 4K specification and assume that the camera will automatically capture every important detail. Real-world evidence is more complicated.
A useful dash-cam recording depends on the sensor, lens, exposure, HDR performance, lighting, compression, camera placement, frame rate, and the distance of the subject. A good 4K front camera can preserve considerably more detail than a basic 1080P camera, but that advantage becomes less meaningful if the plate is heavily blurred by motion, the scene is badly exposed, or the subject is too far away.
That is why the difference between these five systems matters. The 70mai T800 places 4K resolution on both the front and rear road-facing cameras, while the VIOFO A329T uses a 4K front camera alongside a dedicated 2K telephoto camera. The Vantrue N4 Pro S combines a 4K front camera with a 2.5K rear camera and a 1080P infrared cabin camera.
So, when comparing 3-channel cameras, look beyond the largest resolution number printed on the product page.
A Third Camera Can Capture Details a Dual Dash Cam Simply Misses
The strongest reason to move from two channels to three is not necessarily higher resolution. It is additional evidence from another physical viewpoint.
Imagine a minor collision at an intersection. The front camera may show the traffic light and the road ahead, while the rear camera records the vehicle approaching from behind. If something happens inside the cabin immediately before or during the incident, an interior camera can provide another piece of the timeline.
The same principle applies to rideshare situations. A passenger dispute, an unexpected interaction, or an event occurring inside the vehicle may never appear clearly in footage from a front-and-rear-only system.
For family vehicles, the cabin camera can also document what happened inside the car during an incident. That does not mean the camera should be used to invade someone’s privacy; it simply means the additional viewpoint can be useful when interior events are directly relevant to understanding what happened.
Telephoto Coverage Is Different From an Interior Camera
This is where the VIOFO A329T takes a completely different approach.
Instead of pointing the third camera toward the cabin, the A329T uses a 2K Sony STARVIS 2 IMX675 telephoto camera with 4x optical zoom. That changes the purpose of the third channel entirely.
A telephoto camera is useful when something important is farther away than the main camera can comfortably resolve. On a highway, for example, a distant vehicle, road sign, or developing incident may occupy only a small part of the normal wide-angle frame. Optical zoom can give that distant subject a larger portion of the recorded image.
The distinction between optical zoom and digital cropping is important here. Digital cropping simply enlarges existing pixels from the original recording. Optical zoom changes the field of view before the image reaches the sensor, allowing the telephoto camera to devote more of its captured image to the distant subject.
That does not mean the telephoto camera will identify every distant license plate. Distance, lighting, motion, angle, plate visibility, and shutter speed still determine what can actually be captured. But it gives the system a capability that a standard cabin camera cannot provide.
License Plates, Faces and Distant Objects Need the Right Conditions
Higher resolution can help preserve identifying details, but a dash cam should never be treated as a guaranteed license-plate reader.
A vehicle travelling quickly can produce motion blur, particularly at night. Headlights can create glare, reflective license plates can overexpose, and an angled plate may contain much less usable information than a plate directly facing the camera.
The same applies to faces. A cabin camera positioned correctly can provide useful interior footage, but the result depends on where the person is sitting, available light, window reflections, and whether the face is actually within the camera’s field of view.
This is one reason HDR and low-light performance matter alongside 4K resolution. The STARVIS 2 sensors used by several cameras in this guide are designed to improve low-light performance, but they cannot overcome every difficult lighting condition.
Realistically, the goal should be to give yourself the best possible evidence from several angles, rather than expecting any dash cam to produce perfect identification under every circumstance.
Where a 3-Channel Setup Becomes Especially Useful
Insurance and Collision Disputes
After an accident, the most valuable footage is usually the footage that helps establish what happened immediately before, during, and after the event.
A front camera can show lane position, traffic signals, road conditions, and vehicles ahead. A rear camera can document following traffic and what happened behind the vehicle. An interior camera can add context about what was happening inside the cabin.
That combination can be particularly useful when the accounts of the people involved do not match. The footage itself still needs to be interpreted in context, and local insurers or authorities may have their own requirements, but having multiple synchronized viewpoints gives you substantially more information to work with than having no recording or only one camera angle.
Parking-Lot Incidents
Parking lots create a different problem because vehicles and people can approach from several directions, often at low speed and in tight spaces.
A conventional front/rear setup can document much of the surrounding activity, but it cannot necessarily see what is happening inside the vehicle or directly in front of a low bumper.
This is where the different third-camera designs become interesting. A cabin camera adds interior evidence, while the WOLFBOX G900’s dedicated bumper camera provides a low forward-facing perspective that can be more useful around curbs, obstacles, tight parking spaces, and certain off-road situations.
Parking protection also depends heavily on installation. A dash cam sitting in the vehicle does not automatically provide continuous surveillance after the ignition is switched off. Depending on the model, a hardwire kit or additional connected hardware may be required, and the vehicle’s battery condition and parking-mode settings also matter.
Rideshare and Passenger Vehicles
For drivers who regularly carry passengers, the interior channel has a much clearer purpose than it does for someone who normally drives alone.
The front camera documents the road, the rear camera records traffic behind the vehicle, and the cabin camera provides a record of relevant interior events. This three-way view can be useful when an incident involves both road conditions and something happening inside the vehicle.
Privacy should still be considered before enabling cabin recording. Local laws and regulations regarding recording conversations, passengers, or other people can differ by jurisdiction, so drivers should understand the rules that apply where they operate.
Teen Drivers and Family Vehicles
A 3-channel system can also provide parents with a more complete record of how a vehicle was being used.
The front camera can show road conditions and traffic, the rear camera covers following traffic, and the cabin camera can show what was happening inside the vehicle. This can provide useful context after a sudden braking event, collision, or other unusual incident.
The purpose should be documentation rather than assuming that every unusual movement represents dangerous driving. Dash-cam footage captures a limited field of view and does not explain everything happening around the vehicle.
Fleet and Commercial Applications
For a business operating several vehicles, a 3-channel camera can provide another layer of incident documentation.
A fleet vehicle may experience collisions, customer disputes, loading-area incidents, or events around the vehicle that are difficult to reconstruct afterward. Multiple camera angles can reduce the amount of information that has to be inferred from a single recording.
The choice of third channel matters here. A cabin-facing camera may make more sense for passenger transport, while a bumper or telephoto camera could be more useful for specialized vehicles. A connected system such as the 70mai T800 can also appeal to users who specifically need LTE-based features, although connected functionality and parking monitoring may require additional hardware and setup.
The Real Advantage Is Not “More Cameras” — It Is More Context
This is the part many comparison articles skip.
A third camera is valuable only when it covers something the first two cameras cannot. If the third channel simply duplicates an already-covered area without adding useful perspective, the extra recording may not justify the additional installation complexity, storage demand, and cost.
That is why these five cameras have noticeably different strengths:
- The VIOFO A329T adds a telephoto viewpoint for distant detail.
- The Vantrue N4 Pro S adds an infrared cabin view while maintaining a weather-protected rear camera.
- The WOLFBOX G900 Tripro adds a dedicated bumper perspective rather than an interior view.
- The 70mai T800 pushes road-facing resolution further with 4K front and 4K rear recording, plus an interior channel and optional LTE connectivity.
- The REDTIGER F17 Elite combines 4K front, 2.5K rear, and a cabin camera with a particular focus on color night recording.
So the real upgrade from dual-channel to 3-channel is not simply going from two cameras to three cameras. It is choosing a third viewpoint that solves a problem your existing setup cannot solve.
One Important Trade-Off: More Coverage Means More Data
There is a practical downside that is easy to overlook.
Three cameras generate considerably more footage than a basic front-and-rear system, particularly when one or two channels are recording at 2K or 4K. That means storage capacity becomes more important, and older or low-quality memory cards can become a weak point.
A high-endurance microSD card is worth considering for continuous dash-cam recording, especially if parking mode will be used regularly. The VIOFO A329T goes unusually far here by supporting up to 512GB microSD storage and an external SSD option up to 4TB, while the other cameras have their own storage limits.
There is also more installation to deal with. You have additional camera cables, another mounting position, more settings to configure, and potentially greater power consumption when parking mode is active.
That is the real trade-off: you get substantially more context, but you also need to install, power, store, and manage more footage.
When a Dual-Channel Dash Cam May Still Make More Sense
A 3-channel camera is not automatically necessary for every driver.
If your main goal is simply to document collisions on the road ahead and behind the vehicle, a good dual-channel system can provide the coverage you actually need without the additional interior camera, storage requirements, and installation work.
The upgrade makes more sense when the third viewpoint has a specific purpose — cabin protection, distant-road detail, bumper-level visibility, rideshare documentation, connected parking monitoring, or another coverage requirement that your front and rear cameras cannot address.
That is ultimately the question I would ask before buying: What will the third camera show me that the first two cannot?
If you have a clear answer, a 3-channel system can be a meaningful upgrade rather than just another specification to add to the shopping list.
3-Channel 4K Dash Cam Buying Guide for Real-World Use
A good 3-channel dash cam is not simply a front camera with two smaller cameras attached to it. Once you add three simultaneous recording angles, the way you evaluate the system changes. You are dealing with more footage, more storage, more cable routing, more heat, and more opportunities for one camera to perform very differently from another.
The biggest mistake is to compare these cameras by the 4K label alone. A 4K front camera with a poor rear sensor can still leave you with weak evidence behind the vehicle. Likewise, a 3-channel system with a 1080P cabin camera can be perfectly sensible if the interior view is mainly there to document people and events rather than distant road details.
For this guide, I would look at the following areas in this order: sensor quality, the actual purpose of the third camera, nighttime performance, parking functionality, storage, connectivity, installation, and long-term reliability.
Start With the Sensors, Not the Resolution Number
Resolution tells you how many pixels the camera records. The sensor and lens determine how effectively those pixels are used.
The Sony STARVIS 2 sensors appearing in several of these systems are important because they are designed for improved low-light performance compared with older sensor generations. The Sony IMX678 is particularly interesting for high-resolution road recording, which is why it appears in several of the stronger front-camera configurations here.
But there is an important distinction between having an IMX678 somewhere in the system and having IMX678 sensors across multiple road-facing cameras.
The 70mai T800, for example, uses IMX678 sensors for both its front and rear 4K cameras. That gives the two primary road views a similar high-resolution hardware foundation. The VIOFO A329T takes another route, pairing its IMX678 front camera with IMX675 sensors for the telephoto and rear cameras.
That does not make one arrangement automatically better. It tells you what each system has been designed to prioritize.
A sensible sensor check should include:
- Front sensor: Look for a high-quality sensor such as Sony IMX678 when strong 4K road detail is a priority.
- Rear sensor: Do not assume the rear camera is equally capable simply because the box says “4K 3-channel.”
- Cabin sensor: 1080P can be completely adequate for interior documentation, particularly when infrared illumination is available.
- HDR: Useful for scenes containing bright headlights, dark roads, sunlight, and shadows in the same frame.
- Lens and field of view: A very wide lens captures more surroundings, but distant objects occupy fewer pixels.
- Frame rate: Higher frame rates can help with fast-moving scenes, but they should not be considered a substitute for sensor quality and exposure control.
4K Front and 4K Rear Is Useful, But It Is Not Mandatory
A dual-4K configuration sounds impressive, and it can be genuinely useful when rear evidence matters just as much as front evidence.
The 70mai T800 is the clearest example in this group because it records 4K from the front and 4K from the rear, while its third camera handles the cabin at 1080P. That arrangement makes sense for someone who wants maximum resolution concentrated on the two major road-facing views.
However, there are situations where a 4K rear camera is not necessarily the deciding factor.
The VIOFO A329T’s 2K telephoto camera can potentially provide a more useful distant view than a conventional wide-angle 4K camera when the specific requirement is identifying something farther down the road. Similarly, the WOLFBOX G900’s 2.5K rear camera is paired with a separate bumper camera, giving the driver another physical viewpoint rather than simply increasing rear resolution.
This is why I would ask:
Do you need more pixels, or do you need a different viewpoint?
That single question can eliminate a lot of unnecessary comparison between specifications that are not actually solving the same problem.
STARVIS 2 Matters Most When the Light Gets Difficult
Daylight specifications are easy to compare because almost every modern camera can produce attractive footage in good conditions.
Night driving is where the differences become much more obvious.
A useful night recording system needs to deal with:
- Oncoming headlights.
- Reflective road signs.
- Streetlights.
- Deep shadows.
- Vehicles entering and leaving the frame quickly.
- Poorly illuminated side roads.
- Glare from wet roads.
- License plates reflecting headlights directly back into the lens.
STARVIS 2 sensors can help in these conditions, but they do not make a camera immune to difficult lighting. Exposure, HDR processing, lens quality, shutter behaviour, and camera placement still matter.
The cabin camera is a separate issue. Infrared illumination can be much more useful inside a dark vehicle than simply increasing the resolution. That is why an infrared 1080P interior camera can be perfectly practical for night cabin recording.
The REDTIGER F17 Elite approaches this differently, emphasizing full-color night recording for the interior rather than relying purely on conventional infrared footage.
Look for Night Vision That Matches the Camera’s Actual Job
Searches for a “3 channel dash cam with night vision” can be misleading because night vision can mean several different things.
For a front camera, you generally want natural road detail, controlled highlights, readable signs, and reduced glare.
For a cabin camera, the priority is different. You want to see people and activity inside a relatively dark cabin without producing an unusable image.
For a rear camera, low-light performance becomes particularly important because rear traffic can be poorly illuminated, and the camera may be mounted behind tinted glass or on an exterior surface depending on the design.
So rather than asking whether a camera has night vision, ask how each of its three channels handles darkness.
That is a much more useful buying question.
Parking Mode Needs More Attention Than Most Buyers Give It
A “3-channel dash cam with parking mode” can sound like a complete security system, but parking functionality depends on how the camera is powered and what type of recording mode it uses.
Many systems require a hardwire kit to continue recording after the ignition is switched off. Simply plugging the camera into a conventional accessory socket usually does not provide true 24-hour protection once the vehicle is parked and powered down.
There are also different approaches to parking recording:
- Impact detection: Records when the vehicle detects a physical impact.
- Motion detection: Starts recording when movement is detected.
- Buffered parking mode: Keeps a short period before and after an event, giving you more context.
- Time-lapse recording: Continuously captures activity at a reduced recording rate.
- Low-power parking mode: Designed to reduce battery consumption while still monitoring for events.
- Connected parking monitoring: Uses cellular connectivity for additional remote functions where supported.
The Vantrue N4 Pro S is notable for buffered parking recording, while the VIOFO A329T uses an ultra-low-power approach. The 70mai T800 adds more connected functionality when its compatible hardware is installed.
A Real 24-Hour Parking Setup Requires More Than the Camera
If parking protection is one of your main reasons for buying a 3-channel camera, budget for the installation rather than treating the hardwire kit as an afterthought.
A proper setup needs to account for:
- Constant power availability after the ignition is turned off.
- Low-voltage battery protection so the vehicle battery is not excessively discharged.
- Correct fuse selection for the vehicle.
- Suitable parking-mode settings for the type of monitoring you actually need.
- Storage capacity, because three cameras can fill a memory card surprisingly quickly.
- Heat exposure, particularly when the vehicle is parked in direct sunlight.
This is also why “24-hour parking mode” should not be interpreted as “the camera will record everything indefinitely.” The actual behaviour depends on the selected mode, power source, storage capacity, vehicle battery, and hardware configuration.
Storage Becomes a Serious Issue With Three Cameras
Three-channel recording produces a lot more data than a basic front-camera setup.
If you record 4K front footage, 2K or 4K rear footage, and a continuously active cabin channel, the storage card is doing substantially more work. Parking mode can increase the demand further.
That makes 512GB support a genuinely useful feature rather than just another specification.
The VIOFO A329T stands out because its storage architecture goes beyond a typical microSD setup, supporting up to 512GB microSD storage and an external SSD option up to 4TB. The 70mai T800 includes a 512GB card, while the Vantrue N4 Pro S supports up to 1TB.
For most drivers, I would rather have a reliable high-endurance 512GB setup than buy an enormous capacity card without checking whether the camera actually supports it.
Local Storage and Cloud Storage Are Not the Same Thing
This distinction is particularly important because “3 channel dash cam with cloud storage” is a popular search term.
A microSD card gives you local recording. The footage stays in the camera until you remove the card or transfer files through the app or another supported method.
Cloud-based functionality works differently. Footage or alerts may be transmitted through an internet-connected system, usually requiring compatible cellular hardware, a subscription, or both.
There are practical advantages to each:
Local storage
- No recurring cloud subscription for basic recording.
- Full-resolution footage remains directly on the memory card.
- Works without a cellular connection for ordinary recording.
- Usually simpler for everyday driving.
Connected or cloud workflows
- Can provide remote access or notifications when supported.
- Useful when the vehicle is parked away from home.
- Can make certain parking incidents easier to check remotely.
- Depends on cellular connectivity, compatible hardware, service availability, and potentially subscription costs.
The 70mai T800’s optional 4G LTE capability makes it more relevant to this connected category, but it should not be treated as though every recording automatically lives in the cloud. Connected features depend on the additional hardware and service configuration.
Choose the Storage Card for Continuous Recording, Not Just Capacity
Capacity is only one part of the storage decision.
A dash cam writes, overwrites, and rewrites footage continuously. That is harder on a memory card than occasional photography or video recording.
For a three-channel system, I would prioritize a high-endurance microSD card from a reputable manufacturer, then select a capacity that is comfortably supported by the camera.
A practical setup should also leave enough space for event footage rather than running the card permanently at its absolute limit.
And if you use parking mode regularly, check the manufacturer’s supported card specifications rather than assuming any inexpensive high-capacity card will work reliably.
5GHz Wi-Fi Is More Useful Than It Sounds
A 3-channel camera can generate large video files, so transferring footage wirelessly becomes more important than it is with a simple 1080P camera.
A system with 5GHz Wi-Fi can generally offer faster local transfers than older 2.4GHz-only systems, although actual speed depends on the phone, camera, environment, file size, and software.
The cameras in this guide take this further in different ways. The VIOFO A329T and REDTIGER F17 Elite use Wi-Fi 6, while the 70mai T800 combines Wi-Fi 6 with optional 4G LTE connectivity.
But do not confuse Wi-Fi with cellular connectivity.
Wi-Fi is primarily for connecting your phone to the camera when you are near the vehicle.
4G LTE is what can enable remote connectivity when the vehicle is somewhere else, provided the camera and service support that functionality.
That difference matters enormously if remote parking monitoring is part of your buying decision.
4G LTE Is About Connectivity, Not Better Video Quality
A cellular connection does not make the camera’s sensor better.
What it can do is change how you interact with the vehicle when you are away from it. Depending on the supported system and service, LTE can enable remote notifications, connected parking functions, or access to selected camera information.
This can be useful if your vehicle spends long periods parked outside your home, workplace, or another location where you cannot physically check it.
But connected features introduce another layer of ownership: compatible hardware, cellular service, data usage, account setup, and potentially subscription costs.
For someone who only wants to download a collision clip to their phone, paying extra for LTE may not provide much practical benefit.
Telephoto Zoom Is Worth Paying Attention to for a Different Reason
The VIOFO A329T’s telephoto channel deserves separate consideration because it solves a problem that conventional cabin cameras cannot.
Its 2K Sony IMX675 telephoto camera with 4x optical zoom is designed to concentrate on distant details.
That can be useful for:
- Distant vehicles on highways.
- Road signs.
- Traffic events developing farther ahead.
- Objects that occupy only a small part of a wide-angle recording.
- Additional detail during incident reconstruction.
The important word is optical.
A camera cannot magically make an object readable when it is too far away, moving too quickly, obscured, or poorly illuminated. Optical zoom simply gives the system a better way to frame distant subjects than digitally enlarging a normal wide-angle recording.
And if you specifically want cabin monitoring, telephoto is not a replacement for an interior camera. These are two completely different third-channel philosophies.
Interior Capture and Telephoto Capture Solve Different Problems
This is one of the most useful distinctions to make before buying.
An interior camera answers:
What was happening inside my vehicle?
A telephoto camera answers:
What was happening farther away from my vehicle?
A bumper camera answers:
What was happening close to the front of my vehicle?
None of these is universally superior. The right choice depends on what you want the third channel to document.
That is why the WOLFBOX G900 can make sense for a pickup or off-road vehicle where a low bumper perspective is valuable, while a rideshare driver may have a much more obvious reason to choose a cabin-facing third camera.
GPS Is More Than a Specification to Tick Off
GPS is useful because it can associate recorded footage with information about the vehicle’s movement.
Depending on the system, GPS data can include:
- Vehicle speed.
- Location.
- Route information.
- Time and position associated with recorded footage.
The VIOFO A329T goes further with support for multiple positioning systems, including GPS, BeiDou, Galileo, and GLONASS.
That information can provide useful context when reviewing footage later. It should not, however, be treated as a substitute for the video itself. GPS data can be affected by reception conditions, and speed or location information should be interpreted within the limitations of the system.
Heat Tolerance Matters More Than a Pretty Specification Sheet
Dash cams live in one of the harsher electronic environments inside a vehicle.
A parked cabin can become extremely hot, particularly under direct sunlight. A camera that operates perfectly during a short drive still has to survive repeated heat cycles if parking monitoring is used regularly.
This makes several design details worth checking:
- Operating temperature range.
- Supercapacitor versus battery-based power design.
- Quality of the mounting position.
- Memory-card endurance.
- Whether the camera is exposed directly to sunlight.
- Whether additional connected hardware creates extra heat.
The Vantrue N4 Pro S, for example, uses a supercapacitor and specifies a broad operating temperature range, while the 70mai T800 also uses a supercapacitor design.
These details are not exciting marketing features, but they matter more after the camera has been installed for months rather than during the first week of ownership.
Exterior Rear and Bumper Cameras Need Extra Installation Care
A rear camera mounted outside the cabin has different requirements from an interior camera sitting behind the windshield.
The Vantrue N4 Pro S uses an IP67-rated rear camera, which is relevant because the rear unit can face moisture and environmental exposure depending on how it is installed.
The WOLFBOX G900 goes another step by placing its third camera near the bumper. That creates a useful low-angle view, but it also means cable routing, connector protection, mounting security, and exposure to road debris need to be taken seriously.
Do not treat an exterior camera installation as simply sticking the camera onto the vehicle and hiding the cable.
The mounting location should be:
- Secure enough to avoid vibration.
- Positioned to maintain a useful field of view.
- Protected from unnecessary impacts.
- Routed so cables cannot rub against moving or hot components.
- Installed without creating a water-entry path where applicable.
Installation Is Part of the Camera, Whether Manufacturers Say It or Not
A technically excellent camera can produce disappointing footage if it is installed poorly.
For a typical front/rear/cabin configuration, the installation process should generally involve:
- Position the front camera first, keeping the lens clear of tinted areas, stickers, and excessive windshield distortion.
- Check the cabin camera angle, especially if it needs to cover both front occupants and the wider cabin.
- Mount the rear camera carefully, making sure the lens is not blocked by a defroster element or excessive tint.
- Route the rear cable along suitable trim, avoiding airbags and moving components.
- Connect the cameras and test all three views before hiding the cables completely.
- Check the final field of view from the driver’s position, rather than judging the camera angle while standing outside the vehicle.
- Configure date, time, GPS, resolution, loop recording, and parking settings.
- Test a complete recording cycle and confirm that all three channels are actually being saved.
For a hardwired parking setup, installation should be treated as an electrical job rather than simply another USB connection. If you are not comfortable identifying the correct fuse circuit or routing wiring around vehicle safety systems, professional installation is the sensible route.
Cable Management Can Affect Reliability
Three cameras naturally mean more wiring.
The temptation is to hide every cable as tightly as possible, but routing should never come at the expense of safety or serviceability.
Avoid placing cables where they can interfere with:
- Curtain airbags.
- Side airbags.
- Pedal assemblies.
- Steering components.
- Seat tracks.
- Hot engine-bay or exhaust components.
- Sharp metal edges.
A clean installation should look almost invisible from the driver’s seat, but it should also remain mechanically safe.
The slim coaxial cabling used by the A329T is particularly useful for a cleaner installation, although the exact routing still depends on the vehicle.
Privacy Is Part of Buying a Cabin Camera
A cabin-facing camera changes the privacy equation.
If you regularly carry passengers, employees, children, or other people, consider when the interior camera should record and whether local rules impose notice or consent requirements.
Some systems provide ways to control or disable the cabin channel. That can be useful when interior recording is not needed.
This is one reason I would not choose an interior camera solely because it gives you “three channels.” If you rarely need cabin footage, a telephoto or bumper-oriented third camera may actually be more relevant to your driving.
Which Features Should Carry the Most Weight?
When comparing several models, I would prioritize the features based on what they actually change in everyday use:
| Buying factor | Why it matters | What to look for |
|---|---|---|
| Front image quality | Most incidents begin or develop in front of the vehicle | 4K, quality sensor, HDR, strong low-light performance |
| Rear image quality | Important for rear impacts and following traffic | 2.5K or 4K, capable sensor, good night performance |
| Third-channel purpose | Determines whether the extra camera adds real value | Cabin, telephoto, or bumper coverage that matches your use |
| Sensor generation | Influences low-light detail and overall image quality | Sony STARVIS 2, especially IMX678 for high-resolution road views |
| Parking mode | Determines how useful the system is while parked | Buffered, impact, motion, time-lapse, or low-power recording |
| Storage | Three cameras consume storage quickly | 512GB support or greater where genuinely needed |
| Wi-Fi | Makes retrieving footage much easier | 5GHz or Wi-Fi 6 |
| LTE | Enables certain remote connected functions | Optional 4G hardware when remote access is actually needed |
| GPS | Adds location and speed context | Reliable GPS/positioning support |
| Temperature design | Important for long-term vehicle installation | Wide operating range and supercapacitor design |
| Installation | Poor routing can undermine an otherwise good system | Safe cable routing, suitable mounting, proper power integration |
The Best Specification Is the One You Will Actually Use
This is the final filter I would apply before buying.
If you drive long highway distances and regularly want more information about distant vehicles, the telephoto approach can be unusually useful.
If you carry passengers, a front/rear/cabin configuration is more logical.
If you drive a pickup, SUV, or off-road vehicle where close obstacles matter, a bumper-facing third camera can make more sense.
If you want maximum road-facing resolution and connected functionality, a dual-4K system with optional LTE gives you a different set of advantages.
And if nighttime footage is your biggest concern, look beyond the 4K label and examine the sensor combination, HDR, low-light processing, and actual third-camera night capability.
That is the real purpose of this buying guide. A 3-channel dash cam is not automatically better because it records three videos at once. It is better when those three views give you different, usable pieces of evidence, while the sensors, storage, power system, connectivity, and installation are good enough to make that coverage reliable when you actually need it.
3-Channel 4K Dash Cam Installation Guide for a Clean and Reliable Setup
Installing a 3-channel 4K dash cam is not difficult because the cameras are complicated. It becomes difficult because you are installing three recording viewpoints, multiple cables, a power connection, storage, and potentially a parking-mode circuit inside one vehicle.
A clean installation should do more than hide the wires. The cameras need to be positioned correctly, the cables need to stay clear of airbags and moving parts, the power connection needs to be appropriate for the vehicle, and all three channels should be tested before the trim is put back together.
The biggest mistake is rushing the installation because the front camera appears to work immediately. A dash cam can record a perfectly good front view while the rear camera is poorly positioned, the cabin lens is pointed too high, the memory card is unreliable, or parking mode is not actually receiving constant power.
Prepare Everything Before You Start
Before removing any trim or sticking the cameras to the vehicle, make sure you have the complete installation setup.
A typical three-channel installation may require:
- The main dash cam and its front mounting bracket.
- Rear camera and its mounting hardware.
- Interior camera, if the system uses a separate cabin unit.
- Correct rear-camera cable.
- Power cable for the main unit.
- A compatible hardwire kit if parking mode is required.
- A suitable microSD card with the manufacturer’s supported capacity and specification.
- Trim-removal tools for safely lifting interior panels.
- Cable clips or suitable cable-management materials.
- Fuse-tap hardware if you are hardwiring through the vehicle’s fuse box.
- Multimeter or circuit tester when identifying fuse circuits.
- Cleaning material for preparing mounting surfaces.
- A smartphone with the camera’s companion application installed.
Do not assume that a hardwire kit included with another dash cam will automatically work correctly with your new camera. Voltage thresholds, connectors, pin arrangements, and parking-mode communication can differ between manufacturers.
For cameras such as the VIOFO A329T, the hardwire kit is particularly relevant if you intend to use parking protection rather than simply recording while the ignition is on.
Choose the Mounting Positions Before Hiding Any Cables
Do a dry installation first.
Connect all three cameras, place them approximately where you expect them to sit, and turn the system on. Then look at the live views.
This takes only a few minutes and can prevent hours of unnecessary cable-routing work.
The front camera should generally sit high enough to provide a broad road view without obstructing the driver’s vision. The exact position depends on local regulations, windshield design, tint, mirror placement, and the camera’s field of view.
The rear camera needs even more attention because the rear window may contain:
- Defroster lines.
- Tinted glass.
- Factory privacy glass.
- Heating elements.
- Wiper sweep areas.
- A steep window angle.
- Reflective surfaces.
The interior camera should be positioned according to what you actually want it to record. If the objective is passenger or cabin coverage, pointing it too far toward the roof wastes much of the camera’s field of view. Pointing it too low can leave occupants’ faces outside the useful portion of the frame.
Mount the Front Camera Where the Lens Has a Clear View
The front camera is normally the most important viewpoint, so spend the most time getting this one right.
Before attaching it permanently, check the image from the driver’s position.
You want enough road in the frame to understand what happened, but you do not want the camera aimed excessively toward the sky. A useful starting point is to keep the horizon around the upper-middle portion of the image while maintaining sufficient road coverage below it.
Also check:
- The camera does not sit directly behind a tinted strip.
- The lens is not partially blocked by the rear-view mirror.
- The windshield area is clean.
- The camera does not interfere with advanced driver-assistance sensors.
- The mounting position does not obstruct the driver’s view.
- The lens can be cleaned without dismantling the camera.
A common installation mistake is positioning the camera based on how it looks from outside the vehicle rather than checking the actual recorded image.
Give the Rear Camera Its Own Positioning Check
Rear-camera installation is often treated as an afterthought, and that is where many otherwise clean installations lose useful coverage.
If the rear camera sits inside the vehicle, check how the image looks through the rear glass. Privacy tint can reduce light, while defroster lines can appear across the image.
Try to position the camera so that the lens has a clear view through the usable part of the glass.
If the camera is designed for exterior installation, follow the manufacturer’s mounting and sealing instructions carefully. The Vantrue N4 Pro S, for example, uses an IP67-rated rear camera, but waterproof construction does not mean the installation itself can be careless.
Make sure:
- The lens is clean.
- The camera is securely mounted.
- The cable connection is protected as required.
- The camera is not positioned where the rear wiper or vehicle body blocks important areas.
- The cable is not exposed to unnecessary rubbing, heat, or sharp edges.
Position the Cabin Camera for People, Not the Roof
A cabin camera needs a different angle from a road-facing camera.
If it is intended to document the interior, you generally want the useful portion of the cabin to remain inside the frame without making the image unnecessarily wide or ceiling-heavy.
Before finalizing the position, sit in the normal driving position and check:
- Driver’s face and upper body coverage.
- Front passenger coverage.
- Rear-seat visibility, if required.
- Whether the steering wheel blocks an important area.
- Whether the camera is affected by direct sunlight.
- Whether the camera angle creates excessive reflections at night.
Infrared cabin cameras can be particularly useful when the interior becomes dark, but the lens still needs to be positioned correctly. Infrared illumination cannot compensate for an incorrectly aimed camera.
Plan the Cable Routes Before Removing Trim
With three cameras, cable management becomes part of the installation rather than a cosmetic finishing step.
The cleanest route is usually through existing trim channels where appropriate, but do not route cables across or directly in front of airbags.
This is especially important around A-pillars and roof-mounted curtain airbags.
A good rule is:
The cable should be hidden without changing the intended deployment path of a safety system.
Do not force a cable behind an airbag simply because that is where the trim has space.
Instead, follow the vehicle’s existing wiring paths where practical and leave enough slack near connectors and camera mounts to prevent tension.
Keep Rear-Camera Cables Away From Heat and Moving Parts
The rear cable may travel from the windshield area, along the roof or side trim, toward the rear of the vehicle.
Avoid routing it near:
- Seatbelt mechanisms.
- Sliding seat tracks.
- Hinges.
- Pedal assemblies.
- Steering components.
- Sharp metal edges.
- High-temperature components.
- Areas where the cable can become pinched.
For SUVs, hatchbacks, and vehicles with a moving tailgate, take particular care around the hatch or liftgate hinge area. The cable needs enough controlled movement for the hatch to open without pulling on the connector.
The installation should remain secure when the vehicle experiences vibration, not just when it is sitting stationary in your driveway.
Decide Between a 12V Accessory Connection and Hardwiring
For normal driving, many dash cams can operate from a conventional 12V accessory connection or another manufacturer-approved power source.
This is the easiest approach because the camera generally receives power when the vehicle’s accessory circuit is active.
It is also the simplest option if you do not need parking mode.
Hardwiring becomes more relevant when you want the camera to continue monitoring after the ignition is switched off.
The basic difference is:
| Setup | Best suited for | Main consideration |
|---|---|---|
| 12V accessory power | Driving-only recording | Simple installation, usually no continuous parking power |
| Hardwire kit | Parking monitoring | Requires correct fuse, wiring, and battery protection |
| Hardwire + connected hardware | Advanced parking/remote features | More installation complexity and additional hardware |
The correct choice depends on the vehicle and the camera, not simply on which installation looks more professional.
Do Not Treat a Fuse Tap as a Universal Plug
A fuse tap can provide a relatively neat hardwire installation, but it still needs to be used correctly.
Before selecting a fuse circuit, identify whether it is:
- Constant power.
- Ignition-switched power.
- A circuit that changes state during vehicle sleep.
- Appropriate for the camera’s required current.
- Compatible with the vehicle’s electrical architecture.
Do not randomly choose a fuse because it happens to be accessible.
Modern vehicles can have sensitive electronic systems, and some circuits are not appropriate places to add accessories.
If the hardwire kit requires both an ignition-switched connection and a constant-power connection, identify both according to the manufacturer’s instructions.
Use the Correct Hardwire Kit for Parking Mode
Parking mode is one of the areas where using the correct accessory matters most.
A proper dash-cam hardwire kit generally needs to do more than supply electricity. It should provide appropriate battery protection and work with the camera’s parking-mode requirements.
The installation should account for:
- Constant battery power when required.
- Ignition-state detection.
- Low-voltage cutoff.
- Appropriate fuse protection.
- Correct connector type.
- The camera manufacturer’s parking-mode requirements.
For the A329T, for example, the HK6 hardwire kit is required for its parking functionality according to the setup described in this guide.
Do not assume that any USB power adapter or generic hardwire cable will provide equivalent behaviour.
Protect the Vehicle Battery From Excessive Discharge
A 3-channel dash cam can consume more power than a simple single-camera system because multiple cameras may continue recording or monitoring.
This matters particularly when a vehicle sits parked for long periods.
A hardwire installation with low-voltage protection can disconnect the camera when the vehicle battery reaches the selected threshold. However, the protection system does not eliminate every battery-related risk.
Battery age, outside temperature, vehicle electronics, parking duration, and the camera’s recording mode all affect how long the system can safely remain active.
If the vehicle already has a weak or aging battery, adding continuous parking recording may expose a problem that was already there.
Voltage Protection Is More Than Just a Marketing Feature
Vehicle electrical systems can experience voltage changes during starting, charging, and normal operation.
A dash cam should therefore be powered through the manufacturer’s recommended power hardware rather than being connected directly to a vehicle circuit in an improvised way.
If you are installing a hardwire kit yourself, use the correct fuse protection and follow the kit’s wiring instructions. If you are unsure about the vehicle’s fuse layout or electrical architecture, professional installation is safer than experimenting with multiple circuits.
This becomes particularly important in newer vehicles with extensive electronic control modules.
Do the First Power-On Test Before Final Installation
Do not completely hide the cables until the system has passed a basic test.
Power the camera on and verify:
- The front camera records correctly.
- The rear camera is recognized.
- The cabin or third camera is recording.
- The correct resolution is selected.
- The date and time are correct.
- GPS is functioning where applicable.
- Audio is configured as intended.
- The memory card is recognized.
- Loop recording is working.
- The camera is not showing a cable or mount inside an important part of the image.
Record a short test clip and play the file back on a phone or computer.
This is important because a camera display can look normal while the recorded file has an incorrect resolution, missing channel, wrong orientation, or storage problem.
Check the Actual 4K Recording, Not Just the Camera Menu
If you bought a 4K 3-channel dash cam, verify that the file being saved is actually the expected resolution.
Do not rely only on the product menu.
Record a short clip and inspect the file properties or playback information. Confirm that:
- The front channel is recording at the selected 4K setting.
- The rear channel is recording at its selected resolution.
- The third channel is active.
- The frame rate is correct.
- HDR or the selected image mode is enabled where intended.
- All channels are being saved together.
Some cameras offer different combinations of resolution when three channels are active, so always check the actual recording mode rather than assuming the highest advertised resolution applies simultaneously to every camera.
Test Night Vision Before You Finish the Installation
A daytime test is not enough.
After the basic installation is complete, perform another test when it is dark.
Check the front camera for:
- Headlight glare.
- Streetlight blooming.
- Reflections from the windshield.
- License-plate visibility.
- Road detail in unlit areas.
Then check the rear camera for:
- Tint-related darkness.
- Defroster-line interference.
- Headlight glare from following vehicles.
- Useful visibility behind the vehicle.
Finally, check the cabin camera in the actual conditions in which it will be used.
This is particularly important for systems offering infrared or color night recording because the result can look very different from daytime footage.
Test Parking Mode as a Separate Feature
Do not assume parking mode works simply because the icon appears in the application.
Once the hardwire installation is complete, test the vehicle through an actual ignition-off cycle.
Depending on the camera, verify:
- The camera recognizes that the vehicle has been parked.
- The correct parking mode activates.
- The camera continues receiving power after ignition-off.
- An appropriate motion or impact event triggers recording.
- The event file is saved correctly.
- Buffered footage includes the relevant period before and after an event when supported.
- The camera eventually enters its intended low-power state.
- The vehicle can still start normally afterward.
Do not repeatedly create hard impacts simply to test the G-sensor. A controlled movement test or manufacturer’s recommended test procedure is preferable.
Connect the App Only After the Camera Is Recording Correctly
Once the physical installation works, set up the companion application.
Start by connecting the phone to the camera’s supported Wi-Fi network.
Depending on the model, this may use:
- 2.4GHz Wi-Fi.
- 5GHz Wi-Fi.
- Wi-Fi 6.
- A dedicated camera hotspot.
The VIOFO A329T and REDTIGER F17 Elite use Wi-Fi 6, while other systems in this comparison use 5GHz connectivity or other high-speed wireless implementations.
The phone’s normal home Wi-Fi connection and the dash cam’s direct Wi-Fi connection are not necessarily the same thing. Follow the manufacturer’s pairing process rather than assuming the camera needs to join your home router.
Do Not Confuse Wi-Fi Pairing With Cloud Access
Connecting your phone to the camera over Wi-Fi normally means you are near the vehicle.
Cloud or LTE functionality is different.
If your model supports connected features, you may need to:
- Install the compatible cellular hardware.
- Activate the required service.
- Complete the manufacturer’s account setup.
- Confirm that the camera has cellular coverage.
- Enable the supported remote features.
- Check whether any subscription or data plan applies.
The 70mai T800’s optional 4G LTE functionality is an example where connected features go beyond ordinary local Wi-Fi access.
If you do not install or activate the required cellular hardware, you should not expect remote LTE functions simply because the camera specification mentions 4G.
Check the Memory Card Before You Trust the Camera
Insert the recommended microSD card and format it using the camera’s supported method where applicable.
Then record enough footage to make sure the card is behaving correctly.
For a three-channel system, I would not use a cheap generic memory card simply because it has a large capacity.
A better approach is:
- Use a reputable high-endurance card.
- Stay within the camera’s supported capacity.
- Format it according to the manufacturer’s instructions.
- Replace it when it begins showing recording errors or corruption.
- Periodically check important event clips rather than assuming every file is being saved correctly.
This is particularly important when parking mode is used frequently because the card may experience substantially more write activity.
Secure the Final Cable Installation Only After Testing
Once all cameras, recording modes, and power functions have been verified, then finish the cable routing.
Use the vehicle’s trim carefully and avoid forcing panels back into place over thick cable bundles.
After reinstalling the trim:
- Check that no cable is pinched.
- Check that airbags and seatbelts move normally.
- Check that doors and hatch mechanisms operate without pulling the wiring.
- Make sure no connector is under unnecessary tension.
- Confirm the cameras have not moved while the trim was reinstalled.
For an exterior rear or bumper camera, inspect the cable routing again after the first drive, because vibration can reveal problems that were not obvious while the vehicle was stationary.
Do a Final Three-Camera Walk-Around Test
Before considering the installation finished, record one final test drive.
Review the footage from all three channels and check the actual result rather than simply confirming that the camera powers on.
You want to see:
- A properly framed front road view.
- A useful rear view without excessive obstruction.
- A correctly aimed interior, telephoto, or bumper view.
- Clear nighttime footage when applicable.
- Correct GPS information.
- Stable recording without random file gaps.
- Correct date and time.
- Proper loop recording.
- Working parking mode if installed.
- Reliable Wi-Fi file transfer.
- LTE connectivity if that feature was purchased.
If even one channel looks wrong, fix it before assuming the installation is complete.
The Installation Details That Are Easy to Ignore
There are a few small decisions that make a noticeable difference over long-term ownership.
Clean the glass before mounting. Dust or residue underneath an adhesive mount can weaken the bond and make the camera vibrate.
Do not place the camera directly in the driver’s primary sightline. A technically perfect recording is not worth creating a visibility problem.
Keep lenses accessible. A camera that cannot be cleaned easily will eventually collect dust, fingerprints, or road film.
Check the mount after temperature changes. Adhesive mounts can behave differently after repeated hot and cold cycles.
Do not bury every connector permanently. Leave enough access that a camera or cable can be replaced without dismantling half the vehicle.
Check the memory card periodically. A dash cam is only useful if it is actually saving footage.
When Professional Installation Makes More Sense
A front-only accessory-cable installation is usually straightforward. A three-channel system with hardwired parking protection is a different job.
Professional installation is worth considering when:
- The vehicle has complex airbag locations.
- The fuse box is difficult to access.
- The vehicle uses a complicated electrical architecture.
- You want exterior rear-camera wiring.
- The camera has LTE hardware requiring additional installation.
- You are uncomfortable testing fuse circuits.
- The vehicle is still under a service or warranty arrangement where accessory installation needs to be handled carefully.
A professional installer should still be told exactly which parking functions you want. “Install the dash cam” is not the same requirement as “install it for continuous parking monitoring with battery protection.”
Final Installation Check Before You Leave It Alone
A properly installed 3-channel 4K dash cam should disappear into the background of your driving life. You should not have to adjust it every morning, reconnect cables, or wonder whether the rear camera is recording.
Before calling the installation finished, confirm all of these:
- Front: Correct angle, clean lens, expected 4K recording.
- Rear: Clear field of view, correct mounting, no major tint or defroster interference.
- Third channel: Correct purpose and angle, whether cabin, telephoto, or bumper.
- Power: Stable ignition-on operation.
- Hardwire: Correct fuse and low-voltage protection if parking mode is used.
- Storage: Supported high-endurance memory card installed and formatted.
- Night: All three cameras tested in actual low-light conditions.
- Parking: Trigger and recording behaviour verified.
- Wi-Fi: Phone can connect and retrieve footage.
- LTE: Remote features tested if applicable.
- GPS: Location and speed data checked.
- Cables: Secure, hidden where practical, and clear of airbags and moving parts.
The best installation is not the one where you cannot see a single cable. It is the one where all three cameras record the views you intended, the power system behaves correctly, the storage survives continuous recording, and the setup still works months later when you actually need the footage.
Real-World Uses of a 3-Channel 4K Dash Cam
A 3-channel dash cam becomes most useful when you stop looking at it as a gadget and start thinking about the situations in which you may actually need the footage. A collision, a disputed parking-lot incident, a passenger dispute, or an event involving a vehicle behind you can all require different pieces of information.
There is also an important distinction between having footage and having useful evidence. A recording can show that something happened without clearly showing why it happened, who was involved, or what occurred immediately before the event. Multiple camera angles help fill those gaps, but they do not make the footage automatically conclusive. The quality of the recording, camera position, lighting, date and time accuracy, storage integrity, and surrounding circumstances still matter.
When Dash-Cam Footage Can Help With an Insurance Claim
After a collision, one of the biggest advantages of a three-channel system is having more than one perspective of the same event.
The front camera may show the road layout, traffic signals, lane markings, vehicles ahead, and the moment of impact. The rear camera can provide context about following traffic, another vehicle approaching from behind, or what happened immediately after the collision.
If the third camera is aimed at the cabin, it can provide additional context about what was happening inside the vehicle. If it is a telephoto camera, as with the VIOFO A329T, it can instead provide another view of distant road activity.
That additional context can be useful when reviewing an incident for an insurer, attorney, police report, or your own records.
However, I would not describe any dash cam as automatically “insurance approved.” Insurance companies have their own claim procedures, and the usefulness of footage depends on the specific incident and jurisdiction.
The practical advantage is simpler: you have contemporaneous video rather than relying entirely on memory after a stressful event.
Distant License Plates Are Where Telephoto Can Become Genuinely Useful
The VIOFO A329T’s telephoto channel is particularly interesting for highway driving because it approaches evidence capture from a different direction.
A normal wide-angle camera has to cover a large area. As a result, a vehicle several car lengths or lanes away may occupy only a small portion of the image.
The A329T’s dedicated 2K telephoto camera uses the Sony STARVIS 2 IMX675 sensor and 4x optical zoom. That allows it to frame distant objects differently from the main wide-angle camera.
This can be useful when you are trying to preserve details from:
- A vehicle farther ahead.
- Traffic developing across several lanes.
- Road signs at a greater distance.
- A vehicle involved in an incident that does not immediately stop.
- Details that would otherwise occupy only a small section of the main camera’s frame.
But there is an important reality check: optical zoom does not guarantee a readable license plate.
Distance, vehicle speed, viewing angle, lighting, plate reflectivity, weather, and motion blur still determine whether the final recording contains usable identifying information. A telephoto camera gives you a better optical starting point; it does not overcome the limits of physics.
Why Multiple Angles Can Make Incident Reconstruction Easier
A single camera gives you a single timeline from one viewpoint.
Three cameras can give you overlapping information.
For example, consider a rear-end collision. The front camera may show that traffic ahead slowed suddenly. The rear camera may show the following vehicle approaching rapidly. A cabin camera can show whether the driver was facing forward and what was happening inside the vehicle at the time.
The recordings do not independently establish liability, but together they can provide more context for understanding the sequence of events.
This is one of the strongest practical arguments for a 3-channel setup. The value comes from the relationship between the recordings, not simply from having three separate video files.
Parking-Lot Incidents Are Another Strong Use Case
Parking lots are difficult for ordinary dash cams because incidents can happen close to the vehicle and from unexpected directions.
A vehicle can scrape your bumper while you are parked, a shopping cart can strike the side of the vehicle, or another driver can move through a tight space and leave before you return.
Parking mode can provide useful evidence in these situations, provided the camera has continuous power and is configured correctly.
The third camera can change what gets captured.
A cabin camera provides interior coverage, while the WOLFBOX G900’s bumper-facing camera provides a low forward perspective that can be particularly relevant to close obstacles, curbs, and bumper-level incidents.
That makes the third-channel design more important than the simple phrase “3-channel dash cam.”
Fleet Vehicles Have a Different Reason to Use Three Cameras
A private driver may install a dash cam primarily for accident documentation. A fleet operator may have several reasons for recording.
Depending on the vehicle and business, a three-camera system can provide information about:
- Road incidents.
- Vehicle damage.
- Driver actions around an incident.
- Passenger-related events.
- Loading or unloading areas.
- Parking incidents.
- Route and speed information.
- Events occurring inside a passenger vehicle.
For a passenger fleet, an interior camera may be useful because a front-facing camera cannot show everything happening inside the cabin.
For a commercial vehicle where the front bumper or immediate surroundings matter, a low-mounted camera can provide a different type of coverage.
The key is matching the camera layout to the actual fleet operation rather than assuming every vehicle needs the same three-camera configuration.
Wi-Fi Makes Reviewing Fleet Footage More Practical
A 3-channel Wi-Fi dash cam can make footage retrieval considerably easier than removing a memory card every time an incident needs to be checked.
A driver or fleet manager can potentially connect to the camera through the companion application, locate the relevant clip, and transfer it to a phone or another device.
Fast 5GHz Wi-Fi and Wi-Fi 6 can be particularly useful because three-channel cameras can produce large files, especially when 4K recording is active.
But Wi-Fi should not be confused with cloud storage.
Wi-Fi generally means the user is connecting locally to the camera. It does not automatically mean that footage is being uploaded to the internet.
Cloud Storage and LTE Are More Relevant for Remote Fleet Management
A search for a 3-channel dash cam with cloud storage often combines several different features under one phrase.
True remote functionality generally requires more than ordinary Wi-Fi.
A connected system may use 4G LTE to communicate with a remote service, potentially allowing supported features such as:
- Remote status information.
- Parking-related notifications.
- Selected remote access functions.
- Connected vehicle monitoring.
- Location-related services.
The 70mai T800 is relevant here because it supports optional 4G LTE hardware in addition to Wi-Fi 6.
That does not mean every T800 installation automatically provides cloud functionality. The required hardware, service, connectivity, and account configuration all matter.
For a fleet, this distinction becomes particularly important because a local Wi-Fi camera and a genuinely connected fleet-monitoring system serve different purposes.
What Fleet Operators Can Learn From Three Camera Angles
Video can provide more context around driving events, but it should not be treated as a perfect driver-behavior measurement system.
A fleet manager may be able to review footage showing:
- Sudden braking.
- Abrupt lane changes.
- Close following situations.
- Collision events.
- Distracted-looking behaviour.
- Passenger incidents.
- Parking-area events.
However, video has limitations. A camera cannot see everything around a vehicle, and an isolated clip may not explain why a driver made a particular manoeuvre.
For that reason, responsible fleet use should focus on specific safety or operational events rather than assuming every unusual movement is evidence of poor driving.
GPS and speed information can add useful context, but they also need to be interpreted alongside the actual footage and the limitations of the system.
Interior Monitoring Requires a Different Kind of Responsibility
An interior camera can be extremely useful, but it also changes the privacy considerations of the installation.
The moment you point a camera into the cabin, you may be recording passengers, employees, family members, children, conversations, or other people who did not install the camera themselves.
That means the decision to enable interior recording should be based on the actual purpose of the camera and the rules that apply where the vehicle is operated.
Consider:
- Whether passengers need to be informed.
- Whether audio recording creates additional legal considerations.
- Whether employees are being recorded during work.
- Whether the camera needs to remain active at all times.
- Whether the system allows the cabin camera to be disabled.
- Who is allowed to access stored footage.
- How long recordings should be retained.
Privacy requirements differ by jurisdiction, so a dash-cam manufacturer cannot determine the legal requirements for every driver or business.
A Cabin Camera Does Not Need to Record Everything
One practical approach is to treat the interior camera as an incident-recording tool, rather than assuming it needs to document every second of someone’s time inside the vehicle.
For a family vehicle, that might mean enabling it because the owner wants a complete record during a trip.
For a rideshare vehicle, the decision may be more complicated because passengers are third parties.
For a fleet, an organization may have internal policies covering when recording is appropriate, who can view it, and how footage is retained.
The technology gives you the ability to record. It does not automatically tell you when you should use that ability.
Testimonials Are Useful, But They Need Context
There is a lot of dash-cam discussion online, including claims about image quality, reliability, night performance, parking mode, and customer satisfaction.
Those experiences can be useful for identifying recurring ownership issues, but individual testimonials should not be treated as laboratory testing.
One driver’s “excellent night vision” may come from a well-lit city environment, while another driver’s experience may involve dark rural roads. A rear camera that performs well through clear glass may produce a different result through heavily tinted privacy glass.
The same applies to installation.
A person who says a three-channel camera was “easy to install” may have a vehicle with excellent trim access, while another vehicle can require significantly more cable routing work.
For that reason, I would use owner experiences as supporting evidence, not as a substitute for specifications, actual footage, and installation requirements.
What Real Owners Should Pay Attention to After Installation
Instead of looking only for comments such as “great camera” or “amazing quality,” the more useful ownership feedback usually concerns specific behaviour over time.
Look for recurring observations about:
- Memory-card reliability.
- Camera overheating.
- App stability.
- Wi-Fi transfer speed.
- Firmware updates.
- Rear-camera connection problems.
- Parking-mode reliability.
- Hardwire installation.
- Camera movement after temperature changes.
- Nighttime exposure.
- Customer support.
- Replacement or warranty experiences.
Those details tell you much more about long-term ownership than a simple star rating.
The Most Useful Three-Channel Setup Depends on the Vehicle
There is no single camera layout that makes sense for every driver.
A front/rear/cabin arrangement is particularly logical when passenger or interior events matter.
A front/rear/telephoto arrangement makes more sense when distant road detail is a priority.
A front/rear/bumper layout can be valuable for pickups, SUVs, and vehicles where the area immediately ahead of the bumper matters.
A front/rear/cabin system with LTE connectivity can be more relevant to someone who needs connected parking or remote vehicle-related functions.
That is why comparing three-channel cameras solely by the number of cameras misses the most important question: what does the third camera actually add to your vehicle?
What I Would Check Before Trusting Any Footage
Before relying on a dash cam for an insurance claim, fleet incident, or other important event, periodically verify that the system is actually recording as expected.
A simple check should include:
- Confirm all three channels are present.
- Open a recent recording rather than relying on the live preview.
- Check that the date and time are correct.
- Confirm the memory card is being recognized.
- Check that GPS information is being recorded when enabled.
- Test Wi-Fi transfer occasionally.
- If using LTE, confirm the connected features remain active.
- Review a nighttime clip periodically.
- Check that the camera mounts have not shifted.
- Replace a worn memory card rather than waiting for recording corruption.
This sounds excessive until you consider the alternative: discovering after an accident that the camera stopped recording weeks earlier.
The Real Value of a 3-Channel Camera Is Context
The strongest use case for three-channel recording is not simply “more video.”
It is more context around an event.
A front camera can establish what happened ahead. A rear camera can establish what happened behind. A cabin, telephoto, or bumper camera can add the third piece that the first two could never capture.
For insurance disputes, that can mean more information about the sequence of an incident. For highway driving, a telephoto camera can provide another way of capturing distant details. For fleets, connected systems can make selected footage easier to retrieve and manage. For passenger vehicles, an interior camera can document events that would otherwise leave no visual record.
But the same technology comes with responsibilities around privacy, secure footage handling, installation quality, and realistic expectations about what a camera can prove.
That is ultimately what makes a 3-channel 4K dash cam worthwhile: not the number of cameras printed on the box, but whether the three viewpoints give you meaningful information when something happens that you cannot afford to reconstruct from memory alone.
Maintenance and Updates That Keep a 3-Channel Dash Cam Reliable
A 3-channel dash cam is easy to forget once it has been installed and the cables are hidden. That is actually when maintenance becomes important. Unlike a normal camera, a dash cam can be writing video continuously for hours every time you drive, and a parking-mode setup can continue working after the ignition is switched off.
Three cameras also mean more points that can develop a problem: three lenses can collect dirt, multiple camera connections can loosen, the memory card receives more writing activity, and connected features depend on both the camera and the phone or cellular service.
The good news is that you do not need to constantly maintain it. A short inspection every few weeks, a proper memory-card check from time to time, and firmware updates when appropriate can prevent many of the problems that only become obvious when you actually need a recording.
Keep the Firmware Current, But Do Not Update Blindly
Firmware controls much more than the camera’s basic recording function.
Updates can address issues involving:
- Recording stability.
- Memory-card compatibility.
- Wi-Fi connections.
- Smartphone applications.
- Parking-mode behaviour.
- GPS functionality.
- Image processing.
- Connected LTE features.
- Camera compatibility between the main unit and additional cameras.
Some of the cameras in this guide support OTA firmware updates, which makes the process considerably easier.
However, I would not install every firmware update immediately simply because a new version appears. Before updating, check the manufacturer’s release notes and make sure the update is intended for your exact camera version.
A firmware update is also not the time to experiment with an unfamiliar memory card or an unstable power connection. Keep the vehicle stationary, maintain stable power, and follow the manufacturer’s update procedure.
Check the Camera After Every Major Firmware Update
After an update, do not assume all your previous settings have remained exactly the same.
Open the camera settings and verify:
- Front recording resolution.
- Rear recording resolution.
- Third-channel recording.
- HDR settings.
- Loop-recording duration.
- Audio setting.
- Date and time.
- Time zone.
- GPS.
- Parking mode.
- Wi-Fi settings.
- LTE or connected features, if fitted.
Then record a short clip and play it back.
This is particularly important with a three-channel system because a setting change can sometimes affect the available recording combinations. A camera may still appear to be functioning while one channel is operating in a different mode than you intended.
Clean All Three Lenses, Not Just the Front One
The front lens receives most of the attention because it is the camera you see every time you enter the vehicle.
The rear and cabin cameras can become dirty just as easily.
A small amount of dust, fingerprints, condensation, or road film can noticeably reduce contrast and create glare, especially at night.
A sensible cleaning routine is simple:
- Inspect the front lens every few weeks.
- Check the rear camera whenever you wash the vehicle.
- Clean the cabin lens if it is exposed to fingerprints or dust.
- Use a clean microfiber cloth suitable for optical surfaces.
- Avoid aggressive chemicals or abrasive materials.
- Never scrape dirt directly across the lens.
If the rear camera is mounted outside the vehicle, give it extra attention after rain, road salt, mud, or dusty driving.
Check the Mounting Position After Temperature Changes
Dash cams experience repeated temperature cycles.
A camera that was perfectly aligned when installed may gradually move if the mounting adhesive weakens or the bracket is disturbed.
This is particularly important for the front camera because even a small change in angle can alter how much road, sky, or surrounding traffic appears in the recording.
Every few weeks, quickly check:
- Is the front camera still pointing where it was originally aimed?
- Is the rear camera level?
- Is the cabin camera still covering the intended area?
- Has an exterior bumper camera shifted?
- Is any adhesive beginning to separate?
Do not wait until an incident occurs to discover that the camera has been pointing at the dashboard for the past month.
The Memory Card Is One of the Most Important Maintenance Items
The memory card is arguably one of the hardest-working components in a dash-cam system.
A normal camera might write files occasionally. A three-channel dash cam can continuously write several video streams, overwrite old footage, save event files, and potentially continue recording during parking mode.
That is why a high-endurance microSD card is much more appropriate than a generic card designed primarily for occasional photography.
Capacity matters, but endurance matters too.
A 512GB card can store a large amount of footage, but the number “512GB” does not tell you how long the card will physically last. Its useful life depends on:
- Total data written.
- Recording resolution.
- Number of active channels.
- Hours driven.
- Parking-mode usage.
- Temperature.
- Card quality.
- Controller and NAND flash characteristics.
- How aggressively the camera overwrites old footage.
How Long Can a 512GB Card Actually Last?
There is no honest universal answer such as “a 512GB card will last exactly two years.”
Two identical cards can have very different lifespans depending on how much footage they write.
A three-channel camera recording continuously will put substantially more write activity on the card than a front-only camera.
For example, a driver who records a couple of hours per day and rarely uses parking mode may put considerably less stress on a 512GB card than a vehicle that records for many hours every day and remains in parking monitoring overnight.
The right way to think about a 512GB card is storage capacity plus endurance, not capacity alone.
If the manufacturer recommends a particular endurance class or supported card range, follow that recommendation rather than choosing the largest inexpensive card available.
Do Not Wait for a Recording Failure Before Replacing the Card
Memory cards often give warning signs before they completely fail.
Watch for:
- Recording errors.
- Files that cannot be opened.
- Missing sections of footage.
- Camera restart loops.
- “Memory card error” messages.
- The camera repeatedly asking to format the card.
- Event files that disappear unexpectedly.
- Recording stopping without an obvious reason.
If these symptoms appear, do not keep using the card for important evidence simply because the camera still powers on.
First, back up any important footage if it can still be accessed, then replace or troubleshoot the card according to the manufacturer’s instructions.
Format the Card Periodically, Following the Manufacturer’s Guidance
Formatting can help keep the storage system organized, but it should not be treated as a cure for a failing memory card.
If the manufacturer recommends periodic in-camera formatting, follow that schedule.
Before formatting:
- Save any important clips.
- Transfer evidence you need to keep.
- Confirm the files have copied correctly.
- Format the card using the supported method.
- Record a new test clip.
- Confirm that all three channels are being saved.
Never format a card containing an important incident before you have securely backed up the footage.
Check the Recorded Files, Not Just the Live Preview
One of the best maintenance habits is also one of the simplest: periodically open an actual recorded file.
Check a front clip, rear clip, and third-channel clip.
This can reveal problems that are invisible from the camera’s display, such as:
- One channel not being recorded.
- Unexpected resolution changes.
- Audio being disabled.
- Incorrect date and time.
- Dropped frames.
- Corrupted files.
- Excessive vibration.
- Poor nighttime exposure.
Think of it as a quick health check for the entire recording chain.
Cloud and Connected Storage Need Their Own Checks
If your setup uses connected storage or remote services, do not assume that a successful app connection means everything is working correctly.
A cloud-connected workflow can depend on several separate components:
Camera → LTE hardware or network → cellular service → account/service → application → remote storage or notification system
A failure anywhere in that chain can affect remote access.
If your system supports cloud or connected features, periodically check whether:
- The camera is showing a cellular connection.
- The application can reach the vehicle.
- Remote notifications are arriving.
- Recent connected events are appearing.
- The account is still active.
- Any required subscription remains valid.
- The camera has not lost its network configuration.
This is especially important for a vehicle that is normally parked somewhere away from your home.
Wi-Fi Problems Are Usually Different From LTE Problems
A Wi-Fi connection is normally a short-range connection between your phone and the camera.
LTE is intended for communication over a cellular network.
So if the app cannot download a video while you are sitting beside the vehicle, the problem may involve the camera’s Wi-Fi, phone permissions, or application.
If remote LTE features stop working while local Wi-Fi still works, the problem could instead involve cellular coverage, the connected hardware, the service plan, or account configuration.
Keeping those two systems separate makes troubleshooting much easier.
Check LTE Connectivity Where the Vehicle Actually Parks
A cellular dash cam can work perfectly while driving and still have poor connectivity at the location where the vehicle spends most of its time.
Underground garages, enclosed parking structures, dense buildings, and locations with weak cellular coverage can all affect remote connectivity.
If remote parking alerts are important, test the system at the actual parking location, not only in an open driveway.
Also check whether the vehicle remains reachable after sitting untouched for several hours. Some systems use low-power behaviour that changes how connected features operate while parked.
Keep the Phone Application Updated Too
The camera is only one part of the software system.
The companion app can also receive updates that affect:
- Video downloads.
- Camera pairing.
- Firmware installation.
- LTE features.
- Account authentication.
- Device management.
If the camera suddenly stops connecting after a phone operating-system update or app update, check the manufacturer’s current compatibility information before assuming the camera itself has failed.
Inspect the Power Cable and Connectors
Three-channel systems have more wiring than conventional single-camera setups, so there are more connections worth checking.
Every few months, inspect the visible portions of the power cable and camera connections.
Look for:
- Loose connectors.
- Pinched wiring.
- Damaged insulation.
- Unusual heat marks.
- Cables rubbing against trim.
- Connectors being pulled under tension.
- Rear-camera wiring moving when the hatch opens.
- Exterior wiring exposed to unnecessary water or road debris.
Do not ignore an intermittent camera connection. A camera that occasionally loses its rear or cabin feed can become a much bigger problem later.
Prevent Cable Wear During Everyday Vehicle Use
Cable damage often comes from movement rather than age.
This is especially true for hatchbacks, SUVs, and vehicles with powered or manually operated tailgates.
If a rear-camera cable passes through a moving hatch area, check that the cable has enough controlled slack to accommodate normal movement without being stretched.
Likewise, make sure cables are not trapped underneath trim panels in a way that creates constant pressure.
A cable that works today can eventually develop an intermittent connection after thousands of vibration cycles.
Watch for Heat Around the Main Camera and Power Hardware
Dash cams spend their lives in an environment that can become extremely hot.
Do not cover the camera’s ventilation areas with accessories, stickers, or other objects unless the manufacturer specifically allows it.
Also avoid placing additional electronics directly against the camera where they can trap heat.
Supercapacitor-based designs can be advantageous for dash-cam applications because they are generally better suited to repeated temperature cycles than conventional lithium-ion batteries, but the entire system still operates within specified temperature limits.
The safest approach is to follow the manufacturer’s operating-temperature guidance rather than assuming that a camera can tolerate unlimited heat simply because it uses a supercapacitor.
Parking Mode Requires More Battery Awareness
If you use 24-hour parking monitoring, pay attention to the vehicle battery as well as the camera.
A properly configured low-voltage cutoff can help prevent excessive battery discharge, but it cannot compensate for a weak battery indefinitely.
If you notice:
- Slower engine cranking.
- Repeated parking-mode shutdowns.
- The camera switching off unusually early.
- Vehicle battery warnings.
- Unexplained electrical behaviour.
have the vehicle battery and charging system checked.
The goal of parking mode is to protect the vehicle while it is parked, not to keep the dash cam running at any cost.
Keep an Eye on the Hardwire Installation
A hardwire installation is usually hidden behind trim, so it is easy to forget about it.
Every so often, check for any symptoms suggesting a problem:
- Parking mode no longer activates.
- The camera repeatedly switches between driving and parking modes.
- The camera loses power unexpectedly.
- A fuse blows.
- The camera becomes unusually hot near the power connection.
- The vehicle behaves differently after the installation.
If something changes, do not repeatedly replace fuses or alter wiring without identifying the cause.
A hardwire kit is part of the vehicle’s electrical system, so persistent electrical problems deserve proper diagnosis.
Keep Important Footage in More Than One Place
A dash cam should not be your only copy of important evidence.
If an incident occurs, immediately copy the original footage to another secure location.
For particularly important footage, keep the original file intact and create a separate working copy if you need to edit or share it.
A useful workflow is:
Camera → original memory card footage → computer or phone backup → secure secondary backup
Do not rely on a cloud service, phone gallery, or memory card as the only permanent copy of an important incident.
Do Not Edit the Only Copy of an Incident
If you need to send a short clip to an insurer, police department, fleet manager, or another party, preserve the original recording first.
Create a copy for trimming or adding context.
This keeps the original file available if someone later needs the complete recording, adjacent clips, metadata, or additional camera angles.
With a three-channel system, also preserve the related files from the other cameras when they cover the same event.
The front clip alone may not contain the information that becomes important later.
A Simple Maintenance Schedule Works Better Than Constant Checking
You do not need to inspect the camera every day.
A practical schedule is:
Every few weeks
- Wipe the front lens.
- Check the camera angle.
- Confirm all three cameras are recording.
- Look for obvious cable movement.
Every few months
- Inspect the rear and cabin lenses.
- Review actual recorded clips.
- Check the memory card for errors.
- Verify parking mode.
- Check Wi-Fi transfers.
- Inspect visible cable connections.
After a major firmware update
- Review all important settings.
- Test all three channels.
- Test Wi-Fi.
- Test GPS.
- Check parking-mode behaviour.
After an incident
- Back up all relevant recordings immediately.
- Preserve the original files.
- Check related front, rear, cabin, telephoto, or bumper footage.
- Do not format the memory card until important files are safely backed up.
The Real Maintenance Rule
The easiest way to maintain a 3-channel dash cam is to occasionally ask one simple question:
“If something happened to my car tonight, would I trust this camera to give me the footage tomorrow morning?”
If the answer is yes because the lenses are clean, the memory card is healthy, all three channels have been tested, the power system is stable, and connected features are working, you are doing enough.
You do not need to constantly change settings or replace perfectly healthy equipment. But a 3-channel camera should never be treated as a set-it-and-forget-it device, especially when it is recording at 4K, running parking mode, or relying on LTE connectivity.
The hardware may be sophisticated, but the maintenance routine can stay simple: keep the lenses clean, keep the firmware appropriate, use reliable high-endurance storage, check the actual recordings, inspect the power and cables, and periodically verify that the features you paid for are still working.
FAQs About 3-Channel 4K Dash Cams
Is a 3-channel 4K dash cam actually better than a dual-channel camera for a BMW X7 or similar large SUV?
Not automatically. The better question is whether the third camera gives you information that the front and rear cameras cannot.
In a large SUV such as a BMW X7, cabin coverage can be genuinely useful because there is more interior space to cover, particularly when the vehicle regularly carries passengers. A front camera can document the road, a rear camera can document following traffic, but neither one can explain an event that happens inside the cabin.
There is another side to this, though. If you almost always drive alone and your main concern is highway incidents, a third interior camera may add less value than a telephoto or higher-quality rear camera. That is why I would not buy a camera simply because the specification says 3-channel 4K.
Before buying, ask yourself what the third channel is supposed to accomplish:
- Cabin camera: passenger and interior events.
- Telephoto camera: distant road details.
- Bumper camera: close-range forward or terrain visibility.
That distinction is much more useful than comparing “3-channel” against “2-channel” as if one number automatically settles the decision.
Does a 4K 3-channel dash cam really help capture license plates, especially at night or from a distance?
It can help, but this is where dash-cam marketing often gets ahead of reality.
A 4K recording gives the image more pixels to work with, and a good Sony STARVIS 2 sensor can improve low-light detail. But a license plate can still become unreadable because of motion blur, glare, distance, an angled viewing position, rain, or the reflective surface of the plate itself.
The VIOFO A329T takes a more interesting approach because its third camera is a 2K telephoto unit with 4x optical zoom. That can give distant subjects more useful image area than simply cropping a normal wide-angle recording.
But even optical zoom has limits. If a vehicle is too far away or moving quickly, the camera cannot manufacture detail that never reached the sensor.
For important evidence, I would rather have:
- A correctly exposed recording.
- A suitable shutter speed for the conditions.
- A high-quality sensor and lens.
- A useful field of view.
- Multiple camera angles.
That combination is more realistic than assuming a “4K” label means every plate will be readable.
Is the 70mai T800’s dual-4K setup more useful than the 4K front camera and telephoto approach of the VIOFO A329T?
They are designed around different priorities, so comparing them purely by resolution misses the interesting part.
The 70mai T800 puts 4K resolution on both major road-facing cameras, giving you a high-resolution front and rear view. If rear evidence is important to you, that is a meaningful advantage because the rear camera is not treated as a secondary-resolution camera.
The VIOFO A329T instead gives you a 4K IMX678 front camera, a 2K IMX675 telephoto camera with 4x optical zoom, and a 2K IMX675 rear camera. Its third viewpoint is therefore solving a different problem: distant detail rather than cabin coverage or simply another high-resolution road view.
In real driving, the choice comes down to the kind of information you expect to need.
If you regularly drive highways and care about distant vehicles and road details, the telephoto concept is genuinely different. If you want strong resolution both ahead and behind the vehicle, dual 4K road coverage is the more direct approach.
Neither specification should be treated as a universal winner. The important question is whether you need more resolution on an existing viewpoint or a genuinely different viewpoint.
Can I leave a 3-channel dash cam in 24-hour parking mode without worrying about my car battery?
I would not treat “24-hour parking mode” as permission to leave the camera running indefinitely without checking the vehicle’s electrical system.
Three cameras can consume more power than a basic front camera, and parking mode can continue monitoring long after the ignition is switched off. A properly installed hardwire kit with low-voltage protection can reduce the risk of excessive battery discharge, but it does not make the vehicle battery irrelevant.
Battery condition matters just as much as the dash cam.
A newer, healthy battery may tolerate parking monitoring differently from an older battery that is already near the end of its service life. Cold weather, very hot weather, long parking periods, and the selected parking mode can also change the equation.
For a proper 24-hour setup, I would verify:
- The correct hardwire kit is being used.
- Constant and switched power connections are correctly identified.
- Low-voltage cutoff is enabled where supported.
- The camera actually enters parking mode after ignition-off.
- The vehicle still starts normally after extended parking.
- The battery and charging system are healthy.
The uncomfortable truth is that a dash cam cannot compensate for a weak battery. If the vehicle battery is already struggling, continuous parking recording can expose the problem much sooner.
How much does a 512GB memory card really matter in a 3-channel 4K dash cam?
More than it does in a basic front-only camera, but capacity and endurance are two completely different things.
Three cameras can generate a large amount of footage, especially when the front and rear channels are recording at 4K. Add parking mode and the memory card can experience a very high number of write cycles.
That is why I would not choose a 512GB card simply because the number looks impressive.
A better setup is:
- Use a capacity explicitly supported by the camera.
- Choose a reputable high-endurance card.
- Format it using the camera’s recommended procedure.
- Periodically check actual recordings.
- Replace the card when errors or corruption begin appearing.
There is no honest answer to “How many years will my 512GB card last?” without knowing how much footage the vehicle records. A car driven for one hour a day is putting very different demands on its card than a commercial vehicle recording continuously with three channels and overnight parking monitoring.
512GB gives you more room. It does not guarantee a longer card lifespan.
Is cloud storage actually necessary for a 3-channel dash cam, or is local microSD recording enough?
For most ordinary drivers, local storage is still the foundation.
A high-capacity microSD card gives you the original recordings directly from the camera without requiring an internet connection or a recurring cloud service. If an accident happens, you can remove or copy the relevant footage and preserve it independently.
Cloud or connected storage becomes more interesting when you need remote access rather than simply recording.
For example, a fleet operator may want to check a vehicle without physically retrieving its memory card. A person parking an expensive vehicle away from home may value remote notifications. Those situations can justify connected hardware.
But there is an important distinction:
Wi-Fi does not automatically mean cloud storage.
Your phone can connect directly to the camera over Wi-Fi while you are standing next to the vehicle. That is completely different from a camera communicating with a remote service over 4G LTE.
The 70mai T800’s optional LTE functionality is therefore more relevant to connected use cases than simply having fast Wi-Fi.
If remote access is not something you will actually use, I would put the money into better storage, installation, or image quality before paying for connectivity you rarely need.
Final Verdict: Choose the Third View You Will Actually Need
A 3-channel 4K dash cam makes sense when the third camera has a job to do.
That sounds obvious, but it is probably the most important point in this entire guide. It is very easy to compare cameras by 4K resolution, STARVIS 2 sensors, Wi-Fi 6, 512GB storage, LTE, and long feature lists. Those specifications matter, but none of them tells you whether the camera is actually the right fit for your vehicle.
What matters is what happens outside the specification sheet.
If you drive a family SUV and regularly carry passengers, a front/rear/cabin system gives you a much more complete record of what happened inside and around the vehicle. If you spend long hours on highways, a telephoto camera such as the one used by the VIOFO A329T gives the third channel a completely different purpose, helping concentrate on distant road details rather than simply recording the cabin. If you drive a pickup or an off-road-oriented vehicle, the WOLFBOX G900’s bumper-facing camera can provide a viewpoint that a conventional interior camera simply cannot.
The same thinking applies to image quality. 4K is valuable, but 4K is not a magic word. A good sensor, proper exposure, HDR, lens quality, stable mounting, and nighttime performance all determine whether those pixels turn into useful footage. A 4K front camera with a poorly positioned rear camera is still an incomplete system.
Storage deserves the same honesty. Three channels create more footage, so a reliable high-endurance memory card and sensible capacity are more important than buying the biggest number you can find. The VIOFO A329T’s support for large microSD storage and external SSD recording is genuinely useful for heavy recording, while a camera with a smaller supported capacity may still be perfectly adequate for a driver who records fewer hours.
Then there is parking mode. A camera advertising 24-hour protection does not mean you can install it, forget about it, and assume your vehicle is permanently protected. The hardwire installation, battery condition, low-voltage protection, storage capacity, temperature, and selected parking mode all matter. The camera is only one part of the parking system.
Connectivity is similar. Wi-Fi 6 can make transferring large three-channel recordings much less frustrating, while LTE can add genuinely useful remote functionality. But if you never need remote access, paying extra for cellular features may not improve your everyday experience.
That is why I would look at these five cameras as different solutions rather than five versions of the same product:
- VIOFO A329T — built around high-quality road recording and a genuinely unusual telephoto third view.
- Vantrue N4 Pro S — a practical front/rear/cabin system with triple STARVIS 2 hardware and a weather-protected rear camera.
- WOLFBOX G900 Tripro — aimed at drivers who specifically benefit from a bumper-level perspective and mirror-style display.
- 70mai T800 — focused heavily on dual-4K road coverage, connected features, and optional LTE functionality.
- REDTIGER F17 Elite — combines high-resolution road recording with a cabin channel and an emphasis on nighttime color recording.
The right choice therefore comes down to one final question:
If something genuinely important happened tomorrow, which third camera would you wish you had recording?
That answer is more useful than another comparison chart, another “4K” badge, or another list of features.
Because the best 3-channel dash cam is not the one with the longest specification sheet. It is the one that gives you the right three viewpoints, records them reliably, survives the environment inside your vehicle, and still has usable footage when you actually need it.


