
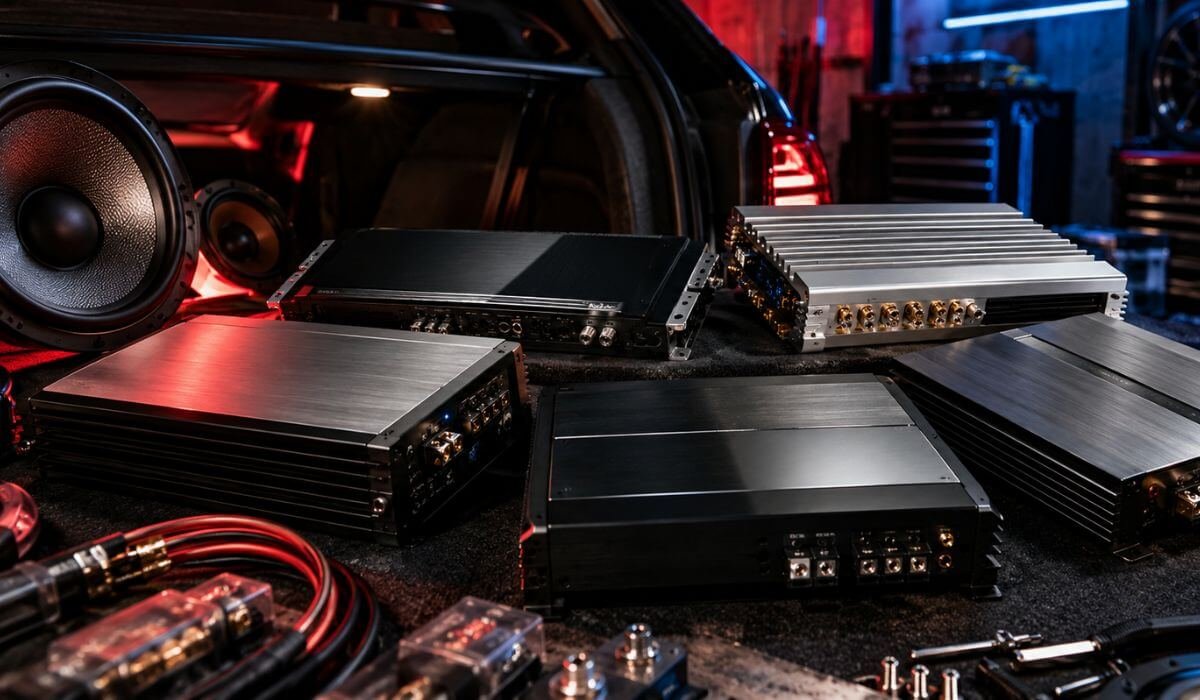
Best 4-Channel Amps in 2026: Car Audio Power With Smarter Sound Control
If you are upgrading the sound system in a newer SUV, an older pickup, or a daily-driven car, the right four-channel amplifier is not simply the one with the biggest wattage printed on the chassis. Your speakers’ RMS rating and impedance, the factory radio’s signal, available installation space, and the vehicle’s electrical system all have to make sense together before you connect anything.
That is why I looked beyond headline power when selecting these best 4-channel amps in 2026. The lineup covers very different approaches, from the DSP-equipped AudioControl D-4.800, with 125 watts RMS x 4 at 4 ohms and 200 watts x 4 at 2 ohms, to the high-output Rockford Fosgate T1000-4AD, which delivers 250 watts x 4 across 1–4 ohms. The AudioControl also stands apart for factory-system integration, with six speaker-level inputs and extensive DSP control for shaping the signal before it reaches the speakers.
Before buying, check the actual speaker load, amplifier dimensions, wiring requirements and signal source instead of assuming a four-channel amp will simply drop into any vehicle. Some models are compact and integration-focused, while others are built to deliver serious current and require a stronger electrical setup; the T1000-4AD, for example, uses a 150A external fuse and calls for substantial power wiring. The real goal is simple: give your speakers the right kind of clean power, with the control and electrical support the complete system actually needs.
Best 4-Channel Car Amplifiers Of 2026: Top Picks for Clean Power and Flexible Setup
#1. AudioControl D-4.800 DSP Car Audio Amplifier
Best 4-Channel Car Amplifier for DSP Tuning, Factory Stereo Integration, Speaker-Level Inputs and Precise Sound Control
#2. Rockford Fosgate Power T1000-4AD 4-Channel Amplifier
Best 4-Channel Amp for High-Output Car Speakers, 1Ω Stability, Constant Power and Serious Full-Range Performance
#3. Sundown Audio SAEv4-150.4 Class AB 4-Channel Amplifier
Best 4-Channel Car Amplifier for High-Power Speakers, 2Ω Operation, Strong RMS Output and Adjustable Filtering
#4. Skar Audio RP-150.4AB 4-Channel Car Amplifier
Best 4-Channel Amp for Speaker Upgrades, Class AB Power, 2Ω Stability and Bridgeable Car Audio Systems
#5. Hertz DP 4.400 AB-Class 4-Channel Amplifier
Best 4-Channel Amplifier for Balanced Car Audio, Compact Installation, High-Resolution Sound and Flexible System Integration
Must Check: Best 5-Channel Amp
Expert Tip
Here is the part I would not skip before buying any four-channel amp: match the amplifier to the speakers you already have or plan to install, not the other way around. A 250-watt-per-channel amplifier can be a fantastic upgrade with speakers that can actually handle that power, but it is the wrong choice for a modest factory speaker system simply because the number looks impressive.
For older cars and trucks, I would pay particular attention to speaker impedance, RMS power and signal input options before worrying about peak wattage. For newer vehicles with complicated factory stereos, DSP capability can be worth more than another 50 or 100 watts because it gives you control over the signal you are actually sending to the speakers. That is exactly why the AudioControl stands apart here, while the Rockford Fosgate makes more sense when raw output and low-impedance flexibility are the priority.
How We Choose the Best 4-Channel Amps
I did not rank these amplifiers by their advertised wattage or by how impressive the product page looks. A four-channel amplifier has to make sense as part of an entire car audio system, and that means looking at what happens before the signal reaches the amp, what the amp can deliver to the speakers, and how practical it is to tune and install.
1. We start with real RMS power, not peak numbers.
RMS output tells us considerably more about how an amplifier will behave in a real installation. The difference between these models is substantial. The AudioControl D-4.800 is rated at 125W x 4 at 4 ohms and 200W x 4 at 2 ohms, while the Rockford Fosgate T1000-4AD reaches 250W x 4 across its 1–4-ohm operating range. The Sundown and Skar also offer serious output, but their power delivery and intended use are different.
That matters because a high-powered amplifier is only useful when the speakers can use that power safely. We therefore looked at usable RMS output at realistic speaker impedances, rather than simply choosing the amplifier with the biggest number on the box.
2. We checked how well each amp matches different speaker upgrades.
A four-channel amp is commonly used to run four door or full-range speakers, but those speakers are not all the same. Some aftermarket speakers are comfortable with relatively modest amplifier power, while higher-performance components can benefit from considerably more headroom.
This is one reason the list is not filled with five nearly identical amplifiers. The Hertz DP 4.400, for example, makes more sense for a balanced daily-driver system with moderate power requirements. The Sundown SAEv4-150.4 moves into a much more powerful speaker-oriented category, while the Rockford is aimed at buyers who genuinely have the speakers and electrical system to take advantage of its very high output.
3. We gave extra weight to DSP and factory-system compatibility.
This is where the AudioControl earns its position rather than simply being called our top pick because it is expensive.
The D-4.800 combines four-channel amplification with a built-in DSP, six speaker-level inputs, 30-band equalization, signal delay, polarity control, RTA functionality and AccuBASS. Those features become particularly valuable when upgrading a newer vehicle where replacing the factory head unit is inconvenient or can interfere with factory functions.
In other words, we considered what problem the amplifier solves, not just how loudly it can play.
4. We looked at impedance flexibility and bridging capability.
A good four-channel amplifier should give you room to change the system later. Running four speakers today does not necessarily mean the system will stay that way forever.
We therefore considered 2-ohm operation, 4-ohm performance and bridged output where applicable. The Rockford, for example, can deliver substantial power at low impedance and can be configured for bridged operation. Sundown and Skar also provide useful flexibility for higher-powered speaker installations.
That kind of flexibility matters if you upgrade speakers later rather than replacing the amplifier every time the system changes.
5. We looked at the controls you will actually use.
Adjustable crossovers, gain control, filtering and protection are not exciting specifications, but they are the things that determine whether an amplifier can be integrated properly.
The Sundown SAEv4-150.4 gives you variable high- and low-pass filtering with a wide adjustment range, while the Skar provides the basic controls needed for a conventional Class AB speaker system. Hertz takes a more restrained approach, but that is not automatically a disadvantage for a simpler installation.
We rewarded useful control rather than adding points simply because an amplifier had a longer specification sheet.
6. We considered electrical demand before calling an amplifier a good upgrade.
This is an easy part of amplifier shopping to overlook. More output means more demand on the vehicle’s electrical system.
The Rockford Fosgate T1000-4AD, for example, is a serious 1,000-watt amplifier and requires a 150A external fuse with 4-gauge power wiring. That is very different from dropping a smaller four-channel amplifier into a basic factory system.
So when we call an amplifier a high-output recommendation, that comes with an important condition: the vehicle’s charging system, wiring and installation have to support it. We would rather make that clear than recommend an unnecessarily powerful amp to someone who does not need it.
7. We considered older vehicles and newer factory systems separately.
There is no single four-channel amplifier that is automatically best for every vehicle.
An older car with a straightforward aftermarket head unit may benefit most from a conventional Class AB or Class AD amplifier with strong RMS output and simple controls. A newer vehicle can present a completely different challenge because of factory equalization, speaker-level signals and integrated audio processing.
That is why the list deliberately includes different types of amplifiers. AudioControl is the strongest choice when signal processing and OEM integration matter. Rockford Fosgate is aimed at maximum amplifier output. Sundown and Skar make more sense for powerful aftermarket speaker systems. Hertz is the more measured choice for a balanced daily-driver setup.
8. We did not treat newer model years as automatically better.
Some of the most worthwhile amplifiers in car audio are not brand-new designs. What matters is whether the architecture, output capability, controls and integration options still make sense for today’s vehicles.
For this list, we looked at what each amplifier can actually do in a 2026 installation, rather than giving an automatic advantage to whichever model has the newest release date.
That is important because a proven amplifier with the right power and features can be a better purchase than a newer model that simply has a newer product page.
9. Finally, we asked the most practical question: who should actually buy it?
This is the final filter.
If an amplifier looks excellent on paper but is difficult to justify for the system it is intended to power, it does not belong at the top of the list. Conversely, an amplifier does not need the highest wattage or the longest feature list to be a good recommendation.
The five models above were selected because each has a clear reason to exist in a different type of car audio build. That is also why the ranking is not based on price alone. We are looking for the amplifier that makes the most sense once the speakers, vehicle, signal source, electrical system and intended listening level are considered together.
That is the difference between buying a powerful amplifier and buying the right amplifier.
#1. AudioControl D-4.800 DSP Car Audio Amplifier
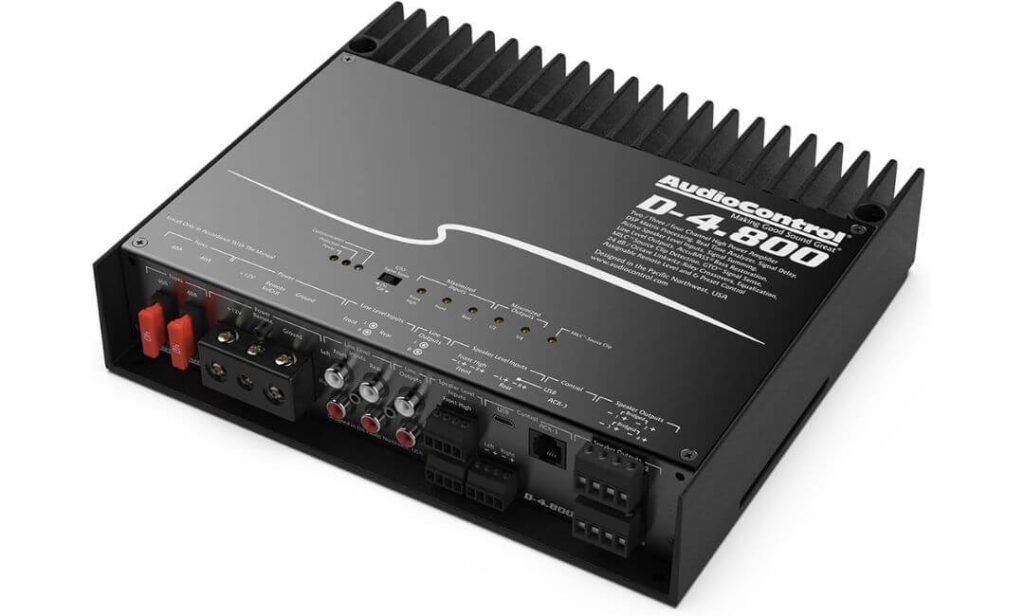
Quick Specs:
- Power: 125W RMS × 4 @ 4Ω; 200W RMS × 4 @ 2Ω; 400W × 2 bridged @ 4Ω
- Amplifier Type: Class D with integrated Matrix DSP
- Inputs: 6 speaker-level inputs + 4 balanced RCA inputs
- Outputs: 2 assignable preamp outputs
- DSP: 30-band EQ, signal delay, polarity control and input/output RTA
- Crossovers: High-pass, low-pass and band-pass with 12/24dB-per-octave Linkwitz-Riley options
- OEM Features: Signal summing, AccuBASS and GTO Signal Sense
- Minimum Load: 2Ω
- Size: About 9 × 8 × 2.1 inches
- Power Wiring: 8–3 AWG range; 2 × 40A fuse rating
The D-4.800 is the kind of amplifier that makes more sense once you look at the entire audio system, rather than just the wattage figure. At 4 ohms, it puts out 125 watts per channel, which is already enough to give many aftermarket component and coaxial speakers considerably more headroom than a factory radio can provide. Drop to a supported 2-ohm load and that rises to 200 watts per channel. If you bridge channels, it can produce 400 watts at 4 ohms. Those numbers make it useful for several different builds instead of locking you into one speaker configuration.
What really separates it, though, is what happens before the amplified signal reaches the speakers. The six speaker-level inputs can accept signals from a factory system, while the four balanced RCA inputs give you a cleaner path for an aftermarket source. The built-in DSP can then route inputs to outputs, apply EQ, delay and polarity adjustments, and use the integrated RTA to help identify and sum factory signals. That is a much more serious approach to an OEM upgrade than simply adding a powerful amp behind the stock radio.
There is also a practical reason I would consider this for newer vehicles with heavily processed factory audio. AccuBASS is designed to compensate for bass roll-off introduced by factory processing, while the selectable high-pass, low-pass and band-pass filters let you shape individual outputs instead of treating all four channels the same. The DM Smart DSP software gives you the controls from a computer or supported mobile device, so this is one of those amplifiers where proper setup matters almost as much as the hardware itself.
(Best suited to factory-radio upgrades, active speaker systems and serious aftermarket builds where tuning control matters as much as amplifier power.)
What Stands Out in Daily Use
- The DSP is the real reason to buy it. You are getting amplification and serious signal processing in one chassis rather than trying to find space for separate components.
- OEM integration is unusually well thought out. Six speaker-level inputs, signal summing and AccuBASS give it a genuine advantage when the factory head unit has its own processing.
- The 2Ω capability gives you room to build. You are not restricted to four conventional 4Ω speakers.
- The crossover flexibility is genuinely useful. High-pass, low-pass and band-pass operation makes it suitable for more advanced active configurations.
- The compact chassis helps. At roughly 9 inches wide, 8 inches deep and just over 2 inches high, it is powerful for its footprint rather than being a huge trunk-mounted amplifier.
The One Thing to Know Before Buying
The only real catch is that this is not a set-it-and-forget-it amplifier. Its strength is its DSP, and getting the best result means spending time setting gains, crossover points, EQ, delay and signal routing correctly. If you only want four channels of extra power and have no interest in tuning, you can spend less on a simpler amplifier and still get the basic job done.
Why It Earns the Top Spot
The strongest argument for putting this amplifier first is not its 800-watt headline. It is the fact that the hardware solves several problems at once.
A factory system can have bass roll-off, unequal speaker signals and built-in processing that make a straightforward amplifier upgrade less straightforward than it sounds. This unit gives you the tools to deal with those issues while still providing substantial RMS power. You can run four channels normally, configure it as a 3- or 2-channel amplifier, bridge channels when appropriate, and send processed signals through its assignable preamp outputs for a larger system.
That versatility is why I would choose it ahead of a more powerful conventional four-channel amplifier for many serious builds. If your priority is simply maximum output, there are stronger choices further down this list. But if you want power plus control plus a realistic path for integrating a modern factory audio system, the D-4.800 is unusually complete.
The Insider Pro-Tip
If you are keeping the factory radio, do not judge this amplifier by its 125-watt-per-channel 4Ω number alone. The bigger advantage is being able to correct what the factory system is doing to the signal before that power reaches your new speakers. That can make a properly tuned 125W system sound more convincing than a much larger amplifier fed a poorly integrated signal.
One more thing I would check before installation is the vehicle’s actual electrical setup and the speakers’ continuous RMS rating. The amplifier is rated at 14.4V, has a 2 × 40A fuse arrangement, and AudioControl specifies substantial power/ground wiring depending on the installation. In other words, this is not a toy amp that you hide behind a panel and forget about. Give it the right wiring, sensible speaker matching and a proper DSP setup, and its flexibility is exactly what makes it worth the premium.
#2. Rockford Fosgate Power T1000-4AD 1,000-Watt 4-Channel Amplifier
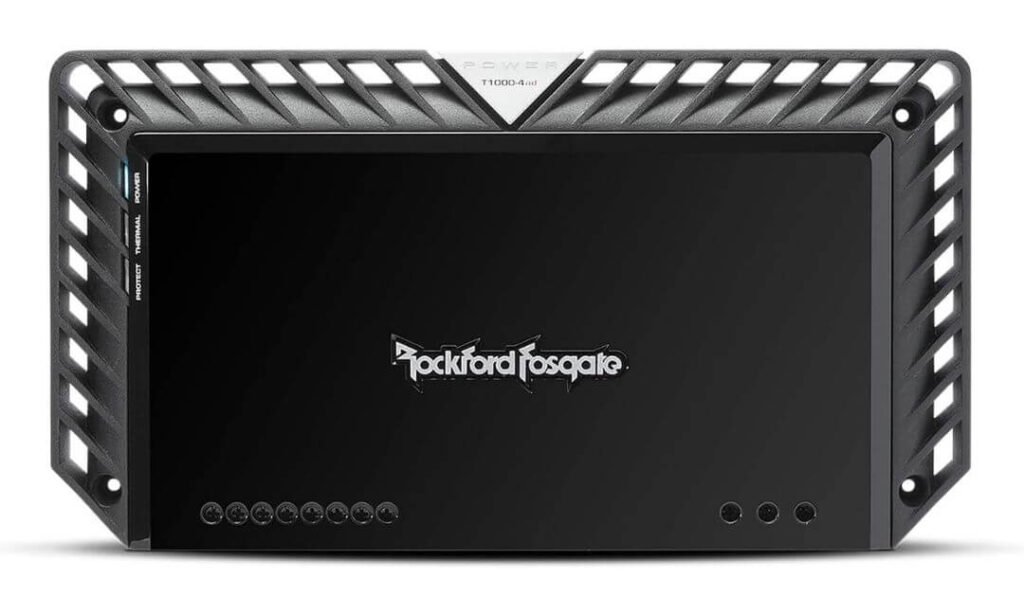
Quick Specs:
- Power: 250W RMS × 4 @ 4Ω, 2Ω or 1Ω; 500W × 2 bridged @ 4Ω or 2Ω
- Amplifier Type: Full-range Class AD
- Constant Power: Maintains the same rated output across 1–4Ω loads
- Crossover: 24dB/octave Butterworth
- Inputs: Differential RCA inputs
- Outputs: RCA pass-through
- Tone Control: Variable Punch EQ with bass and treble adjustment
- Protection: Thermal, over-current and voltage protection
- Dimensions: 14.91 × 8.14 × 2.14 inches
- Weight: About 13.5 lb
- Recommended Fuse: 150A
The first thing worth understanding about this amplifier is that the 1,000-watt rating is not being achieved by simply chasing one impressive peak number. It is designed around Rockford Fosgate’s Constant Power architecture, allowing the amplifier to deliver 250 watts per channel at 4 ohms, 2 ohms and 1 ohm. That is unusual flexibility for a full-range four-channel amplifier and gives you much more freedom when choosing speakers.
That 1-ohm capability is particularly interesting if your speaker system presents a demanding load. You can run four channels at 250 watts each, or bridge two pairs for 500 watts per channel at the supported bridged impedances. In practical terms, this is an amplifier for someone who wants considerable headroom and does not want the amplifier to become the limiting factor when the rest of the system gets upgraded later.
The Power Delivery Is the Real Story
The Class AD design is another reason this model stands out. It aims to combine the sonic characteristics associated with traditional high-fidelity amplification with the efficiency advantages of a Class D architecture. That matters in a high-output four-channel amp because producing this much power in a conventional full-range amplifier can quickly turn into a heat and space problem.
Rockford also uses thermal-management technology within the chassis, while the amplifier’s 24dB/octave Butterworth crossover gives you a much steeper filter slope than a basic amplifier with only simple filtering. Add the differential RCA inputs and you get a design that is clearly intended for a serious aftermarket system rather than a casual power upgrade.
What Makes It Stand Out
- 250W × 4 across 1Ω, 2Ω and 4Ω gives this amp unusually consistent output capability as speaker loads change.
- 500W × 2 bridged opens the door to much more powerful two-channel configurations.
- Class AD architecture makes sense when you need high output without moving to an enormous conventional Class AB chassis.
- 24dB/octave Butterworth filtering gives you tighter frequency separation when integrating speakers.
- Differential RCA inputs help reduce unwanted noise in the signal path.
- RCA pass-through makes adding another amplifier considerably cleaner.
- Punch EQ gives you direct control over low-frequency emphasis and high-frequency shaping without needing a separate processor.
The Trade-Off I Would Not Ignore
The downside is simple: this is a lot of amplifier for an ordinary factory-speaker replacement. Its 150A fuse recommendation and high current demand mean the installation needs to be treated seriously. If the vehicle has modest speakers, a small factory electrical system and no plan for a high-output audio build, buying this much amplifier can be unnecessary rather than impressive.
The other practical consideration is its physical size. At roughly 14.9 inches long and 8.1 inches wide, it is compact for what it produces, but it is still a substantial piece of hardware. Measure the mounting location before ordering rather than assuming a four-channel amp will automatically fit beneath a seat.
Why It Makes Sense in a High-Power Build
This is the amplifier I would look toward when the priority shifts from signal correction to outright speaker headroom.
Unlike the AudioControl above, it does not try to be a complete DSP platform. Its job is much more direct: take a properly prepared signal and deliver a serious amount of clean full-range power to the speakers. The ability to maintain 250 watts per channel across 1–4Ω loads is the feature that makes it especially interesting for enthusiasts who are building around higher-powered aftermarket speakers.
It also leaves you room to change the system later. A speaker upgrade that presents a different impedance does not automatically mean you need another amplifier, and the bridged configuration gives you another way to use the available channels when the system design changes.
The Insider Pro-Tip
Do not buy this amplifier because you want a louder factory system. Buy it because your speakers can actually use the power. That distinction matters. A high-quality speaker that is comfortable with substantial amplifier power can take advantage of the headroom; a basic factory driver cannot magically become a high-power speaker just because a 1,000-watt amplifier is connected to it.
And if you are putting this into a truck or SUV with upgraded front and rear speakers, I would plan the electrical side before buying the amp: proper power and ground wiring, the correct fuse protection, a healthy charging system and enough ventilation around the chassis. Once those pieces are right, the real attraction here becomes obvious—the amplifier gives you an unusually large amount of usable power without forcing you to commit to one speaker impedance.
#3. Sundown Audio SAE-150.4 Class A/B 4-Channel Amplifier
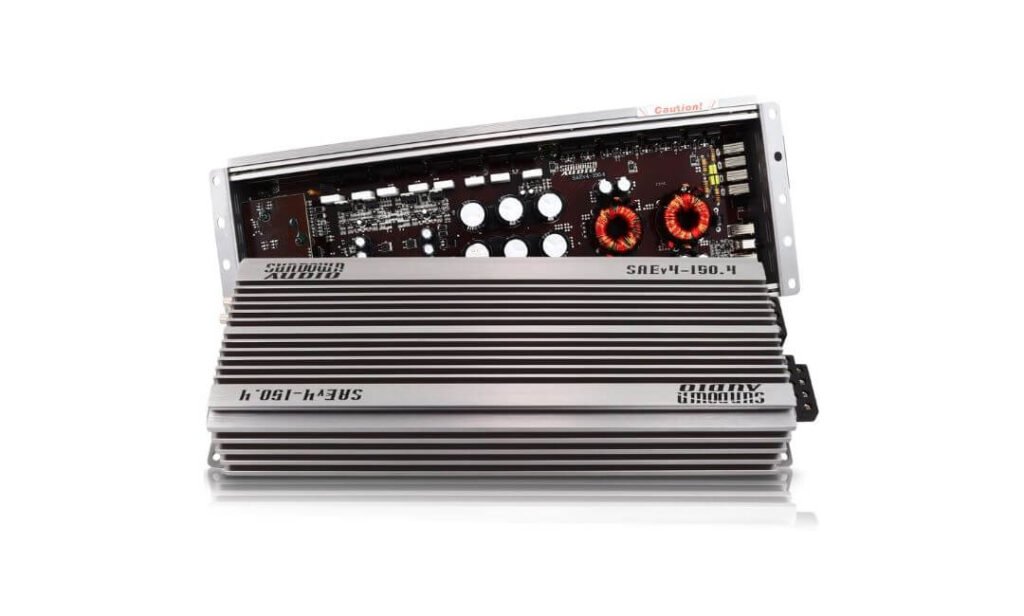
Quick Specs:
- Power: 150W RMS × 4 @ 4Ω; 225W RMS × 4 @ 2Ω; 450W × 2 bridged @ 4Ω
- Amplifier Type: Class A/B, SAEv4 half-bridge design
- Filters: Variable high-pass, low-pass and subsonic
- Filter Range: Approximately 40Hz–5kHz
- Filter Slope: 12dB/octave
- Signal-to-Noise Ratio: 92dB
- Input Sensitivity: Up to 6V
- Protection: Thermal, voltage, speaker-short and DC-offset protection
- Chassis: Redesigned aluminum heatsink construction
- Dimensions: 17.95 × 6.3 × 2.75 inches
There is something refreshingly straightforward about this amplifier. Instead of trying to win the specification sheet with an enormous headline number, it puts 150 watts RMS into each of four 4-ohm channels. That is serious power for a set of aftermarket door or component speakers, while the 225-watt-per-channel rating at 2 ohms gives you additional headroom when the speaker system presents a lower load.
That makes the SAE-150.4 particularly interesting for someone building a proper four-speaker system rather than simply chasing the loudest possible setup. You can run the front and rear speakers independently, or bridge the amplifier to produce 450 watts per pair at 4 ohms when the system design calls for more power per channel. The important part is that the amplifier gives you several ways to use its output without turning the four-channel format into a limitation.
Where the Class A/B Design Still Makes Sense
This is a conventional Class A/B amplifier at a time when compact Class D designs dominate the market. That is not automatically better or worse; it simply gives the buyer a different approach to amplification.
The useful thing here is that the amplifier is designed around full-range speaker duty, with enough output to give capable aftermarket speakers substantial headroom. Its 92dB signal-to-noise ratio also gives it a solid specification for a clean signal path, although the final result will still depend heavily on the source signal, gain structure and installation.
The bigger practical advantage is the control section. The variable high-pass, low-pass and subsonic filters cover roughly 40Hz to 5kHz, allowing you to make meaningful adjustments for the actual speakers in the vehicle rather than being stuck with one fixed crossover point.
The Controls Matter More Than They Look
For a four-channel speaker amplifier, crossover flexibility is one of those things you appreciate after installation, not while reading the box.
A high-pass filter can keep deep bass away from smaller door speakers. A low-pass configuration can be useful when channels are being repurposed in a more unusual system. The broad adjustment range also gives an installer much more freedom when matching the amplifier to speakers with different frequency capabilities.
That makes this a particularly sensible choice when the system is being built around specific speaker characteristics, rather than buying an amplifier first and trying to force every speaker to work around it.
What Stands Out Here
- 150W × 4 at 4Ω is a strong match for higher-powered aftermarket speakers without entering extreme-power territory.
- 225W × 4 at 2Ω gives you useful additional output when the speaker load allows it.
- 450W × 2 bridged gives the amplifier another role in a more advanced system.
- Variable HPF, LPF and subsonic filtering provide considerably more control than basic fixed crossover sections.
- 92dB signal-to-noise ratio is a respectable specification for a full-range amplifier.
- Expanded aluminum heatsinking is useful for an amplifier expected to work hard for long periods.
- Four-way protection covers thermal, voltage, speaker-short and DC-offset conditions.
- 6V maximum input sensitivity gives the amplifier useful compatibility with different source-level outputs.
One Practical Limitation
The main thing I would check before ordering is where you intend to mount it. At nearly 18 inches long, this is not a tiny under-seat amplifier, even though its 2.75-inch height is reasonably manageable. Measure the available mounting area first, particularly in vehicles where the seat rails, factory wiring or carpet leave less usable space than the cabin dimensions suggest.
I would also avoid pairing it blindly with low-power factory speakers. 150 watts RMS per channel is enough to expose the limitations of a weak speaker, so the speakers’ continuous power handling should be checked before installation.
Why This One Deserves a Place in the Top Three
The SAE-150.4 occupies an interesting middle ground in this list.
The AudioControl is the obvious choice when DSP and factory-signal correction are the priority. The Rockford Fosgate is the heavy hitter when maximum output and low-impedance flexibility take centre stage. This Sundown sits between those approaches with a much simpler objective: give four good speakers substantial, controllable power without turning the amplifier into a DSP project.
That is why I like its position here. If you already have a capable head unit or processor and simply need a serious four-channel amplifier behind it, spending more money on DSP you will never use does not necessarily improve the system. In that situation, the SAE-150.4’s combination of 4Ω power, 2Ω capability and adjustable filtering can make more sense.
The Insider Pro-Tip
If your goal is a front-and-rear speaker upgrade, I would start with the speakers’ RMS ratings and work backward from there. The 150W × 4 figure is attractive, but you do not need to run the amplifier at its maximum simply because it can produce it. Proper gain setting is what lets you use the available headroom without asking the speakers to do something they were never designed to handle.
Also, do not overlook the thermal side of the installation. The larger aluminum heatsink is helpful, but it cannot compensate for an amplifier being buried in a sealed space with no sensible airflow. Give the chassis room to shed heat, use appropriately sized power and ground wiring, and tune the filters around the actual speakers. That is where this amplifier starts making sense—not on the spec sheet, but once all four channels are working together in the vehicle.
#4. Skar Audio RP-150.4AB 1,000-Watt Class A/B 4-Channel Car Amplifier
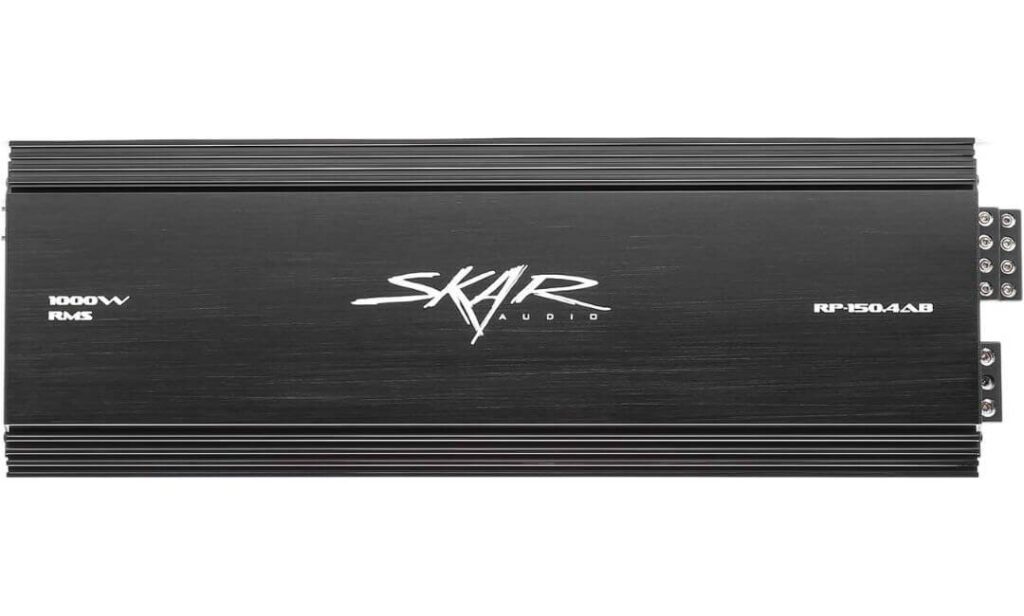
Quick Specs:
- Power: 125W RMS × 4 @ 4Ω; 250W RMS × 4 @ 2Ω
- Amplifier Type: Full-range Class A/B MOSFET
- Total Rated Output: Up to 1,000W at 2Ω across four channels
- Frequency Response: 20Hz–20kHz
- Signal-to-Noise Ratio: 105dB
- Controls: Adjustable gain, bass EQ and crossover controls
- Crossovers: Variable high-pass and low-pass
- Protection: Four-way protection circuitry
- Power Connections: 4-gauge power and ground terminals
- Speaker Loads: 2Ω and 4Ω operation
- Bridging: Bridgeable for higher-power configurations
The RP-150.4AB is not trying to compete with the AudioControl on DSP processing or the Rockford Fosgate on extreme low-impedance power delivery. Its appeal is much simpler: a conventional Class A/B four-channel amplifier with substantial output at a price-conscious level.
At 4 ohms, you get 125 watts RMS per channel, which is already a meaningful step above the power available from most factory head units. When the speaker load allows 2-ohm operation, the rated output rises to 250 watts per channel. That gives this amplifier plenty of headroom for a properly matched aftermarket speaker system without requiring a separate amplifier for every pair.
Why the 2-Ohm Rating Matters
This is where the amplifier becomes more interesting than its price might suggest.
A lot of four-channel installations simply run four 4-ohm speakers, but some aftermarket systems present a lower impedance. Being rated for 250W × 4 at 2 ohms gives you another level of output when the speakers are designed to accept it. That does not mean every speaker should be wired down to 2 ohms; the speaker configuration needs to be compatible first.
The amplifier also provides adjustable gain and crossover controls, so you can actually tailor the output to the speakers instead of sending the same unrestricted signal to every driver. For a straightforward front-and-rear speaker upgrade, that is the kind of functionality that matters far more than a flashy feature list.
A Traditional Class A/B Approach
The Class A/B architecture makes this a natural fit for a full-range speaker system where the amplifier is handling mids, vocals and highs as well as bass.
Its 20Hz–20kHz frequency-response specification covers the conventional audible range, while the 105dB signal-to-noise specification indicates a low stated noise floor. As always, the final sound depends on the source, speakers, gain structure and installation, so I would not treat the number alone as proof of superior sound quality.
What I do like is that the controls are practical. Variable high-pass and low-pass filtering, gain adjustment and bass EQ give you the basic tools needed to properly integrate an aftermarket speaker system without requiring a separate DSP processor.
What Makes It Worth Considering
- 125W × 4 at 4Ω gives most aftermarket speakers considerably more power than a factory radio can provide.
- 250W × 4 at 2Ω gives the system substantially more headroom when the speaker configuration supports the lower load.
- Class A/B amplification keeps the design focused on full-range speaker duty.
- 105dB signal-to-noise ratio is a strong stated specification for keeping amplifier noise low.
- Variable HPF and LPF controls let you limit unwanted frequencies reaching the speakers.
- 4-gauge power and ground terminals are appropriate for an amplifier in this output class.
- Four-way protection adds useful safeguards against electrical and speaker-related problems.
- Adjustable gain and bass EQ make it easier to match the amplifier to different speakers and source levels.
The Part I Would Check Before Buying
The biggest thing is speaker matching. With 250 watts per channel available at 2 ohms, this is not an amplifier I would connect to a set of low-power factory speakers and simply turn the gain up.
The physical size is also worth checking before installation. This is not one of the ultra-compact four-channel amplifiers, so measure the available mounting area and leave enough room for sensible ventilation. A good amplifier installation is not just about getting the chassis physically inside the vehicle; it also needs appropriate power wiring, grounding and airflow.
Where It Fits in This List
This is the amplifier I would consider when the priority is getting a lot of usable speaker power without paying primarily for advanced DSP features.
The AudioControl earns its higher position because its DSP and OEM integration solve problems that conventional amplifiers cannot. The Rockford Fosgate moves further toward high-output performance and unusual impedance flexibility. The Sundown offers a more premium high-power Class A/B approach with broader filtering.
The Skar takes a different route: give the buyer serious four-channel output, useful controls and a conventional full-range design without making the purchase about sophisticated processing. For someone already happy with their head unit or using a separate processor, that can be exactly the right approach.
The Insider Pro-Tip
If you are building a four-speaker system around this amplifier, do not choose the speakers based on their peak wattage. Look at their continuous RMS rating and impedance first. The amplifier has enough output that the wrong speaker pairing can turn “more power” into premature distortion or damaged drivers rather quickly.
And if you plan to use the 2-ohm rating, verify the actual final speaker load with the wiring configuration—not just the nominal impedance printed on one speaker. Use properly sized power and ground wiring, install the correct fuse close to the battery, set the gain from the source signal rather than using it as a volume control, and make sure the amplifier has ventilation. That is how you turn the RP-150.4AB’s biggest advantage—its amount of available power—into something useful instead of simply having a big number sitting in the trunk.
#5. Hertz DP 4.400 AB-Class 4-Channel Amplifier
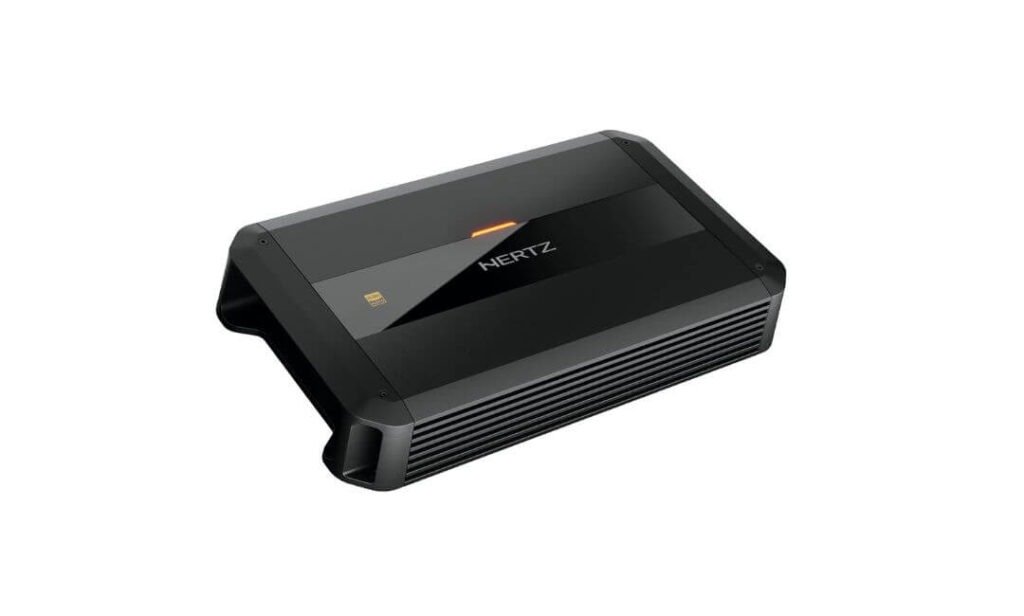
Quick Specs:
- Power: Up to 125W RMS × 4 @ 2Ω
- Amplifier Type: Class AB
- Audio Response: 10Hz–50kHz
- Signal-to-Noise Ratio: 101dB A-weighted
- THD: 0.01%
- Damping Factor: 130 @ 1kHz
- Configurations: Fully bridgeable 4-, 3- or 2-channel operation
- Inputs: RCA pre-input and speaker-level input
- Input Sensitivity: Speaker input 1.6–40Vrms
- Vehicle Compatibility: 9–16.5V operating range
- Integration: Universal Speaker Simulator
- Size: About 13.2 × 7.5 × 2 inches
- Construction: Machined terminal block with removable protective top panel
The Hertz takes a noticeably different approach from the high-output amplifiers above it. Its headline specification is not a 1,000-watt figure; instead, the interesting part is the combination of Class AB amplification, a 10Hz–50kHz frequency response, 101dB signal-to-noise ratio and 0.01% THD specification. Those numbers point toward an amplifier designed with signal quality and controlled reproduction in mind rather than simply trying to win the power race.
That makes it particularly relevant for a clean daily-driver system where the speakers themselves are already capable and you want the amplifier to stay out of the way. The 125W × 4 rating at 2 ohms also gives it useful output for a four-channel configuration, while the fully bridgeable architecture means you are not permanently locked into four-channel operation.
The Factory-System Compatibility Is More Interesting Than It Looks
One of the strongest practical features here is the input section. The amplifier accepts speaker-level and RCA signals, so it can work with a factory source or a conventional aftermarket head unit. Hertz also includes its Universal Speaker Simulator technology, which is intended to help the amplifier work with modern factory audio systems that can behave differently from a simple aftermarket head unit.
That matters because factory integration is often where otherwise good amplifiers become awkward. A system may have speaker-level signals, unusual signal characteristics or an OEM amplifier in the chain. Having an input stage designed with those situations in mind gives an installer more flexibility before even getting to the tuning stage.
High-Resolution Specifications With a Practical Purpose
The 10Hz–50kHz frequency response is far beyond the conventional audible range, but I would not tell you that this automatically means you will hear frequencies above 20kHz. You probably will not. What the specification does tell you is that the amplifier has a very wide stated operating bandwidth.
The more immediately useful figures are the 101dB signal-to-noise ratio and 0.01% THD specification. Those are the kinds of measurements I would pay more attention to when evaluating a clean full-range amplifier, particularly if the rest of the system uses revealing speakers.
What Makes This Model Interesting
- Class AB architecture makes it a natural fit for a full-range speaker-focused system.
- 125W × 4 at 2Ω provides useful output without pushing this model into extreme-power territory.
- 10Hz–50kHz response gives it an unusually broad stated bandwidth.
- 101dB S/N ratio and 0.01% THD are strong published signal-quality specifications.
- Fully bridgeable 4/3/2-channel operation gives you room to change the system configuration later.
- Speaker-level and RCA inputs make it suitable for both OEM and aftermarket sources.
- Universal Speaker Simulator adds another layer of compatibility for factory audio systems.
- Compact 2-inch height makes installation easier in locations where depth is more restrictive.
- Removable top panel and machined terminal block give the installation a cleaner, more protected finish.
The One Thing I Would Keep in Mind
This is not the amplifier I would choose simply because you want the maximum possible output from four channels. The Rockford Fosgate and Sundown make more sense for that job.
The Hertz makes more sense when the rest of the system is already reasonably well matched and you value compact installation, input flexibility and clean signal performance over having enormous power reserves. It is also worth remembering that Class AB amplification can produce more heat than an equivalently powerful modern Class D design, so mounting location and ventilation still matter.
Why It Still Belongs on This List
The reason I kept this amplifier in the roundup is that a good four-channel system does not always need to be a high-power competition-style build.
Imagine a daily driver with quality component speakers, a factory radio you want to keep, and limited space behind the trim or under a seat. In that situation, an amplifier with sensible dimensions, speaker-level integration and flexible channel configuration can be more useful than an enormous power amplifier that you will never operate anywhere near its limits.
The fully bridgeable design is another quiet advantage. You can begin with four speakers on four channels, then change the configuration later if the system grows. That gives the amplifier a useful degree of longevity even though its output numbers are less dramatic than some of the other models here.
The Insider Pro-Tip
If your speakers are already good enough that you can hear differences in noise floor, tonal balance and system tuning, this is where I would pay attention to the Hertz rather than automatically moving toward the biggest amplifier. More power is not automatically more detail.
For a factory-radio installation, I would also spend time getting the speaker-level input sensitivity and gain structure right before touching the bass controls. The Universal Speaker Simulator and broad input range give you useful integration flexibility, but they cannot fix a badly configured signal chain. A modestly powered amplifier with a clean, correctly matched input can produce a much better result than a monster amp receiving a compromised signal.
Best 4-Channel Amplifiers (2026): Side-by-Side Power, Features and System Fit
| 4-Channel Amplifier | RMS Power | Amplifier Design | DSP / Tuning | Input & Integration | System Flexibility | Best Fit |
|---|---|---|---|---|---|---|
|
AudioControl D-4.800
Best Overall
Class D + DSP
|
125W × 4 @ 4Ω
200W × 4 @ 2Ω
400W × 2 bridged @ 4Ω
|
Class D amplification with integrated Matrix DSP.
Built for high-output power without turning the installation into a separate amp + processor setup.
|
30-band graphic EQ 10-band parametric EQ per output Signal delay, polarity, RTA HPF / LPF / band-pass |
6 speaker-level inputs 4 balanced RCA inputs 2 assignable preamp outputs AccuBASS + GTO signal sensing |
4 / 3 / 2-channel configuration
Excellent choice when the factory radio needs signal correction as well as more power.
|
OEM + Aftermarket
Factory-radio upgrades, active systems and serious tuned builds.
|
|
Rockford Fosgate Power T1000-4AD
Power Pick
Class AD
|
250W × 4 @ 4Ω
250W × 4 @ 2Ω
250W × 4 @ 1Ω
500W × 2 bridged
|
Class AD full-range design with Constant Power architecture.
The unusual part is maintaining its rated 250W-per-channel output across 1–4Ω loads.
|
Variable Punch EQ 24dB/octave Butterworth crossover Less processor-heavy than AudioControl, but built around serious amplifier output.
|
Differential RCA inputs RCA pass-through A good foundation when another amplifier or processor may be added later.
|
4-channel or bridged 2-channel operation
Very strong impedance flexibility for changing speaker configurations.
|
High-Output Builds
Power-hungry aftermarket speakers and systems that genuinely need large headroom.
|
|
Sundown Audio SAE-150.4
Speaker Power Pick
Class A/B
|
150W × 4 @ 4Ω
225W × 4 @ 2Ω
450W × 2 bridged @ 4Ω
|
Class A/B SAEv4 half-bridge architecture.
A straightforward choice when the amplifier’s main job is driving capable full-range speakers.
|
Variable HPF Variable LPF Variable subsonic Approximately 40Hz–5kHz adjustment range with 12dB/octave filtering.
|
Up to 6V input sensitivity Speaker-focused signal path Best suited to a properly prepared factory or aftermarket signal.
|
4-channel or bridged operation
Enough flexibility for a conventional four-speaker system or a more involved build.
|
Powerful Speakers
Higher-powered door and component speakers where adjustable filtering matters.
|
|
Skar Audio RP-150.4AB
Value Pick
Class A/B MOSFET
|
125W × 4 @ 4Ω
250W × 4 @ 2Ω
|
Full-range Class A/B MOSFET design.
Focused on delivering substantial speaker power without paying primarily for advanced DSP hardware.
|
Variable HPF / LPF Adjustable gain Bass EQ |
4-gauge power and ground terminals
A conventional installation approach with the controls needed for basic system matching.
|
2Ω / 4Ω operation Bridgeable Useful when building around higher-powered aftermarket speakers.
|
Power for the Money
Budget-conscious upgrades that need more than factory-radio power.
|
|
Hertz DP 4.400
Compact Pick
Class AB
|
125W × 4 @ 2Ω
Published power figure supplied for the 2Ω load.
|
Class AB full-range amplification.
The emphasis is on compact packaging, signal quality and integration flexibility rather than extreme output.
|
Adjustable crossover Adjustable bass control Fully bridgeable for 4-, 3- or 2-channel configurations.
|
RCA + speaker-level inputs Universal Speaker Simulator 9–16.5V operating range |
4 / 3 / 2-channel operation
A useful option when the installation may evolve without requiring a large chassis.
|
Compact Systems
Daily drivers, quality speakers and installations where space and integration matter.
|
Best 4 Channel Amp Buying Guide for Choosing the Right Power and Setup
A four-channel amplifier looks simple on paper, but the wrong match can leave you with a system that is louder without actually sounding better. The important part is not finding the amplifier with the biggest wattage number. You need to look at RMS output, speaker impedance, input compatibility, filtering, installation requirements and how much control you actually need over the system.
For a typical front-and-rear speaker upgrade, four channels give you one dedicated channel for each speaker. That keeps the system straightforward and avoids the need to split channels or run speakers from an amplifier that is not designed for their load. Once you start bridging channels, running lower-impedance speakers or integrating with a factory radio, the decision becomes more technical.
The right approach is to work backwards from the speakers and vehicle rather than buying the amplifier first.
Start With the Speakers You Actually Plan to Run
The speaker’s RMS power rating should be one of the first numbers you check. RMS tells you much more about a realistic power match than a large peak or maximum wattage figure printed on a product box.
For example, if your front speakers are rated around 100W RMS each and your rear speakers are rated around 75W RMS each, an amplifier producing roughly 75–100W RMS per channel at the correct impedance can make considerably more sense than buying a 250W-per-channel model simply because it appears more powerful.
That does not mean an amplifier has to have exactly the same RMS rating as the speaker. A quality amplifier with some additional headroom can be useful, provided the gain is set correctly and the speakers are capable of handling the available power.
A sensible matching process looks like this:
- Check the speaker RMS rating, not just peak or maximum power.
- Confirm the speaker impedance, usually 2Ω or 4Ω in aftermarket car-audio applications.
- Compare that impedance with the amplifier’s published RMS output.
- Leave enough headroom for clean playback rather than running the amplifier at its limit all the time.
- Do not assume that a higher wattage amplifier automatically produces better sound.
- If the speakers are low-powered factory units, a very high-output amplifier can be unnecessary unless you are also replacing the speakers.
This is where the difference between a powerful amplifier and an appropriate amplifier becomes important. A 250W-per-channel model may be excellent for a high-power speaker system but excessive for basic factory door speakers.
RMS Power Matters More Than the Biggest Number on the Box
When comparing four-channel amplifiers, look specifically for continuous RMS power at the impedance you will actually use.
An amplifier might produce 125W × 4 at 4Ω, 200W × 4 at 2Ω, and a much larger bridged figure. Those are three very different operating conditions. The number that matters to your installation is the one that corresponds to your speaker impedance and channel configuration.
Also pay attention to whether the manufacturer publishes power with all channels operating. Some amplifier specifications can look impressive because they highlight a maximum or bridged configuration that does not represent normal four-speaker operation.
A useful comparison should therefore look more like this:
| What to compare | Why it matters |
|---|---|
| RMS watts × 4 @ 4Ω | Useful for conventional 4Ω aftermarket speakers |
| RMS watts × 4 @ 2Ω | Important for lower-impedance speakers |
| Bridged RMS output | Relevant if two channels will be combined for a higher-power load |
| Voltage used for the rating | Helps put the published output into context |
| Number of channels tested simultaneously | Gives a better idea of usable system output |
| Manufacturer’s distortion specification | Helps judge how cleanly the amplifier reaches its rated output |
Do not judge an amplifier from a 1,000W, 1,500W or 2,000W headline alone. In car audio, that number may refer to combined output, peak capability or a particular impedance and configuration. The individual RMS figures tell you far more about whether it belongs in your system.
Understand Impedance Before You Compare Amplifiers
Impedance is one of the easiest specifications to overlook and one of the easiest ways to choose the wrong amplifier.
A 4Ω speaker does not place the same electrical demand on an amplifier as a 2Ω speaker. As impedance decreases, the amplifier generally has to deliver more current to maintain its output. That is why you should never assume an amplifier’s 2Ω rating applies to every speaker configuration.
Before purchasing, check:
- Whether the amplifier is stable at 2Ω per channel.
- Whether the manufacturer specifies a minimum impedance.
- Whether the amplifier can safely operate at the impedance created by your particular speaker wiring.
- Whether bridging changes the minimum supported impedance.
- Whether your speakers are single-voice-coil, dual-voice-coil or another configuration that changes the final load.
A common mistake is to look only at the 4Ω specification because most conventional door speakers are 4Ω. If your system uses 2Ω speakers, that single assumption can completely change which amplifier is appropriate.
Do Not Ignore Distortion and Signal-to-Noise Ratio
Power is only one part of amplifier performance. Total harmonic distortion (THD) indicates how much unwanted harmonic content is introduced by the amplifier, while signal-to-noise ratio (S/N) gives you an idea of how far the useful audio signal sits above the amplifier’s own noise floor.
These figures should not be treated as a simple competition where the lowest THD automatically wins. Real-world system performance also depends on the source signal, gain structure, speaker quality, installation, grounding and tuning.
Still, they are useful when comparing otherwise similar amplifiers.
Look for:
- A clearly published THD specification rather than no distortion information at all.
- A strong signal-to-noise ratio when you are building a revealing system.
- Consistent specifications at realistic output levels.
- Proper gain structure between the head unit, line output converter, DSP and amplifier.
- A clean electrical and grounding installation.
A premium amplifier cannot repair a noisy source signal. If the head unit is sending a poor or heavily processed signal, increasing amplifier power simply gives that bad signal more authority.
Be Careful With CEA and CTA Power Claims
You may see CEA-2006 or newer CTA-2031 terminology when researching amplifier power. These standards are useful because they attempt to make power specifications more comparable under defined test conditions.
However, the presence of a certification label should not make you stop looking at the rest of the specification sheet.
The important question is still: how much clean RMS power does the amplifier provide at your speaker’s impedance, and under what test conditions?
A realistic comparison should consider the rated voltage, impedance, distortion limit and number of channels operating. This gives you a much better understanding of usable output than a single maximum-wattage figure.
Four Channels or Bridged Channels: Know What You Give Up
A four-channel amplifier gives you four independent amplified channels, which is ideal for powering front and rear speakers separately.
Bridging changes that arrangement. Two amplifier channels are combined to produce more power for a single load. That can be useful, but you effectively sacrifice those two independent channels.
For example, a four-channel amplifier can typically be used as:
- 4-channel: one channel for each front and rear speaker.
- 3-channel: two channels for the front speakers and two bridged channels for another higher-power load, depending on amplifier design.
- 2-channel bridged: two pairs of channels combined for higher-power applications, if supported.
Never assume every amplifier can be bridged at the same impedance. Always check the manufacturer’s minimum bridged load before wiring it.
For a normal four-speaker setup, there is usually no reason to bridge channels simply because the amplifier offers that feature. Keep the four channels independent if that gives you the power and control your speakers need.
The Filters and Controls That Actually Matter
A good four-channel amplifier does not need a huge list of controls. It needs the right controls, and they need to be usable.
A variable high-pass filter is particularly useful for door speakers because it can prevent them from trying to reproduce extremely low frequencies that they are not designed to handle. This can improve usable headroom and reduce unnecessary cone movement.
A low-pass filter becomes useful when the amplifier is being used for a suitable lower-frequency application, although a dedicated subwoofer amplifier is generally the cleaner choice for a serious subwoofer system.
The controls worth paying attention to include:
- High-pass filter: useful for protecting and focusing full-range speakers.
- Low-pass filter: useful when a channel is intended for lower-frequency duties.
- Band-pass filtering: valuable for more advanced active systems.
- Gain adjustment: necessary for matching amplifier sensitivity to the source signal.
- Bass control: useful in moderation, but not a substitute for proper speaker or subwoofer selection.
- Crossover slope: gives greater control over how quickly frequencies are removed from a speaker’s range.
- Remote level or bass control: useful when the amplifier supports it and the installation genuinely benefits from adjustment from the driver’s seat.
The important distinction is between gain and volume. Gain should not be used as a second volume knob. It is there to match the amplifier to the signal coming from the source.
High-Level and RCA Inputs Can Change the Installation
If you are keeping the factory head unit, input compatibility becomes much more important.
High-level or speaker-level inputs allow an amplifier to accept signal directly from the vehicle’s speaker wiring. That can make integration much easier when the factory radio has no conventional RCA preamp outputs.
RCA inputs are generally more straightforward when you already have an aftermarket head unit, line output converter or DSP with dedicated preamp outputs.
Some modern vehicles go further and use factory equalisation, active noise processing, channel-specific tuning or signal summing. In those situations, simply connecting an amplifier to one speaker output may not give you the full-range signal you expect.
That is where advanced integration hardware or a DSP-equipped amplifier can make a meaningful difference.
For a factory system, check whether you need:
- Speaker-level inputs
- Signal summing
- Factory signal correction
- Automatic remote turn-on
- Differential or balanced input capability
- A dedicated DSP or amplifier with integrated processing
- Compatibility with the factory amplifier architecture
Do not assume that every vehicle sends a clean full-range signal to every door speaker.
DSP Is Worth Paying For When the Factory Signal Is Complicated
A DSP is not automatically necessary for every four-channel amplifier installation.
If you have a simple aftermarket head unit feeding a conventional set of speakers, basic crossover and gain controls may be enough. Paying for advanced processing that you will never configure is not necessarily good value.
The situation changes when the vehicle has a heavily processed factory sound system.
A DSP can provide tools such as:
- Parametric or graphic equalisation
- Time alignment
- Channel routing
- Signal summing
- Polarity control
- More precise crossover configuration
- Factory signal correction
- Output-level control
That is why an amplifier with moderate RMS output can sometimes make more sense than a much larger amplifier with little signal control. Clean signal management can be more valuable than another few hundred watts.
Remote Bass Control Is Useful, But It Is Not a Requirement
A remote bass control can be convenient, particularly when the amplifier is powering a system where low-frequency output needs to be adjusted from the driver’s seat.
But do not buy an amplifier purely because it has a remote control option.
For a four-channel amplifier powering four full-range door speakers, the more important priorities are proper RMS matching, reliable filtering, input compatibility and clean gain structure.
Remote control becomes more meaningful when the amplifier configuration or system design actually gives you a reason to change that level regularly.
Damping Factor, Protection and Thermal Management Matter More Than Marketing Features
Damping factor is often presented as an important amplifier specification, but it should not be used in isolation to decide which model sounds better. The speaker, wiring, frequency, amplifier output impedance and complete system all influence the final result.
What deserves more attention is whether the amplifier has sensible protection circuitry.
Look for protection against:
- Thermal overload
- Short circuits
- Over-voltage or under-voltage conditions
- DC offset
- Excessive current, where specified
Thermal management is especially important in a vehicle because an amplifier may be installed under a seat, behind trim or inside a relatively confined enclosure.
A compact amplifier is not automatically easier to install if it has nowhere to release heat. Leave adequate ventilation around the chassis and avoid covering its heat-sink surfaces with carpet, insulation or loose trim.
Installation Starts With the Electrical System
A four-channel amplifier is only as good as the installation supporting it.
The power cable should be sized for the amplifier’s actual current demand and installation length, with the main fuse positioned close to the battery. The ground connection should be short, secure and attached to a suitable bare-metal chassis point or an appropriate manufacturer-approved grounding location.
Do not choose the wiring kit based purely on the number printed on the amplifier box. The amplifier’s fuse rating, current demand, cable length and installation environment all matter.
A proper installation normally includes:
- Correctly sized power cable
- Appropriate main fuse near the battery
- Proper chassis ground
- Secure RCA or speaker-level signal connections
- Correct remote-turn-on wiring where required
- Protected cable routing
- Adequate amplifier ventilation
- Secure mechanical mounting
- Correct speaker polarity
- Gain and crossover adjustment after installation
If the amplifier is demanding substantially more current than the factory electrical system was designed to support, the charging system also deserves attention.
Grounding Is Not the Place to Cut Corners
Many amplifier problems that appear to be amplifier failures actually begin with poor installation.
A loose or contaminated ground can contribute to noise, voltage drop and unstable operation. The grounding point should be mechanically secure and electrically clean.
Avoid relying on a random factory bolt covered in paint or corrosion. Prepare the grounding location properly and keep the ground cable as short as practical.
Also route power and signal cables intelligently. Good cable management will not fix a fundamentally noisy system, but careless routing can make troubleshooting considerably harder.
Check the Physical Installation Before Buying
An amplifier can have perfect specifications and still be the wrong choice if it simply does not fit where you intend to install it.
Measure:
- Length
- Width
- Height
- Cable and terminal clearance
- Ventilation space
- Mounting access
- Fuse access
- Adjustment access
This matters particularly with larger high-output Class A/B or high-current designs. A long amplifier may fit on paper but become impossible to service once the seat, trim or wiring is installed around it.
Compact amplifiers can be easier to package, but compact does not mean heat can be ignored. Give the chassis enough breathing room for the intended operating conditions.
Choose the Budget Based on the Rest of the System
There is no universal price point where a four-channel amplifier suddenly becomes “good.” The better question is how much of your system is already capable of taking advantage of the amplifier.
| System level | What you should prioritise | Where the money is best spent |
|---|---|---|
| Entry-level | Clean RMS power, basic filters, reliable protection | Good speakers, proper wiring and installation |
| Mid-range | Better power matching, input flexibility, stronger filtering | Speaker upgrade, amplifier and sound treatment |
| High-end | DSP, advanced integration, precise tuning and strong headroom | Complete system design rather than amplifier wattage alone |
An inexpensive amplifier paired with poor speakers will not suddenly create a high-end system. At the same time, spending heavily on an advanced DSP amplifier makes little sense if you are using basic factory speakers and have no intention of tuning the system.
For most upgrades, the middle of the market offers the best balance when the speakers, source and installation are also reasonably capable.
When a More Expensive Amplifier Is Actually Worth It
A premium four-channel amplifier becomes easier to justify when it solves a specific problem.
That might mean:
- You need DSP processing because the factory signal is heavily processed.
- Your speakers require considerably more clean RMS power.
- You need stable operation at a lower impedance.
- You want more precise crossover and equalisation control.
- You are building an active front stage.
- Installation space is limited and the amplifier needs to combine multiple functions.
- You need more flexible signal inputs and routing.
If none of those apply, a more expensive amplifier may simply give you specifications you will never use.
A Realistic Way to Choose Between the Five Picks
The five amplifiers in this guide do not fill exactly the same role, which is why comparing them purely by wattage would be misleading.
AudioControl D-4.800 makes the strongest case when factory integration and DSP control are central to the build.
Rockford Fosgate T1000-4AD is aimed at a much more power-hungry system where substantial output and impedance flexibility matter more than having extensive built-in DSP.
Sundown Audio SAEv4-150.4 sits in the serious speaker-power category, particularly for buyers who prefer a conventional Class A/B architecture and substantial RMS output.
Skar Audio RP-150.4AB is the more straightforward value-oriented route for someone who wants strong four-channel power without paying primarily for advanced processing.
Hertz DP 4.400 makes more sense when compact packaging, flexible integration and controlled full-range amplification matter more than chasing the largest output figure.
The important takeaway is that there is no single wattage number that makes one four-channel amplifier universally better. The best choice is the one whose output, impedance range, controls and installation requirements line up with the speakers and vehicle you already have.
The Final Check Before You Buy
Before placing the order, run through this checklist:
- Does the amplifier’s RMS output match your speaker requirements?
- Have you checked the amplifier’s rating at your actual speaker impedance?
- Is it stable at the load you intend to use?
- Do you need four independent channels, or are you actually planning to bridge two?
- Does your head unit provide the correct type of signal?
- If using the factory radio, will you need signal summing or DSP?
- Does the amplifier have the crossover controls your speakers need?
- Is the available mounting location large enough?
- Can your wiring and fuse arrangement support its current demand?
- Will the amplifier have adequate ventilation?
- Are you paying for features you will actually use?
If those answers line up, you are much less likely to end up with an amplifier that looks impressive on paper but is poorly matched to the rest of the car audio system.
4-Channel Amp Installation Tips for a Clean, Reliable and Properly Tuned Car Audio System
Installing a four-channel amplifier is not difficult simply because there are four channels. The real challenge is getting the power wiring, signal path, speaker loads, gain structure, crossover settings and heat management right at the same time.
A good installation should do more than make the speakers louder. It should give the amplifier a stable electrical supply, keep unwanted noise out of the signal, protect the wiring in the event of a fault, and make sure each speaker receives the type of signal it was designed to handle. Small mistakes here can easily undo the advantage of buying a better amplifier.
Build the Power and Ground Connections Around the Amplifier’s Actual Demand
Start with the electrical side before connecting the signal cables. The amplifier’s fuse rating, expected current demand, cable length and installation location should determine the power-wire size rather than simply choosing the biggest cable that fits the terminal.
The main power cable should run from the battery to the amplifier, with an appropriately rated fuse installed close to the battery. The fuse protects the vehicle’s power cable if that cable becomes shorted to the chassis. The amplifier’s own onboard fuses serve a different purpose and should not be treated as a replacement for the main battery-side fuse.
For the ground connection, keep the cable as short as practical and use a solid chassis location. Remove paint, corrosion and other insulating material where appropriate so the terminal has a clean electrical connection. A loose or poorly prepared ground can create voltage drop, unwanted noise and intermittent amplifier behaviour.
A basic installation should therefore include:
- Correctly sized power cable for the amplifier’s current demand and cable length.
- A properly rated main fuse near the battery.
- A short, secure ground connection to a suitable chassis point.
- Properly terminated power and ground cables.
- Protected cable routing through the vehicle.
- Speaker wiring that matches the amplifier’s recommended load.
- Secure connections that cannot loosen from normal vehicle vibration.
Do not treat the ground cable as an afterthought. A powerful amplifier cannot compensate for a poor electrical connection.
Keep Power and Signal Wiring Separate Where Practical
RCA and other low-level signal cables carry a much smaller electrical signal than the amplifier’s power cable, so installation quality matters.
Where possible, route power and signal cables separately, particularly over long runs through the vehicle. This is not a magic cure for every source of noise, but it reduces the chance of creating an unnecessarily difficult noise problem.
Speaker wires should also be routed carefully and protected wherever they pass through metal openings. A sharp edge can eventually damage insulation, creating a short that may cause amplifier protection or, in a serious case, an electrical fault.
Before closing panels and trim, inspect the complete cable path. It is much easier to correct a cable-routing problem while the interior is still accessible than after everything has been reassembled.
Decide Whether Four Separate Channels or Bridging Makes More Sense
For a conventional front-and-rear speaker system, the cleanest arrangement is normally four independent channels:
- Channel 1 → front left
- Channel 2 → front right
- Channel 3 → rear left
- Channel 4 → rear right
This keeps the front and rear speakers independently amplified and makes level and crossover adjustment straightforward.
Bridging combines two amplifier channels to create a higher-power output for a single speaker or load. That can be useful when the speaker requires more power, but you give up independent channels in the process.
For example, if channels 3 and 4 are bridged, those channels can no longer independently power the left and right rear speakers. That may be perfectly sensible in a system where the rear channels are being replaced by another purpose, but it is not automatically an upgrade for a normal four-speaker setup.
Before bridging, always verify the amplifier’s minimum bridged impedance. An amplifier that safely handles 2Ω on each individual channel may require a higher impedance when bridged.
The real question is not, “Can this amplifier be bridged?” It is, “Does bridging solve a problem in this particular system?”
Set the Gain as a Signal-Matching Control, Not a Volume Knob
One of the most common installation mistakes is turning the gain up until the system sounds loud and assuming the amplifier is properly tuned.
The gain control is primarily used to match the amplifier’s input sensitivity to the signal supplied by the head unit, DSP or line output converter. It is not intended to determine how loud the system should be during normal driving.
A sensible starting process is:
- Set the head unit’s tone controls and loudness enhancement to a known baseline.
- Turn off unnecessary bass boost or signal-processing features while establishing the basic gain structure.
- Set the amplifier gains low before introducing the audio signal.
- Use a suitable test signal or carefully selected music at a controlled source volume.
- Increase the gain gradually until the desired output is reached without audible clipping.
- Repeat the process for the other channels while maintaining a sensible left/right balance.
- Recheck the system after setting the crossovers.
Do not use a high gain setting to compensate for weak speakers or a poor source signal. Excessive gain can make the system more sensitive to noise and can push the amplifier or speakers into distortion sooner.
Set the Crossovers Around the Speakers, Not Around a Random Number
Crossover settings should reflect what the speakers can realistically reproduce.
For most aftermarket door speakers, a high-pass filter is useful because it prevents the speakers from being asked to reproduce extremely low frequencies that may cause excessive cone movement. The exact frequency should depend on the speaker, enclosure, door installation and the rest of the system.
A reasonable starting point may be somewhere around the lower part of the speaker’s useful range, followed by listening and adjustment. There is no universal crossover frequency that is correct for every six-inch, six-and-a-half-inch or six-by-eight-inch speaker.
The goal is to create a clean transition between the door speakers and subwoofer rather than simply choosing the same setting used in another vehicle.
Pay attention to:
- High-pass frequency
- Filter slope
- Low-pass frequency where applicable
- Relative front and rear levels
- Phase and polarity
- Subwoofer integration
- Any factory equalisation already present in the signal
If the door speakers sound strained at higher volume, raising the high-pass point slightly can sometimes help more than simply increasing amplifier power.
Do Not Chase Bass From Full-Range Door Speakers
A four-channel amplifier can provide substantially more power to door speakers, but that does not mean those speakers should be forced to reproduce deep sub-bass.
This is particularly important when the system also contains a dedicated subwoofer. Let the subwoofer handle the frequencies it is designed for, while the four-channel amplifier concentrates on the front and rear full-range speakers.
Trying to create deep bass by pushing the gain or bass boost on small door speakers can increase distortion and mechanical stress without producing the kind of low-end authority a properly integrated subwoofer provides.
More power is useful when the speaker can convert it into clean output. More bass boost is not the same thing as more usable bass.
Integrating a Factory Head Unit Requires More Attention
An aftermarket head unit with conventional RCA outputs is usually straightforward. A factory system can be considerably more complicated.
Many modern vehicles use factory equalisation, active processing, separate amplifier channels or signal shaping designed around the original speakers. A speaker-level output may therefore not behave like a clean, full-range preamp signal.
Before connecting the amplifier, determine what signal is actually available at the point where you intend to integrate it.
Depending on the vehicle, you may need:
- High-level speaker inputs built into the amplifier.
- A suitable line output converter.
- Signal summing when separate factory channels contain different frequency ranges.
- A DSP with factory signal correction.
- Differential or balanced signal handling.
- Automatic signal sensing or remote turn-on.
- Integration with an existing factory amplifier.
This is one reason a DSP-equipped amplifier can be substantially more useful in a modern vehicle than a conventional high-power amplifier. The extra processing can solve a signal problem that additional wattage cannot.
Understand the Difference Between Speaker-Level and Line-Level Signals
A line-level signal from an RCA output is much lower in power than the signal being sent to a speaker. A speaker-level signal has already been amplified by the head unit or factory amplifier.
The amplifier you select must be designed to accept the type of signal you are providing.
If the amplifier has dedicated speaker-level inputs, follow the manufacturer’s wiring instructions. If it only accepts RCA inputs, you may need a suitable interface between the factory system and amplifier.
Do not randomly connect factory speaker wires to RCA inputs. They are not interchangeable simply because both carry audio information.
Protect the System With Correct Fuse Placement
The main fuse should be positioned as close to the battery as reasonably practical.
The reason is simple: the cable between the battery and the fuse is still unprotected. If that cable becomes damaged and contacts the chassis, the battery can deliver a very large amount of current through the fault.
The fuse should be selected according to the amplifier manufacturer’s recommendations and the capacity of the installed cable. Do not install an unnecessarily large fuse just because the amplifier occasionally demands more current.
If the amplifier itself has multiple onboard fuses, those do not eliminate the need for appropriate battery-side protection.
Give the Amplifier Room to Get Rid of Heat
An amplifier needs somewhere to transfer heat. This becomes particularly important with Class A/B designs and high-output amplifiers, which can generate substantial heat during sustained operation.
Avoid installing the amplifier where its heat-sink surface is completely blocked by carpet, insulation or another component. Under-seat mounting can work very well, but only if there is enough clearance around the chassis and the location remains reasonably dry and protected.
Before final mounting, consider:
- Airflow around the amplifier.
- Clearance above and around the heat sink.
- Exposure to water or moisture.
- Accessibility of gain and crossover controls.
- Access to fuses and terminals.
- Whether passengers or cargo can damage the amplifier.
- Whether the mounting surface is strong enough to prevent vibration.
A small amount of extra installation planning can make a meaningful difference to long-term reliability.
Avoid Running the Amplifier at an Impedance It Was Not Designed to Handle
Never assume that because an amplifier produces more power at 2Ω, every speaker configuration can safely be wired to 2Ω.
The final load presented to each channel depends on how the speakers are wired, and bridging changes the electrical demand seen by the amplifier.
If you are connecting multiple speakers to one channel, using dual-voice-coil speakers or creating a bridged configuration, calculate the final impedance before powering the system.
If the final load falls below the amplifier’s rated minimum, the amplifier may run excessively hot, enter protection or suffer damage.
Check Speaker Polarity Before Tuning Anything
Incorrect speaker polarity can make a system sound surprisingly weak even when the amplifier is working correctly.
If one speaker is wired with reversed polarity relative to another, the speakers can partially cancel each other acoustically, particularly around lower frequencies.
Check the positive and negative terminals carefully on every channel before completing the installation.
This is especially important when replacing factory wiring or using vehicle-specific harnesses where wire colours may not be immediately obvious.
If the system has already been installed and the bass sounds strangely weak despite the amplifier working normally, speaker polarity should be one of the first things checked.
Common Installation Mistakes That Are Easy to Avoid
Most problems do not come from some mysterious amplifier defect. They usually come from a small installation detail that was overlooked.
Avoid these mistakes:
- Installing the battery fuse too far from the battery.
- Using undersized power or ground wiring.
- Using a poor chassis grounding point.
- Leaving exposed power terminals where they can contact metal.
- Running speaker wiring against sharp metal edges.
- Connecting an incompatible signal source directly to the amplifier.
- Setting gains excessively high.
- Using bass boost to compensate for poor speaker selection.
- Ignoring the amplifier’s minimum impedance.
- Bridging channels without checking the bridged load requirement.
- Blocking the amplifier’s heat sink.
- Mounting the amplifier where moisture can reach it.
- Closing the interior before testing every channel.
- Assuming factory speaker wires provide the same full-range signal on every channel.
- Skipping polarity checks.
- Choosing a fuse that is larger than the wiring or manufacturer’s recommendation.
Test the Entire System Before Reassembling the Vehicle
Do not wait until every trim panel is back in place to find out that the rear-right speaker is silent.
Before final assembly, test every channel individually. Confirm that the front left, front right, rear left and rear right speakers are all receiving the correct signal and that the balance and fader behave as expected.
Then check the system at low, medium and higher listening levels. Listen for obvious clipping, unwanted hiss, alternator-related noise, intermittent connections and thermal problems.
Only after everything works correctly should you finish securing the wiring and reinstalling the interior panels.
The Final Installation Check Is More Important Than the Last Few Watts
A properly installed four-channel amplifier should operate as part of the entire vehicle’s electrical and audio system, not as an isolated box that simply produces more power.
Before calling the installation finished, verify the power connections, ground, fuse, speaker impedance, polarity, gain, crossover settings, signal source and amplifier temperature. If all of those are correct, the amplifier has a much better chance of delivering the clean output you actually paid for.
The best installation is not necessarily the loudest one. It is the one where the amplifier has enough electrical support, the speakers receive appropriate power, the signal remains clean and the system continues to behave properly when you turn the volume up.
How to Choose the Best 4 Channel Amp for Your Setup Without Overspending or Mismatching Your Speakers
Choosing a four-channel amplifier should start with the system you are building, not with whichever amplifier has the biggest power number or the longest feature list. Your speakers, impedance, head unit, vehicle acoustics, available installation space and future plans all affect which amplifier actually makes sense.
A good match gives the speakers enough clean power without forcing the amplifier to work outside its comfortable range. It should also fit the way the vehicle produces and distributes sound. A technically impressive amplifier can still be the wrong purchase if the speakers cannot use its output, the factory signal is heavily processed, or the installation leaves no sensible path for future upgrades.
Match the Amplifier to the Speakers Before Looking at Anything Else
The first question is simple: what speakers are you actually powering?
Look at the RMS rating and nominal impedance of the front and rear speakers. Those two specifications tell you far more about amplifier compatibility than peak wattage, marketing power or the total wattage printed on the amplifier’s packaging.
If your speakers are rated at 75W RMS at 4Ω, an amplifier producing around 75–100W RMS per channel at 4Ω can be a sensible starting point. If your speakers are capable of substantially more power, a small amplifier may leave performance on the table.
There is also nothing wrong with choosing an amplifier with more available RMS power than the speaker’s published rating, provided the system is properly configured. The amplifier does not automatically send its maximum rated output to the speaker at all times. Gain setting, listening level, signal content and the speaker’s actual behaviour all matter.
The important part is having enough headroom without treating excess power as a substitute for proper system matching.
Impedance Changes the Power Equation
Do not compare RMS figures without looking at the impedance beside them.
An amplifier might produce:
- 125W × 4 at 4Ω
- 200W × 4 at 2Ω
- A substantially higher figure when bridged
Those figures describe different electrical operating conditions. If your speakers are 4Ω, the 2Ω output figure is not the number you should use when deciding whether the amplifier is suitable.
You also need to check the amplifier’s minimum supported impedance. Running below that specification can increase current demand and heat, potentially causing protection shutdown or damage.
For a conventional four-speaker installation, the safest approach is usually straightforward:
| Speaker setup | What to look for |
|---|---|
| 4Ω front and rear speakers | Check the amplifier’s 4Ω RMS output |
| 2Ω front and rear speakers | Confirm the amplifier is stable at 2Ω per channel |
| Higher-power front speakers | Look for sufficient RMS headroom |
| Mixed speaker impedances | Check each channel’s output at its actual load |
| Bridged configuration | Verify the amplifier’s minimum bridged impedance |
Never assume that an amplifier’s ability to operate at 2Ω automatically means every bridged or multi-speaker configuration is safe.
Look for RMS Harmony Rather Than an Exact Wattage Match
There is no magic rule saying that the amplifier must have exactly the same RMS rating as the speaker.
A speaker rated for 100W RMS does not suddenly become unsafe because a properly configured amplifier can produce 125W RMS. Likewise, a 100W speaker is not guaranteed to sound better simply because you connect a 300W amplifier to it.
Think about the relationship as usable headroom.
A little additional amplifier capability can be beneficial because you do not have to push the amplifier to its limit to achieve the desired output. But excessive power requires greater care with gain settings and speaker capability.
The real mistake is buying based on peak wattage. RMS-to-RMS comparison at the actual impedance is the useful starting point.
Consider What Your Factory or Aftermarket Head Unit Is Sending
The speakers are only half of the signal chain.
If you have an aftermarket head unit with proper RCA preamp outputs, amplifier integration is usually relatively straightforward. A factory system can be very different.
Modern factory audio systems may apply equalisation, bass roll-off, channel-specific processing or other signal shaping. Some vehicles also use separate channels that do not carry identical full-range information.
That means an amplifier that looks perfect on the specification sheet may not integrate cleanly with the vehicle’s original audio system without additional processing.
Before buying, determine whether you need:
- RCA inputs for an aftermarket source.
- High-level speaker inputs for factory integration.
- Signal summing.
- A line output converter.
- Factory signal correction.
- DSP processing.
- Automatic signal sensing.
- Compatibility with an existing factory amplifier.
If the factory signal is complicated, an amplifier with integrated DSP can be much more useful than simply buying a higher-output conventional amplifier.
Your Vehicle’s Acoustics Matter More Than Most Spec Sheets Admit
A car is not a neutral listening room.
The speakers are usually mounted inside doors, dashboards or rear panels, while the listener sits in an asymmetric cabin surrounded by glass, plastic, metal, seats and other reflective surfaces. The left and right speakers are also different distances from the driver’s ears.
That is why two vehicles using the same amplifier and speakers can produce noticeably different results.
The amplifier cannot correct every acoustic problem, but the right controls can help you deal with some of them.
Door Speakers Need a Different Approach From Dash Speakers
Door-mounted speakers are affected by the door cavity, mounting location, surrounding trim and the quality of the speaker installation itself.
If the door panel allows significant vibration or the speaker is poorly sealed against the mounting surface, adding more amplifier power will not necessarily improve the result. You may simply create more panel vibration and mechanical noise.
For door speakers, pay attention to:
- Solid speaker mounting.
- Proper adapter brackets.
- Door sealing around the speaker.
- Adequate high-pass filtering.
- Correct speaker polarity.
- Door-panel vibration and rattles.
- Whether the speaker is actually capable of using the amplifier’s available RMS output.
The amplifier should support the speaker installation, not compensate for a weak mounting structure.
Dashboard Speakers Have Their Own Acoustic Challenges
Dash-mounted speakers can have a very different tonal balance because they are firing into the cabin from a higher and more reflective position.
Windshield reflections can affect high-frequency response, while the physical distance between the left and right speakers and the listener can influence the stereo image.
This is one situation where DSP features such as equalisation, time alignment and individual channel control can become genuinely useful.
If you are building a more advanced front stage, the ability to adjust each channel independently can be more valuable than another 50 or 100 watts of amplifier output.
Cabin Resonances Can Make More Power Sound Worse
The vehicle cabin naturally reinforces some frequencies and reduces others.
If a particular frequency is already strongly reinforced by the cabin, increasing amplifier output or applying more bass boost can make the system sound bloated rather than fuller. Conversely, a weak frequency may not be fixed simply by turning up the amplifier.
This is why a properly tuned system often sounds better at the same volume than a system that simply uses more power.
The amplifier’s job is to provide clean, controlled power. Equalisation, speaker positioning, installation quality and acoustic treatment determine how effectively that power becomes useful sound inside the cabin.
Think About the Listening Position
For a driver-focused system, the front stage normally deserves more attention than the rear speakers.
The driver’s seat is not positioned in the centre of the vehicle, so the left and right speakers are not naturally equidistant from the listener. The result can be a soundstage that pulls toward one side.
A DSP-equipped amplifier can help through time alignment and individual channel adjustment.
If your goal is simply to give all four passengers a stronger and fuller sound, independent four-channel amplification with sensible front/rear balance may be more appropriate.
There is no single tuning strategy that is correct for every owner. Decide whether you care more about driver-focused imaging or an evenly distributed cabin experience before spending money on advanced processing.
Decide Whether You Actually Need DSP
DSP is one of the biggest dividing lines between conventional and advanced four-channel amplifier systems.
You do not need DSP just because it is available. A simple aftermarket head unit and well-matched speakers can work extremely well with a conventional amplifier.
DSP becomes much more compelling when:
- The factory audio system heavily processes the signal.
- The front stage needs time alignment.
- Different speakers require precise crossover points.
- You need individual channel equalisation.
- Signal summing is required.
- You are building an active front stage.
- You want more precise control over the final cabin response.
This is why the AudioControl D-4.800 occupies a different role from a straightforward high-power Class A/B amplifier. Its advantage is not simply how many watts it produces. It combines amplification with signal processing that can solve problems earlier in the audio chain.
Think About How You Want the System to Grow
A four-channel amplifier does not have to be the final stage of a car audio build.
There are several ways to design the system so it can evolve later.
The simplest approach is to use the four channels for the front and rear speakers and add a separate mono or dedicated subwoofer amplifier later. For a serious bass system, this is generally the cleaner approach because the subwoofer receives an amplifier designed specifically for its power requirements.
Another possibility is using a four-channel amplifier in a more flexible configuration where two channels drive the front speakers and the other two channels are bridged for a suitable higher-power load. Whether this makes sense depends entirely on the amplifier and the speaker configuration.
Do not buy a four-channel amplifier assuming that every model can perform every future configuration. Check its published bridged output, minimum bridged impedance, crossover capabilities and available inputs before planning around it.
Adding a Subwoofer Does Not Automatically Mean You Should Bridge the Amp
This is an important distinction.
If you want a strong subwoofer later, using two channels of a four-channel amplifier in bridged mode can work in certain systems, especially where the subwoofer’s power requirement is modest and the amplifier explicitly supports the required load.
But a dedicated subwoofer amplifier is usually the better route when you want substantial low-frequency output.
A four-channel amplifier is primarily valuable because it can independently power multiple full-range speakers. Sacrificing two channels simply to power a subwoofer can leave you with less flexibility for the rest of the system.
Think about the complete system rather than the individual amplifier:
Four-channel amplifier → front and rear speakers
Dedicated subwoofer amplifier → subwoofer
This arrangement is often the easiest to expand and tune as the system develops.
Leave Room for the Electrical Upgrade Your Future System May Need
Future expansion also means future current demand.
Adding a more powerful subwoofer amplifier can change the vehicle’s electrical requirements considerably. The fact that the original four-channel amplifier worked perfectly does not mean the vehicle’s charging system automatically has enough capacity for another high-current amplifier.
When planning a larger system, consider:
- Total amplifier fuse ratings.
- Expected current demand.
- Battery condition.
- Alternator capacity.
- Main power distribution.
- Grounding.
- Cable sizing.
- Voltage stability under load.
It is much better to plan the electrical side before adding the equipment than to discover voltage problems after the upgrade.
Match the Amplifier to the Installation Space
The physical size of the amplifier should be part of your buying decision from the beginning.
A powerful amplifier that is nearly 18 inches long may be completely unsuitable for a vehicle where the available mounting location is small. Conversely, a compact amplifier may be ideal for an under-seat installation, provided it still has enough ventilation.
Measure the actual mounting area, including:
- Amplifier length and width.
- Height above the mounting surface.
- Terminal clearance.
- Cable-bend space.
- Ventilation space.
- Access to controls.
- Access to fuses.
- Seat movement and trim clearance.
Do not measure only the empty space. Measure the space the amplifier will occupy after the power, ground, signal and speaker cables are connected.
Choose the Amplifier According to the Kind of Build You Are Creating
Your ideal choice becomes much clearer when you define the system first.
For a straightforward four-speaker upgrade, prioritise appropriate RMS output, impedance compatibility, reliable filtering and easy installation.
For a factory-radio integration, give more weight to speaker-level inputs, signal handling and DSP capabilities.
For high-power aftermarket speakers, focus on clean RMS output, impedance stability, electrical requirements and thermal management.
For a compact daily-driver installation, chassis dimensions, efficiency, ventilation and installation flexibility can matter as much as raw output.
For an advanced active system, DSP control, independent channel adjustment, crossover flexibility and signal routing become much more important.
This is why there is no honest answer to “Which four-channel amplifier is best?” without knowing what it is supposed to power.
The Best Match Is the One That Leaves You With a Balanced System
A properly chosen four-channel amplifier should fit into the system rather than dominate it.
The speakers should be capable of using its output, the amplifier should be comfortable with their impedance, the source should provide a suitable signal, and the installation should support its electrical and thermal requirements.
If you are planning future upgrades, leave enough flexibility for another amplifier or a subwoofer rather than sacrificing useful channels today simply because a particular configuration looks attractive on paper.
Ultimately, clean power, correct impedance, sensible tuning and good vehicle integration will do more for the final result than buying the amplifier with the largest number on its specification sheet.
Care and Maintenance Tips to Keep a 4-Channel Amplifier Reliable for Years
A good four-channel amplifier should not need constant attention, but it should not be treated as completely maintenance-free either. Automotive interiors expose electronics to heat, dust, vibration, moisture and repeated temperature changes, so a few simple checks can prevent problems before they turn into intermittent channels, protection shutdowns or damaged wiring.
Maintenance is mostly about keeping the amplifier’s cooling path clear and periodically checking the parts of the installation that experience the most stress. You do not need to open the amplifier or regularly adjust its internal components. In fact, opening the chassis yourself can create more problems than it solves.
Keep the Amplifier Cool Without Blocking Its Heat Dissipation
Heat is one of the biggest long-term concerns with any car amplifier, particularly when it is installed in a confined location.
The amplifier’s chassis and heat sink are designed to move heat away from the internal components. If the amplifier is buried under carpet, pushed tightly against another component or installed where airflow is restricted, its operating temperature can rise significantly during extended listening.
Keep the area around the amplifier reasonably clear and make sure:
- The heat-sink surface is not covered by carpet, insulation or loose material.
- Air can move around the amplifier where the installation requires it.
- The amplifier is not pressed tightly against another heat-producing component.
- Under-seat installations still have adequate clearance.
- Cargo, luggage or loose objects cannot cover the amplifier.
- The mounting location is protected from direct water exposure.
A compact amplifier still needs somewhere to release heat. Smaller dimensions make installation easier, but they do not eliminate thermal requirements.
Clean Dust Without Introducing New Problems
Dust can accumulate around amplifier ventilation openings and heat-sink surfaces over time, especially in vehicles that regularly carry passengers, pets or outdoor equipment.
For normal maintenance, inspect the amplifier periodically and remove loose dust from accessible surfaces using a soft, dry brush or appropriate low-pressure air. Do not spray cleaning chemicals directly onto the amplifier.
Avoid introducing moisture into the chassis, terminals or ventilation openings. You are trying to remove surface contamination, not wash the amplifier.
If the amplifier is mounted underneath a seat, also check the surrounding area. Dust and debris can accumulate underneath seats more quickly than most people realise, and anything that restricts airflow around the amplifier deserves attention.
Inspect the Power and Ground Connections
Power and ground connections deserve more attention than the amplifier’s cosmetic condition.
Vehicle vibration can gradually stress cable terminals and mounting hardware. During a periodic inspection, check that the power, ground and remote-turn-on connections remain secure.
Look for:
- Loose terminal screws.
- Frayed or damaged cable strands.
- Signs of heat around terminals.
- Discolouration or melted insulation.
- Corrosion.
- A ground connection that has become loose.
- Cables rubbing against metal.
- Damaged protective sleeving.
Do not simply tighten every terminal as hard as possible. Follow the amplifier manufacturer’s recommended terminal procedure and avoid damaging the connection through excessive force.
If you notice melted insulation, repeated fuse failures or visible heat damage, stop using the system until the underlying problem has been identified.
Check the Main Fuse and Fuse Holder
The fuse near the battery is one of the most important safety components in the installation.
During inspection, make sure the fuse holder is secure and that there are no signs of corrosion, melting or heat damage. A fuse should not repeatedly fail during normal operation.
If a fuse blows, do not simply install a larger fuse to keep the amplifier running.
A blown fuse can indicate a short circuit, damaged cable, excessive current demand or another electrical fault. Replacing the fuse with one that exceeds the wiring or manufacturer’s specification can remove an important layer of protection.
The amplifier’s own onboard fuses should also be inspected where accessible, particularly if the amplifier has experienced a protection event or electrical problem.
Pay Attention to Changes in Amplifier Temperature
You do not need to measure amplifier temperature every time you drive the car. What matters is recognising a meaningful change in behaviour.
If the amplifier previously operated normally but suddenly becomes extremely hot during ordinary listening, repeatedly enters protection or shuts down after relatively short periods, investigate rather than simply reducing the volume and ignoring it.
Possible causes can include:
- Restricted airflow.
- An impedance load below the amplifier’s specification.
- A damaged speaker or speaker wire.
- Excessive gain.
- Electrical voltage problems.
- A cooling problem.
- Internal amplifier failure.
An amplifier becoming warm during operation is normal. Repeated thermal protection during normal use is not something to treat as normal behaviour.
Inspect the Speaker Wiring Along With the Amplifier
The amplifier can be perfectly healthy while a damaged speaker cable creates the problem.
Inspect accessible speaker wiring for crushed insulation, loose terminals, exposed copper or contact with the vehicle chassis. This becomes particularly important if wires pass through doors, seats, trim panels or other areas that move.
Also listen for changes in the speakers themselves.
A sudden buzzing sound, intermittent channel, distorted output or speaker that cuts in and out can indicate a problem somewhere in the signal or speaker path.
Do not immediately assume the amplifier has failed. Swap channels or test the signal path systematically where appropriate. A damaged speaker or loose connection can create symptoms that initially look like an amplifier problem.
Watch for Changes in Sound Quality
You do not need specialised equipment to notice that something has changed.
If one channel suddenly sounds quieter than the others, the balance changes, distortion appears at previously normal listening levels or a channel intermittently disappears, investigate the system.
Useful things to check include:
- RCA or signal connections.
- Speaker terminals.
- Speaker wiring.
- Head-unit settings.
- Gain controls.
- Crossover settings.
- Ground connections.
- Amplifier protection indicators.
- Speaker condition.
Avoid randomly turning controls to “fix” a problem. If the system worked correctly for months and suddenly changed, find the cause rather than retuning around the symptom.
Protect the Amplifier From Moisture
Most automotive amplifiers are designed for vehicle installation, but that does not mean they are waterproof.
Avoid mounting the amplifier where water can reach it from leaking doors, windows, trunks, hatch areas or condensation-prone locations. This is particularly important for installations under cargo floors or in custom enclosures.
If the vehicle has recently suffered a water leak, inspect the amplifier and surrounding wiring before continuing to use the system.
Moisture and electrical connections are a poor combination. Corrosion can develop gradually, meaning the system may continue working for a while before intermittent faults appear.
Check the Mounting Hardware
The amplifier should remain firmly mounted.
Loose mounting can allow vibration to transfer through the chassis and can also allow the amplifier or its cables to move against surrounding components.
During a periodic inspection, make sure:
- Mounting screws remain secure.
- The amplifier has not shifted.
- The chassis is not contacting another metal component.
- Cables are not being pulled by the amplifier’s movement.
- The mounting surface remains strong and free from damage.
Do not mount the amplifier where the mounting screws could interfere with fuel lines, wiring harnesses or other components hidden behind the mounting surface.
Recheck the System After Major Changes
Maintenance is particularly important after other work has been carried out in the vehicle.
If the seats are removed, carpeting is replaced, a new battery is installed, additional amplifiers are added or interior trim is modified, inspect the amplifier wiring afterward.
A cable that was perfectly secure before the work can become trapped, pulled or pinched during reassembly.
After any major electrical or interior modification, verify the power, ground, signal and speaker connections before returning the system to normal high-volume use.
Know When Maintenance Is Not Enough
Routine maintenance can prevent many installation-related problems, but it cannot repair a failed electronic component.
Stop and investigate if you notice:
- Repeated protection shutdowns.
- Repeatedly blown fuses.
- Burning smells.
- Melted terminals or insulation.
- Smoke.
- Severe unexplained heat.
- A channel that remains dead after wiring and source checks.
- Visible damage to the amplifier.
Do not continue increasing the fuse rating, bypassing protection circuits or repeatedly powering an amplifier that is showing signs of electrical failure.
A protection circuit is there to prevent a fault from becoming a much larger problem.
A Simple Maintenance Routine Is Usually Enough
You do not need to service a four-channel amplifier every few weeks. For a normally functioning installation, a periodic visual and electrical inspection is enough.
A practical routine is:
- Check the amplifier’s mounting and ventilation.
- Remove accumulated dust from accessible surfaces.
- Inspect the battery-side fuse and holder.
- Check power and ground connections.
- Look for damaged or overheated wiring.
- Inspect speaker connections and listen for changes in output.
- Check for moisture around the installation.
- Investigate protection shutdowns instead of ignoring them.
The goal is not to constantly adjust a properly tuned system. It is to catch heat, vibration, corrosion, loose connections and wiring damage before they become expensive failures.
A well-installed amplifier that has adequate airflow, correct electrical protection and properly secured wiring can generally be left alone to do its job. The best maintenance is often simply making sure the conditions that allowed it to work correctly in the first place have not changed.
FAQs About 4-Channel Amp
Is a 4-channel amp actually a good upgrade for a Ford F-150 or Silverado if the factory speakers are still installed?
It can be, but this is where people often spend money in the wrong order. If the Ford F-150 or Chevrolet Silverado still has relatively modest factory speakers, installing a very high-output four-channel amplifier does not automatically turn the factory system into a high-end setup. The speakers remain the limiting component, and the factory head unit may also be shaping the signal before it reaches the amplifier.
A better approach is to determine what the factory system is sending first. If the signal is heavily equalised or different channels contain different frequency ranges, a DSP-equipped amplifier or suitable integration processor can be more valuable than simply adding more watts. If the factory speakers are being replaced at the same time, then a four-channel amplifier with RMS output that closely suits those replacement speakers becomes much easier to justify.
The real upgrade is better-controlled power with a clean signal, not simply a bigger amplifier.
Can a 4-channel amp power upgraded front speakers while the factory rear speakers stay connected?
Yes, but you need to decide how you want the system balanced rather than assuming every speaker should receive identical amplifier power. This is particularly relevant in vehicles such as the Toyota Tacoma, where owners may upgrade the front stage substantially while leaving the rear speakers relatively close to stock.
One sensible approach is to use the amplifier’s four channels for the upgraded front and rear speakers, then adjust the rear level lower so the front stage remains dominant. Another option is to use a different amplifier configuration if the particular model supports it and the system design calls for something more specialised.
What I would avoid is mixing radically different speaker loads without checking the amplifier’s impedance requirements. Also remember that a factory speaker receiving less power from the original system does not necessarily need to be replaced just because the front speakers are more powerful.
Front-stage quality usually matters more to the driver than making every speaker equally loud.
Is a 250W-per-channel 4-channel amplifier too much for 100W RMS car speakers?
Not automatically, but it is enough power that gain setting and speaker matching become much more important. An amplifier capable of 250W RMS per channel does not continuously force 250 watts into a 100W speaker. Actual output depends on the input signal, gain structure, listening level and program material.
The bigger concern is that a high-output amplifier gives you enough headroom to damage an under-rated speaker if the system is poorly configured. If your speakers are rated at 100W RMS and the amplifier can produce substantially more, set the gain around the actual system requirements instead of using the extra capability as an excuse to run the system harder.
This is also why the Rockford Fosgate T1000-4AD belongs in a different category from a modest four-channel upgrade. Its output makes much more sense with speakers and a vehicle electrical system designed around that level of demand.
Before buying, check these three things together:
- Speaker RMS rating.
- Amplifier RMS output at the speaker’s actual impedance.
- How much power the rest of the electrical system can realistically support.
The wattage gap itself is not the problem. Poor control of that gap is.
Why can a more powerful 4-channel amplifier sound worse than a lower-powered one in the same car?
Because amplifier power is only one part of the signal chain. If the factory head unit is applying aggressive equalisation, the speakers are poorly mounted, the gain is too high, or the crossover is wrong, additional amplifier power can make those problems more obvious.
There is also the cabin itself. A car has reflections from glass and trim, different speaker-to-ear distances and resonances created by the interior. More output at a problematic frequency does not automatically create a better soundstage.
This is where something like the AudioControl D-4.800 can make sense even though another amplifier may offer considerably more raw output. Its integrated DSP provides tools for signal correction, equalisation, routing and time alignment. In a complicated factory system, controlling the signal can be more valuable than simply adding another few hundred watts.
A useful way to think about it is:
Power determines how hard the system can play.
Tuning determines how intelligently that power is used.
Can a 4-channel amp run a subwoofer later, or should I plan for a separate subwoofer amplifier now?
It can do either, depending on the amplifier and the subwoofer, but planning for a dedicated subwoofer amplifier is usually the cleaner long-term solution if you expect serious bass.
Some four-channel amplifiers can be bridged, allowing two channels to combine into a higher-power output for a suitable subwoofer. That can work well for a modest system, especially when the subwoofer does not require a large amount of power.
The catch is that bridging uses two amplifier channels, so those channels are no longer independently available for rear speakers or another part of the system. You also have to check the amplifier’s minimum bridged impedance and its actual bridged RMS output.
If you already know that a substantial subwoofer is coming later, I would normally build around:
- Four-channel amplifier → front and rear speakers
- Dedicated mono amplifier → subwoofer
That gives you cleaner system expansion and avoids buying a four-channel amplifier today only to compromise its channel configuration later.
The exception is a compact build where the subwoofer’s power requirement is modest and the four-channel amplifier’s bridged specifications genuinely match it. In that case, using two channels for the sub can be perfectly reasonable.
Does a four-channel amplifier still make sense with a modern factory audio system that uses its own DSP?
Yes, but the integration method becomes more important than the amplifier itself. Many newer vehicles do not provide the same simple full-range signal from every speaker wire that older factory stereos did.
If you connect an amplifier to a processed factory output without understanding what that signal contains, you can end up amplifying a signal that already has bass roll-off, equalisation or channel-specific processing built into it.
For these systems, look for an amplifier or integration setup that can properly handle:
- High-level factory signals.
- Signal summing where required.
- Factory equalisation.
- Automatic turn-on.
- Individual channel processing.
- Time alignment and equalisation when necessary.
This is one of the situations where a DSP-equipped four-channel amplifier can genuinely solve a problem, rather than simply adding another feature to a specification sheet.
And there is an important reality check: if the factory system already sounds reasonably balanced and your goal is only a moderate volume increase, you may not need an elaborate DSP installation at all. The correct solution depends on what the vehicle is actually doing to the signal.
The Right 4-Channel Amp Is the One That Fits the Whole System
A four-channel amplifier should never be chosen by wattage alone. The better question is whether the amplifier makes sense at every point in the signal chain — from the factory or aftermarket head unit, through the amplifier and wiring, to the speakers and the acoustics of the vehicle.
If your system needs sophisticated factory integration, signal correction and precise tuning, an amplifier such as the AudioControl D-4.800 offers a very different advantage from a conventional high-output design. If your priority is substantial speaker power, models such as the Rockford Fosgate T1000-4AD or Sundown Audio SAEv4-150.4 make more sense when the speakers, electrical system and installation can actually support their output. More straightforward builds can benefit from the value and conventional architecture of the Skar Audio RP-150.4AB, while a compact system may have a better fit with the Hertz DP 4.400.
The important part is not buying the most expensive amplifier in the comparison. It is avoiding a mismatch.
A 100W speaker does not need a 300W amplifier simply because the number looks impressive, and a powerful amplifier does not fix a badly processed factory signal, poor grounding, rattling door panel or incorrectly set crossover. Likewise, buying a smaller amplifier purely to save money can be false economy if you later replace the speakers and immediately outgrow its available output.
Before you buy, verify the amplifier’s RMS power at your actual speaker impedance, minimum supported load, input type, crossover controls, physical dimensions and electrical requirements. Then look at the installation honestly: where will it go, how will it be cooled, how will the signal reach it, and does the vehicle’s electrical system have enough capacity for the complete build?
That is ultimately what separates a good four-channel amplifier purchase from an impressive-looking specification sheet.
The best 4-channel amp is not the one with the biggest number. It is the one that gives your speakers the right amount of clean power, works properly with your vehicle’s signal, leaves enough control for proper tuning, and still makes sense when you look at the system as a whole.
Also Check:


