
Best Car Audio DSP Processors in 2026: Hi-Res Tuning, OEM Control & Smarter Sound
If your car already has a decent head unit but the sound still feels flat, poorly balanced, or disconnected from the driver’s seat, adding another amplifier is not always the answer. A properly chosen DSP can correct factory EQ, control individual speaker levels, shape crossovers, improve phase relationships, add precise time alignment, and bring the entire soundstage under control without forcing you to replace the radio.
The bigger question is what kind of audio system you are actually trying to build. Older vehicles with straightforward RCA outputs can work well with a conventional processor, while newer cars may have factory amplifiers, high-level signals, active speaker layouts, separate frequency bands, or heavily processed OEM audio. Those systems need much more than a few EQ adjustments. The Alpine PXE-C80-88 OPTIM8 is particularly interesting here because it combines an 8-channel DSP with built-in amplification and 96kHz/24-bit processing, giving you both detailed signal control and amplification in a single unit.
I also looked at how practical each processor is once it is actually inside the vehicle, because impressive specifications mean very little if the unit is difficult to integrate or tune. Input architecture, output flexibility, signal summing, crossover control, time alignment, gain structure, software, OEM compatibility, and the ability to expand the system later all matter when you are dealing with a real car rather than a specification sheet.
For this list, I focused on processors that make sense for real car-audio upgrades, from systems receiving their first serious DSP treatment to more advanced builds where the factory radio needs to stay in place. The rankings consider not just processing power, but how effectively each unit solves the problems that usually appear during installation, integration, amplifier matching, and final tuning.
Best Car Audio DSP Processors: Top 2026 Picks for EQ, OEM Integration and Advanced Tuning
#1. Alpine PXE-C80-88 OPTIM8 DSP Amplifier
Best Car Audio DSP With Amplifier Integration, Hi-Res Processing, Automatic Tuning, Time Alignment and OEM Signal Correction
#2. AudioControl DM-810 DSP Processor
Best DSP for Car Audio With Advanced OEM Integration, 8-Input/10-Output Routing, EQ Control, Signal Summing and Flexible Amplifier Integration
#3. Mosconi 6TO8 PRO DSP
Best Digital Signal Processor for Car Audio With Precision DSP Tuning, Parametric EQ, Time Alignment, High-Level Inputs and Flexible Crossover Control
#4. Rockford Fosgate DSR1 DSP
Best Car DSP Processor for OEM Factory Audio Upgrades With Signal Summing, 8-Channel Output Control, Time Alignment and Vehicle-Specific Integration
#5. Dayton Audio DSP-408 Processor
Best Budget Car Audio DSP With 8-Channel Output Control, Parametric EQ, Time Alignment, Flexible Crossovers and Manual DSP Tuning
Expert Tip
A DSP is one of those car-audio upgrades where more channels does not automatically mean better sound. Before buying one, count the speakers you actually plan to run, check whether your factory system sends processed high-level signals, and decide whether you need a standalone processor or one with amplification built in.
For example, the Alpine OPTIM8 makes a lot of sense when you want to simplify the system because its DSP and eight-channel amplifier work together. On the other hand, a processor such as the AudioControl DM-810 makes more sense when you already have multiple amplifiers and need more outputs and routing flexibility. That difference matters far more than simply seeing “8-channel” on the box.
If your car is newer and has a heavily integrated factory audio system, OEM signal handling and tuning flexibility should come before the number of EQ bands. For an older vehicle with a straightforward aftermarket stereo, you may not need to spend several times more for features you will never use.
How We Choose the Best Car Audio DSP Processors
We did not rank these processors by brand name, price, or channel count alone. The important question was what each unit can actually do once it is installed in a real vehicle.
First, we looked at signal compatibility and system architecture. A good DSP needs to fit the way your car produces its audio signal. Some vehicles give you clean RCA outputs, while many newer factory systems use high-level speaker signals and apply their own EQ, crossover points, and volume-dependent processing. That is why models with high-level input capability, signal summing, OEM integration, or flexible input routing received more attention.
We then looked closely at input and output flexibility. Four inputs and eight outputs can be perfectly adequate for a relatively simple system, but a more ambitious build may need additional inputs or outputs to separately control front speakers, rear speakers, tweeters, midbass drivers and subwoofers. The AudioControl DM-810 stands out here with eight inputs and ten outputs, while the Mosconi 6TO8 PRO takes a different approach with six inputs and eight outputs. These differences are not marketing numbers; they directly affect what kind of system you can build later.
Tuning control was another major factor. We wanted processors that give the installer genuine control over EQ, crossover frequencies, slopes, phase and time alignment rather than offering a few basic presets. The Mosconi, AudioControl and Alpine models are particularly interesting because they provide the level of adjustment needed to properly integrate different speakers and create a more convincing soundstage.
We also considered time alignment and speaker integration carefully. This is easy to overlook when shopping, but it can make a bigger audible difference than simply adding more power. Speakers mounted several feet apart do not reach your ears at the same time, especially in a typical left-hand-drive vehicle. Proper delay adjustment allows the processor to compensate for those physical differences and can move vocals and instruments into a much more coherent position across the dashboard.
For factory-audio upgrades, we gave additional weight to OEM integration. Replacing a factory radio is not always practical on newer vehicles, particularly when the screen, steering-wheel controls, warning sounds, vehicle settings, Bluetooth functions, or other systems depend on it. The Rockford Fosgate DSR1 is particularly relevant in this type of installation, while AudioControl and Alpine also offer strong solutions for working around the limitations of factory audio systems.
We did not ignore amplification requirements, either. This is one reason the Alpine OPTIM8 ranks so highly. Its built-in amplification means you are not necessarily buying a DSP today and then adding several external amplifiers just to make the system work. For the right vehicle and speaker configuration, that can reduce complexity, wiring, installation space, and overall system cost.
At the same time, we did not automatically push the most expensive processor to the top. The Dayton DSP-408 earns its place because its four-input/eight-output layout, parametric EQ, crossover controls, time alignment and high-level input capability provide a substantial amount of actual DSP functionality without moving into the pricing of the premium units.
Finally, we considered who each processor genuinely suits. A professional installer building a fully active multi-amplifier system has very different requirements from someone trying to clean up a factory stereo in a daily driver. Our rankings reflect that difference. The goal is not to tell every reader to buy the same processor; it is to make sure that whichever model you choose, its inputs, outputs, processing power and integration features actually match the system sitting in your car.
That is ultimately what separated these five from the rest of the field for this list: each one solves a real car-audio problem, but they do not all solve the same problem.
#1. Alpine PXE-C80-88 OPTIM8 DSP Amplifier
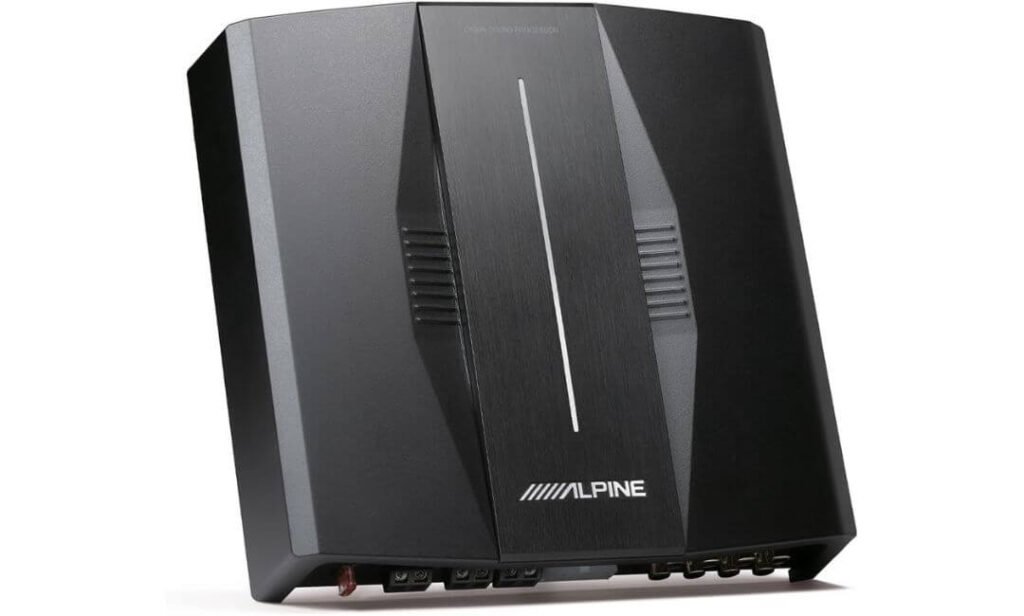
Quick Specs:
- Processing: 96kHz/24-bit Hi-Res audio
- Amplifier: 8 channels
- Power: 50W × 6 + 150W × 2 at 4Ω, or 50W × 6 + 300W × 2 at 2Ω
- EQ: 31-band parametric and graphic EQ
- Inputs: 8-channel high-level / 6-channel RCA, plus Bluetooth, USB DAC and coaxial digital
- Outputs: 8-channel 4V RCA
- Tuning: Individual time correction on all 8 channels
- OEM Control: Anti-EQ and automatic vehicle-response correction
- Software: Alpine OPTIM smartphone app and PC software
- Auto Tuning: Guided AutoEQ 2.0 system with real-time acoustic analysis
- Speaker-Level Handling: Up to 30V
- Control: Included RUX-CSP1 remote controller
What immediately makes the OPTIM8 interesting is that it doesn’t force you to build the system around a separate DSP and amplifier. The processing and eight amplifier channels live in the same unit, so a factory system can be taken apart at the signal level, corrected, tuned and powered without turning the vehicle into a wiring project.
The real advantage shows up when you start tuning. You get 31-band parametric/graphic EQ, individual time correction across all eight channels and 4V RCA outputs if you later want to hand off part of the system to external amplification. The high-level inputs can also accept up to 30V, which gives it considerably more room to work with factory audio signals than a processor designed only around conventional RCA sources.
And then there is AutoEQ 2.0. This is not simply a preset labelled “better sound.” The software measures the vehicle’s acoustic response and helps build a corrected target, while the newer software adds target-curve presets and Center Stage Mode. For someone who knows how to tune a DSP manually, the manual controls are still there; for everyone else, the guided process gives you a far less intimidating starting point.
What We Like About the OPTIM8
- DSP and amplification in one chassis — fewer major components to buy and install, particularly useful for factory-system upgrades.
- Real OEM correction — Anti-EQ is designed to deal with the factory system’s existing frequency shaping instead of simply piling another EQ curve on top of it.
- Eight individually tunable channels — useful when the system moves beyond a basic front/rear speaker arrangement.
- Proper expansion path — the 8-channel 4V RCA outputs mean you can add external amplification later rather than replacing the processor.
- AutoEQ 2.0 is genuinely useful — especially for owners who want a properly balanced starting point without spending hours learning DSP software first.
The Trade-Off Worth Knowing
The only thing I’d make clear before buying is that automatic tuning does not eliminate installation and setup work. The processor still needs correct signal connections, speaker configuration and sensible microphone positioning for the measurement process to produce a useful result. And if you’re building a very high-output system with large dedicated subwoofer amplification, the built-in amplifier should be viewed as part of the system—not as a replacement for a serious external mono amplifier.
Where the OPTIM8 Makes the Most Sense
The strongest case for this unit is a vehicle where the factory radio needs to stay, but the owner wants substantially more control over the speakers. You can take high-level signals directly from the OEM system, correct the factory EQ, establish individual speaker timing and then use the internal amplification for the main speakers. If the system eventually grows into a larger build, the RCA outputs give you an escape route to external amps.
That makes it unusually flexible for both older vehicles receiving a serious audio upgrade and newer cars where replacing the factory infotainment system is simply not worth the trouble. The important part is matching the channel plan to the speakers you actually intend to run rather than buying it just because “eight channels” sounds impressive.
The Insider Pro-Tip
Before installing it, map the entire audio system on paper first: which factory signals are available, which speakers need individual processing, which channels will handle the front stage, and whether the subwoofer will eventually need its own amplifier. That five-minute exercise can save hours of rewiring later.
And don’t judge the OPTIM8 by its first automatic tune alone. Use AutoEQ as the starting point, then listen from the driver’s seat and make small manual corrections. A measurement can tell the processor what the cabin is doing; it cannot know whether you personally want a warmer vocal, tighter midbass or a little more low-end weight. That final bit of judgement is where a good DSP installation starts sounding like your system rather than a factory curve that happens to be flatter.
#2. AudioControl DM-810 DSP Processor
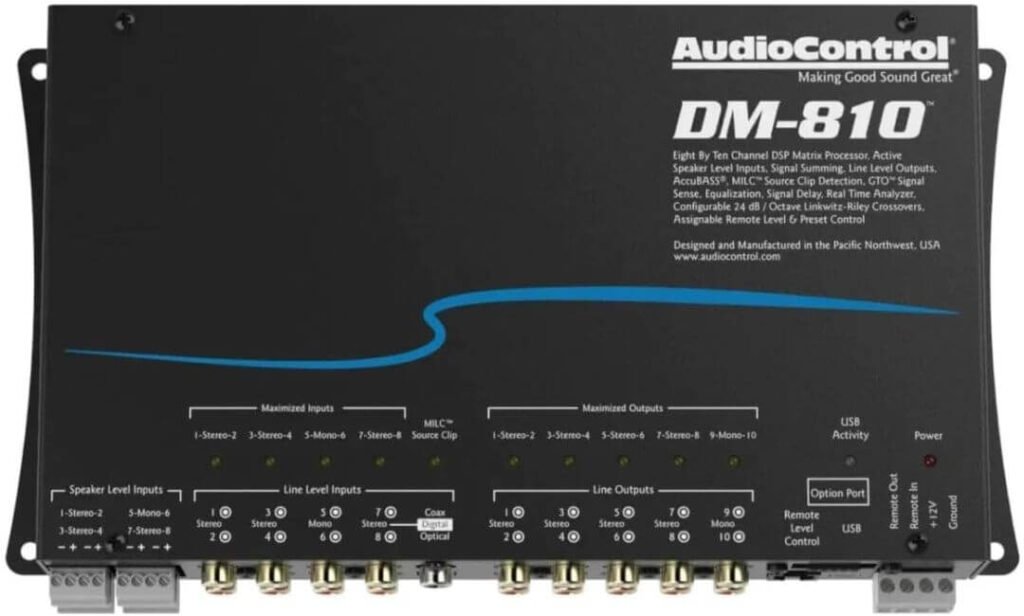
Quick Specs:
- Architecture: 8-input / 10-output matrix DSP
- Inputs: Speaker-level, RCA line-level, S/PDIF and TOSLINK
- Outputs: 10 channels of flexible signal routing
- EQ: 30-band graphic/parametric equalization
- Analysis: Input and output real-time analyzers
- Processing: AccuBASS, signal summing, phase correction and signal delay
- Crossovers: Adjustable high-pass, low-pass and band-pass filters
- OEM Integration: Designed for factory and aftermarket audio systems
- Input Control: MILC with clipping indication
- Turn-On: GTO signal sensing
- Control: DM Smart DSP software for PC
- Expansion: Optional accessories available for additional connectivity
The DM-810 makes the most sense when the factory audio system is complicated enough that a simple line-output converter starts becoming a compromise. Its four speaker-level input pairs can accept factory signals, while the RCA, S/PDIF and TOSLINK inputs give an aftermarket system several other ways into the processor. That flexibility becomes valuable when a modern vehicle has different audio signals feeding different parts of the factory system.
The real trick is the matrix architecture. Instead of treating every input as a fixed destination, the processor lets you work with and redistribute those signals before sending them to your amplifiers. Its internal channel summing can help reconstruct a more useful full-range signal from factory outputs that have already been divided or processed upstream. That is a much more meaningful feature for OEM integration than simply advertising a large EQ.
Once the signal is inside, the 30-band EQ, adjustable crossovers, phase controls and signal delay give you the tools to build the system around the speakers rather than the factory response. The built-in RTA is especially useful here because you can actually see what is happening instead of making repeated EQ changes purely by ear. AudioControl also gives the DM-810 its AccuBASS processing, which is intended to restore low-frequency content that factory systems may reduce as volume increases.
What We Like About the DM-810
- 8×10 matrix flexibility — ten outputs give a serious multi-amplifier build plenty of room to grow.
- Strong OEM signal handling — speaker-level inputs and channel summing make it particularly useful when working around a factory radio’s processing.
- Built-in RTA tools — valuable when you want to tune from measurements rather than guessing at frequencies.
- AccuBASS has a real purpose — it addresses the bass roll-off behaviour that can appear in factory systems as volume rises.
- MILC is a practical detail — monitoring input level and clipping helps prevent you from building the rest of the system around an already-distorted signal.
One Thing You Should Know Before Buying
The DM-810 is not the processor I’d recommend simply because you want better sound with the least possible setup work. Its strength is control, and control comes with a learning curve. You will get much more from it if you are comfortable using a laptop/PC and actually want to understand input levels, routing, crossover points, time alignment and EQ rather than relying entirely on automatic correction.
Why the Extra Outputs Can Matter
The difference between eight and ten outputs sounds small until you start planning a fully active system. A basic front/rear/sub setup may never use the additional flexibility, but a system with separately amplified tweeters, midrange, midbass and subwoofer can consume outputs surprisingly quickly.
That is where the DM-810 starts looking less like an unnecessarily complicated processor and more like infrastructure for the whole audio system. You can route, sum and process signals before they reach separate amplifiers, which is exactly the sort of control that becomes useful when a factory stereo refuses to give you one clean, untouched full-range signal.
The Insider Pro-Tip
If you are integrating a factory system, do not start by adjusting the EQ. First identify exactly what each factory channel is carrying. If the OEM radio has already separated bass, midrange or treble between different outputs, use the DM-810’s analysis and summing capabilities to establish a sensible full-range signal first. Only then should you start shaping the response.
And there is a second advantage to doing it this way: your final EQ becomes much easier to understand. If the input signal is wrong, you can spend hours trying to fix the sound with output EQ and never quite get there. Get the factory signal under control first, establish clean crossover points and timing, then make the smaller tonal adjustments. That is where this processor earns its “matrix” name rather than simply being another box with a lot of EQ sliders.
#3. Mosconi 6TO8 PRO DSP
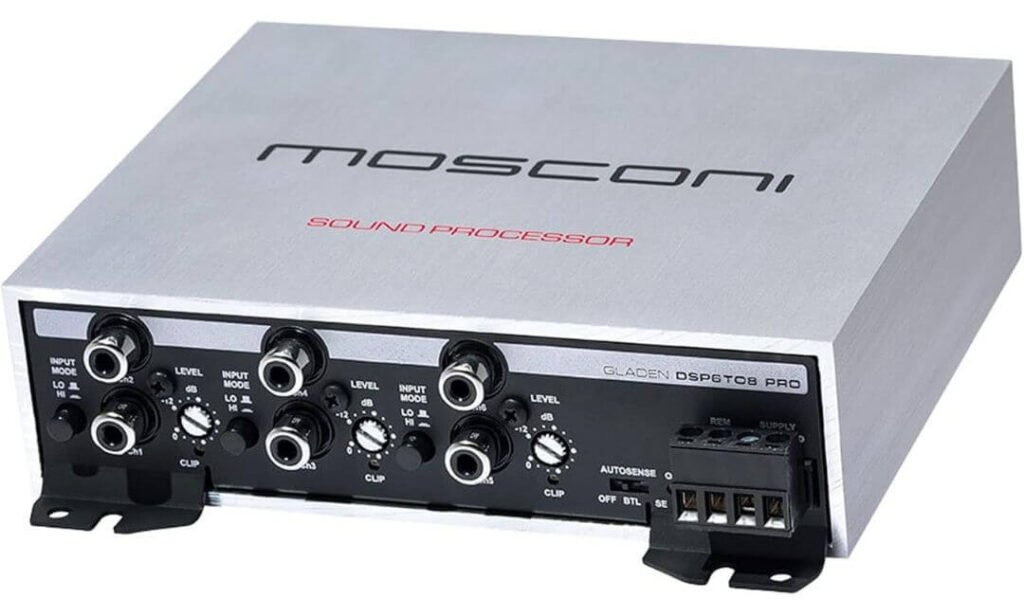
Quick Specs:
- Architecture: 6 inputs / 8 outputs
- Input Compatibility: Low-level and high-level audio signals
- Input Range: 1.2–8 Vrms low-level, 3–20 Vrms high-level
- Maximum Output: Up to 8 Vrms
- THD: 0.003%
- Frequency Response: 10Hz–40kHz
- Channel Separation: 90dB
- Power Supply: 10–16V DC
- Control: USB connection for PC tuning
- Optional Control: RCD/RC-Mini remote and MOS-BTM Bluetooth module
- Remote Output: 100mA maximum
- Size: 150 × 125 × 40mm including fixed feet
The 6TO8 PRO takes a very different route from the Alpine OPTIM8. There is no amplifier built into it, and that is not necessarily a disadvantage. If you already know which amplifiers you want—or are building a system where the front stage and subwoofer need completely different amplification—the processor simply sits between the source and those amplifiers and gives you control over the signal.
Its six-input/eight-output architecture is particularly useful once a system starts becoming more complicated. You can bring multiple factory or aftermarket signals into the processor and distribute them across separate amplifier channels rather than being locked into a simple front/rear arrangement. That gives an installer considerably more freedom when designing an active front stage, rear fill and subwoofer section.
The other important detail is its input flexibility. The processor can accept low-level signals from an aftermarket source as well as higher-level signals from a factory system, so replacing the head unit is not automatically required. With a 3–20Vrms high-level input range, it has plenty of headroom for working with stronger OEM speaker outputs, provided the vehicle’s signal and wiring are correctly identified before installation.
What We Like About the 6TO8 PRO
- Pure DSP architecture — you choose the amplifiers instead of being tied to an integrated amplifier section.
- Six inputs and eight outputs — enough flexibility for substantially more than a basic front/rear/subwoofer installation.
- High- and low-level compatibility — useful when moving between factory and aftermarket source equipment.
- Very compact chassis — at roughly 150 × 125 × 40mm, it is considerably easier to find a discreet mounting location than many larger processors.
- Strong electrical specifications — 0.003% THD, 90dB channel separation and up to 8Vrms output give an installer a clean signal platform to work with.
The One Trade-Off to Understand
The 6TO8 PRO is not the “press a button and let the processor do everything” option. Its appeal is manual control, so getting the best from it means spending time on gain structure, crossover points, equalisation and time alignment—or paying an installer who knows how to do that work properly.
Where It Becomes the Smarter Choice
This processor starts making much more sense when you have already decided that your system will use separate amplifiers. A four-channel amplifier can handle the front stage while another amplifier handles the subwoofer, for example, with the DSP determining exactly what each amplifier receives.
That separation also gives you room to change the system later. You can replace an amplifier, change speakers or move from a conventional passive setup toward a more actively controlled system without having to replace the DSP simply because its internal amplifier is no longer suitable.
The compact size is another practical advantage that is easy to overlook. A processor measuring 150 × 125 × 40mm can be hidden in places where a larger all-in-one unit may become awkward, which matters when you are trying to keep the installation clean and serviceable.
The Insider Pro-Tip
With a processor like this, don’t start tuning by chasing the flattest graph you can produce. Start with the physical system: verify speaker polarity, establish sensible crossover points, set gains so the processor is receiving a clean signal, and then work on time alignment. A perfectly flat measurement means very little if one driver is out of phase or the system is being pushed into clipping upstream.
And if you’re installing it into a factory system, spend your time understanding what the OEM radio is actually sending into each channel before touching the output EQ. Six clean inputs that are correctly identified are far more valuable than eight outputs being heavily corrected to compensate for a misunderstood factory signal. That’s the kind of detail that separates a genuinely well-tuned DSP system from one that simply has a lot of adjustments.
#4. Rockford Fosgate DSR1 DSP
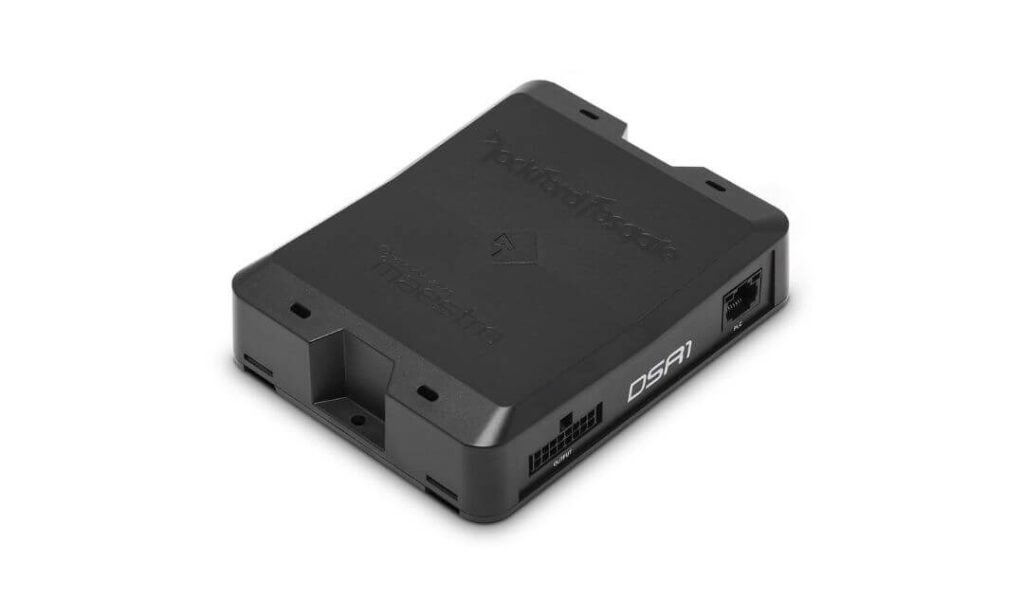
Quick Specs:
- Architecture: 8-channel digital signal processor
- High-Level Inputs: 4 channels
- Balanced Inputs: 4 channels
- Additional Inputs: Auxiliary RCA and S/PDIF coaxial
- Outputs: 8-channel RCA
- EQ: Up to 245 bands of adjustable equalization
- Time Alignment: Up to 10ms of delay
- Crossovers: Adjustable high-pass and low-pass filters with selectable slopes
- Tuning: Interactive iOS and Android app
- Wireless Control: Bluetooth 4.0
- Turn-On: Signal-sense activation
- OEM Integration: Integrated iDatalink Maestro functionality for supported applications
- Warranty: 1 year
The DSR1 is aimed at a problem that many modern car-audio upgrades run into: you want aftermarket speakers and amplifiers, but you don’t want to throw away the factory radio just to get proper DSP control. That makes its OEM-oriented architecture the most important part of this processor—not the impressive number of EQ bands printed on the specification sheet.
You can bring factory speaker-level signals into the processor, combine that with other available inputs where appropriate, and then feed up to eight processed RCA outputs to your amplifier system. That gives you a practical route from an OEM source to a more serious multi-amplifier setup without making the factory head unit the weak link.
Why the DSR1 Still Has Plenty to Offer
The 245-band equalization capability gives you a huge amount of adjustment room, but the real benefit is having enough control to correct individual parts of a vehicle’s response rather than trying to solve everything with broad bass, mid and treble adjustments.
The same goes for its up-to-10ms channel delay. In a car, the driver’s left-side speaker can be dramatically closer than the opposite speaker, while the subwoofer may sit several feet behind both. Being able to delay individual channels gives an installer the ability to bring those arrival times into better alignment and create a more stable front image.
And unlike older DSP workflows that can leave you tied to a laptop, the DSR1’s iOS/Android control makes real-time adjustments much easier once the unit is installed. That is particularly handy when you are sitting in the driver’s seat and trying to understand what a change actually does to the soundstage.
What We Like About the DSR1
- Factory-system focus — a strong choice when replacing the OEM radio isn’t desirable.
- Eight processed outputs — enough flexibility for multi-amplifier builds without immediately running out of channels.
- Extensive EQ control — useful for correcting heavily processed factory audio signals.
- Mobile tuning — iOS and Android control makes adjustment considerably more convenient once the processor is installed.
- Maestro integration — for compatible vehicles and configurations, it can help retain important factory functions while adding aftermarket audio hardware.
The Important Compatibility Catch
The DSR1 is not a universal “plug it into any car and keep everything” box. The Maestro side of the installation depends on the vehicle, compatible firmware and the appropriate integration hardware. Before buying, check the exact vehicle application rather than assuming that every Ford, Chrysler or other supported-platform vehicle will use the same installation path.
Why Eight Outputs Are Useful Here
The eight outputs are what make this processor particularly attractive for someone who expects the system to grow. A relatively simple setup might use channels for the front stage, rear speakers and subwoofer, while a more ambitious build can divide the front stage across separate amplifier channels and give the subwoofer section its own processing.
That means you can keep the factory source while building the amplifier side almost like a completely new audio system. For a vehicle with a deeply integrated infotainment system, that can be a much cleaner solution than fighting to replace the factory screen or radio.
The Insider Pro-Tip
Don’t buy the DSR1 because 245 EQ bands sounds better than 30 or 31. You will rarely need anything close to that level of adjustment if the system is designed correctly. Buy it when you need its combination of OEM signal handling, eight outputs, mobile tuning and vehicle integration.
For a factory-radio installation, spend your first tuning session getting the input signal right. Identify what the OEM channels actually contain, establish clean gain levels, verify polarity and set your crossover strategy before touching the detailed EQ. Once the foundation is correct, the enormous amount of available equalization becomes useful rather than becoming a collection of sliders you keep moving to compensate for an upstream problem.
#5. Dayton Audio DSP-408 Processor
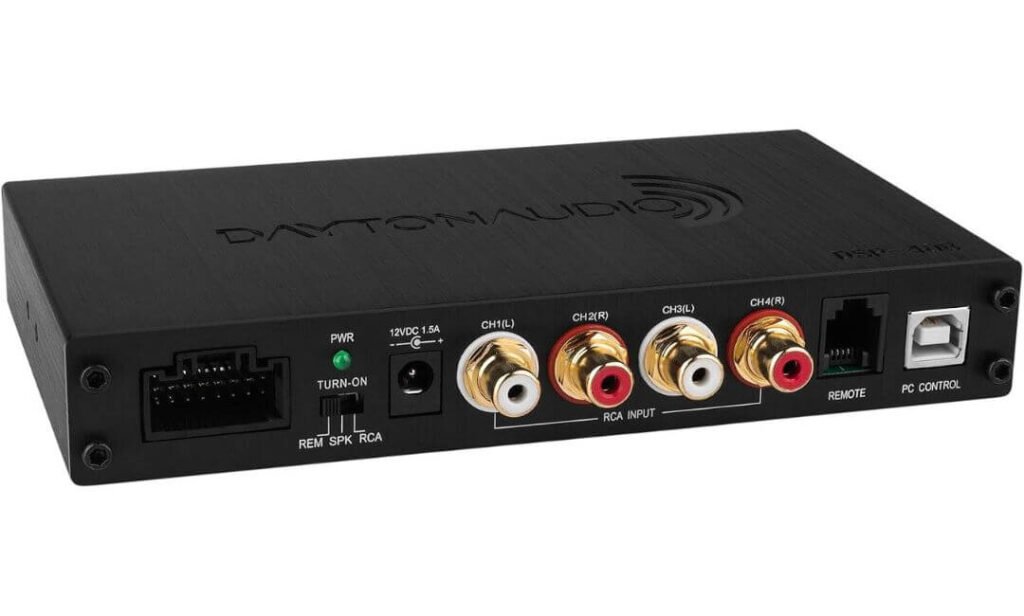
Quick Specs:
- Architecture: 4 inputs / 8 outputs
- EQ: 10-band parametric EQ on every output
- Processing: Real-time digital signal processing
- Crossovers: Adjustable high-pass and low-pass filtering
- Time Alignment: Adjustable speaker-distance delay
- Routing: Flexible input/output matrix mixing
- Inputs: RCA audio inputs with included 16-pin harness for installation
- Outputs: 8 RCA channels
- Control: Windows-based graphical tuning software
- Presets: Six user-configurable memory locations
- Expansion: Optional Bluetooth module for wireless control and audio streaming
- Installation: Suitable for both automotive and home-audio applications
The DSP-408 does not try to compete with premium processors by adding a huge list of luxury features. Its appeal is much simpler: it gives you eight independently processed outputs without demanding a premium DSP budget. For a system using separate amplifiers for the speakers and subwoofer, that can be exactly what you need.
Each of the eight outputs gets its own 10-band parametric EQ, while crossover and delay controls let you work on the parts of the system that actually affect integration. You can route the available inputs through the matrix rather than being stuck with a rigid one-input-to-one-output arrangement. That makes the unit considerably more capable than its relatively straightforward appearance suggests.
The Real Value Is in the Eight Outputs
A four-input/eight-output layout is particularly useful when you already have external amplification. You could dedicate different processed outputs to a front stage, rear speakers and subwoofer amplification, or build a more involved setup where individual amplifier channels receive their own crossover and EQ settings.
The time-alignment controls are another feature I would not overlook. Speaker locations inside a car are rarely symmetrical, so the driver’s seat does not hear every driver at the same distance. Being able to compensate for those differences gives you a much better starting point for imaging and speaker-to-subwoofer integration.
What We Like About the DSP-408
- Eight independently processed outputs — a lot of system flexibility for its class.
- 10-band parametric EQ per output — enough control for serious manual tuning.
- Input/output matrix routing — useful when the source signal does not perfectly match the amplifier layout.
- Time alignment and crossover control — the two features that matter enormously when integrating multiple speakers.
- Straightforward software approach — the graphical interface makes the adjustment process easier to understand than a processor that hides everything behind complicated menus.
The Main Compromise
The DSP-408 is a manual-tuning processor, not an automatic room-correction system. There is no built-in microphone routine that will measure your vehicle and create the initial tune for you. If you want the best result, you need to spend time setting levels, crossover points, delay and EQ—or have an installer do it.
When the DSP-408 Is Actually the Smart Buy
This is where I would consider the Dayton before simply spending more money. If you already have good external amplifiers and your main requirement is to control the signal going to them, paying for an integrated amplifier or advanced OEM software features may not give you much additional benefit.
It also works nicely for someone upgrading an older vehicle where the audio architecture is relatively straightforward. You can keep the existing source, feed the processor, divide the signal between the amplifiers and tune the individual outputs without rebuilding the entire vehicle around an expensive DSP platform.
There is also something useful about its simplicity: because the DSP is not tied to a built-in amplifier, you can choose the amplification separately. That makes it easier to build around the speakers and subwoofer you already own rather than letting the processor determine the rest of the system.
The Insider Pro-Tip
With an affordable DSP, don’t try to make up for cheap or badly matched hardware with more EQ. Get the gain structure right first, establish your crossover points, set the speaker delays and verify polarity. Only after those pieces are correct should you start using the 10-band EQ on each output.
And if you’re installing it in a vehicle, take a little extra care with power, grounding and RCA routing. DSPs live in the signal chain, so installation quality matters more than many first-time buyers expect. If you introduce electrical noise at the power or signal stage, even a perfectly configured EQ cannot remove the underlying problem cleanly. A neat power/ground layout and sensible signal routing are part of getting the most from this processor.
Best Car Audio DSP Processors in 2026 Compared for EQ, Time Alignment and Amplifier Integration
| What matters in a real install | Alpine PXE-C80-88 OPTIM8 Best All-In-One | AudioControl DM-810 OEM / Matrix | Mosconi 6TO8 PRO Precision Tuning | Rockford Fosgate DSR1 Factory Integration | Dayton Audio DSP-408 Value Pick |
|---|---|---|---|---|---|
| Processing layout |
8-channel DSP + amplifier
Processing and amplification in one chassis |
8 inputs / 10 outputs
Matrix architecture for complex signal routing |
6 inputs / 8 outputs
Pure DSP for external amplification |
8-channel DSP
Designed around OEM and multi-amp integration |
4 inputs / 8 outputs
Straightforward multi-channel processing |
| Built-in amplification |
Yes
50W × 6 + 150W × 2 at 4Ω 50W × 6 + 300W × 2 at 2Ω |
No | No | No | No |
| High-level OEM input |
Yes
Up to 30V speaker-level input handling |
Yes
Speaker-level inputs plus signal summing |
Yes
High-level and low-level input capability |
Yes
Four high-level input channels |
Yes
Useful for straightforward factory-radio upgrades |
| Detailed EQ control |
31-band parametric / graphic EQ
Individual channel tuning |
30-band EQ
Strong measurement and tuning workflow |
Advanced DSP tuning
Built for detailed manual adjustment |
Up to 245 EQ bands
Extensive frequency correction capability |
10-band parametric EQ per output
Eight outputs can be adjusted independently |
| Time alignment |
8-channel correction
Useful for front-stage imaging and sub integration |
Yes
Channel delay for acoustic alignment |
Yes
Detailed manual delay control |
Up to 10ms
Per-channel timing adjustment |
Yes
Speaker-distance compensation |
| OEM signal correction |
Anti-EQ + AutoEQ
Designed to work around factory processing |
Channel summing + AccuBASS
Especially useful with processed factory signals |
High/low-level flexibility
Strong choice when the installer wants manual control |
Maestro integration
Particularly relevant to supported OEM applications |
Basic OEM signal path
Better suited to simpler factory systems |
| Automatic tuning |
Yes
Guided AutoEQ 2.0 workflow |
Auto EQ support
Also offers detailed manual tuning |
Manual tuning focus
Better suited to experienced installers |
App-based tuning
Real-time adjustment from mobile devices |
No automatic vehicle tuning
Manual setup is required |
| Control approach |
iOS / Android + PC
Automatic and manual workflows |
PC software
Designed for detailed system setup |
USB / PC
Optional remote and Bluetooth accessories |
iOS / Android
Wireless real-time tuning |
Windows GUI
Optional Bluetooth expansion |
| Best system match |
Factory-to-aftermarket upgrade
Especially when you want DSP and amplification together |
Complex OEM / multi-amp build
Excellent when signal routing is the difficult part |
Custom multi-amplifier system
Best suited to deliberate manual tuning |
Factory-radio replacement strategy
Strongest when supported OEM integration matters |
Budget multi-channel upgrade
Good fit when external amplifiers already exist |
| What sets it apart |
DSP + 8-channel amp + AutoEQ
The easiest path to a sophisticated system with fewer major components |
8×10 matrix architecture
Exceptional routing freedom for complicated factory signals |
Compact pure-DSP platform
Lets you choose the amplifiers independently |
OEM integration + mobile tuning
A practical bridge between factory audio and aftermarket hardware |
Strong DSP fundamentals at a lower tier
Eight outputs, PEQ, delay and crossover control without premium-system complexity |
| The honest catch | Built-in power is convenient, but serious subwoofer systems may still need external amplification. | Powerful but more demanding to configure; it rewards an installer who understands OEM signal behaviour. | No built-in amplifier or automatic tuning; manual setup is part of the experience. | Vehicle-specific integration needs to be checked carefully before purchase and installation. | Less automation and refinement than the premium processors; best when you are comfortable tuning manually. |
Buying Guide for Choosing the Right Car Audio DSP Processor
A DSP is easiest to buy when you stop looking at it as a sound-quality accessory and start treating it as the control centre between your source and amplifiers. The right processor depends on how your factory or aftermarket system sends its signal, how many speakers you want to control independently, whether you need automatic tuning, and whether you already have amplification.
A simple two-way front stage and subwoofer does not need the same processor as a fully active system with separate tweeter, midrange, midbass, rear fill and multiple subwoofer channels. Spending more on unused outputs or complicated integration features will not automatically make that simpler system sound better.
Start With the Signal Your Car Already Has
This is the first thing I would check before looking at EQ bands or processing resolution.
Aftermarket head units commonly give you RCA preamp outputs, which are relatively straightforward to feed into a DSP. Factory systems can be much less predictable. The OEM amplifier may receive speaker-level signals, the radio may apply its own EQ, and different channels may already be filtered for specific factory speakers.
That is why high-level input capability matters.
If you are keeping the factory radio, look for a processor that can accept the signal directly from the vehicle without forcing you to add another box simply to convert the signal.
The five processors in this guide approach that problem differently:
- Alpine OPTIM8: high-level integration with Anti-EQ and automatic correction.
- AudioControl DM-810: particularly strong when factory channels need to be analysed and summed.
- Mosconi 6TO8 PRO: accepts high- and low-level sources while leaving the system architecture largely in the installer’s hands.
- Rockford Fosgate DSR1: particularly interesting for compatible OEM integration applications.
- Dayton DSP-408: a simpler route for systems where you mainly need DSP control and external amplification.
If you do not know what your factory system is outputting, find that information before buying the DSP. Guessing here can turn an otherwise good processor into a frustrating installation.
Decide How Many Channels You Actually Need
Channel count should follow your speaker layout, not the other way around.
For example, imagine a system with:
| Speaker arrangement | Processing requirement |
|---|---|
| Front speakers + subwoofer | Relatively simple |
| Front + rear + subwoofer | More output flexibility |
| Separate tweeters + midrange + subwoofer | Active front stage |
| Tweeters + midrange + midbass + subwoofer | High channel demand |
| Front stage + rear fill + multiple subwoofer channels | Complex multi-amplifier system |
A processor with eight outputs gives you considerably more freedom than a basic four-output design, but having eight outputs does not mean you have to use all eight immediately.
This is where the difference between the models becomes important.
The four-input/eight-output layout of the Dayton can be enough for a straightforward multi-amplifier system. The six-input/eight-output Mosconi gives you more source-side flexibility. The ten-output AudioControl goes further when the installation requires several separately processed amplifier feeds.
Know When You Need a Pure DSP and When an Amplifier Makes More Sense
This is one of the biggest differences between the products in this list.
A standalone DSP does not power your speakers. It processes the signal and sends it to external amplifiers.
The Alpine takes a different approach by combining DSP processing with an eight-channel amplifier. That can make the installation considerably simpler when its built-in power is appropriate for the speakers you are running.
Think about it this way:
Choose a DSP with built-in amplification when:
- You want fewer major components.
- You are replacing or upgrading factory speakers.
- Installation space is limited.
- You do not need a very high-powered dedicated subwoofer amplifier.
- You prefer an integrated solution.
Choose a standalone DSP when:
- You already own good amplifiers.
- You want to select amplification independently.
- You plan to run a powerful dedicated subwoofer amplifier.
- You are building a fully active system.
- You expect the system to evolve over time.
For a serious subwoofer installation, I would not choose a processor simply because its internal amplifier saves you from buying another amp. The subwoofer’s actual power requirement should decide that part of the system.
Pay Attention to Input and Output Routing
This is where terms such as matrix DSP start becoming meaningful.
A basic DSP might simply take an input and send it to a corresponding output. A matrix processor gives you considerably more freedom to combine and redistribute signals.
That becomes important when the factory system does something inconvenient, such as sending different frequency ranges through different outputs.
The AudioControl DM-810 is particularly strong in this area because its 8-input/10-output architecture gives an installer substantial routing flexibility. Its internal channel-summing capability can also be useful when working with factory systems that do not provide one clean full-range signal.
The practical question to ask is:
Can this DSP create the signal I actually need for the amplifier channels I plan to run?
That question is more useful than simply asking whether one processor has more EQ bands than another.
Don’t Buy Based on EQ Band Count Alone
A long EQ specification looks impressive, but more adjustment does not automatically produce better sound.
The Rockford DSR1’s large EQ capability, for example, gives you extensive correction options, while the Alpine provides 31-band parametric/graphic EQ and the Dayton provides 10-band parametric EQ on each output.
All three can be useful.
What matters is whether the processor gives you the controls you actually need:
- Frequency adjustment
- Gain adjustment
- Q control where available
- High-pass filtering
- Low-pass filtering
- Band-pass filtering
- Crossover slope adjustment
- Phase or polarity control
- Individual channel delay
- Input gain control
- Signal routing
A processor with sensible controls that are correctly configured can outperform a much more complicated unit that has simply been adjusted without understanding what the vehicle is doing acoustically.
Time Alignment Is More Important Than Many Buyers Realise
If you sit in the driver’s seat, the left-side speaker may be much closer to you than the right-side speaker. Your subwoofer may be several feet behind the front stage.
The speakers therefore do not reach your ears at exactly the same time.
Time alignment lets the DSP compensate for those differences.
This can improve:
- Vocal placement
- Centre image
- Front-stage focus
- Speaker-to-speaker coherence
- Subwoofer integration
You do not need to chase extreme settings. Accurate measurements and sensible adjustment matter more than simply entering large delay numbers.
This is also why I would consider time correction a core DSP feature, not an optional luxury.
Consider Automatic Tuning Honestly
Automatic tuning is useful, but it should not be confused with professional installation.
The Alpine OPTIM8 is particularly attractive here because its guided AutoEQ workflow can give you a properly measured starting point without requiring you to understand every DSP parameter before you hear the system.
That is a genuine advantage for a first-time DSP owner.
But there is still a reason manual tuning exists.
Your vehicle has its own cabin acoustics, speaker locations, reflections, seats and listening position. A measurement system can identify frequency-response problems, but it cannot completely understand what you personally want the system to sound like.
The best approach is usually:
- Get the installation and speaker polarity correct.
- Set appropriate input levels.
- Establish crossover points.
- Measure the system.
- Apply automatic correction if available.
- Listen from the driver’s seat.
- Make small manual adjustments.
That last step is where a good tune becomes personal rather than simply mathematically tidy.
Check OEM Integration Before You Buy
Newer vehicles can make DSP installation much more complicated than older cars.
A factory radio may control:
- Steering-wheel buttons
- Bluetooth
- Navigation
- Vehicle settings
- Door chimes
- Safety alerts
- Reverse-camera functions
- Factory amplifier behaviour
- Active noise cancellation
- Multiple speaker channels
Replacing the head unit may therefore create more problems than it solves.
If your goal is to keep the factory infotainment system, prioritise a DSP with the right OEM signal-handling capabilities.
The Rockford DSR1 can be particularly useful for compatible vehicle-specific installations through its Maestro integration, while the AudioControl and Alpine approaches are more broadly focused on processing and correcting factory audio signals.
Always verify your exact vehicle and integration hardware before ordering. A DSP being technically capable of OEM integration does not mean every vehicle uses the same wiring or programming.
Think About the Amplifiers Before Choosing the DSP
Your amplifier layout should be planned at the same time as your DSP.
For example:
Simple upgrade
Factory radio → DSP → 4-channel amplifier → front/rear speakers
DSP → mono amplifier → subwoofer
Active front-stage build
Factory or aftermarket source → DSP → separate amplifier channels → tweeters + midrange/midbass
DSP → dedicated amplifier → subwoofer
The second arrangement requires substantially more control.
If you already know that you will run separate amplification for multiple speaker sections, buying a processor with insufficient outputs today can become an expensive mistake later.
Check Installation Space and Wiring
DSPs are not all equally easy to hide.
The physical dimensions matter if you are mounting the processor:
- Under a seat
- Behind the dashboard
- Near the factory amplifier
- Inside a centre console
- In the trunk
- Beside aftermarket amplifiers
The Mosconi 6TO8 PRO is particularly compact, which can be useful in a tight installation. An all-in-one processor/amplifier can also reduce the number of separate boxes, although you still need to allow enough room for wiring, ventilation and service access.
Do not choose the mounting position purely because the processor fits there. Signal wiring, power wiring, grounding and accessibility all matter.
Don’t Forget Power and Grounding
A DSP sits in the signal path, so poor electrical installation can become audible.
Use an appropriate power connection, a solid ground point, sensible cable routing and proper protection. Keep signal wiring away from unnecessary sources of electrical interference where practical.
This becomes particularly important when the system contains several amplifiers.
If you hear alternator whine, hiss or unwanted noise after installing a DSP, do not immediately assume the DSP itself is defective. Check the grounding, gain structure, RCA routing and source signal first.
Decide How Much Tuning You Actually Want to Do
Be honest with yourself here.
If you enjoy experimenting with EQ curves, crossover slopes, delays and individual speaker channels, a processor with extensive manual controls can be extremely rewarding.
If you want the system installed once and would rather not spend an evening learning DSP software, automatic tuning and a simpler interface may be worth paying extra for.
A rough guide:
| Your priority | Look for |
|---|---|
| Easiest sophisticated upgrade | DSP + amplifier + automatic tuning |
| Complex factory integration | Strong OEM processing and signal summing |
| Serious manual tuning | Extensive routing, EQ, delay and crossover control |
| Multi-amplifier system | More inputs and outputs |
| Lower-cost custom build | Eight outputs with essential DSP controls |
| Future expansion | Spare outputs and flexible routing |
Which Type of Buyer Should Choose Which?
Alpine OPTIM8: Best suited to someone who wants an advanced DSP system without separately building the amplifier section, particularly when factory integration and easier tuning are important.
AudioControl DM-810: Makes the most sense for a complicated OEM or multi-amplifier installation where signal summing, routing and measurement tools are central to the job.
Mosconi 6TO8 PRO: Better suited to an experienced enthusiast or installer who wants a compact, standalone DSP and intends to choose the amplifiers separately.
Rockford Fosgate DSR1: A strong option when compatible OEM integration and convenient mobile tuning are high on the priority list.
Dayton DSP-408: The sensible choice when you mainly need eight processed outputs, EQ, crossover and time-alignment control without moving into the feature level of the more expensive processors.
One Last Buying Check Before You Order
Before clicking the buy button, make sure you can answer these six questions:
- What audio signal does my vehicle provide?
- Am I keeping the factory radio?
- How many speakers need independent processing?
- How many amplifier channels will I actually use?
- Do I want automatic tuning or manual control?
- Will the system need more channels later?
If you can answer those correctly, choosing the processor becomes much easier.
The best car audio DSP is not necessarily the one with the highest EQ count, most outputs, or highest price. It is the one whose inputs, processing architecture and output channels fit the way your particular car is built—and give you enough control to improve the system without creating unnecessary complexity.
Core Capabilities to Verify Before Choosing a Car Audio DSP Processor
A DSP can have an impressive specification sheet and still be the wrong unit for your vehicle. Before buying, I would verify the signal path, channel requirements, tuning controls, amplifier relationship, software support, and installation requirements as one system. These details determine whether the processor will actually solve the problem you bought it for.
EQ, Crossover and Time Alignment Should Work Together
Look for a DSP that gives you more than a basic bass and treble adjustment. A useful car audio DSP should let you control frequency, gain, crossover points, filter slopes, phase or polarity, and speaker delay independently where the system requires it.
The crossover section is particularly important. Your tweeters, midrange, midbass drivers and subwoofer should not all receive the same full-range signal. A good processor allows you to decide which frequencies reach each speaker and how quickly the signal rolls off outside that speaker’s working range.
At minimum, check for:
- Parametric or sufficiently detailed EQ
- High-pass filtering
- Low-pass filtering
- Band-pass filtering where required
- Adjustable crossover slopes
- Individual output gain
- Phase or polarity adjustment
- Individual channel delay
- Input-level adjustment
- Preset or memory storage
The goal is not to have the longest feature list. It is to have enough control to properly integrate the speakers you actually own.
Time Alignment Accuracy Matters More Than a Big Number
Time alignment is one of the reasons a DSP can make a properly installed system feel dramatically different.
The driver’s seat is not centred between the speakers. A tweeter beside your left A-pillar can be much closer to you than the opposite-side driver, while the subwoofer might be behind the rear seats or in the trunk. Without correction, those signals arrive at different times.
A useful processor should therefore give you individual channel delay, preferably with measurements that are easy to understand and adjust.
When comparing processors, check:
- Whether delay is available independently per channel
- Whether it can be entered by distance or time
- How fine the adjustment steps are
- Whether the software shows the current delay clearly
- Whether the processor can retain different tuning presets
- Whether phase/polarity can be adjusted alongside delay
Do not get distracted by the largest delay number. You rarely need extreme delay values in a normal installation. Accurate measurement and sensible adjustment are what matter.
Measurement Tools Can Save Hours of Guesswork
Some processors are designed around manual tuning, while others provide automatic measurement and correction.
Both approaches can work.
A processor such as the Alpine OPTIM8 is attractive for someone who wants a guided automatic starting point, whereas a unit such as the Mosconi 6TO8 PRO is better suited to someone who wants to manually control the system and work through the tuning process themselves.
When a processor offers measurement or automatic correction, check whether it actually provides:
- Microphone-based measurement
- Frequency-response analysis
- Automatic EQ correction
- Target-curve selection
- Manual adjustment after automatic tuning
- Multiple listening-position or system presets
The important point is that automatic tuning should be treated as a starting point, not a replacement for judgement. The microphone measures the vehicle; it does not know whether you personally prefer a slightly warmer vocal presentation or stronger midbass.
Check the DSP’s Input Architecture Before Anything Else
This is one of the most commonly overlooked parts of buying a processor.
An aftermarket head unit might give you clean RCA outputs. A factory system may instead provide amplified speaker-level signals, separate frequency bands, or heavily processed channels.
That changes which DSP makes sense.
For a factory system, verify:
- Speaker-level input capability
- Maximum supported input voltage
- Input sensitivity adjustment
- Signal summing
- OEM equalisation correction
- Signal-sense turn-on
- Factory amplifier compatibility
- Vehicle-specific integration where applicable
A processor that accepts the right type of signal can save you from adding unnecessary conversion hardware.
The AudioControl DM-810, for example, is particularly useful when the factory system has to be summed and reorganised before reaching aftermarket amplifiers. The Rockford Fosgate DSR1 takes a different route, with its OEM integration focus and vehicle-specific Maestro compatibility on supported applications.
Verify Amplifier Integration and Gain Staging
A DSP does not automatically make an amplifier system cleaner. The signal entering the processor, the signal leaving it and the amplifier’s input sensitivity all need to work together.
A sensible gain structure should prevent you from running one component unnecessarily hot and then trying to correct the resulting distortion downstream.
Before installation, establish:
- The maximum clean output level from the factory or aftermarket source.
- The appropriate input level for the DSP.
- The DSP’s output level for each amplifier.
- The amplifier’s input sensitivity.
- The desired speaker and subwoofer levels.
- Where clipping occurs in the complete signal chain.
This is especially important with factory audio systems, because the OEM source may change its output behaviour as volume increases.
A processor with input-level monitoring or clipping indication can make this process easier. AudioControl’s MILC system is a good example of a feature that addresses a real installation problem rather than simply adding another specification to the box.
Decide Whether You Need a DSP With an Amplifier
This should be a deliberate decision.
The Alpine OPTIM8 combines its DSP with an eight-channel amplifier, which can make a complete upgrade considerably simpler.
The Mosconi, AudioControl, Rockford and Dayton approaches are fundamentally different because the DSP is used to feed external amplification.
A built-in amplifier makes more sense when:
- You want fewer separate components.
- Your speaker power requirements are moderate.
- Installation space is limited.
- You are upgrading factory speakers.
- You want a cleaner all-in-one installation.
A standalone DSP makes more sense when:
- You already own amplifiers.
- You want different amplifier power levels for different speakers.
- You plan to use a powerful mono amplifier for the subwoofer.
- You want to upgrade amplification independently later.
- You are building a fully active system.
Do not buy a DSP amplifier combination simply because it looks like better value on paper. If your subwoofer eventually needs a dedicated high-power amplifier, the integrated amplifier may not remove that requirement.
Check Output Voltage and Amplifier Compatibility
The processor’s output specification matters because it determines how much signal you can provide to the amplifier without unnecessarily increasing gain downstream.
When comparing processors, check:
- Maximum RCA output voltage
- Output impedance
- Number of independent outputs
- Whether each output can be separately configured
- Remote turn-on capability
- Signal-sense functionality
- Whether the amplifier accepts the processor’s output level comfortably
The goal is a clean signal relationship, not simply the highest voltage number possible.
High-Level Inputs Are Not All the Same
Seeing “high-level input” on a product page is not enough.
You should also check the supported voltage range.
Factory systems can produce significantly different signal levels, particularly when an OEM amplifier is involved. A processor designed around low-level speaker signals may behave very differently from one built to accommodate stronger factory outputs.
This is one reason the Alpine’s high-level input handling and the Mosconi’s stated high-level input range are useful specifications rather than marketing decoration.
Check Software Before You Commit to the Hardware
A powerful DSP with frustrating software can become a product you stop using properly.
Before buying, look at the control method:
- Windows PC
- Mac compatibility
- iOS
- Android
- Bluetooth control
- USB connection
- Wired remote
- Wireless remote
- Firmware-update procedure
Also check whether the software allows you to save and recall complete system configurations.
That can be useful if you want separate settings for different listening preferences, passengers, different speaker configurations, or a future system upgrade.
Warranty, Firmware and Manufacturer Support Matter
DSPs are software-driven products, so support matters more than it does with a basic passive speaker.
Before buying, verify:
- Warranty length
- Where warranty service is handled
- Whether firmware updates are still being released
- Whether the tuning application is actively supported
- Whether replacement cables or accessories are available
- Whether installation documentation is detailed
- Whether vehicle-specific integration information is maintained
- Whether optional Bluetooth or remote-control accessories are still available
This is particularly important when buying an older DSP at a discount. A low price is not necessarily a bargain if the software, firmware or required accessory is difficult to obtain.
Don’t Ignore Optional Accessories
Some processors become substantially more useful with optional hardware.
For example, a Bluetooth module can change how you interact with a DSP, while an external remote can make preset switching easier from the driver’s seat.
Before comparing prices, check whether the configuration you actually want requires:
- Bluetooth module
- External microphone
- Wired remote
- Wireless remote
- Vehicle-specific integration harness
- USB interface
- Additional installation harnesses
Compare the price of the complete usable system, not just the processor sitting alone in the box.
Verify Physical Installation Requirements
The processor has to live somewhere in the vehicle, and that location affects the installation.
Before ordering, check:
- Overall dimensions
- Mounting depth
- Connector clearance
- Ventilation requirements
- Power and ground access
- RCA cable routing
- USB access
- Bluetooth or wireless reception
- Accessibility for future servicing
A compact processor such as the Mosconi 6TO8 PRO can be easier to hide in a constrained installation. An integrated DSP amplifier can also reduce the number of boxes, but it may require more attention to airflow and power wiring.
The 1.8-Channel Reference Is Not a Buying Category
If you see terminology such as “1.8-channel DSP” or another unusual channel designation while comparing products, do not assume it represents a meaningful advantage.
Car-audio DSPs are normally described by their actual input/output architecture, such as 4-in/8-out, 6-in/8-out or 8-in/10-out. Those numbers tell you much more about what the processor can actually do in a vehicle.
For this article, I would therefore judge a processor by its real input count, independently processed outputs, routing flexibility and amplifier integration, rather than by unusual channel terminology used in a listing.
The Final Checklist Before You Buy
Before placing the order, verify these points against your exact vehicle and planned system:
- Input type: RCA, high-level, optical or digital
- Input voltage: Enough headroom for the factory or aftermarket source
- Outputs: Enough independent channels for today’s system and the next upgrade
- EQ: Genuine per-channel control where required
- Crossovers: Suitable filters and slopes for your speakers
- Time alignment: Individual adjustment with practical measurement options
- Phase: Available where speaker integration requires it
- OEM correction: Anti-EQ, summing or vehicle-specific integration if needed
- Amplification: Built-in or external, depending on your system
- Gain control: Enough adjustment to establish a clean signal path
- Tuning: Automatic, manual, or both
- Software: Compatible with the computer or phone you actually use
- Updates: Current firmware and supported software
- Warranty: Clear coverage and service route
- Installation: Correct dimensions, wiring and mounting space
- Expansion: Enough flexibility for the system you may build later
The most important check is still the simplest one: make sure the DSP matches the architecture of your car before worrying about which specification looks best on a product page. A processor with fewer headline features can be the better purchase if it accepts your factory signal cleanly, gives you the outputs you need, integrates properly with your amplifiers and can be tuned correctly.
Installation and Integration Tips for a Car Audio DSP
A good DSP cannot compensate for an installation where the signal path, amplifier gains, speaker polarity, or power wiring are wrong. In a serious car audio system, the processor should be treated as the control centre of the signal chain, not simply another box added between the head unit and amplifiers.
The best results usually come from getting the physical installation right first, then establishing a clean signal path, setting gains, confirming speaker polarity, and only afterwards beginning DSP tuning.
Plan the Signal Path Before Routing Any Cable
Before mounting the processor, map the complete system from source to speaker.
A typical installation might look like:
Factory head unit → DSP → front-stage amplifier → tweeters and midrange/midbass → subwoofer amplifier → subwoofer
If the vehicle uses a factory amplifier, the path may instead be:
Factory head unit → OEM amplifier → DSP → aftermarket amplifiers → speakers
The exact arrangement depends on the vehicle and the processor, but the principle remains the same: know where every signal originates, where it is being processed, and which amplifier ultimately drives each speaker.
Before installing anything, identify:
- Factory head-unit outputs
- Factory amplifier location, if equipped
- DSP input channels
- DSP output channels
- Front-stage amplifier inputs
- Subwoofer amplifier input
- Speaker wiring locations
- Remote turn-on or signal-sensing connections
- Power and ground locations
- USB, Bluetooth, or tuning access
This prevents a surprisingly common problem: installing the processor first and then discovering that the available factory signal does not match the planned input configuration.
Route Signals With the Soundstage in Mind
The phrase “dash-to-door” is useful because many factory and aftermarket systems have a physical separation between the source and the speakers.
The DSP does not care whether a speaker is in the dashboard, door, A-pillar, kick panel, or rear deck. What matters is which output channel feeds which speaker and how that speaker is positioned relative to the listening position.
For a front-stage system, keep the signal routing logically separated:
- Left tweeter
- Right tweeter
- Left midrange or midbass
- Right midrange or midbass
- Subwoofer
If the system is fully active, each of these speakers can receive its own DSP output and its own tuning parameters.
That is where the DSP becomes genuinely useful. Instead of sending the same processed signal to several speakers, you can control each section of the front stage independently.
The goal is not merely to send audio from the dashboard to the doors. The goal is to create a predictable signal path that allows the DSP to control the acoustic relationship between those speakers later.
Keep Left and Right Channels Consistent
When routing the front stage, maintain consistent channel identification from the source all the way to the amplifier.
Label both ends of every important cable.
For example:
- FL = Front Left
- FR = Front Right
- FL Tweeter
- FR Tweeter
- FL Midbass
- FR Midbass
- Subwoofer
This sounds basic, but it becomes extremely valuable when you are troubleshooting a system several months later.
A reversed left/right connection can also make DSP tuning unnecessarily confusing. You may spend time trying to correct imaging through delay and EQ when the real problem is simply that the channels were connected incorrectly.
Align DSP Outputs With the Front-Stage Amplifier
Once the signal path is physically established, assign each DSP output to the correct amplifier input.
For a four-channel front-stage amplifier, for example:
| DSP Output | Amplifier Channel | Speaker |
|---|---|---|
| Output 1 | Channel 1 | Left tweeter |
| Output 2 | Channel 2 | Right tweeter |
| Output 3 | Channel 3 | Left midbass |
| Output 4 | Channel 4 | Right midbass |
The exact arrangement can change depending on the system, but keeping the channel structure logical makes tuning much easier.
If you later adjust the left tweeter EQ, you should know exactly which DSP output and amplifier channel you are changing.
Integrate the Subwoofer as Part of the System
The subwoofer should not be treated as an independent system that simply gets connected after everything else is finished.
Its crossover, level, phase, polarity and time relationship all affect the front stage.
A common arrangement is:
DSP subwoofer output → mono amplifier → subwoofer
The DSP should normally handle the signal shaping, while the amplifier provides the required power.
During setup, establish:
- Appropriate low-pass crossover
- Appropriate high-pass protection where required
- Subwoofer output level
- Phase or polarity
- Time alignment
- Amplifier gain
- Integration with the front-stage midbass
The crossover between the front midbass and subwoofer deserves particular attention. If the transition is poorly chosen, you can end up with a system that has plenty of bass but sounds disconnected, with the subwoofer seeming to come from the rear of the vehicle.
Do Not Use the Amplifier Gain as a Volume Control
This is one of the most important installation rules.
The DSP output level and amplifier gain should work together as part of a controlled gain structure. Turning the amplifier gain up simply because the subwoofer “needs more bass” can create an unnecessarily sensitive amplifier input stage and make the system harder to tune.
A better process is:
- Establish a clean source level.
- Set the DSP input level correctly.
- Configure DSP output levels.
- Set amplifier gains appropriately.
- Confirm that the amplifiers remain clean at the intended listening level.
- Use the DSP for final channel-level balancing.
The exact procedure depends on the equipment and test method, but the underlying principle is universal: do not use gain controls to compensate for a poorly planned signal level.
OEM Integration Requires More Than Connecting Four Wires
Factory integration is where many DSP installations become complicated.
Modern vehicles can have:
- Factory equalisation
- Loudness processing
- Active noise cancellation
- Multiple factory amplifier channels
- Separate tweeter and midbass signals
- Factory crossovers
- Bass roll-off at higher volume
- Signal summing requirements
- Vehicle-specific communication between the head unit and amplifier
This means simply tapping one left and one right speaker signal may not give you the full-range signal you expect.
Before connecting the DSP, determine whether the factory system provides:
A full-range signal, partially processed channels, or multiple frequency-specific channels.
If separate channels are already being processed by the factory system, a DSP with appropriate OEM integration features may be required to reconstruct a usable signal.
OEM Signal Summing Must Be Done Correctly
If the factory system divides audio between multiple channels, signal summing can be necessary.
For example, one pair of factory outputs may primarily contain low-frequency information while another carries higher-frequency information. Combining them incorrectly can produce an incomplete or frequency-distorted signal.
This is one reason processors designed for OEM integration, such as the AudioControl DM-810 and Rockford Fosgate DSR1, can be attractive for certain factory upgrades.
But do not assume that every vehicle needs signal summing.
Always determine the factory signal architecture first.
Watch for Factory Equalisation and Bass Roll-Off
Some OEM systems deliberately change their output as volume increases.
A factory system may boost or reduce certain frequencies to compensate for the limitations of its original speakers. Replacing those speakers or inserting a DSP without accounting for that processing can produce an uneven result.
This is where features such as OEM equalisation correction or automatic signal correction can be valuable.
However, the DSP should not be used to blindly flatten every factory response.
The better approach is to understand what the factory system is doing and why, then decide which part of that processing should be corrected.
Active Noise Cancellation Can Create Problems
Some newer vehicles use microphones and speakers as part of an active noise-control system.
Changing the audio system can sometimes interfere with that factory system, particularly when factory speaker signals are altered substantially.
Potential symptoms can include:
- Unexpected low-frequency behaviour
- Changes in cabin noise
- Unusual bass response
- Noise-control errors
- Unwanted feedback or tonal changes
The correct solution is vehicle-specific. Do not automatically disable every factory microphone or system simply because an aftermarket DSP is being installed.
Keep Signal Cables Away From High-Current Power Wiring
Cable routing can have a direct effect on system noise.
Where practical, keep low-level RCA or other sensitive signal wiring separated from:
- Main battery power cables
- High-current amplifier power cables
- Alternator wiring
- Motors
- Factory high-current harnesses
If signal and power wiring must cross, crossing them at approximately a right angle is generally preferable to running them parallel for a long distance.
The objective is not to create an unnecessarily complicated installation. It is simply to avoid placing sensitive signal wiring next to strong electrical interference sources for the entire length of the vehicle.
Grounding Is More Important Than Adding Filters Later
A DSP can expose grounding problems that were already present in the vehicle.
Use a solid, properly prepared grounding point with an appropriate cable size for the equipment. Remove paint or coating where required to establish a reliable electrical connection, and keep the ground path short and secure.
Avoid treating noise with random filters before finding its source.
If you hear alternator whine, investigate:
- DSP ground
- Amplifier grounds
- Head-unit ground
- RCA or signal connections
- Power cable routing
- Damaged or poorly shielded cables
- Ground-potential differences
A noise filter can sometimes be useful, but it should not be the first response to a poor installation.
Manage Ground Loops and Potential Differences
When multiple components are grounded at different locations, small voltage differences can sometimes create unwanted noise.
This becomes particularly relevant when you have:
- Factory head unit
- DSP
- Multiple amplifiers
- Additional signal converters
- Factory amplifier
- Aftermarket accessories
The solution is usually to establish a clean, consistent grounding strategy, rather than randomly moving grounds until the noise disappears.
If a system is quiet before the engine starts but develops a rising whine with engine speed, treat that as a diagnostic clue rather than simply increasing the DSP’s noise filtering.
Protect the DSP From Heat and Moisture
The DSP should be installed in a location that is dry, secure and reasonably protected from excessive heat.
Avoid locations where it can be exposed to:
- Water
- Condensation
- Direct sunlight
- Excessive amplifier heat
- Loose cargo
- Unprotected metal edges
- Constant vibration
Also leave enough access for USB connections, software updates and troubleshooting.
A processor hidden permanently behind trim may look clean during the installation, but it can become a headache the first time you need to connect a computer.
Use the App for Convenience, Not as a Substitute for Proper Setup
A mobile application can make DSP adjustment much easier, particularly when you need to make small changes from the driver’s seat.
Depending on the processor, an app may let you control:
- Volume
- Presets
- Input selection
- EQ
- Time alignment
- Crossover settings
- Channel levels
That is convenient, but initial system configuration is often easier on a computer because the larger interface gives you a clearer view of the complete signal chain.
For example, a PC interface is generally better suited to setting up multiple channels, crossover relationships and detailed EQ. A phone can then become the convenient interface for final adjustments and preset selection.
On-Device Controls Have Their Own Advantages
A processor with physical controls or a dedicated remote can still be useful even when smartphone control is available.
A physical remote can be particularly convenient for:
- Preset switching
- Subwoofer level adjustment
- Master volume control
- Input selection
- Driver-position adjustments
The important distinction is that a remote should normally provide access to the functions you use while driving, rather than becoming a replacement for detailed DSP programming.
Detailed tuning should be completed while stationary.
Complete the Physical Installation Before Tuning
Do not start serious DSP tuning while the installation is still changing.
Before measuring or adjusting the system, confirm:
- Every speaker is connected to the intended output.
- Left and right channels are correct.
- Speaker polarity is correct.
- Amplifier channels are correctly assigned.
- Subwoofer polarity is correct.
- All amplifiers turn on reliably.
- There are no obvious ground or signal noises.
- The factory system behaves normally.
- DSP input levels are within an appropriate range.
- Amplifier gains have been established.
- No speaker is receiving an inappropriate full-range signal.
Only after these checks should you move into detailed EQ, crossover and time-alignment work.
The Real Installation Goal
A professional DSP installation should leave you with a signal chain that is easy to understand, easy to troubleshoot and easy to tune.
That means the DSP should know exactly what each input represents, every output should have a defined job, the amplifiers should receive appropriate signal levels, and the physical wiring should not introduce avoidable noise.
Once that foundation is correct, the DSP’s more advanced functions become genuinely useful. You can then work on imaging, tonal balance, crossover integration and staging without constantly wondering whether the problem is actually a wiring or gain-setting mistake.
FAQs About Car Audio DSP Processors
Can a DSP actually fix the sound problems created by a factory system in a Ford F-150 or Toyota Tacoma, or does it just EQ the factory signal?
A good DSP can do considerably more than apply EQ, but it cannot magically undo every decision made upstream by the factory audio system.
In a Ford F-150, Toyota Tacoma, or another newer vehicle, the factory signal may already contain equalisation, crossover filtering, channel-specific processing, level changes and other corrections designed around the original speakers. If you simply feed one of those processed signals into an aftermarket amplifier, the new speakers inherit some of that factory behaviour.
A properly selected DSP can help by:
- Summing separate factory frequency bands when necessary.
- Correcting unwanted factory equalisation.
- Applying new crossovers for aftermarket speakers.
- Controlling individual speaker levels.
- Adding time alignment between left and right channels.
- Creating a controlled signal for aftermarket amplifiers.
- Building a new acoustic balance around the replacement speakers.
But here is the part many DSP articles skip: you have to know what the factory signal is doing before you try to correct it. If the OEM system is already heavily processed, flattening the signal with a generic EQ curve can actually make the final system worse.
The DSP is most powerful when it is used to understand and reshape the factory signal, not simply “make everything flat.”
If I install a DSP in a BMW or Mercedes-Benz with a heavily processed factory audio system, should I flatten the OEM signal first?
Not automatically.
This is one of those areas where the usual “flatten the factory EQ and start fresh” advice sounds logical but can be misleading. A BMW, Mercedes-Benz, or another premium OEM system may use complicated processing that changes with volume, speaker position and system configuration.
The better approach is to measure and identify the behaviour of the signal first.
If the factory system has a frequency response that changes significantly with volume, you need to know that before deciding how much correction the DSP should apply. Otherwise, you may create a tune that sounds acceptable at one volume and noticeably wrong at another.
A sensible workflow is:
- Identify which factory channels contain useful full-range information.
- Determine whether channels need to be summed.
- Measure the response at realistic listening levels.
- Check whether the factory response changes as volume increases.
- Apply only the correction necessary for the aftermarket system.
- Re-measure after the DSP configuration.
- Fine-tune by ear after the measurement work is complete.
Real talk: a perfectly flat graph is not automatically a perfectly sounding car. Cabin acoustics, speaker installation, reflections and personal listening preference still matter.
The DSP should give you control over those problems. It should not encourage you to chase a graph simply because the graph looks impressive.
Is an 8-channel DSP enough for a modern active car audio system, or can I run out of outputs surprisingly quickly?
Eight outputs can be plenty, but the answer depends on how ambitious the front stage is.
A simple active front stage with separate tweeters and midbass drivers might use four outputs:
- Left tweeter
- Right tweeter
- Left midbass
- Right midbass
Add a subwoofer channel and you are at five. Add a centre channel, rear speakers, or additional midrange drivers, and the channel requirement rises quickly.
For example, a more complex arrangement could consume outputs like this:
| Speaker section | DSP outputs |
|---|---|
| Left/right tweeters | 2 |
| Left/right midrange | 2 |
| Left/right midbass | 2 |
| Subwoofer | 1–2 |
| Centre speaker | 1 |
| Total | 8–9 |
This is why an 8-channel DSP should not be judged simply as “more than enough”.
If you are building a straightforward two-way active front stage plus subwoofer, eight outputs give you useful room. If you are planning a three-way front stage, centre channel and multiple subwoofer outputs, you should start looking at the complete channel map before purchasing the processor.
The AudioControl DM-810’s 10 outputs, for example, can make sense for a more complicated system even if you do not need all ten channels on day one.
Can DSP time alignment make a car’s soundstage genuinely appear in front of the driver, or is that mostly marketing?
Time alignment is absolutely real, but time alignment alone does not create a convincing front soundstage.
It corrects the arrival-time differences between speakers so that the sound from different drivers reaches the listening position in a more controlled relationship. That can dramatically improve image placement.
But if your tweeters are poorly aimed, one midbass is mounted differently from the other, the crossover region is wrong, or the left and right output levels are badly mismatched, simply entering distance measurements into the DSP will not solve everything.
A convincing image normally depends on several things working together:
- Speaker installation and aiming
- Correct polarity
- Crossover selection
- Level matching
- Time alignment
- Phase behaviour
- Equalisation
- Cabin reflections
- Listening position
There is also an important measurement detail: do not blindly assume the physical speaker distance is the final answer. Distance provides a useful starting point, but acoustic behaviour can differ because speakers are mounted in doors, dashboards and pillars rather than existing in free space.
The best process is to establish the physical measurements first, then verify the result through measurement and listening.
Why can a more expensive car audio DSP sound worse than a cheaper one after installation?
Because the processor is rarely the limiting factor by itself.
A $1,000-plus DSP with sophisticated processing can still produce a disappointing system if the installer gets the signal architecture, gain structure, polarity, crossover points or speaker integration wrong.
Meanwhile, a less expensive processor with fewer features can produce an excellent result when:
- Its inputs correctly match the vehicle.
- It has enough outputs for the system.
- The amplifiers are properly integrated.
- The speakers are installed correctly.
- Gains are set methodically.
- Crossovers are appropriate.
- Time alignment is measured rather than guessed.
- EQ is used to correct real problems rather than every visible peak.
This is also why I would not choose a DSP based only on EQ band count, maximum delay or the number of presets.
The real value is how well the processor fits the complete system.
A processor like the Dayton DSP-408 can make sense in a relatively straightforward build because its 4-input/8-output architecture provides substantial control for the money. A more expensive AudioControl, Mosconi or Alpine unit becomes worthwhile when its additional integration, routing, processing or amplification capabilities solve a problem that the simpler unit cannot.
That is the uncomfortable truth with DSP upgrades: buying a more expensive processor does not automatically buy better sound. Buying the right processor for the vehicle and tuning it properly does.
Final Verdict: The Right DSP Is the One That Gives You Control Without Creating Another Problem
A car audio DSP is easy to oversell because the specification sheet can make almost any processor look impressive. More channels, more EQ bands, higher output voltage, automatic tuning, smartphone control, and increasingly complicated factory-integration features all sound like reasons to spend more.
But after looking at the complete signal path, the more useful question is much simpler:
What problem is the DSP actually solving in your vehicle?
If you are keeping the factory head unit, OEM integration should be near the top of the list. If you are building an active front stage, independent outputs, crossover flexibility and accurate time alignment become far more important. If you already own good amplifiers, a standalone DSP may be the logical choice. If you want fewer components and a cleaner installation, an integrated DSP amplifier such as the Alpine OPTIM8 can make considerably more sense.
The Best DSP Depends on the System You Are Building
There is no universal winner here.
The Alpine PXE-C80-88 OPTIM8 is the most complete choice when you want DSP processing and amplification in one installation, particularly when automatic correction and OEM integration are important.
The AudioControl DM-810 stands out when the factory signal is complicated and you need substantial input/output routing, signal summing and processing flexibility.
The Mosconi 6TO8 PRO is the more enthusiast-oriented choice when you already have amplification and want detailed manual control over a relatively serious system.
The Rockford Fosgate DSR1 makes the most sense when factory integration and vehicle-specific functionality are central to the build.
The Dayton Audio DSP-408 remains interesting when you want genuine DSP control without spending heavily on features your system may never use.
That distinction matters because these processors are not simply five versions of the same product.
Do Not Buy More DSP Than Your System Can Use
One of the easiest mistakes is buying a processor with capabilities far beyond the actual system.
If your vehicle has a conventional two-way front stage, subwoofer and aftermarket amplifier, you may not need an enormous processing architecture. On the other hand, a three-way active front stage, centre channel, rear fill and multiple subwoofer channels can consume outputs surprisingly quickly.
Before buying, draw the system on paper.
Source → DSP inputs → DSP outputs → amplifiers → speakers
If you cannot clearly explain what every input and output will do, you are not ready to choose the processor.
That simple exercise can prevent an expensive mistake.
Spend Money on the Installation Before Chasing the Last DSP Feature
A premium DSP cannot correct a badly mounted speaker, poor grounding, incorrect polarity or an amplifier that has been improperly gained.
The order should be:
Correct installation → clean signal path → proper gain structure → correct crossover setup → time alignment → measurement → EQ → listening adjustments.
That order is more important than whether your DSP has another ten EQ bands on the specification sheet.
And this is where many online buying guides get the subject backwards. They compare processors as if the hardware itself creates the sound.
It does not.
The processor gives you control. The installation and tuning determine what you do with that control.
The Most Important Upgrade May Be the DSP You Already Know How to Tune
If you are new to DSP tuning, buying the most complicated processor available may actually slow you down.
A processor with clear software, sensible routing, reliable presets and enough adjustment range can be more valuable than one with an intimidating list of advanced functions.
Automatic tuning can give you a useful starting point. Measurement software can reveal problems your ears may not immediately identify. But neither replaces understanding what the speakers are doing in the vehicle.
The strongest setup is usually the one where you can answer three questions:
- What is wrong with the current signal?
- What is the DSP being used to correct?
- How will I know the correction actually worked?
If you can answer those before buying, you are already ahead of most DSP purchases.
Our Pick for Different Types of Builds
| Your priority | Best direction |
|---|---|
| DSP plus amplification in one unit | Alpine PXE-C80-88 OPTIM8 |
| Complex OEM integration and routing | AudioControl DM-810 |
| Detailed manual tuning with external amplifiers | Mosconi 6TO8 PRO |
| Factory integration and vehicle-specific functionality | Rockford Fosgate DSR1 |
| Strong DSP control without a premium price | Dayton Audio DSP-408 |
The Real Bottom Line
If your current system sounds harsh, muddy, poorly centred or disconnected, do not assume that buying a DSP is automatically the cure.
First determine where the problem actually originates.
It could be the factory signal. It could be speaker placement. It could be crossover overlap. It could be phase. It could be gain structure. It could be time alignment. Or, in some cases, the speakers themselves simply are not capable of producing the result you want.
A good DSP gives you the ability to separate those problems instead of treating the entire system with one broad EQ curve.
That is why the best car audio DSP processor is not necessarily the one with the most channels, the most EQ bands or the highest price. It is the processor whose inputs, outputs, processing tools, software and integration capabilities match the architecture of your vehicle and the system you are actually building.
Get that part right, install it properly, and tune it with measurements and your ears working together, and a DSP can become the component that finally makes the rest of your car audio hardware work like one coherent system.
Also Check:


