5 Best Rooftop Tent for Jeep Renegade in 2026: Aluminum Hard Shells, Fast Pop-Up & 4-Season Comfort
If you drive a Jeep Renegade, choosing a rooftop tent is less about squeezing the biggest sleeping area onto the roof and more about finding the right balance of weight, size and usability. The Renegade is a compact SUV, and Jeep documentation for relevant configurations specifies a 150-lb (68-kg) roof-load limit with the luggage rack. That makes the tent’s own weight important from the start—especially when some options in this guide weigh 158 lb, 160 lb or considerably more before the mounting system is added.
That changes what “best” really means. A hard shell that opens in 5–30 seconds, a comfortable mattress, condensation control, blackout fabric or four-season insulation can make a huge difference at camp, but those features only matter if the complete setup makes sense for the vehicle. Your crossbars, mounting hardware, tent dimensions and roof rating all need to work together; a stronger aftermarket rack does not automatically increase the Renegade’s own limit.
For this guide, I’m looking beyond the usual feature checklist and comparing hard-shell construction, sleeping space, setup speed, weather protection, comfort features and real vehicle fitment. Some tents here are genuinely impressive but simply too heavy for the Renegade, and I’ve called that out rather than pretending “fits Jeep SUVs” means every Jeep is equally suitable. The aim is simple: help you find a rooftop camping setup that works in the real world, not just one that looks good in a product photograph.
Best Jeep Renegade Rooftop Tent: Top 2026 Picks for Quick Setup, Comfort & Practical Fitment
#1. HEYFUN Explorer Pro Rooftop Tent
Best Jeep Renegade rooftop tent for 158-lb aluminum hard-shell design and 5-second setup
#2. Bayati Naturnest Sirius 1 Plus Rooftop Tent
Best rooftop tent for Jeep Renegade with 63-inch sleeping width, blackout fabric and four-season insulation
#3. Jiadrooe Hard Shell Roof Top Tent
Best Jeep Renegade roof tent for adjustable crossbars, thermal insulation and integrated USB power
#4. WildFinder Hard Shell Rooftop Tent
Best rooftop camping tent for Jeep Renegade with aluminum shell, 5 cm mattress and 5,000 mm weather protection
#5. ARCTWONDER Solar Panel Rooftop Tent
Best Jeep Renegade rooftop tent for 216W solar power, 10-second setup and four-season camping
Expert Tip
For a Jeep Renegade, the tent that looks most impressive is not necessarily the smartest buy. The roof has a limited payload, so every pound matters once you add the tent, crossbars, mounting hardware and anything else you plan to carry up there. That is why I would rather have a well-matched hard-shell tent that sets up quickly and does its job than a larger tent that pushes the vehicle too close to its limit.
One more thing worth checking before you order: measure your actual crossbar spacing and mounting area, then compare it with the tent’s mounting hardware. Features such as adjustable crossbars, insulation, blackout fabric or an integrated solar system are useful, but none of them matter if the complete setup is not properly compatible with your Renegade.
How We Chose These Jeep Renegade Rooftop Tents
We did not rank these tents simply by counting features or putting the most expensive-looking model first. The Renegade changes the buying equation. It is a compact SUV, so the useful question is not “Which tent has the most features?” but “Which tent gives a Renegade owner the most practical camping setup without ignoring the vehicle?”
We started with the hard-shell designs, because quick deployment is one of the biggest advantages of an RTT for short trips. The HEYFUN Explorer Pro gets attention for its aluminum construction, 2–3-person layout and straightforward pop-up design, giving it a strong balance between practical construction and everyday usability.
The Bayati Naturnest Sirius 1 Plus earned its place because it goes beyond the basic tent concept. Its waterproof, UV-resistant, blackout and four-season-oriented construction addresses the things you actually notice after spending a night outdoors: weather, light and comfort. Its easy pop-up setup also keeps the camping routine simple.
Jiadrooe takes a different approach. Its adjustable crossbars, detachable thermal insulation liner, anti-condensation mat and USB power hub make it the most feature-focused option in this group. Those additions are not just marketing decoration—they target genuine camping annoyances such as condensation, temperature changes and keeping small electronics powered. The important caveat is that the adjustable mounting system still needs to be checked against your specific Renegade rack.
WildFinder is included for buyers who do not need a long list of extras. Its hard-shell format keeps the proposition simple: a rooftop sleeping space designed around Jeep, SUV and truck use. Sometimes that simplicity is exactly what a weekend camper wants.
ARCTWONDER made the list for a completely different reason: integrated solar capability. That can be genuinely useful for people who spend longer periods away from powered campsites, but we deliberately did not let the solar feature outweigh the basics. On a Renegade, vehicle and rack compatibility still come first.
Finally, we looked at the details that are easy to overlook when comparing RTTs online: setup method, shell construction, weather protection, mounting flexibility, insulation, condensation control and power-related features. Just as importantly, we avoided treating a claimed “2–3 person” capacity as proof that a tent is automatically suitable for the Renegade. Sleeping capacity tells you how many people can lie inside; it does not tell you whether the complete roof-mounted setup is appropriate for your vehicle.
That is the standard behind this list: not the tent with the longest feature sheet, but the tent whose particular strengths make sense for a Jeep Renegade owner.
#1. HEYFUN Explorer Pro Rooftop Tent
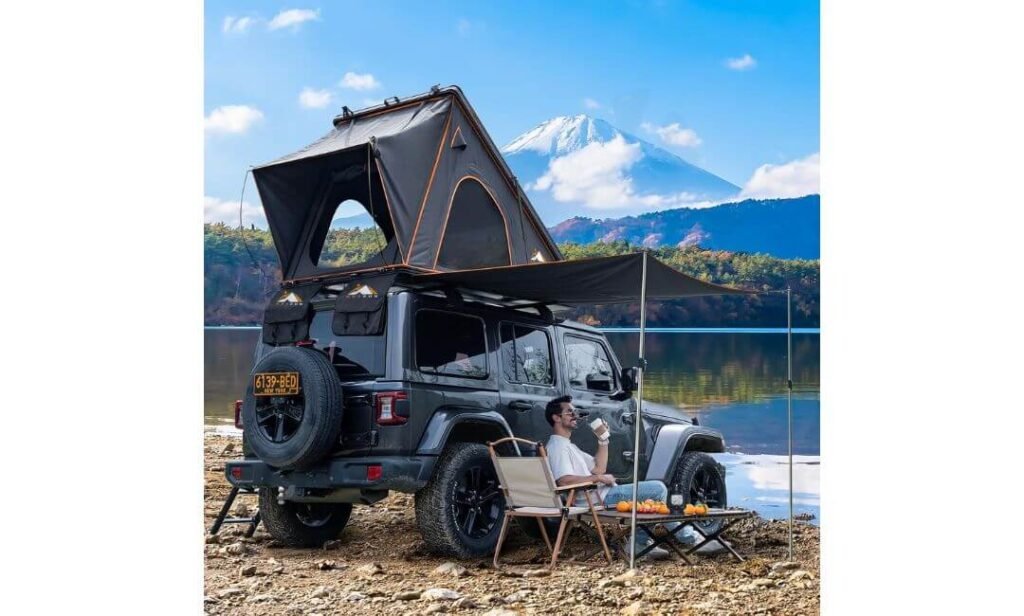
Quick Specs:
- Footprint: 83.86 × 51.57 in — a long but reasonably narrow platform for a compact-SUV rooftop setup
- Packed height: 7 in — keeps the hard shell impressively slim when closed
- Weight: 158 lb — substantial enough that your vehicle and rack limits deserve a proper check before mounting
- Sleeping capacity: 2 adults + 1 child — better suited to a couple than three full-size adults
- Shell: Aircraft-grade aluminum — rigid protection without relying on a soft rooftop cover
- Water resistance: Up to 5,000 mm — useful for serious wet-weather camping
- Opening system: Hydraulic gas struts — designed to open and close in about 5 seconds
- Sleeping platform: 83.86 × 51.57 in — practical room for two adults, with extra space for a child
- Interior load rating: 660 lb — plenty of capacity inside for the advertised sleeping arrangement
- Camping extras: Sleeping mat, condensation mat, LED strip, side awning, ladder and shoe storage included
There is a very practical reason this one catches the eye: you can arrive at camp and be nearly ready before the usual tent setup even begins. The hydraulic gas-strut system is designed to pop the shell open in roughly five seconds, and the 7-inch closed height keeps the package surprisingly slim once everything is packed away. For someone using an SUV for weekend escapes, that simplicity matters more than another page of decorative features.
The aluminum shell is another meaningful advantage. It is paired with 320g polyester fabric, a waterproof rubber seal and a flocked floor lining, while the manufacturer gives the tent a 5,000 mm water-resistance rating. The supplied condensation mat and sleeping pad add another layer of practicality, particularly when nights are cooler or moisture becomes an issue. This is a setup built around real overnight use rather than just looking good in a campsite photograph.
Inside, the 83.86 × 51.57-inch sleeping area is advertised for two adults and one child, which is the way I would think about the capacity in real life. Two adults get the most comfortable use of the available space, while a child or smaller sleeper can make the third position practical. The 13 storage pockets are also the kind of small detail you appreciate later, while the LED strip, side awning, ladder and two shoe bags mean you are not immediately shopping for accessories after opening the box.
(The clever part is the combination: rigid aluminum protection outside, a genuinely quick setup, and the small camping details that make overnight use less fiddly.)
What We Like
- Five-second deployment — exactly the sort of convenience that makes an RTT worth using more often.
- 7-inch closed profile — impressively compact for a hard-shell design.
- Aluminum construction — gives the shelter a rigid, durable outer structure.
- Condensation mat and flocked floor — useful comfort features rather than filler accessories.
- Side awning and built-in lighting — practical additions that extend the usable camping space beyond the sleeping area.
What We’d Keep in Mind
- The 158-lb tent weight makes proper vehicle-load checking especially important. That is not a reason to dismiss the tent; it simply means your Renegade’s roof rating and the complete rack setup should be confirmed first. A good tent still has to be a good match for the vehicle carrying it.
Jeep Renegade Compatibility Check
The manufacturer lists Jeep SUVs among the intended applications, but I would separate physical compatibility from load compatibility. The tent weighs 158 lb on its own, and Jeep documentation for Renegade configurations specifies a 150-lb maximum roof load with the luggage rack. Once crossbars and mounting hardware enter the equation, the complete roof setup can become heavier still.
That makes this one a product I would verify carefully rather than blindly label as Renegade-compatible. Check the exact roof-load specification for your Renegade and the rating of your crossbars before installation. If your vehicle’s permitted load is below the complete setup weight, stronger aftermarket bars do not change the vehicle’s own limit.
The Insider Pro-Tip
This is exactly why I would not choose a rooftop tent by the words “2–3 person” on the box. The sleeping capacity tells you what can fit inside; it says nothing about whether the tent is the right weight for the vehicle underneath it. With this model, the fast deployment, aluminum shell and useful camping equipment are genuinely attractive—but the Renegade’s roof-load number should be the first checkpoint.
If your particular Renegade and rack configuration can legitimately support the complete installed weight, the package makes a lot of sense for someone who values fast setup and hard-shell protection. If they cannot, the honest answer is not to stretch the numbers—it is to choose a lighter RTT. That is the difference between a tent that merely fits on a vehicle and a camping setup you can actually feel confident using.
#2. Bayati Naturnest Sirius 1 Plus Rooftop Tent
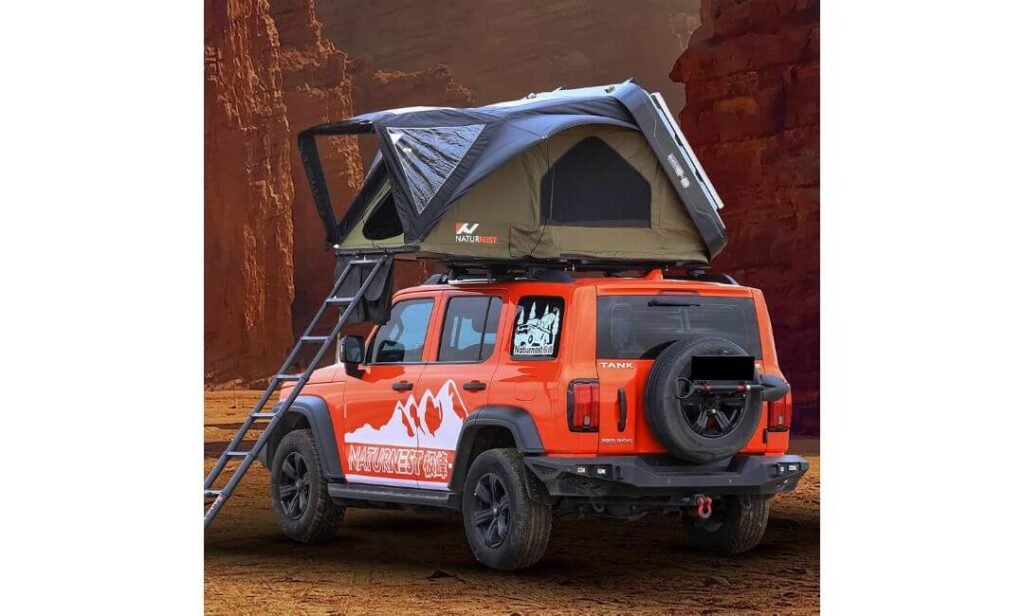
Quick Specs:
- Packed footprint: 82.7 × 63 in — a noticeably wide sleeping platform
- Weight: 160 lb — substantial for a Renegade, making the complete roof-and-rack calculation important
- Sleeping space: 82.7 × 63 in — designed around two adults and one child
- Mattress: 1.97-inch thick, non-deformed sleeping mattress
- Shell: High-strength ABS with aluminum framing
- Insulation: Honeycomb thermal and sound-insulating panels
- Weather protection: Waterproof coating with four-season construction
- Setup: Approximately 30 seconds
- Hardware: 316 stainless-steel gas struts and YKK zippers
- Included: Extension ladder, shoe bags, support rods, parts and tools
What separates this one from a lot of rooftop tents is what happens after you climb inside. The 82.7 × 63-inch interior gives the sleeping area a genuinely generous footprint, while the 1.97-inch mattress and blackout fabric are aimed squarely at people who care about getting proper rest rather than simply having somewhere to sleep above the ground.
The shell construction is also doing more than providing a rigid lid. The ABS hard shell, aluminum frame and honeycomb insulation panels are designed to reduce heat and sound transfer while providing a stronger barrier against changing weather. Add the waterproof fabric, 316 stainless-steel gas struts and YKK zippers, and the specification reads more like a tent designed for repeated use than a lightweight weekend accessory.
Then there is the setup. Around 30 seconds is a realistic advantage when you have already driven several hours and simply want the campsite sorted. The dedicated vent can also be used with a heater or cooler, while the panoramic openings provide ventilation and views. The included crossbars are another clever touch for carrying lightweight items such as solar panels, skis or bikes without using up sleeping space inside.
(The real selling point here is comfort: it feels designed around the night you spend inside it, not just the few minutes it takes to open.)
What We Like
- 63-inch floor width — gives couples considerably more elbow room than narrower RTT layouts.
- 1.97-inch mattress — a meaningful comfort upgrade for longer trips.
- Blackout fabric — particularly useful for early sunrises and brighter campsites.
- Honeycomb insulation — adds a layer of temperature and noise control.
- Replaceable fabric and premium hardware — thoughtful for owners planning to keep the tent for years.
What We’d Keep in Mind
- At 160 lb, weight is the main number to verify for a Renegade setup. The tent itself is close to the vehicle’s published roof-load figure, so the rack, mounting hardware and vehicle specification should all be considered together before installation.
A Proper Jeep Renegade Fitment Check
The manufacturer says the tent works with most factory and aftermarket roof racks, but “fits most vehicles” is not the same thing as confirming a specific Renegade configuration. This model weighs 160 lb before the mounting system is added, so the exact roof-load specification for your Renegade and the rating and spacing of your crossbars matter more than a generic compatibility statement.
There is also an important distinction between rack capacity and vehicle capacity. A higher-rated crossbar does not automatically increase what Jeep allows on the Renegade’s roof. If your vehicle’s permitted roof load is below the complete installed weight, the sensible answer is to choose a lighter setup rather than trying to solve the difference with heavier-duty bars.
The Insider Pro-Tip
This is the kind of rooftop tent where the extra width actually has a purpose. If you camp as a couple and spend real time inside the tent, 63 inches of floor width and the 1.97-inch mattress can matter far more than another gadget added to the specification sheet.
For a Renegade owner, though, I would make the decision in this order: vehicle roof limit first, rack compatibility second, comfort features third. If those numbers work for your exact setup, the blackout interior, insulated honeycomb construction and genuinely fast 30-second deployment make this a very compelling comfort-first option.
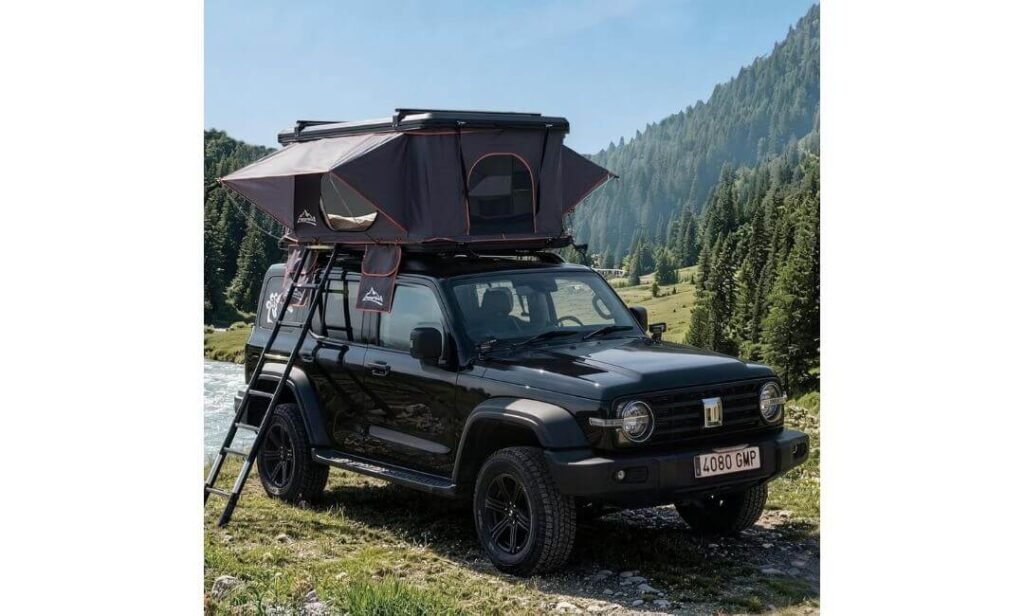
#3. Jiadrooe Hard Shell Roof Top Tent
Quick Specs:
- Footprint: 77 × 64 in — broad rectangular layout with a notably wide base
- Weight: 176 lb — the most important number to consider for a compact Renegade
- Sleeping capacity: 3 people
- Profile: 40 in listed height
- Shell: Aerodynamic ABS hard shell
- Fabric: 600D Oxford/ripstop construction with up to 5,000 mm waterproofing claim
- Insulation: Detachable thermal liner
- Sleeping system: Two-layer mattress with integrated anti-condensation mat
- Setup: Hydraulic struts, under 60 seconds
- Power: Built-in USB charging hub
- Lighting: Dual cool/warm LED strips
- Cargo bars: Two adjustable aluminum crossbars, rated at 150 lb
- Included: Telescoping aluminum ladder, universal mounting hardware and repair kit
Some rooftop tents try to win you over with sleeping capacity. This one takes a different route: it is built around making the entire campsite more functional. The two adjustable aluminum crossbars sit above the hard shell, giving you a dedicated place for lightweight adventure equipment such as solar panels or other compatible gear instead of forcing everything into the vehicle. For road-trip campers, that is a genuinely useful idea.
Inside, the specification gets more interesting. A detachable thermal insulation liner, two-layer mattress and integrated anti-condensation mat address three things that can make rooftop camping uncomfortable: cold surfaces, moisture underneath you and poor overnight insulation. The 600D fabric and hard ABS shell are paired with a claimed 5,000 mm waterproofing specification, giving the shelter a serious four-season orientation rather than limiting it to fair-weather weekends.
The hydraulic opening system is another practical win. It takes under a minute to pop up, while the aerodynamic shell is intended to reduce wind noise and drag during travel. Add the built-in USB power controller and dual-mode LED lighting, and the tent starts feeling more like a small mobile sleeping room than a basic shelter. Those are features you actually use once the novelty of rooftop camping wears off.
(The clever part is how the insulation, condensation control, lighting and charging are integrated instead of leaving you to build the comfort system yourself.)
What We Like
- Adjustable aluminum cargo bars — useful for keeping compatible lightweight gear outside the sleeping area.
- Detachable thermal liner — lets you adapt the interior to changing temperatures.
- Integrated anti-condensation mat — a practical feature for humid nights.
- USB power hub + dual-mode LEDs — small conveniences that become valuable after dark.
- Under-one-minute deployment — quick enough for frequent campsite changes.
What We’d Keep in Mind
- At 176 lb, this is a serious load for a Jeep Renegade. The tent’s own weight also exceeds its included crossbars’ stated 150-lb capacity, so the complete vehicle and rack configuration needs to be verified rather than relying on a generic SUV fitment claim.
A Closer Look at Renegade Fitment
This is where the product becomes a specification match rather than an automatic recommendation. The 77 × 64-inch footprint is broad, and at 176 lb, the tent is heavier than the previous options in this lineup. The manufacturer describes it for SUVs, trucks and vans, but that broad category does not establish that every compact SUV can safely carry it.
For a Renegade, check the vehicle’s roof-load limit, crossbar spacing, rack rating and complete installed weight together. The included crossbars are listed at 150 lb capacity, which is already below the 176-lb tent weight, so those supplied bars should not be treated as an adequate solution for this particular load.
The Insider Pro-Tip
There is a good lesson hidden in this product: more usable features do not automatically make a better vehicle match. The insulation, anti-condensation system, USB hub and cargo bars are genuinely thoughtful, but the 176-lb starting weight changes the conversation completely when the vehicle underneath is a Renegade.
If you are choosing specifically for a Renegade, I would keep this model as a feature benchmark rather than forcing the fit. It shows what a well-equipped four-season RTT can offer, but your vehicle’s allowable roof load should decide whether those features belong on your particular setup. That approach may save you from buying an impressive tent first and discovering the limitation afterward.
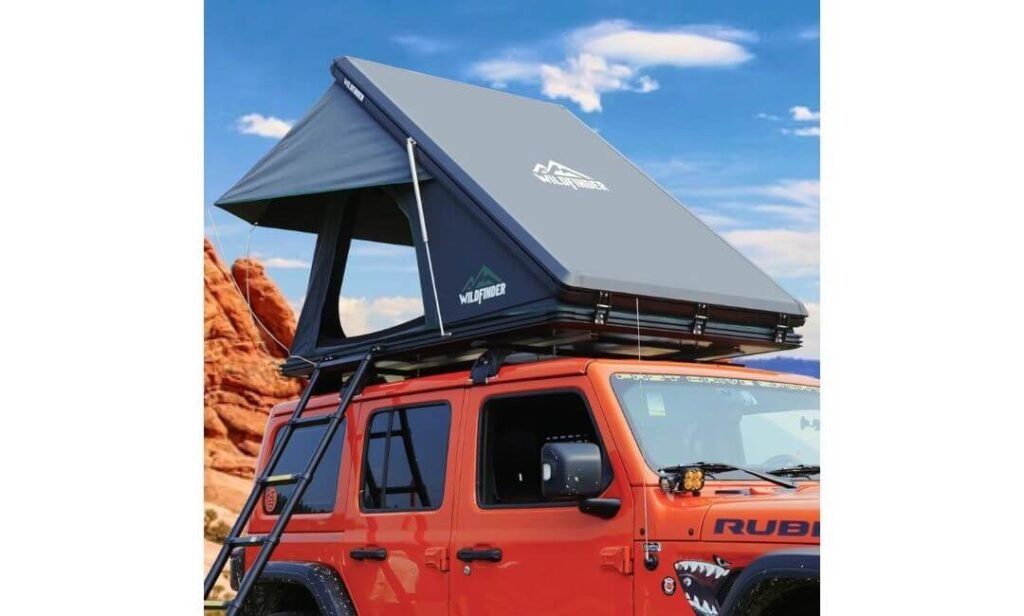
#4. WildFinder Hard Shell Rooftop Tent
Quick Specs:
- Packed footprint: 83 × 52 × 9 in — a fairly long, narrow shape for an SUV-mounted tent
- Weight: 197.6 lb — the key figure to consider before putting it on a Renegade
- Sleeping capacity: 3 people — best viewed as two adults plus a smaller third sleeper
- Shell: Aircraft-grade aluminum alloy
- Mattress: 5 cm non-deforming comfort mattress
- Weather protection: Claimed 5,000 mm rain resistance, Level 6 wind protection and heavy-snow protection
- Ventilation: 3 mesh windows with blackout/privacy-focused fabric
- Condensation control: Recessed marine pad plus dedicated condensation pad
- Access: 7.5-ft telescoping ladder
- Lighting: Built-in LED strip
- Storage: 10 organizer bags plus 2 shoe organizers
- Included: Mattress system, ladder, organizers and camping accessories; crossbars are not included
There is something refreshingly straightforward about this design: the focus is on the parts you actually notice after a long day outside. The aircraft-grade aluminum shell gives it a rigid outer structure, while the polyester sleeping area is designed for ventilation, waterproofing and privacy. The combination of a marine pad, condensation pad and 5 cm mattress is especially interesting because moisture management is one of those things you appreciate much more at 2 a.m. than you do while reading a product listing.
The weather specification is also substantial. The manufacturer claims 5,000 mm rain protection, Level 6 wind resistance, 99.99% sun protection and Level 4 heavy-snow protection. I would treat those as manufacturer claims rather than guarantees for every real-world storm, but they do show where this tent is positioned: serious four-season use rather than a fair-weather rooftop bedroom.
Inside, the 83 × 52-inch footprint gives two adults a sensible sleeping platform, with the advertised third-person capacity better suited to a child or smaller sleeper. The three mesh windows help with airflow, while the blackout/privacy-focused fabric is useful when you want the interior to feel like a proper sleeping space rather than a bright fabric box. Ten organizer bags, two shoe organizers and an LED strip are also the kind of included details that reduce the usual pile of loose camping gear.
(The standout here is the complete sleeping environment—rigid shell, moisture control, ventilation, blackout fabric and a proper mattress working together.)
What We Like
- Aircraft-grade aluminum shell — a rigid construction choice designed for long-term outdoor use.
- 5 cm comfort mattress — more substantial than the thin sleeping pads found on many basic RTTs.
- Dedicated condensation system — the marine and condensation pads directly address overnight moisture.
- Three mesh windows + blackout fabric — a useful combination of ventilation and privacy.
- Generous accessory package — organizers, shoe storage, ladder and lighting are already covered.
What We’d Keep in Mind
- The 197.6-lb listed weight makes this a poor candidate for a Renegade roof setup if the vehicle’s applicable roof-load limit is 150 lb. That is a vehicle limitation, not a reflection of the tent’s construction quality.
Renegade Roof Compatibility: Read This Before Ordering
WildFinder is marketed for Jeeps, SUVs, trucks and vans, but the 197.6-lb listed weight is the deciding detail for a Renegade. Jeep’s Renegade documentation specifies a 150-lb maximum roof load with the luggage rack for relevant configurations, so this tent is well beyond that figure before adding crossbars or mounting hardware.
For that reason, I would not recommend this model for a Renegade simply because the manufacturer lists Jeep compatibility. The physical dimensions may look workable, but safe vehicle fitment is about the complete load, not whether the tent can physically be attached. A higher-rated aftermarket crossbar also does not increase the Renegade’s own vehicle limit.
The Insider Pro-Tip
This is a good example of why our ranking does not simply follow the feature sheet. On paper, there is a lot to like here: aluminum construction, 5 cm mattress, condensation control, blackout fabric, serious weather claims and a generous accessory package.
But for a Renegade buyer, the honest recommendation has to stop at the vehicle’s roof-load limit. If you’re considering this model for a larger SUV or truck, its specification becomes much more interesting. For the Renegade, however, I would use its features as a benchmark and look for a significantly lighter alternative rather than trying to make the numbers work after the purchase.
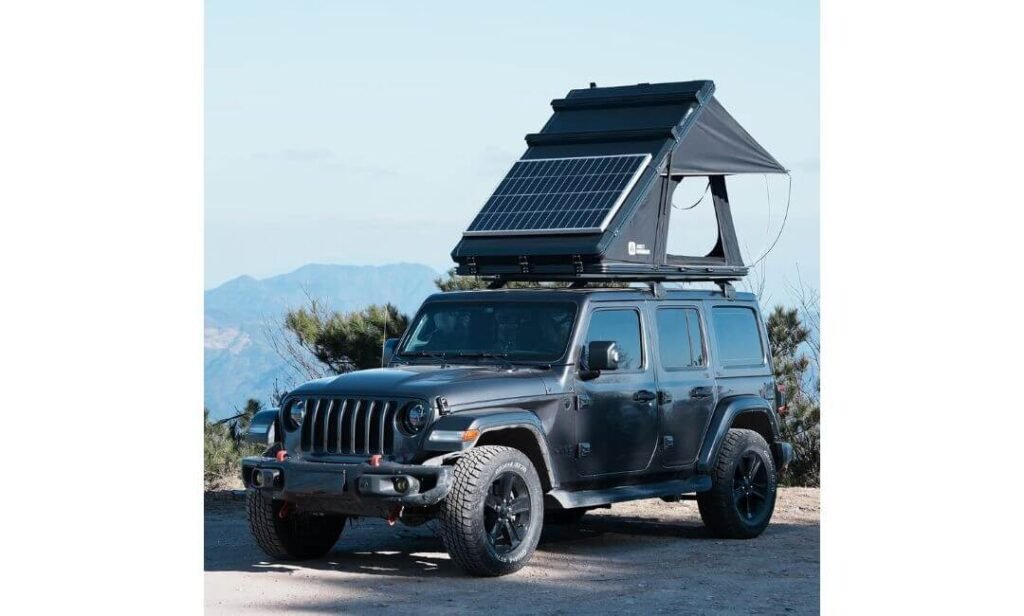
#5. ARCTWONDER Solar Panel Rooftop Tent
Quick Specs:
- Tent weight: 198 lb — a major consideration for a compact SUV roof setup
- Sleeping space: 85 × 52 × 59 in — sized for two adults plus a child or pet
- Shell construction: Aluminum top cover, bottom plate and four corners
- Fabric: 320g waterproof polyester with sealed seams
- Water resistance: W/R 5000
- Solar system: Integrated 12V 216W solar panel
- Opening: Air-pressure rods, approximately 10 seconds
- Packed height: 7 in — keeps the closed shell notably low
- Windows: 3 large windows with protective awnings
- Included: Ladder, mattress, luggage bar, shoe bag and installation accessories
The solar panel is not just a small accessory bolted onto the side of the specification sheet. A 12V 216W panel is built directly into the roof, giving the setup a useful source of energy for compatible power banks and portable power equipment while you are away from a campsite outlet. For someone who actually spends several nights off-grid, that can be far more meaningful than another cosmetic tent feature.
The construction follows the same practical thinking. Aluminum is used across the bottom plate, top cover and four corners, while the 320g polyester fabric uses black rubber sun protection technology and sealed seams. The manufacturer gives it a W/R 5000 rating and positions it for four-season use. I would still treat those figures as product specifications rather than a promise that no weather can overwhelm it, but the underlying design is clearly aimed at year-round outdoor use.
Then comes the part you will appreciate every time you move campsites: roughly 10-second opening with air-pressure rods. The shell closes down to around 7 inches, while the 85 × 52-inch sleeping area gives two adults sensible room with a child or pet as the third occupant. Three large windows with awnings help keep the interior ventilated without giving up protection from sun and rain.
(The interesting combination is the low closed profile and integrated 216W solar system—you get a hard-shell shelter that also treats power as part of the camping setup.)
What We Like
- 12V 216W integrated solar panel — a genuinely useful feature for longer off-grid trips.
- Aluminum construction at key shell points — gives the enclosure a more robust structure.
- 10-second deployment — excellent for quick roadside or campsite setup.
- 7-inch closed height — keeps the folded package relatively sleek.
- Three awning-covered windows — balances ventilation, visibility and weather protection.
What We’d Keep in Mind
- The 198-lb weight is the real deciding factor for a Renegade. The solar capability is impressive, but it should never be used as a reason to overlook the vehicle’s own roof-load specification.
What This Means for a Jeep Renegade
The manufacturer markets this as a vehicle-compatible hard-shell RTT, but the 198-lb listed weight makes it unsuitable for a Renegade configuration governed by Jeep’s 150-lb roof-load limit. That is before adding the rack and mounting hardware, so I would not recommend installing it on such a setup simply by choosing stronger aftermarket crossbars.
That distinction matters: a rack can have its own impressive rating, but the rack does not raise the vehicle’s roof-load limit. For a Renegade owner, this is better viewed as a useful example of what an integrated solar RTT can offer, while a lighter model should be selected for the actual vehicle.
The Insider Pro-Tip
The solar system is probably the feature that will get the most attention, but the smartest part of this product is actually how the power system is integrated into the hard shell. If this were going onto a vehicle with sufficient roof capacity, 216W of built-in solar could make a meaningful difference for off-grid travel.
For the Renegade, though, I would keep the buying decision brutally simple: vehicle limit first, tent weight second, features third. If the numbers do not work, no amount of solar power or hard-shell engineering makes it a sensible installation. That’s not a criticism of the tent—it’s simply what responsible vehicle-specific buying looks like.
Best Jeep Renegade Rooftop Tent Picks: Compare Weight, Setup Speed & Camping Comfort
Buying Guide for the Right Jeep Renegade Rooftop Tent
A Renegade changes the usual rooftop-tent buying equation. It is a compact SUV, so the goal is not to find the biggest sleeping platform or the longest feature list. The better approach is to work from the vehicle and rack limits outward, then choose the tent that gives you the comfort and convenience you can realistically use.
Aluminum Hard Shell vs. Fabric: What You Actually Gain
A hard shell gives you something a soft rooftop tent cannot: a rigid protective enclosure when the tent is closed. Aluminum and ABS shells also make pop-up mechanisms practical, keep the packed package organized, and generally make daily opening and closing less of a chore.
That does not automatically make every hard shell better. A fabric RTT can be lighter and may pack into a smaller overall system, while a hard shell can add considerable weight before you have even installed the crossbars. For a Renegade, that trade-off matters. The construction should be judged alongside the complete mounted weight, not in isolation.
Among the tents in this guide, the HEYFUN and WildFinder use aluminum shell construction, while the Bayati and Jiadrooe models use rigid ABS-based shell designs with aluminum components. ARCTWONDER combines aluminum in key shell sections with a polyester tent body. These are meaningful differences, but none should override the vehicle’s roof-load requirements.
Pop-Up Speed: When “Fast” Actually Means Fast
A rooftop tent advertised as opening in seconds sounds impressive, but the useful question is what happens after you arrive at camp. A genuinely convenient RTT should let you release the closures, deploy the shell, position the ladder and get inside without turning setup into a project.
The five-second HEYFUN, roughly 10-second ARCTWONDER and approximately 30-second Bayati are all genuinely quick concepts. Jiadrooe’s under-one-minute setup is still fast enough for practical touring, while WildFinder uses a pressure-assisted opening system. In real use, the final setup time will also depend on ladder adjustment, bedding arrangement and how easily the shell closes again.
Reliability matters just as much as the headline number. Gas struts, hinges, latches and seals are repeatedly used every time you camp, so a tent that opens quickly but becomes awkward to close is not really saving you much time. This is one reason I would value a straightforward mechanism over a complicated system with impressive marketing numbers.
Four-Season Comfort: Insulation, Mattress and Airflow
“Four-season” should never be interpreted as “comfortable in every possible climate.” It tells you how the tent is designed and marketed for year-round conditions; your actual comfort still depends on insulation, bedding, ventilation and weather exposure.
The Bayati is particularly interesting here because it combines honeycomb thermal and sound insulation with a 1.97-inch mattress and blackout fabric. Jiadrooe adds a detachable thermal liner, a two-layer mattress and an anti-condensation mat. HEYFUN also includes a sleeping mat and condensation mat, while WildFinder combines a 5 cm mattress with marine and condensation pads.
Ventilation deserves equal attention. A completely sealed tent may feel warm for a few minutes, but overnight condensation can become the bigger problem. Mesh windows, roof vents, breathable fabric and controlled airflow help remove moisture generated by sleeping occupants. A rain-protected opening is especially useful because you can maintain airflow without simply leaving the tent exposed to rain.
Also, do not get distracted by mattress thickness alone. A thicker mattress can improve comfort, but it does not automatically tell you its R-value or true insulation performance. The products in this lineup do not provide standardized mattress R-values in the supplied specifications, so it would be misleading to invent a comparison. For colder trips, your sleeping bag, insulated bedding and the tent’s floor insulation can matter just as much.
Weight, Roof Load and What It Means for a Renegade
This is the section I would take most seriously before buying. The five tents here range from 158 lb to 198 lb before adding the rest of the roof system. That is a major difference on a compact SUV.
Jeep documentation for Renegade configurations specifies a 150-lb maximum roof load with the luggage rack. That means you cannot look at a crossbar advertisement saying “165 lb” or “200 lb” and assume the vehicle can safely carry that amount. The vehicle’s own limit remains the controlling number.
This also means suspension and fuel economy are secondary concerns compared with staying within the vehicle’s permitted roof load. A heavy RTT mounted high on the vehicle raises the mass above the roof and can affect the vehicle’s handling, braking feel, wind sensitivity and fuel consumption. It can also make loading and unloading substantially harder.
One important distinction: the occupants sleeping inside the tent are not normally counted as roof cargo in the same way as the tent itself, because they are supported through the tent structure and vehicle/rack system differently while parked. However, that does not make an overloaded installation acceptable. The tent, rack, mounting hardware and anything permanently or temporarily carried on the roof must be evaluated according to the vehicle and rack manufacturers’ instructions.
For this reason, the 158-lb HEYFUN and 160-lb Bayati are already worth checking very carefully, while the 176-lb Jiadrooe, 197.6-lb WildFinder and 198-lb ARCTWONDER are not sensible choices for a Renegade configuration subject to the 150-lb roof-load limit.
Mounting Compatibility: Crossbars, Factory Rails and Track Systems
Physical attachment is only half of fitment. You need to establish whether the tent’s mounting hardware, crossbar spacing and available mounting area actually work together.
If your Renegade has factory roof rails, those rails are not automatically the same thing as a load-rated RTT platform. Depending on the configuration, you may need properly positioned crossbars or an appropriate rack system. The important measurements are the bar spacing, usable bar width, mounting-channel dimensions and the rack’s permitted dynamic load.
Track-style systems can provide more freedom in positioning the mounting hardware, while conventional crossbars can be perfectly workable when their dimensions and ratings match the tent. What matters is not whether the product listing says “universal mounting hardware,” but whether your specific Renegade rack gives the hardware enough room to mount securely.
And remember the distinction between rack rating and vehicle rating. A rack rated for more weight does not increase the Renegade’s roof capacity. If the vehicle limit is the lower number, that lower number wins.
Ventilation, Rain Protection and Useful Extras
The best rooftop tent is not necessarily the one with the longest accessory list. Look for features that solve problems you will actually encounter.
Mesh windows are useful for airflow and insect protection. Awnings over windows are even better when they allow ventilation during light rain or strong sun. Blackout fabric can make a surprisingly noticeable difference when sunrise comes early, particularly during summer camping.
Annexes and side awnings can also expand the usefulness of an RTT, but they add setup time and sometimes additional weight. The HEYFUN’s detachable side awning is a good example of a useful middle ground: you get extra sheltered space without turning the tent into a large ground-level room.
Rain protection should be considered as a complete system, not just a single waterproof number. Shell seals, fabric treatment, stitched seams, window design and ventilation openings all influence how well a tent handles prolonged wet weather. A claimed 5,000 mm rating is useful specification information, but it should not be treated as a guarantee that every part of the shelter is equally waterproof under every condition.
Budget vs. Long-Term Value: Look Beyond the Sticker Price
The cheapest RTT is rarely the cheapest camping setup once you start adding everything around it. You may need crossbars or a rack, mounting hardware, bedding, weather accessories, storage solutions and power equipment depending on how you camp.
Hard shells can make sense for frequent users because fast deployment encourages you to actually use the tent. A well-designed mattress and condensation system can also improve long-trip comfort enough to justify spending more. Conversely, paying extra for features you will never use is not value.
For a Renegade, there is another layer to the calculation: weight itself has value. If a lighter tent is more appropriate for your vehicle, choosing it can be smarter than spending more on a heavier model packed with features. The right long-term purchase is the one that remains compatible with your vehicle, easy enough to deploy regularly, comfortable enough to sleep in, and durable enough that you are not replacing it after a handful of seasons.
The simplest rule is also the most useful: buy the vehicle-compatible setup first, the comfortable tent second, and the extra features third. That order keeps the purchase enjoyable instead of discovering after delivery that the tent you loved on paper was never the right match for the Renegade.
Jeep Renegade Rooftop Tent Installation Tips for a Secure, Clean Setup
Installing a rooftop tent is not difficult, but getting the mounting relationship right is more important than getting it done quickly. On a Renegade, the roof, rails, crossbars and tent all become one system once mounted, so a few minutes spent checking measurements and load limits can prevent a lot of frustration later.
Quick Installation Overview Without Taking the Roof Apart
For most compatible hard-shell setups, you should not need to dismantle the vehicle’s roof structure. The basic process is:
- Confirm the vehicle’s roof-load limit first. Do this before lifting the tent onto the vehicle. The tent’s weight, rack components and mounting hardware need to be considered together.
- Measure the crossbar spacing. Compare the distance between the bars with the tent’s mounting channels or brackets. “Universal” hardware still needs usable mounting positions.
- Position the crossbars correctly. Keep them within the manufacturer’s permitted mounting area and as evenly positioned under the tent as possible.
- Lift the closed tent onto the bars. This is usually the hardest physical part. A second person or a proper lifting method is far safer than trying to muscle a heavy shell onto the roof alone.
- Center the tent before tightening anything. Check front-to-back and side-to-side alignment, making sure the tent does not interfere with the roof, hatch, antenna or other vehicle equipment.
- Install the supplied mounting brackets and hardware. Tighten them gradually, alternating between mounting points so the pressure is distributed evenly.
- Check every fastener again. Use the manufacturer’s specified torque where one is provided. Do not substitute “tight enough by feel” for a torque specification.
- Open and close the tent before your first trip. Check the ladder, hinges, gas struts, seals and mounting points while the vehicle is parked on level ground.
The first installation is worth doing slowly. Once the hardware is correctly positioned, future removal and refitting can be much quicker.
Tools and Small Things Worth Having Ready
The exact tools depend on the mounting kit, so the supplied hardware instructions should always take priority. In practice, it is useful to have:
- Metric socket set and ratchet
- Appropriate open-end or combination wrenches
- Torque wrench
- Measuring tape
- Step stool for safer roof access
- Thread-locking product only if specifically permitted by the mounting instructions
- A second person for lifting and positioning
- Small container for washers, nuts and brackets during installation
Do not improvise with missing hardware. A rooftop tent experiences repeated vibration, wind loading and road movement, so the correct bolt, washer, bracket and nut combination matters.
One common mistake is tightening one side completely before moving to the other. That can pull the mounting system out of alignment. Start everything loosely, center the tent, then tighten the hardware progressively.
Another easy mistake is forgetting the roof hatch and rear liftgate. Before final tightening, open the hatch slowly and confirm there is adequate clearance between the vehicle and the tent. The same applies to antennas, roof-mounted accessories and any wiring connected to the vehicle.
Crossbar Spacing and Weight Distribution Matter More Than “Universal Fit”
A tent can physically attach to a pair of crossbars and still be a poor installation. Check the bar spacing, bar width, mounting-channel range and load rating against the exact hardware supplied with your tent.
The weight should be distributed across the intended mounting points rather than concentrated toward one end. A long tent with widely separated mounting locations is generally easier to support properly when the crossbars can be positioned within the manufacturer’s specified range.
For the Renegade specifically, do not confuse the crossbar rating with the vehicle’s roof-load limit. A bar may be rated to carry more than the vehicle itself permits. In that situation, the vehicle limit remains the boundary.
Also remember that the tent’s advertised weight is not necessarily the complete installed weight. Mounting brackets, crossbars and permanently attached accessories add to the roof system. If you are close to the vehicle’s limit, measure the actual setup instead of relying on a rounded product-page number.
Security, Locks and the Part People Remember Too Late
A rooftop tent is expensive equipment sitting in a very accessible position, so basic security is worth considering from the beginning.
If your rack or mounting system supports locking fasteners or a dedicated security solution, use them. They will not make the installation theft-proof, but they can make an opportunistic removal considerably harder. Keep the mounting hardware itself inaccessible where possible and periodically inspect the fasteners for movement.
There is also a less obvious security issue: the tent should not be able to shift once mounted. After the first short drive, park somewhere safe and recheck the mounting points. Look for movement, unusual noises, loose hardware or any change in the tent’s position relative to the crossbars.
Before a longer trip, perform the same check again. A five-minute inspection is cheap insurance compared with discovering a loose mounting system halfway through a road trip.
One Final Check Before You Drive Away
Once installation is complete, stand back and look at the entire vehicle rather than just the tent. Check roof clearance, hatch operation, bar position, mounting brackets, cable routing and overall alignment.
Then open and close the tent once more, confirm the ladder is secured, make sure every storage accessory is properly stowed, and verify that nothing can contact the roof while driving.
Most importantly, if the numbers do not work for your particular Renegade, do not try to solve a vehicle-load problem with stronger crossbars. A stronger rack can improve the rack’s own capability, but it cannot increase the vehicle manufacturer’s roof-load limit. That single distinction is one of the most important things to understand before putting any rooftop tent on a compact SUV.
How to Maximize Comfort and Usability on the Trail
A rooftop tent becomes genuinely useful when it stops feeling like something you have to “manage” and starts working naturally with the way you travel. In a Jeep Renegade, that usually means keeping the sleeping setup simple, leaving the cabin available for people and essentials, and making sure the things you use every night are reachable without unpacking half the vehicle.
Pack the Sleeping Setup Around the Tent, Not Around the Car
The best overnight setup is usually the one that requires the fewest decisions after dark. Keep your sleeping bag or compact quilt, pillow, headlamp, small clothing layer and other nighttime essentials together rather than scattering them throughout the Renegade.
A useful arrangement is to reserve one compact bag or soft-sided organizer specifically for the sleeping area. Bedding that compresses well is much easier to live with than bulky blankets that have to be forced back into the tent every morning.
Keep the mattress, condensation mat and built-in storage working together rather than adding unnecessary layers. If the tent already provides a proper sleeping pad, adding another thick mattress may consume useful interior height without delivering much extra comfort. For colder trips, better insulated bedding is often a smarter upgrade than simply adding bulk.
Climate control should also be approached realistically. Ventilation is your first tool. Open opposing windows slightly when conditions allow, use mesh panels to maintain airflow, and take advantage of dedicated vents where the tent provides them. If you use a heater or cooler through a designated vent, follow the equipment manufacturer’s ventilation and safety requirements rather than treating the tent as a sealed room.
Make Nighttime Access Almost Automatic
Small changes make a huge difference after sunset. Keep a headlamp, phone, glasses, water bottle and footwear in the same location every night. If your tent has interior pockets, use them for lightweight essentials instead of filling them with equipment you rarely touch.
A simple rule works well: anything you need between getting into bed and getting back into the vehicle should be reachable without completely changing position or opening the tent.
Footwear deserves special attention. Shoe organizers or dedicated exterior storage keep muddy shoes outside the sleeping area and stop the mattress from becoming the place where everything gets dumped. A small towel near the ladder can also help when conditions are wet.
During longer trips, keep one dry layer of clothing inside the tent. It sounds insignificant, but having a clean, dry shirt or base layer waiting for you in the morning is one of those comforts that makes rooftop camping feel much more civilized.
Use Privacy Without Sacrificing Airflow
Blackout fabric is excellent for privacy and early-morning light, but privacy and ventilation should not be treated as opposites. Use the tent’s mesh windows and protected openings whenever weather permits rather than sealing everything shut simply because the fabric blocks light.
Window awnings are particularly useful because they can provide shade and some rain protection while allowing airflow underneath. That is far more comfortable than relying entirely on a closed interior during warm weather.
At a campsite, also think about where you park. Positioning the Renegade so the tent opening and ladder are not directly facing the busiest part of a campground can give you privacy without needing to keep every opening closed.
Give the Renegade a Simple Day-to-Day Camping Routine
The biggest mistake on an overland-style trip is turning the vehicle into a mobile storage locker. Once every seat, footwell and cargo area is filled with loose equipment, even a comfortable rooftop tent cannot make the trip feel organized.
Keep frequently used items divided into three groups:
- Daily-use gear: water, food, clothing, electronics and hygiene items.
- Camp equipment: cooking equipment, lighting, chairs and recovery or outdoor gear.
- Rarely used equipment: emergency supplies, spare parts and backup equipment.
The first group should be the easiest to reach. The second can live in dedicated containers. The third should stay packed until there is a genuine reason to access it.
This matters particularly with a Renegade because interior cargo space is limited compared with a larger SUV or truck. A rooftop tent gives you a sleeping platform, but it does not magically create additional cabin or cargo capacity. Smart organization is what turns that extra sleeping space into a real advantage.
Keep the Roof Working for You, Not Against You
Once the tent is installed, resist the temptation to use every available roof surface for additional equipment. Roof-mounted gear adds weight, increases aerodynamic drag and can make the vehicle less pleasant to drive.
If your setup includes cargo bars above the tent, use them selectively for lightweight equipment that genuinely benefits from being outside the cabin. Do not automatically fill them simply because there is room.
The same thinking applies inside the tent. Built-in pockets, shoe storage, LED lighting and other integrated features are useful precisely because they can replace loose accessories. The more equipment you can eliminate from your packing list, the easier every campsite becomes.
Make Morning Pack-Up as Easy as Arrival
A good rooftop setup should be almost as easy to close as it is to open. Before leaving camp, give yourself a fixed sequence: dry what needs drying, fold bedding consistently, check the interior for small items, secure the ladder and close the tent.
Do not rush the final inspection simply because everyone is ready to leave. Check the latches, mounting hardware and anything attached to the tent before driving away. A loose shoe bag is annoying; a loose mounting component is a completely different problem.
For multi-day travel, it is also worth taking a few minutes each evening to reset the campsite rather than leaving everything for the next morning. A clean, repeatable routine makes frequent moves much less tiring.
The Best Overland Setup Is the One You Will Actually Use
There is no prize for carrying the most equipment. The strongest setup for a Jeep Renegade is usually compact, repeatable and boringly organized: sleep comfortably, find your essentials immediately, maintain airflow, keep the cabin usable and avoid unnecessary weight.
That approach also protects the main advantage of a rooftop tent. Instead of turning every overnight stop into a full camp build, you can pull over, deploy the sleeping space, settle in and be ready for the next morning. For a compact vehicle, simplicity is not a compromise—it is what makes the whole system work.
Real-World Pros, Cons, and Comparisons for Jeep Renegade Campers
A rooftop tent can look almost perfect in a product listing because every model is photographed open, clean and sitting on a vehicle that makes it look effortless. Real ownership is different. Weight, setup time, weather, wind, daily drivability and how often you actually camp matter far more once the tent is living on your vehicle.
For the Renegade, that distinction is especially important because the models in this comparison range from 158 to 198 pounds before the rest of the mounting system is considered. So the best tent on paper is not automatically the best tent for this particular SUV.
Where Each Design Wins in the Real World
| Model | Durability | Setup Speed | Weather & Comfort | What Makes It Different |
|---|---|---|---|---|
| HEYFUN Explorer Pro | Aluminum hard shell, 320g polyester | ~5 seconds | 5,000 mm claimed water resistance, condensation mat | Fastest setup in this group, with awning and integrated lighting |
| Bayati Naturnest Sirius 1 Plus | ABS shell, aluminum frame, honeycomb panels | ~30 seconds | Blackout fabric, thermal insulation, 1.97-inch mattress | Strongest comfort-oriented package |
| Jiadrooe Hard Shell RTT | ABS shell, 600D fabric | Under 60 seconds | Thermal liner, anti-condensation mat, two-layer mattress | Adjustable cargo bars and integrated USB power |
| WildFinder | Aircraft-grade aluminum shell | Pop-up design | 5,000 mm claimed rain protection, 5 cm mattress | Strong moisture-control and sleeping-comfort package |
| ARCTWONDER Solar Panel RTT | Aluminum shell components, 320g polyester | ~10 seconds | W/R 5000 claimed, blackout-oriented fabric | 12V 216W integrated solar panel |
The table shows why these products should not be treated as interchangeable. One prioritizes deployment speed, another puts more emphasis on sleeping comfort, another integrates cargo and electrical functionality, while the solar-equipped design is built around off-grid power.
The Trade-Offs You Notice After the First Few Trips
Weight is the biggest trade-off in this particular lineup. The HEYFUN is listed at 158 lb and the Bayati at 160 lb, while the Jiadrooe reaches 176 lb. WildFinder and ARCTWONDER are both around 198 lb. That difference becomes meaningful on a compact SUV, particularly once the mounting system and crossbars are added.
Then there is wind and road behavior. A rooftop tent raises weight above the vehicle and adds a large aerodynamic object to the roof. Even a well-designed hard shell can produce more wind noise than an unladen roof, and you may notice greater sensitivity to crosswinds. A lower closed profile helps, but it does not make the tent aerodynamically invisible.
Clearance is another practical consideration. The tent itself does not usually determine trail clearance underneath the vehicle, but the additional height of the complete vehicle changes where you can drive and park. Low branches, covered parking, garage entrances and some trail obstacles can become relevant surprisingly quickly. Measure the vehicle with the tent installed rather than relying on the tent’s closed height alone.
Price should also be viewed as a complete-system cost. A tent may appear reasonably priced until you add appropriate crossbars or rack equipment, bedding, storage accessories, power equipment and other camping necessities. The more specialized the setup, the more important it becomes to ask whether you will actually use those features.
Daily Drivers: Keep the Setup Easy to Live With
If the Renegade is your everyday vehicle, low-effort ownership matters more than maximum camping capability. You are likely to drive it to work, through town, into shopping centers and on ordinary roads between camping trips.
For that use, a fast-opening design with a relatively low closed profile is attractive because the tent is not merely camping equipment—it becomes part of the vehicle every day. But the first filter remains weight. A model that exceeds your vehicle’s permitted roof load should not be made acceptable simply because it has a convenient design.
A daily driver also benefits from minimal roof clutter. Keep unnecessary accessories off the tent, secure everything properly and consider removing the RTT when you know you will not be camping for an extended period.
Weekend Warriors: Convenience Starts to Matter More
For someone who camps a few weekends each month, setup speed and sleeping comfort become much more valuable. You are more likely to arrive after work, drive several hours and want to be asleep rather than spending another twenty minutes assembling camp.
That is where features such as hydraulic opening systems, built-in lighting, condensation control, blackout fabric and a useful mattress begin earning their place. The Bayati’s insulation and mattress package, for example, addresses comfort directly, while the HEYFUN’s very quick deployment makes frequent campsite changes easier.
The key is still balance. You do not need every available feature. You need the features that remove the particular annoyances you encounter repeatedly.
Hardcore Overlanders: Capability Is Not the Same as Compatibility
Long-distance overland travel can justify more sophisticated equipment, particularly when you need four-season protection, insulation, cargo management or off-grid power.
The Jiadrooe’s integrated USB system, thermal liner and adjustable cargo bars are good examples of features that make sense for longer trips. ARCTWONDER’s integrated 216W solar panel is another genuinely useful concept when extended time away from electrical hookups is part of the plan.
But there is a line that should not be crossed: overlanding does not make vehicle limits disappear. A feature-rich tent that is too heavy for the Renegade remains too heavy, regardless of how capable it looks on an off-road vehicle.
The Honest Verdict by User Type
For a daily-driven Renegade: prioritize the lightest compatible setup, low closed height and fast deployment. You will notice those characteristics every day, not just on camping weekends.
For the weekend camper: prioritize setup speed, mattress comfort, ventilation and condensation control. These are the features that make the difference between “camping sounds fun” and actually wanting to camp again next weekend.
For longer off-grid trips: look for insulation, weather protection, integrated power and sensible storage, but only after confirming that the complete system works within the vehicle’s permitted limits.
For the Renegade owner comparing this entire lineup: the HEYFUN and Bayati are the closest to the useful end of this weight range, but even those should be checked against the exact vehicle and rack specification. The heavier Jiadrooe, WildFinder and ARCTWONDER models demonstrate what a more equipment-heavy RTT can offer, yet their listed weights make them poor choices where the Renegade’s 150-lb roof-load limit applies.
The most important comparison, therefore, is not which tent has the most features. It is which tent gives you the features you will genuinely use without asking the Renegade to carry more than it was designed to carry.
FAQs About Jeep Renegade Rooftop Tents
Can a rooftop tent actually make sense on a Jeep Renegade, or is the roof simply too limited?
It can make sense, but the Renegade is a vehicle where you have to choose the tent around the roof limit rather than choosing the roof rack around the tent. That distinction is easy to miss because many RTT listings say they fit “Jeep, SUV, truck and van,” which describes the intended vehicle category, not necessarily the safe load limit of every model within that category.
For a Renegade configuration with a 150-lb roof-load limit, the tent’s own weight becomes the first serious filter. A 158-lb tent is already above that figure before its mounting hardware and crossbars are considered. In other words, finding a rack advertised with a higher capacity does not solve the problem—the vehicle’s own limit still governs the installation.
If your goal is a practical Renegade camping setup, look for a tent that leaves genuine room within the applicable vehicle and rack limits rather than trying to squeeze a heavy hard shell into the equation.
Does the Jeep Renegade’s roof-load rating change when the vehicle is parked and people are sleeping in the tent?
This is one of those questions where a simple “yes” or “no” answer can be misleading. Dynamic roof load and the loads involved while the vehicle is stationary are not the same engineering condition, which is why rooftop-tent manufacturers and vehicle manufacturers can describe their limits differently.
While driving, the vehicle is dealing with braking, cornering, bumps, wind forces and movement of the load. Once parked, the tent’s support system is carrying the occupants through the rack and vehicle structure in a different loading condition. However, that does not mean you should assume a manufacturer’s 150-lb roof limit can simply be ignored once you stop.
The safe approach is:
- Follow the vehicle manufacturer’s rooftop and rack instructions.
- Follow the tent manufacturer’s mounting requirements.
- Confirm whether the particular roof-load figure applies to the dynamic load only or has additional manufacturer-specific conditions.
- Never use a higher rack rating as permission to exceed the vehicle’s stated limit.
That distinction is especially important with the heavier tents in this comparison.
Is a heavier aluminum hard-shell rooftop tent really better than a lighter one for four-season camping?
Not automatically. Aluminum can give you a rigid, durable shell, but material choice and total weight are two separate questions. A beautifully constructed 190-plus-pound RTT can be a worse choice for a compact SUV than a lighter design with slightly fewer features.
For four-season use, I would pay closer attention to the complete system:
- Shell construction and seals
- Fabric weather protection
- Floor insulation
- Condensation management
- Mattress and bedding
- Ventilation
- Wind and rain protection
For example, the Bayati’s honeycomb insulation and blackout fabric target comfort directly, while the Jiadrooe adds a detachable thermal liner and anti-condensation system. Those details can matter more on a cold, damp night than simply knowing that the shell is aluminum or ABS.
So the real question is not “Is aluminum better?” It is “Does this tent give me the weather protection and comfort I need at a weight my vehicle can legitimately carry?”
Why can a rooftop tent feel comfortable at camp but become annoying during everyday driving?
Because the camping experience and the driving experience are two completely different tests. At camp, you notice the mattress, ventilation, sleeping space and how quickly the tent opens. On the road, you notice the additional height, aerodynamic drag, wind noise and roof weight.
A hard shell with a low closed profile can help, but it does not remove those effects. You may also become more conscious of:
- Low garage or parking entrances
- Tree branches and overhead obstacles
- Crosswinds on exposed roads
- Extra fuel consumption
- The effort required to remove the tent when you do not need it
This is why a Renegade owner who camps twice a year may make a very different choice from someone who moves camp every day for a week-long overland trip.
The best RTT is the one whose compromises you can comfortably live with when you are not camping.
What should I upgrade first on a Jeep Renegade rooftop-tent setup: the mattress, rack, storage or power system?
The rack and mounting system come first. There is little value in improving the mattress or adding solar power if the underlying roof setup has not been confirmed as compatible with the vehicle and tent.
Once the structural side is right, prioritize upgrades according to how you actually camp. A good order for many owners would be:
- Correctly rated and compatible mounting system
- Comfortable sleeping setup
- Condensation and ventilation improvements
- Simple storage organization
- Power or solar equipment, if your trips genuinely need it
Power is a perfect example. An integrated 216W solar panel sounds fantastic—and it can be genuinely useful—but it does not automatically make a rooftop tent a better Renegade choice. If the tent carrying that panel weighs close to 200 lb, the solar advantage is irrelevant if the vehicle cannot legitimately carry the complete installation.
The smartest upgrade is therefore rarely the most exciting one. Fix the fundamental limitation first, then spend money on the feature you will actually use at 2 a.m. when you are tired, cold or trying to find something in the dark.
Final Thoughts: Choose the Rooftop Tent Around the Renegade
A Jeep Renegade can make a surprisingly capable little camping platform, but it rewards restraint more than excess. The temptation with rooftop tents is to chase the biggest bed, thickest mattress or longest list of features. With this vehicle, the smarter move is to start with the roof and rack limitations, then work toward the camping experience you actually want.
The tents in this guide show the trade-off clearly. Fast-opening hard shells make spontaneous trips easier, insulation and condensation control improve overnight comfort, and features such as integrated lighting, awnings or solar power can genuinely earn their place on longer adventures. But none of those advantages should come at the expense of proper vehicle compatibility.
If there is one thing worth remembering before you buy, it is this: do not ask whether the tent fits the Renegade; ask whether the entire tent-and-rack system is appropriate for your Renegade. Those are two very different questions. Check the exact roof-load information for your vehicle, verify the crossbar spacing and rating, account for mounting hardware, and only then compare mattresses, weather protection and camping features.
That approach may lead you away from the biggest or most heavily equipped RTT on the page—and that is perfectly fine. A rooftop tent should make your trips simpler, more comfortable and more enjoyable, not turn every drive into a compromise.
For a compact SUV like the Renegade, the smartest setup is ultimately the one you can mount with confidence, deploy without a fight, sleep comfortably in, and use often enough that it becomes part of how you travel—not an expensive piece of equipment sitting on the roof.