
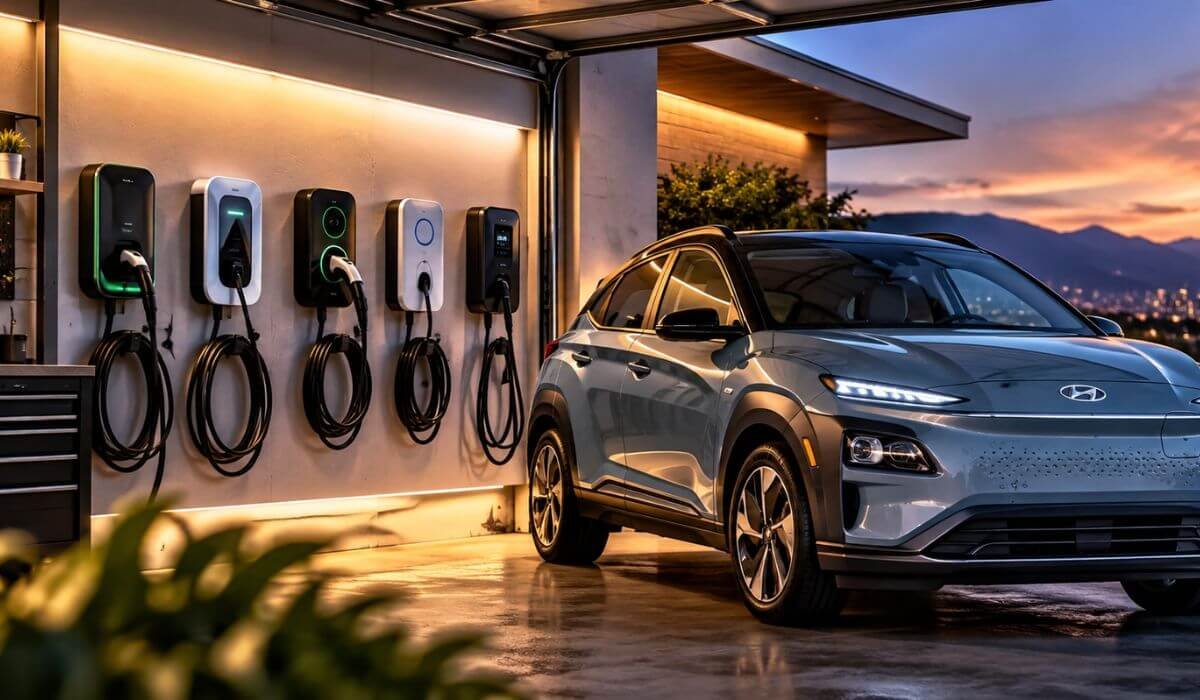
Best Level 2 Chargers for Hyundai Kona EV in 2026: 50A Power, Smart Control & Garage-Ready Reach
If you own a Hyundai Kona Electric, the charger you install at home should be chosen around the car’s actual charging hardware, not simply the biggest amp number printed on the box. The current Kona Electric uses a 48.6-kWh battery in the SE Standard Range and a 64.8-kWh battery in higher trims, paired with an 11-kW onboard Level 2 charger. Hyundai rates the 64.8-kWh Kona at about 6 hours 5 minutes from 10% to 100% on an 11-kW, 240V AC Level 2 charger, although real charging time can change with battery temperature, state of charge and charging conditions.
That is why this list is not built around amp ratings alone. A 40A, 48A or 50A home charger can all be sensible for a Kona, but the differences that matter in daily use are installation flexibility, cable reach, current adjustment, smart controls, weather protection and overall fit with your garage. I have also kept earlier Kona Electric models in mind rather than treating every model year as identical. For the 2026 Kona Electric, Hyundai has not announced a transition to a native NACS inlet, so always verify the connector on the exact vehicle before ordering a home charger.
Best Level 2 Home EV Chargers for Hyundai Kona Electric: Top 2026 Picks for 40A–50A Power and Smart Control
#1. Autel Home Level 2 EV Charger
Best Level 2 Home Charger for Hyundai Kona EV With Up to 50A Power, 25-Foot Cable, Adjustable Current & Hardwired Installation
#2. EMPORIA Level 2 EV Charger
Best Smart EV Charger for Hyundai Kona Electric With 48A Power, WiFi Energy Tracking, 25-Foot Cable & NEMA 14-50 Setup
#3. ChargePoint HomeFlex Level 2 EV Charger
Best Hyundai Kona EV Home Charging Station With 50A Power, 23-Foot Cable, Smart App Controls & J1772 Connection
#4. Grizzl-E Classic Level 2 EV Charger
Best Durable Level 2 Charger for Hyundai Kona EV With 40A 240V Power, 24-Foot Cable, NEMA 14-50 Plug & Rugged Protection
#5. EVIQO Level 2 EV Charger
Best 40A Home EV Charger for Hyundai Kona With 240V Power, J1772 Connector, 25-Foot Cable, WiFi Control & NEMA 14-50 Setup
Expert Tip
For the Kona Electric, I would not spend extra money simply because a charger says 50A on the front. The car’s onboard charger is what ultimately controls the AC charging rate, so once you are looking at a properly installed Level 2 unit with enough capacity, the decision becomes much more practical.
Look at where your Kona actually parks. If the charger will sit several feet away from the inlet, a 25-foot cable can make everyday charging noticeably easier. If you already have a suitable 240V outlet, a NEMA 14-50 charger can keep installation simpler; if you are building a permanent setup, hardwiring can make more sense. And if you charge overnight on a regular schedule, smart controls are useful only if you will actually use them.
That is the approach I used for this list: buy for the way your Kona lives at home, not for the biggest number printed on the charger.
How We Choose the Best Level 2 Chargers for Hyundai Kona EV
We did not put these five chargers together by taking the highest amp ratings we could find and calling them the best. That would be easy, but it would also miss what actually matters once a Kona is sitting in your garage every night.
The first filter was vehicle compatibility. The charger has to make sense for the Kona’s AC charging system and the connector used by the vehicle. From there, we looked at the electrical side more carefully: 40A, 48A and 50A ratings are useful specifications, but they are not the same thing as the charging speed the Kona will actually receive. That distinction matters, particularly when comparing premium chargers that cost considerably more.
Next came installation. A charger that looks excellent on a specification sheet can become a poor choice if its installation does not suit the garage. That is why this list includes both NEMA 14-50 plug-in models and hardwired options. The right choice depends on the electrical setup you already have and whether you want a permanent installation.
We also paid close attention to cable reach. This is one of those details that rarely sounds exciting when buying a charger, but it becomes very important when the charging port is on the opposite side of the vehicle or the parking position is not perfectly aligned with the wall unit. The 25-foot cables on several of our selections were therefore treated as a genuine everyday advantage, not just another specification to mention.
Smart features were judged differently. We did not automatically favour a charger because it had an app or WiFi. EMPORIA, for example, brings meaningful connected features and energy-focused controls, so those capabilities actually influence its position. With other chargers, a rugged enclosure, straightforward installation or a permanent hardwired design may be more useful than adding another layer of software.
Durability was another deliberate part of the selection. Grizzl-E Classic is here because its metal enclosure and indoor/outdoor design give it a very different reason to exist than a feature-heavy smart charger. That matters because not every Kona owner needs the same thing from a home charging station.
We also looked at the list as a whole rather than choosing five versions of the same charger. Autel gives the list a high-power, long-cable hardwired option. EMPORIA brings smart connected charging. ChargePoint HomeFlex covers the established smart-home-charging approach. Grizzl-E Classic focuses on physical durability. EVIQO provides a simpler 40A plug-in route.
That balance is intentional.
A good Kona charger list should not leave you choosing between five products that all promise the same thing. It should help you understand why one charger may fit your garage, driving routine and installation better than another.
Finally, we kept the recommendations grounded in the actual ownership experience. A charger can have impressive numbers and still be inconvenient if the cable is too short, the installation is wrong for the electrical service, or its smart features add complexity you never use. Our goal with these five picks is therefore simple: each one needs a clear reason to be on the list.
That is also why we have not treated the most expensive or highest-rated charger as automatically the right answer for every Kona owner. The best home charging setup is the one that delivers the power your vehicle can use, fits your electrical installation, reaches the car comfortably and remains easy to live with long after the initial purchase.
#1. Autel Home Level 2 EV Charger
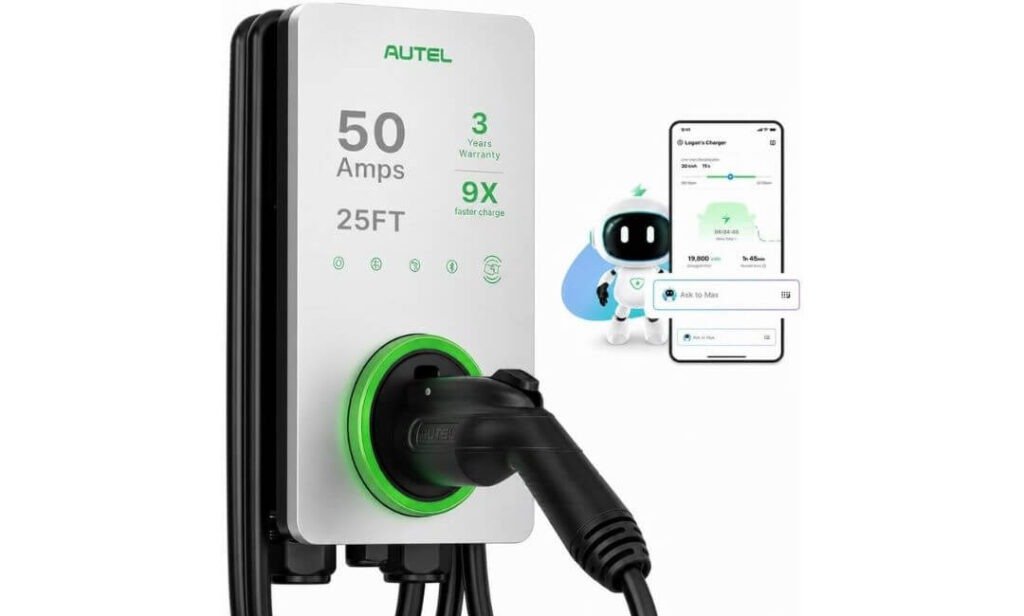
Quick Specs:
- Output: Up to 50A / 12 kW
- Cable: 25-foot flexible charging cable
- Installation: Hardwired 240V
- Circuit: 60A breaker for full 50A output
- Connector: J1772
- Weather rating: NEMA 4X
- Controls: Autel app, WiFi, Bluetooth & Ethernet
- Current adjustment: 6A–50A
- Warranty: 3 years
- Use: Indoor or outdoor
The first thing I like about this charger for the Kona is that it doesn’t force you to build your decision around one fixed charging setting. It can deliver up to 50A, but the current can also be adjusted from 6A to 50A, which is genuinely useful when an electrician needs to work around the home’s available electrical capacity. For a full 50A configuration, you’re looking at a 60A circuit and dedicated wiring, so this is much more of a permanent home-charging installation than a casual plug-in accessory.
Then there is the part you’ll notice every single night: the 25-foot cable. It gives you considerably more freedom when the Kona isn’t parked directly beside the wall unit, and the cable is designed to remain flexible in very cold conditions. Add the NEMA 4X enclosure, indoor/outdoor installation and built-in protection against overcurrent, overvoltage and ground faults, and this becomes a charger designed to live where your car actually lives — not something that needs to be treated delicately.
The smart side is useful, too, but I wouldn’t buy this charger just for the app. You can schedule charging, monitor sessions and adjust settings remotely, while the charger can still handle basic charging without relying on WiFi. That’s an important distinction for a home charger: the smart features should make charging easier, not become a requirement for charging the car.
(A particularly practical combination here is the adjustable current setting, long cable and weather-resistant enclosure — three things that matter far more once the charger is installed than another flashy number on the box.)
What Stands Out
- 50A capability with adjustable 6A–50A output gives the installation more flexibility than a fixed-current unit.
- The 25-foot cable is long enough to solve awkward parking positions without constantly moving the Kona.
- NEMA 4X protection makes it suitable for an exposed garage wall, driveway or other outdoor location.
- The Autel app brings scheduling, charging history and cost tracking into one place.
- A 3-year warranty and 24/7 support add some welcome reassurance for a permanently installed charger.
One Thing to Know Before Buying
The smart functions aren’t the only reason this charger works as a daily Kona charger. The unit can operate for basic charging without the app or WiFi, which is worth remembering because the source material reports mixed experiences with connectivity and scheduling reliability. If you mainly want dependable overnight charging and treat the app as an extra, that limitation is much less important.
Why We Picked It for the Hyundai Kona EV
This is the kind of charger I would put on the shortlist when the goal is a proper permanent home installation, rather than simply finding the cheapest way to add Level 2 charging.
The combination is what makes it interesting: 50A capability, adjustable current, a genuinely useful 25-foot cable, outdoor-ready construction and hardwired installation. The Kona does not magically charge faster just because a charger is labelled 50A, but having a charger with more electrical headroom can make sense when you’re installing it as a long-term part of the garage.
For Kona owners who want one charger that can handle the practical realities around the car — awkward parking, outdoor placement, scheduled overnight charging and different electrical configurations — this selection makes considerably more sense than choosing a unit from its headline amp figure alone.
The Insider Pro-Tip
If you’re having this installed specifically for your Kona, don’t automatically tell the electrician to configure it for 50A. First look at your home’s electrical service and what else is running on that circuit. The ability to dial the charger down is one of this unit’s genuinely useful features; a correctly sized installation at a lower current is better than forcing maximum output where the home’s electrical setup doesn’t comfortably support it.
And if your Kona parks outside or at the far end of a two-car garage, I’d give the 25-foot cable more weight than you might expect. Six months from now, you probably won’t care that the charger had another app feature — you will care whether you can pull in, plug in and walk away without having to position the car perfectly every night.
#2. EMPORIA Level 2 EV Charger
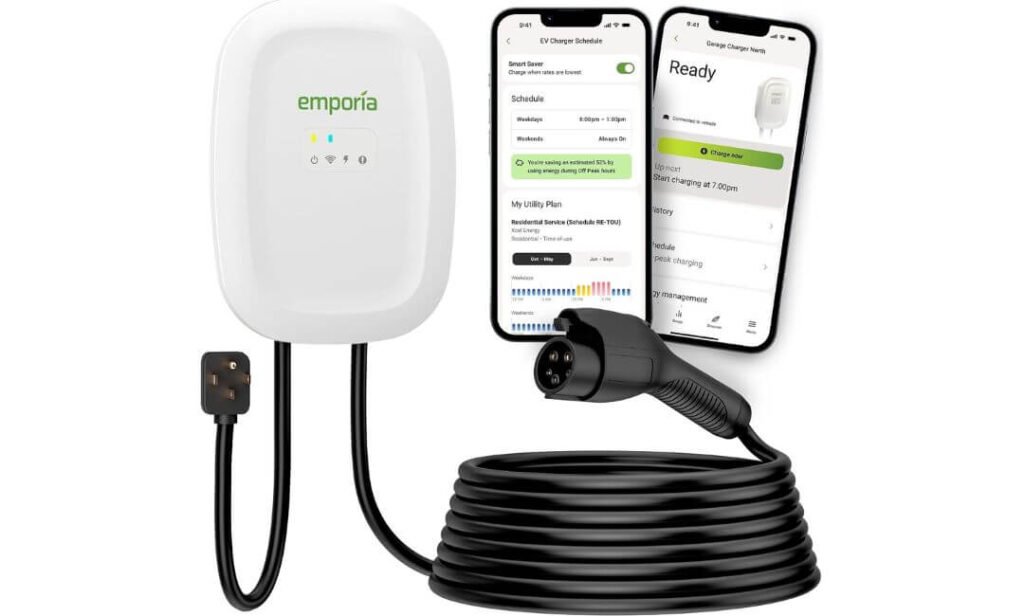
Quick Specs:
- Output: Up to 48A / 11.5 kW hardwired
- Plug-in output: Up to 40A / 9.6 kW
- Cable: 25 feet
- Installation: NEMA 14-50 or hardwired
- Connector: SAE J1772
- WiFi: 2.4 GHz
- Smart controls: Scheduling, energy data & remote control
- Current adjustment: 6A–48A hardwired
- Certification: UL Listed & ENERGY STAR
- Enclosure: NEMA Type 4
- Warranty: 3 years
What makes this one interesting for a Kona owner isn’t the fact that it says 48A on the specification sheet. It’s the flexibility around that number. You can use it as a 40A NEMA 14-50 charger when you already have the appropriate outlet, or have it hardwired for up to 48A. That gives the buyer two genuinely different installation paths instead of forcing everyone into the same electrical setup.
And that distinction matters in a real garage. If your home already has a suitable 50A NEMA 14-50 outlet, you can keep things simple and use the plug-in configuration. If you’re installing a dedicated circuit from scratch, the hardwired route makes more sense and allows the higher 48A setting. Just don’t confuse the charger’s maximum output with what the Kona itself will accept; the vehicle remains the limiting factor.
The other reason I would consider it is the energy-management side. The app can show charging activity and energy usage, let you schedule sessions and manage charging remotely. That’s useful if your electricity rate changes throughout the day. You can basically set the Kona to do its overnight work when your electricity is cheaper instead of plugging it in and forgetting about the timing.
(For a daily driver, that combination of installation flexibility and energy control is more useful than another charger that simply promises a bigger number.)
What We Like About It
- Two genuinely useful installation routes: keep the NEMA 14-50 setup or convert to hardwired charging.
- The 25-foot cable gives you much more freedom when the Kona isn’t parked directly beside the charging wall.
- Adjustable current from 6A to 48A lets the installation be matched to the home’s electrical situation rather than treating maximum output as mandatory.
- The smart app has a practical purpose: scheduling, energy tracking, charging history and remote control.
- UL Listed and ENERGY STAR certified, with a NEMA Type 4 enclosure for a more weather-resistant installation.
One Detail Worth Knowing
The WiFi connection is 2.4 GHz only, so don’t expect it to connect directly to a 5 GHz-only network. The good part is that the charger doesn’t become useless if the network goes down; the supplied information confirms it can still be used for normal charging without the app.
Why It Earned a Place Among the Kona’s Home Charging Options
I like this choice for a Kona because it gives the owner room to make the installation fit the house rather than the other way around. Plug it in at up to 40A if you already have the right outlet, or hardwire it for up to 48A if you’re doing a dedicated installation. That is a much more useful form of flexibility than a feature that sounds impressive but never changes how you charge the car.
Then there is the 25-foot lead and the connected energy data. Those are small details until you’ve lived with a charger for a while. A long cable can save you from awkward parking, while scheduled charging can make overnight charging almost invisible once you’ve set it up. For a Kona owner who wants smart charging without making the installation unnecessarily complicated, that’s where this model earns its spot.
The Insider Pro-Tip
If you already have a proper 50A NEMA 14-50 outlet, I wouldn’t automatically pay for a hardwired installation just to see “48A” instead of “40A” in the app. The Kona is not going to turn that extra charger capacity into extra vehicle charging speed. Use the plug-in configuration if it genuinely suits your home and parking setup.
If you’re starting the electrical work from zero, however, I’d have the electrician look at the hardwired route and your home’s overall electrical load before deciding. The adjustable 6A–48A range is one of the more useful things about this unit because it gives you room to configure the charger sensibly rather than treating maximum output as the only correct setting.
#3. ChargePoint HomeFlex Level 2 EV Charger
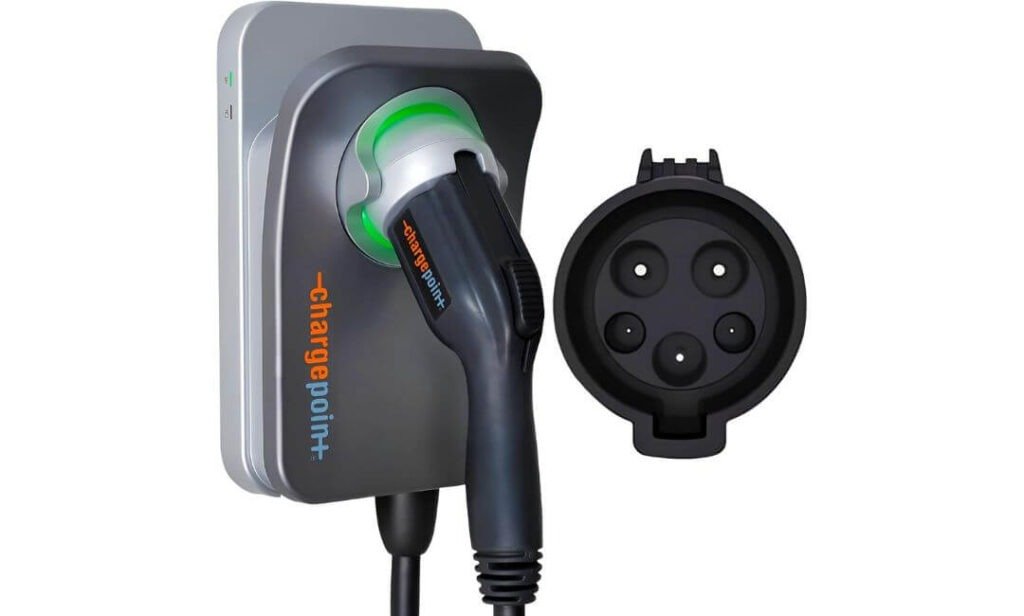
Quick Specs:
- Output: Up to 50A / 12 kW
- Installation: Hardwired 240V
- Cable: 23 feet, cold-resistant
- Connector: J1772
- Controls: ChargePoint app
- Current adjustment: 16A–50A
- Weather rating: NEMA 3R
- Certification: UL certified
- Smart features: Charging data, reminders & remote control
- Warranty: 3 years
- Support: 24/7
There is something reassuring about a home charger that doesn’t try to make every feature the main attraction. Here, the useful part is the combination of 50A capability, a 23-foot cable and a permanent hardwired installation. If your Kona spends most nights in the same garage spot, that is the sort of setup that quietly does its job without asking much from you.
The J1772 connector also keeps things straightforward for a Kona using that inlet. The charger is designed for indoor or outdoor installation, and its cold-resistant cable is a nice practical touch if the car lives somewhere with harsh winters. The advertised charging rate can reach up to 45 miles of range per hour depending on the vehicle, but the Kona itself determines how much power it actually accepts.
What makes the ChargePoint ecosystem different is everything around the charger. The mobile app can give you charging information, reminders and control from your phone, while the broader ChargePoint network becomes useful when you take the Kona away from home. That doesn’t make the home unit charge the car faster, but it does make the ownership experience feel more connected.
What We Like About It
- 50A hardwired capability makes it a serious permanent home installation.
- The 23-foot cable gives plenty of freedom when the Kona isn’t parked directly beside the wall.
- J1772 connectivity keeps the setup straightforward for compatible Kona models.
- NEMA 3R weather protection allows indoor or outdoor installation.
- The ChargePoint app and wider charging network make it useful beyond the garage.
One Thing to Know Before Buying
The smart functions depend on WiFi, so I’d treat the app as a useful extra rather than something your everyday charging routine should depend on. The supplied material also reports mixed experiences with WiFi and app connectivity. The important part is that basic charging can continue without the connected features.
Why It Earned Its Place for the Hyundai Kona EV
The reason this one stays in the list is not simply its 50A rating. It is the combination of permanent installation, long cable reach, J1772 compatibility and a mature connected charging ecosystem.
For someone who wants the Kona’s charger to feel like a fixed part of the home rather than another gadget sitting on the wall, that combination is compelling. You install it properly, park the car, plug in and let the system handle the routine.
The wider ChargePoint network is also a genuine bonus for owners who travel. Having your home charging history and public charging experience tied into the same ecosystem can make things simpler, particularly if the Kona is used for longer trips as well as the daily commute.
The Insider Pro-Tip
Don’t choose the 50A setting simply because the charger offers it. Have the electrician size the circuit around your home’s actual electrical capacity, especially if your garage already has heavy loads such as an HVAC system, dryer or other large appliances. The charger has adjustable current capability, so there is no prize for running more amperage than your electrical setup needs.
And I’d pay attention to the 23-foot cable before worrying about another smart feature. If the Kona can be parked comfortably and plugged in without stretching the cable, that is an advantage you’ll use every night. An app feature might impress you on day one; good cable placement is what you’ll appreciate months later.
#4. Grizzl-E Classic Level 2 EV Charger
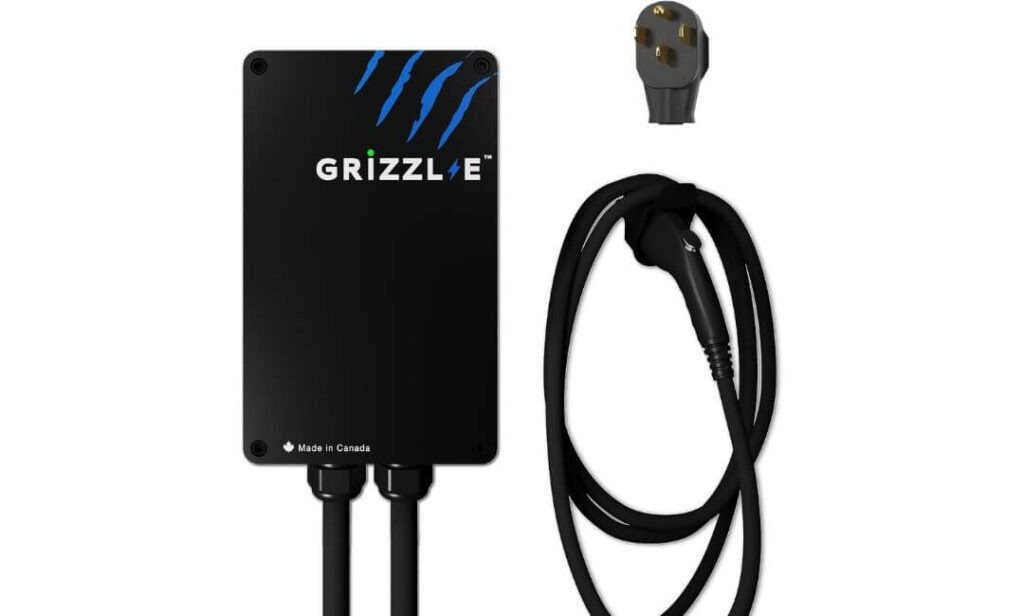
Quick Specs:
- Output: Up to 40A / 9.6 kW
- Charging rate: 28–30 miles of range per hour at 40A
- Cable: 24-foot premium cable
- Installation: NEMA 14-50 plug-in
- Adjustable current: 16A / 24A / 32A / 40A
- Connector: J1772
- Protection: IP67 water-resistant enclosure
- Safety: UL certified, built-in GFCI
- Temperature range: -22°F to 122°F
- Warranty: 5 years
- Use: Indoor or outdoor
There is a very simple reason this charger works so well in a Kona garage: it doesn’t try to turn charging into another app you have to manage. Plug it into a suitable NEMA 14-50 outlet, hang it on the wall and the Kona can simply charge. No WiFi account, no Bluetooth pairing and no dependence on a phone just to start a normal charging session. That simplicity is actually the product’s biggest differentiator.
The 40A output is also a sensible match for a home Level 2 setup. At its highest setting, it is rated for roughly 28–30 miles of range per hour, while the selectable 32A, 24A and 16A settings let you reduce the load when your home’s electrical capacity calls for it. That’s useful in an older garage or a home where the EV charger shares the overall electrical-service planning with other heavy loads.
Then there is the part I suspect many owners will appreciate more after installation: the 24-foot cable. It’s long enough to make parking position less fussy, and the included holster gives the cable somewhere sensible to live when you’re finished charging. Add the aluminum enclosure, IP67 protection and automatic recovery features, and this is clearly built around the idea of being a piece of garage equipment rather than a delicate piece of connected electronics.
(If your idea of a good charger is “plug in, charge the Kona and get on with your evening,” this is exactly the philosophy behind this model.)
What We Like About It
- No app or WiFi dependency keeps everyday charging refreshingly straightforward.
- The 24-foot cable gives you excellent freedom around the garage or driveway.
- Four current settings — 16A, 24A, 32A and 40A — make it easier to match the charger to the home’s electrical setup.
- IP67 protection and an aluminum enclosure make it a strong choice for demanding indoor or outdoor locations.
- The 5-year warranty gives it a longer safety net than the three-year coverage found on several alternatives.
The Trade-Off Is Actually Quite Simple
You give up WiFi, remote monitoring and app-based charging schedules. For some owners that’s a disadvantage; for others, it’s precisely why this charger is attractive. If you want to schedule charging from your phone or track electricity consumption remotely, choose one of the smart models higher on this list. If you already prefer letting the Kona handle its own charging schedule, the lack of an app may genuinely be a benefit.
Why We Chose It for the Hyundai Kona EV
This selection fills a gap the smarter chargers cannot: straightforward, physical durability without unnecessary technology.
The Kona doesn’t need a WiFi connection to accept Level 2 power. What it needs is a correctly installed electrical supply, a compatible connector and a charger that can keep doing its job in the environment where you park the car. The Classic brings those basics together with 40A output, four current settings, a 24-foot cable, IP67 protection and built-in safety monitoring.
It also makes sense for someone who may move the charger later. Because this version uses a NEMA 14-50 plug, it can be unplugged and relocated when necessary, assuming the destination has the appropriate outlet. That’s a small advantage, but it can matter if you’re renting, moving homes or simply don’t want a permanent hardwired installation.
The Insider Pro-Tip
Before buying this one, look at the outlet you already have — not the outlet you wish you had. The charger is plug-in only, so if your garage doesn’t already have a properly installed NEMA 14-50 receptacle, you’ll still need an electrician to create the appropriate circuit.
And if you do have that outlet, don’t feel pressured to run the full 40A simply because it’s available. The ability to select 32A, 24A or 16A is there for a reason. If your home’s electrical setup is happier at 32A, letting the Kona charge overnight at that setting is a perfectly sensible way to use the charger. A comfortable electrical installation beats chasing the last few miles of range per hour.
#5. EVIQO Level 2 EV Charger
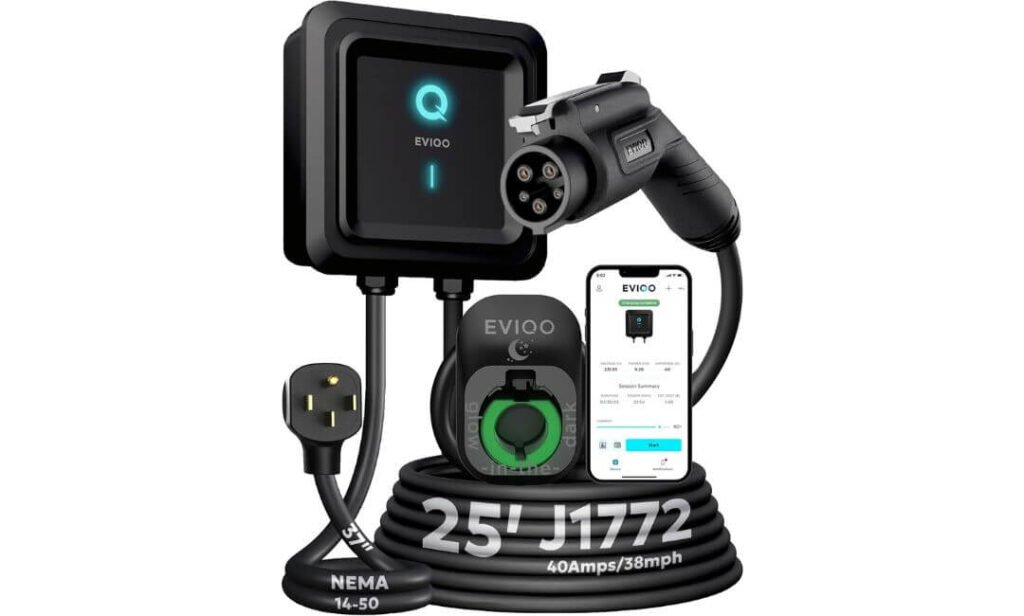
Quick Specs:
- Output: Up to 40A / 9.6 kW
- Cable: 25 feet
- Installation: NEMA 14-50 plug-in
- Connector: J1772
- Current adjustment: 6A–40A
- WiFi: 2.4 GHz
- App: Scheduling, energy tracking & remote control
- Weather rating: IP66 / NEMA 4
- Safety: UL, ETL, FCC & ENERGY STAR certified
- Special feature: Glow-in-the-dark holster
- Warranty: 3 years
- Reset: Accessible side reset button
The first thing that stands out here isn’t the 40A output. It’s how much everyday thought has gone into the charger around it. The 25-foot cable gives the Kona plenty of freedom in a garage or driveway, while the plug-in NEMA 14-50 design keeps installation straightforward if you already have the correct 240V outlet. You aren’t buying into a complicated hardwired project just to get proper Level 2 charging.
Then you notice the details you normally don’t think about until you actually own a charger. The glow-in-the-dark holster makes finding the connector easier at night, while the side-mounted reset button lets you clear a fault without opening the unit or walking to the electrical panel. Those aren’t headline-grabbing specifications, but they are exactly the kind of small decisions that can make a charger nicer to live with.
The smart side is equally practical. You can adjust charging between 6A and 40A, schedule sessions, monitor energy consumption and control charging from your phone. But you aren’t left stranded if the WiFi disappears; normal plug-and-charge operation can continue without the app. That is an important distinction for a device whose primary job is still simply to charge your Kona.
(The combination of a long cable, simple installation and genuinely useful little touches is what makes this more interesting than another generic 40A wall charger.)
What We Like About It
- 25-foot cable gives the Kona considerable freedom when parking isn’t perfectly aligned with the wall.
- NEMA 14-50 plug-in installation keeps things simple when the correct outlet is already available.
- The 6A–40A adjustment is useful for matching charging to the home’s electrical situation.
- Glow-in-the-dark holster is an unusually thoughtful touch for nighttime charging.
- IP66/NEMA 4 protection and internal reinforcement make it suitable for indoor or outdoor use.
One Thing to Know Before Buying
This particular version is plug-in only, so the 40A ceiling comes with the NEMA 14-50 configuration. If you don’t already have the correct 240V outlet, you’ll need an electrician to install one. That’s not really a weakness — it just means you should check the garage electrical setup before ordering, rather than discovering the requirement afterward.
Why It Works Well for the Hyundai Kona EV
For the Kona, I like this charger because it doesn’t make the owner pay for complexity where it isn’t necessary. 40A and 9.6 kW is already a substantial Level 2 setup for home use, and the 25-foot cable means the charger can remain on the wall while the car has plenty of freedom about where it parks.
The rest of the package feels deliberately practical: J1772 compatibility, adjustable amperage, app scheduling, offline charging, weather protection and the easy-access reset button. It’s a particularly sensible combination for someone who wants smart features but still wants the charger to behave like a normal charger when the internet or phone isn’t involved.
The Insider Pro-Tip
Before buying, walk into your garage and look at the actual outlet. You want a proper 240V NEMA 14-50 receptacle on a dedicated 50A circuit — not a visually similar dryer outlet. If that outlet is already there and correctly wired, this becomes a very straightforward installation.
And I’d use the app’s adjustable current rather than automatically leaving it at 40A. If your Kona is sitting overnight for six or eight hours, you may not need maximum output every night. Set the charging level around your routine and electrical setup, then let the car quietly do its work while you sleep. That’s where this charger makes the most sense.
Best Level 2 Charger for Hyundai Kona EV (2026): Compare 40A, 48A & 50A Chargers With Smart Controls and Flexible Installation
Practical Guidance: 50A Power, Smart Control, and Garage-Ready Charging
Why 50A power matters for the Hyundai Kona EV
A 50A Level 2 charger can make sense for the Hyundai Kona EV, but the important point is that the charger’s 50A rating does not mean the Kona will automatically pull 50A from it. The vehicle’s onboard AC charging system ultimately determines how much power the battery can accept. In other words, buying a higher-rated EV charger is not the same thing as making the car charge at that charger’s maximum output.
Where the higher rating does become useful is in the installation and flexibility it gives you. A hardwired 50A-class charger can provide plenty of available capacity while still allowing the current to be adjusted when your electrical system, household load, or charging routine calls for it. That is why I would look at 50A as an installation and flexibility choice rather than simply a promise of dramatically faster Kona charging.
There is also a practical future-proofing angle. If you keep the charger for several years, the wall unit may outlast the vehicle currently parked beside it. A properly installed higher-capacity charger can give you more flexibility if you eventually move to another EV with a higher AC charging capability. Just make sure the breaker, wiring, electrical panel capacity, and charger settings are all matched correctly rather than installing a 50A unit and assuming the maximum output is automatically available.
When smart charging is actually worth using
Smart features are useful when they solve a real problem. For the Kona, the most worthwhile ones are usually scheduled charging, remote control, charging history, and energy tracking, rather than simply having an app because the charger happens to offer one.
If your electricity rate changes during the day, scheduling can be particularly useful. You can set the charger to operate during your preferred lower-cost period instead of plugging the car in and manually remembering when to start or stop charging. That can make a bigger difference to ownership costs over time than choosing between two chargers with only a small difference in maximum amperage.
Energy monitoring is another genuinely useful feature. A good smart charger can show charging sessions, energy consumption, and related charging information, giving you a clearer idea of how much electricity the Kona is using at home. This is especially helpful if you are trying to understand your household electricity usage rather than simply watching the battery percentage.
Remote control also has a practical role. If the vehicle is already plugged in, you may be able to change schedules or charging settings from your phone without walking back to the garage. But I would not make WiFi availability the deciding factor. The charger should still be able to deliver basic charging when the internet or app is unavailable. That is why the underlying electrical hardware matters more than the smart interface.
Garage-ready installation starts with the cable
A charger can have excellent specifications on paper and still be frustrating if its cable cannot comfortably reach the Kona. This is one of those details that looks minor when shopping but becomes obvious every single night.
A 23- to 25-foot cable gives you considerably more freedom than a short lead, particularly if the car does not always park in exactly the same position. Before installation, measure the real route from the proposed charger location to the Kona’s charging port, including the height of the wall-mounted unit and any distance the cable needs to travel around the vehicle.
Do not measure only the straight-line distance. A garage wall, parking position, shelving, another vehicle, or the location of the electrical panel can change how much usable cable you actually need. A little extra reach is usually more useful than mounting the charger in an awkward position simply to save a few feet of cable.
Indoor versus outdoor protection matters
If the charger is going inside a closed garage, protection from rain may not be the main concern, but temperature, dust, accidental contact, and cable management still matter. A weather-rated enclosure is still useful because it gives the charger additional protection and installation flexibility.
For an outdoor installation, the protection rating becomes much more important. Look for the actual enclosure rating rather than relying on vague descriptions such as “weather resistant.” Models in this comparison offer different levels of protection, so the right choice depends partly on where the charger will physically live.
The same principle applies to the charging cable. A long cable is helpful, but it should have a sensible place to hang when the Kona is not charging. Keeping the connector off the floor and avoiding sharp bends or unnecessary loops helps make the setup cleaner and easier to live with.
NEMA 14-50 or hardwired: choose based on the installation
For a garage that already has a properly installed 240V NEMA 14-50 outlet, a plug-in charger can be an attractive option. You get a relatively straightforward connection, and some models can be removed or replaced without changing the entire electrical installation.
That does not mean every existing 14-50 outlet is automatically suitable. The outlet needs to be correctly wired and rated for continuous EV charging, and the circuit must be appropriate for the charger’s intended current. An outlet that physically looks like the right connector is not enough by itself.
A hardwired charger makes more sense when you are building the installation from scratch, want a permanent wall-mounted setup, or need higher available charging capacity. It can also produce a cleaner installation because there is no large plug and receptacle hanging behind the charger.
For this group of chargers, the distinction is important:
- Autel is aimed at a permanent hardwired installation with adjustable current up to 50A.
- EMPORIA gives you both NEMA 14-50 plug-in and hardwired installation options.
- ChargePoint HomeFlex is positioned as a hardwired 240V setup.
- Grizzl-E Classic keeps things simple with a NEMA 14-50 plug-in design.
- EVIQO is also designed around a NEMA 14-50 plug-in installation.
The right choice is therefore less about which installation type sounds more advanced and more about what your garage already has and what you want the electrical installation to become.
Trenching versus conduit for a detached garage
If your garage is detached from the house, the charging project becomes more than simply mounting a wall box. The electrical supply has to travel from the main electrical system to the garage, and that may involve conduit, underground routing, trenching, or other site-specific electrical work.
This is where installation planning can matter more than the charger itself. A longer cable does not eliminate the need for proper electrical routing. Likewise, choosing a 50A charger does not mean the existing electrical service can support a new 50A EV charging circuit.
If underground work is required, discuss the complete route with a qualified electrician before buying the charger. The electrician can determine the appropriate wire size, conduit arrangement, breaker requirements, voltage drop considerations, grounding, and available electrical capacity for the property.
For a detached garage, I would decide where the Kona normally parks first, where the charger should sit second, and only then work backward toward the electrical supply. That approach usually produces a cleaner installation than choosing a charger location based solely on where the existing wiring happens to be easiest to reach.
The real-world setup matters more than the biggest number
For the Hyundai Kona EV, a good home charging setup is not simply the charger with the highest amperage printed on its specification sheet. The better match is the one that combines appropriate electrical capacity, useful cable reach, suitable weather protection, a sensible installation method, and controls you will actually use.
If you already have a suitable NEMA 14-50 installation, a plug-in model can keep the project straightforward. If you are starting from zero and want a permanent setup, a hardwired unit may make more sense. And if you regularly manage charging around electricity rates or household energy use, smart controls can justify choosing a connected charger.
That is the real reason the five chargers above are not interchangeable despite all serving the same basic purpose. The Kona needs reliable Level 2 AC charging; your garage determines how that charging should be delivered.
Hyundai Kona EV Buying Guide: How to Choose the Right Level 2 Home Charger
Choosing a home charger for the Hyundai Kona EV is easier when you stop treating amperage as the only deciding factor. The charger, the vehicle’s onboard charging capability, your home’s electrical system, cable placement, and the way you actually charge overnight all need to work together.
A 50A charger can be an excellent long-term installation, but it is not automatically a better choice for every Kona owner. Likewise, a 40A unit is not necessarily a compromise if it fits your electrical setup, charging routine, and installation budget better. The goal is to build a setup that is safe, convenient, appropriately sized, and easy to live with for years.
Start with the Kona’s actual charging requirement
Before looking at individual charger features, separate two numbers that are often confused:
- The charger’s maximum output — what the wall unit is capable of supplying.
- The vehicle’s AC charging limit — what the Kona can actually accept through its onboard charger.
A charger rated for 40A, 48A, or 50A does not force the vehicle to consume that amount of current. The vehicle controls the charging process and draws only what its onboard system is designed to accept.
That is why buying the largest charger available simply because it has a bigger amp number can be unnecessary. A higher-rated unit can still make sense for electrical flexibility and future EVs, but you should not pay extra expecting the Kona itself to automatically charge at the wall unit’s maximum rating.
40A vs 48A vs 50A: what actually changes?
For most home installations, these ratings are better viewed as different levels of available electrical capacity rather than three completely different charging experiences.
| Charger rating | Typical role | Installation consideration | When it makes sense |
|---|---|---|---|
| 40A | Strong everyday Level 2 setup | Often available in plug-in configurations | Good fit for straightforward home charging |
| 48A | Higher-capacity permanent setup | Commonly paired with hardwiring | Useful when building a dedicated higher-capacity installation |
| 50A | High-capacity home charger | Usually requires a properly sized hardwired circuit | Makes sense when you want more installation headroom and future flexibility |
The important part is the electrical circuit behind the charger. Do not choose a charger first and assume the house can support its maximum output. The breaker, conductors, panel capacity, installation method, and local electrical requirements all need to be considered by a qualified electrician.
For that reason, the difference between a 48A and 50A charger should not be treated as a dramatic real-world charging advantage for the Kona. In many cases, the more meaningful difference is how the charger fits your electrical installation and how much flexibility you want later.
Decide between plug-in and hardwired charging
This is one of the first genuine decisions to make because it affects installation, portability, maximum output, and how permanent the setup becomes.
Choose a NEMA 14-50 plug-in setup when
A plug-in charger can be attractive if your garage already has a properly installed 240V NEMA 14-50 circuit suitable for EV charging.
It can make sense when:
- You already have the appropriate outlet.
- You want a simpler installation.
- You may want to remove or replace the charger later.
- You prefer not to permanently hardwire the wall unit.
- The charger’s plug-in current rating fits your electrical circuit.
The important warning is that not every NEMA 14-50 outlet should automatically be assumed to be EV-ready. The circuit needs to be correctly installed and sized for continuous EV charging.
The Grizzl-E Classic and EVIQO in this list follow this straightforward plug-in approach, while EMPORIA gives you the choice between plug-in and hardwired installation.
Choose hardwired charging when
Hardwiring becomes more attractive when you are installing a charger from scratch and want a permanent setup.
It can be preferable when:
- You want a cleaner permanent installation.
- You want access to higher charging capacity.
- The charger is being mounted in a fixed location.
- You are already paying for electrical work.
- You want fewer exposed plug-and-receptacle connections.
- The charger is going outside or in a location where a permanent installation makes more sense.
Autel and ChargePoint HomeFlex are particularly aligned with this type of setup, while EMPORIA provides both paths.
There is no universal rule that hardwired is always better. The best installation is the one that matches the electrical system and the way the vehicle is actually parked and charged.
Cable length deserves more attention than most buyers give it
A charger can have excellent electrical specifications and still be annoying if the cable barely reaches the Kona’s charging port.
For a garage installation, I would pay close attention to the difference between a 23-foot, 24-foot, and 25-foot cable. That extra foot or two can determine whether the cable reaches comfortably around the front or side of the vehicle without stretching across a walking path.
Before mounting anything, measure:
- Where the Kona normally parks.
- Where the charging port sits on the vehicle.
- Where the charger can realistically be mounted.
- The route the cable will take between those two points.
- Where the connector will sit when the vehicle is not charging.
Do not measure only from the wall to the front bumper. The cable may need to travel around the vehicle, and a few feet can disappear quickly once you account for the actual parking position.
For this reason, the 23–25-foot cables used across this selection are a meaningful part of the buying decision rather than a specification included simply to make the comparison table longer.
Think about where the charger will live
Your installation environment should influence the charger you choose.
For a closed garage, you still want good enclosure protection, sensible cable management, and a mounting location that keeps the connector accessible without creating a trip hazard.
For an outdoor installation, enclosure and weather protection become much more important. Rain, dust, temperature swings, and direct exposure can make the physical protection of the charger just as important as its smart features.
The products in this list take different approaches:
- Autel uses a NEMA 4X enclosure.
- EMPORIA uses NEMA Type 4 protection.
- ChargePoint HomeFlex uses a NEMA 3R enclosure.
- Grizzl-E Classic is built around IP67 protection.
- EVIQO combines IP66/NEMA 4 protection.
These ratings should not be treated as interchangeable marketing badges. The actual installation location still matters, and outdoor electrical installation should be handled according to applicable local requirements.
Don’t overspend on smart features you will never use
Smart charging can be genuinely useful, but only if it matches your routine.
Look for features such as:
- Scheduled charging when you want charging to happen at specific times.
- Energy tracking when you want to understand household EV electricity use.
- Remote control when you want to manage charging without visiting the garage.
- Current adjustment when you want to limit charging based on electrical capacity or household demand.
- Charging history when you want a clearer record of energy consumption.
The important distinction is between useful smart control and technology for its own sake.
If you plug in every evening and simply want the Kona ready in the morning, a basic charger can do that job extremely well. If you actively manage electricity usage, schedules, or household energy consumption, the connected models become more compelling.
Also remember that WiFi should not become a single point of failure. A home EV charger should still be capable of basic charging when the internet or app is unavailable.
Adjustable current is an underrated feature
One feature I would pay more attention to is adjustable charging current.
It gives you more control over how much electrical capacity the charger uses. That can be useful if you do not need maximum output every night or if the home’s electrical load changes.
The chargers in this comparison offer different adjustment ranges:
- Autel: 6A–50A
- EMPORIA: 6A–48A
- ChargePoint HomeFlex: 16A–50A
- Grizzl-E Classic: 16A / 24A / 32A / 40A
- EVIQO: 6A–40A
This matters because home charging is usually an overnight activity, not a race. If the Kona has several hours to charge while you sleep, running the charger at its maximum setting may provide little practical benefit compared with a lower setting that better fits the home’s electrical load.
Consider the electrical panel before buying the charger
This is where an otherwise sensible shopping decision can become an expensive installation problem.
Before choosing a high-output unit, have the electrician look at:
- Available capacity in the electrical panel.
- Existing major electrical loads.
- Breaker capacity.
- Required circuit size.
- Wire size and installation route.
- Distance between the panel and charger.
- Whether the garage is attached or detached.
- Whether trenching or conduit is required.
- Local electrical requirements.
If the panel is already heavily loaded, simply adding another large circuit may not be straightforward.
For a detached garage, the situation can become even more involved because the electrical supply may need to travel underground or through conduit before reaching the charging location. In that situation, installation planning can easily become more important than the small difference between charger models.
Match the charger to your daily parking routine
This is one of the simplest tests and one that buyers often skip.
Ask yourself:
Where does the Kona actually park every night?
If it always sits in the same garage position, you may not need an extremely long cable. If the vehicle sometimes parks outside, the cable needs to reach farther. If another car shares the garage, charger placement becomes more important. If the charging port is awkward relative to the wall, extra cable length can be worth paying for.
A charger that looks perfect in a specification sheet can become frustrating if you have to stretch the cable across the garage every night.
Durability matters when the charger is staying for years
A home EV charger is not something most owners want to replace every couple of years.
That makes the physical construction, enclosure protection, cable quality, warranty, and installation flexibility worth considering alongside charging output.
The five models here take noticeably different approaches:
- Autel: high output, adjustable current, long cable, and strong enclosure protection.
- EMPORIA: smart energy management combined with plug-in or hardwired flexibility.
- ChargePoint HomeFlex: permanent installation with a connected charging ecosystem and long cable.
- Grizzl-E Classic: deliberately simple hardware with rugged protection and no app dependency.
- EVIQO: practical plug-in installation, long cable, smart controls, and useful physical touches.
That difference is important. You are not really choosing between five identical boxes with different logos. You are choosing five different approaches to home charging.
Check the connector before placing the order
For a J1772-equipped Kona setup, make sure the charger you purchase has the connector required by the specific vehicle and model year you own.
This becomes particularly important when shopping online because product listings can mix J1772 and NACS versions, sometimes under very similar product names.
Before ordering, verify:
- Connector type.
- Vehicle model year.
- Charger version.
- Plug type.
- Maximum current.
- Installation method.
- Included cable length.
A charger with the wrong connector is not a minor inconvenience; it can turn into an unnecessary return or adapter decision.
What I would prioritize before making the final choice
If I were narrowing these five options for a Kona home installation, I would work through the decision in this order:
- Confirm the vehicle and connector.
- Check what electrical capacity your home can actually support.
- Decide whether you want plug-in or hardwired installation.
- Measure the real cable distance to the parking position.
- Choose the appropriate charging capacity rather than automatically chasing the highest number.
- Decide whether smart controls will genuinely improve your charging routine.
- Check enclosure protection if the charger will be exposed to the elements.
- Look at warranty and long-term ownership considerations.
- Only then compare price.
That order prevents a common mistake: choosing the charger first and trying to make the garage fit around it.
The bottom line when buying a Kona home charger
The right Level 2 charger for a Hyundai Kona EV is not necessarily the one with the biggest amperage, the longest feature list, or the most impressive app.
A 40A unit can be completely sensible for an owner who wants straightforward overnight charging. A 48A or 50A charger can make more sense for a new permanent installation where higher electrical capacity and future flexibility are priorities. A smart charger is worthwhile when scheduling and energy monitoring fit your routine, while a simpler model can be the better match if you just want reliable plug-in charging without another connected device to manage.
The safest approach is to treat the charger and electrical installation as one system. Match the hardware to the Kona, match the electrical circuit to the charger, and match the cable and features to the way you actually use your garage. That is far more useful than buying purely on the highest number printed on the box.
Installation Considerations and Costs for a Hyundai Kona EV Home Charger
Installing a Level 2 charger is usually straightforward when the electrical panel, garage, and parking position are already well suited for it. The complexity starts when the charger is far from the panel, the existing electrical service has limited capacity, or a detached garage requires a new underground electrical run.
The charger itself is only one part of the project. The circuit, breaker, wiring, outlet or hardwired connection, mounting location, and electrical service capacity all need to work together. That is why installation cost can vary considerably between two homes using the exact same charger.
What a typical installation involves
A professional installation generally starts with an assessment of the home’s existing electrical system and the location where the Kona will normally be parked.
The electrician will typically look at:
- The main electrical panel and available capacity.
- Existing breaker configuration.
- Distance between the panel and charger location.
- Whether the charger will be plug-in or hardwired.
- Required circuit and breaker size.
- Wire size and routing.
- Whether the garage is attached or detached.
- Whether conduit is required.
- Whether the charger will be installed indoors or outdoors.
- Local electrical requirements and permitting.
- The position of the charging cable relative to the Kona’s charging port.
This assessment should happen before purchasing a charger solely because it advertises 48A or 50A output. A high-capacity wall unit does not create additional electrical capacity in the house.
Step-by-step installation process
For a straightforward garage installation, the process generally looks like this:
1. Electrical assessment
The electrician checks the panel, available capacity, existing loads, and the proposed charger location. This is where potential problems should be identified before any equipment is mounted.
2. Choose the circuit configuration
The installation is then designed around either a suitable NEMA 14-50 plug-in connection or a hardwired charger.
For a plug-in setup, the electrician needs to install or verify an appropriate 240V circuit and receptacle. For a hardwired unit, the charger is connected directly to the dedicated circuit according to its installation requirements.
3. Plan the cable route
The route between the electrical panel and charging station matters. A short run through an accessible garage wall is very different from a long run through finished walls or an underground route to a detached garage.
4. Install the electrical circuit
The appropriate wiring, conduit where required, breaker, and other electrical components are installed. The exact requirements depend on the charger, installation method, property, and applicable electrical rules.
5. Mount the charger
The wall unit is positioned so the Kona can be connected comfortably without stretching the cable, placing it across a walking path, or leaving the connector on the floor.
6. Connect and configure the charger
For a smart model, this may include configuring the charging current, WiFi connection, schedule, and other available settings. The installer should also confirm that the charger operates correctly at the intended electrical rating.
7. Test the complete setup
The final step is not simply checking whether the charger powers on. The installation should be checked as a complete electrical system, including the connection, protective devices, charger operation, and vehicle charging.
How long does installation usually take?
A simple installation can often be completed within a few hours when the electrical panel is close to the garage, sufficient capacity is available, and the charger location is straightforward.
The timeline can become longer when additional electrical work is needed, such as:
- A long cable run.
- Finished-wall access.
- A new electrical panel or service work.
- Conduit installation.
- Outdoor mounting.
- A detached garage.
- Underground trenching.
- Permit or inspection requirements.
- Additional load-management equipment.
The charger itself may take only a short time to mount, but the electrical work around it is what determines the real installation time.
For a new installation, it is better to ask the electrician for a complete project estimate and expected timeline rather than assuming the job is simply “mount charger and plug it in.”
What should a 40A installation cost?
There is no single nationwide installation price because labour rates, electrical infrastructure, distance, permits, and local requirements vary significantly.
For a relatively straightforward 40A Level 2 installation, the cost can be comparatively modest when a suitable electrical circuit and panel capacity are already available. A new NEMA 14-50 circuit may cost more if the electrician has to run new wiring from the panel or work through finished areas.
A reasonable way to think about the cost is:
| Installation situation | Rough cost direction |
|---|---|
| Suitable existing circuit and simple charger connection | Lower |
| New 240V circuit with nearby panel | Moderate |
| New circuit with longer wiring/conduit run | Moderate to higher |
| Difficult garage access or finished walls | Higher |
| Detached garage with underground electrical work | Significantly higher |
The charger purchase price is separate from these installation costs.
For a 40A plug-in charger such as the Grizzl-E Classic or EVIQO, the hardware can be relatively simple, but that does not eliminate the need for a properly sized circuit. The fact that a charger uses a NEMA 14-50 plug does not mean you can safely connect it to any existing 14-50 receptacle without checking the circuit.
What changes when you move to 48A or 50A?
The difference between a 40A installation and a higher-output 48A or 50A installation is not simply the charger price.
Higher-current installations can require larger electrical infrastructure and a different installation approach, particularly when the charger is hardwired.
For example, the Autel unit in this comparison is designed for up to 50A and a hardwired installation, while ChargePoint HomeFlex also provides up to 50A through a hardwired setup. EMPORIA offers a useful middle ground because it supports both plug-in and hardwired configurations, with different maximum outputs depending on the installation.
That means a higher-capacity charger can increase installation cost when it requires:
- A larger dedicated circuit.
- More substantial wiring.
- A longer or more difficult wiring route.
- Additional conduit.
- Panel modifications.
- Load-management considerations.
- More involved electrical work.
A useful rough planning range for a straightforward residential Level 2 installation is often around $500–$1,500 for installation, but difficult projects can exceed that range. A 40A setup may fall toward the lower portion when the electrical infrastructure is convenient, while a 48A or 50A hardwired installation can move toward the higher portion when additional electrical work is required.
These are planning figures, not a guaranteed quote. The property determines the actual cost.
Why the distance from the panel matters so much
One of the easiest ways for an installation quote to increase is simply having the charger far away from the electrical panel.
A charger mounted directly on the other side of a garage wall from the panel is a very different job from one installed at the opposite end of the house.
The electrician may need to account for:
- Longer wire runs.
- Additional conduit.
- Wall access.
- Attic or crawl-space access.
- Exterior routing.
- Underground work.
- Additional labour.
- Voltage-drop considerations for longer runs.
This is why two Kona owners can buy the same 50A charger and receive very different installation quotes.
Detached garages can change the budget completely
If the Kona is parked in a detached garage, do not assume the installation will be priced like a normal attached-garage charger.
The electrical supply may need to travel from the main building to the detached structure. Depending on the property, that can involve conduit, underground routing, trenching, additional electrical equipment, and more labour.
Before buying the charger, establish the complete route:
Main panel → electrical run → detached garage → charger → Kona
If the electrical run itself becomes the expensive part of the project, saving a little money on the wall charger will not materially change the total installation cost.
Plug-in versus hardwired installation cost
The plug-in route can be attractive because the charger connects to a properly installed NEMA 14-50 receptacle rather than being permanently wired into the wall.
But remember that the receptacle and circuit still have to be installed correctly if they do not already exist.
Hardwired installation can cost more in some situations because the electrician is connecting the charger directly to the dedicated circuit and may need to accommodate the higher current rating.
| Factor | NEMA 14-50 Plug-In | Hardwired |
|---|---|---|
| Existing suitable outlet | Can simplify installation | Not required |
| Portability | Easier to disconnect | More permanent |
| Installation appearance | Plug and receptacle remain visible | Cleaner permanent connection |
| Higher-output setups | Depends on charger | Common choice |
| Electrical work | Still required for a new circuit | Direct circuit connection |
| Best suited to | Flexible home setups | Permanent installations |
Neither approach should be selected purely because it sounds more advanced. The correct choice depends on the charger specification, electrical system, property layout, and how permanent you want the installation to be.
Professional installation versus DIY
This is one area where saving a few hundred dollars can create a much bigger problem if the electrical work is not done correctly.
A Level 2 charger operates on a 240V electrical circuit, and higher-current EV charging is a substantial continuous electrical load. Installing the charger is therefore not equivalent to plugging in an ordinary household appliance.
For most homeowners, I would leave the electrical work to a qualified electrician, particularly when installing a new circuit, modifying the panel, running conduit, or working on a hardwired 48A or 50A charger.
A professional can also identify problems that are easy to miss when looking only at the charger installation itself, such as inadequate panel capacity, unsuitable wiring, incorrect breaker sizing, or an inappropriate existing receptacle.
When DIY becomes particularly risky
I would not treat these as casual DIY jobs:
- Installing a new 240V circuit.
- Modifying the main electrical panel.
- Installing a new breaker without the required electrical knowledge.
- Running new high-current wiring.
- Hardwiring a 48A or 50A charger.
- Running electrical service to a detached garage.
- Installing underground electrical conduit.
- Working on an electrical system that has not been assessed for available capacity.
If your local rules allow certain electrical work to be performed by a homeowner, that does not automatically mean it is a sensible project for someone without the required experience.
There is also the question of permits, inspection, insurance, and manufacturer installation requirements, all of which can vary by location.
Where it is reasonable to save money
The smart place to save is not by cutting corners on the electrical circuit.
Instead, save by making the installation plan efficient:
- Mount the charger relatively close to the electrical panel where practical.
- Choose the charger location before electrical work begins.
- Avoid unnecessarily long cable routes.
- Use an existing suitable circuit when it genuinely meets the charger’s requirements.
- Decide between plug-in and hardwired installation before the electrician arrives.
- Avoid paying for smart features you will never use.
- Compare complete installation quotes rather than only hourly labour rates.
A few minutes spent measuring the garage and planning the charger location can sometimes save considerably more than trying to negotiate a cheaper installation after the work has already started.
Get the installation quote as a complete number
When requesting quotes, ask the electrician to separate the estimate into the major components.
A useful quote should make it clear whether the price includes:
- Charger installation labour.
- New breaker.
- Wiring.
- NEMA 14-50 receptacle, if applicable.
- Conduit.
- Panel modifications, if needed.
- Permit fees.
- Inspection requirements.
- Trenching or underground work.
- Any additional equipment required for the property.
That makes it much easier to compare two quotes fairly. A $600 quote that excludes several required items may ultimately cost more than a $900 quote that includes the complete installation.
The real installation budget to plan for
For a normal attached-garage installation with a nearby electrical panel, roughly $500–$1,500 for electrical installation is a useful planning range, with simpler projects potentially below that and complicated installations going substantially higher.
A 40A plug-in charger can be relatively straightforward when the correct circuit already exists. A 48A or 50A hardwired charger can require more electrical work, particularly when the panel is distant, the service has limited capacity, or the wiring route is difficult.
For a detached garage, long conduit run, trenching, panel upgrade, or other major electrical work, treat $1,500+ as entirely possible rather than assuming a standard garage installation price.
The important takeaway is simple: budget for the electrical installation separately from the charger itself. The wall unit may be the part you spend the most time researching, but the home’s electrical infrastructure is what ultimately determines whether the installation is simple, expensive, or unsuitable without additional work.
FAQs About Level 2 Charger for the Hyundai Kona EV
Can the Hyundai Kona EV actually benefit from a 48A or 50A home charger, or is that just overbuying?
Yes, but the benefit needs to be understood correctly. A 48A or 50A charger does not make the Kona pull 48A or 50A simply because the wall unit can provide it. The vehicle’s onboard AC charging system controls how much power it accepts.
So why consider one?
Because the charger is part of your home’s long-term electrical setup. If you are already paying for a new circuit and professional installation, a higher-capacity unit can give you more flexibility than buying a charger that is barely above today’s requirement. It can also be useful if you eventually replace the Kona with another EV capable of accepting more AC power.
There is another practical reason that gets missed in most buying guides: adjustable current can matter more than maximum current. A unit capable of 50A but configurable to a lower level gives you room to adapt the charging load to your home’s electrical capacity and daily routine.
For a Kona owner who simply plugs in overnight, I would not pay a large premium solely because the box says “50A.” The value is in the installation flexibility and future usefulness, not in assuming the Kona will charge 25% faster just because the charger is rated 50A instead of 40A.
Is a 25-foot cable really worth choosing for a Hyundai Kona EV garage setup?
In many garages, yes, and this is one of those specifications that sounds boring until you actually live with the charger.
The difference between a short cable and a 23- to 25-foot cable can determine whether you can park slightly differently and still reach the charging port without moving the car. It also gives you more freedom when the charger cannot be mounted directly beside the vehicle’s normal parking position.
Before choosing based on cable length, measure the actual route. The useful measurement is not simply “wall to car.” Consider:
- Where the Kona normally sits.
- Where the charger will be mounted.
- Where the charging port is positioned.
- Whether the cable needs to travel around the front or side of the vehicle.
- Where you will hang the connector when charging is finished.
- Whether another vehicle or walking path shares the garage.
There is a small twist here: the longest cable is not automatically the best cable. Excess cable lying on the garage floor can become a nuisance, so the goal is enough reach with sensible cable management. For many typical garage layouts, however, 23–25 feet gives a much more forgiving installation than a short lead.
If I already have a NEMA 14-50 outlet, should I buy a plug-in charger instead of paying for a 50A hardwired installation?
Not automatically. First confirm what that outlet and its circuit were actually installed for.
A NEMA 14-50 receptacle may look exactly right for an EV charger, but the appearance of the outlet tells you very little about whether the entire circuit is appropriate for continuous EV charging at the intended current. An electrician should verify the wiring, breaker, circuit configuration, and available electrical capacity.
If everything checks out, a plug-in charger can be a very sensible solution. It can make replacement easier later and may avoid unnecessary electrical work.
Hardwiring becomes more attractive when you are building the installation from scratch, want a permanent setup, or need a higher-capacity configuration. It can also produce a cleaner finished installation.
The important point is that “hardwired” does not automatically mean better and “plug-in” does not automatically mean cheaper. If the suitable 240V circuit already exists, plug-in may be the practical choice. If the electrician has to build the circuit anyway, the cost difference can look very different.
How much should I realistically budget for installing a Level 2 charger for the Kona, and what makes the quote jump?
For a relatively straightforward residential installation, around $500–$1,500 for electrical installation is a reasonable planning range, but it is not a universal price. The actual number depends heavily on the property.
A nearby electrical panel and an uncomplicated garage can keep the work relatively simple. A charger at the opposite end of the house, a finished wall, limited panel capacity, outdoor routing, or a detached garage can change the economics quickly.
The biggest cost drivers are usually:
- Distance from the electrical panel to the charger.
- New circuit requirements.
- Wiring and conduit.
- Panel capacity or required modifications.
- Plug-in versus hardwired installation.
- Outdoor installation.
- Permit and inspection requirements.
- Detached-garage electrical runs.
- Trenching or underground conduit.
Here is the part I would pay attention to when comparing quotes: ask what is actually included. A cheap quote that excludes the breaker, conduit, permit, or difficult wiring work is not necessarily the cheaper installation.
And if a detached garage requires trenching, do not be surprised if the electrical work costs considerably more than the charger itself. At that point, the property layout—not the EV charger—is driving the project.
Should I choose a smart WiFi charger for the Hyundai Kona EV, or is a simple charger actually the smarter long-term choice?
This depends almost entirely on how you charge the car.
If you plug the Kona in every night and want it to charge whenever it is connected, a basic charger can be perfectly adequate. You do not need an app to make Level 2 charging work, and adding WiFi does not make the underlying electricity any cheaper by itself.
A smart charger becomes genuinely useful when you will actually use features such as:
- Scheduled charging to control when the vehicle charges.
- Energy monitoring to see how much electricity the Kona consumes.
- Remote controls when you do not want to walk back to the garage.
- Adjustable current when you want to control the electrical load.
- Charging history when you want a clearer picture of home charging.
There is also a less obvious consideration: do not buy a smart charger that becomes frustrating when the internet connection disappears. Basic charging should remain useful even if WiFi or the manufacturer’s app is temporarily unavailable.
That is why the smart-versus-basic decision should come after the electrical and physical requirements. First make sure the charger has the right connector, output, installation method, cable reach, and enclosure protection. Then decide whether connected features genuinely improve your routine.
For a Kona owner who wants a straightforward setup, something like the Grizzl-E Classic’s no-app approach can be completely logical. For someone who actively manages charging schedules and energy consumption, the connected approach offered by models such as EMPORIA, Autel, ChargePoint, or EVIQO can provide useful control rather than just another gadget on the wall.
Final Verdict: Choose the Charger That Fits the Kona and Your Garage
The best Level 2 charger for a Hyundai Kona EV is not simply the one with the highest amperage or the longest list of smart features. A good home charging setup should feel almost boring after installation: park the car, plug it in, and know it will be ready when you need it.
That is why the five chargers in this guide are deliberately different. The Autel stands out for a high-capacity hardwired installation with adjustable current and a 25-foot cable. EMPORIA makes more sense when installation flexibility and energy management are important. ChargePoint HomeFlex is built around a permanent connected setup and a familiar charging ecosystem. Grizzl-E Classic takes the opposite approach, keeping things rugged and simple without making you depend on an app. EVIQO combines plug-in convenience, a long cable, adjustable output, and useful smart controls.
The important thing is not to confuse charger capacity with vehicle charging speed. A 50A wall unit does not force the Kona to accept 50A, just as buying a 40A charger does not automatically make it a poor choice. What matters is how the charger’s available power, the Kona’s onboard charging system, your electrical panel, and your daily charging routine fit together.
If you are starting with an empty garage and need new electrical work, plan the installation before the purchase. Check the panel, decide where the Kona actually parks, measure the cable route, determine whether plug-in or hardwired makes more sense, and then choose the charger. That approach can prevent the frustrating situation where a technically impressive charger ends up being poorly positioned or unnecessarily expensive to install.
And if your current setup already has a suitable 240V circuit, do not replace good infrastructure simply to chase a bigger number on the charger. A properly installed 40A or 48A setup that works every night is more useful than a 50A charger that creates unnecessary electrical work.
Ultimately, the smartest Kona EV charging setup is the one you stop thinking about after the first week. It should deliver the power the vehicle can use, reach the car comfortably, survive the environment where it is installed, and give you only the controls you genuinely need. Get those fundamentals right, and the charger becomes what it should have been all along: a reliable part of the garage, not another piece of technology you have to manage.
Also Check:


