
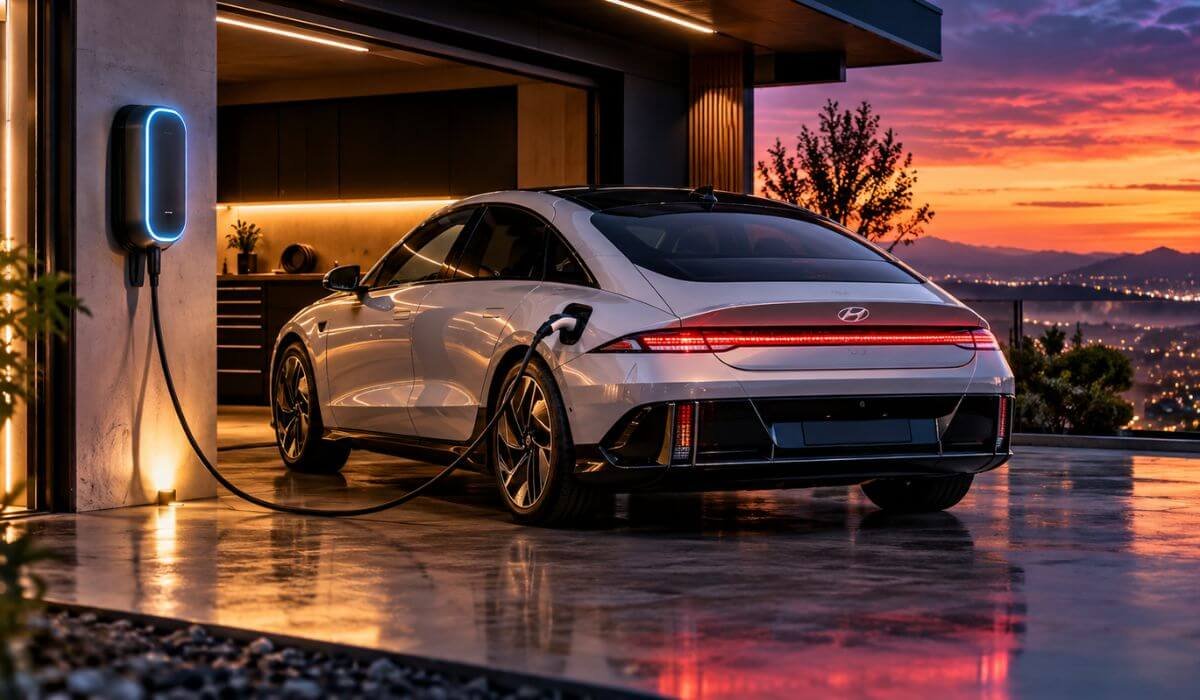
Best Home EV Chargers for Hyundai Ioniq 6 in 2026: 48A Level 2 Power Future Ready
If you own a Hyundai IONIQ 6, the home charger you choose matters less for the biggest amp number on the box and more for how well it fits the car, your electrical setup, and the way you actually charge. The IONIQ 6 has been offered with 53.0-kWh and 77.4-kWh battery packs, while larger-battery versions can use roughly 10.9 kW of Level 2 AC power under the right conditions. Hyundai estimates about 6 hours 55 minutes to charge from 10% to 80% using a 10.9-kW, 240V AC charger, which is why a 48A charger should not be viewed as a promise that the car will continuously pull 48 amps.
That is the part many EV charger lists overlook. For this guide, I looked beyond headline charging numbers and focused on what actually affects IONIQ 6 ownership: usable Level 2 power, connector compatibility, cable reach, installation requirements, smart charging controls, electrical flexibility and everyday reliability. I also considered the changing connector landscape, because a charger that makes perfect sense for one IONIQ 6 setup may not be the most practical choice for another, especially when you are planning a home installation that you expect to keep for years.
Best Home EV Chargers for Hyundai Ioniq 6: Top 2026 Picks for Fast Level 2 Home Charging
#1. Tesla Universal Wall Connector
Best Home EV Charger for Hyundai Ioniq 6 With 48A Level 2 Power, 11.5kW Capability and J1772-NACS Flexibility
#2. ChargePoint HomeFlex Level 2 EV Charger
Best Level 2 Charger for Hyundai Ioniq 6 With J1772 Charging, 50A Power and NEMA 14-50 Plug-In Convenience
#3. MACH 2 Fast Hardwired Level 2 EV Charger
Best 48A Home EV Charger for Hyundai Ioniq 6 With 11.5kW Output, 30-Ft Cable and NACS Adapter Support
#4. EMPORIA Level 2 EV Charger
Best Smart EV Charger for Hyundai Ioniq 6 With 48A Level 2 Power, WiFi Energy Tracking and 25-Ft Cable
#5. IYILO Level 2 EV Charger
Best 240V EV Charger for Hyundai Ioniq 6 With 48A Power, 11.5kW Output, NACS and Smart Charging Control
Expert Tip
Here is the one thing I would keep in mind before buying any charger for an IONIQ 6: do not choose it simply because it says 48A on the box. Your car decides how much AC power it can actually accept, so once you are around the IONIQ 6’s usable Level 2 charging range, the bigger differences are installation quality, cable reach, connector compatibility, controls and how easy the charger is to live with every night.
That is also why I would not automatically spend more money on the most powerful-looking unit. A properly installed charger that reaches your parking spot comfortably and works reliably every night is far more useful than extra capacity the car cannot use.
How We Choose These Hyundai Ioniq 6 Chargers
We did not build this list by taking five popular EV chargers and putting the IONIQ 6 name in front of them. The selection starts with the car’s actual charging needs, then works outward to the things that can make home charging either genuinely convenient or unnecessarily frustrating.
1. We started with usable Level 2 power
The IONIQ 6 is capable of making very good use of a proper 240V Level 2 installation, but that does not mean every 48A charger will give the car 48A. We therefore looked for chargers with enough electrical headroom to comfortably support the vehicle rather than treating the highest advertised amperage as the deciding factor.
This is why the list includes several 48A-class chargers. The extra capacity gives you flexibility, while the vehicle’s onboard charging system remains in control of what it actually draws.
2. Connector flexibility mattered more than it normally does
This is where the IONIQ 6 deserves a little more attention than a generic EV charger article.
Instead of assuming that every owner has the same connector situation, we considered connector flexibility and future usability when arranging the list. The Tesla Universal Wall Connector is particularly interesting here because Tesla builds an integrated J1772 adapter into the unit and rates it for up to 48A / 11.5kW, with a 24-foot cable and WiFi connectivity.
That gives it a different kind of value from a conventional single-connector home charger.
3. We paid attention to the installation you will actually have to live with
A charger can look excellent on a product page and still be the wrong choice for your garage.
For example, ChargePoint Home Flex can be installed hardwired or through a NEMA 14-50 configuration, but its plug-in setup is limited to 40A, while higher settings require hardwiring. ChargePoint also lists support for up to 50A when hardwired.
That distinction matters because a buyer who already has a suitable 240V outlet has a different starting point from someone installing a completely new circuit.
4. Cable length was treated as a real-world feature
This sounds minor until the charger is installed and you realise the cable does not comfortably reach the charge port.
That is why we gave genuine weight to cable reach. Tesla’s Universal Wall Connector comes with a 24-foot cable, ChargePoint Home Flex uses a 23-foot cable, and the MACH 2 option you selected goes even further with its 30-foot cable.
For a garage where the electrical panel is not positioned beside the normal parking spot, that difference can be more useful than another few amps on a specification sheet.
5. Smart features had to be useful, not just impressive
WiFi is easy to advertise. What matters is what you can actually do with it.
We looked for features such as charging schedules, app control, energy monitoring, remote access and software updates because these are the functions an owner can actually use after the installation is finished. Tesla, for example, provides charging management through its app along with WiFi-based updates and diagnostics, while EMPORIA provides app-based scheduling and charging/energy monitoring.
That is why smart functionality influenced the selection, but it was never allowed to replace the fundamentals of a good charger.
6. We checked the electrical details behind the advertised numbers
This is one of the easiest places for EV charger lists to become misleading.
EMPORIA’s documentation, for example, specifies up to 40A with its NEMA 14-50 configuration and up to 48A when hardwired, with 11.5kW at 240V/48A.
That is an important difference from simply writing “48A, 11.5kW” beside the product name and leaving the reader to figure out the installation requirements.
We considered the breaker requirement, plug-in versus hardwired operation, maximum charging output and vehicle compatibility together so the recommendations make sense outside of a product listing.
7. Finally, we looked at why each charger deserves a place on this particular list
The five chargers are not interchangeable, and that is intentional.
Tesla Universal Wall Connector brings connector flexibility and a future-oriented design.
ChargePoint Home Flex gives you a flexible installation platform with a long-established home charging ecosystem.
MACH 2 makes more sense when hardwired installation and a 30-foot cable solve a real garage-layout problem.
EMPORIA earns its place through its combination of smart controls, energy monitoring and adjustable charging.
IYILO focuses more directly on the core hardware: 48A / 11.5kW-class Level 2 charging, WiFi functionality and listed safety certifications.
So the list is not meant to say that one charger is perfect for every IONIQ 6 owner. It is meant to make the choice easier by showing what each charger does differently and where that difference actually matters.
That is the standard we used: not the most impressive specification sheet, but the charger that makes sense once the IONIQ 6 is sitting in your driveway and you have to charge it there every night.
#1. Tesla Universal Wall Connector
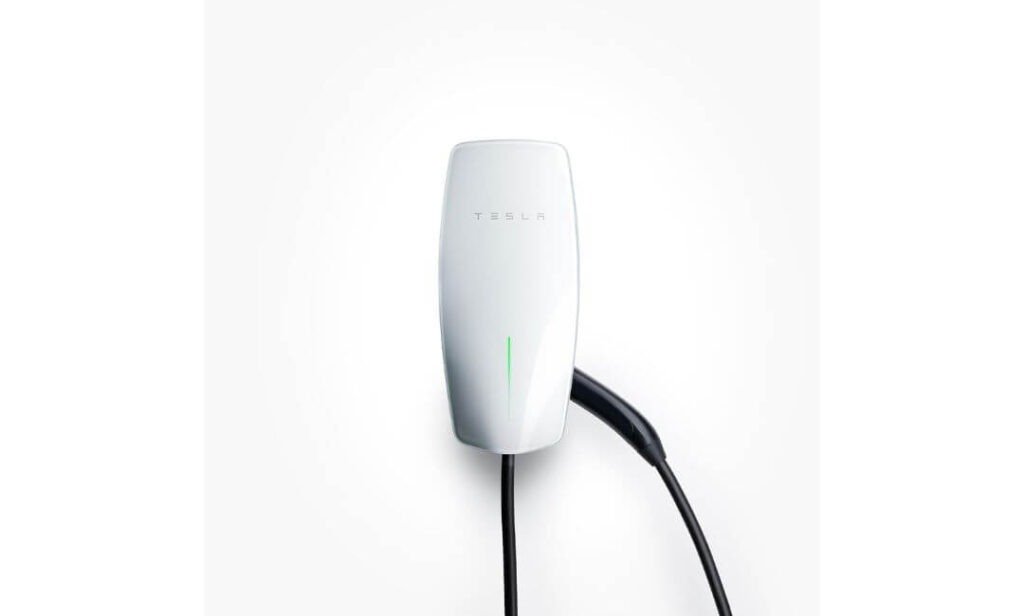
Quick Specs:
- Charging Output: Up to 48A / 11.5kW
- Charging Cable: 24 ft
- Connector Setup: Built-in NACS + J1772
- Power Adjustment: 12A, 16A, 24A, 32A, 40A or 48A
- Smart Features: WiFi, Tesla app and OTA updates
- Installation: Hardwired indoor or outdoor
- Multi-Charger Support: Power sharing with up to 6 Wall Connectors
The first thing that makes this charger different is not the 48A number. It is the fact that you are getting two charging standards built into one wall-mounted unit. For an IONIQ 6 owner, that means you can use the J1772 connection without buying a separate adapter, while the same charger remains useful if another EV in the household uses NACS. That is a genuinely useful difference when you are spending money on a permanent home installation.
Then there is the practical side. The 24-foot cable gives you considerably more freedom over where the car sits, while adjustable output lets the electrician configure the unit around the electrical capacity available at your home. You can select settings from 12A through 48A, rather than treating one maximum output as the only way to use the charger.
The WiFi connection is another feature that makes sense after installation, rather than simply looking good on a specification sheet. Through the Tesla app, you can manage charging remotely and receive over-the-air firmware updates, while the charger can continue basic plug-and-charge operation even when you are not using its connected features.
(In other words, it is less about buying the “biggest” charger and more about getting one installation that can keep making sense as your EV setup changes.)
What We Like
- Built-in J1772 and NACS flexibility makes it unusually practical for mixed-EV households.
- 24-foot cable gives you useful reach without forcing the car to park directly beside the charger.
- 12A–48A adjustment makes it easier to match the charger to the home’s available electrical capacity.
- WiFi and Tesla app access add useful scheduling, remote control and firmware updates.
- Power sharing for up to six units gives the platform room to grow if the household eventually has multiple EVs.
One Thing to Know
The J1772 adapter mechanism has received some customer reports of sticking when exposed to high heat. It is not a reason to dismiss the charger, but it is worth knowing before installation, particularly if the unit will live in a very hot environment. The supplied material also notes that Tesla support has provided replacement units in reported cases.
Why This Home Charger Makes Sense for the Hyundai Ioniq 6
For the IONIQ 6, the real strength here is the combination of 11.5kW-class Level 2 capability and connector flexibility. The charger has enough output headroom for the vehicle’s home AC charging capability, while the built-in J1772 connection keeps the setup straightforward rather than making you manage another adapter.
There is also a longer-term advantage. If the IONIQ 6 is not the only EV that will use your garage, you are not buying a charger that becomes inconvenient the moment another vehicle arrives. One wall unit can serve different connector types, and the adjustable power settings give an electrician room to configure the installation around the circuit rather than forcing you into one fixed setting.
The Insider Pro-Tip
If you are installing this specifically for an IONIQ 6, I would not size the entire project around the 48A headline number just because it is available. Have the electrician look at the actual circuit, breaker capacity and installation distance first. The useful part of this charger is that it can be configured below its maximum output, so you can build the installation around what your home can comfortably support instead of making the car adapt to an unnecessarily aggressive electrical setup.
And if there is even a reasonable chance that another EV will share your garage later, the universal connector design is the feature I would value most. You are paying for a permanent installation once; having that installation remain useful across different EV connector types can be worth more in the long run than chasing a slightly different charging specification today.
#2. ChargePoint HomeFlex Level 2 EV Charger
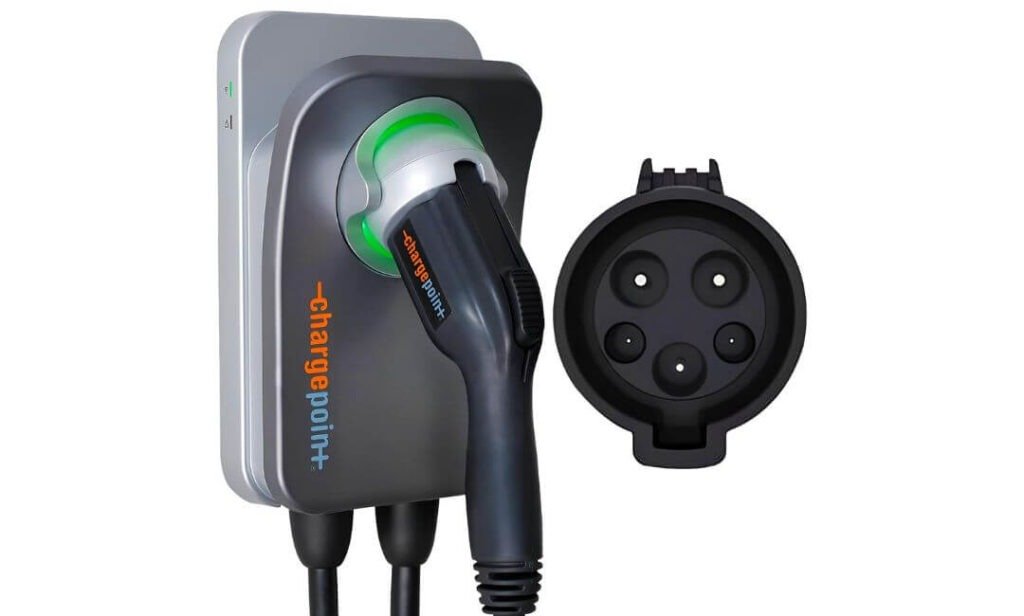
Quick Specs:
- Charging Output: Up to 50A / 12kW
- Cable: 23 ft cold-resistant cable
- Connector: J1772
- Plug: NEMA 14-50
- Charging Speed: Up to 45 miles of range per hour
- Smart Control: ChargePoint app with scheduling and charging data
- Installation: Plug-in or hardwired, indoor or outdoor
- Safety: UL-certified with weather-resistant construction
- Warranty: 3 years
What makes this charger interesting for an IONIQ 6 is how little you have to overthink the basic setup. The J1772 connector works directly with compatible IONIQ 6 charging hardware, while the NEMA 14-50 configuration gives you a familiar route into home Level 2 charging if the right outlet is already available. You are not buying a charger that needs an unusual installation just to make everyday charging work.
The 23-foot cable is another feature that becomes more valuable once you actually park the car at home. If your charging point is not perfectly positioned beside the charge port, that extra reach can save you from moving the car around every night. The cable is also designed for cold-weather use, which is useful for owners who deal with genuinely low winter temperatures rather than treating weather resistance as a marketing checkbox.
Then there is the ChargePoint app. This is where the unit becomes more than a simple wall-mounted power source. You can schedule charging, check charging information, manage reminders and monitor your sessions from your phone. For someone who plugs in after coming home and wants the car ready the next morning, that kind of control is much more useful than another specification buried on the product page.
(The real appeal here is simple: familiar installation, useful cable reach and smart control in one setup.)
What We Like
- J1772 connection keeps the setup straightforward for compatible IONIQ 6 configurations.
- 23-foot cable gives plenty of freedom when the parking position is not right beside the charger.
- NEMA 14-50 plug-in design is convenient when a suitable 240V outlet is already installed.
- ChargePoint app adds scheduling, charging data and remote management instead of leaving everything to the wall unit.
- Indoor/outdoor capability and UL certification make it suitable for different home installation environments.
One Thing to Know
The smart features depend on the charger’s connected functionality, so WiFi and app reliability can matter if you regularly use scheduling or remote controls. The important part is that basic charging does not become dependent on constantly checking the app; the unit can still be used for normal plug-in charging when those connected features are not being used.
Why This Home Charger Makes Sense for the Hyundai Ioniq 6
The strongest argument for this setup is its balance rather than one standout specification. The IONIQ 6 can make good use of a properly installed 240V Level 2 charger, and this unit combines strong output capability with a J1772 connector, long cable and familiar NEMA 14-50 installation. That makes it easy to build into an existing garage without making the charging routine more complicated than it needs to be.
It also gives you a useful choice in how you install it. If you already have a properly installed NEMA 14-50 outlet, the plug-in route keeps things simple. If you are building the charging circuit from scratch, a hardwired installation gives you another path. That flexibility is important because the best installation is ultimately the one that matches your home’s electrical setup rather than the one that looks best on a product page.
The Insider Pro-Tip
Before buying this one, I would check the NEMA 14-50 outlet itself, not just assume that seeing the outlet means everything is ready for EV charging. The circuit, breaker rating, wiring and installation quality all matter. If the outlet is already there but was not installed with sustained EV charging in mind, have an electrician verify it before relying on it every night.
And if your garage layout is awkward, pay attention to the 23-foot cable before you focus on the charging number. A charger that comfortably reaches the IONIQ 6 from its normal parking position is a much better everyday setup than a theoretically faster installation that leaves you stretching the cable across the garage. That is the kind of detail you notice every single time you plug in.
#3. MACH 2 Fast Hardwired Level 2 EV Charger
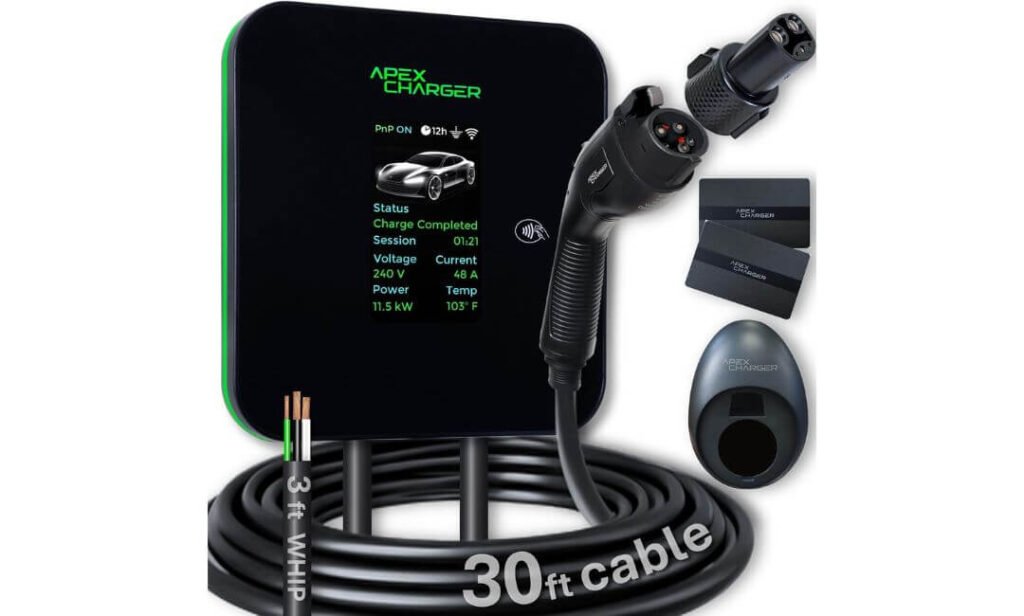
Quick Specs:
- Charging Output: Up to 48A / 11.5kW
- Cable: 30-ft heavy-duty cable
- Connector: J1772
- Included Adapter: PRO 1 Tesla NACS adapter
- Current Adjustment: 6A–48A
- Smart Control: WiFi + Bluetooth app
- Display: 4.75-inch LED screen
- Access Control: 2 RFID cards
- Protection: IP66 / Type 6 weather protection
- Warranty: 5 years
The first thing I would notice here is the 30-foot cable. That sounds like a small detail until you have a garage where the electrical panel and the IONIQ 6 do not line up neatly. Instead of moving the car closer to the wall every night or stretching a shorter cable to its limit, that extra reach gives you much more freedom over where the car actually sits. The supplied information specifically positions the 30-foot cable as a key advantage over the more common 18–25-foot lengths.
There is also more going on at the charger itself than just power delivery. The 4.75-inch LED display gives you a quick view of charging information, while the standby mode is designed to reduce unnecessary power use when the vehicle is not charging. You can also adjust the current from 6A to 48A, either through the app or manually, which is useful when you want the charging load to fit comfortably around the rest of your home’s electrical demand.
The other detail I genuinely like is that the J1772 connector is not the end of the story. You get a PRO 1 Tesla NACS adapter with the unit, so the same installation can remain useful if a Tesla or another NACS vehicle eventually joins the household. Add WiFi, Bluetooth, RFID access and a 5-year warranty, and this becomes a much more complete home charging setup than the basic “48A Level 2” description suggests.
(That combination makes the MACH 2 particularly interesting for a garage where reach, control and future vehicle flexibility matter as much as charging speed.)
What We Like
- 30-foot cable gives exceptional freedom when the parking position is far from the electrical installation.
- 6A–48A adjustment lets you tailor the charging load to the home’s electrical situation.
- PRO 1 NACS adapter included adds flexibility without requiring a separate adapter purchase.
- 4.75-inch display plus app control gives you two convenient ways to check charging information.
- 5-year warranty and 24/7 U.S.-based support add useful long-term reassurance.
One Thing to Know
The large LED display can be harder to read in direct sunlight, according to some customer feedback. It does not affect charging itself, and the app can still be used to check the charger’s status when the screen is difficult to see.
Why This Home Charger Makes Sense for the Hyundai Ioniq 6
For an IONIQ 6 owner, the MACH 2 makes the most sense when the charger needs to solve a real installation problem, not simply provide electricity. The native J1772 connector suits the vehicle, while the 48A / 11.5kW capability gives the installation enough headroom for the car’s Level 2 charging needs. The 30-foot cable is arguably the bigger everyday advantage because it can determine whether the charger works comfortably from the car’s normal parking position.
It is also unusually adaptable. You can reduce the current when the home’s electrical load calls for it, use the app for charging control, restrict access with the included RFID cards, and keep the NACS adapter available for another compatible EV. In other words, this is not just a high-output charger; it is a setup that can adapt to how the garage is actually used.
The Insider Pro-Tip
If your IONIQ 6 normally parks 20–25 feet or more from the electrical panel, I would give the 30-foot cable more weight than another small difference in advertised charging output. Cable reach is something you interact with every single time you charge, and having comfortable slack is much better than constantly parking the car to a precise spot.
For the electrical side, do not assume that selecting 48A in the app means your existing wiring can safely support it. A full 48A installation needs the appropriate dedicated circuit and wiring, so have the electrician size the circuit first and then set the charger accordingly. The useful part of this unit is that you can dial the current down when necessary rather than treating maximum output as mandatory.
#4. EMPORIA Level 2 EV Charger
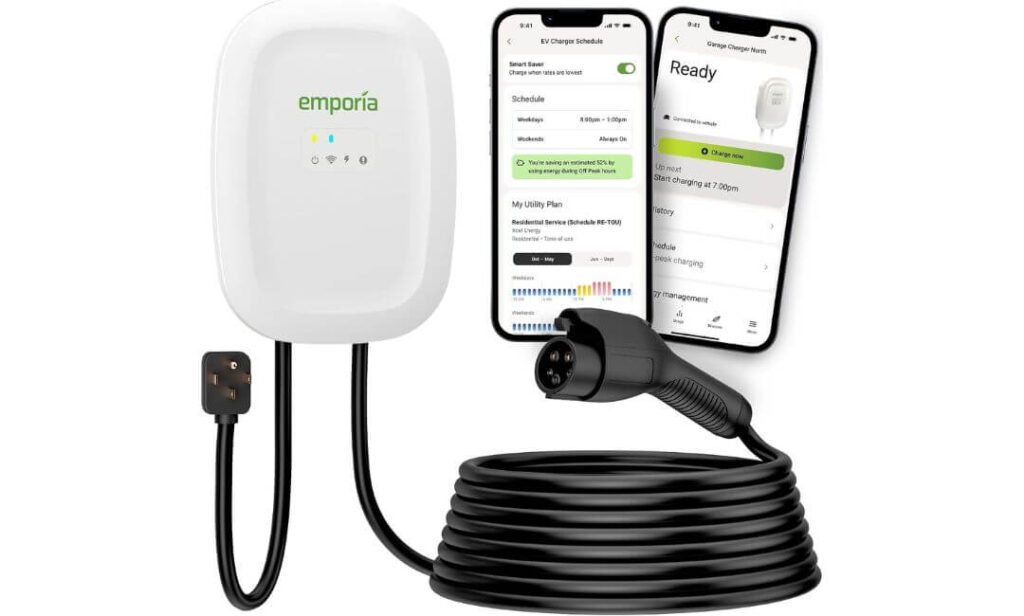
Quick Specs:
- Charging Output: Up to 48A / 11.5kW hardwired
- Plug-In Output: Up to 40A / 9.6kW with NEMA 14-50
- Cable: 25 ft
- Connector: SAE J1772
- Current Adjustment: 6A–48A hardwired
- Smart Control: 2.4GHz WiFi + mobile app
- Installation: NEMA 14-50 plug-in or hardwired
- Certification: UL Listed + ENERGY STAR
- Warranty: 3 years
The appeal here is not complicated: you get to choose how you want the charger installed. If your garage already has a suitable NEMA 14-50 outlet, the plug-in configuration can deliver up to 40A without turning the installation into a major project. If you want the full 48A capability, the unit can instead be hardwired to a properly sized circuit. That makes it easier to match the charger to the home you already have rather than rebuilding everything around the charger.
The 25-foot cable is another detail that earns its place here. It gives you useful reach around a normal garage or driveway, and the built-in holder helps keep that cable under control when the car is not plugged in. For a home charger, those little details matter because you are going to handle the cable far more often than you will think about the maximum kW number.
What makes the EMPORIA more interesting is the software. Its app can show energy usage, charging costs and session data, while scheduling lets you choose when charging should happen. The charger also allows current adjustment, including 6A–48A in hardwired mode, so the electrician can configure the installation around the home’s electrical capacity instead of simply setting everything to maximum.
(It is the kind of charger that makes sense for someone who wants control over the charging routine without paying for features that have nothing to do with everyday home use.)
What We Like
- Two installation routes let you choose between NEMA 14-50 convenience and full 48A hardwired charging.
- 25-foot cable gives useful reach without making the garage layout overly restrictive.
- Detailed energy tracking lets you see charging consumption and estimated cost rather than guessing.
- 6A–48A adjustment gives the electrician flexibility to work around the home’s electrical capacity.
- UL Listed and ENERGY STAR certified provide meaningful reassurance for a charger that will be used regularly.
One Thing to Know
The connected features use 2.4GHz WiFi, so if your home network is configured only around 5GHz, you will need to make sure a compatible 2.4GHz connection is available. The important part is that the charger can still handle normal plug-and-charge use without relying on the app.
Why This Home Charger Makes Sense for the Hyundai Ioniq 6
For the IONIQ 6, EMPORIA hits a useful middle ground. The J1772 connector works directly with the supported vehicle setup, while the hardwired configuration can reach 48A / 11.5kW, giving the car enough charging capacity for a strong overnight Level 2 routine. If you already have the right NEMA 14-50 outlet, you can instead use the plug-in setup and accept the lower 40A ceiling.
The other reason it fits this car well is the amount of control you get over the installation. You are not locked into one charging current, one installation style or one way of managing electricity use. Scheduling, cost tracking, adjustable amperage and a 25-foot cable all contribute to a setup that can be tailored around how your IONIQ 6 is actually parked and charged at home.
The Insider Pro-Tip
If you already have a NEMA 14-50 outlet, do not automatically assume you should convert this charger to hardwired just to get the bigger number. The plug-in configuration can deliver up to 40A, which is already a substantial Level 2 charging rate for regular overnight use. The hardwired route makes more sense when you specifically want the additional output and your electrical panel can support the required circuit.
Also, when setting the current, think about what else is running in your home. The ability to dial the charger down in 1-amp increments is genuinely useful when the garage shares electrical capacity with other heavy loads. A slightly lower charging current that works comfortably every night is more valuable than maximum output that forces unnecessary electrical upgrades.
#5. IYILO Level 2 EV Charger
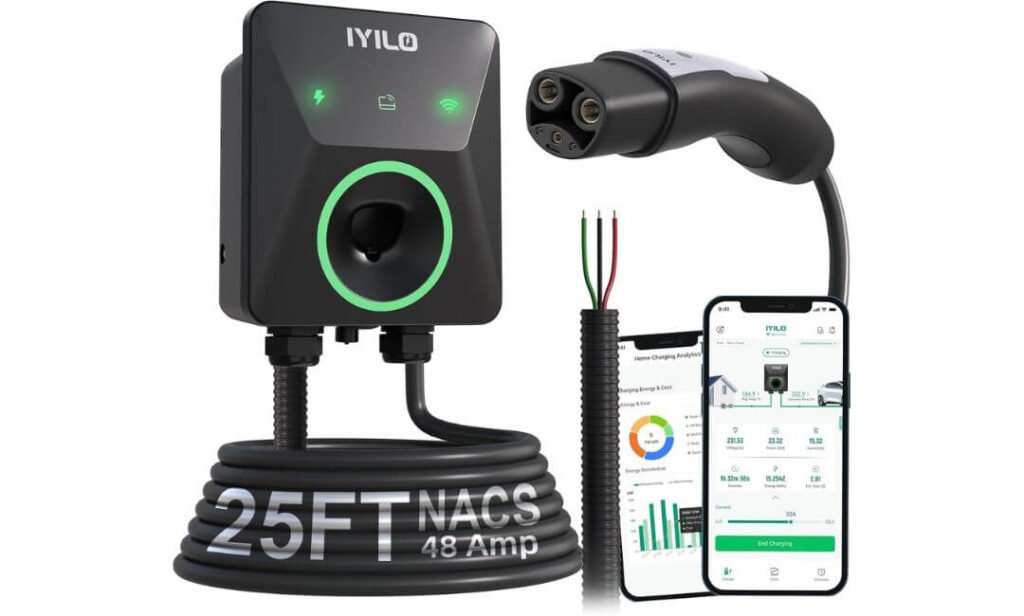
Quick Specs:
- Charging Output: Up to 48A / 11.5kW
- Cable: 25-ft heavy-duty cable
- Connector: Native NACS / J3400
- Current Adjustment: 6A–48A in 1A increments
- Smart Control: WiFi app + RFID + OTA updates
- Safety: NTC connector temperature monitoring
- Load Management: Power sharing + dynamic load balancing with Energy Meter
- Certifications: UL 2594, ETL, ENERGY STAR and CSA
- Warranty: 3 years
The first thing to understand about this charger is who it is really for. Unlike the J1772 chargers above, this unit has a native NACS connector, so its strongest fit is with an IONIQ 6 that already uses the NACS charging standard. For that owner, there is no adapter sitting between the charger and the car, which keeps the setup clean and straightforward.
The more interesting engineering detail is inside the connector. The charger uses NTC temperature sensing to monitor connector temperature while charging. If the temperature reaches the stated 221°F (105°C) threshold, the system can reduce charging power or stop charging altogether. That is the kind of feature I pay more attention to on a high-output charger than another generic “fast charging” claim, because the charger is managing a substantial continuous electrical load.
You also get unusually fine control over the charging load. The current can be adjusted from 6A to 48A in 1A increments, while the app provides charging schedules, energy information and cost tracking. For a home where the EV shares electrical capacity with other heavy appliances, that flexibility can be genuinely useful rather than just another feature to mention in a product description.
(This is the one on the list where the connector itself and the way it manages electrical load deserve as much attention as the charging speed.)
What We Like
- Native NACS connection makes it especially clean for compatible newer IONIQ 6 configurations.
- Real-time temperature monitoring adds another layer of protection during high-power charging.
- 1A current adjustment from 6A to 48A gives you unusually precise control over electrical demand.
- 25-foot cable provides useful reach around larger garages and driveways.
- Power sharing and optional dynamic load balancing can help households manage multiple chargers or heavy electrical loads.
One Thing to Know
The most important thing is to confirm your IONIQ 6’s connector before buying. This is a native NACS charger, so an IONIQ 6 using the older J1772/CCS1 setup would need a compatible J1772-to-NACS adapter. If your car already uses NACS, that extra step disappears completely.
Why This Home Charger Makes Sense for the Hyundai Ioniq 6
For a compatible NACS-equipped IONIQ 6, this charger has a very clean proposition: 48A / 11.5kW-class Level 2 charging without an adapter, combined with temperature monitoring and detailed control over the charging current. That makes it less about simply delivering electricity and more about giving the owner control over how that electricity is delivered.
The other standout is its ability to work around the home’s electrical demands. With power sharing between two chargers and dynamic load balancing when paired with the optional Energy Meter, the system can adjust to household consumption instead of assuming the EV is the only major load on the panel. That is a valuable distinction for newer homes with multiple electric appliances or households planning for more than one EV.
The Insider Pro-Tip
Before you get excited about the 48A / 11.5kW figure, check the connector on your actual IONIQ 6 first. This is one of those purchases where five minutes spent confirming the charging port can save you from buying an adapter you never wanted in the first place. If your car is NACS-equipped, the native connection is the reason this charger becomes much more attractive.
And if your home already has several big electrical loads, I would look closely at the load-management capability, not just the charging speed. The optional Energy Meter can let the system account for overall household demand, which may be more useful in the long run than simply running the charger at maximum current every night.
Best Home EV Chargers for Hyundai Ioniq 6 (2026): Compare 48A Level 2 Power and Smart Charging Features
What “Future-Ready” Means for the Hyundai Ioniq 6
A future-ready home charger for the Hyundai Ioniq 6 is not necessarily the charger with the highest amp rating on the box. The better question is whether the charger can still make sense as your charging needs, electricity rates, home electrical setup, or even the connector on your next EV changes.
The Ioniq 6 is well suited to Level 2 home charging, so there is little reason to choose a charger that only solves today’s basic requirement. A properly installed 48A-class unit can give you useful headroom, while adjustable current settings, smart scheduling, energy monitoring, longer cables, and connector flexibility can make a much bigger difference over several years of ownership.
48A Level 2 Power Gives You Useful Headroom
A 48A Level 2 charger can deliver up to around 11.5 kW under the right electrical conditions, which fits comfortably into the Ioniq 6’s home-charging range. The important point, however, is that the charger does not force the vehicle to take 48 amps. The vehicle’s onboard charging system determines how much AC power it can actually accept.
That makes a 48A charger more about headroom and installation flexibility than simply chasing the biggest number. If your electrical service and dedicated circuit are properly sized, having an 11.5 kW-class charger means the equipment is not unnecessarily limiting the car. It can also be useful if you eventually own another EV that can make better use of the available charging capacity.
There is another practical advantage here. Several chargers in this guide allow the current to be reduced rather than locking you into one output level. That matters when your home has other significant electrical loads, or when an electrician recommends a lower continuous charging current based on the available circuit capacity.
For a hardwired 48A installation, this is not a situation where you simply install a larger breaker and call it done. The breaker, wiring, disconnect requirements where applicable, panel capacity, and charger configuration all need to be appropriate for continuous EV charging. A licensed electrician should determine what your home can safely support.
Smart Charging Is About More Than Starting the Charger From Your Phone
Smart features become genuinely useful when they solve something you would otherwise have to manage manually. App control is convenient, but scheduling can be more valuable because it lets you choose when the Ioniq 6 charges rather than simply charging whenever the vehicle is plugged in.
That can be particularly useful if your electricity plan has time-of-use pricing. A charger that supports scheduled charging can allow the vehicle to charge during the hours you have selected, while energy and charging-history information can help you understand how much electricity the car is actually using.
The better smart chargers in this comparison also add different levels of control. The Tesla Universal Wall Connector offers WiFi connectivity, app features, and over-the-air updates. ChargePoint provides scheduling and charging data through its app, while EMPORIA goes further into energy and cost tracking. IYILO adds features such as time-of-use scheduling, RFID access and OTA updates.
This is where “smart” should be judged realistically. You do not need an app simply because a charger has one. The useful feature is the one that fits your routine, whether that means scheduled overnight charging, tracking energy costs, controlling access, or adjusting charging around the electrical demands of your home.
NACS Compatibility Can Make the Installation More Adaptable
Connector compatibility is becoming a more important part of choosing home charging equipment. A charger that works with only one connector standard can still be perfectly practical for the right vehicle, but a more flexible setup may reduce the need to replace charging equipment if your vehicle situation changes later.
The Tesla Universal Wall Connector is particularly different in this group because it combines NACS and J1772 connectivity in the same charging solution. That gives it a practical advantage for a household that may eventually have EVs using different connector standards.
The IYILO takes a different approach with a native NACS / J3400 connector. For a compatible NACS-equipped setup, that means the vehicle can connect directly. For an Ioniq 6 configuration using J1772, an appropriate J1772-to-NACS adapter becomes part of the equation, so connector compatibility should be confirmed before installation or purchase.
That distinction matters more than simply seeing the word “NACS” in a product title. NACS support is useful only when the complete connection between the vehicle and charger is compatible, including the connector, adapter requirements where applicable, and the charging equipment’s supported configuration.
Adjustable Charging Current Makes a Charger More Future-Proof
One feature that does not get enough attention is current adjustment. A charger that lets you select a range of charging currents gives you more flexibility than a unit that effectively operates at one fixed level.
The MACH 2, for example, allows adjustment from 6A to 48A, while EMPORIA and IYILO also provide adjustable charging control. This can be useful if your electrical circumstances change, if another large electrical load is added to the property, or if you want an electrician to configure the charger below its maximum output.
In real ownership, that flexibility can be more valuable than a small difference in headline charging speed. You are buying the charging equipment for years, not just for the day it is installed, so having room to adapt the charging current can prevent the charger from becoming unnecessarily restrictive later.
Cable Length and Installation Flexibility Matter More Than They Look
Future-ready does not only mean electronics and connectors. The physical installation matters too.
A 23-, 24-, 25-, or 30-foot cable can completely change how convenient a charger is depending on where the electrical panel, charger and parking position are located. The MACH 2’s 30-foot cable is especially useful when the car cannot always park directly beside the charging unit, while the 25-foot options from EMPORIA and IYILO give more freedom than a short cable.
Installation choice matters as well. Some chargers in this guide can be installed using a NEMA 14-50 connection, while others are designed primarily around hardwired installation. EMPORIA is particularly flexible because it supports both approaches, with its plug-in configuration providing up to 40A and its hardwired setup supporting up to 48A.
That gives homeowners another form of future-proofing: you can choose the installation method around the house you actually have instead of buying a charger first and trying to make the electrical system fit around it.
Load Management Can Matter in a Busy Home
A home with an EV is not the same as a home with an EV and very few other electrical demands. Electric heating, an electric water heater, a dryer, an induction range, a second EV, or other large loads can all change how much spare electrical capacity is available.
This is where features such as power sharing and dynamic load management become meaningful. The Tesla Universal Wall Connector can support power sharing across multiple Wall Connectors, while IYILO supports power sharing and can use an optional Energy Meter for dynamic load balancing.
The point is not that every Ioniq 6 owner needs load management. Most do not. But if you are building a more capable EV charging setup, these features can give the installation more room to grow without treating the charger as an isolated appliance.
The Real Meaning of Future-Ready
For the Ioniq 6, future-ready charging is really about avoiding unnecessary limitations. A charger should have enough power for the vehicle, but it should also fit the home’s electrical capacity, provide a sensible cable length, offer useful control features, and handle connector requirements without creating unnecessary complications.
That is why the five chargers in this guide are not identical even though several sit around the same 48A and 11.5 kW class. One may make more sense because of dual-connector flexibility, another because of a plug-in installation, another because of a 30-foot cable, and another because of detailed energy management.
The best long-term setup is therefore not simply the charger with the biggest specification. It is the one that gives your Ioniq 6 the charging capacity it can use today while leaving enough practical flexibility for the way your home and EV needs may change tomorrow.
Hyundai Ioniq 6 Home Charger Buying Guide: How to Choose the Right Level 2 Setup
Choosing a home charger for the Hyundai Ioniq 6 should start with your home’s electrical setup, not with the charger sitting highest on an Amazon search page. A 48A charger can look impressive on paper, but it only makes sense if the panel, circuit, wiring, installation location, and vehicle can support it properly.
The good news is that you do not need to overcomplicate the decision. Work through the five steps below, and the right charger usually becomes much easier to identify.
Step 1: Check Your Electrical Panel Before Choosing the Charger
This is the part many buyers skip, and it is probably the most important step.
A Level 2 EV charger is a substantial continuous electrical load. Before ordering a 48A unit, have a qualified electrician look at your main service capacity, available breaker space, existing circuits, wiring condition, and the distance between the electrical panel and charger location.
Do not assume that an empty breaker slot means your home has enough capacity. The panel may have physical space for another breaker while the home’s overall service is already heavily loaded.
For a 48A hardwired charging setup, the electrical installation needs to be designed appropriately for continuous EV charging. That can involve a properly sized circuit, breaker, conductors, conduit where required, and suitable termination at the charger. The exact requirements depend on the home and installation method, so this is where an electrician should make the call rather than an online product listing.
A simple pre-purchase check looks like this:
| What to check | Why it matters |
|---|---|
| Main service capacity | Determines how much electrical load the home can support |
| Available panel space | Confirms whether the required circuit can physically be added |
| Existing electrical loads | Helps identify whether the panel is already heavily loaded |
| Charger-to-panel distance | Longer runs can increase installation complexity and material cost |
| Wiring condition | Older or unsuitable wiring may require additional work |
| Indoor or outdoor location | Influences equipment placement and installation requirements |
| Future electrical loads | A second EV, heat pump, electric range or other large loads may change the calculation |
If the electrician says your home can comfortably support the required circuit, then you can move on to comparing chargers. If not, a lower charging current or a different electrical solution may make more sense than simply buying the biggest charger available.
Step 2: Confirm Which Connector Your Ioniq 6 Setup Uses
Connector compatibility should be settled before you compare smart features, cable length or charging speed.
The charging hardware in this guide includes both J1772-based and NACS-based approaches, so the correct choice depends on the connector configuration of your particular Ioniq 6 and the equipment you intend to use.
A native J1772 charger provides a straightforward connection for a J1772-equipped vehicle. A native NACS charger takes a different approach, and a J1772-to-NACS adapter may be required when the vehicle and charger use different connector standards.
This is why the word “NACS” alone should not decide the purchase. You want to know what connector is on the vehicle, what connector is attached to the charger, whether an adapter is required, and whether that complete combination is suitable for the charging setup you are planning.
For households that may own more than one EV over time, connector flexibility becomes more interesting. A dual-connector design can potentially make one wall-mounted charger useful across different vehicles instead of forcing you to rethink the installation later.
Before buying, confirm these four things:
- Vehicle connector: Check the exact configuration of your Ioniq 6.
- Charger connector: Confirm whether the unit is J1772 or NACS.
- Adapter requirement: If the standards differ, check whether a suitable adapter is required and whether it is included.
- Future vehicles: If another EV may use a different connector, consider whether additional flexibility is worth paying for now.
Step 3: Choose the Charging Amperage Based on Your Home, Not the Biggest Number
For the Ioniq 6, a charger in the 48A and approximately 11.5 kW class provides useful Level 2 charging capacity when the electrical installation supports it.
But there is an important distinction between charger output and vehicle charging acceptance. Buying a 48A charger does not mean the Ioniq 6 will automatically pull 48A continuously. The vehicle’s onboard charging system controls how much AC power it accepts.
That means there is little value in paying extra simply because one charger advertises a larger number that the vehicle cannot use. What matters more is having a charger that comfortably covers the car’s charging capability while giving you sensible flexibility for the future.
Adjustable amperage can be particularly useful here. Some chargers allow you to reduce the current when necessary, which can be helpful if your home’s electrical capacity is limited or your household develops additional high-demand electrical loads later.
Think about amperage this way:
| Charging setup | What it means in real use |
|---|---|
| Lower-current Level 2 | Still useful for overnight charging when daily driving needs are moderate |
| Around 40A | A strong home-charging setup without necessarily requiring the maximum available output |
| Around 48A | Provides approximately 11.5 kW of charging capacity when the installation supports it |
| Adjustable 6–48A | Gives you more control when electrical demand or installation conditions change |
The important point is that 48A should be treated as available headroom, not a target that every homeowner must reach.
If your daily driving is modest and your home already has a suitable NEMA 14-50 installation, a 40A configuration can still be perfectly practical. If you are installing a new hardwired circuit and want maximum useful Level 2 capacity within the vehicle’s charging range, a 48A-class charger becomes more compelling.
Step 4: Compare Installation Cost, Not Just the Charger Price
The charger is only one part of the project.
A relatively inexpensive wall unit can become an expensive installation if the electrical panel is far from the garage, the wiring run is complicated, the panel needs additional work, or the installation location requires more labour and materials.
This is why it is worth getting the installation quote before deciding between two chargers that appear similar in price.
A plug-in setup can be attractive when a properly installed, compatible NEMA 14-50 outlet is already available in the right location. It can make installation simpler because the charger can be connected without creating an entirely new hardwired charging circuit.
A new installation, however, may make hardwiring more attractive. It can provide a cleaner permanent setup and, depending on the charger and electrical design, allow the higher charging-current configuration available from the equipment.
The real installation cost can be affected by:
- Distance from the electrical panel to the charger
- Whether the panel has sufficient capacity
- Existing outlet availability
- Wire and conduit requirements
- Indoor versus outdoor installation
- Wall construction and access to the wiring route
- Electrical service upgrades, if required
- Local permit or inspection requirements
- Labour rates in your area
One practical point often overlooked is cable length. A charger mounted in the perfect location with a cable that barely reaches the vehicle is not a good installation. If the parking position changes or you occasionally park on the other side of the garage, a 23-, 24-, 25-, or 30-foot cable can be worth far more than a small difference in charging specifications.
This is one reason the MACH 2’s 30-foot cable stands out in this particular group, while the 24- and 25-foot options elsewhere in the list offer a useful middle ground.
Step 5: Look at Warranty and Support Before You Commit
Once power, connector and installation requirements are sorted, warranty and support become the final reality check.
A home EV charger is not something most owners want to replace every couple of years. It is mounted to the property, connected to the electrical system, and expected to work repeatedly in hot summers, cold weather, overnight charging sessions and changing software environments.
Look beyond the number of years printed in the product description. Check what the warranty actually covers, how support is provided, whether replacement assistance is available, and whether the manufacturer offers software updates for connected equipment.
The chargers in this guide take different approaches. The Tesla Universal Wall Connector comes with a longer stated warranty period, the MACH 2 offers a five-year warranty, while ChargePoint, EMPORIA and IYILO provide three-year coverage based on the specifications considered for this guide.
That does not automatically make a longer warranty the right choice. What matters is the combination of warranty length, manufacturer support, installation quality and the maturity of the charging platform.
A Practical Way to Narrow Down Your Choice
After working through the five steps, you can reduce the decision to a much smaller set of questions:
- Can my electrical system safely support the charger I want?
- Does the connector match my Ioniq 6 setup, or will I need an adapter?
- Do I actually need 48A, or would a lower adjustable setting suit my home better?
- Will the cable comfortably reach where I park?
- Do I want plug-in simplicity or a permanent hardwired installation?
- Which smart features will I genuinely use?
- Is the warranty and support strong enough for a charger I expect to keep for years?
If you answer those questions honestly, the choice becomes much less about buying the charger with the longest feature list and much more about buying the one that fits your vehicle, garage, electrical system and daily routine.
One Final Buying Tip
Do not let a product page convince you that the highest amperage automatically means the best home-charging experience. For the Ioniq 6, a correctly installed Level 2 charger with enough capacity, the right connector, sensible cable reach and useful charging controls will usually matter far more than a specification that looks impressive but does not fit your home.
The smartest purchase is the one that works properly on day one and still gives you enough flexibility when your charging habits, electricity plan or EV setup changes later.
Hyundai Ioniq 6 Home Charger Installation Essentials: What Needs to Be Done Right
Installing a Level 2 charger for the Hyundai Ioniq 6 is more than mounting a box on the garage wall and connecting a few wires. The charger becomes a permanent part of your home’s electrical system, so the quality of the installation can matter just as much as the charger you choose.
The exact requirements depend on your home, charger, local electrical code, and whether you choose a plug-in or hardwired setup. A professional installer should assess the property before work begins, particularly when you are planning to use a 48A-class charger.
Start With a Proper Electrical Load Assessment
Before the charger is installed, the electrician should determine whether the home’s existing electrical service can support the additional EV charging load.
This is different from simply looking for an empty space in the breaker panel. A panel can have room for another breaker while the overall service is already carrying substantial loads from appliances such as an electric range, clothes dryer, water heater, heat pump, or other large electrical equipment.
For a higher-output Level 2 installation, the assessment should consider:
- The home’s available electrical service capacity
- Existing and expected electrical loads
- Available breaker-panel space
- The required charging current
- The distance between the panel and charger
- Wire size and routing requirements
- Whether conduit is needed
- Indoor or outdoor installation conditions
- Local permit and inspection requirements
This is one area where cutting corners can create problems later. If the electrician determines that the home cannot comfortably support the intended charging load, the answer may be a lower charging current, load-management equipment, or electrical service work rather than simply installing a larger breaker.
Choose the Installation Method Before Running the Wiring
The next decision is whether the charger will be plugged into an appropriate receptacle or hardwired directly into the electrical system.
A plug-in installation can make sense when a properly rated receptacle is already available, correctly located, and connected to a suitable dedicated circuit. It also makes the charger easier to disconnect or replace later.
Hardwiring is a more permanent approach and is common for higher-current home charging. It can provide a clean installation without relying on a plug and receptacle, but the circuit must be designed specifically for the charger’s required continuous load.
The important point is not that one method is universally better. The right choice depends on the charger, your existing electrical infrastructure, the desired charging current, and how the garage or parking area is laid out.
Make Sure the Circuit Is Designed for Continuous EV Charging
EV charging is a long-duration electrical load. A charger can run for several hours at a time, particularly when the Ioniq 6 is recovering a significant amount of energy overnight.
That means the circuit should be sized for the charger’s actual configured current rather than treated like an occasional household appliance.
For a 48A configuration, the electrician needs to account for the appropriate continuous-load requirements when selecting the breaker, conductors and other electrical components. The exact installation must follow the applicable electrical code and the charger’s installation instructions.
Do not use a breaker size simply because it appears in an online product description. The complete circuit, including the panel, conductors, connections, protection and charger settings, needs to work together.
GFCI Protection and Charger Safety Features Need to Be Considered Together
Ground-fault protection is an important part of EV charging safety. Depending on the installation configuration and local electrical requirements, GFCI protection may be required for the circuit or provided as part of the charging equipment.
This is also why an electrician should check the charger’s installation instructions rather than adding protection blindly. Different equipment can incorporate different forms of ground-fault monitoring or protection.
The installer should verify:
- Correct grounding and bonding
- Required GFCI protection
- Appropriate overcurrent protection
- Proper termination of conductors
- Charger-specific protection requirements
- Correct configuration of the charging current
- Compliance with applicable local electrical requirements
The goal is not simply to make the charger turn on. It is to make sure the complete installation provides the protection the equipment and electrical system require.
Use Proper Conduit and Protect the Wiring
The route between the electrical panel and the charger deserves more attention than it usually gets.
If wiring is exposed or installed in an area where it can be damaged, suitable conduit and physical protection may be required. The correct type depends on where the wiring is being installed, whether it is indoors or outdoors, and the applicable electrical requirements.
Longer cable runs also deserve proper planning. A charger installed far from the panel may require considerably more material and labour than one mounted immediately beside the panel.
Avoid treating conduit as an afterthought. A neat, properly supported run protects the wiring and usually produces a much cleaner finished installation.
Outdoor Installation Requires Real Weather Protection
The Ioniq 6 does not need to be parked inside a garage for home charging to work, but an outdoor charger installation needs to be planned for the environment.
The charger itself should be suitable for the intended location, and the installation should protect electrical connections from moisture and physical exposure according to the equipment’s requirements.
The electrician should pay attention to:
- Charger location and mounting surface
- Weather exposure
- Water entry around electrical connections
- Conduit and fittings
- Cable routing
- Receptacle protection, where applicable
- Proper sealing and weatherproofing
- Accessibility without creating a trip or vehicle-damage hazard
A weather-resistant charger does not mean every part of the installation automatically becomes weatherproof. The surrounding electrical work has to be suitable for the same environment.
Position the Charger Around the Car, Not Just the Electrical Panel
This sounds obvious, but it is one of the most common practical mistakes.
The charger should be positioned so that the cable reaches the Ioniq 6 comfortably without being stretched across a walking path or routed where it can be driven over unnecessarily.
Before drilling anything, park the car where you normally charge it and consider:
- Where the charging port sits on the vehicle
- Which direction the car normally approaches from
- Where the cable will hang when not in use
- Whether another vehicle will need access
- Whether the cable can reach alternative parking positions
- Where the electrical panel is located
- Whether the charger display or controls will remain accessible
This is where a longer cable can be genuinely useful. A 30-foot cable may be excessive for one garage but extremely convenient for another. Cable length should be chosen around the actual parking arrangement, not simply because a longer number sounds better.
Permits and Inspection Should Be Checked Before the Installation
Permit requirements vary by location, so this should be confirmed locally before electrical work begins.
Where a permit is required, the electrician should handle the appropriate process and ensure the installation is ready for any required inspection. Some jurisdictions have specific requirements for EV charging equipment, while others may treat the work under broader residential electrical rules.
Do not assume that a charger being listed or certified means the home’s installation automatically meets local requirements. Product certification and building or electrical-code compliance are separate considerations.
A good installation process is generally:
- Confirm the charger and intended charging current.
- Inspect the electrical panel and calculate available capacity.
- Determine the circuit and installation method.
- Confirm local permit requirements.
- Plan the cable and conduit route.
- Install the appropriate breaker, wiring and protection.
- Mount and connect the charger according to its instructions.
- Complete required inspection or testing.
- Configure the charger’s maximum current correctly.
- Test charging with the Ioniq 6 before considering the job finished.
Commissioning the Charger Is Just as Important as Installing It
A charger should not simply be powered on and left for the homeowner to figure out.
After installation, the electrician should verify that the equipment is operating correctly and that the charging current is configured appropriately for the installed circuit.
For a smart charger, this is also the time to confirm the basics:
- WiFi connection, where required
- Mobile-app communication
- Charging schedule settings
- Current-limit configuration
- Energy monitoring, where supported
- Any load-management functionality
- Proper cable and connector operation
It is worth doing an actual charging session with the Ioniq 6 before the installation is considered complete. That can reveal issues with connectivity, cable positioning, configuration, or the charging equipment that may not be obvious when the unit is simply powered on.
Common Installation Mistakes to Avoid
Most installation problems are not caused by the charger itself. They usually come from treating the project like a simple appliance installation.
Installing the Charger Before Checking the Panel
Buying the charger first and asking an electrician to “make it work” can lead to unnecessary electrical upgrades or a lower final charging current.
Better approach: have the electrical capacity assessed before purchasing the equipment if your home’s capability is uncertain.
Assuming an Empty Breaker Slot Means You Have Enough Capacity
An empty physical slot does not tell you whether the electrical service can safely handle another continuous load.
Better approach: have the electrician evaluate the complete service and existing loads.
Using the Maximum Current Without Confirming the Circuit
A charger may support 48A, but the installation must also be designed for that configured current.
Better approach: configure the charger according to the installed circuit and applicable electrical requirements.
Putting the Charger Where the Cable Barely Reaches
A technically correct installation can still be frustrating if you have to park at exactly the right angle every night.
Better approach: position the charger around your normal parking pattern and choose an appropriate cable length.
Treating Outdoor Installation Like Indoor Installation
Mounting a weather-resistant charger outdoors does not automatically make the electrical connections, conduit and receptacle arrangement suitable for weather exposure.
Better approach: make the complete installation appropriate for the environment.
Ignoring Future Electrical Loads
A home that comfortably supports one EV today may eventually have a second EV, heat pump, electric water heating or another large electrical load.
Better approach: discuss potential future loads with the electrician, especially if you are installing a higher-output charger.
Skipping the Final Charging Test
A charger that powers on is not necessarily a charger that has been properly commissioned.
Better approach: connect the Ioniq 6, start an actual charging session, verify the configured current and check the charger’s smart functions before the installer leaves.
The Practical Installation Rule
The safest way to approach an Ioniq 6 home-charging installation is to treat the charger as part of the home’s electrical infrastructure, not as another plug-in accessory.
The charger, breaker, wiring, protection, conduit, mounting location and vehicle connection all need to work together. If you are aiming for a 48A-class installation, having a qualified electrician assess the system first is far more valuable than saving a little money by trying to shortcut the electrical work.
Once the electrical side is done properly, the differences between the chargers in this guide become much easier to evaluate. At that point, cable reach, connector flexibility, smart controls, energy management, warranty and everyday usability become the things that separate one good home-charging setup from another.
FAQs About Hyundai Ioniq 6 Home Charging
Is a 48A charger actually worth installing for the Hyundai Ioniq 6, or is a 40A charger enough for overnight charging?
For many Ioniq 6 owners, 40A is already enough to cover normal overnight charging needs. The mistake is thinking that a 48A charger automatically makes the car charge dramatically faster. It does not work that way. The vehicle ultimately controls how much AC power it accepts, so the charger’s maximum rating is only part of the equation.
Where 48A starts making more sense is when you are installing a new dedicated circuit and want useful headroom for the long term. A properly installed 48A-class charger can provide around 11.5 kW of Level 2 capacity, assuming the electrical installation and vehicle support it. That gives you more charging capability without requiring the charger to operate at maximum output every time.
There is also a less obvious benefit: adjustability. If your household later adds another major electrical load, or your electrician recommends a lower charging current, a charger that can be configured below 48A gives you room to adapt instead of replacing the equipment.
So, real talk:
- Choose 40A when it already fits your driving routine and existing electrical setup.
- Consider 48A when you are building a new installation and want additional headroom.
- Do not upgrade to 48A solely because the number looks better on the product page.
The right question is not “How many amps can the charger advertise?” It is “How much charging capacity can my Ioniq 6 and my home actually use comfortably?”
If the Hyundai Ioniq 6 and my home charger use different connectors, should I replace the charger or use an adapter?
An adapter can be a perfectly practical solution, but it should not be treated as an afterthought. The important thing is to verify the complete charging chain, including the vehicle connector, charger connector, adapter compatibility, charging current, and the manufacturer’s supported configuration.
This becomes particularly relevant when comparing J1772 and NACS equipment. A J1772-based charger can be a straightforward choice for a compatible Ioniq 6 configuration, while a native NACS charger may make more sense when the vehicle and household charging setup are built around NACS.
There is also a long-term angle here. If you expect to keep the charger for several years and may eventually have another EV with a different connector, a more flexible charging setup can be worth considering.
But I would not buy a NACS charger simply because “NACS” is currently the newer-looking specification. The connector is only one part of the installation.
Before purchasing, check:
- The exact connector on your Ioniq 6
- The connector permanently attached to the charger
- Whether an adapter is required
- Whether the adapter is included
- The charger’s supported charging current with that configuration
- Whether another EV in the household may use a different connector later
That small amount of checking can prevent an expensive charger purchase from turning into an adapter hunt after installation.
What is more important for an Ioniq 6 home charger: 11.5 kW charging, a longer cable, or smart charging features?
There is no universal winner because these three features solve completely different problems.
Around 11.5 kW of Level 2 capacity is useful when you want strong overnight charging performance and your electrical system can support the required circuit. A longer cable, on the other hand, can be far more valuable if your parking position is awkward. And smart controls matter most when you actually use scheduled charging, energy monitoring, time-of-use rates, or remote control.
This is one of those cases where the specification sheet can be misleading. Imagine two garages:
Garage A: The panel is close to the car, electricity pricing is simple, and the owner normally plugs in overnight. A sensible 40A or 48A charger with an appropriately sized cable may be all that is needed.
Garage B: The panel is on the opposite side of the garage, the vehicle sometimes parks in different positions, and the owner has time-of-use electricity pricing. Here, a 25- or 30-foot cable and good scheduling controls could genuinely improve everyday ownership.
That is why I would prioritise the features like this:
- Electrical compatibility and safe installation
- Correct vehicle-to-charger connector
- Enough usable charging capacity
- Cable length that works with your actual parking position
- Smart features you will genuinely use
Once those fundamentals are right, the extra features start becoming meaningful rather than just marketing decoration.
Can I install a 48A Hyundai Ioniq 6 charger on a 100A or 200A electrical service without upgrading the home’s electrical service?
Possibly, but the 100A or 200A number by itself does not answer the question.
A 200A service can already be carrying substantial loads from an electric range, dryer, heat pump, water heater, HVAC equipment and other household systems. Conversely, a 100A home with relatively modest electrical demand may have a very different load profile.
The electrician needs to evaluate the home’s actual electrical demand and determine whether the proposed EV charging circuit can be added within the applicable requirements.
For a 48A charging configuration, that assessment should account for the continuous nature of EV charging and the complete circuit design, including:
- Main service capacity
- Existing electrical loads
- Breaker-panel capacity
- Required overcurrent protection
- Conductor sizing
- Wiring distance
- Conduit requirements
- Grounding and required ground-fault protection
- Local electrical requirements
- Potential future loads
This is also where load management can change the conversation. In some homes, intelligently managing charging demand may be more practical than immediately assuming that a service upgrade is required.
The important part is not to ask an electrician, “Can you fit a 48A charger?” Ask them to assess whether the home can safely support the proposed continuous EV charging load. That is a much more useful question.
What is the biggest mistake people make when choosing a home charger for the Hyundai Ioniq 6?
The biggest mistake is usually shopping for the charger before understanding the installation.
People compare 48A versus 50A, WiFi versus Bluetooth, 24-foot versus 25-foot cables, or J1772 versus NACS, then discover that the charger they bought does not fit the electrical setup or parking arrangement they actually have.
A charger can have excellent specifications and still be the wrong choice for a particular garage.
For example, a 48A hardwired unit is not automatically better if your electrical system is better suited to a lower current. A 30-foot cable is not necessarily better if you park directly beside the charger. A charger with an impressive mobile app is not especially useful if you never schedule charging or monitor energy costs. And NACS compatibility does not remove the need to verify the vehicle connection.
The smarter buying process is:
- Check the electrical service first.
- Confirm the Ioniq 6 connector configuration.
- Work out where the charger will actually be mounted.
- Measure the real cable distance to the charging port.
- Decide whether plug-in or hardwired installation makes more sense.
- Then compare charging power and smart features.
- Finally, check warranty and manufacturer support.
That order sounds less exciting than comparing shiny charger specifications, but it is much closer to how a good installation should actually be planned.
The truth is, the charger you barely notice after installation is often the charger that was chosen correctly. It reaches the car, works with the electrical system, charges when you need it, and does not create a new problem that you have to think about every night.
Final Thoughts on Choosing a Home Charger for the Hyundai Ioniq 6
The right home charger for the Hyundai Ioniq 6 is not necessarily the one with the highest amperage, the longest feature list, or the newest connector printed across the front of the box. After looking at the charging requirements, electrical considerations, installation scenarios, connector options, and the five chargers in this guide, the bigger picture is much simpler: the best setup is the one that fits the car and the house equally well.
A properly installed Level 2 charger in the 40A to 48A range can give an Ioniq 6 owner the kind of overnight charging that makes public charging far less important for everyday driving. But the useful number is not the charger’s maximum output in isolation. Your home’s electrical capacity, the vehicle’s charging capability, the circuit design, and the way you actually park the car all determine how much of that specification becomes useful in real life.
There is also a strong argument for thinking beyond today’s charging session. Adjustable current can give an installation more electrical flexibility, smart scheduling can make charging fit around electricity rates and daily routines, and connector flexibility can matter if your household eventually adds another EV. Features such as power sharing and load management become increasingly relevant when one home starts supporting multiple electric vehicles.
That is why the differences between the five chargers are worth paying attention to. The Tesla Universal Wall Connector focuses heavily on connector flexibility, ChargePoint HomeFlex offers a familiar J1772-oriented home setup, the MACH 2 brings exceptional cable reach and detailed control, EMPORIA puts more emphasis on energy management, and IYILO takes a NACS-focused approach with additional charging-control features.
None of those differences matters, however, if the installation itself is poorly planned.
Before spending money on the charger, confirm the electrical capacity, choose the correct connector arrangement, decide whether plug-in or hardwired installation fits the property, measure the actual cable distance, and have the circuit installed and configured correctly. That groundwork will have a much bigger effect on your ownership experience than choosing between two chargers that are only a few amps apart on paper.
The Ioniq 6 is an EV that can make home charging unusually convenient when the infrastructure is done properly. You plug in when you get home, let the car charge during the hours that suit your routine, and start the next day with the battery where you want it. That is the real goal of a home charger — not impressive specifications on a product page, but a charging setup that quietly does its job for years without becoming another thing you have to think about.
Also Check:


