
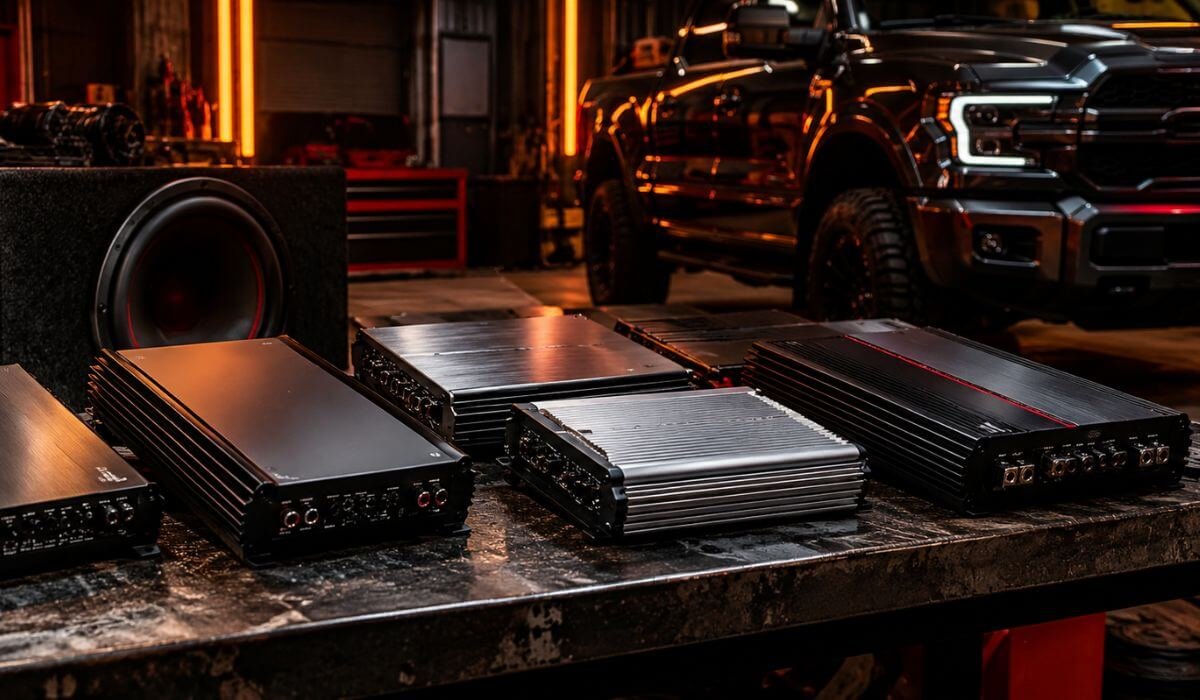
Best Class D Monoblock Amplifiers (2026): 1-Ohm Power From 1000W to 3000W
If you are building a serious car-audio subwoofer system, a monoblock Class D amp is where the power supply, impedance and subwoofer actually have to make sense together. A 3,000-watt badge looks impressive, but it means very little if your electrical system, voice-coil configuration or enclosure cannot use that power properly. Even the ARC Audio X2 1100.1, our first pick, is engineered around more than headline output, with 1,100W RMS at 1 ohm, a fully balanced input stage, microprocessor-controlled Class D design and a high-frequency power supply. That is why this list is not ranked by wattage alone.
I selected these amplifiers around real installation differences: 1-ohm capability, usable RMS output, chassis size, control range and how practical each amp is for a daily-driven car, truck or SUV. The lineup spans compact 1,000-watt models through serious 2,000W and 3,000W builds, so you can match the amplifier to your subwoofer rather than forcing the subwoofer to fit the amplifier. Before buying, check your sub’s final impedance and the vehicle’s charging system; higher-output setups may need upgraded power and ground cables, a stronger battery and sufficient alternator capacity.
Because these models target very different types of builds, there is no single winner for everyone. Below, I have separated the picks by what they actually do best, from the refined 1,100W ARC Audio design to genuine 2,000W and 3,000W high-output systems, so you can see which monoblock amplifier for subwoofer makes sense for your setup before spending your money.
Best Class D Monoblock Amp in 2026: Top Picks From 1000W to 3000W
#1. ARC Audio X2 1100.1 Mono Block Amplifier
Premium 1-Ohm Monoblock Amplifier for High-End Car Audio Subwoofer Systems, Refined Low-Frequency Control and Clean Daily Power
#2. Sundown Audio SAE-2000D V.3 Digital Amplifier
High-Power Class D Amplifier for Subwoofer Systems, 1-Ohm Monoblock Performance and Serious 2000-Watt Car Audio Builds
#3. Taramps HD 3000 1-Ohm Amplifier
High-Power Monoblock Amplifier for 3000-Watt Subwoofer Systems, 1-Ohm Operation, Full-Range Flexibility and Extreme Output
#4. Skar Audio RP-2000.1D Monoblock Amplifier
Best-Value 1-Ohm Monoblock Amp for 2000-Watt Subwoofer Systems, Strong Bass Output, Flexible Tuning and High-Power Car Audio Builds
#5. Rockford Fosgate R2-1200X1 Prime Amplifier
Dependable Mono Amplifier for Car Audio Subwoofer Systems, 1200-Watt 1-Ohm Power, Practical Tuning Controls and Strong Daily Bass
#6. CT Sounds CT-1000.1D Compact Amplifier
Compact Class D Mono Amp for 1000-Watt Subwoofer Systems, 1-Ohm Stability, Efficient Power Delivery and Space-Saving Car Audio Installations
Expert Tip
Real talk: A monoblock amplifier should never be chosen by the biggest wattage printed on its case. The number that matters is whether the amp can deliver the right RMS power at your subwoofer’s final impedance without turning the rest of the vehicle into the weak link.
That is why I would not automatically put the Taramps HD 3000 ahead of everything else. Yes, 3,000 watts at 1 ohm is serious output, but it only makes sense when the subwoofer, wiring and charging system are built for it. For a daily-driven car, a well-matched 1,000W–1,200W amplifier can actually be the smarter purchase than an oversized amp that you cannot use properly.
The same goes for the 2,000W models. The Sundown SAE-2000D V.3 and Skar RP-2000.1D are there for people who genuinely need that level of output, not simply because 2,000W looks better in a headline. Match the amplifier to the subwoofer first, then build the electrical system around that decision. That is where a good car-audio setup starts making sense.
How We Choose These Monoblock Amplifiers
We did not build this list by sorting amplifiers from the highest wattage to the lowest. That would make the article easy to write, but it would be a poor way to help someone spend their money.
The first thing we looked at was usable RMS power at the impedance that actually matters. Most of these amplifiers are built around 1-ohm operation, but that does not mean every subwoofer should be wired to 1 ohm. Your subwoofer’s voice coils determine the final load, and that load has to stay within the amplifier’s rated operating range. This is why the 1-ohm capability is treated as an important specification here, rather than as a badge of honour.
We then looked at what each amplifier is actually designed to do. The ARC Audio X2 1100.1 brings a more premium approach to a roughly 1,100-watt system. The Sundown SAE-2000D V.3 and Skar RP-2000.1D move into serious 2,000-watt territory. The Taramps HD 3000 takes the list to 3,000 watts and adds full-range flexibility, while the Rockford Fosgate R2-1200X1 sits in a practical range for a strong daily system. The CT Sounds CT-1000.1D gives buyers a compact 1,000-watt option when installation space matters as much as output.
Size and installation practicality also mattered. A powerful amplifier that cannot be mounted sensibly, cooled properly or supplied with adequate cable is not a better amplifier for that particular vehicle. Compact designs can make far more sense in a tight trunk or under-seat installation, while higher-output models need more attention to wiring, ventilation and electrical capacity.
We also considered the controls that you will actually use after installation. Subwoofer level control, low-pass filtering, subsonic filtering and gain adjustment are more meaningful to a real installation than a long list of marketing features. The amplifier should give you enough control to integrate the subwoofer with the rest of the system rather than simply make it louder.
Finally, we considered who each amplifier makes sense for. That is an important distinction. There is no honest reason to tell every reader that the same amp is the best choice. Someone replacing a factory subwoofer has very different requirements from someone running a high-output dual-voice-coil setup. Our final six therefore cover different power levels, installation requirements and budgets rather than giving you six versions of essentially the same recommendation.
Most importantly, we have not treated maximum wattage as a substitute for compatibility. Before buying any of these amplifiers, check the subwoofer’s final impedance, RMS rating, recommended amplifier range and the vehicle’s electrical capacity. If you are stepping into the 2,000W–3,000W range, plan the power cable, ground, fuse, battery and alternator capacity at the same time. That is the difference between buying an amplifier that looks impressive and building a system that can actually use it.
#1. ARC Audio X2 1100.1 Mono-Block Amplifier
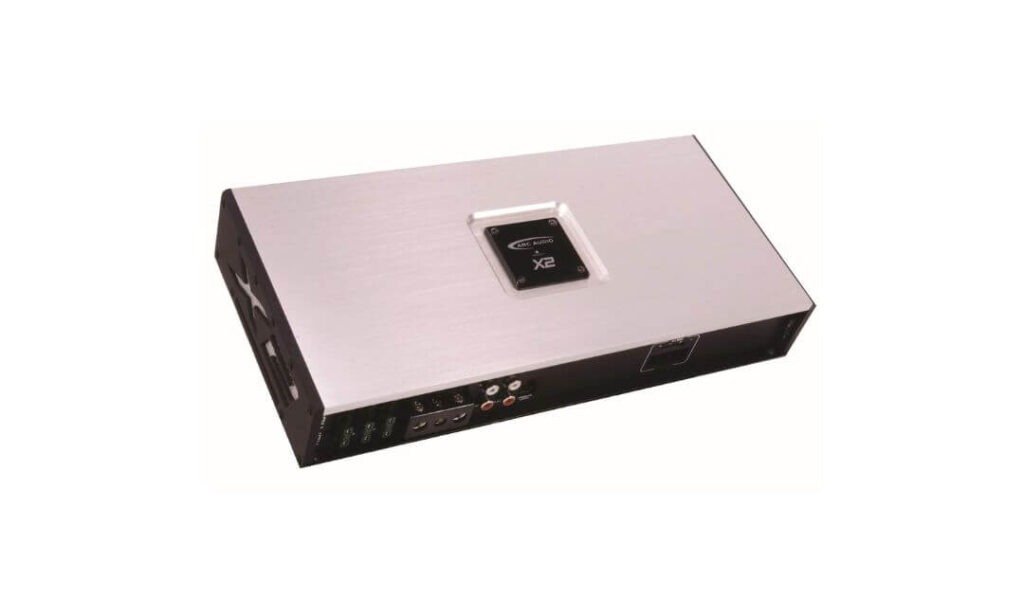
Quick Specs:
- Amplifier type: Microprocessor-controlled Class D monoblock
- RMS output: 350W @ 4Ω / 600W @ 2Ω / 1,100W @ 1Ω
- Frequency response: 20Hz–230Hz
- Crossover: 30Hz–230Hz, 24dB/octave
- Bass boost: 0–12dB at 30Hz–125Hz
- Inputs: Fully balanced input stage
- Power supply: High-frequency design with high-capacity, low-ESR capacitors
- Chassis: CNC-machined extruded aluminium
- Dimensions: 13.0 × 6.268 × 2.162 inches
- Control: Included remote bass control
The first thing that separates this amp from a lot of high-wattage Class D options is how deliberately it is engineered around the signal path. You get 1,100 watts at 1 ohm, but ARC Audio has also put serious attention into the parts that determine what reaches the subwoofer: a fully balanced input stage, audiophile-grade output filtering and nickel-plated RCA connections. That matters when the goal is tight, controlled bass rather than simply making the trunk shake.
The 350W at 4 ohms and 600W at 2 ohms ratings also make the amplifier easier to match than a unit that only looks attractive at its lowest impedance. Pair it with a properly matched subwoofer and you can use the amplifier’s output without forcing the system into a load it was never designed to handle.
What we like about the X2’s engineering
- The balanced input stage is a genuine highlight. It is designed to keep the signal cleaner and reduce the noise floor, which is exactly the sort of detail that gets overlooked when people compare amps only by RMS figures.
- The high-frequency power supply helps keep the chassis compact while improving efficiency and controlling heat — useful when the amplifier has to live inside a confined trunk or cargo area.
- ARC Audio’s microprocessor-controlled protection and diagnostics add another layer of confidence. DC detection, signal-sense shutdown and fault-code storage are far more useful in a real installation than another flashy specification.
- The 0–12dB remote bass control gives you something practical to reach for once the system is installed. If the bass needs a little more authority on a particular track, you do not have to start adjusting the amplifier itself.
- The CNC-machined aluminium chassis is not just cosmetic. Its finned construction helps with heat dissipation, while the 13-inch-long footprint keeps the amp reasonably manageable for a serious 1,100W installation.
One thing to think about before buying
The X2 1100.1 is not the choice for someone chasing the biggest number possible. If your system is built around a subwoofer that genuinely demands 2,000W or 3,000W RMS, there are more appropriate amplifiers in this list. Its appeal is the combination of usable 1-ohm power, refined signal handling and compact Class D construction, so buying it simply because it is a “1,100W amp” misses the point.
Where this Class D monoblock amp makes the most sense
For a daily-driven car, truck or SUV with a properly matched single or multi-voice-coil subwoofer, the sweet spot here is the combination of 1,100W at 1 ohm and the amplifier’s more sophisticated signal circuitry. The flexible mounting orientation is particularly useful when trunk space is awkward, and its start-stop compatibility is a nice fit for newer vehicles that shut the engine off at traffic lights.
The electrical side still deserves attention. At this output level, use properly sized power and ground wiring, an appropriately rated fuse and a healthy charging system. You do not necessarily need to turn the vehicle into a competition-SPL build, but the amplifier should never be starved of stable voltage.
The Insider Pro-Tip
If your subwoofer can be wired to 1 ohm within its recommended RMS range, this is where the amplifier starts to make real sense. Do not set the gain by ear and then use the remote bass control as a permanent volume knob. Set the amplifier correctly first, keep the bass boost sensible, and use the remote controller only for small level changes.
One more thing I would pay attention to during installation: leave the chassis enough breathing room for its cooling fins. A compact Class D design is useful because it saves space, but compact does not mean it should be buried underneath carpet, luggage or other heat-producing equipment. Give it a sensible mounting position and the X2’s efficiency, protection circuitry and aluminium chassis can work the way they were intended.
#2. Sundown Audio SAE-2000D V.3 Digital Monoblock Amplifier
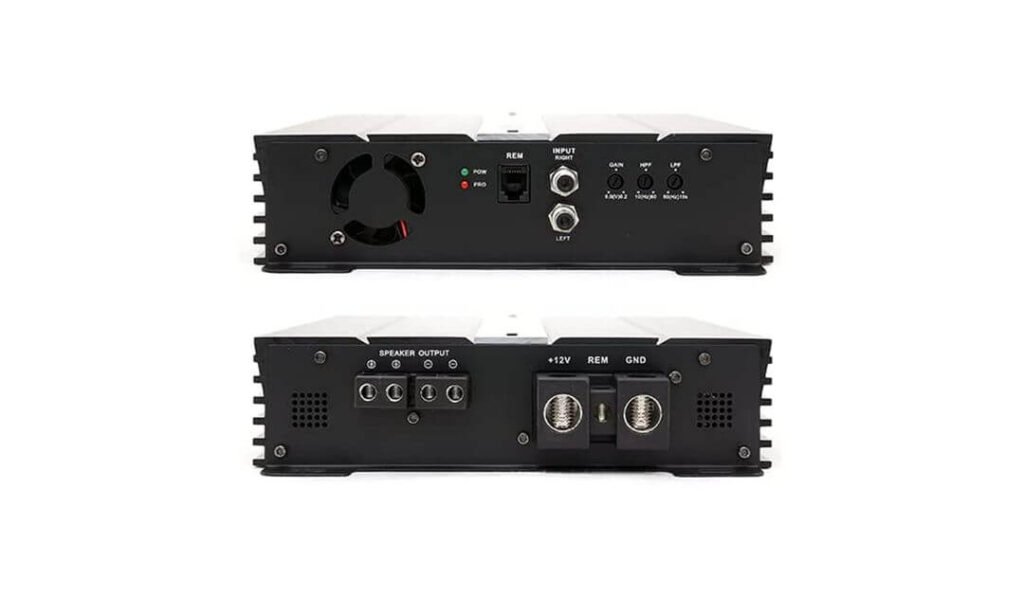
Quick Specs:
- Amplifier type: Digital Class D monoblock
- RMS output: 700W @ 4Ω / 1,400W @ 2Ω / 2,000W @ 1Ω
- Frequency response: 10Hz–15kHz
- THD: 0.20%
- Signal-to-noise ratio: 82dB
- Subsonic filter: Variable 0–60Hz
- Low-pass filter: Variable 50Hz–15kHz
- Input gain: Continuously variable, 0.2–6V
- Power supply: MOSFET PWM
- Operating voltage: 9–16V DC
- Power/ground terminals: 1/0 AWG
- Speaker output: 8 AWG
- Fuse recommendation: 220A
- Dimensions: 9.57 × 9.96 × 2.52 inches
- Remote: Included subwoofer volume controller
A 2,000W RMS amplifier at 1 ohm is not something I would recommend simply because the number looks impressive on a product page. The SAE-2000D V.3 belongs in a system where the subwoofer is actually capable of using that output and the vehicle can supply it. At 1 ohm it delivers 2,000W RMS, while the output drops to 1,400W at 2 ohms and 700W at 4 ohms, giving you useful flexibility when the final voice-coil configuration does not land at 1 ohm.
What I particularly like here is the amount of control available around that power. The 0–60Hz variable subsonic filter, adjustable low-pass filter and 0.2–6V input gain range let you tune the amplifier around the enclosure and subwoofer instead of treating the amp like a simple volume booster. That becomes especially useful with ported enclosures, where controlling frequencies below the box’s useful operating range can help keep the subwoofer from wasting excursion.
Then there is the hardware you need to take the output seriously. 1/0-gauge power and ground connections, a recommended 220A fuse, MOSFET PWM power supply and a 9–16V operating range tell you pretty clearly what kind of installation this amplifier expects. The chassis is only about 2.52 inches tall, which is surprisingly manageable for a 2,000W-class amplifier, although its roughly 9.6 × 10-inch footprint still deserves proper mounting and ventilation.
What we like about this high-output Class D design
- 2,000W at 1 ohm gives it genuine headroom for demanding subwoofer systems rather than entry-level “2,000W” marketing.
- The 1-ohm / 2-ohm / 4-ohm output scaling makes it easier to match with different final subwoofer loads.
- A variable subsonic filter is a particularly useful feature when the amplifier is driving a ported enclosure.
- 1/0-gauge power and ground terminals are appropriate for an amplifier that can demand serious current.
- The relatively low-profile chassis makes it easier to find a sensible mounting location than some physically larger high-power amplifiers.
One installation detail I would not overlook
The 220A recommended fuse rating should immediately tell you that this is not a casual add-on for a weak factory electrical system. If you are genuinely going to use anything close to its rated output, plan the wiring, fuse protection, battery and alternator capacity before installation rather than fixing voltage problems after the amplifier is already in the vehicle.
Why this 2,000W monoblock amp earns its place
The reason I kept this model ahead of several lower-powered alternatives is simple: it occupies a very specific part of the market. The ARC Audio above makes more sense for a refined 1,100W-class daily system; this one is for the reader who has stepped up to a genuinely demanding subwoofer setup and needs an amplifier capable of following it.
Its 9.57 × 9.96-inch footprint and 2.52-inch height are also worth noting. For a 2,000W unit, that is a useful combination when you’re working inside a trunk where every inch matters. Just don’t confuse compact dimensions with low electrical demand — the power requirements remain substantial.
The Insider Pro-Tip
If you’re running a dual-voice-coil subwoofer, work out the final wired impedance before you even look at the amplifier’s gain knob. A 2,000W amp is only useful if the final load is compatible with it and the subwoofer can safely absorb the power. Once that is confirmed, set the gain from the head unit’s clean output rather than using it as a second volume control.
And if you are building around the full 1-ohm output, I would treat stable voltage as part of the amplifier installation, not as an optional upgrade. Proper 1/0-gauge power and ground wiring, correct fusing and a healthy charging system will do far more for the real-world result than chasing another specification on the amplifier box.
#3. Taramps HD 3000 1-Ohm Full-Range Monoblock Amplifier
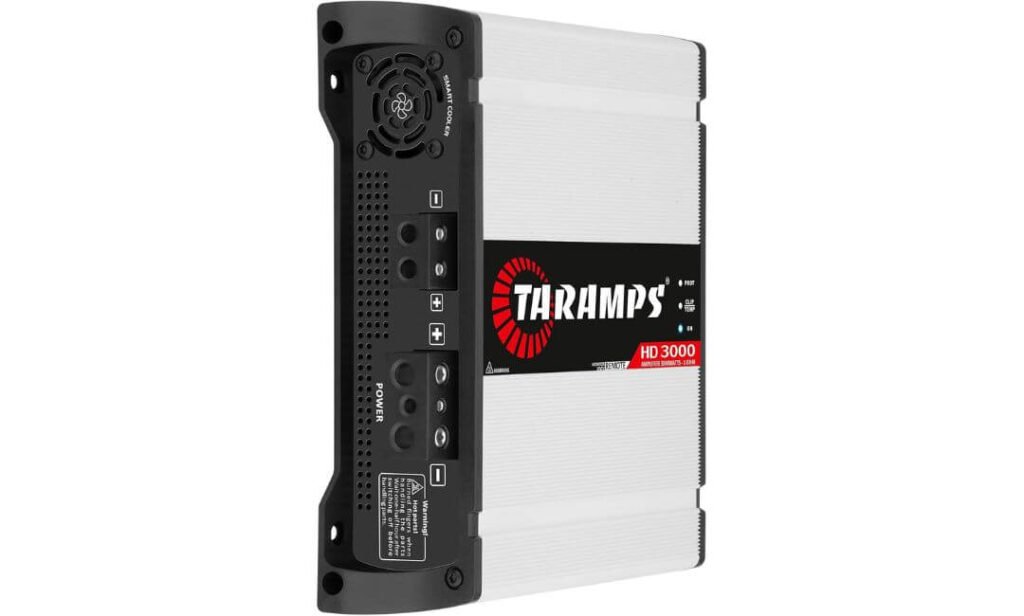
Quick Specs:
- Amplifier type: Digital Class D, single channel
- RMS output: 3,000W @ 1Ω
- Load options: 1Ω / 2Ω / 4Ω
- Frequency response: 10Hz–20kHz
- HPF: 10Hz–80Hz
- LPF: 80Hz–Full
- Bass boost: 0–10dB @ 50Hz
- Input sensitivity: 0.22V–4V
- Power/ground cable: 4 AWG
- Speaker output: 9 AWG
- Remote cable: 18 AWG
- Recommended fuse: 150A
- Remote: Monitor Level compatible
- Design: Digital full-range monoblock
There is a big difference between an amplifier being rated at 3,000W and a system actually being built to use 3,000W. The HD 3000 sits firmly in the latter category. At 1 ohm it delivers 3,000W RMS, but its ability to operate at 1, 2 or 4 ohms makes it considerably more flexible than a unit that is designed around one particular load.
The other unusual part is the 10Hz–20kHz full-range response. Despite being a single-channel monoblock, this is not restricted to conventional subwoofer duty. With adjustable HPF from 10–80Hz and LPF from 80Hz to full range, you can configure it around different parts of a car-audio system. That makes the HD 3000 an interesting option for someone who wants enormous output but does not want an amplifier that is locked into one narrow application.
For a high-power subwoofer setup, the useful controls continue with 0–10dB bass boost at 50Hz and 0.22–4V input sensitivity adjustment. These are not features to max out blindly; they give you room to match the amplifier to the source and enclosure properly. The Monitor Level remote compatibility is another practical touch when you want control from the driver’s seat without constantly reaching for the amplifier.
What we like about this 3,000W Class D monoblock
- 3,000W RMS at 1 ohm gives this amp the highest output ceiling in this lineup.
- The 1Ω / 2Ω / 4Ω operation makes it easier to work around different speaker and subwoofer configurations.
- Full-range 10Hz–20kHz operation gives it versatility that many conventional monoblock subwoofer amps do not have.
- The adjustable HPF and LPF make it possible to shape its operating range rather than leaving the amplifier with a fixed subwoofer-only character.
- The compact digital architecture keeps the physical package relatively manageable for an amplifier with this much output capability.
The one thing you should understand before buying
The HD 3000’s biggest strength is also the reason it is not a sensible upgrade for every system. A 3,000W amplifier can expose weaknesses in the vehicle’s electrical supply very quickly. The supplied 4-AWG power/ground requirement and 150A fuse recommendation should not be treated as an afterthought. If the subwoofer, wiring and charging system are not designed around this level of output, buying the amplifier first can create more problems than bass.
Why this full-range monoblock earned a place here
I kept this model in the list because it gives the article something the other recommendations cannot: serious 3,000W output combined with genuine full-range flexibility. The Sundown above is a more conventional high-output choice for a demanding subwoofer system; this one gives you a broader operating range while moving the power ceiling even higher.
That makes it particularly interesting for enthusiasts who want to build around a powerful subwoofer system today but still value the option to configure the single channel differently later. Just remember that full-range capability does not make it a multi-channel amplifier — you still have one channel to work with.
The Insider Pro-Tip
Do not look at the 3,000W rating and immediately plan your system around the amplifier. Start with the subwoofer’s RMS rating and final impedance, then work backwards to the amplifier and electrical system. If your subwoofer is not designed to accept anything close to this output, you will gain very little by owning a 3K amp.
For a genuine 1-ohm build, I would also treat voltage stability and correct fusing as part of the performance equation, not merely safety requirements. Set the gain correctly, keep bass boost under control, use appropriately sized wiring and make sure the charging system can support the demand. That is how you turn the HD 3000 from a big number on a specification sheet into useful, controlled output.
#4. Skar Audio RP-2000.1D Monoblock Amplifier
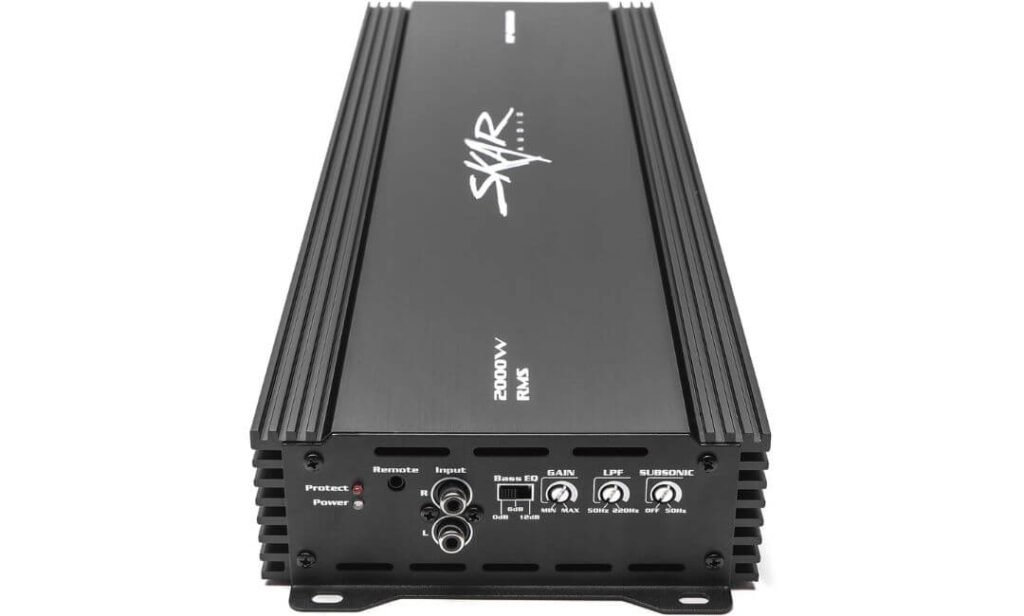
Quick Specs:
- Amplifier type: Class D MOSFET monoblock
- RMS output: 2,000W @ 1Ω
- Peak power: 2,800W @ 1Ω
- Frequency response: 20Hz–250Hz
- Bass EQ: 0 / +6 / +12dB @ 45Hz
- Load: 1Ω stable
- Power/ground terminals: 1/0 AWG
- Cooling: Oversized passive heatsink
- Protection: 4-way protection circuitry
- Controls: Gain, LPF, subsonic filter and bass EQ
- Remote: Subwoofer level control included
- Design: Single-channel MOSFET Class D
The RP-2000.1D is aimed at the buyer who wants to step into 2,000W-class subwoofer power without paying premium-amplifier money. Its 1-ohm stability is the key specification because that is where the amplifier reaches its 2,000W RMS rating. With a suitable subwoofer configuration, that gives you enough output for a genuinely serious bass system rather than a modest factory upgrade.
What makes it more practical than the headline wattage suggests is the amount of adjustment built into the chassis. You get a variable gain, low-pass filter, subsonic filter and three-position bass EQ, with the latter offering 0, +6 or +12dB at 45Hz. The included remote subwoofer control is also useful once everything is tuned, particularly if you want quick level adjustments from the driver’s seat without touching the amplifier.
The hardware follows the same high-current philosophy. 1/0-AWG power and ground terminals give the amplifier a proper connection point for a demanding electrical system, while the oversized heatsink provides passive cooling during sustained use. The four-way protection circuitry is another worthwhile inclusion because a high-output monoblock has little room for sloppy wiring, voltage problems or thermal abuse.
What we like about this 2,000W monoblock amp
- 2,000W RMS at 1 ohm puts serious output within reach without moving into an extreme competition-only price bracket.
- The 1/0-AWG terminals are appropriate for a high-current installation and leave less room for restrictive power connections.
- The 0/+6/+12dB bass EQ at 45Hz gives you a quick way to alter the system’s character, although I would use the boost conservatively.
- The subsonic filter and LPF provide the basic control needed to properly integrate the amp with the enclosure and subwoofer.
- The 4-way protection system adds useful safeguards against common electrical and thermal problems.
One detail I would keep in mind
The RP-2000.1D is attractive because of its power-to-price ratio, not because it replaces a premium amplifier in every respect. If your priority is the most refined signal path, premium construction or long-term high-end system integration, the ARC Audio is the more appropriate direction. Here, the appeal is getting serious output and useful controls for less money.
Where this Class D monoblock amp fits best
This is the recommendation I would look at when the system is being built around one or more properly matched subwoofers that can genuinely use 2,000W RMS. The 1-ohm capability gives you plenty of wiring flexibility, but the final impedance still needs to be calculated from the subwoofer’s voice-coil configuration before installation.
It is also a good example of why this list is not ranked purely by wattage. The Skar can produce substantially more power than the ARC Audio, but the ARC occupies a different part of the market. Power, refinement, price and intended use are separate decisions, and this model makes the most sense when value is high on the list.
The Insider Pro-Tip
If you are buying this specifically because of the 2,000W @ 1Ω figure, make sure your electrical system is ready before chasing that output. Use the appropriate 1/0-AWG power and ground connections, proper fuse protection and a solid ground point; a high-current amplifier cannot compensate for a weak installation.
I would also leave the +12dB bass EQ alone initially. Get the gain, LPF and subsonic filter properly matched to the enclosure first, then add only the amount of boost the system genuinely needs. A subwoofer that sounds stronger because it is properly tuned is a much better result than simply turning every available control upward.
#5. Rockford Fosgate Prime R2-1200X1 Mono Amplifier
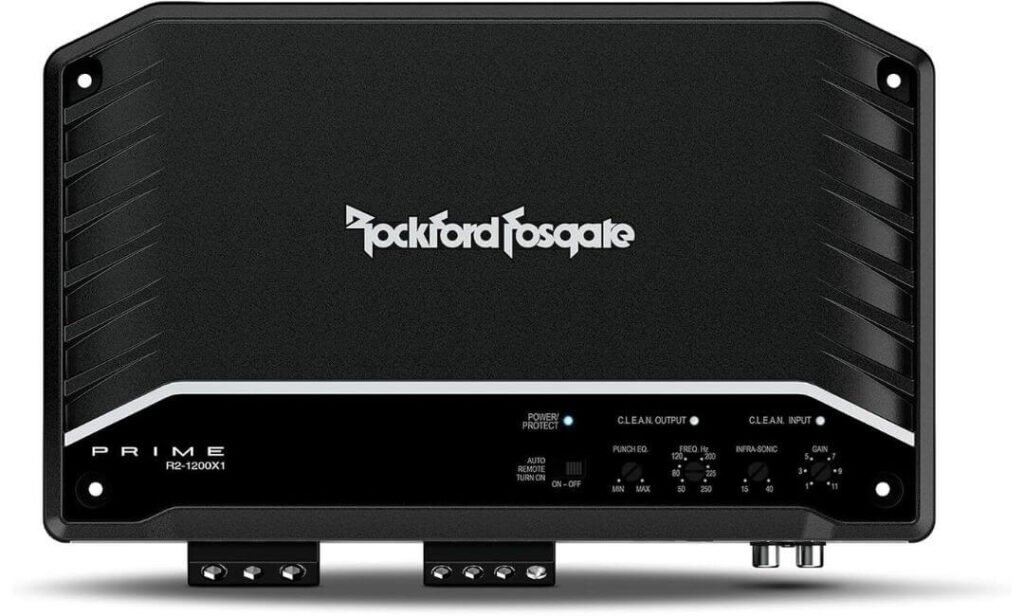
Quick Specs:
- Amplifier type: Full-range Class D monoblock
- RMS output: 400W @ 4Ω / 800W @ 2Ω / 1,200W @ 1Ω
- Low-pass filter: Variable 50Hz–250Hz
- Infrasonic filter: Variable 15Hz–50Hz
- Bass control: Integrated Punch EQ
- Gain setup: C.L.E.A.N. circuitry
- Power supply: P.O.W.E.R. supply technology
- Remote: Level control included
- Cooling: Cast-aluminium heatsink
- Protection: Short-circuit and over-current protection
- Dimensions: 11.3 × 6.8 × 1.9 inches
- Warranty: 1 year
The R2-1200X1 is the sort of Class D monoblock amp I would recommend when the system needs real subwoofer authority but does not need a 2,000W or 3,000W electrical commitment. Its output progression is straightforward — 400W at 4 ohms, 800W at 2 ohms and 1,200W at 1 ohm — which makes it relatively easy to match with a properly configured subwoofer system.
Where this model becomes more interesting is in the tuning hardware. Rockford’s C.L.E.A.N. circuitry helps you set the gain without relying entirely on guesswork, while the variable 50–250Hz low-pass filter lets you determine where the amplifier stops handing frequencies to the subwoofer. The adjustable 15–50Hz infrasonic filter is particularly useful with ported enclosures because it can keep extremely low frequencies outside the enclosure’s useful range from consuming unnecessary excursion.
There is also the Punch EQ, remote level control and P.O.W.E.R. supply technology. I would not treat the “3X bass” language as a reason to buy the amp — the useful part is having an integrated way to shape the low end when the vehicle’s cabin changes how the system sounds. Combined with the compact 1.9-inch-tall chassis, this makes the amplifier unusually easy to live with once the installation is finished.
What we like about this daily-use mono amplifier
- The 1,200W @ 1Ω rating hits a very useful middle ground between moderate and extreme subwoofer systems.
- C.L.E.A.N. gain circuitry is genuinely useful for getting the input level properly matched instead of setting gain by ear.
- The adjustable infrasonic filter gives you meaningful control when the amplifier is paired with a ported enclosure.
- The P.O.W.E.R. supply and Class D architecture help keep electrical demand more manageable than an equivalent older Class AB design.
- The low-profile chassis and remote level control make it a particularly practical choice for a clean daily installation.
The one compromise worth knowing
This is not the amplifier I would choose if the entire point of the build is maximum SPL output. A properly matched 2,000W or 3,000W amplifier will obviously give you a much larger power ceiling. The appeal here is different: 1,200W of useful output, sensible tuning controls and a compact chassis without making the electrical system unnecessarily complicated.
Why this 1,200W Class D monoblock belongs in the lineup
The R2-1200X1 fills an important gap between the lower-output compact option and the genuinely high-current amplifiers above it. For a daily system, 1,200W at 1 ohm is already enough to drive a serious subwoofer setup, provided the subwoofer’s RMS rating and final impedance are matched correctly.
It is also a good reminder that not every buyer needs to step up to 2,000W just because it is available. If the goal is strong bass, predictable tuning and an installation that remains relatively easy to manage, the balance here can be more valuable than another 800 watts on the specification sheet.
The Insider Pro-Tip
Use the C.L.E.A.N. circuitry as a setup tool, not as a substitute for proper gain matching. Start with the head unit at a known clean listening level, set the amplifier accordingly and then leave the gain alone. The remote level controller is there for convenient level adjustment — it should not be used to compensate for an incorrectly set gain.
And if you are pairing this with a ported enclosure, spend a little time getting the infrasonic filter right. That small adjustment can matter more to the subwoofer’s behaviour than adding another dose of bass boost. A properly filtered 1,200W system can sound considerably more controlled than a much larger amplifier that is simply being pushed harder.
#6. CT Sounds CT-1000.1D Compact Monoblock Amplifier
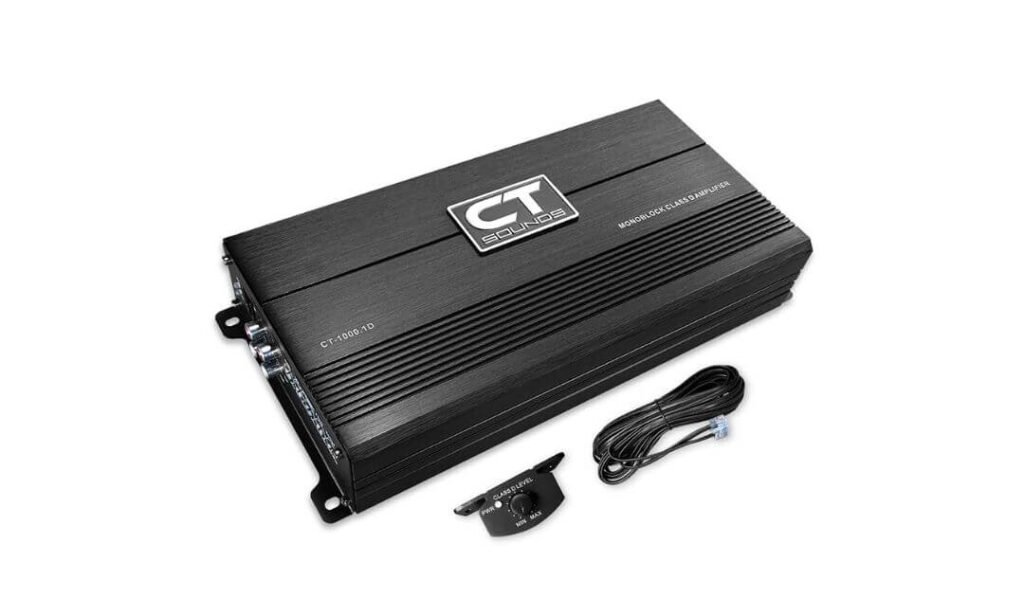
Quick Specs:
- Amplifier type: Class D MOSFET monoblock
- RMS output: 350W @ 4Ω / 650W @ 2Ω / 1,000W @ 1Ω at 14.4V
- Frequency range: Up to 320Hz
- Power supply: MOSFET PWM
- Cooling: Proprietary heat-dissipation design
- Controls: Gain, low-pass filter, subsonic filter and bass boost
- Remote: Bass knob included
- Protection: High-voltage, low-voltage, over-current and high-temperature protection
- Chassis: Compact design for tight installations
The CT-1000.1D makes sense for a very specific reason: you do not always need a physically large amplifier to build a strong subwoofer system. At 14.4V, it produces 1,000W RMS at 1 ohm, 650W at 2 ohms and 350W at 4 ohms, giving you a useful range of output depending on how the subwoofer is wired. For a daily system where installation space is limited, that combination is genuinely appealing.
Its Class D design is also focused heavily on efficiency. The MOSFET PWM power supply and dedicated heat-dissipation design are intended to keep thermal losses under control while the amplifier is working hard. That matters when the amp has to live somewhere with restricted airflow, although compact dimensions should never be treated as permission to mount it somewhere completely enclosed.
The tuning section covers the things I would actually want from a subwoofer amplifier: gain adjustment, low-pass filtering, subsonic filtering and bass boost, plus an included remote bass knob. You also get four-way protection covering high voltage, low voltage, over-current and high temperature, which gives the amplifier some useful protection against the problems that can show up in a high-current installation.
What we like about this compact Class D monoblock
- 1,000W RMS at 1 ohm gives it enough output for a serious daily subwoofer system without jumping straight into 2,000W territory.
- The 350W / 650W / 1,000W output progression makes it easier to match different final subwoofer loads.
- The compact chassis is one of its biggest practical advantages when trunk, cargo or seat space is limited.
- The combination of PWM power supply and dedicated heat dissipation is well suited to an efficient Class D installation.
- Four-way protection circuitry covers the electrical and thermal faults that matter most in a high-current car-audio setup.
One thing I would be careful with
The 1,000W rating is specified at 14.4V, so the electrical side of the installation still matters. I would not choose a 1-ohm configuration simply because it produces the highest number. Make sure the subwoofer is rated for the resulting power, the wiring is appropriate and the vehicle can maintain stable voltage when the system is working hard.
Why this 1,000W monoblock amp made the final six
This amplifier gives the list something the larger models cannot: a genuinely compact route to 1,000W-class output. That makes it a sensible alternative for someone who wants meaningful subwoofer power but has no interest in finding space for a physically larger high-output amplifier.
It also completes the power spread of the list nicely. You have the refined 1,100W ARC Audio, the 1,200W Rockford Fosgate, serious 2,000W options from Sundown and Skar, the 3,000W Taramps and this compact 1,000W CT Sounds. That gives the reader a choice based on the actual system, rather than forcing everyone toward the most powerful amplifier.
The Insider Pro-Tip
The temptation with a compact amplifier like this is to assume that because it fits almost anywhere, it can also be hidden almost anywhere. Don’t. Give the chassis enough open space to move heat away from the amplifier, particularly if you are regularly running it near its higher output levels.
For most daily installations, I would get the 2-ohm or 1-ohm final load figured out from the subwoofer’s voice coils first, then set the gain and filters around that configuration. If everything is matched properly, 1,000 watts can be more than enough to make a daily system genuinely satisfying — you do not need a 3,000W amplifier just to prove that the system is serious.
Best Class D Monoblock Amplifiers in 2026 Compared by Power, Impedance and Features
| Amplifier | Real Output | 1Ω Capability | What Makes It Different | Best System Match | Our Take |
|---|---|---|---|---|---|
| ARC Audio X2 1100.1 Premium single-channel Class D design |
Premium Pick 350W / 600W / 1,100W RMS 4Ω / 2Ω / 1Ω |
1,100W RMS Built around a serious 1Ω daily system. |
Fully balanced input stage, audiophile-grade filtering, high-frequency power supply, microprocessor protection and CNC aluminium chassis. | Refined daily systems where signal quality and controlled output matter as much as raw wattage. |
The refined choice. Less about chasing numbers, more about how the whole system behaves. |
| Sundown Audio SAE-2000D V.3 High-output digital monoblock |
High Output 700W / 1,400W / 2,000W RMS 4Ω / 2Ω / 1Ω |
2,000W RMS Built for genuinely demanding subwoofer loads. |
Variable 0–60Hz subsonic filter, adjustable LPF, 0.2–6V gain range, 1/0-AWG power terminals and 220A recommended fuse. | Serious subwoofer builds with an electrical system capable of supporting high current demand. |
The serious 2K option. This is where the electrical side of the build becomes part of the purchase decision. |
| Taramps HD 3000 Full-range 3,000W digital monoblock |
Maximum Output 3,000W RMS @ 1Ω 1Ω / 2Ω / 4Ω operation |
3,000W RMS Highest output ceiling in this lineup. |
10Hz–20kHz response, adjustable HPF/LPF, 0–10dB bass boost, 0.22–4V gain range and full-range flexibility. | Extreme-output systems where maximum power and configuration flexibility are the priority. |
The power specialist. Impressive on paper, but only worthwhile when the rest of the system is built to use it. |
| Skar Audio RP-2000.1D Value-focused 2,000W Class D monoblock |
Best Value 2,000W RMS @ 1Ω 2,800W peak rating |
1Ω stable Designed for high-output subwoofer systems. |
1/0-AWG terminals, adjustable gain, LPF, subsonic filter, 0/+6/+12dB bass EQ and four-way protection. | Buyers who want serious 2K-class output without paying for a premium-positioned amplifier. |
The power-per-dollar play. Strong output and useful controls make it easy to understand why it remains attractive. |
| Rockford Fosgate R2-1200X1 Daily-driver focused mono amplifier |
Balanced Pick 400W / 800W / 1,200W RMS 4Ω / 2Ω / 1Ω |
1,200W RMS A useful middle ground for daily systems. |
C.L.E.A.N. gain circuitry, P.O.W.E.R. supply, Punch EQ, variable infrasonic filter and remote level control. | Daily subwoofer systems where easy tuning, efficiency and manageable power are more important than extreme output. |
The sensible middle ground. Enough power to get serious without turning the installation into a full-scale SPL project. |
| CT Sounds CT-1000.1D Compact 1,000W Class D monoblock |
Compact Pick 350W / 650W / 1,000W RMS 4Ω / 2Ω / 1Ω at 14.4V |
1,000W RMS Enough for a strong daily subwoofer system. |
Compact chassis, MOSFET PWM supply, dedicated heat dissipation, bass knob and four-way voltage, current and thermal protection. | Space-conscious installations where compact dimensions and efficient power delivery matter. |
The compact solution. A good reminder that you do not need a 2K–3K amp for every serious daily system. |
Buying Guide for Choosing the Right Class D Monoblock Amplifier
A good monoblock amplifier is not simply the one with the biggest number on the front panel. The right choice comes down to final subwoofer impedance, RMS power, electrical capacity, efficiency, filtering, protection and how you actually use the system. A 1,000-watt amplifier can be a better choice than a 3,000-watt model if your subwoofer is designed around 1,000 watts and your vehicle cannot comfortably support the extra current.
Start With the Subwoofer’s Final Impedance
Before comparing amplifiers, work out the final impedance your subwoofer system will present to the amplifier. This is one of the most important steps because an amplifier’s power rating changes with impedance.
A model rated for 1,000 watts at 1 ohm is not automatically a 1,000-watt amplifier for every installation. If your final load is 2 ohms, its output will normally be lower. Your subwoofer’s voice coils, the number of subwoofers and the way they are wired determine that final load.
| Final Load | What It Means | What To Check |
|---|---|---|
| 4 ohms | Lower current demand, usually lower amplifier output | Confirm the amplifier provides enough RMS power for the sub |
| 2 ohms | Common compromise between output and electrical demand | Compare the amplifier’s actual 2-ohm RMS rating |
| 1 ohm | High-output configuration used by many mono amplifiers | Confirm the amplifier is genuinely rated for 1-ohm operation |
| Below the rated minimum | Excessive load for the amplifier | Avoid it unless the manufacturer specifically supports it |
Real talk: do not wire a subwoofer to 1 ohm simply because the amplifier advertises a 1-ohm rating. The amplifier being 1-ohm stable only tells you what load it can safely handle. It does not tell you that 1 ohm is the correct load for your subwoofer.
Your subwoofer’s RMS rating and final impedance should be matched first, then the amplifier should be selected around that combination.
RMS Power Matters More Than the Biggest Number
When comparing a 1,000W, 1,200W, 2,000W or 3,000W monoblock, look at RMS output at the impedance you will actually use.
Peak and maximum figures can make an amplifier look considerably more powerful, but they are not the number I would use to build a system around. RMS output gives you a much more useful idea of what the amplifier is designed to deliver continuously under the manufacturer’s specified conditions.
A sensible matching range also gives you some breathing room. You do not necessarily need an amplifier whose RMS rating exactly matches the subwoofer’s RMS rating, but you should understand what you are doing with the gain and how much clean power the subwoofer can realistically handle.
| Amplifier Class | Sensible Use | What To Watch |
|---|---|---|
| Around 1,000W | Strong daily subwoofer systems | Excellent when matched to a roughly 750–1,000W-class sub |
| Around 1,200W | Daily systems needing a little more headroom | A useful middle ground without jumping into extreme current demand |
| Around 2,000W | Serious high-output subwoofer builds | Wiring, alternator, battery capacity and cooling become much more important |
| Around 3,000W | Extreme-output systems | Requires a properly planned electrical system and subwoofer setup |
This is why the six amplifiers in this article are not ranked simply from 3,000 watts down to 1,000 watts. The Taramps HD 3000 has the highest output ceiling, but that does not make it the best choice for someone who only needs 1,000 watts. Likewise, a compact 1,000-watt amplifier can make much more sense than a 2,000-watt unit in a practical daily installation.
Understand What 1-Ohm Stable Really Means
The phrase 1-ohm stable gets used so often in car audio that it is easy to treat it like a performance badge. It is not.
An amplifier that is 1-ohm stable is designed to operate safely with a 1-ohm load when installed according to the manufacturer’s requirements. Because lower impedance generally allows more current to flow, the amplifier can produce substantially more power at 1 ohm than it does at 2 or 4 ohms.
That additional output comes with a cost: higher current demand and greater electrical stress.
This is where the difference between the products becomes useful. The ARC Audio X2 1100.1, Rockford Fosgate R2-1200X1 and CT Sounds CT-1000.1D sit in a more manageable power range, while the Sundown SAE-2000D V.3, Skar RP-2000.1D and Taramps HD 3000 are aimed at systems where the electrical side deserves considerably more attention.
Before buying a 1-ohm amplifier, check:
- Your subwoofer’s voice-coil configuration
- The final impedance after wiring
- The amplifier’s minimum rated impedance
- RMS output at 1 ohm
- Required power and ground cable size
- Recommended fuse rating
- Battery and alternator capacity
- Available ventilation around the amplifier
Do Not Ignore the Vehicle’s Electrical System
This is probably the most overlooked part of a high-powered amplifier purchase.
An amplifier does not create electrical power. It converts the vehicle’s available electrical energy into output for the subwoofer, with some energy lost as heat. As amplifier output rises, current demand can rise substantially as well.
That means moving from a 1,000W system to a 2,000W or 3,000W system is not simply a matter of buying a bigger amplifier.
You may also need to consider:
- Power cable: Higher-output systems generally require heavier-gauge wiring.
- Grounding: The ground connection needs to be properly sized and securely attached to suitable chassis metal.
- Fuse: Follow the amplifier manufacturer’s recommended fuse arrangement rather than choosing a fuse simply because it is convenient.
- Battery: A healthy battery is essential, particularly when the system is played hard at low engine speeds.
- Alternator: High-output systems can place a substantial additional load on the charging system.
- Voltage stability: Watch for excessive voltage drop when the system is operating at high volume.
- Heat management: More output and current generally mean more heat that needs to be managed.
The Sundown SAE-2000D V.3, with its 2,000W 1-ohm capability and substantial current requirements, is a good illustration of why the amplifier and electrical system should be considered together. Going even higher with the Taramps HD 3000 makes that planning more important, not less.
Real talk: if the vehicle’s voltage drops badly every time the bass hits, buying an even more powerful amplifier is not fixing the underlying problem. It is usually making it worse.
Efficiency Is One of the Reasons Class D Makes Sense
Class D amplification is particularly popular for subwoofer systems because it can deliver substantial output while generally wasting less energy as heat than older amplifier designs.
That efficiency does not mean a Class D monoblock runs cold or needs no ventilation. At high output, it still has to deal with considerable heat. Efficiency simply makes it more practical to produce high power in a relatively compact chassis.
This is one reason compact designs can be attractive. The CT Sounds CT-1000.1D, for instance, makes sense for installations where amplifier size matters, while the more powerful models need greater attention to airflow and mounting.
When evaluating efficiency, do not look only for a percentage printed on a specification sheet. Think about the entire installation:
- How much power does the subwoofer actually need?
- How often will you run the amplifier near its limit?
- Can the charging system supply the required current?
- Is there enough airflow around the amplifier?
- Will the amplifier be mounted somewhere exposed to excessive heat?
A well-matched amplifier running comfortably within its capabilities can be a better real-world setup than an oversized unit constantly being pushed beyond what the installation can support.
THD Is Useful, But Do Not Buy an Amplifier on THD Alone
Total Harmonic Distortion, or THD, measures unwanted harmonic content introduced by the amplifier. Lower distortion is generally desirable, but this specification needs context.
For a subwoofer system, obsessing over a tiny difference in THD while ignoring impedance, RMS power, gain structure, enclosure design and electrical stability is not a sensible way to choose an amplifier.
The better approach is to treat THD as one part of the technical picture.
Also pay attention to:
- Signal-to-noise ratio
- Frequency response
- Input sensitivity
- Gain adjustment
- Low-pass filtering
- Subsonic filtering
- Bass EQ
- Protection circuitry
- Build quality and cooling
The Sundown SAE-2000D V.3, for instance, specifies 0.20% THD and an 82dB signal-to-noise ratio, but those figures are useful because they sit alongside its power capability and filtering rather than being treated as the entire reason to buy it.
Filtering Is More Important Than Many Buyers Realise
A good monoblock amplifier should give you enough control to integrate the subwoofer properly with the rest of the audio system.
The low-pass filter controls how much upper-frequency information reaches the subwoofer. The subsonic filter is particularly useful with certain ported enclosure designs because it can reduce very low-frequency content that the enclosure and subwoofer may not handle safely.
Look for sensible adjustment ranges rather than simply counting how many controls are on the amplifier.
The models in this guide take different approaches. Some provide broad filtering ranges, while others concentrate on the controls most useful for a dedicated subwoofer system. That difference matters because more controls do not automatically mean better tuning.
Gain Is Not a Volume Control
This is worth mentioning because incorrect gain adjustment is one of the easiest ways to make a good amplifier perform badly.
The gain control is there to match the amplifier’s input sensitivity to the signal coming from the head unit or processor. Turning the gain all the way up does not make the amplifier “more powerful.” It can instead encourage clipping when the source signal reaches a level the amplifier cannot reproduce cleanly.
Use the gain as part of the system setup, not as a substitute for a volume knob.
The Rockford Fosgate R2-1200X1 is particularly interesting here because its C.L.E.A.N. circuitry is intended to help with gain setup. Regardless of which amplifier you choose, however, proper gain structure still matters more than having a fancy control panel.
Protection Features Are Part of the Amplifier’s Value
A high-powered amplifier lives in a demanding environment. It deals with heat, current, vibration and changing electrical conditions, so protection circuitry is not something I would treat as a minor specification.
Useful protection can include:
- Over-temperature protection
- Over-current protection
- Short-circuit protection
- Low-voltage protection
- High-voltage protection
- Thermal monitoring
The exact protection system varies between manufacturers, so do not assume that every amplifier protects itself in exactly the same way.
The ARC Audio X2 1100.1 takes a more sophisticated approach with microprocessor-controlled protection and diagnostics, while the Skar RP-2000.1D and CT Sounds CT-1000.1D also provide multiple layers of protection. The important point is that protection should complement a correct installation; it should not be treated as permission to undersize the wiring or ignore excessive heat.
How to Compare 1000W, 1200W, 2000W and 3000W Monoblocks
The easiest way to understand these power levels is to stop thinking of them as a ranking system.
1,000W: This is already plenty of amplifier for many serious daily subwoofer systems. If the subwoofer is designed around this power level, there is little benefit in automatically moving to 2,000W or 3,000W.
1,200W: The extra output can provide a useful step up without moving as far into the electrical demands of a 2,000W system. This makes the R2-1200X1 an interesting middle-ground option.
2,000W: This is where the installation needs to become more deliberate. The Sundown SAE-2000D V.3 and Skar RP-2000.1D can deliver serious output, but the subwoofer, wiring and charging system need to be capable of supporting it.
3,000W: This is no longer simply “more bass for everyone.” The Taramps HD 3000 belongs in a system designed around that level of output. If the electrical system or subwoofer cannot use the available power, the extra capacity becomes expensive headroom rather than useful performance.
Match the Amplifier to the Subwoofer, Not the Other Way Around
This is the decision I would make before looking at brand, appearance or even price.
Start with the subwoofer and answer four questions:
- What is its RMS power rating?
- What impedance will the final wiring produce?
- How many voice coils does it have?
- What amplifier power range does the manufacturer recommend?
Then choose an amplifier that can provide appropriate RMS power at that final impedance.
A dual-voice-coil subwoofer can be wired to different final loads depending on the voice-coil impedance and wiring configuration. That means two visually identical subwoofers can require completely different amplifier choices.
This is also why a “1-ohm monoblock amplifier” keyword should never be interpreted as “buy this and wire everything to 1 ohm.” The final load comes from the subwoofer configuration.
Check the Installation Before You Check Out
A technically excellent amplifier can still be the wrong purchase if it does not physically suit the installation.
Before ordering, measure the available mounting area and leave enough room for:
- Cable connections
- Airflow around the chassis
- Fuse access
- Gain and filter adjustment
- Remote-control connections
- Service access
This matters particularly with higher-output models. A compact amplifier may fit neatly into a restricted installation, while a larger high-output unit may require a more deliberate mounting location.
Do not mount the amplifier somewhere that traps heat simply because it is out of sight. Cooling is part of reliability.
A Simple Way to Narrow Down the Six Picks
If you are still deciding between the models in this guide, I would approach them by system requirement rather than by rank.
- Choose the ARC Audio X2 1100.1 if you want a premium, controlled 1,100W-class system and care about the amplifier’s engineering and signal path.
- Choose the Sundown SAE-2000D V.3 if your system genuinely needs around 2,000W at 1 ohm and the electrical side is ready for it.
- Choose the Taramps HD 3000 when 3,000W output is actually part of the plan, rather than simply an attractive specification.
- Choose the Skar RP-2000.1D when you want serious 2,000W-class output with a value-oriented approach.
- Choose the Rockford Fosgate R2-1200X1 if you want a strong daily-driver amplifier without stepping into extreme-output territory.
- Choose the CT Sounds CT-1000.1D when approximately 1,000W is enough and a compact installation is a major priority.
The Final Check Before Buying
Before you place the order, compare these specifications against your actual system:
| Check | What You Need to Confirm |
|---|---|
| Subwoofer RMS | Amplifier output should make sense for the subwoofer’s power handling |
| Final impedance | Amplifier must safely support the load you will actually wire |
| RMS output at that load | Use this instead of peak or maximum wattage |
| Power and ground wiring | Follow the manufacturer’s recommended cable size |
| Fuse requirement | Match the amplifier’s specified protection requirements |
| Charging system | Make sure the battery and alternator can support the demand |
| Cooling | Leave adequate airflow around the amplifier |
| Filtering | Confirm the LPF and subsonic controls suit the enclosure |
| Physical size | Measure the mounting area before buying |
| Gain setup | Plan to set gain correctly rather than using it as a volume control |
The biggest mistake is buying the amplifier first and trying to make everything else fit around it. Build the match on paper before you build it in the car. Once the subwoofer impedance, RMS requirement and electrical capacity are known, the difference between a sensible 1,000W system and an unnecessarily complicated 3,000W system becomes much easier to see.
Power Tiers From 1000W to 3000W and What 1-Ohm Stability Really Means
Power ratings make monoblock amplifiers look easy to compare, but the jump from 1,000 watts to 3,000 watts is not simply a jump in how loud your subwoofer will play. As output increases, the demands on the subwoofer, enclosure, wiring, charging system, cooling and tuning increase with it.
That is why I would treat these four power levels as different system categories rather than four steps on a “more is better” ladder. The right amplifier is the one that gives your subwoofer the power it can actually use, at the impedance you actually plan to run.
1000-Watt Monoblock Amplifiers: The Sensible Starting Point for Strong Daily Systems
A 1,000-watt monoblock amplifier is already capable of powering a serious subwoofer system. You do not need to move into 2,000W territory simply because you want noticeable bass.
This power range makes particular sense when the subwoofer has an RMS rating around the 750W–1,000W range and the installation is intended for regular daily listening rather than maximum-output competition use. It can also be easier to integrate into a vehicle because the electrical demand is more manageable than with the larger amplifiers in this guide.
The CT Sounds CT-1000.1D is a good illustration of this category. It produces 350W at 4 ohms, 650W at 2 ohms and up to 1,000W at 1 ohm at 14.4 volts. Its compact chassis, adjustable gain, low-pass and subsonic controls, bass boost and protection circuitry make it more than just a small amplifier with a 1,000W badge.
The important point is that 1,000W does not mean “budget system.” A properly matched 1,000W amplifier and subwoofer can sound considerably better than a poorly matched 2,000W setup.
1200-Watt Monoblock Amplifiers: A Useful Middle Ground for Daily Bass
The 1,200-watt monoblock amplifier category is interesting because it sits in a very practical part of the market. You get more headroom than a typical 1,000W design without immediately moving into the much heavier electrical demands associated with 2,000W and 3,000W systems.
The Rockford Fosgate R2-1200X1 is a strong example here, with 400W at 4 ohms, 800W at 2 ohms and 1,200W at 1 ohm. It also brings useful installation features such as C.L.E.A.N. circuitry, a variable infrasonic filter, Punch EQ and remote level control.
This is the sort of power level I would consider when the goal is strong, dependable daily bass rather than chasing the largest possible output number. You still need to match the amplifier to the subwoofer’s RMS rating and final impedance, but you are not necessarily asking the vehicle’s electrical system to support the kind of current demand associated with a 2,000W-plus build.
There is also a practical heat advantage. That does not mean a 1,200W amplifier cannot run hot, but a system that normally operates below its maximum output can be easier to manage than an oversized amplifier constantly being pushed near its limit.
2000-Watt Monoblock Amplifiers: Where the Electrical System Starts Mattering More
A 2,000-watt monoblock amplifier is a different proposition. This level of output makes sense when the subwoofer system is genuinely built for high power and you want considerably more output than a typical daily-driver setup.
Both the Sundown Audio SAE-2000D V.3 and Skar Audio RP-2000.1D occupy this part of the lineup, but they approach the category differently.
The Sundown is rated at 700W at 4 ohms, 1,400W at 2 ohms and 2,000W at 1 ohm. It also uses substantial power and ground connections and calls for a serious fuse arrangement. That tells you something important: at this level, the amplifier should be considered together with the electrical system, not as an isolated component.
The Skar also delivers 2,000W RMS at 1 ohm and adds adjustable gain, low-pass and subsonic filtering, bass EQ and 1/0-AWG terminals. It is a more value-focused way into this power category.
With either type of setup, 2,000 watts should be planned rather than guessed.
You need to consider:
- The subwoofer’s RMS power handling
- The final impedance after wiring
- The required power and ground cable
- Fuse requirements
- Battery condition and capacity
- Alternator output
- Voltage stability under load
- Amplifier ventilation
- Enclosure design and subwoofer excursion
If the vehicle’s electrical system is struggling at 1,000W, jumping to 2,000W will not solve the problem. It simply gives the electrical system a much harder job.
3000-Watt Monoblock Amplifiers: For Systems Built Around Serious Output
A 3,000-watt monoblock amplifier belongs in a different category from a conventional daily subwoofer upgrade.
The Taramps HD 3000 represents this tier in the article, delivering up to 3,000W at 1 ohm and supporting 1-, 2- and 4-ohm operation. Unlike a narrowly focused subwoofer amplifier, it also has a 10Hz–20kHz frequency response and full-range functionality, giving it more flexibility than its power rating alone suggests.
But this is where I would be particularly careful with the “more power equals more bass” mindset.
A 3,000W amplifier only becomes useful when the subwoofer, enclosure, wiring and electrical system are all capable of taking advantage of it. If the subwoofer is not rated for that level of power, the additional amplifier capacity does not automatically make the system better.
At this level, installation quality becomes increasingly important. Cable sizing, grounding, fuse selection, voltage stability and heat management can have a much bigger impact on reliability than the difference between two amplifier brands.
For that reason, I would not recommend a 3,000W amplifier to someone who simply wants “more bass” without first checking what the rest of the system can actually handle.
1-Ohm Stable Does Not Mean Every System Should Run at 1 Ohm
This is the part of monoblock amplifier specifications that causes the most confusion.
When an amplifier is described as 1-ohm stable, it means the manufacturer has designed it to operate safely with a 1-ohm load within its specified conditions. It does not mean that 1 ohm is automatically the best setting.
A lower impedance allows more current to flow, which is why these amplifiers can generally produce significantly more power at 1 ohm than at 2 or 4 ohms. But that increased output also means increased electrical demand.
Think of the relationship like this:
Higher impedance → lower current demand → usually lower amplifier output
Lower impedance → higher current demand → potentially higher amplifier output
The final impedance comes from the subwoofer’s voice coils and wiring configuration, not from the amplifier itself.
That distinction matters enormously. You should never buy a 1-ohm stable monoblock and then assume your subwoofer should automatically be wired to 1 ohm.
How Voice-Coil Configuration Changes the Final Load
A subwoofer can have a single voice coil or multiple voice coils, and the impedance of those coils determines what final loads are possible.
Two subwoofers with the same RMS power rating can therefore require completely different amplifier setups.
Before choosing a 1-ohm amplifier, work backwards:
- Check the impedance of each voice coil.
- Check whether the subwoofer uses one or multiple voice coils.
- Determine which series or parallel wiring configurations are available.
- Calculate the final impedance.
- Compare that final load with the amplifier’s rated operating range.
- Check how much RMS power the amplifier produces at that exact load.
This is far safer than starting with an amplifier because it says “1 ohm stable” on the specification sheet.
1,000W vs 1,200W vs 2,000W vs 3,000W
| Power Tier | Best Fit | Electrical Demand | Main Advantage | Main Concern |
|---|---|---|---|---|
| 1,000W | Strong daily systems | Moderate | Excellent balance of usable output and practicality | Do not oversize the amp for a lower-rated sub |
| 1,200W | Daily systems needing extra headroom | Moderate to higher | Useful step above 1K without jumping to 2K | Still needs correct impedance and gain setup |
| 2,000W | High-output daily and enthusiast systems | High | Serious subwoofer output | Wiring, battery, alternator and cooling matter much more |
| 3,000W | Extreme-output and SPL-oriented systems | Very high | Maximum output potential in this lineup | Expensive electrical and installation requirements |
The table is useful for narrowing the field, but there is one important qualification: these power tiers are not directly interchangeable.
A 1,000W amplifier running a properly matched subwoofer at its intended load can be the right answer, while a 3,000W amplifier can be completely wrong for the same system.
Why 1-Ohm Operation Is So Common in Monoblock Amplifiers
There is a practical reason manufacturers offer high-output mono amplifiers that can operate at 1 ohm.
Subwoofer systems often need substantial power, and running the amplifier at a lower impedance allows the amplifier to deliver more output from the same basic installation. Class D architecture makes this especially practical because these amplifiers can produce high power in relatively compact chassis.
But there is a trade-off.
As the load becomes lower, current demand increases. That means the amplifier’s power supply, wiring, fuse, battery, alternator and thermal management all become more important.
This is why the 1-ohm rating should be viewed as a system capability, not a marketing trophy.
Do Not Confuse 1-Ohm Stability With Efficiency
These are two completely different specifications.
1-ohm stability tells you about the load the amplifier can safely operate into.
Efficiency tells you how effectively the amplifier converts electrical input power into useful audio output rather than heat.
A 1-ohm stable amplifier can still require substantial current, and a highly efficient Class D design can still generate considerable heat when pushed hard.
For a daily system, I would rather have an amplifier operating comfortably within its intended range than constantly run an oversized amplifier at the edge of its electrical and thermal limits.
Where Each Power Tier Makes the Most Sense
If you are building the system around the amplifier’s actual job, the choice becomes much easier:
Choose around 1,000W when your priority is a strong daily subwoofer system, sensible installation requirements and enough output without unnecessary electrical complexity.
Move to around 1,200W when you want a little more headroom and your subwoofer can use it, but you still want the system to remain relatively practical.
Move to 2,000W when you have a genuinely high-power subwoofer setup and are prepared to upgrade or verify the electrical system accordingly.
Consider 3,000W only when the entire system is designed around that output, including the subwoofer, enclosure, wiring and charging system.
The Real Rule for Choosing Your Power Level
The most useful rule is surprisingly simple:
Do not choose the biggest amplifier your budget can afford. Choose the biggest amplifier your entire system can use properly.
That means a well-matched 1,000W system can be a smarter build than an under-supported 2,000W system, and a properly engineered 2,000W system can make more sense than buying a 3,000W amplifier just because the number looks impressive.
For the amplifiers covered here, the ARC Audio X2 1100.1, Rockford Fosgate R2-1200X1 and CT Sounds CT-1000.1D sit in the more practical daily-power territory, while the Sundown SAE-2000D V.3 and Skar RP-2000.1D move into serious high-output territory. The Taramps HD 3000 sits at the extreme end of this particular selection.
And across all four power levels, the same rule remains true: confirm the final impedance first, match RMS power second, then make sure the vehicle’s electrical system can support the decision.
Performance and Sound: What Deep Bass Really Feels Like in a Real Car Audio System
A subwoofer does not sound better simply because the amplifier has a bigger power rating. What you actually hear depends on the complete system, including the subwoofer, enclosure, final impedance, amplifier gain, filtering, electrical stability and how much clean power is available when the system is being pushed.
That is why the difference between a good 1,000W Class D monoblock and a 3,000W model is not necessarily “this one sounds three times louder.” The bigger amplifier can provide more output headroom, but only when the subwoofer and the rest of the installation are capable of using it.
Class D Efficiency Can Give You More Usable Headroom
One of the biggest reasons Class D amplifiers work so well for subwoofer systems is their efficiency.
A traditional amplifier can waste a larger portion of its electrical input as heat. Class D designs use a switching output stage, allowing them to produce substantial power without turning as much of the supplied electrical energy into heat.
That matters in a car because you have limited physical space and a finite electrical supply.
A more efficient amplifier can offer:
- Less wasted energy as heat
- More practical high-power output
- A smaller chassis for the amount of power produced
- Better thermal management when properly installed
- More usable output before thermal protection becomes a concern
But there is an important distinction here: efficient does not mean cold.
A 2,000W or 3,000W amplifier being pushed hard is still handling a large amount of electrical power. The heatsink, mounting location and airflow remain important. Efficiency simply makes the job more manageable.
This is one reason the compact Class D designs in this guide make sense for different types of installations. The CT Sounds CT-1000.1D can provide 1,000W at 1 ohm in a relatively compact package, while the higher-output models require more attention to electrical supply and thermal conditions.
More Wattage Gives You Headroom, Not Automatically Better Sound
There is a common misunderstanding that a larger amplifier automatically makes bass deeper.
It does not.
Bass depth is heavily influenced by the subwoofer and enclosure, particularly how the enclosure is designed and tuned. The amplifier’s job is to provide clean, controlled power to the subwoofer.
What additional amplifier power can give you is headroom.
Suppose a subwoofer system needs 800W of clean power for the level you normally listen at. An amplifier capable of delivering substantially more than that may have more reserve available when the music demands a sudden increase in output.
That can help the system stay composed instead of immediately reaching its limits.
However, this only works when the subwoofer can safely handle the additional power. Putting a 3,000W amplifier on a subwoofer that cannot use that power does not magically create deeper bass. It can simply increase the chance of excessive excursion, thermal stress or damage if the system is incorrectly tuned.
What Distortion Actually Means for a Subwoofer
Total Harmonic Distortion, or THD, describes unwanted harmonic content introduced by the amplifier.
Lower distortion is generally desirable, but subwoofer systems need some perspective. Human hearing is less sensitive to fine distortion differences at very low frequencies than it is through the midrange and treble, so I would not choose between two monoblocks based on a tiny THD difference alone.
The more important question is whether the amplifier can deliver the required output cleanly and consistently at the impedance you are actually using.
That means looking at THD alongside:
- RMS output
- Signal-to-noise ratio
- Frequency response
- Gain range
- Input sensitivity
- Filtering
- Protection circuitry
- Electrical stability
The Sundown SAE-2000D V.3, for instance, specifies 0.20% THD and an 82dB signal-to-noise ratio. Those numbers are useful, but they make the most sense when considered alongside its 2,000W output capability and filtering rather than treated as proof that it will automatically sound better than every lower-powered amplifier.
Damping Factor and Why It Gets Overstated
Damping factor is another specification you may see when comparing amplifiers.
In simple terms, it describes the amplifier’s ability to control the motion of the speaker through its electrical output impedance. A higher damping factor can indicate stronger electrical control, but the number printed on an amplifier’s specification sheet does not tell the entire story once the amplifier is connected to a real installation.
The speaker wiring, cable resistance, subwoofer impedance and voice-coil characteristics all become part of the real-world system.
That is why I would not buy a monoblock simply because it advertises an impressive damping-factor number.
For a subwoofer system, proper enclosure design, suitable power, correct gain and appropriate filtering can have a much more obvious effect on what you actually hear.
Bass Control Comes From More Than the Bass Knob
A remote bass control is convenient, but it should not be confused with proper system tuning.
The amplifier controls that really matter include:
Gain: Matches the amplifier’s input sensitivity to the source signal.
Low-pass filter: Prevents unnecessary higher frequencies from being sent to the subwoofer.
Subsonic filter: Can help protect a subwoofer from very low frequencies that are unsuitable for certain ported enclosure designs.
Bass EQ: Adds emphasis around a selected frequency, but should be used carefully because boosting bass can increase amplifier demand and subwoofer excursion.
Remote level control: Gives you convenient adjustment of subwoofer level from the driver’s seat.
This is where the products in the lineup have meaningful differences.
The ARC Audio X2 1100.1 offers variable bass boost and a broad crossover range. The Sundown SAE-2000D V.3 provides adjustable subsonic and low-pass filtering. The Rockford Fosgate R2-1200X1 adds Punch EQ and an infrasonic filter, while the Skar RP-2000.1D provides bass EQ alongside its gain, low-pass and subsonic controls.
None of those controls replaces correct tuning.
The 1000W Range: Controlled Daily Bass
A properly matched 1,000W monoblock system can already produce impressive low-frequency output.
What stands out at this level is practicality. You can build a system with meaningful bass without necessarily turning every part of the installation into a high-current project.
The CT Sounds CT-1000.1D is representative of this category. With up to 1,000W at 1 ohm, it has enough output for a serious daily system while remaining compact enough to make installation space a consideration rather than an afterthought.
For normal music listening, this power range can be more than sufficient when paired with a suitable subwoofer and enclosure.
The real advantage is not that it is “less powerful.” It is that the system can be easier to balance.
The 1200W Range: A Little More Reserve Without Going Extreme
Moving to around 1,200W does not transform the character of bass overnight, but it can provide additional headroom.
The Rockford Fosgate R2-1200X1 sits nicely in this range, offering 1,200W at 1 ohm with useful tuning controls and a compact chassis.
In a properly matched setup, this can mean the amplifier has more reserve when demanding bass passages arrive. The important word is matched. If the subwoofer is already at the limit of what it can safely handle, additional amplifier power is not automatically an advantage.
For a daily driver, this is one of the power levels I would consider particularly sensible when the goal is strong bass without building an unnecessarily complicated electrical system.
The 2000W Range: When Bass Starts Feeling More Physical
Once you move into the 2,000W range, the difference can become much more obvious when the subwoofer and enclosure are designed around it.
This is where systems can start producing the kind of low-frequency energy that you do not merely hear. You can begin to feel the pressure and movement of the bass through the cabin.
But that sensation is not coming from the amplifier alone.
The amplifier supplies the power. The subwoofer converts that power into mechanical movement, and the enclosure determines how that movement is controlled and used acoustically.
The Sundown SAE-2000D V.3 and Skar RP-2000.1D are therefore better viewed as components for a complete high-output system rather than simply louder versions of a 1,000W amplifier.
At this level, electrical voltage stability also becomes increasingly important. If voltage collapses when the bass hits, the amplifier cannot perform as intended regardless of what its specification sheet says.
The 3000W Range: Maximum Output Requires Maximum Preparation
A 3,000W monoblock amplifier can provide enormous output potential, but this is also the point where the phrase “real-world system” becomes especially important.
The Taramps HD 3000 can deliver 3,000W at 1 ohm, and its 10Hz–20kHz response gives it full-range flexibility. But if the subwoofer, enclosure or electrical system is not designed for that level of output, the extra capacity does not automatically translate into better sound.
When properly matched, however, the difference can be substantial.
A high-power system can deliver stronger transient impact, greater low-frequency authority and more headroom before the amplifier reaches its limits. That is the attraction of this power range.
The trade-off is that everything around the amplifier has to be taken more seriously.
What You Actually Notice When Comparing These Power Levels
The difference between power tiers is easier to understand when you separate the specifications from what you actually experience.
| Power Range | What You Can Typically Expect | What Determines the Final Result |
|---|---|---|
| Around 1,000W | Strong, controlled daily bass | Subwoofer efficiency, enclosure and tuning |
| Around 1,200W | Slightly more headroom and output reserve | Subwoofer power handling and electrical stability |
| Around 2,000W | More authority and stronger physical impact | Enclosure, subwoofer excursion and charging capacity |
| Around 3,000W | Very high output potential and serious cabin pressure | Complete system design, electrical capacity and thermal management |
This is why I would never describe a 3,000W amplifier as automatically sounding “three times better” than a 1,000W model.
Power gives you potential. The rest of the system determines whether that potential becomes useful sound.
Deep Bass Starts With the Enclosure Too
If your goal is genuinely deep bass, do not spend your entire budget on the amplifier and treat the enclosure as an afterthought.
The enclosure controls how the subwoofer behaves at different frequencies. Its internal volume, port design and tuning can dramatically change the character of the bass.
A powerful amplifier feeding a poorly designed enclosure can produce disappointing results. A correctly designed enclosure paired with an appropriately powered subwoofer can sound significantly more impressive than the amplifier’s wattage would suggest.
That is also why amplifier selection should happen alongside the subwoofer and enclosure choice, not after everything else has already been purchased.
The Real Meaning of “Clean Bass”
Clean bass is not simply bass that is loud.
A well-set system should maintain control when the music becomes demanding. The low end should not become unnecessarily muddy because the amplifier is clipping, the gain is badly adjusted, the electrical voltage is collapsing or the enclosure is being asked to do something it was not designed to do.
You should be able to increase the volume and still hear the difference between a deep kick, sustained bass note and a fast bass line rather than everything turning into one long rumble.
That is where correct power, gain structure, filtering and enclosure design work together.
Where Each Amplifier Tier Makes the Most Sense
For this particular lineup, I would look at the power levels like this:
- ARC Audio X2 1100.1: Best suited to someone who values a refined, controlled 1,100W-class system and wants more attention paid to the amplifier’s engineering.
- CT Sounds CT-1000.1D: Makes sense when compact size and practical 1,000W output are important.
- Rockford Fosgate R2-1200X1: A sensible choice for strong daily bass, useful tuning and moderate high-power requirements.
- Sundown SAE-2000D V.3: Better suited to a serious 2,000W-class subwoofer system where the electrical installation is prepared for the demand.
- Skar RP-2000.1D: An attractive option when high output is important and value matters.
- Taramps HD 3000: For systems deliberately built around extreme output rather than buyers simply chasing the biggest wattage number.
The Real-World Rule: Build Around the System, Not the Amplifier
If you want deep bass that actually feels good from the driver’s seat, I would prioritise the system in this order:
- Choose the right subwoofer.
- Choose or design the correct enclosure.
- Calculate the final impedance.
- Select an amplifier that can provide appropriate RMS power at that impedance.
- Make sure the electrical system can supply it.
- Set the gain and filters correctly.
- Give the amplifier enough cooling and mounting space.
That approach is much more reliable than starting with a 3,000W amplifier and trying to build everything around the number.
A properly matched 1,000W or 1,200W Class D monoblock can deliver excellent daily bass, while a well-engineered 2,000W or 3,000W system can take physical low-frequency impact considerably further. The difference is not just the wattage on the amplifier. It is whether the entire system is capable of turning that electrical power into controlled, clean and repeatable bass.
Installation and Setup: Class D Monoblock Amp Installation Essentials
A powerful monoblock amplifier can only perform as well as the installation supporting it. Correct wiring, a solid ground, the right fuse, sensible speaker wiring and enough ventilation are not small details you sort out after buying the amplifier. They are part of the amplifier system itself.
This becomes even more important as you move from a 1,000W setup toward 2,000W or 3,000W output. Current demand increases, wiring becomes more critical, heat becomes harder to manage and a poor connection can create voltage drop, noise or intermittent protection shutdowns.
The good news is that the fundamentals are straightforward. The important part is doing them properly rather than treating the installation as a collection of cables that simply need to reach the amplifier.
Start With the Power Cable and Main Fuse
The main power cable carries current from the vehicle’s battery or primary power source to the amplifier, so it needs to be sized according to the amplifier’s requirements and the length of the cable run.
Do not choose the cable simply because it physically fits the amplifier terminal.
Before installation, check:
- Recommended cable gauge
- Maximum current demand
- Cable length
- Fuse requirement
- Terminal size
- Routing distance from the battery to the amplifier
The main fuse should be installed close to the battery. Its primary purpose is to protect the power cable if that cable becomes shorted to the vehicle chassis.
A fuse located only beside the amplifier does not provide the same protection for the long section of unfused cable running through the vehicle.
Real talk: never choose a larger fuse simply because you want to stop nuisance blowing. If the cable or amplifier is not designed for that current, a larger fuse can create a serious safety problem.
Choose the Ground Connection With the Same Care as the Power Connection
The ground cable is just as important as the power cable.
The amplifier needs a low-resistance return path to the vehicle’s electrical system. A loose, painted, rusty or undersized ground connection can create voltage drop, noise and unreliable amplifier operation.
A proper ground point should be:
- On solid vehicle chassis metal
- Clean and free from paint or corrosion
- Mechanically secure
- As short as reasonably practical
- Sized appropriately for the amplifier’s power requirements
Do not attach the ground to a random thin body panel simply because it is nearby.
For higher-powered systems, grounding deserves even more attention because the amplifier can demand substantial current. A connection that seems acceptable at moderate volume can become a weak point when the system is pushed hard.
Remote Turn-On Wiring Has a Simple Job
The remote turn-on wire tells the amplifier when the source unit is active.
It carries very little current compared with the main power cable, but it still needs to be connected correctly. When the head unit or processor switches on, the remote signal activates the amplifier; when the source switches off, the amplifier shuts down.
Keep the remote wire separate from the main power cable where practical, and make sure the connection is secure.
If the amplifier does not switch on consistently, do not immediately assume the amplifier has failed. Check the remote-turn-on voltage, ground connection, main fuse and power terminals first.
Fuse Sizing Is About Protection, Not Performance
There are two different things people often confuse here:
The amplifier’s recommended fuse rating protects the amplifier’s power circuit according to the manufacturer’s design.
The main power-cable fuse protects the cable run from the battery.
Depending on the installation, multiple fuses may be required, particularly when using larger electrical systems or distribution blocks.
Always follow the amplifier manufacturer’s specified fuse arrangement and the requirements of the cable being used. Do not select a fuse based solely on the amplifier’s advertised wattage.
A 3,000W amplifier does not mean you should simply calculate a huge fuse value and install it. The actual requirement depends on the amplifier’s design, operating voltage, efficiency and manufacturer’s specifications.
Understand Your Final 1-Ohm Load Before Connecting the Speaker
If you are building around a 1-ohm stable monoblock amplifier, the speaker wiring needs to produce the correct final impedance.
This is determined by the subwoofer’s voice coils and how they are wired.
The amplifier does not decide the final load.
For a single voice coil, the final impedance is straightforward. Multiple voice coils or multiple subwoofers give you more wiring possibilities, but they also create more opportunities to make a mistake.
Before connecting the speaker cable, confirm:
- The impedance of each voice coil.
- The number of voice coils.
- Whether the coils are being wired in series or parallel.
- The final impedance presented to the amplifier.
- Whether that final impedance is within the amplifier’s rated range.
- The amplifier’s RMS output at that specific load.
Series and Parallel Wiring Change the Load
With multiple voice coils, the wiring method changes the impedance seen by the amplifier.
Series wiring increases impedance.
Parallel wiring decreases impedance.
That sounds simple, but the final result depends on the impedance of the individual coils and the number of coils involved.
This is why you should calculate the final load before installation rather than connecting everything and measuring afterward.
A lower final impedance can allow the amplifier to produce more power, but it also increases current demand. If the amplifier is not designed to operate at that load, the result can be excessive heat, protection shutdown or permanent damage.
Do Not Assume Every Subwoofer Should Be Wired to 1 Ohm
This deserves its own warning because it is one of the most common misunderstandings around mono amplifiers.
A 1-ohm stable amplifier is capable of handling a 1-ohm load. It does not mean that every subwoofer should be wired to 1 ohm.
You may deliberately choose a higher final impedance if it better matches the subwoofer’s power handling, the amplifier’s output characteristics or the vehicle’s electrical limitations.
For a daily-driven system, there is nothing inherently wrong with running a subwoofer at 2 or 4 ohms when that configuration gives you the power and reliability you actually need.
The objective is correct matching, not achieving the lowest possible impedance.
Keep Power and Signal Wiring Sensibly Separated
Signal cables and high-current power cables should be routed thoughtfully.
The main power cable carries substantial current and can potentially introduce unwanted electrical noise into nearby signal wiring. Good installation practice is therefore to avoid running RCA signal cables directly alongside the main power cable for long distances.
A common approach is:
- Route power cable down one side of the vehicle.
- Route RCA or low-level signal cables down the opposite side where practical.
- Keep the remote wire with the signal wiring or route it separately from the main power cable.
- Keep speaker wiring organised and away from sharp metal edges.
- Secure cables so they cannot move, rub or become pinched.
You do not need to treat the vehicle like a laboratory experiment. You simply want to avoid creating unnecessary opportunities for interference or physical damage.
Ground Loops and Alternator Noise
If you hear a high-pitched whine that changes with engine speed, do not immediately blame the amplifier.
Alternator noise can be caused by several parts of the installation, including poor grounding, damaged signal cables, incorrect routing or differences in ground potential between components.
A proper troubleshooting sequence is much better than randomly buying noise filters.
Check:
- Amplifier ground connection
- Head-unit ground
- Processor or DSP ground
- RCA cables and connectors
- Signal-cable routing
- Battery and charging connections
- Any aftermarket equipment sharing the audio system
Avoid creating multiple unnecessary chassis grounding points for interconnected audio equipment. The objective is to maintain a clean and consistent electrical reference.
And never use a cheap ground-loop isolator as the first solution without identifying the underlying problem. Sometimes it masks the symptom while leaving the poor installation untouched.
Give the Amplifier Room to Breathe
Class D amplifiers are efficient, but they still generate heat.
The amplifier needs enough open space around its heatsink and ventilation areas to move that heat away. Installing a high-powered amplifier inside a completely enclosed space can cause temperatures to rise rapidly.
Avoid mounting it:
- Directly against carpet or upholstery
- Under objects that block ventilation
- Inside an airtight compartment
- Against a heat-producing component
- In a location exposed to unnecessary moisture
A solid mounting surface is preferable, and the amplifier should be positioned so the manufacturer-provided ventilation paths remain unobstructed.
More power means more attention to heat. This is particularly important when a 2,000W or 3,000W system is played hard for extended periods.
Heat Sinking Is More Than a Cosmetic Feature
The metal chassis on many Class D amplifiers also acts as part of the thermal-management system.
The amplifier’s internal components generate heat, which needs to move into the chassis and then into the surrounding air. If the amplifier is pressed against an insulating surface, that process becomes less effective.
This is why mounting orientation and clearance matter.
A large amplifier with a substantial heatsink can still overheat if it is installed somewhere with no airflow. Conversely, a smaller amplifier can operate reliably when mounted correctly with enough room around it.
Do not judge thermal performance only by chassis size. Installation conditions matter just as much.
Protect the Amplifier From Overload
Modern monoblock amplifiers typically include several protection systems designed to respond to abnormal operating conditions.
Depending on the design, these can include:
- Over-temperature protection
- Over-current protection
- Short-circuit protection
- Low-voltage protection
- High-voltage protection
- Output protection
- Thermal monitoring
Protection circuitry is valuable because electrical faults and temperature spikes can happen even in a properly installed system.
But protection should be treated as a last line of defence, not as part of the normal operating strategy.
If an amplifier repeatedly enters protection mode, find the cause. Common possibilities include:
- Speaker load below the amplifier’s rated minimum
- Shorted speaker wiring
- Poor power connection
- Weak ground
- Excessive heat
- Low system voltage
- Damaged speaker or voice coil
Repeatedly turning the amplifier off and back on without correcting the problem is not a solution.
Set the Gain After Everything Is Connected
Do not set the amplifier’s gain before the rest of the system has been properly configured.
Once the head unit, signal processor, amplifier and subwoofer are connected, the gain should be adjusted to achieve the desired output without introducing unnecessary clipping.
The gain is not a bass-volume control.
Turning it up does not unlock hidden amplifier power. It changes how much input signal is required to drive the amplifier toward full output.
A sensible setup starts with the source level, confirms the signal is clean and then adjusts the amplifier gain accordingly.
Set the Low-Pass Filter for the Subwoofer
The low-pass filter prevents higher-frequency content from being sent unnecessarily to the subwoofer.
The exact setting depends on the rest of the audio system, enclosure and personal preference, but the objective is smooth integration rather than simply setting the highest available frequency.
You want the subwoofer to blend into the front stage rather than sound like a separate speaker sitting somewhere in the rear of the vehicle.
If you can clearly identify the exact location of the subwoofer because the crossover is poorly integrated, the system probably needs more tuning.
Use the Subsonic Filter With the Enclosure in Mind
The subsonic filter is particularly important with certain ported enclosures.
Below the enclosure’s tuning frequency, the port may no longer provide the same acoustic control over the subwoofer. Excessive low-frequency content can then cause unnecessary cone movement.
A correctly selected subsonic setting can help keep that excursion under control.
Do not simply turn the subsonic filter all the way up because you want “protection.” You can remove useful low-frequency information in the process.
The correct setting depends on the enclosure’s design and tuning frequency, which is another reason the amplifier cannot be selected independently from the subwoofer system.
Check Speaker Polarity Before Finalising the Installation
Speaker polarity is simple but easy to overlook.
The amplifier’s positive speaker output should connect to the subwoofer’s positive terminal, and negative should connect to negative according to the intended wiring configuration.
With multiple subwoofers or voice coils, incorrect polarity can cause the drivers to work against one another rather than together.
The result can be surprisingly weak bass despite having plenty of amplifier power.
If the system suddenly sounds thin after installation, check polarity before assuming the amplifier or subwoofer is defective.
Secure Every Connection
High-current systems do not tolerate loose connections well.
Before finishing the installation, inspect:
- Battery connection
- Main fuse holder
- Amplifier power terminal
- Amplifier ground terminal
- Speaker terminals
- Remote connection
- RCA connections
- Distribution blocks
- Chassis ground
The connection should be mechanically secure and free from exposed strands that could touch neighbouring terminals or metalwork.
Also protect cables wherever they pass through metal panels. Use appropriate grommets so vibration cannot slowly wear through the insulation.
A Proper Installation Should Look Boring
This is one of the best rules I can give you.
A good amplifier installation does not need to look complicated. It should look clean, deliberate and easy to troubleshoot.
The power cable should have a sensible route, the fuse should be accessible, signal cables should be organised, speaker wiring should be secure, the ground should be obvious and solid, and the amplifier should have enough room to cool itself.
If you open the trunk and see a collection of tangled cables with no obvious logic, that is not an advanced installation. It is simply a difficult one to diagnose later.
Installation Checklist Before You Power the System
Before switching the amplifier on for the first time, run through this checklist:
- Battery: Main power connection is secure.
- Fuse: Correct type and rating, installed close to the battery.
- Power cable: Correct gauge and protected where it passes through metal.
- Ground: Short, secure and attached to clean chassis metal.
- Remote: Correct turn-on connection.
- Speaker load: Final impedance has been calculated and is within the amplifier’s specification.
- Speaker wiring: Correct polarity and no exposed or damaged conductors.
- RCA cables: Fully seated and routed sensibly.
- Ventilation: Amplifier has adequate clearance.
- Gain: Not simply turned to maximum.
- Filters: Low-pass and subsonic settings suit the enclosure.
- Connections: All terminals have been checked before power-up.
The Real Installation Rule
The most reliable Class D monoblock installation is not the one with the thickest cable, biggest fuse or most expensive accessories. It is the one where every component is correctly matched to the next.
A 1,000W system still needs proper grounding and fuse protection. A 1,200W system still needs sensible cable routing. A 2,000W system needs considerably more attention to current demand, and a 3,000W setup leaves very little room for careless electrical planning.
Get the impedance right, protect the power cable, establish a proper ground, give the amplifier room to dissipate heat and tune the system instead of simply turning every control upward. That is what turns a powerful monoblock amplifier into a reliable car-audio installation rather than an expensive box of watts.
Subwoofer Compatibility Matrix: Match the Voice Coils, Enclosure and Final Impedance
Choosing the amplifier power is only half the job. The subwoofer’s voice-coil configuration, RMS rating, enclosure and final impedance determine whether that amplifier can actually be used properly.
A 1-ohm stable monoblock does not automatically belong with every 1-ohm subwoofer system, and a 3,000W amplifier does not automatically require a huge subwoofer. The useful match comes from putting the right power range, impedance and enclosure together.
Recommended Subwoofer Setup by Amplifier Power
There is no universal “correct” subwoofer size for each wattage tier. A 10-inch subwoofer can be built for more power than a poorly matched 12-inch model, and a 15-inch driver does not automatically need a 3,000W amplifier.
What matters is the subwoofer’s RMS power handling and the enclosure’s ability to support the intended output.
| Amplifier Tier | Sensible Subwoofer Match | Voice-Coil Consideration | Enclosure Direction | Real-World Use |
|---|---|---|---|---|
| 1,000W Class D | Roughly 750–1,000W RMS subwoofer system | Single or dual voice coil, depending on final impedance | Sealed for controlled response, ported for more output around the tuning range | Strong daily bass |
| 1,200W Class D | Roughly 900–1,200W RMS system | DVC can offer useful wiring flexibility | Sealed or correctly tuned ported enclosure | Daily system with extra headroom |
| 2,000W Class D | Roughly 1,500–2,000W RMS system | DVC configurations become particularly useful for achieving the desired load | Larger sealed or properly designed ported enclosure | High-output daily and enthusiast systems |
| 3,000W Class D | High-power subwoofer system genuinely rated for this level | Multiple voice coils or multiple subs may make impedance matching easier | Large, purpose-built ported enclosure is common in extreme-output systems | Maximum-output and SPL-oriented builds |
These are system-planning ranges, not hard rules. A manufacturer may recommend a different amplifier range for a particular subwoofer, and that recommendation should take priority over a generic wattage category.
Voice-Coil Configuration Matters More Than Subwoofer Diameter
When choosing a subwoofer for a monoblock amplifier, do not start with “10-inch, 12-inch or 15-inch.”
Start with the voice-coil configuration.
A subwoofer may use:
- Single voice coil (SVC)
- Dual voice coil (DVC)
- Different nominal impedance options for each voice coil
- Multiple subwoofers wired together
The voice-coil arrangement determines which final impedance loads are available.
That becomes especially important with a 1-ohm stable monoblock amplifier, because the amplifier’s output can be substantially different at 1 ohm, 2 ohms and 4 ohms.
The subwoofer should therefore be selected around both power handling and wiring possibilities.
Single Voice Coil vs Dual Voice Coil
A single voice-coil subwoofer is straightforward because there is only one coil to connect.
A dual voice-coil subwoofer gives you more wiring flexibility, but it does not automatically mean it is better.
For a DVC subwoofer, the coils can generally be wired in series or parallel, depending on the manufacturer’s specifications. Series wiring raises the total impedance, while parallel wiring lowers it.
That can make a DVC design useful when you are trying to achieve a particular final load.
For a system centred around a 1-ohm stable amplifier, this flexibility can be valuable, but you still need to calculate the final impedance before choosing the amplifier.
1-Ohm Amplifier and Subwoofer Pairing Matrix
The following is a practical way to think about the most common final loads.
| Final Subwoofer Load | Amplifier Requirement | What Changes | Best Reason to Use It |
|---|---|---|---|
| 4 ohms | Amplifier must be rated for 4Ω operation | Lower output, lower current demand | When the subwoofer configuration naturally produces 4Ω |
| 2 ohms | Amplifier must be rated for 2Ω operation | Moderate output and current demand | Useful compromise between power and electrical load |
| 1 ohm | Amplifier must be explicitly rated 1Ω stable | Highest output from many mono amplifiers, higher current demand | When the subwoofer and electrical system are built around it |
| Multiple subs | Depends on each driver’s impedance and wiring | Final load can change substantially | Useful when more cone area and output are required |
The important phrase here is final subwoofer load.
Two subwoofers do not automatically create a 1-ohm load. Their individual voice-coil impedances and wiring determine what the amplifier actually sees.
Common Multi-Subwoofer Configurations
Adding a second subwoofer changes the calculation significantly.
With multiple drivers, you need to consider both the impedance of each voice coil and whether the drivers are wired in series or parallel.
| Subwoofer Arrangement | Possible Result | What You Must Check |
|---|---|---|
| Single SVC subwoofer | Usually a straightforward final load | Coil impedance must match the amplifier’s usable range |
| Single DVC subwoofer | Multiple wiring possibilities | Calculate series and parallel configurations |
| Two SVC subwoofers | Final impedance depends on each coil and wiring | Both drivers should be compatible and wired consistently |
| Two DVC subwoofers | Several possible final loads | Calculate the complete circuit rather than assuming 1Ω |
| Multiple high-power subs | Potentially very low impedance | Amplifier stability and electrical demand become critical |
With multiple subwoofers, all drivers should also be properly matched in model, impedance and wiring configuration where possible. Mixing different drivers can create uneven output and different electrical behaviour.
How to Match a 1000W Amplifier to a Subwoofer
A 1,000W monoblock is a sensible choice for a subwoofer system where the total RMS power handling is in an appropriate range.
The important part is not finding a subwoofer with “1,000W” printed on the box and stopping there.
Check:
- Subwoofer RMS rating
- Recommended amplifier power range
- Voice-coil impedance
- SVC or DVC configuration
- Final impedance after wiring
- Enclosure type
- Enclosure volume requirements
- Amplifier RMS output at that final load
If the subwoofer is DVC, calculate the final load before deciding whether the amplifier will actually deliver its rated power.
A 1,000W amplifier at 1 ohm and the same amplifier at 2 ohms are not the same power configuration.
How to Match a 1200W Amplifier to a Subwoofer
The 1,200W tier gives you a little more headroom than the 1,000W class without automatically moving into the electrical demands of a 2,000W system.
This makes it a useful range for a strong daily setup where the subwoofer is genuinely capable of using the additional output.
The same rules apply:
Do not match 1,200W to a subwoofer simply because the amplifier says 1,200W.
Look at the amplifier’s RMS rating at the final impedance, then compare that with the subwoofer’s RMS handling and recommended amplifier range.
How to Match a 2000W Amplifier to a Subwoofer
At 2,000W, the subwoofer selection becomes considerably more important.
You are now dealing with a level of output where a suitable high-power driver, appropriate enclosure and properly planned electrical system are all part of the same decision.
A DVC subwoofer can be particularly useful here because its voice-coil configuration may allow you to reach the desired final impedance more easily.
But do not assume that two 1,000W subwoofers automatically make a perfect 2,000W system. Their individual impedance, wiring configuration, enclosure requirements and recommended amplifier range still need to line up.
How to Match a 3000W Amplifier to a Subwoofer
A 3,000W monoblock should be treated as a system-level purchase.
At this output level, I would want to know the following before buying the amplifier:
- What is the subwoofer’s actual RMS power handling?
- What final impedance will the subwoofer system present?
- Is the enclosure designed for that driver and power level?
- Can the electrical system support the amplifier?
- Is the amplifier rated for the intended impedance?
- Is sufficient cooling available?
- Is the system being built for daily use or maximum-output applications?
The Taramps HD 3000 in this article reaches 3,000W at 1 ohm, but that does not mean every 3,000W-capable subwoofer is automatically a suitable match.
The subwoofer has to be built for the job.
Sealed vs Ported Enclosures: Which Fits Each Power Tier?
The enclosure is often overlooked when people compare amplifiers, even though it has a major effect on the resulting bass.
A sealed enclosure generally offers a controlled and predictable response. It can be an excellent choice when the goal is tight integration and a smoother low-frequency response rather than extracting every possible decibel.
A ported enclosure can produce greater output around its tuning frequency and is commonly used when maximum efficiency and stronger low-frequency output are priorities. But it requires more careful design.
| Enclosure Type | Main Strength | What Requires Attention | Best General Match |
|---|---|---|---|
| Sealed | Controlled response and simpler design | Correct internal volume and adequate subwoofer excursion control | Daily systems focused on balanced bass |
| Ported | Greater output around tuning frequency | Port area, tuning frequency, internal volume and subsonic protection | Higher-output systems |
| SPL-focused ported | Maximum output over a targeted range | Very precise design and tuning | Extreme-output builds |
A larger amplifier does not automatically mean you need a ported enclosure. The choice should follow the subwoofer’s design and your listening goal.
Why Enclosure Volume Has to Match the Subwoofer
Do not build an enclosure around the amplifier’s wattage alone.
The subwoofer manufacturer will normally specify an appropriate enclosure volume or range. The enclosure should then be designed around the actual driver.
If the internal volume is wrong, the port is poorly sized or the tuning frequency is unsuitable, more amplifier power can simply make the problems more obvious.
This is especially important at 2,000W and 3,000W, where the subwoofer is moving significantly more air and the enclosure has to manage that energy properly.
1 Ohm, 2 Ohms or 4 Ohms: Which Should You Choose?
There is no universal winner.
1 ohm is attractive when you want to extract high output from a compatible monoblock and the electrical system can handle the increased current demand.
2 ohms can be a very sensible compromise. You may get less amplifier output than at 1 ohm, but current demand is generally lower.
4 ohms can make sense when the subwoofer configuration naturally presents that load or when the required output is modest.
The correct impedance is therefore the one that matches the subwoofer and amplifier without forcing either component outside its intended operating range.
The Impedance Matching Mistake to Avoid
Never look at a subwoofer’s advertised impedance and assume that is the final load.
A DVC subwoofer with two coils does not necessarily present the same impedance as either individual coil once the coils are connected.
Likewise, two subwoofers wired together do not automatically create half the impedance of one driver.
The final load must be calculated from the complete wiring configuration.
If you are unsure, calculate the wiring before purchasing the amplifier. That is considerably easier than discovering after installation that the amplifier cannot safely handle the load you created.
A Practical Compatibility Formula
When comparing a subwoofer and monoblock, think through the match in this order:
Subwoofer RMS → Voice-coil configuration → Wiring → Final impedance → Amplifier RMS at that impedance → Electrical capacity → Enclosure
That sequence prevents the most common mistake: choosing an amplifier first and trying to make the subwoofer fit afterward.
The Real-World Compatibility Rules
A few simple rules cover most of the decisions:
- 1,000W amplifier: pair it with a subwoofer system that can realistically use roughly that level of clean RMS power.
- 1,200W amplifier: useful when the subwoofer can take the additional output and you want a little more headroom.
- 2,000W amplifier: use with a genuinely high-power subwoofer system and a properly planned electrical installation.
- 3,000W amplifier: reserve for a system specifically engineered around that output.
- 1-ohm stable: means the amplifier can safely operate at 1 ohm under its specified conditions, not that every subwoofer should be wired to 1 ohm.
- DVC: provides wiring flexibility, but does not automatically make a subwoofer better.
- Ported enclosure: can provide greater output, but requires proper volume, port design and tuning.
- Sealed enclosure: can provide controlled bass without needing the same port design considerations.
- Multiple subs: require the complete voice-coil and wiring configuration to be calculated before amplifier selection.
The best compatibility match is not the combination with the biggest wattage numbers. It is the combination where the subwoofer’s RMS capability, final impedance, enclosure and amplifier output all agree with each other.
That is the point at which a Class D monoblock stops being just a powerful component and becomes part of a properly engineered subwoofer system.
FAQs About Class D Monoblock Amplifiers
Is a 1-ohm stable monoblock always the better choice for a Toyota Tundra or other high-power audio build?
Not necessarily. A 1-ohm stable monoblock gives you the option to run a 1-ohm final load, but that does not make 1 ohm automatically better for every system. The real question is whether your subwoofer’s voice-coil configuration can produce that load and whether the amplifier, wiring and charging system can support the resulting current demand.
For a Toyota Tundra or any other vehicle, I would decide the impedance from the subwoofer backward, not from the amplifier forward. Check the voice coils, calculate the final load, then look at the amplifier’s RMS output at that exact impedance. If the subwoofer works better at 2 ohms and the amplifier produces enough clean power there, forcing it down to 1 ohm can add electrical stress without giving you a meaningful benefit.
The useful rule is simple: 1-ohm stability is a capability, not a target.
Would a 2,000W monoblock actually sound better than a 1,200W amplifier in a Toyota Tundra?
It can produce more output, but more wattage does not automatically mean better-sounding bass. The difference becomes worthwhile only when the subwoofer, enclosure and electrical system can actually use the additional power.
The jump from 1,200W to 2,000W is roughly a 67% increase in amplifier power, but perceived loudness does not increase by 67%. In practice, the larger amplifier gives the system more output potential and headroom. Whether you hear a worthwhile difference depends heavily on the subwoofer’s efficiency, enclosure design and how much power the system was already using.
For a properly built high-output system, 2,000W can make the bass feel substantially more physical. For an ordinary daily setup with a subwoofer that is already well matched to 1,200W, spending more on amplifier power may be a worse upgrade than improving the enclosure, tuning or electrical stability.
If my subwoofer is rated at 1,000W RMS, should I buy a 1,000W monoblock or leave headroom?
I would not treat 1,000W RMS as a mathematical speed limit. A subwoofer’s RMS rating is a useful reference for continuous thermal power handling, but the correct amplifier choice also depends on the manufacturer’s recommended amplifier range, final impedance, enclosure and how the system will be used.
A little additional amplifier capability can be perfectly reasonable when the gain is set correctly and the subwoofer is capable of handling the resulting output. The mistake is assuming that a larger amplifier must be run at full power simply because it is installed.
Before choosing, check these four things:
- Subwoofer RMS rating
- Recommended amplifier power range
- Final impedance
- Amplifier RMS output at that impedance
Real talk: I would rather run a well-matched 1,000W amplifier cleanly than buy a 2,000W unit and spend the installation fighting voltage drop, excessive heat or an under-rated subwoofer.
Why can a 3,000W Class D monoblock be the wrong upgrade even when I want deeper bass?
Because amplifier wattage does not determine how deep a subwoofer can play. Low-frequency extension is heavily influenced by the subwoofer’s design and the enclosure, particularly its volume, alignment and tuning.
A 3,000W amplifier can give a compatible subwoofer substantially more output capability, but it cannot turn an unsuitable enclosure into a deep-bass enclosure. If the enclosure is badly designed, poorly tuned or unsuitable for the driver, adding another 1,000 watts can simply make the weaknesses more obvious.
There is another issue that gets ignored in a lot of amplifier buying guides: electrical headroom. A 3,000W system has a much larger appetite for current than a 1,000W system. If voltage falls significantly when the bass hits, the amplifier cannot deliver its advertised performance regardless of how impressive the wattage looks on the box.
For a 3,000W build, I would want the complete system planned together:
- Subwoofer and enclosure
- Final impedance
- Amplifier RMS output
- Power and ground wiring
- Fuse arrangement
- Battery and alternator capacity
- Thermal management
- Gain and filter setup
That is why the Taramps HD 3000 is not automatically the best amplifier in this article simply because it has the highest power rating. It is the best fit only when the rest of the system can actually justify 3,000 watts.
What is the most important specification to compare when choosing between 1,000W, 1,200W, 2,000W and 3,000W monoblock amplifiers?
For this type of purchase, I would start with RMS output at your actual final impedance, not peak wattage, maximum wattage or the number printed largest on the amplifier.
A useful comparison looks like this:
| What to Compare | Why It Matters |
|---|---|
| RMS power at final impedance | Tells you how much usable power the amplifier can provide to your actual load |
| Minimum supported impedance | Prevents an unsafe speaker load |
| Subwoofer RMS handling | Determines whether the driver can realistically use the amplifier |
| Electrical requirements | Shows whether the vehicle can supply the required current |
| Filtering and gain controls | Determines how accurately the subwoofer can be integrated and tuned |
| Protection circuitry | Helps protect against thermal, current and wiring faults |
| Physical and thermal design | Matters when the amplifier is installed in a confined space |
There is also a practical hierarchy I would use: final impedance first, RMS power second, electrical capacity third, tuning controls fourth. Once those four agree, brand, appearance and extra features become much less important.
And if two amplifiers appear similar on paper, look beyond the headline wattage. A 1,200W amplifier with sensible filtering, stable operation and an installation your vehicle can comfortably support may be a far better purchase than a 2,000W amplifier that forces compromises elsewhere.
The honest answer is not “buy the most powerful one.” It is “buy the one your entire subwoofer system can use properly.”
Final Verdict: Choose the Monoblock That Your System Can Actually Use
After comparing these amplifiers by RMS output, impedance capability, controls, installation demands, thermal behaviour and real-world system matching, one thing becomes clear: there is no honest reason to call the highest-wattage amplifier the winner for everyone.
The ARC Audio X2 1100.1 makes the strongest case when you want a more refined 1,100W-class system and care about the engineering behind the amplifier rather than simply chasing a bigger number. The Rockford Fosgate R2-1200X1 sits in a particularly sensible zone for a daily system, while the CT Sounds CT-1000.1D makes more sense when installation space and practical 1,000W output are important.
Move into serious high-output territory and the decision changes. The Sundown SAE-2000D V.3 and Skar RP-2000.1D are better suited to systems where 2,000W is genuinely required, not simply desired on paper. The Taramps HD 3000 goes further still, but its 3,000W capability only becomes an advantage when the subwoofer, enclosure and electrical system have all been designed around that level of output.
The Real Buying Decision
Before you click buy, forget the amplifier’s biggest number for a moment and answer these questions:
- What is my subwoofer’s actual RMS rating?
- What will its final impedance be after wiring?
- How much RMS power does the amplifier produce at that exact load?
- Can my battery, alternator, wiring and fuse arrangement support it?
- Is the enclosure designed for the subwoofer and intended power?
- Do I have enough space and airflow around the amplifier?
- Am I building for daily listening, strong street bass or maximum-output performance?
If those answers line up, you are already much closer to the right amplifier.
The biggest mistake in car audio is buying components individually and hoping they work together. A monoblock amplifier, subwoofer, enclosure and electrical system are not four separate purchases. They are one system.
Our Bottom Line
If your system needs around 1,000W, do not feel pressured into buying 2,000W or 3,000W. If you genuinely need 2,000W, make sure the electrical system is ready before the amplifier arrives. And if you are considering 3,000W, understand that you are no longer making a simple amplifier upgrade; you are planning a high-output audio system.
Most importantly, do not chase 1 ohm just because the amplifier is 1-ohm stable. Calculate the subwoofer’s final impedance first, then choose the amplifier around that load.
That is the real difference between an amplifier that looks impressive in a specification sheet and one that performs properly once it is installed. Buy the power your subwoofer can use, build the electrical system that power requires, tune it correctly, and let the whole system—not the wattage badge—decide how good the bass actually feels.
Also Check:


