

Best Sounding 6.5″ Component Speakers (2026): Rich Sound, Strong Midbass & Smarter Tuning
If your car still has its factory 6.5-inch speakers, you do not necessarily need a huge amplifier or an expensive head unit to hear a worthwhile difference. A properly matched component set separates the midbass driver and tweeter, giving vocals more definition, instruments a more convincing position, and high frequencies a cleaner path toward the dash or upper door. The Morel Tempo Ultra 602 MKII, with 130W RMS power handling, 90dB sensitivity and a 1.1-inch soft-dome tweeter, takes that approach with a smooth, refined character, while the HERTZ Mille Pro MPK 1653 adds 110W RMS handling, 92dB sensitivity and a 29mm Tetolon Fiber tweeter for a more energetic front stage. That difference is noticeable whether you are upgrading an older Civic, Camry, Silverado, Mustang, or a newer vehicle with an underwhelming factory system.
For this guide, I focused on what actually matters when choosing the best sounding 6.5″ component speakers: RMS power instead of inflated peak numbers, tweeter design, crossover quality, sensitivity, impedance, woofer construction, mounting depth, and how naturally each set works with a factory radio or aftermarket amplifier. The six systems below are not simply the most expensive names available. Each brings a different strength to a serious car-audio upgrade, whether you want smoother vocals and midbass, higher efficiency, more output, a more refined soundstage, or greater tuning flexibility.
There is one thing I would check before buying any of them: vehicle fitment. “6.5-inch” does not guarantee a direct fit in every car; newer models can use shallow baskets, unusual mounting patterns, factory brackets, proprietary connectors, or limited window clearance. Older vehicles may be easier to work with, but they can still require adapter rings, spacers and wiring harnesses. Check your exact make, model, model year, factory speaker size, mounting depth and window clearance before ordering. That small bit of homework can save you from buying an excellent component system that simply does not fit the door properly.
Best Sounding 6.5″ Component Car Speakers (2026) for Bass, Detail and Clean Power
#1. Morel Tempo Ultra 602 MKII
Best Sounding 6.5″ Component Speakers for Sound Quality, Smooth Midbass, Natural Vocals, 130W RMS Power and a Refined Front Stage
#2. HERTZ Mille Pro MPK 1653
Best Sounding 6.5″ Component Car Speakers for Detailed Sound, 92dB Sensitivity, Strong Dynamics, Fast Midbass and Amplifier-Powered Systems
#3. Focal PS 165 FE Flax EVO
#3. Focal PS 165 FE Flax EVO
Best Sounding 6.5″ Component Speakers for Musical Detail, Flax-Fibre Midbass, Natural Vocals, Controlled Highs and Wide Front-Stage Imaging
#4. Rockford Fosgate T2652-S Power
Best Sounding 6.5″ Component Speakers for Bass, Punchy Midbass, 100W RMS Power, Crisp Highs and High-Output Amplified Car Audio
#5. Alpine R2-S65C R-Series
Best Sounding 6.5″ Component Car Speakers for High-Resolution Detail, Glass-Fibre Woofer, Precise Imaging, Flexible Tweeter Mounting and Amplifier Use
#6. Infinity Kappa 60CSX
Best Sounding 6.5″ Component Car Speakers for Strong Midbass, 96dB Sensitivity, Efficient Output, Smooth Textile Highs and Factory Stereo Upgrades
Must Check: Best 6.5″ Coaxial Car Speakers
Expert Tip
Real talk: 6.5″ component speakers choose karte waqt sirf wattage, price ya brand name dekhna sabse badi mistake hai. A speaker with a huge peak rating can still sound average if its tweeter, crossover, sensitivity and installation do not suit the car. For a genuinely good-sounding front stage, what matters is how the woofer, tweeter and crossover work together once the speakers are actually installed in the doors.
And do not confuse a low frequency specification with real bass. A 6.5″ door speaker is still a door speaker. For this list, clean midbass, natural vocals, controlled highs and proper integration matter much more than chasing impressive numbers on a specification sheet.
How We Choose These 6.5″ Component Speakers
We selected these six by looking at the complete sound package, not by simply ranking the biggest wattage or most recognisable brand. RMS power, sensitivity, impedance, woofer construction, tweeter design, crossover quality, mounting depth and the way each system is likely to behave in a real car all mattered.
Sound character was equally important. The Morel Tempo Ultra 602 MKII brings 130W RMS handling, 90dB sensitivity and a 1.1-inch soft-dome tweeter, giving it a strong case for listeners who want smooth vocals, controlled midbass and a refined front stage. The HERTZ Mille Pro MPK 1653 combines 110W RMS with 92dB sensitivity and a Tetolon Fiber tweeter, making it particularly appealing when you want efficiency with a more lively presentation.
The Focal PS 165 FE Flax EVO earns its place for its Flax-fibre woofer and distinctive inverted-dome tweeter, while the Rockford Fosgate T2652-S Power leans towards punch, output and a more energetic character. The Alpine R2-S65C brings detailed reproduction and flexible tweeter positioning, while the Infinity Kappa 60CSX stands out for its 96dB sensitivity, adjustable tweeter design and 2.5-ohm architecture.
We also did not treat frequency-response figures as proof of better sound. A published 35Hz or 40Hz figure does not mean a door speaker will deliver subwoofer-level bass, just as a 35kHz or 40kHz upper limit does not automatically make a tweeter superior.
Finally, fitment and system matching are part of sound quality. Mounting depth, door clearance, tweeter position, crossover installation and amplifier compatibility can all change what you actually hear from the same speaker.
The goal is simple: every speaker here needs a genuine reason to be included. The ranking is based on what each set actually brings to a car-audio system, not on whichever specification looks biggest on the product page.
#1. Morel Tempo Ultra 602 MKII
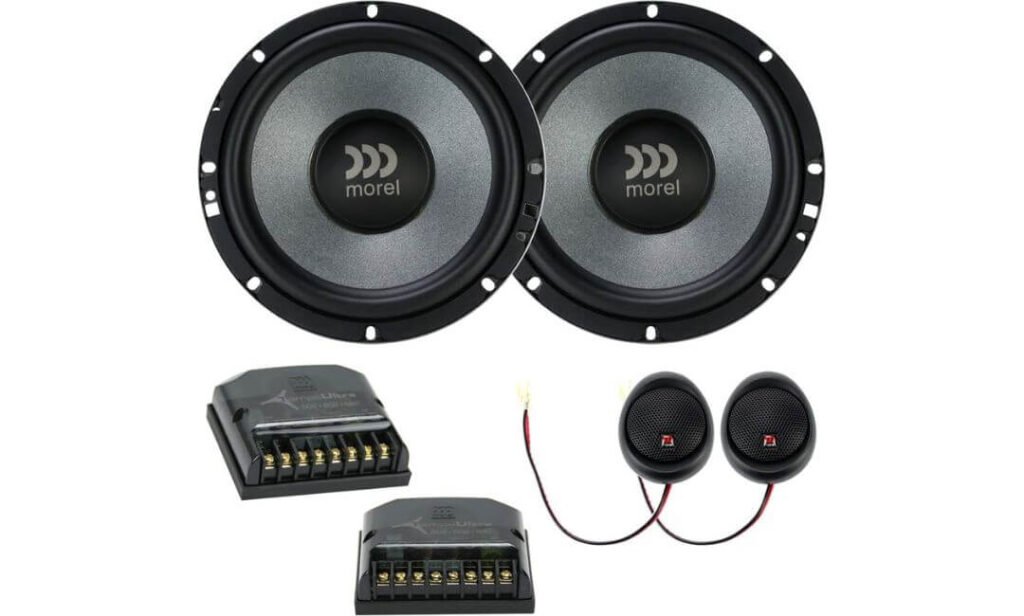
Quick Specs:
- Speaker size: 6-1/2-inch 2-way component system
- Power handling: 130W RMS / 250W peak per speaker
- System power: 260W RMS / 500W peak per pair
- Impedance: 4 ohms
- Sensitivity: 90dB
- Frequency response: 55Hz–22kHz
- Tweeter: 1.1-inch soft-dome
- Cone: Treated paper composite
- Voice coil: Oversized 1.5-inch
- Crossover: MXR Direct Crossover
- Mounting depth: 2.56 inches (65mm)
The first thing I would look at here is not the 500-watt peak number on the box. The useful figure is the 130W RMS per speaker, because that tells you this is built for considerably more than a basic factory-speaker replacement. With a 90dB sensitivity and 4-ohm impedance, it has the efficiency and load characteristics that make sense in a properly matched car-audio system, while the 1.5-inch voice coil gives the midbass driver some serious thermal headroom.
Then there is the part you actually hear. The treated paper composite cone is a smart choice for this type of system because it keeps the presentation natural rather than making every vocal and cymbal sound artificially bright. The 1.1-inch soft-dome tweeter is separately mounted, so you can position the high-frequency driver where it makes more sense acoustically instead of leaving everything trapped down in the door.
The MXR Direct Crossover is another reason this feels like a proper component upgrade rather than simply a more expensive door speaker. It handles the separation between the woofer and tweeter, while the 55Hz–22kHz response gives the set enough range to handle meaningful midbass and clean upper frequencies. Just remember that 55Hz is not a substitute for a dedicated subwoofer if you want genuine low-end impact.
What Makes It Easy to Recommend
- 130W RMS per speaker gives you plenty of room for a serious amplifier without immediately pushing the drivers beyond their intended power range.
- The 90dB sensitivity is useful when building a system where you want strong output without wasting amplifier power.
- The soft-dome tweeter is the component I would pay attention to if you are sensitive to bright or tiring highs.
- The 2.56-inch mounting depth is reasonable for many 6.5-inch door locations, although the actual vehicle bracket and window clearance still need checking.
- The separate woofer/tweeter arrangement gives you much more freedom to build a convincing front soundstage than a conventional coaxial speaker.
The One Thing I’d Check Before Ordering
The mounting depth and factory opening deserve a proper measurement before buying. At 65mm deep, this is not an ultra-shallow speaker, and some newer doors have surprisingly little clearance behind the factory driver. Depending on the car, you may need an adapter bracket, speaker spacer, wiring harness or tweeter mounting solution rather than a completely direct installation.
Why This Set Works as a Front-Stage Upgrade
What I like about this particular configuration is that it does not depend on one exaggerated specification to make its case. You have a large voice coil, efficient 90dB sensitivity, separate 1.1-inch tweeter, dedicated crossover and a 6.5-inch treated-paper woofer all working toward the same goal: making the front seats sound more complete.
In an older car with basic factory speakers, the difference should be most noticeable in vocals, midrange weight and stereo positioning. In a newer car with a decent factory head unit, I would be more careful about the amplifier and factory signal integration rather than assuming the speakers alone will magically transform the system.
The Insider Pro-Tip
If you are putting these into a Honda Civic, Toyota Camry, Ford Mustang, Chevrolet Silverado or another vehicle with a factory 6.5-inch opening, don’t buy the speaker based on diameter alone. Measure the basket depth, mounting-hole pattern and window clearance first. A simple adapter ring can solve the mounting pattern, but it cannot create extra space behind the woofer.
And if you plan to use an amplifier, I would rather see you run a clean, properly matched 4-ohm channel than chase the biggest wattage figure you can find. This set has enough power-handling capability that a sensible amplifier, solid installation and careful tweeter positioning can matter more than another 100 watts on paper.
#2. HERTZ Mille Pro MPK 1653
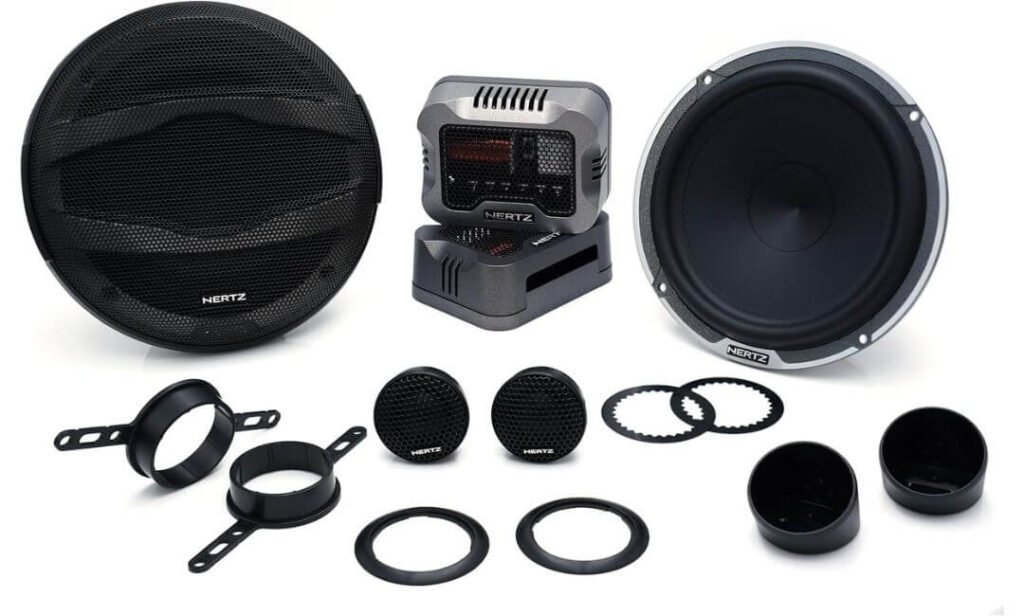
Quick Specs:
- Speaker size: 6.5-inch 2-way component system
- Power handling: 110W RMS / 220W peak
- Impedance: 4 ohms
- Sensitivity: 92dB SPL
- Frequency response: 40Hz–22.5kHz
- Tweeter: 29mm Tetolon Fiber soft dome
- Woofer technology: V-Cone
- Voice coil: 25mm pure copper
- Surround: Boundary-Free rubber
- Crossover: MPCX 2.3 external crossover
- Installation: Low-mounting-depth design
With the MPK 1653, the number I would pay attention to first is 92dB sensitivity. That is unusually useful in a 6.5-inch component setup because it means the speakers can produce strong output without demanding enormous amplifier power just to wake them up. Add the 110W RMS handling and 4-ohm load, and you have a set that can work sensibly in a moderate system while still leaving room for a proper aftermarket amplifier.
The woofer is where Hertz gets more interesting. Its V-Cone design is intended to improve dispersion and maintain controlled response across the midrange, while the Boundary-Free rubber surround lets the cone move without making the suspension feel like an afterthought. The result is the kind of front-stage response that suits vocals, guitars and drums particularly well—you get more of the recording instead of simply getting more volume.
Then there is the 29mm Tetolon Fiber soft-dome tweeter. This is not the sort of tweeter I would choose simply because the specification sheet looks impressive; its real appeal is the way the material is used to deliver detailed highs without making every recording feel sharp. The included MPCX 2.3 external crossover also gives you a proper way to divide the signal between the woofer and tweeter rather than leaving that job to a basic factory setup.
What We Like About This 6.5-Inch Component System
- 92dB sensitivity is a genuine advantage for getting strong output from sensible amplifier power.
- The 40Hz low-end extension gives the woofer useful range before a subwoofer needs to take over.
- The Tetolon Fiber tweeter is a particularly good fit if you want detail without an aggressively bright presentation.
- The pure copper 25mm voice coil is a serious component choice for efficient power transfer and sustained operation.
- The low-mounting-depth design makes this more interesting for vehicles where door clearance is limited.
One Installation Detail You Should Not Ignore
The low-depth design makes this easier to package than many performance-oriented 6.5-inch sets, but low mounting depth does not mean universal direct fitment. Your vehicle may still need a speaker adapter, mounting bracket, wiring harness or tweeter mounting hardware. Measure the factory opening and the space behind it before ordering, especially on newer doors with unusually shallow speaker cavities.
Where This Set Makes the Most Sense
This is the set I would look toward when the priority is getting plenty of output without making the system unnecessarily difficult to drive. The combination of 92dB sensitivity, 110W RMS handling, V-Cone woofer and separate Tetolon tweeter gives it a noticeably different personality from a component set that relies mainly on brute-force amplifier power.
It also has a useful advantage for real-world builds: the external crossover gives you another layer of control over the front stage. If the tweeter ends up sounding too forward in your particular installation, its level adjustment can help you bring the presentation back into balance rather than simply accepting whatever the factory speaker location gives you.
The Insider Pro-Tip
If these are going into a Toyota Tundra, Subaru Crosstrek, Honda, Ford or another vehicle where the factory speaker sits deep inside the door, take advantage of the low-depth architecture—but still measure the actual clearance around the window mechanism. A speaker can technically fit the factory hole and still interfere with the glass or inner door panel.
For the best result, spend as much attention on tweeter positioning and crossover placement as you do on the speaker itself. Put the tweeter somewhere that helps pull vocals toward the front of the cabin rather than simply hiding it down in the lower door. That is where a good 6.5-inch component system starts sounding like a genuine front-stage upgrade instead of just a louder replacement speaker.
#3. Focal PS 165 FE Flax EVO
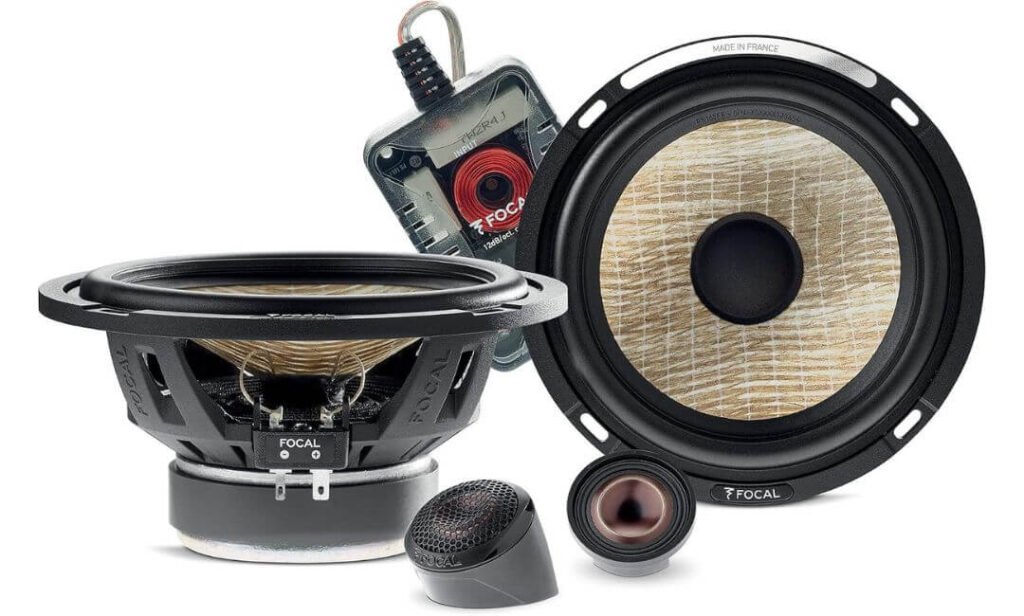
Quick Specs:
- Speaker size: 6.5-inch 2-way component system
- Power handling: 70W RMS / 140W max
- Impedance: 4 ohms
- Frequency response: 60Hz–20kHz
- Woofer cone: Flax fibre
- Tweeter: TAM aluminium/magnesium inverted dome
- Tweeter profile: M-shaped inverted dome
- Surround: TMD Tuned Mass Damper
- Crossover: External 12dB/octave at 3kHz
- Mounting depth: 2.75 inches
- Design: Separate woofer and tweeter
- Origin: Made in France
The interesting thing about this set is that Flax is not being used as a marketing decoration. Focal has been developing its Flax cone technology in France since 2013, and the reason it works so well in a car is fairly simple: the material is designed to keep the midrange natural while giving the woofer enough control to reproduce bass without making everything sound thick or coloured.
That becomes noticeable with the kind of music where vocals sit right in the middle of the mix. Instead of pushing the upper frequencies forward just to create the impression of detail, the Flax woofer and TAM tweeter are designed to keep the presentation balanced. The result is a sound that can feel more open and believable from the driver’s seat, particularly when the speakers are mounted low in the doors.
The TAM inverted-dome tweeter is probably the most important feature for an in-car installation. Its wide-angle diffusion is designed with the unavoidable off-axis listening position of a car in mind, while the aluminium/magnesium M-profile helps reproduce fine treble detail. Add Focal’s TMD surround and the external 3kHz crossover, and this is a much more carefully engineered front-stage system than simply replacing the factory 6.5-inch drivers.
What We Like About This 6.5-Inch Component Setup
- The Flax fibre cone gives the system a naturally textured midrange rather than an overly processed character.
- The TAM tweeter’s wide dispersion is particularly useful when the left and right speakers are not directly facing the occupants.
- TMD surround technology helps keep cone movement controlled when the woofer is working harder.
- The external 12dB/octave crossover at 3kHz gives the tweeter and woofer clearly defined jobs.
- At 70W RMS, it is easier to integrate into a moderate-power system than some of the much higher-rated sets in this list.
The Reality Behind the 70W Rating
This is where I would set expectations correctly. 70W RMS per speaker is not a weakness, but it does mean this is not the set I would choose simply because you want to throw a huge amplifier at your front doors. Its appeal is refinement, imaging and tonal balance rather than chasing maximum output.
The 2.75-inch mounting depth is also worth checking before installation. It is reasonably manageable for many factory 6.5-inch locations, but every door is different. Depending on the vehicle, you may need an adapter bracket or spacer, and the separate tweeter will require a suitable mounting position.
Where This One Makes the Most Sense
If your idea of a good upgrade is “I want the music to sound more natural,” this is where the Focal makes its case. The combination of Flax, TMD and the TAM tweeter gives the front stage a character that is noticeably different from a system designed primarily around maximum volume.
It is especially interesting for vehicles where the factory tweeters are poorly positioned or where the door speakers sit well below ear level. Because the tweeter can be mounted separately and the TAM design spreads high frequencies broadly, you have more freedom to create a wider, better-focused soundstage rather than hearing everything originate from your knees.
The Insider Pro-Tip
Don’t judge this set from the driver’s door position alone during installation. Spend time aiming the TAM tweeters and listen from both front seats before permanently fixing them. A small change in angle can alter how the centre image and vocals appear in the cabin.
And if you’re pairing the set with an amplifier or DSP, resist the temptation to immediately boost the treble. The wide-dispersion tweeter and natural Flax midrange are already doing a lot of the work. Get the crossover, polarity and tweeter position right first; only then decide whether the system actually needs EQ.
#4. Rockford Fosgate T2652-S Power
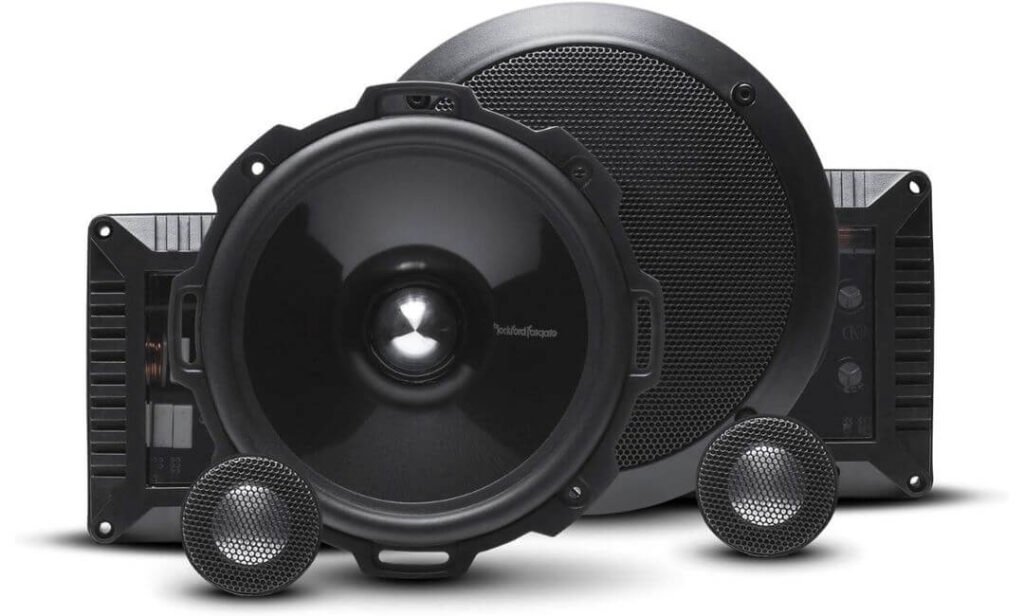
Quick Specs:
- Speaker size: 6.5-inch 2-way component system
- Power handling: 100W RMS / 200W max
- Impedance: 4 ohms
- Frequency response: 55Hz–22kHz
- Woofer cone: Carbon-fiber reinforced
- Tweeter: Aluminum-dome Neo-tweeter
- Phase plug: Billet aluminum
- Surround: VAST
- Crossover: External audiophile-grade crossover
- Mounting depth: 2.51 inches
- Basket: Flex Fit design
- Tweeter mounting: Flush and angled surface options
- System: Separate woofer and tweeter
Some component speakers are built around subtle refinement. The T2652-S takes a different route. Its 100W RMS rating, carbon-fiber reinforced woofer and aluminum-dome Neo-tweeter make it much more at home in a system where you actually intend to use the amplifier instead of keeping the volume at background-listening levels.
The woofer’s VAST surround is one of the more meaningful details here. By increasing the effective cone area, Rockford gives the 6.5-inch driver more room to move air, which is useful when you’re asking a door speaker to deliver convincing midbass. You still should not expect a 6.5-inch woofer to replace a dedicated subwoofer, but for kick drums, bass guitar and the upper part of the low-frequency range, this design is aimed at keeping things energetic.
At the top end, the aluminum-dome Neo-tweeter gives the system its more aggressive personality. It is designed to deliver crisp, immediate highs, while the billet aluminum phase plug helps with thermal management around the driver. The external crossover then separates the frequency bands, giving you much more control over the finished sound than you get from a conventional coaxial installation.
What We Like About This 6.5-Inch Component System
- 100W RMS per speaker makes this a natural match for a properly powered aftermarket system.
- The VAST surround gives the woofer more effective radiating area for stronger midbass.
- The aluminum-dome Neo-tweeter delivers the crisp top-end character Rockford systems are known for.
- Flex Fit basket construction can make installation easier when the factory mounting pattern is not perfectly cooperative.
- The flush and angled tweeter mounts give you useful freedom when building the front soundstage.
The Trade-Off I’d Keep in Mind
The same aluminum-dome tweeter that gives this set its energetic top end may not be everyone’s idea of relaxed listening. If you prefer a very warm, laid-back presentation, the Rockford character can feel more forward than something like the Morel. That is not a flaw—it is simply a different tuning philosophy.
Where This Set Makes the Most Sense
This is a particularly good fit for someone who says, “I want my front speakers to keep up when I turn the system up.” The 100W RMS handling, stiff reinforced woofer and high-output tweeter give it enough authority to make sense in a genuinely amplified car-audio setup.
The 2.51-inch mounting depth is also useful from an installation perspective. It is not an ultra-shallow driver, but it is compact enough to work in many factory-style door locations. Still, check the exact depth behind your vehicle’s speaker opening before ordering—window tracks and inner door structures are where otherwise straightforward installations can become complicated.
The Insider Pro-Tip
If you’re installing these in something like a Subaru Crosstrek, Ford Mustang, Chevrolet Silverado or another daily driver with a factory 6.5-inch opening, don’t automatically aim the tweeters directly at your ears. Start with the included angled or flush options and listen for where vocals lock into the centre of the windshield.
Also, don’t let the 200W max figure dictate your amplifier choice. The useful number is 100W RMS, and a clean amplifier matched around that range is far more valuable than chasing a huge peak-power specification. Get the crossover, gain and tweeter position right and this set can deliver the loud, detailed front stage it was designed for without turning the system harsh.
#5. Alpine R2-S65C R-Series
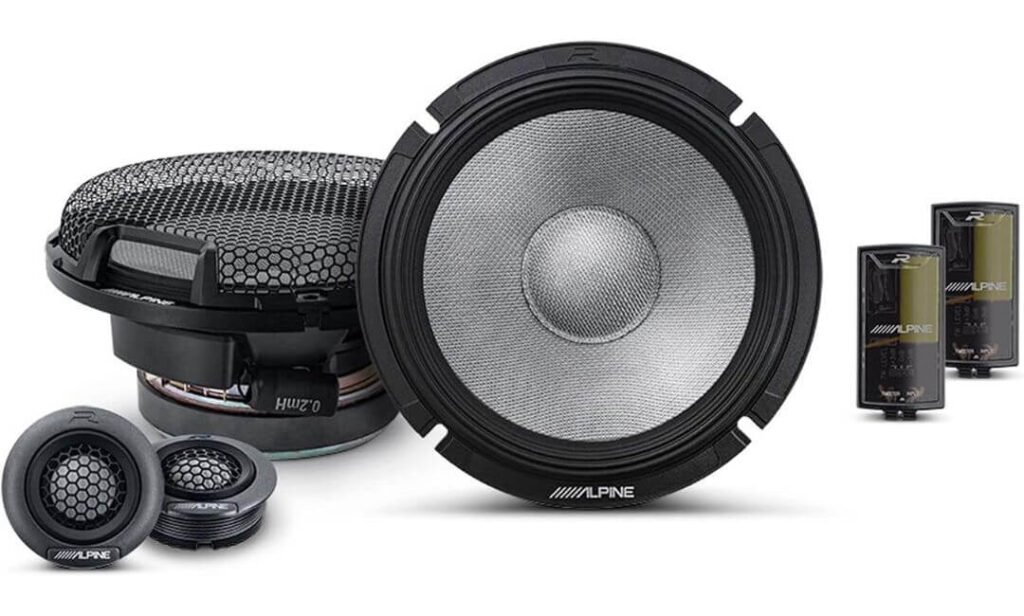
Quick Specs:
- Speaker size: 6.5-inch 2-way component system
- Power handling: 100W RMS / 300W peak
- Impedance: 4 ohms
- Sensitivity: 88dB
- Frequency response: 65Hz–40kHz
- Woofer: 16.5cm glass-fiber reinforced cone
- Tweeter: 4.3cm magnesium hard-dome
- Surround: HAMR
- Basket: Composite
- Crossover: External high-pass network
- Mounting depth: 6.3cm
- Woofer cutout: 13.5cm
- Tweeter mounting: Flush, angled surface and on-dash options
The R2-S65C is interesting because Alpine did not simply make another 6.5-inch woofer and put a fancy tweeter beside it. The woofer uses a glass-fiber reinforced cone, which gives it the stiffness needed for quick movement without making the driver excessively heavy. In real listening, that kind of construction is valuable when you want drums, guitar attacks and vocal transitions to sound quick and well-defined rather than slightly blurred together.
The other half of the equation is the 4.3cm magnesium hard-dome tweeter. Its headline specification reaches 40kHz, but I would not buy this set because of that number alone—human hearing does not extend anywhere close to 40kHz. The more useful takeaway is the tweeter’s ability to reproduce the audible treble range cleanly and with plenty of headroom, while the separate mounting lets you move the high-frequency source away from the lower door.
Installation is another area where this set gets practical. The tweeter’s frame and trim ring can be removed to reduce its overall footprint, and Alpine provides multiple mounting approaches. The 6.3cm mounting depth is also reasonable for many door applications. Still, treat that as a starting point rather than a universal fitment guarantee because every vehicle’s inner door structure is different.
What We Like About This 6.5-Inch Component System
- The glass-fiber woofer gives the system a quick, controlled character that suits detailed music particularly well.
- The magnesium hard-dome tweeter delivers crisp upper-frequency information without relying on a soft-dome design.
- HAMR surround technology allows substantial cone movement, helping the 6.5-inch woofer contribute useful midbass.
- The multiple tweeter mounting options make it easier to build a convincing front soundstage in different cabins.
- 100W RMS handling gives you plenty of room to pair the set with a quality aftermarket amplifier.
Don’t Chase the 40kHz Number
The 40kHz frequency response looks impressive on a specification sheet, but it is not the reason I would choose this Alpine. The useful benefit is the tweeter’s clean, extended response within the frequencies you can actually hear. The bigger question is whether your installation, amplifier and source are good enough to take advantage of it.
With 88dB sensitivity, this set can work in a variety of systems, but I would favour an aftermarket amplifier if you are buying it specifically for its performance rather than simply replacing blown factory speakers.
Where This Set Fits Best
The R2-S65C makes sense for someone who wants a fast, crisp and modern-sounding front stage without jumping into Alpine’s more expensive PRO-level construction. The composite basket helps keep the price more approachable, while the glass-fiber woofer and magnesium tweeter still give the system a serious performance identity.
It is also a good option for a daily-driven car where you want flexibility. You can start with a conventional amplifier and later add a DSP when you want to fine-tune the tweeter level, imaging and crossover points to the cabin rather than replacing the speakers again.
The Insider Pro-Tip
If you are fitting these into a Honda Civic, Toyota Camry, Ford Mustang, Subaru Crosstrek or another vehicle using a 6.5-inch-class door opening, check the 13.5cm cutout and 6.3cm mounting depth against the actual factory location before ordering. Adapter brackets are often the easy part; window clearance is what catches people out.
For the best result, take advantage of Alpine’s separate tweeter mounting instead of automatically placing it wherever the factory tweeter was. Aim for a coherent centre image first and maximum brightness second. Once the vocals sound anchored in front of you, the rest of the system usually needs far less EQ to sound right.
#6. Infinity Kappa 60CSX
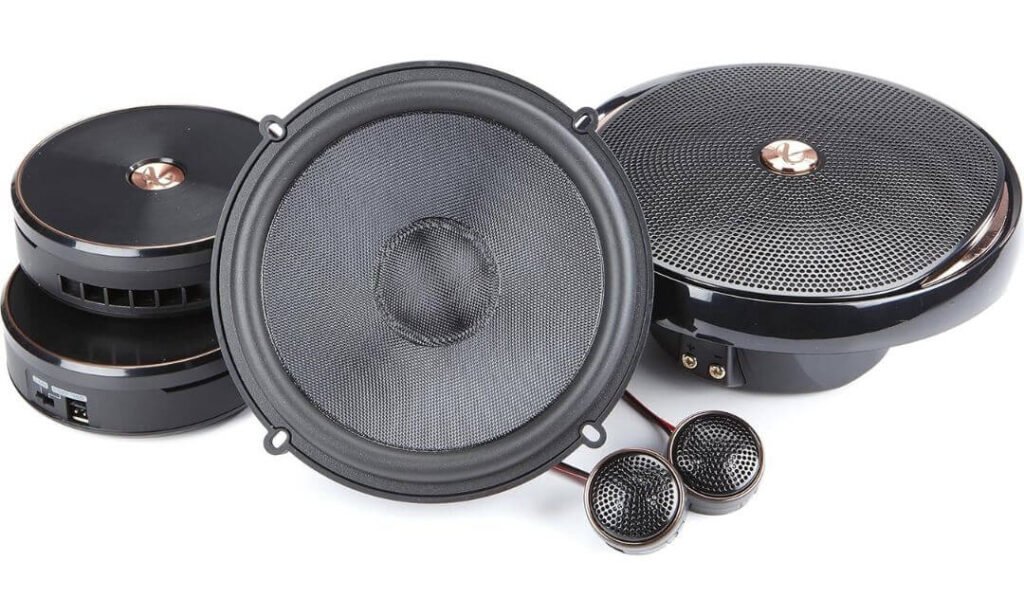
Quick Specs:
- Speaker size: 6.5-inch 2-way component system
- Power handling: 100W RMS / 300W peak
- Impedance architecture: 2.5-ohm SLI design
- Sensitivity: 96dB @ 2.83V/1m
- Frequency response: 35Hz–35kHz
- Woofer: Plus One glass-fiber cone
- Tweeter: Edge-driven textile dome
- Tweeter mounting: UniPivot adjustable design
- Crossover: External inline crossover with tweeter adjustment
- Voice coil former: Aluminum
- Basket: Stamped steel
- Suspension: Dual spider configuration
The 96dB sensitivity is the first specification that makes this set worth a closer look. That is a genuinely high-efficiency design for a 6.5-inch component system, so you do not need to throw huge amplifier power at it just to get convincing output. For someone upgrading a factory system or working with an amplifier that has limited headroom, that efficiency can be more useful than an impressive peak-power number.
Infinity also takes an unusual route with the 2.5-ohm SLI architecture. The lower impedance is intended to let the amplifier deliver more available power to the speakers, while the 100W RMS rating gives the woofer enough headroom for a serious daily-driver setup. This is the kind of specification where amplifier compatibility matters, though, so I would check the amplifier’s supported load before treating the low impedance as an automatic advantage.
Why the Kappa Woofer Is More Interesting Than It Looks
The Plus One glass-fiber cone is designed to provide more effective cone area while remaining light and stiff. That combination is useful in a door-mounted 6.5-inch driver because the speaker has to create meaningful midbass from a relatively small enclosure. You should not mistake the 35Hz published low-end figure for subwoofer performance, but it does show that Infinity is aiming for a fuller-range woofer rather than a driver that disappears as soon as the music reaches the lower octaves.
The edge-driven textile-dome tweeter gives the system a different personality from the aluminum-dome Rockford or magnesium-dome Alpine. It is designed for a broader, smoother high-frequency response, and the UniPivot mounting lets you adjust the tweeter’s direction to suit the cabin. That is especially useful in cars where the left and right door positions are acoustically very different.
What We Like About This 6.5-Inch Component System
- 96dB sensitivity is the standout feature for getting strong output without excessive amplifier demand.
- The Plus One glass-fiber woofer gives the door driver useful cone area and stiffness for stronger midbass.
- The textile-dome tweeter should appeal to listeners who prefer smoother highs over an aggressive top end.
- UniPivot tweeter adjustment gives you real control over the front-stage presentation.
- The external crossover includes tweeter-level adjustment, which is valuable when the factory mounting locations make one side sound brighter than the other.
One Important Amplifier Check
The 2.5-ohm architecture is the one specification I would not ignore. It is part of what makes the system efficient, but your amplifier needs to be comfortable with the load. Don’t assume that every factory or aftermarket amplifier will behave identically with a lower-impedance component set.
Also, the 35Hz–35kHz frequency-response figure should be treated as a specification, not a promise that you will hear 35kHz or get subwoofer-level bass from a door speaker. The real-world advantage is the driver’s overall range and efficiency.
Where This Set Makes the Most Sense
This is probably the easiest set in the lineup to understand if your priority is getting more output from relatively modest power. The combination of 96dB sensitivity, glass-fiber construction and low-impedance architecture gives it a very different approach from the higher-end sets above it.
It also makes sense for a daily driver where you want to replace tired factory speakers without immediately turning the car into a full custom audio build. Add a suitable amplifier later, adjust the tweeter level through the crossover and you have room to keep developing the system rather than replacing the speakers again.
The Insider Pro-Tip
If you’re installing these in a Honda Civic, Toyota Camry, Ford Mustang, Chevrolet Silverado or another vehicle with a factory 6.5-inch location, take advantage of the included mounting hardware, but still verify the actual basket depth, cutout and window clearance before ordering. The extensive hardware helps with fitment; it does not guarantee a direct bolt-in installation.
And because the UniPivot tweeter can be aimed, don’t simply point both tweeters straight at the occupants. Start with a neutral angle, listen for where vocals settle between the seats, and then make small adjustments. With a 96dB-sensitive speaker, getting the positioning and amplifier gain right can make a bigger audible difference than chasing another specification on the box.
Best Sounding 6.5″ Component Car Speakers (2026) Compared by Power, Sensitivity, Fitment and Tuning
| What Matters in a 6.5-Inch Component Set | Morel Tempo Ultra 602 MKII BEST OVERALL | HERTZ Mille Pro MPK 1653 HIGH-EFFICIENCY PICK | Focal PS 165 FE Flax EVO NATURAL SOUND | Rockford Fosgate T2652-S Power PUNCH & OUTPUT | Alpine R2-S65C R-Series HI-RES DETAIL | Infinity Kappa 60CSX EASY OUTPUT |
|---|---|---|---|---|---|---|
| Best suited to | Balanced front-stage upgrade with natural vocals and strong midbass Most versatile | Detailed, lively systems where efficiency and response matter 92dB efficiency | Refined tonal balance, wide imaging and natural musical presentation Flax fibre | Amplified systems that prioritise punch, dynamics and high output 100W RMS | Crisp, extended detail with flexible tweeter positioning 40kHz response | Strong output from relatively modest amplifier power 96dB sensitivity |
| Woofer construction | Treated paper composite cone with an oversized 1.5-inch voice coil | V-Cone woofer with Boundary-Free rubber surround and 25mm copper voice coil | Flax fibre cone with TMD Tuned Mass Damper surround | Carbon-fibre reinforced woofer with VAST surround and billet aluminium phase plug | Glass-fibre reinforced cone designed for a stiff, lightweight and fast response | Plus One glass-fibre cone designed for more effective cone area and efficiency |
| Tweeter approach |
1.1-inch soft-dome Smooth, natural presentation that suits long listening sessions |
29mm Tetolon Fiber soft-dome Detailed highs without relying on a hard-dome character |
TAM aluminium/magnesium inverted dome Designed for controlled, detailed high-frequency reproduction |
Aluminium-dome Neo-tweeter More immediate, energetic top-end character |
4.3cm magnesium hard-dome Crisp extended response with Hi-Res Audio capability |
Edge-driven textile dome Broader, smoother high-frequency presentation |
| Power handling |
130W RMS 250W peak per speaker |
110W RMS 220W peak |
70W RMS 140W max |
100W RMS 200W max |
100W RMS 300W peak |
100W RMS 300W peak |
| Sensitivity |
Good balance of efficiency and power handling |
Very amplifier-friendly |
Better suited to a properly matched system |
More convincing with clean amplification |
Works across mixed system types |
The efficiency leader here |
| Nominal impedance | 4 ohms | 4 ohms | 4 ohms | 4 ohms | 4 ohms |
2.5-ohm SLI architecture Check amplifier load compatibility |
| Published frequency response | 55Hz–22kHz | 40Hz–22.5kHz | 60Hz–20kHz | 55Hz–22kHz | 65Hz–40kHz | 35Hz–35kHz |
| Crossover & tuning |
MXR Direct Crossover Focused on clean separation between woofer and tweeter |
MPCX 2.3 external crossover Adds useful control over the front-stage blend |
External 12dB/octave crossover 3kHz crossover point |
Audiophile-grade external crossover Built for a more serious amplified system |
External high-pass crossover Gives the separate drivers defined frequency duties |
External inline crossover Tweeter level adjustment from 0dB to +3dB |
| Installation flexibility |
2.56-inch / 65mm depth Measure window and inner-door clearance carefully |
Low-mounting-depth design Helpful where door depth is restricted |
2.75-inch depth Adapter rings may be needed depending on vehicle |
2.51-inch depth Flex Fit basket plus multiple tweeter mounts |
6.3cm depth Tweeter frame can be reduced for a smaller footprint |
Extensive mounting hardware UniPivot tweeter adds positioning flexibility |
| Tweeter positioning |
Separate tweeter placement Useful for building a natural front stage |
Separate tweeter placement Position carefully to avoid excessive brightness |
Separate tweeter placement Imaging benefits from careful aiming |
Flush and angled mounts Good flexibility for cabin tuning |
Flush, surface and on-dash options Excellent placement flexibility |
UniPivot adjustable design Especially useful for off-axis door positions |
| How it should sound |
Balanced and natural Strong vocals with controlled midbass and a refined top end |
Fast and detailed Lively presentation with strong output potential |
Smooth and musical Natural midrange with controlled highs |
Punchy and energetic Built for dynamics and amplified listening |
Crisp and precise Fast woofer response with extended treble |
Efficient and lively Strong output with smoother textile-dome highs |
| Best amplifier match |
Quality 4-ohm amplifier Especially worthwhile with 100W+ clean power |
Efficient 4-ohm amplifier Does not need extreme power to wake up |
Clean, controlled amplifier A good match matters more than chasing wattage |
Around 100W RMS/channel A natural match for its power handling |
Quality 4-ohm amplifier Benefits from clean power and DSP tuning |
Amplifier rated for 2.5-ohm loads Verify compatibility before installation |
| Real-world fitment note | 6.5-inch sizing does not guarantee direct fit. Door depth and window clearance need checking. | Low depth helps, but vehicle-specific brackets and wiring may still be required. | The 2.75-inch depth deserves a measurement before ordering, particularly in shallow doors. | Flex Fit helps with mounting, but the factory speaker opening still needs to be measured. | The reduced tweeter footprint is useful, but the 6.3cm woofer depth still needs verification. | Included hardware gives you options, but factory door depth and amplifier load remain the key checks. |
| Real talk | The safest all-round choice if you want excellent vocals, midbass and refinement without pushing the system toward an overly bright character. | A strong choice when you want high output and detail without requiring a huge amplifier. | Choose this for tonal refinement and natural presentation rather than maximum output or headline power. | Makes the most sense when the system already has a capable amplifier and you want more punch and dynamics from the front doors. | The Hi-Res specification is not the main reason to buy it; the glass-fiber woofer, magnesium tweeter and mounting flexibility are more meaningful. | The 96dB sensitivity is genuinely useful, but the unusual 2.5-ohm architecture makes amplifier compatibility especially important. |
6.5 Inch Sounding Component Speakers Buying Guide: What Actually Matters Before You Buy
A good 6.5-inch component speaker set is not simply the one with the biggest wattage number or the widest frequency range printed on the box. In a car, the door location, glass clearance, amplifier power, tweeter position, crossover design, cabin acoustics and even the type of music you listen to can change how the same set performs.
The six sets above also show why there is no single specification that tells the whole story. One prioritises sensitivity, another focuses on refined midrange, another is better suited to an amplified system, while another gives you more freedom to aim the tweeter. Use the points below to match the speaker to the system you actually have, rather than buying on specifications alone.
The Specifications That Deserve Your Attention
When comparing 6.5-inch component speakers, start with these specifications, but understand what each one means in a real car.
| Specification | What to look for | Why it matters in a car |
|---|---|---|
| RMS power handling | Match it reasonably with your amplifier’s clean output | RMS is much more useful than peak power when deciding whether a speaker suits your system |
| Sensitivity | Around 88dB–96dB can cover very different system needs | Higher sensitivity generally means more output from the same amount of amplifier power |
| Impedance | Usually 4 ohms, but some designs differ | Your amplifier must be comfortable with the speaker’s actual load |
| Frequency response | Look at the overall system, not just the biggest number | A published range does not tell you how loud or accurate a speaker is at every frequency |
| Crossover | Proper external crossover with suitable slopes and adjustment | It controls which frequencies reach the woofer and tweeter and can make a major difference to integration |
| Tweeter type | Soft dome, textile, aluminium, magnesium or other designs | Tweeter material and design influence how the upper frequencies are presented |
| Woofer cone | Paper composite, flax, glass fibre, carbon reinforced and similar materials | Cone stiffness, weight and damping affect midbass response, detail and tonal character |
| Mounting depth | Compare the manufacturer’s depth with your door clearance | A speaker can be a perfect 6.5-inch diameter and still fail to fit properly |
| Tweeter mounting | Flush, angled, surface, dash or pivoting options | Positioning can change imaging and how aggressive the highs sound from the driver’s seat |
The most important point is not to evaluate any of these figures in isolation. A 96dB speaker can be easier to drive than an 88dB model, but that does not automatically make it the better-sounding speaker. Likewise, a speaker advertised to reach extremely high frequencies is not automatically more detailed to the human ear.
For a serious upgrade, I would put RMS handling, sensitivity, impedance, woofer/tweeter design, crossover quality and physical fit ahead of impressive-looking peak-power or frequency-response numbers.
Sensitivity Matters More Than Many Buyers Realise
Sensitivity becomes particularly important when you are deciding whether to keep the factory head unit or add an amplifier.
A higher-sensitivity component set can produce useful output with less amplifier power. That makes something around the low-to-mid 90dB range particularly interesting for a factory-powered system, provided the rest of the design is good. This is one reason the HERTZ Mille Pro MPK 1653 at 92dB and Infinity Kappa 60CSX at 96dB @ 2.83V/1m stand out differently from lower-sensitivity alternatives.
Lower sensitivity is not automatically a disadvantage. A well-designed speaker with an 88–90dB rating can sound excellent when paired with a capable amplifier. The mistake is buying a relatively power-hungry set and then expecting the factory radio to make it perform at its best.
Real-world rule: if you are keeping the factory stereo, pay extra attention to sensitivity. If you are installing a proper amplifier, you have considerably more flexibility.
Impedance and Amplifier Matching Should Be Checked Before Installation
Most component systems in this category use a 4-ohm design, which makes them straightforward to pair with many aftermarket car amplifiers. But do not assume every 6.5-inch component set behaves the same way.
The Infinity Kappa 60CSX, for instance, uses a 2.5-ohm SLI architecture, so amplifier compatibility deserves more attention than it would with a conventional 4-ohm load.
Before buying, check:
- The amplifier’s RMS output at the speaker’s impedance.
- Whether the amplifier is stable at that impedance.
- Whether you are running one component set per channel or bridging channels.
- Whether the amplifier manufacturer recommends a minimum speaker impedance.
- Whether the gain can be set correctly rather than simply turned up for more volume.
- Whether the speaker’s RMS handling makes sense for the amplifier’s clean output.
You do not need to perfectly match the RMS numbers on paper. What matters more is having a clean, sensible power relationship and avoiding an amplifier being driven into clipping.
Crossover Design Is One of the Most Overlooked Parts of a Component Set
The whole reason to buy component speakers instead of a basic coaxial set is that the woofer and tweeter can be positioned separately and given different frequency duties.
That makes the crossover far more than a box that sits in the wiring.
A properly designed crossover helps prevent the woofer from receiving frequencies it cannot reproduce cleanly and protects the tweeter from low-frequency energy it was never designed to handle. It also influences how naturally the two drivers blend together.
Look for:
- External crossover networks rather than extremely basic inline filtering.
- Appropriate crossover slopes.
- Tweeter-level adjustment where available.
- A crossover point that suits the woofer and tweeter combination.
- A practical installation location that remains dry and secure inside the vehicle.
The Focal PS 165 FE Flax EVO, for instance, uses an external 12dB/octave crossover at 3kHz. The Infinity set gives you tweeter-level adjustment, while other systems in this group use their own dedicated external crossover designs.
The important takeaway is simple: do not judge a component set by its tweeter or woofer alone. The way those two drivers are integrated is just as important.
Tweeter Material Changes the Character More Than the Marketing Suggests
You will see plenty of different tweeter materials in this category, and they are not simply different versions of the same thing.
Soft-dome and textile tweeters can produce a smoother, more forgiving presentation. Aluminium and magnesium designs can offer a more immediate, crisp character. That does not mean one material is universally better.
Your installation position matters just as much.
A tweeter aimed directly at your ears can sound considerably more prominent than the same tweeter mounted lower in the door or angled toward the windscreen. This is why adjustable or multiple mounting options can be genuinely useful in a car.
For a daily driver, I would rather have a well-integrated tweeter that is correctly positioned than chase the highest published frequency-response number.
Woofer Construction Has a Direct Effect on Midbass and Vocals
The 6.5-inch woofer handles much more than bass. It is responsible for a large part of the midrange, including vocals, guitars, snare hits and much of the musical energy you hear from the front stage.
That is why cone construction matters.
Paper composites can provide a natural, controlled character. Flax fibre is known for its balance of stiffness and damping. Glass-fibre designs can offer a light and rigid diaphragm, while reinforced or carbon-based constructions can favour a more energetic response.
But again, material alone does not determine sound quality.
The surround, voice coil, motor structure, cone geometry, basket and crossover all work together. A speaker with an exotic cone material is not automatically better than a carefully engineered paper-based design.
Construction Details That Matter Beyond the Cone Material
If you are spending serious money on a component system, look beyond the word used to describe the cone.
Pay attention to:
- Voice-coil size: Larger or more robust voice coils can help with power handling and thermal control.
- Surround design: This affects cone movement and how the woofer behaves around its working range.
- Basket construction: A rigid mounting structure helps keep the driver stable.
- Magnet and motor design: This influences how efficiently the woofer converts amplifier power into movement.
- Cone damping: Important for controlling unwanted resonances.
- Tweeter mounting hardware: Useful when the factory location is not acoustically ideal.
- Crossover components: Better filtering and adjustment options can make integration easier.
This is also where product specifications should be read with some scepticism. A long list of impressive materials does not guarantee a better result if the speaker is badly installed.
Best Sounding 6.5 Inch Component Speakers for Factory Stereo
If you are keeping the factory head unit, the priority changes.
You generally do not need the highest RMS-rated component set you can find. The factory amplifier or head unit may not have enough clean power to take advantage of it.
Instead, look for:
- Higher sensitivity.
- Reasonable impedance for the factory system.
- Efficient woofer design.
- Smooth tweeter behaviour.
- A crossover that works properly at modest power.
- Easy integration with the vehicle’s factory wiring.
- Correct mounting depth.
The HERTZ Mille Pro MPK 1653 is interesting here because its 92dB sensitivity gives it an efficiency advantage. The Infinity Kappa 60CSX goes even further on sensitivity, although its 2.5-ohm architecture means you should verify the factory system can safely handle the load before choosing it.
The Morel set can also make sense as a factory-system upgrade, but its 130W RMS capability is better appreciated once you give it suitable amplification.
One important reality: replacing factory speakers does not automatically mean you will get dramatically more bass. Factory systems can use equalisation and processing specifically designed around the original speakers. A replacement component set may need proper tuning, high-pass filtering and sometimes additional amplification to sound its best.
Best Sounding 6.5 Inch Component Car Speakers for an Aftermarket Amp
An aftermarket amplifier opens up considerably more options.
Now you can take advantage of component systems with higher RMS handling and drive the woofer with enough clean power to produce stronger midbass without asking the factory radio to do all the work.
This is where sets such as the Morel Tempo Ultra 602 MKII, Rockford Fosgate T2652-S Power, Focal PS 165 FE Flax EVO and Alpine R2-S65C become particularly interesting, depending on the sound you want.
For an amplified setup, pay particular attention to:
- Amplifier RMS output, rather than peak wattage.
- Speaker RMS handling, especially if you listen loudly for extended periods.
- Impedance compatibility between amplifier and speakers.
- Crossover settings at the amplifier and component network.
- Door treatment, because more amplifier power can expose weaknesses in an untreated door.
- Gain setting, so you get clean output rather than distortion.
- DSP availability, if you want to fine-tune imaging and frequency balance.
You do not necessarily need hundreds of watts per channel. A clean amplifier delivering sensible power can transform a good 6.5-inch component set without making the system unnecessarily complicated.
Best Component Speakers for a Car Overall
For an overall upgrade, look for the combination rather than a single standout specification.
The ideal all-round component system should offer:
- Strong and controlled midbass.
- Natural vocals.
- A tweeter that does not become tiring.
- Good sensitivity.
- Sensible RMS handling.
- A useful external crossover.
- Flexible tweeter mounting.
- Reasonable mounting depth.
- Straightforward amplifier compatibility.
That is why the Morel Tempo Ultra 602 MKII makes a convincing all-round choice in this particular group. Its 130W RMS handling, 90dB sensitivity, 4-ohm impedance, soft-dome tweeter and 2.56-inch mounting depth give it a well-rounded specification rather than relying on one headline number.
But “overall” should not be confused with “best for everybody.” Someone chasing maximum output may prefer a different design, while a listener who values a softer presentation may prioritise another set.
Best Sounding Component Speakers for Sound Quality and Bass
There is an important distinction between midbass and genuine low bass.
A 6.5-inch door speaker can deliver impressive punch, kick-drum impact and upper-bass energy when the door is sealed and treated properly. It is not a replacement for a dedicated subwoofer when you want deep sub-bass at high volume.
For sound quality and bass together, look for:
- A rigid but well-damped woofer cone.
- A capable motor and voice coil.
- A properly controlled surround.
- Good crossover integration.
- Solid door mounting.
- Adequate amplifier power.
- Proper high-pass filtering.
- A well-sealed door environment.
The Morel Tempo Ultra 602 MKII is a strong balanced choice for this goal, while the Rockford Fosgate T2652-S Power makes more sense if your definition of “bass” leans toward punch and output.
The Focal set takes a different approach, favouring natural musical presentation rather than trying to turn a 6.5-inch door speaker into a subwoofer.
Best Sounding 6.5 Component Speakers for Bass: What to Expect Realistically
If bass is your main priority, do not shop purely by the lowest frequency printed in the specification sheet.
A published response of 35Hz or 40Hz does not mean the speaker will reproduce 35Hz with the authority of a dedicated subwoofer. Frequency response tells you where the system is specified to operate; it does not tell you how much output it produces at each frequency.
For stronger real-world midbass:
- Treat the front doors properly.
- Use solid speaker adapter rings.
- Prevent air leaks around the mounting surface.
- Make sure the door card is not rattling.
- Use an appropriate high-pass filter.
- Give the speakers clean amplifier power.
- Let a subwoofer handle the lowest frequencies if deep bass is important.
This is one of those areas where installation can make a cheaper speaker sound surprisingly good and a very expensive speaker sound disappointing.
Door Installation Can Matter as Much as the Speaker You Buy
A 6.5-inch component woofer is installed into a large, imperfect enclosure: your car door.
That environment is not acoustically neutral.
Before ordering, measure:
- Factory speaker diameter.
- Mounting-hole spacing.
- Available mounting depth.
- Window-glass clearance when fully lowered.
- Door-card clearance.
- Magnet clearance behind the speaker.
- Space available for an adapter bracket.
- Tweeter mounting location.
- Crossover mounting space.
An adapter bracket or spacer may be required in vehicles such as a Honda Civic, Toyota Camry, Ford Mustang, Chevrolet Silverado or Subaru Crosstrek, even when the factory speaker is described as a 6.5-inch unit.
The phrase “6.5-inch” describes the driver size, not guaranteed vehicle fitment.
Tweeter Placement Is a Tuning Tool, Not Just an Installation Detail
Component speakers give you something a coaxial speaker cannot: freedom to decide where the tweeter sits.
Possible locations include:
- Factory sail-panel location.
- A-pillar.
- Upper door.
- Dashboard.
- Surface-mounted position.
- Angled mounting position.
Do not automatically point both tweeters directly at your face. That can make the upper frequencies overly prominent in some vehicles.
A slightly different angle can change the balance between direct and reflected sound. Start with a conservative position, listen from the driver’s seat, then adjust the angle and level rather than immediately changing the entire speaker set.
This is particularly useful with systems that provide angled or pivoting tweeter mounts.
Budget Tiers: Spend According to the Rest of the System
Entry-Level: Spend More on Installation Than Specifications
At the entry level, the goal should be a meaningful improvement over tired factory speakers without creating an unbalanced system.
Prioritise:
- Sensitivity.
- Basic crossover quality.
- Correct fitment.
- Smooth tweeter response.
- Solid mounting.
- Good wiring connections.
Do not spend your entire budget on the speaker and then install it directly against a flimsy factory bracket with air gaps around the frame.
A properly installed entry-level component system can be far more satisfying than a poorly installed expensive one.
Mid-Range: The Sweet Spot for Most Daily Drivers
This is where you can start getting meaningful improvements in:
- Midbass control.
- Vocal clarity.
- Stereo imaging.
- Tweeter refinement.
- Power handling.
- Crossover quality.
- Installation flexibility.
For most enthusiasts upgrading a daily driver, this is the area where I would spend carefully rather than automatically jumping to the most expensive set available.
The Morel, HERTZ, Focal, Rockford Fosgate, Alpine and Infinity options in this article all demonstrate different approaches to this level of system building.
Premium: Build the System Around the Speakers
Once you move into premium component systems, the speaker itself is only one part of the equation.
You should also budget for:
- A quality multi-channel amplifier.
- Proper door treatment.
- Rigid speaker adapters.
- Quality wiring.
- Correct crossover configuration.
- DSP tuning where appropriate.
- Careful tweeter positioning.
- A properly integrated subwoofer.
At this level, buying a more expensive component set without addressing installation and tuning can be a poor use of money.
The Biggest Buying Mistakes to Avoid
Before placing the order, avoid these common traps:
- Choosing by peak wattage: RMS handling is far more useful.
- Assuming 6.5 inches means universal fitment: Door depth and mounting holes still matter.
- Ignoring impedance: Especially with unusual low-impedance designs.
- Chasing frequency-response numbers: A lower or higher published number does not automatically mean better sound.
- Using the factory amplifier with a demanding speaker: High RMS handling does not mean the factory radio can exploit it.
- Skipping door treatment: Midbass performance can suffer badly from air leaks and vibration.
- Mounting both tweeters without listening: Position and aiming can change the entire front stage.
- Ignoring the crossover: It is a major part of how the two drivers work together.
- Expecting a 6.5-inch speaker to replace a subwoofer: Strong midbass and deep sub-bass are different jobs.
- Buying before checking the window clearance: A large magnet or deeper basket can interfere with the glass.
The Right Way to Choose Your 6.5-Inch Component Speakers
If you want the shortest sensible decision process, start with the system rather than the product.
Factory stereo: prioritise sensitivity, sensible impedance and efficient design.
Aftermarket amplifier: focus more heavily on RMS handling, woofer construction, crossover quality and amplifier matching.
Sound quality: prioritise tonal balance, tweeter integration, crossover design and installation.
More midbass: prioritise woofer construction, door treatment, mounting rigidity and clean amplifier power.
High output: look closely at sensitivity, thermal handling, RMS capability and amplifier compatibility.
Best all-round upgrade: choose the set whose sound character, fitment and power requirements match the rest of your car audio system.
That is ultimately what separates a genuinely good component-speaker upgrade from simply replacing one set of factory drivers with another.
6.5 Inch Component Speakers Installation Guide: Fitment, Wiring, Crossover Setup and Door Tuning
Installing a 6.5-inch component speaker system is not simply a matter of removing the factory speaker and bolting in the new one. The woofer, tweeter and crossover each have a separate job, and the installation determines how well those parts work together once everything is back inside the car.
The biggest mistakes usually happen before the speaker is even connected. A mounting depth that looks acceptable on paper can interfere with the window glass, a poorly sealed adapter can rob the woofer of midbass, and a tweeter mounted in the wrong position can make an otherwise excellent system sound unnecessarily bright. Take your time with the physical installation first, then deal with wiring and tuning.
Before You Remove the Factory Speakers
Have the basic installation parts and tools ready before opening the door. Depending on the vehicle, you may need:
- Trim-removal tools.
- Screwdrivers or socket set appropriate for the vehicle.
- Torx bits if the factory door hardware uses them.
- 6.5-inch speaker adapter brackets or mounting rings.
- Vehicle-specific wiring harnesses or speaker connectors.
- Electrical tape or fabric automotive tape for securing wiring.
- Foam speaker gasket or sealing tape.
- Heat-shrink tubing or suitable insulated connectors.
- Cable ties or other secure cable-management hardware.
- A multimeter for checking continuity and polarity.
- Drill and suitable fasteners only if the vehicle-specific mounting solution requires them.
- A small amount of sound-deadening material if you are also treating the door.
Disconnect the negative battery terminal when the vehicle manufacturer’s procedure calls for it, particularly if the door contains side-airbag wiring, illuminated trim, window controls or other electrical components. Never pull on an electrical connector by its wires.
It is also worth taking a few photographs of the factory wiring and mounting arrangement before removing anything. That small step can save a lot of frustration when you are putting everything back together.
Remove the Door Panel Without Creating New Problems
Start by locating all visible screws and clips around the door panel. Some vehicles hide fasteners behind trim pieces, inside the door-handle area or beneath small covers.
Once the fasteners are removed, use a trim tool rather than forcing the panel away from the door. Work around the perimeter and release the clips one at a time.
Before completely lifting the panel away, check for:
- Power-window connectors.
- Door-lock wiring.
- Courtesy-light connectors.
- Speaker wiring.
- Door-handle cables.
- Side-airbag wiring where applicable.
Do not allow the door panel to hang from its wiring or cables.
Once the panel is removed, inspect the area around the factory speaker. This is the point where you should stop and measure rather than assuming the replacement will fit because both speakers are described as 6.5 inches.
Measure Mounting Depth Before Installing the Woofer
Mounting depth is one of the most important fitment measurements.
Measure from the speaker mounting surface toward the inside of the door and check how much room remains before the window glass, regulator mechanism or other hardware.
Then lower the window and inspect the clearance again.
This matters because the window can occupy a completely different position when it is lowered. A speaker magnet or basket that appears to have plenty of room with the glass raised can interfere with the window once it moves down.
Check at least these areas:
- Rear of the magnet.
- Outer edge of the basket.
- Window glass path.
- Window regulator.
- Door reinforcement.
- Factory wiring.
- Door-card clearance.
If the speaker is deeper than the factory unit, do not assume an adapter ring will automatically solve the problem. A thicker spacer moves the woofer outward, which can create a different problem with the door card or grille.
Choose the Right Spacer or Adapter Ring
A proper adapter ring does more than allow the speaker to bolt into a different hole pattern.
It needs to:
- Match the factory mounting points.
- Support the entire speaker frame.
- Keep the woofer rigid.
- Provide enough clearance behind the speaker.
- Avoid interfering with the window mechanism.
- Maintain clearance between the speaker surround and door panel.
- Seal the speaker against the mounting surface.
A plastic or composite adapter can work perfectly well when it is correctly sized and firmly mounted. The important thing is rigidity and fit, not simply choosing the thickest material available.
If the factory speaker is mounted at an unusual angle, the replacement ring should preserve the intended mounting orientation where possible.
Seal the Woofer Against the Door
This is one of the easiest installation steps to overlook, and it can have a noticeable effect on midbass.
The front and rear of the woofer should not be allowed to freely mix through large gaps around the mounting surface. If there is a significant air gap between the adapter and the door, some of the acoustic energy from the rear of the cone can interfere with the output you actually want from the front.
Use suitable foam gasket material around the mounting interface.
You are not trying to make the entire door a perfectly sealed speaker enclosure. The goal is to create a stable mounting surface and minimise unwanted air leakage around the speaker.
Secure the Speaker Without Over-Tightening It
Place the adapter ring correctly, check the screw positions, then mount the woofer evenly.
Tighten the fasteners gradually in a cross pattern rather than fully tightening one screw before the others.
Do not crush the speaker basket or deform the mounting surface by using excessive force.
A rigid installation is desirable, but more torque is not automatically better. If the mounting material begins to flex or crack, you have gone too far.
After tightening, gently check the speaker frame for movement. There should be no obvious rocking or looseness.
Route the Speaker Wiring Away From Moving Parts
The wiring should have enough length to accommodate normal movement without becoming loose enough to contact the window mechanism.
Keep wiring away from:
- Window regulators.
- Moving cables.
- Hinges.
- Sharp metal edges.
- Hot components.
- Water paths inside the door.
Use existing factory wiring routes wherever practical.
Inside a door, water can enter from the window area even when everything appears sealed from the outside. Connectors and exposed wiring should therefore be positioned sensibly rather than sitting directly in a location where water can collect.
Do not leave loose wire loops hanging behind the door panel. A cable that is harmless during installation can become an annoying rattle once the vehicle is moving.
Install the Tweeter Where It Can Actually Work
The tweeter is one of the major advantages of a component system because you are not forced to place it directly beside the woofer.
Possible locations include:
- Factory tweeter position.
- Door sail panel.
- Upper door area.
- A-pillar.
- Dashboard.
- Angled surface mount.
The best position depends on the vehicle and the tweeter’s dispersion characteristics.
Do not automatically aim the tweeter directly at the driver’s ears. In some cabins that can make the upper frequencies sound overly prominent. A slightly different angle can produce a smoother balance.
If the system includes flush, angled or pivoting mounting options, use them as tuning tools rather than simply choosing the easiest installation position.
6.5 Inch Component Speakers in Doors vs Kick Panels
Door installation is by far the more common arrangement for 6.5-inch component systems, but kick-panel installation changes the acoustic and physical requirements.
Door-Mounted Installation
A door-mounted woofer normally benefits from the larger available mounting area and can provide good midbass when the mounting surface is rigid and reasonably well sealed.
Pay particular attention to:
- Window clearance.
- Door-card clearance.
- Adapter-ring thickness.
- Water exposure.
- Speaker sealing.
- Door vibration.
- Tweeter position.
The door location also makes it easier to separate the woofer and tweeter physically, which can help create a more convincing front soundstage.
Kick-Panel Installation
Kick-panel mounting puts the woofer considerably lower and closer to the floor.
That can change the relationship between the left and right speakers and may require more careful aiming or DSP adjustment to achieve a balanced image.
Before using this location, check:
- Foot clearance.
- Pedal clearance.
- Carpet and trim interference.
- Driver-seat movement.
- Passenger-seat clearance.
- Heat from nearby components.
- Whether the speaker can be mounted securely without weakening the panel.
Kick panels can work very well when designed for the vehicle, but they are not automatically a better location than the doors. The cabin geometry matters.
Connect the Crossover Correctly
A component system normally separates the woofer and tweeter through an external or integrated crossover network.
Follow the wiring markings on the crossover carefully.
The basic signal path is:
Amplifier or head unit → crossover input → woofer output + tweeter output
Do not connect the tweeter directly to the full-range amplifier output unless the specific system is designed for that arrangement.
The crossover should be mounted somewhere secure, dry and accessible enough that you can inspect the connections later.
Good locations can include:
- Inside the door in a protected area.
- Behind the door panel.
- Behind interior trim.
- Under the dashboard.
- Near the amplifier.
Avoid placing it where it can rattle against metal or where water can easily reach it.
Check Speaker Polarity Before Reassembling Everything
Polarity is easy to get wrong and can make a correctly installed system sound strangely weak.
Positive from the amplifier or factory wiring should go to the positive input of the crossover, and the crossover’s positive woofer and tweeter outputs should go to their corresponding positive terminals.
Do the same for the negative connections.
If one side of the front stage is wired with reversed polarity, the two speakers can partially cancel one another, particularly around the midbass region. The result can be a thin, hollow presentation with less impact even though both speakers are producing sound.
This is why polarity should be checked before the door panel goes back on.
Use a Multimeter When the Wiring Is Unclear
If the factory wiring colours are uncertain, do not guess.
A multimeter can help you establish continuity and identify wiring relationships. For more advanced installations, dedicated speaker-polarity testing tools or an appropriate test signal can also be useful.
Avoid relying solely on wire colour because manufacturers can use different colour schemes between models, model years and audio packages.
If the vehicle has a factory amplified system, active processing or unusual speaker wiring, the installation can be considerably more complicated than a conventional two-wire speaker connection.
Do Not Ignore Factory Amplifiers and Active Audio Systems
Some modern vehicles do not send a simple full-range signal to every speaker.
The factory system may use:
- Separate amplifier channels.
- Factory equalisation.
- Active crossover points.
- Digital signal processing.
- Different signal levels.
- Speaker-specific tuning.
- Factory noise cancellation.
In these vehicles, simply connecting aftermarket component speakers to the original wiring may not produce the expected result.
If the factory system uses an external amplifier or active processing, identify the audio architecture before changing the speakers. In some cases, a line-output interface, amplifier integration device or DSP may be required.
This is particularly important if the new speakers sound quieter, thinner or unusually bright after installation. The problem may not be the speakers at all.
Set the Tweeter Level Before Putting the Door Back Together
If the crossover provides tweeter-level adjustment, start with the neutral setting.
Listen from the driver’s seat using familiar recordings rather than extremely bass-heavy demo tracks.
Pay attention to:
- Vocal position.
- Cymbals and percussion.
- Harshness around loud vocals.
- Whether the sound seems to come from the dashboard or from the lower doors.
- Left-to-right balance.
- Midbass strength.
If the tweeter sounds too aggressive, reduce its level where the crossover allows it rather than immediately changing its mounting position.
If the system sounds dull, check the tweeter aiming and wiring before simply increasing the high-frequency level.
Set the Amplifier Gain Properly
If an aftermarket amplifier is being used, gain is not a volume control.
The purpose of the gain control is to match the amplifier’s input sensitivity to the signal being supplied.
Start with the gain low, establish an appropriate listening level from the head unit, and increase the gain carefully while listening for clean output.
If the speaker becomes harsh or distorted when the volume rises, do not assume that more gain will solve the problem. Excessive gain can make the system reach clipping sooner.
A clean, moderately powered amplifier is usually far more useful than a poorly adjusted amplifier with a much higher advertised wattage.
Set a Sensible High-Pass Filter
A high-pass filter prevents the 6.5-inch woofer from being asked to reproduce very deep frequencies that may cause excessive cone movement without producing useful output.
The exact setting depends on the speaker, amplifier, door installation and whether a subwoofer is present.
As a starting point, many systems benefit from a high-pass filter somewhere around the 60–80Hz region, but this should not be treated as a universal rule.
Listen and adjust.
If the woofer sounds strained at higher volume, raising the high-pass point slightly can reduce unnecessary excursion. If the front stage sounds too thin, the setting may be too aggressive or the installation may have an air-sealing problem.
Common Installation Pitfalls and How to Fix Them
| Problem | What usually causes it | Practical fix |
|---|---|---|
| Speaker does not physically fit | Insufficient depth, wrong mounting pattern or door-card interference | Re-measure the opening, window clearance and mounting depth before changing the spacer |
| Window hits the speaker | Magnet or basket extends into the glass path | Use the correct adapter solution or a shallower driver, and verify clearance through the full window movement |
| Weak midbass | Air leaks, loose mounting, reversed polarity or poor door sealing | Check polarity, tighten mounting, seal the adapter and inspect the door structure |
| Harsh tweeters | Tweeter aimed directly at the listener, excessive level or unsuitable mounting position | Re-angle the tweeter and reduce its crossover level if adjustment is available |
| Very low output | Low sensitivity, incorrect amplifier gain or factory audio processing | Check signal level, amplifier settings, impedance and factory-system integration |
| Thin sound | One driver wired out of polarity | Check positive and negative connections on both sides |
| Door rattles | Loose trim, wiring or vibrating sheet metal | Secure wiring, fasteners and trim, then treat obvious vibration points |
| Crossover rattles | Network left loose behind the panel | Secure it with suitable mounting material and keep it away from loose metal |
| Distortion at high volume | Clipping, insufficient amplifier power or excessive bass demand | Lower the gain/volume, use a suitable high-pass filter and verify amplifier matching |
| Speaker sounds dull | Poor tweeter position, crossover issue or incorrect wiring | Verify the tweeter connection, mounting angle and crossover settings |
| Door panel will not reinstall | Speaker or spacer protrudes too far | Check grille clearance and use a thinner mounting solution where safely possible |
| Different sound left and right | Unequal tweeter positioning, polarity issue or factory processing | Check wiring first, then compare tweeter position and channel settings |
Do a Full Test Before Reinstalling the Door Panel
This step is worth the extra few minutes.
Reconnect the speaker, crossover and amplifier or factory wiring, then test the system while the door panel is still off.
Check:
- Left and right output.
- Woofer operation.
- Tweeter operation.
- Bass response.
- Vocal clarity.
- Crossover operation.
- Tweeter level.
- Window movement.
- Any obvious vibration.
- Wiring clearance.
Operate the window fully up and down while listening carefully for contact.
Then gently press or move nearby trim pieces while music is playing. If a rattle appears before the door is reassembled, fix it now. Once the panel is clipped back into place, finding the source becomes considerably more annoying.
The Final Installation Check Most People Skip
After everything is installed, take the car for a normal drive rather than judging the system while parked.
Road noise changes the way you perceive bass and treble, and different cabin surfaces can affect reflections.
Listen at several normal volume levels.
If the system is bright, first check tweeter aiming and level. If it lacks midbass, inspect mounting and sealing before replacing speakers. If it distorts, check amplifier gain and filtering. If the soundstage sits unusually low, experiment with tweeter positioning before changing hardware.
That approach saves money because many problems blamed on the speaker are actually caused by installation, wiring, tuning or the vehicle’s factory audio processing.
A Proper 6.5-Inch Component Installation Is About the Whole System
The best installation is not the one with the most expensive wiring or the largest amount of sound-deadening material. It is the one where the woofer is mounted securely, the door is reasonably sealed, the tweeter is positioned intelligently, the crossover is wired correctly, the amplifier sees a suitable load and the system is tuned without forcing the speakers beyond what they can comfortably reproduce.
Take care of those fundamentals and a good component system can produce a much larger improvement than simply swapping speakers and hoping for the best.
Tuning, Alignment, and Sound Enhancement for 6.5 Inch Component Speakers
A properly installed component system can still sound average if the crossover points, amplifier gain, tweeter level and speaker positioning are left at their default settings. This is especially true in a car because the driver’s seat is not in the centre of the cabin, the left and right speakers are different distances from your ears, and the doors create very different acoustic environments.
The aim of tuning is not simply to make the system louder. A good tune should give you a stable centre image, controlled midbass, clear vocals, smooth treble and enough headroom that the speakers remain comfortable when you turn the volume up. Start with the physical installation correct, then tune one part at a time rather than changing five settings together.
Start With a Clean Baseline Before Changing Anything
Before touching the equaliser or DSP, return the system to a sensible starting point.
Set:
- Bass and treble controls to flat or neutral.
- Loudness enhancement off.
- Artificial surround modes off.
- Factory sound-enhancement modes off where possible.
- Amplifier gain conservatively.
- Subwoofer level at a moderate starting point.
- Crossover settings at safe initial values.
- Left and right balance centred.
- Fader centred between the front and rear system.
This gives you a reference point.
If you immediately add bass, treble, loudness and several equaliser boosts, it becomes difficult to identify what actually improved the sound and what simply made it louder.
Use a few familiar tracks that you know extremely well. Acoustic vocals, well-recorded rock, electronic music with sustained bass and tracks with clear percussion are useful because they expose different parts of the system.
Crossover Settings Should Match the Driver and the System
There is no universal crossover setting that makes every 6.5-inch component speaker sound its best.
The correct setting depends on:
- The woofer’s usable response.
- Tweeter design.
- Manufacturer crossover network.
- Door installation.
- Amplifier power.
- Whether a subwoofer is present.
- Listening volume.
- Cabin acoustics.
If the component system includes a dedicated passive crossover, use it as intended. Do not bypass it simply because an aftermarket amplifier or DSP gives you additional crossover controls.
The amplifier or DSP can then be used to establish the broader system crossover points while the supplied passive network continues to perform its intended driver-to-driver filtering.
Morel Tempo Ultra 602 MKII: Start Smooth, Then Build the Midbass
With a system built around a 1.1-inch soft-dome tweeter, 90dB sensitivity and 55Hz–22kHz published response, the sensible approach is to avoid immediately adding a large treble boost.
For a front-stage system with a subwoofer, a useful starting point is a high-pass filter around 60–70Hz, using a moderate slope. If the doors are well treated and the system remains clean, you can experiment with a lower point.
If the system is being used without a subwoofer, allow the front speakers to contribute more of the lower range, but listen carefully for excessive cone movement at higher volume.
For the tweeter:
- Start with the neutral crossover setting.
- Aim the tweeters slightly away from a direct on-axis position if the upper range feels prominent.
- Adjust level only after positioning has been checked.
- Avoid boosting treble simply because the system sounds dull from one listening position.
The goal here is a smooth front stage with enough midbass weight to make vocals and instruments feel connected to the door rather than sounding like separate drivers.
HERTZ Mille Pro MPK 1653: Use Its Efficiency to Your Advantage
With 92dB sensitivity, a 110W RMS rating, a 40Hz–22.5kHz published response and a Tetolon Fiber soft-dome tweeter, this set gives you useful efficiency as well as plenty of output potential.
For an amplified front stage, begin around 60–70Hz high-pass and listen for how the V-Cone woofer behaves in your particular door.
If you are using a subwoofer, there is little reason to force the front doors to reproduce the deepest bass. Let the subwoofer take over the lowest frequencies and allow the front stage to concentrate on clean midbass and vocals.
If the upper range feels too forward, check the tweeter’s physical position before increasing or reducing crossover levels. A small change in aiming can sometimes accomplish more than several equaliser adjustments.
Focal PS 165 FE Flax EVO: Protect the Natural Tonal Balance
The Flax fibre woofer, TMD surround and TAM inverted-dome tweeter give this system a different tuning priority.
The published response is 60Hz–20kHz, with a 70W RMS power rating and an external crossover operating at 3kHz with a 12dB/octave slope.
A sensible starting point is a 65–80Hz high-pass filter when a subwoofer is installed. This leaves the woofer working in a comfortable region while allowing the subwoofer to handle the deeper material.
If you are running the front stage without a subwoofer, experiment downward carefully rather than forcing large low-frequency equaliser boosts.
The biggest mistake here would be trying to make a natural component set sound artificially aggressive by adding excessive upper-midrange or treble. If vocals sound too distant, first check the tweeter position, crossover wiring and time alignment.
Rockford Fosgate T2652-S Power: Tune for Punch Without Making the Top End Fatiguing
A system with a 100W RMS component set, carbon-fibre reinforced woofer, aluminium-dome Neo tweeter and VAST surround can deliver a lively presentation, particularly with proper amplification.
For an amplified system with a subwoofer, start around 60–80Hz high-pass and adjust according to door behaviour and listening volume.
If the midbass feels too light, do not immediately boost the 60Hz region. First check whether the woofer is mounted against a properly sealed adapter and whether the door itself is allowing excessive vibration.
The aluminium tweeter can have a more immediate character than a soft-dome design. If cymbals, vocals or percussion become tiring, reduce the tweeter level or adjust its aiming before reaching for a large treble cut.
A good tune should preserve the set’s punch without turning the upper frequencies into the dominant part of the presentation.
Alpine R2-S65C R-Series: Take Advantage of Placement Flexibility
The glass-fibre reinforced woofer, 88dB sensitivity, 100W RMS handling and magnesium hard-dome tweeter give you plenty of scope for a properly amplified front stage.
The published response extends from 65Hz to 40kHz, but the 40kHz figure should not be treated as the reason to buy the set. Your more useful tuning decisions concern the audible range, crossover behaviour, tweeter position and system integration.
With a subwoofer, try a high-pass starting point around 70–80Hz and adjust downward only if the installation remains clean.
Because the tweeter offers flush, angled surface and on-dash mounting options, spend time experimenting with position. A well-aimed tweeter can improve the perceived soundstage without requiring aggressive equalisation.
Infinity Kappa 60CSX: Exploit Efficiency, But Respect the Load
The combination of 96dB sensitivity, 100W RMS handling, a Plus One glass-fibre woofer and textile-dome tweeter makes this system particularly interesting when output from modest amplifier power matters.
The 2.5-ohm SLI architecture needs to remain part of the tuning conversation. Before changing amplifier settings, make sure the amplifier is designed to handle the speaker’s load.
For a system with a subwoofer, begin around 60–80Hz high-pass and adjust according to the door installation.
The adjustable tweeter level is particularly useful. Start at the neutral setting and make small changes. If the front stage sounds too bright, reducing the tweeter level is preferable to trying to remove large amounts of treble with an equaliser.
Why There Is No Single Perfect Crossover Setting
You will often see people recommend one exact frequency and slope as though it works for every vehicle.
It does not.
A 6.5-inch woofer mounted in a well-treated door can behave very differently from the same driver installed against a thin factory plastic adapter. The cabin itself also changes the response dramatically.
As a practical starting point:
| System setup | Front high-pass starting point | Typical goal |
|---|---|---|
| Component speakers only, factory-style system | 60–80Hz | Protect the woofer while retaining useful midbass |
| Component speakers + subwoofer | 70–90Hz | Let the subwoofer handle deeper bass |
| Strongly amplified front stage | 60–80Hz | Preserve punch without excessive cone movement |
| Small sealed subwoofer | Around 70–80Hz | Create a clean handover between front stage and sub |
| Large subwoofer system | Around 80–100Hz | Reduce low-frequency demand on the doors |
| Door installation with obvious strain | Raise the high-pass gradually | Reduce excursion and distortion |
These are starting points, not fixed prescriptions.
Listen for the transition between the front speakers and subwoofer. If you can clearly hear the bass moving from the front of the car to the rear, the crossover region or subwoofer phase may need attention.
Using an Aftermarket Amplifier for Smarter Control
An aftermarket amplifier does more than add volume.
A correctly matched amplifier can provide:
- More clean RMS power.
- Better control of the woofer.
- Adjustable high-pass filtering.
- More headroom at higher listening levels.
- Better channel separation.
- A more predictable signal path.
The important word is clean.
If an amplifier is rated for more power than the speakers can comfortably handle, that does not mean you should use all of it. Set the gain correctly and use the speaker’s RMS capability as a practical reference.
Do not set amplifier gain by ear simply because the system becomes louder. The goal is to reach useful output without clipping.
A DSP Is Where Serious Tuning Becomes Much More Precise
A digital signal processor gives you considerably more control than the basic bass, treble and balance controls found on most head units.
Depending on the system, a DSP can provide:
- Individual left and right equalisation.
- Time alignment.
- Active crossover control.
- Phase adjustment.
- Multiple listening presets.
- Subwoofer integration.
- Channel-level adjustment.
- Parametric equalisation.
- More accurate control of the front soundstage.
A DSP is particularly useful because the driver’s seat is not acoustically symmetrical.
The left speaker may be considerably closer to your ears than the right speaker. Without time alignment, the sound from the nearer speaker reaches you first, which can pull the apparent centre image toward that side.
Time Alignment Can Transform the Front Stage
Time alignment delays individual channels so sound from the left and right sides reaches the listening position at approximately the intended time.
Measure the distance from your normal listening position to each speaker.
For example:
- Left tweeter: 32 inches.
- Right tweeter: 48 inches.
- Left woofer: 38 inches.
- Right woofer: 54 inches.
You do not need to use those numbers as a universal setting; they simply illustrate the principle.
The DSP uses the distance differences to calculate the necessary delay.
Start with the driver’s seat as the primary listening position. Once the centre image is stable, you can experiment with a more balanced compromise if the car regularly carries passengers.
Imaging and Staging: Make the Sound Come From the Front
A good component system should not sound as though six separate speakers are shouting from the doors.
Ideally, vocals should appear closer to the centre of the dashboard, with instruments spreading naturally across the front of the vehicle.
To improve imaging:
- Keep left and right tweeter levels reasonably balanced.
- Aim tweeters carefully.
- Use time alignment where available.
- Avoid excessive upper-midrange equalisation.
- Make sure both front speakers have the same polarity.
- Set the front-to-rear balance correctly.
- Avoid making the rear speakers louder than the front stage.
If the singer appears to be sitting directly inside the left door, something is usually wrong with level, timing, polarity, tweeter placement or equalisation.
How to Position Tweeters for a More Natural Soundstage
Tweeter aiming deserves more attention than it normally receives.
Try three basic approaches:
Direct aiming:
The tweeter points toward the opposite side of the cabin or toward the listener. This can increase detail and direct high-frequency energy.
Off-axis aiming:
The tweeter points more toward the windscreen, side glass or another surface. This can soften the direct high-frequency response.
Cross-aiming:
The left tweeter points toward the right side of the cabin and vice versa. This can help create a broader presentation in some vehicles.
There is no universal winner.
Listen from the driver’s seat and make one physical change at a time. If you change the mounting angle, equaliser and tweeter level simultaneously, you will not know which adjustment produced the improvement.
Fine-Tuning Bass Without Creating Distortion
Bass is where many otherwise good installations go wrong.
When a driver says, “I want more bass,” the first instinct is often to increase the 60Hz or 80Hz region. That can work briefly, but excessive equaliser boost also demands significantly more cone movement and amplifier power.
If you want stronger bass, work through the system in this order:
- Check the speaker mounting.
- Seal the mounting surface.
- Check polarity.
- Check the door for obvious rattles and leaks.
- Set the high-pass filter correctly.
- Verify amplifier gain.
- Integrate the subwoofer if one is installed.
- Only then use modest equaliser adjustment.
This order matters.
If the mounting surface is leaking air, a 4dB bass boost will not repair the installation. It will simply ask the amplifier and woofer to work harder.
Use the Subwoofer to Create More Bass, Not the Door Speaker
A component woofer can produce impressive midbass, but asking it to reproduce deep sub-bass at high volume is usually inefficient.
If you have a subwoofer, let the subwoofer handle the lowest frequencies.
The front stage should provide:
- Kick-drum impact.
- Bass guitar definition.
- Lower vocals.
- Guitar body.
- Piano fundamentals.
- Midbass energy.
The subwoofer can then handle the deeper material without forcing the door speakers into excessive excursion.
A properly integrated subwoofer should not sound like it is sitting in the boot. When crossover, phase and level are correct, the transition should feel continuous.
Phase and Polarity Are Different Things
Polarity refers to the positive and negative electrical connection.
Phase describes the timing and relative relationship between signals.
You can have both speakers wired with correct polarity and still have a phase problem around the crossover region, particularly when integrating a subwoofer.
If the front stage and subwoofer sound weak around the crossover point, try the available phase or polarity options on the subwoofer system and listen from the driver’s seat.
Do not assume that “0 degrees” is always correct. The correct setting is the one that produces the strongest, cleanest transition at the listening position without creating an obvious hole around the crossover region.
Equalisation Should Correct Problems, Not Hide Them
A DSP equaliser is powerful, but it should not be used as a substitute for correct installation.
If you have a huge peak in the upper midrange, a modest cut may be appropriate.
If you have a huge dip caused by poor speaker positioning or destructive reflections, adding a large boost can make the amplifier work unnecessarily hard without fixing the underlying problem.
As a general approach:
- Cut large peaks before boosting deep nulls.
- Use modest adjustments.
- Make changes one frequency region at a time.
- Listen at normal and moderately high volume.
- Recheck the system after changing crossover points.
- Do not chase a perfectly flat measurement if it sounds unnatural in your vehicle.
Measurements are useful, but the final goal is enjoyable, coherent sound from the driver’s seat.
Tune for the Music You Actually Listen To
There is no benefit in creating a spectacular tuning profile for music you never play.
If you mainly listen to rock, pay attention to:
- Kick-drum attack.
- Snare presence.
- Electric-guitar texture.
- Vocal placement.
For hip-hop and electronic music:
- Keep the front-stage midbass controlled.
- Make sure the subwoofer integrates smoothly.
- Avoid excessive 50–70Hz boosting from the door speakers.
For acoustic and vocal music:
- Concentrate on vocal naturalness.
- Avoid aggressive upper-midrange boosts.
- Use tweeter positioning to control brightness.
For mixed daily listening, aim for a neutral starting point and make only small personal adjustments.
The Final Tuning Sequence I Recommend
Once the installation is complete, tune the system in this order:
1. Verify polarity
Make sure every woofer and tweeter is wired correctly.
2. Set the amplifier gain
Keep the signal clean before doing any detailed tuning.
3. Set the basic crossover points
Protect the front speakers and establish the subwoofer handover if applicable.
4. Set tweeter level
Use the supplied crossover adjustment if available.
5. Position and aim the tweeters
Do this before trying to fix everything electronically.
6. Set time alignment
Measure speaker distances from the driver’s listening position.
7. Adjust channel levels
Create a stable centre image without making one side unnaturally dominant.
8. Equalise carefully
Correct obvious tonal problems with modest adjustments.
9. Recheck the crossover
Equalisation can change how the system behaves around the crossover region.
10. Listen on several tracks
Use different recordings and normal driving conditions rather than judging everything from one song.
What a Properly Tuned System Should Sound Like
When the installation and tuning are right, you should stop thinking about individual speakers.
Vocals should appear forward and reasonably centred. The front doors should provide convincing midbass without sounding boomy. The tweeters should add detail without drawing attention to themselves. The subwoofer, if fitted, should blend into the front stage instead of announcing where it is installed.
Most importantly, the system should remain composed as you increase the volume.
That is the real test of a good 6.5-inch component setup. Not the biggest wattage number, not the widest frequency-response figure and not the most aggressive equaliser curve, but a system that sounds balanced, controlled and enjoyable from the driver’s seat.
FAQs About Best Sounding 6.5 Inch Component Car Speakers
Can 6.5-inch component speakers actually improve a newer car with a factory audio system, or does the factory tuning limit the upgrade?
Yes, they can improve it, but the result depends heavily on how the factory audio system is engineered. In something like a Toyota Camry, Honda Civic, or Ford Mustang, the factory system may use equalisation, active crossovers, dedicated amplification or even speaker-specific processing. Simply fitting better aftermarket drivers does not guarantee a better result if the factory signal has been heavily shaped around the original speakers.
The smarter approach is to first understand what signal the replacement speakers are receiving. If the factory system sends a reasonably full-range signal, a sensitive component set can make a worthwhile improvement without changing the rest of the system. If the factory amplifier is heavily processed, a DSP or suitable integration interface may be needed to get the new speakers working properly.
There is also a common misconception that a higher RMS rating automatically makes a speaker better for a factory system. It does not. A 100W RMS speaker receiving a small amount of clean factory power can still work, but it may never reach the performance level it was designed to deliver.
Real-world takeaway: with factory audio, efficiency, impedance compatibility and proper integration can matter more than buying the most expensive component set you can afford.
Why do some 6.5-inch component speakers sound thin after installation even when their specifications look better than the factory speakers?
This is usually an installation or system-integration problem rather than proof that the aftermarket speaker is worse.
A 6.5-inch woofer depends heavily on its mounting environment. If the adapter ring leaks air, the speaker is mounted loosely, the door has excessive vibration or the woofer is not properly coupled to the door panel, midbass can disappear. Reversing the polarity on one side can create another particularly frustrating problem because both speakers still produce sound, but their output can partially cancel around important midbass frequencies.
Before changing speakers, check these areas:
- Speaker polarity on both sides.
- Air gaps around the mounting ring.
- Window and door-panel clearance.
- Loose wiring behind the door card.
- Factory amplifier processing.
- High-pass filter settings.
- Amplifier gain.
- Whether the original system used dedicated bass enhancement.
There is another less obvious issue: the factory speaker may have been heavily equalised by the car’s audio system. A replacement speaker with a more neutral response can initially sound less bass-heavy simply because the factory tuning is no longer producing the same acoustic result.
So if a new set sounds thin, do not immediately turn up the bass. Find out why the bass disappeared first. A few minutes spent checking the mounting and polarity can achieve more than another expensive hardware upgrade.
Is a lower-impedance 6.5-inch component speaker automatically a better choice for getting more volume from a factory amplifier?
No, and this is one of those specifications that can cause expensive mistakes.
A lower impedance can allow a compatible amplifier to deliver more power, but that only helps if the amplifier is actually designed to operate safely at that load. The Infinity Kappa 60CSX, for instance, uses a 2.5-ohm SLI architecture, so it should not be treated like an ordinary 4-ohm component system when choosing an amplifier or factory integration method.
Before choosing a lower-impedance design, check:
- The amplifier’s minimum supported impedance.
- Its RMS output at that impedance.
- Whether the factory amplifier is designed for the replacement load.
- Whether the vehicle’s audio system uses individual amplification or shared channels.
- Whether the speaker’s sensitivity already provides enough output without changing the load.
And there is an important twist: more electrical power does not automatically mean better sound. If the factory amplifier becomes unstable, overheats or clips into a load it was never designed to drive, the theoretical volume advantage is worthless.
For most conventional installations, a properly matched 4-ohm component system is easier to integrate. A lower-impedance design becomes interesting when you know exactly what the amplifier can handle.
If I want stronger bass from 6.5-inch component speakers, should I choose the set with the lowest published frequency response?
Not necessarily. In fact, using the lowest number on the specification sheet as your deciding factor is one of the easiest ways to choose the wrong speaker for a car.
A published response such as 35Hz, 40Hz or 55Hz tells you the manufacturer’s stated operating range. It does not tell you how much output the speaker produces at that frequency, how much distortion it generates, or how well it will reproduce that frequency once installed in your particular door.
For stronger real-world bass, look at the complete system:
- Woofer construction and motor design.
- Voice-coil capability.
- Door mounting rigidity.
- Air sealing around the speaker.
- Amplifier power.
- High-pass filtering.
- Cabin resonance.
- Subwoofer integration, if fitted.
A well-mounted 6.5-inch woofer with sensible filtering can produce excellent midbass, including kick-drum impact and bass-guitar definition. But deep sub-bass is a different job.
If you want genuinely deep low-frequency output, the smarter approach is to let the subwoofer handle the bottom end and allow the component woofers to concentrate on clean midbass and lower-midrange information. That usually gives you more usable bass, less distortion and more headroom, rather than simply asking the door speakers to move farther.
When is upgrading to a DSP actually worth the money, and when is better tuning of the existing system enough?
A DSP becomes worthwhile when the limitations of the vehicle and audio system cannot be solved with basic gain, crossover and speaker-position adjustments.
If your component speakers are correctly installed, the polarity is right, the amplifier is properly matched and the tweeters are sensibly positioned, but the soundstage still sits heavily toward one side, the bass-to-front-stage transition is poor or the factory signal is strongly processed, a DSP can make a substantial difference.
The biggest benefits are usually:
- Time alignment, which compensates for different speaker distances from the driver’s ears.
- Individual left/right equalisation, rather than applying the same correction to both sides.
- Precise crossover control between the front stage and subwoofer.
- Channel-level adjustment for a more stable centre image.
- Multiple tuning profiles for different listening preferences.
But there is a point where DSP becomes overkill. If the doors are rattling, the speaker adapters are leaking air, the tweeters are badly positioned or the amplifier is clipping, a DSP will not magically repair those problems.
Real talk: fix the physical installation first, get the amplifier and crossover settings sensible, then use DSP to refine the system. A DSP should be the finishing tool, not a substitute for proper installation.
If you want the front stage to sound as though the music is coming from the dashboard rather than six separate speakers in the doors, that is where advanced tuning starts to earn its place.
Final Verdict: Choose the 6.5-Inch Component Set Around Your Car, Not the Spec Sheet
There is a point with component speakers where the numbers stop being useful and the installation starts deciding everything.
A 130W RMS rating will not fix a badly sealed door. A 40kHz frequency-response figure will not make a poorly aimed tweeter sound better. A 96dB sensitivity rating will not automatically make an incompatible amplifier happy. And the most expensive set in the range is not necessarily the one that will sound best in your particular cabin.
What matters is how the woofer, tweeter, crossover, amplifier and installation work together.
For a balanced upgrade, look for a component set with the power handling and tonal character that match your system. If you are keeping the factory stereo, efficiency and impedance deserve more attention. If you are adding an aftermarket amplifier, you can take greater advantage of stronger RMS handling and more demanding drivers. If sound quality is your priority, crossover design, tweeter behaviour and positioning become more important than chasing impressive numbers on a specification sheet.
There is also no shortcut around fitment. Before ordering, measure the mounting depth, window clearance, speaker opening and tweeter location. A 6.5-inch label tells you the general driver size, not whether it will bolt directly into your door. A proper adapter, solid mounting surface and good sealing can make a surprisingly large difference to midbass.
And if the goal is more bass, remember what these speakers are actually designed to do. A good 6.5-inch component woofer can deliver convincing midbass, punch and musical weight, but it should not be forced to behave like a subwoofer. Give the lowest frequencies to a properly integrated subwoofer and let the front stage concentrate on vocals, instruments, attack and controlled midbass.
The best component-speaker upgrade is ultimately the one that disappears into the music. You should hear a stable front stage, natural vocals, clean detail and strong bass without constantly noticing where each individual speaker is mounted.
That is the real measure of a good 6.5-inch component system: not how impressive the specification sheet looks, but how naturally the entire car sounds once you are sitting behind the wheel.
Also Check:


