
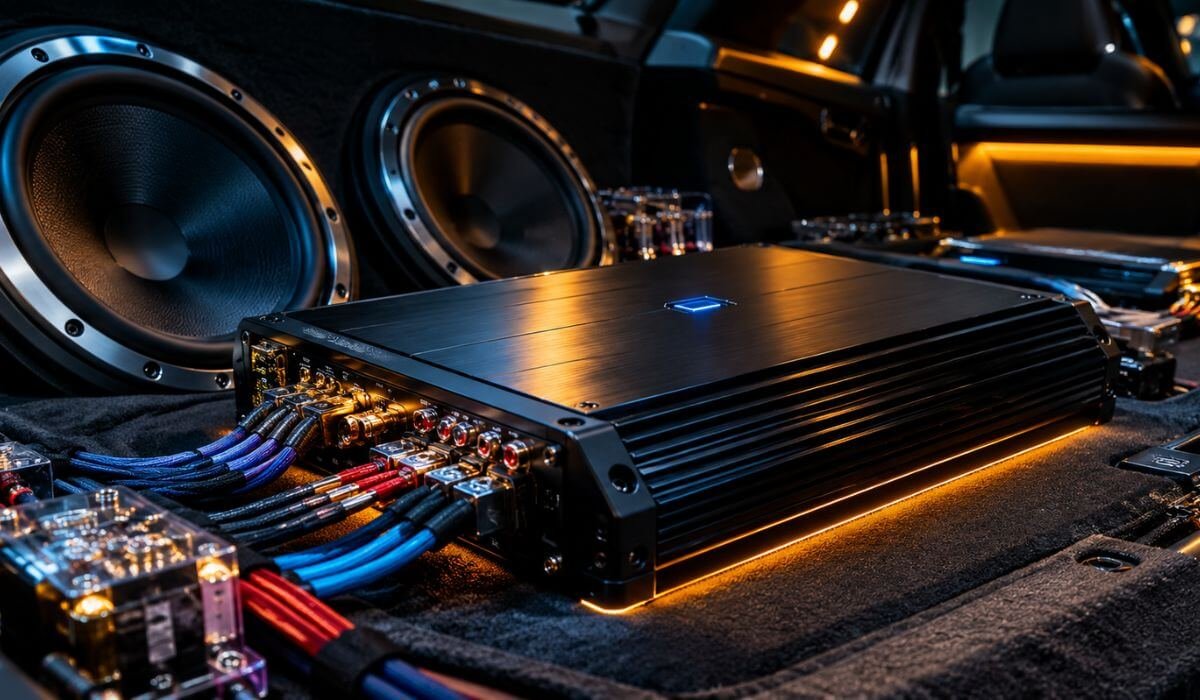
Best 6 Channel Car Amplifiers (2026): Smarter DSP Tuning & High-Output Audio
A good six-channel car amplifier should deliver more than extra volume. It needs to provide clean power, balanced sound and enough control to make your speakers work together properly. The AudioControl D-6.1200 delivers 125 watts RMS per channel at 4 ohms, with a built-in DSP, 30-band graphic EQ, 10-band parametric EQ per output, time alignment and configurable crossovers.
Choosing the right amplifier means looking beyond advertised wattage. RMS power, speaker impedance, crossover controls, factory-audio compatibility and channel configuration all affect how well an amplifier fits your system. If you plan to run active speakers or add a subwoofer, check the supported routing and bridging options before buying.
This comparison covers six-channel amplifiers suited to advanced DSP tuning, high-output speaker systems, compact installations and marine audio. Each model has different strengths, so the aim is to help you match its real specifications and limitations to your build, rather than pay for power or features you do not need.
Best Six Channel Car Amplifiers (2026): Top Picks for Active Speakers and Subwoofer Setups
#1. AudioControl D-6.1200 DSP Car Audio Amplifier
Best premium six-channel car amplifier with built-in DSP, advanced signal routing, 30-band graphic EQ, parametric EQ and flexible crossover controls for precision sound tuning
#2. Mosconi D2 80.6 DSP Mini Amplifier
Best compact six-channel car audio amplifier with integrated DSP, digital audio connectivity, space-saving installation and independent sound adjustment for custom speaker systems
#3. CT Sounds ATv2-150.6d Class D Amplifier
Best high-power six-channel car amplifier for demanding speaker setups, Class D operation, flexible channel-pair filtering and system upgrades requiring substantial output
#4. Alpine R-A90S R-Series Power Amplifier
Best six-channel car amplifier for mixed speaker configurations, staggered RMS power delivery, active front-stage setups and supported bridged subwoofer applications
#5. KICKER 48KMA6006 KMA600.6 Amplifier
Best weather-resistant six-channel marine audio amplifier with conformal-coated circuit boards, stainless-steel hardware, flexible speaker-zone configurations and integrated crossover controls
#6. NVX MVPA6 Marine V-Series Amplifier
Best marine and powersports six-channel amplifier for compact installations, high-output speaker systems, bridgeable channel configurations and moisture-conscious audio upgrades
Must Check: Best 8 Channel Car Amplifier
Expert Tip Before You Buy
Real talk: Don’t choose a six-channel amplifier just because its total wattage looks impressive. Check the RMS output per channel at your speakers’ actual impedance, then look at how you plan to use all six channels. If your goal is a front-stage component setup with rear fill, a built-in DSP can help with crossover points, time alignment and level matching. But DSP is not automatically worth the extra cost if you only need straightforward amplification and already have suitable tuning equipment. Also, bridging channels reduces the number available for separate speakers, and the amplifier’s minimum impedance and bridged-power rating must support your intended setup.
How We Chose These Six-Channel Car Amplifiers
We selected these amplifiers around six practical buying priorities rather than ranking them by advertised peak watts or brand reputation alone. Each model offers a different reason to consider it, but not every one is intended for the same vehicle or audio system.
Power you can actually use: We considered published RMS ratings and the impedance at which they are measured. For example, the AudioControl D-6.1200 is rated at 125W RMS per channel at 4 ohms, while the CT Sounds ATv2-150.6d offers 150W RMS per channel at 4 ohms under its stated conditions. That difference matters when matching an amplifier to speakers, although it does not automatically make the CT Sounds the better-sounding choice.
Useful DSP features, not just a feature list: The AudioControl D-6.1200 and Mosconi D2 80.6 DSP earned places because they combine six-channel amplification with digital signal processing. Features such as crossover adjustment, equalisation and time alignment can help correct a poorly balanced system, but their value depends on installation, tuning and the rest of the equipment.
Different power requirements: The Alpine R-A90S has staggered channel power, with four channels rated at 75W RMS and two at 150W RMS at 4 ohms. That makes its power distribution worth considering for a mixed system, provided the intended speaker and subwoofer arrangement is compatible with its channel configuration.
A realistic compact-amplifier option: The Mosconi D2 80.6 DSP offers six channels rated at 80W each at 4 ohms under its specified test conditions. We included it for buyers who want DSP functionality in a compact package, rather than assuming everyone needs the highest possible output.
Weather resistance as a genuine requirement: The KICKER 48KMA6006 and NVX MVPA6 are marine-oriented amplifiers, so their weather-resistant construction is relevant for boats and suitable powersports installations. We have not treated that as a substitute for a car-focused recommendation: buyers installing either model in a road car should confirm that its features and installation requirements suit their system.
Compatibility and installation realities: Before recommending any amplifier for a particular setup, we consider speaker impedance, channel allocation, input compatibility, physical dimensions and cooling requirements. A six-channel model is only a good purchase if it fits the vehicle and can power the intended speakers safely.
We also distinguish manufacturer-published specifications from independent listening tests. Product specifications can establish rated output and listed features; they cannot, by themselves, prove which amplifier sounds best in every car. Because these models do not all have the same use case, we present them as options for different needs rather than claiming that every one is a universal winner.
#1. AudioControl D-6.1200 DSP Car Audio Amplifier
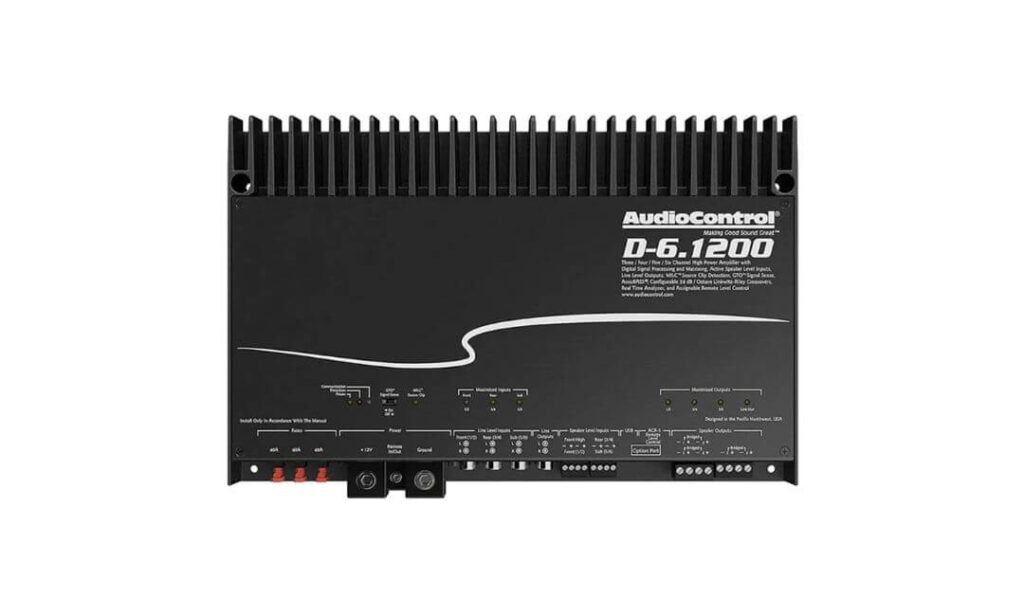
Quick Specs:
- Amplifier Type: Class D
- Channels: Configurable 6/5/4/3-channel operation
- Power Output at 4Ω: 125W RMS × 6
- Power Output at 2Ω: 200W RMS × 6
- Bridged Output: 400W RMS × 3 at 4Ω
- Built-in DSP: Matrix DSP with signal routing and time alignment
- Equalisation: 30-band graphic EQ and 10-band parametric EQ per output
- Crossovers: High-pass, low-pass and band-pass
- Factory Integration: 8 speaker-level inputs and 6 RCA inputs
- Preamp Outputs: 2 assignable outputs
- Bass Restoration: AccuBASS
- Automatic Turn-On: GTO signal sensing
- Clipping Detection: MILC with LED indicator
- Tuning Software: DM Smart App for PC/Mac
The AudioControl D-6.1200 is worth considering when you want more than a straightforward power upgrade. It combines a six-channel amplifier with a built-in DSP, giving you control over speaker output, crossover settings and signal routing without requiring a separate standalone processor. Its 125W RMS per channel at 4 ohms provides substantial power for many aftermarket speakers, while its 2-ohm capability offers additional flexibility when the connected speakers are compatible.
The real advantage is its Matrix DSP. You can assign input signals to different outputs, adjust crossover frequencies and use the 30-band graphic EQ and 10-band parametric EQ per output to fine-tune the system. Time alignment can also help improve stereo imaging from the driver’s seat, where the left and right speakers are rarely the same distance away. These features are especially useful in a carefully planned system, although good tuning and correct speaker placement still matter.
Factory-radio integration is another reason to shortlist this model. It has eight speaker-level inputs, six RCA inputs and two assignable preamp outputs, giving installers several ways to incorporate it into compatible factory or aftermarket systems. AccuBASS is designed to compensate for bass roll-off introduced by certain factory audio systems, while GTO signal sensing can switch the amplifier on when an audio signal is detected. Compatibility still depends on how the vehicle’s audio system processes its outputs, so check that before purchasing.
(Best suited to a multi-speaker car audio build that needs strong amplification, detailed DSP control and flexible factory-system integration.)
What Makes It Worth Considering
- Flexible channel configuration: Supports six-, five-, four- and three-channel arrangements within its intended configurations.
- Independent tuning options: DSP controls help balance speakers, adjust crossovers and improve integration between different drivers.
- Factory stereo integration: Speaker-level inputs provide a practical connection option when replacing the original head unit is undesirable.
- Expansion potential: Two assignable preamp outputs can feed additional equipment in a compatible system.
- Clipping awareness: MILC detection and its LED indicator help identify clipping, allowing gain settings to be corrected before distortion becomes a recurring problem.
One Thing to Consider Before Buying
Its extensive processing features are most valuable when you intend to configure and tune them properly. If you simply want to amplify factory speakers without adjusting crossovers or equalisation, you may not benefit from much of what makes this model distinctive. Allow for suitable wiring, power delivery, mounting clearance and ventilation, and follow the manufacturer’s installation instructions.
Where This Six-Channel Amplifier Fits Best
The D-6.1200 makes the most sense in a system that needs both speaker power and signal correction. A front component-speaker setup with rear fill can benefit from separate output control, while a compatible bridged configuration can support other arrangements. Remember that bridging reduces the number of independent channels available, and you must observe the specified impedance limits.
It can also be a useful candidate for an older vehicle whose owner wants to retain the factory head unit. For newer vehicles, however, integration is not guaranteed simply because speaker-level inputs are available. Factory amplifiers, signal processing and vehicle-specific audio architectures can complicate installation, so confirm the connection method before ordering.
The Insider Pro-Tip
Before choosing this amplifier, list the RMS power handling and impedance of every speaker in your planned setup. Match those figures to the amplifier’s output at the relevant impedance, and decide which channels will power each speaker before considering any bridged configuration. Peak wattage is not the right figure for matching continuous speaker power.
If you’re retaining the factory stereo, have the installer check the incoming signal before tuning the DSP. Some factory systems change their equalisation or bass output as the volume rises, so a setup that sounds balanced at low volume may not remain balanced at higher levels. Get the input signal right first, then adjust crossovers, output levels and time alignment. That’s how you make practical use of the D-6.1200’s processing capabilities rather than paying for features that remain untouched.
#2. Mosconi D2 80.6 DSP Mini 6-Channel Class D Amplifier
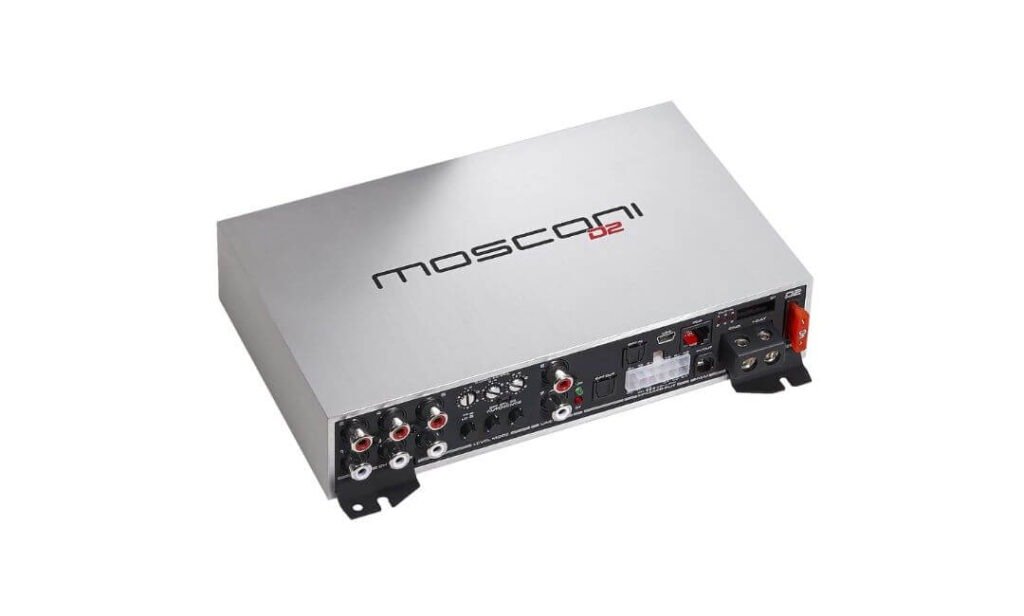
Quick Specs:
- Amplifier Type: Class D
- Channels: 6-channel amplifier with built-in 6-to-8 DSP
- Power Output: Up to 105W per channel at 4Ω, as specified
- Built-in DSP: 6-to-8-channel digital signal processor
- Inputs: High-level, low-level and digital inputs
- Digital Connectivity: SP-DIF input
- Additional Inputs: AUX connectivity, depending on configuration
- Preamp Outputs: 2 processed line outputs
- Dimensions: 200 × 145 × 40 mm
- Weight: 1,340 g (approximately 2.95 lb)
The Mosconi D2 80.6 DSP Mini combines six-channel amplification with integrated digital signal processing in a compact chassis measuring just 200 × 145 × 40 mm. Its space-saving design makes it worth considering for installations where a full-size amplifier would be difficult to accommodate, while the integrated DSP gives you greater control over speaker performance and system tuning.
The built-in 6-to-8-channel DSP is the main attraction. It allows an installer to configure and tune audio signals for different speakers, with crossover adjustments and signal routing depending on the processor’s capabilities. Rather than sending identical audio across every channel, the system can be configured to better match the characteristics of individual drivers, helping achieve a more balanced and controlled soundstage.
Connectivity adds to its flexibility. The specified high-level and low-level inputs provide integration options for compatible factory and aftermarket head units, while the SP-DIF digital input offers another route for supported audio sources. The amplifier also lists two processed line outputs, potentially allowing integration with an additional amplifier for a subwoofer or other system components, depending on the available output configuration.
Details That Make It Stand Out
- Compact Installation: The small chassis helps when boot or under-seat mounting space is limited, provided adequate ventilation and cable clearance are available.
- Integrated DSP: The 6-to-8 processing architecture offers greater flexibility for configuring a multi-speaker audio system.
- Flexible Inputs: High-level and low-level connections support different source-unit configurations when properly matched.
- Digital Audio Connectivity: The SP-DIF input provides a digital connection option for compatible sources.
- System Expansion: The specified processed line outputs may allow connection to an additional amplifier, depending on the final system layout.
One Important Power Specification to Verify
The supplied specifications list up to 105W per channel at 4 ohms, while the model designation refers to 80.6. Before comparing this amplifier with competing models, verify its continuous RMS output, test voltage, distortion level and channel-loading conditions against the manufacturer’s current documentation. Peak power and RMS power are not interchangeable, and the actual output depends on the specified operating conditions.
Who Should Consider This Amplifier?
The Mosconi D2 80.6 DSP Mini is worth considering for a carefully planned car audio build where installation space, speaker tuning and flexible connectivity matter as much as amplification. Its integrated DSP can help an installer tailor the sound for different speakers, while the processed line outputs offer potential expansion options for a more elaborate setup.
However, buyers primarily looking for maximum volume on a tight budget should compare verified RMS power, supported speaker impedance and overall system cost before choosing it. Its strongest appeal is the combination of compact packaging and integrated processing rather than wattage alone.
The Insider Pro-Tip
Before purchasing, measure the available mounting area and leave enough room for connectors, cable bends and airflow. A compact amplifier still needs a suitable mounting position, secure wiring and adequate ventilation to operate reliably.
For the best results, plan the DSP output routing before installation. Begin with crossover settings recommended by the speaker manufacturer, then adjust channel levels, time alignment and equalisation where supported. This approach helps build a properly balanced system instead of relying on excessive EQ adjustments to compensate for incorrect speaker integration.
#3. CT Sounds ATv2-150.6d 1500 Watt Class D 6-Channel Car Amplifier
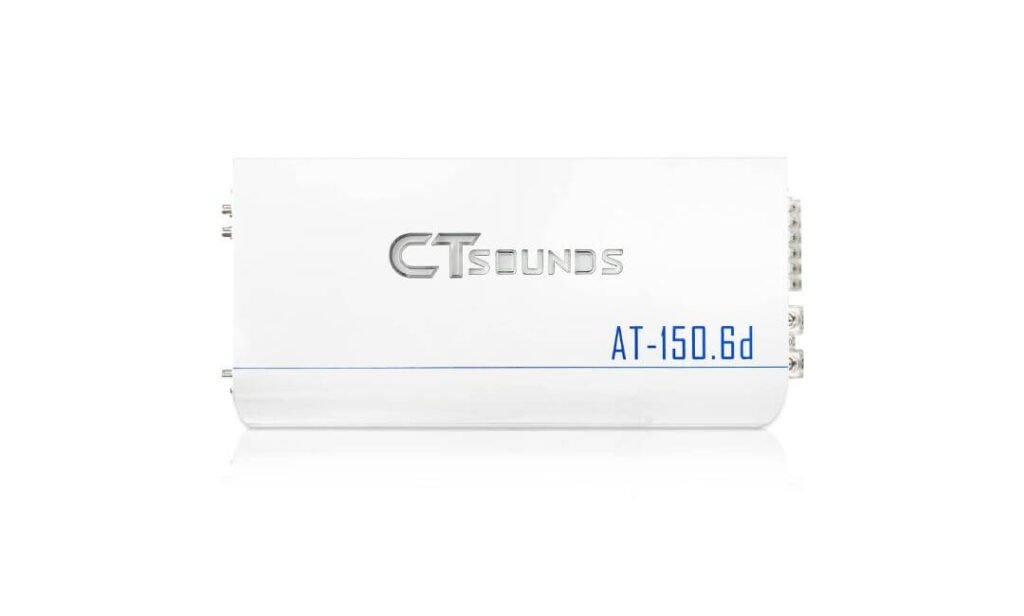
Quick Specs:
- Amplifier Type: Class D
- Channels: 6-channel
- Power Output at 4Ω: 150W RMS × 4, as supplied
- Power Output at 2Ω: 250W RMS × 4, as supplied
- Bridged Output: 500W RMS × 2 at 4Ω, as supplied
- Advertised Peak Power: 1,500W
- Frequency Response: 20Hz–20kHz, as supplied
- Crossovers: Selectable high-pass and low-pass filters
- Bass Boost: Supported, according to the supplied specifications
- Operating Voltage: 9–16V DC, as supplied
- Design: White chassis with illuminated CT Sounds logo
- Weight: Approximately 17 lb, as supplied
The CT Sounds ATv2-150.6d is worth considering for custom car audio systems that need substantial amplification and flexibility in speaker configuration. Its advertised 1,500-watt peak rating catches the eye, but the more important figures are the supplied ratings of 150W RMS × 4 at 4 ohms and 250W RMS × 4 at 2 ohms. These figures describe four channels rather than all six, so the complete manufacturer-rated power output needs to be verified before planning a full system around this amplifier.
Its bridged configuration adds another option for installations with different power requirements. The supplied specifications list 500W RMS × 2 at 4 ohms bridged, potentially making this arrangement useful for selected speakers or other compatible loads. However, bridging reduces the number of independently powered channels available, and the actual configuration must follow the manufacturer’s wiring instructions and minimum impedance requirements.
Selectable high-pass and low-pass filters provide control over the frequencies sent to connected speakers, while bass boost offers another adjustment for low-frequency response. These features can help refine the system when matched to the speakers’ capabilities. Proper gain adjustment, suitable wiring and adequate electrical supply remain essential, particularly when the amplifier is expected to operate at higher output levels.
Features That Make It Worth Considering
- Higher-Output Potential: The supplied RMS figures make it worth evaluating for aftermarket speakers that require more amplification than a basic factory system provides.
- Bridged Configuration: Provides additional system-design flexibility when the speaker impedance and power requirements match the manufacturer’s specifications.
- Selectable Crossovers: High-pass and low-pass filtering help direct suitable frequency ranges to individual speakers.
- Bass Adjustment: Bass boost provides an additional tuning option, although excessive boosting can increase distortion and place extra stress on speakers.
- Distinctive Design: The white chassis and illuminated CT Sounds logo suit buyers who want a more distinctive appearance in a custom audio installation.
What to Check Before Buying
The first priority is confirming the amplifier’s complete six-channel RMS power ratings. The supplied 150W and 250W figures cover four channels, so they should not be assumed to represent the output available across all six channels simultaneously. Likewise, the advertised 1,500W peak figure should not be treated as continuous RMS power.
Check the manufacturer’s documentation for the complete power table, minimum supported impedance, recommended fuse rating, wiring requirements and thermal limits. Pay particular attention to bridged operation because the safe impedance requirements can differ from those of individual channels.
Who Should Consider the CT Sounds ATv2-150.6d?
This amplifier deserves consideration if you’re building a custom car audio system around aftermarket speakers with varying power requirements. Its channel configuration and supplied output ratings may suit a setup that needs stronger amplification, provided the verified specifications support the intended speaker arrangement.
If you’re planning to add a subwoofer amplifier or bridge channels for a particular application, map out the entire system before purchasing. Bridging changes the number of independent channels available, so the final design must account for every speaker and its power requirements.
For a factory-radio upgrade, confirm input compatibility and the availability of the connections needed for your vehicle. High power output alone does not guarantee straightforward integration with a factory head unit or its existing audio-processing system.
The Insider Pro-Tip
Before pairing speakers with the CT Sounds ATv2-150.6d, create a channel-by-channel plan showing each speaker’s nominal impedance and continuous RMS power handling. Compare those figures against the manufacturer’s verified output ratings for the exact configuration you intend to use. This prevents you from designing a system around the headline wattage without confirming how much power each speaker can actually receive.
If your priority is higher volume, have the installer set the gain correctly and check for clipping at realistic listening levels. Additional amplifier headroom can help maintain clean sound, but it cannot compensate for inadequate electrical supply, incorrect tuning or mismatched speakers.
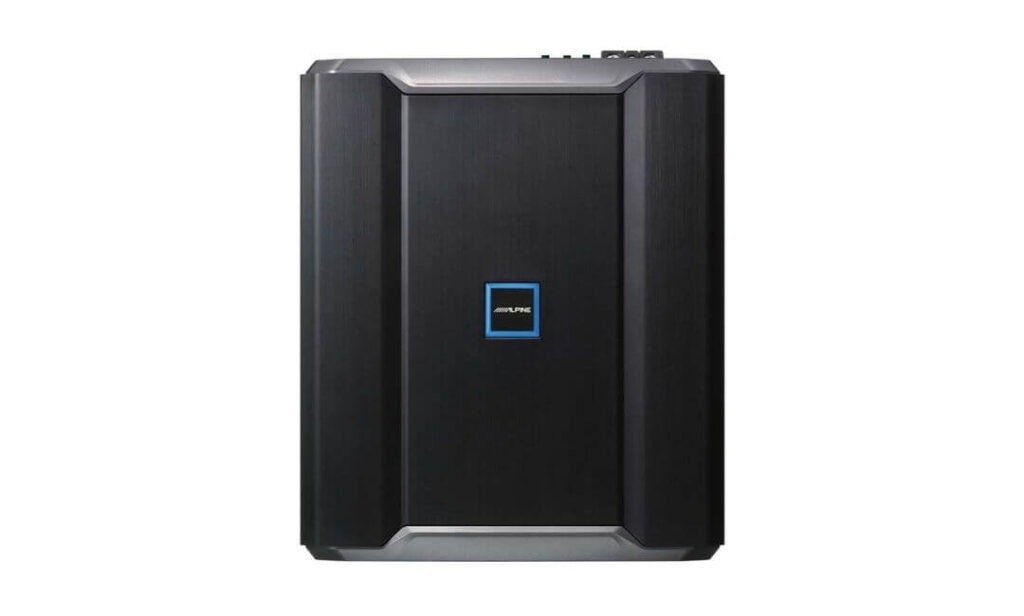
#4. Alpine R-A90S R-Series 6/5/4/3 Channel Power Amplifier
Quick Specs:
- Amplifier Type: Class D
- Channels: Configurable 6/5/4/3-channel operation
- Power Output at 4Ω: 75W RMS × 4 + 150W RMS × 2
- Power Output at 2Ω: 100W RMS × 4 + 250W RMS × 2
- Bridged Output at 4Ω: 200W RMS × 2 + 500W RMS × 1
- Channel Design: Staggered power output
- Turn-On Feature: GTO signal-sensing technology
- Factory Integration: Speaker-level input on channels 1/2
- Recommended Wiring: 4-gauge power and ground leads
- Installation Note: Wiring and mounting hardware are not included
The Alpine R-A90S R-Series amplifier takes a different approach to six-channel amplification by providing different power levels across its channels. Its specified output of 75W RMS × 4 plus 150W RMS × 2 at 4 ohms gives you four lower-powered channels and two higher-powered channels to work with. This arrangement can be useful when designing a custom system around speakers with different power requirements, rather than relying on identical output across all six channels.
One particularly interesting application is a three-way active front-stage system, where tweeters, midrange drivers and midbass speakers receive separate amplified signals. The staggered output provides flexibility when allocating power to different drivers, although the final channel assignment must match each speaker’s impedance, RMS power handling and crossover requirements. Higher output does not automatically make a channel suitable for a particular speaker.
The R-A90S also supports alternative channel configurations, with the supplied bridged ratings listing 200W RMS × 2 and 500W RMS × 1 at 4 ohms. Its GTO signal-sensing technology can simplify turn-on in compatible installations, while the speaker-level input on channels 1 and 2 offers an option for integrating certain factory audio systems. Check the manufacturer’s wiring instructions and your vehicle’s audio output requirements before choosing the installation method.
Features That Matter When Planning a System
- Staggered Channel Output: Four 75W channels and two 150W channels at 4 ohms offer flexibility when matching amplifier outputs to different speakers.
- Three-Way Front-Stage Potential: Six amplified channels can support an active front-speaker arrangement when channel routing, crossovers and power requirements are planned correctly.
- Multiple Channel Configurations: The configurable design accommodates different system layouts, subject to the manufacturer’s supported modes.
- GTO Signal Sensing: This feature can simplify amplifier turn-on in compatible installations by detecting an audio signal.
- Factory Audio Integration: The speaker-level input on channels 1 and 2 provides a connection option for supported factory-source configurations.
Installation Costs You Should Plan For
Alpine recommends 4-gauge power and ground leads, while wiring and mounting hardware are not included. Budget for suitable power cable, fuse protection, grounding and any additional integration equipment your vehicle requires.
Mount the amplifier securely and allow sufficient space for ventilation and cable access. A high-quality amplifier still needs a properly sized electrical supply and a suitable mounting location to perform reliably, particularly during extended listening at higher volume levels.
Why the Staggered Power Design Makes Sense
The Alpine R-A90S is worth considering when your speaker system has different amplification requirements across the front and rear stages. Its higher-powered pair can be assigned to drivers that benefit from additional output, while the remaining four channels handle other speakers. The correct allocation depends on the actual speaker specifications and the amplifier’s supported configurations.
It can also be considered for a front-and-rear speaker setup with a separate subwoofer arrangement. However, bridging changes the number of independently powered channels available, so plan the complete system before purchasing. If all six speakers require separate amplified signals, you cannot assume that bridging channels for another application will preserve the same six-channel configuration.
The Insider Pro-Tip
Before buying the Alpine R-A90S, create a channel map showing which outputs will power the tweeters, midrange drivers, midbass speakers, rear speakers or other components. Match each assignment to the speaker’s RMS rating and nominal impedance, then confirm the configuration against Alpine’s official wiring diagram.
This is particularly important for a three-way active front stage, where incorrect crossover settings can damage tweeters even when the amplifier’s power ratings appear suitable. After installation, configure the crossovers and gains carefully, then verify the system at realistic listening levels. The staggered output gives you more design flexibility, but proper channel allocation and tuning are what turn that flexibility into a balanced, clean-sounding system.
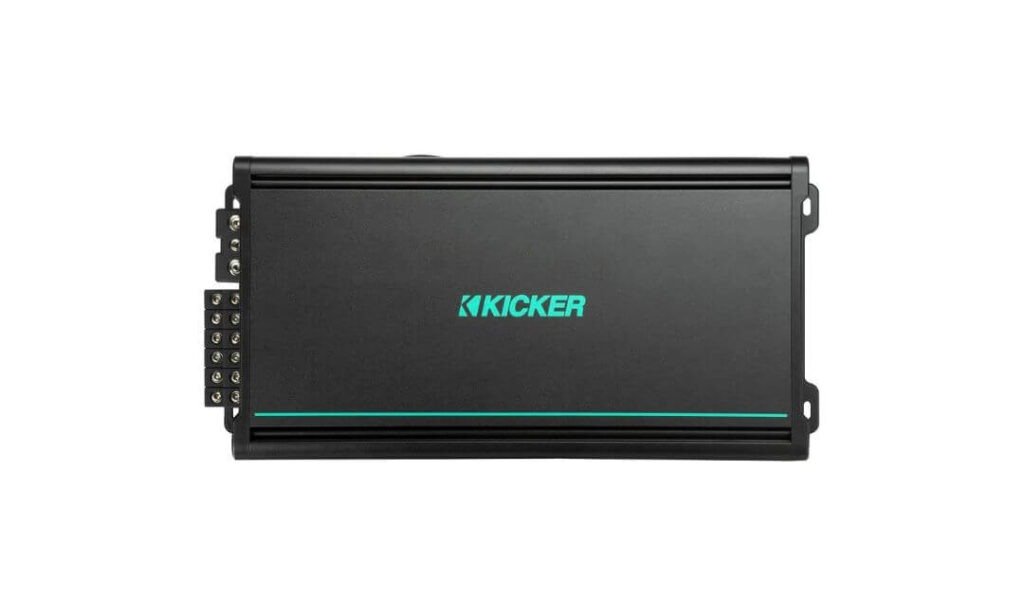
#5. KICKER 48KMA6006 KMA600.6 6x100W 6-Channel Weather-Resistant Full-Range Amplifier
Quick Specs:
- Amplifier Type: Full-range marine amplifier
- Channels: 6-channel
- Power Output at 4Ω: 50W RMS × 6
- Power Output at 2Ω: 100W RMS × 6
- Bridged Output: 200W RMS × 3 at 4Ω, according to the supplied specifications
- Circuit Protection: Conformal-coated circuit boards
- Hardware: 316L stainless steel
- Crossovers: Built-in variable crossovers
- Bass Adjustment: KickEQ+ bass boost, listed as 0–6dB at 40Hz
- Frequency Response: 10Hz–20kHz, as supplied
- Installation Advantage: Compact footprint for space-conscious installations
The KICKER KMA600.6 takes a different approach to six-channel amplification by prioritising weather-resistant construction for marine and other suitable installations. Its conformal-coated circuit boards help protect against moisture exposure, while the 316L stainless-steel hardware is designed to resist corrosion. These features make it worth considering for boat audio systems and other environments where ordinary car-audio equipment may face more demanding conditions.
The supplied specifications list 50W RMS × 6 at 4 ohms and 100W RMS × 6 at 2 ohms, giving the amplifier the potential to power several compatible speakers from a single unit. This configuration can be useful for multi-speaker installations where consistent amplification matters more than advanced signal processing or exceptionally high power per channel. Confirm the manufacturer’s complete power ratings and operating conditions before comparing its output directly with competing amplifiers.
Built-in variable crossovers provide control over the frequencies delivered to connected speakers, while the listed KickEQ+ bass boost offers 0–6dB of adjustment at 40Hz. These controls allow you to tailor the sound to your speaker arrangement without necessarily requiring a separate processor. However, increasing bass output also increases the demands on the amplifier and speakers, so adjustments should remain within the equipment’s limits.
Practical Features Beyond the Power Rating
- Moisture-Conscious Construction: Conformal-coated circuit boards provide additional protection against moisture exposure, although they do not make the amplifier waterproof under every condition.
- Corrosion-Resistant Hardware: The 316L stainless-steel components are designed to resist corrosion in demanding environments.
- Six-Channel Flexibility: Powers multiple compatible speakers from one amplifier, making it useful for multi-speaker installations.
- Variable Crossovers: Helps direct suitable frequency ranges to the connected drivers.
- Adjustable Bass Response: The KickEQ+ control provides an additional low-frequency tuning option without requiring a separate processor.
One Important Limitation to Understand
The KICKER KMA600.6 is a marine-oriented full-range amplifier, not a dedicated DSP amplifier. If your priority is detailed time alignment, extensive equalisation or complex signal routing, a DSP-equipped alternative may be more suitable.
Also, verify the complete bridged-power specifications, minimum impedance and supported channel combinations in the current manufacturer’s manual before planning a system around three bridged loads. The supplied bridged rating should not be treated as confirmation that every possible configuration is supported.
Where the KICKER KMA600.6 Makes the Most Sense
This amplifier is particularly worth considering for boat audio systems and other compatible installations where moisture-conscious construction is a priority. Its six channels can accommodate multiple speakers, while the built-in crossovers provide practical control over frequency delivery. It may also suit a vehicle installation where weather resistance is important, provided the mounting environment, electrical requirements and intended use match the manufacturer’s recommendations.
For a conventional road-car system focused on precise sound staging, extensive DSP tuning or maximum output, compare it with models such as the Alpine R-A90S, Mosconi D2 80.6 DSP Mini and CT Sounds ATv2-150.6d. The KICKER’s main advantage is its weather-resistant construction, so it makes the most sense when that feature addresses a genuine installation requirement.
The Insider Pro-Tip
When installing the KICKER KMA600.6, consider the entire mounting environment rather than relying solely on its coated circuit boards. Position the amplifier according to the manufacturer’s instructions, protect connections with suitable marine-grade wiring and connectors where required, and avoid unnecessary exposure to direct water.
For tuning, begin with the connected speakers’ recommended frequency limits and set the crossovers accordingly. Apply bass boost gradually, checking for distortion and ensuring the speakers can handle the additional low-frequency demand. This approach helps you get the most from the amplifier’s straightforward controls while preserving the reliability that makes its weather-conscious design valuable.
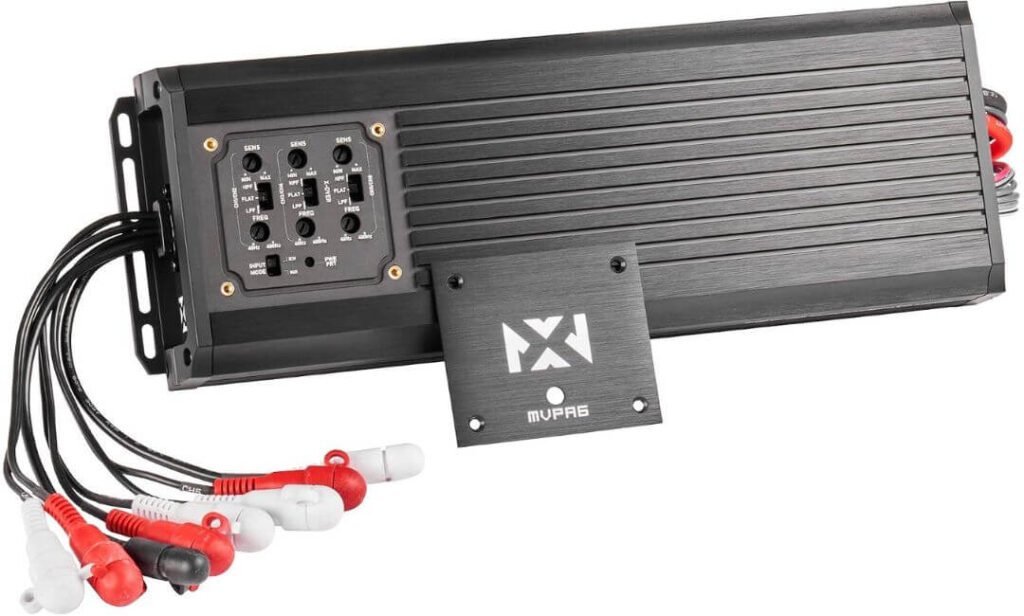
#6. NVX MVPA6 900W Total RMS 6-Channel Bridgeable Marine-V Series
Quick Specs:
- Amplifier Type: Class D, full-range
- Channels: 6-channel, bridgeable
- Total RMS Power: 900W, as advertised
- Power Output at 4Ω: 100W RMS × 6
- Power Output at 2Ω: 150W RMS × 6
- Bridged Output: Up to 300W × 3, according to the supplied specifications
- Water Resistance: IPX67 rating, as specified
- Circuit Protection: Conformal-coated PCB
- Protection Features: Thermal, voltage and short-circuit protection
- Frequency Response: 20Hz–20kHz
- Total Harmonic Distortion: 0.3%, as specified
- Signal-to-Noise Ratio: 90dB
- Bass Boost: Variable, up to +12dB at 50Hz
- Inputs: High-level, RCA and AUX options, as specified
- Remote Control: Bass remote included, according to the supplied details
- Dimensions: 12.9 × 4.4 × 1.7 inches
The NVX MVPA6 is designed for audio systems that need multiple amplified channels without taking up the space required by a conventional full-size amplifier. Its compact Class D design makes it worth considering for suitable cars, boats, motorcycles and other powersports applications where mounting space is limited. The supplied specifications list 100W RMS per channel at 4 ohms and 150W RMS per channel at 2 ohms, providing a useful starting point when matching the amplifier to compatible speakers.
Its main advantage is the combination of compact packaging and weather-conscious construction. The specified IPX67 rating and conformal-coated circuit board make it relevant for marine and outdoor installations where moisture exposure is a genuine concern. However, water resistance does not eliminate the need for correct mounting, suitable connections and proper wiring. Always follow the manufacturer’s installation instructions for the intended environment.
Connectivity and everyday controls add to its appeal. The supplied specifications list high-level and RCA inputs, AUX connectivity, built-in protection circuitry and a remote bass control. Its adjustable bass boost of up to +12dB at 50Hz provides additional control over low-frequency response, although excessive boost can increase distortion and place extra demands on the amplifier and speakers. For buyers who want six amplified channels in a compact package, the MVPA6 offers a combination of practical controls and weather protection worth evaluating.
Features That Matter Beyond the Power Rating
- Compact Installation: Its listed dimensions of 12.9 × 4.4 × 1.7 inches can help when mounting space is restricted, provided there is sufficient room for connections and ventilation.
- Weather-Resistant Construction: The specified IPX67 rating and coated circuit board make it relevant for suitable marine and outdoor installations.
- Flexible Input Options: High-level and RCA inputs provide connection options for compatible factory and aftermarket audio sources.
- Built-In Protection: Thermal, voltage and short-circuit protection help guard against certain electrical and operating faults.
- Remote Bass Adjustment: The included bass remote allows convenient adjustment without accessing the amplifier directly.
One Important Power Detail to Understand
The advertised 900W total RMS corresponds to the supplied six-channel rating of 100W RMS per channel at 4 ohms. The 150W-per-channel figure at 2 ohms applies under a different load condition, so these ratings should not be added together.
Before purchasing, confirm the complete power table, minimum supported impedance, recommended fuse rating and bridged operating limits in the manufacturer’s current documentation. The supplied bridged rating of up to 300W × 3 should also be checked against the manufacturer’s approved channel configurations.
Where the NVX MVPA6 Makes the Most Sense
This amplifier is particularly worth considering for a compact marine or powersports audio system where space efficiency, multiple speaker channels and weather protection are priorities. Its six-channel configuration can simplify installations involving several compatible speakers without requiring a separate amplifier for every pair.
It may also suit a vehicle build where the installation environment benefits from weather-resistant equipment. However, buyers primarily interested in advanced sound staging, detailed time alignment and extensive equalisation should compare it with DSP-equipped alternatives such as the Mosconi D2 80.6 DSP Mini or AudioControl models.
If you’re planning to add a subwoofer, determine the channel allocation before installation. Bridging changes the number of independent channels available, and the included bass remote should not be confused with a dedicated digital signal processor offering comprehensive crossover and signal-routing controls.
The Insider Pro-Tip
For marine or outdoor installations, treat the amplifier’s water-resistance rating as one part of the overall protection plan. Follow the specified mounting orientation, protect exposed connections appropriately and use correctly sized power cables, grounding and fuse protection. Even weather-resistant equipment can develop problems because of poor connections or incorrect installation.
When tuning the system, start with the speakers’ continuous RMS ratings and recommended crossover limits. Keep bass boost conservative until you’ve checked the sound for distortion at realistic listening levels. This approach helps you make effective use of the MVPA6’s compact design and remote adjustment without pushing the amplifier or connected speakers beyond their practical limits.
Best 6 Channel Car Amplifiers (2026): Which Models Deliver the Best Audio Control?
| Amplifier | Published RMS Output | Standout Features | Best Fit | Check Before Buying |
|---|---|---|---|---|
| AudioControl D-6.1200 Class D · Built-in Matrix DSP DSP Tuning | 125W × 6 at 4Ω 200W × 6 at 2Ω; 400W × 3 bridged at 4Ω | 30-band graphic EQ, 10-band parametric EQ per output, time alignment, AccuBASS, 8 speaker-level inputs and 6 RCA inputs. | Factory integration and detailed sound tuning in one unit. | DSP setup takes time. Check factory signal processing and mounting space. |
| Mosconi D2 80.6 DSP Compact amplifier · 6-to-8 DSP Compact DSP | 105W per channel at 4Ω* Supplied information also states 80W/channel; verify the official rating. | Built-in DSP, SP-DIF digital input, high- and low-level inputs, compact 200 × 145 × 40 mm chassis. | Space-conscious systems needing integrated processing and flexible inputs. | Resolve the 80W versus 105W discrepancy using current manufacturer documentation. |
| CT Sounds ATv2-150.6d Class D · Bridgeable High Output | 150W × 4 at 4Ω* 250W × 4 at 2Ω; 500W × 2 bridged at 4Ω, as supplied. | Selectable high-pass and low-pass filtering, bass boost and bridgeable channel configurations. | Custom systems where higher output and flexible channel planning matter. | Verify the complete six-channel power table before planning all outputs. |
| Alpine R-A90S R-Series · Staggered power Flexible Power | 75W × 4 + 150W × 2 at 4Ω 100W × 4 + 250W × 2 at 2Ω, as specified. | Staggered channel output, multiple channel configurations and GTO signal-sensing turn-on. | Three-way active front-stage or mixed speaker/subwoofer systems when correctly configured. | Bridging reduces independent channel count. 4-gauge power and ground leads are recommended. |
| KICKER 48KMA6006 KMA600.6 Weather-resistant marine amplifier Marine Use | 50W × 6 at 4Ω 100W × 6 at 2Ω, as supplied. | Conformal-coated circuit boards, 316L stainless-steel hardware and variable crossovers. | Boat audio and suitable installations where moisture resistance matters. | Marine-focused rather than DSP-focused. Verify bridged channel combinations in the manual. |
| NVX MVPA6 Marine-V Series Compact Class D · Weather-resistant Outdoor Audio | 100W × 6 at 4Ω 150W × 6 at 2Ω; 300W × 3 bridged, as supplied. | IPX67 rating as specified, coated PCB, protection circuitry, AUX/RCA inputs and bass remote. | Compact marine, motorcycle and powersports systems. | Confirm installation conditions for the IP rating and exact bridged impedance limits. |
Important verification: The supplied Mosconi details conflict on 80W versus 105W per channel. The supplied CT Sounds figures also do not fully establish output with all six channels driven. Verify both before publication.
Buying Guide for Choosing a Six-Channel Car Amplifier That Actually Fits Your System
A six-channel amplifier can simplify a multi-speaker installation, but choosing the right model comes down to how you plan to use those channels. More power doesn’t automatically mean better sound, and paying extra for a built-in DSP makes little sense if you don’t need advanced tuning. Before comparing models, consider your speaker layout, power requirements, installation space and whether you intend to retain the factory head unit.
Match RMS Power to Your Speakers, Not the Biggest Wattage on the Box
The first specification to check is continuous RMS power per channel at the impedance your speakers will present. Peak power figures may look impressive, but they aren’t a reliable basis for choosing an amplifier for sustained listening.
For comparison, the AudioControl D-6.1200 is rated at 125W RMS per channel at 4 ohms, while the KICKER KMA600.6 is listed at 50W RMS per channel at the same impedance. That difference affects available output, but it doesn’t mean the AudioControl will automatically sound better in every vehicle. Speaker sensitivity, installation quality, crossover settings and gain adjustment all influence the final result.
Before buying, check the following:
- Speaker power handling: Match amplifier output to each speaker’s continuous power rating and intended operating range.
- Impedance: Compare ratings at the actual speaker load. A 2-ohm output rating doesn’t mean every channel or bridged configuration can safely operate at 2 ohms.
- Channels driven: Confirm whether the advertised output applies with all six channels operating simultaneously.
- Electrical requirements: Check the recommended fuse, power cable gauge, grounding and vehicle charging-system capacity.
A useful rule is to compare RMS ratings at the same impedance and under similar supply-voltage and distortion conditions. Otherwise, the wattage figures may not tell the whole story.
Decide Whether Built-In DSP Is Worth Paying For
A six-channel amplifier with built-in DSP combines amplification with digital signal processing. Depending on the model, this can include equalisation, crossover adjustment, time alignment and flexible input-to-output routing. These features are particularly useful when speakers sit at different distances from the driver’s seat or when different driver types need carefully coordinated frequency ranges.
The AudioControl D-6.1200 and Mosconi D2 80.6 DSP both offer integrated processing, but their specifications and capabilities aren’t identical. Check the available software, routing options, filters and confirmed power ratings rather than assuming every DSP amplifier provides the same controls.
An external DSP may make more sense if you already own a suitable amplifier or need processing features your chosen model doesn’t provide. An integrated DSP, meanwhile, can reduce equipment duplication and simplify a carefully planned installation.
| Your priority | What to look for |
|---|---|
| Straightforward speaker amplification | Suitable RMS output, compatible inputs and basic crossover controls |
| Better driver-seat imaging | Time alignment, output-level adjustment and appropriate EQ |
| Active component speakers | Enough independently controlled outputs and suitable crossover options |
| Future system expansion | Processed preamp outputs and a compatible external amplifier |
| Factory stereo retention | Suitable speaker-level inputs and a way to handle factory signal processing |
Remember, DSP doesn’t guarantee better sound on its own. Poorly configured equalisation or crossovers can make a system sound worse, so the feature is most valuable when you’re prepared to tune it properly.
Choose a Channel Layout That Matches Your Speaker Plan
Six channels don’t automatically mean six speakers in every installation. Depending on the amplifier’s supported configurations, you might use all six channels for independent speakers, build an active front stage or combine speakers with a subwoofer arrangement.
A conventional setup might use four channels for front and rear speakers, with the remaining two assigned to compatible drivers. A three-way active front stage can use separate channels for tweeters, midrange drivers and midbass speakers, but this requires suitable crossover control and careful channel allocation.
The Alpine R-A90S is particularly relevant because it uses staggered power output, with four channels rated at 75W RMS and two at 150W RMS at 4 ohms. This provides different power levels for system designers to work with, although each channel must still be matched to its connected speaker.
Before committing to a configuration, confirm:
- How many speakers need independent amplification.
- Whether any channels will be bridged.
- The minimum permitted impedance in stereo and bridged modes.
- Whether the amplifier provides the required crossover controls.
- How much power remains available when multiple channels operate together.
Bridging reduces the number of independent channels available. Never plan a subwoofer connection around bridged wattage alone; check the wiring diagram and minimum load requirements first.
Check the Amplifier’s Size Before Planning the Installation
A six-channel amplifier may look compact in product photos but still need considerable space once power cables, speaker connections and ventilation clearance are included. Measure the intended mounting location before ordering, especially if the amplifier must fit beneath a seat or behind interior trim.
The Mosconi D2 80.6 DSP measures 200 × 145 × 40 mm according to the supplied specifications, making it worth considering for a space-limited installation. The NVX MVPA6 is also marketed around a compact design. Neither should be installed in a sealed or poorly ventilated space simply because it fits.
Look beyond the chassis dimensions:
- Cable clearance: Allow room for plugs, wiring bends and strain relief.
- Ventilation: Follow the manufacturer’s mounting and cooling requirements.
- Service access: Make sure connections can be inspected and settings adjusted without dismantling unnecessary interior panels.
- Mounting security: Choose a stable mounting surface suitable for the vehicle and installation environment.
- Environmental exposure: Marine-rated construction may help in suitable outdoor applications, but installation and connection requirements still apply.
A compact amplifier that cannot be cooled or wired properly isn’t a good installation choice.
Understand THD, Signal-to-Noise Ratio and Bass Controls
Power ratings are only part of the picture. Total harmonic distortion (THD), signal-to-noise ratio (SNR) and frequency response help describe an amplifier’s measured performance, but these figures need context.
THD measures unwanted harmonic content under specified test conditions. Lower distortion can be desirable, but a quoted percentage is useful only when you know the output level, frequency and measurement conditions.
SNR compares the wanted signal with background noise. A higher figure generally indicates less noise relative to the signal under comparable conditions, although the source unit, grounding, gain structure and installation can also affect audible noise.
Frequency response indicates the range over which an amplifier reproduces a signal within a specified tolerance. A broad stated range doesn’t, by itself, prove superior sound quality.
Bass boost deserves particular care. It can increase low-frequency output, but boosting bass also demands more amplifier power and speaker excursion. If the system starts to distort, reducing the boost may be more effective than increasing the gain further.
For most buyers, correct gain setting, appropriate crossover frequencies and a clean source signal matter more than chasing a single impressive laboratory figure.
Check Factory and Aftermarket Input Compatibility
If you want to retain the original head unit, check whether the amplifier accepts the signal your vehicle provides. Speaker-level inputs can simplify connections to compatible factory speaker outputs, while RCA inputs are commonly used with aftermarket head units or compatible signal processors.
However, high-level inputs don’t guarantee straightforward integration with every modern vehicle. Some factory systems use a separate amplifier, apply equalisation or change their output with volume. Others may require an interface or signal-correction device.
The AudioControl D-6.1200 lists eight speaker-level inputs and six RCA inputs, offering several integration options. The Alpine R-A90S lists a speaker-level input on channels 1 and 2. These specifications are useful starting points, but the correct wiring method depends on the vehicle’s audio architecture.
Before purchasing, confirm:
- Whether the signal comes directly from the head unit or from a factory amplifier.
- The input types and signal levels supported by the amplifier.
- Whether factory equalisation or bass roll-off needs correction.
- Whether a remote turn-on wire or compatible signal-sensing feature is required.
- Whether an additional integration interface is needed for your vehicle.
Checking these details beforehand can prevent unexpected installation costs.
Look Beyond Basic Protection Features
Thermal, voltage and short-circuit protection can help an amplifier respond to certain operating faults. These safeguards are useful, but they can’t make incorrect wiring, poor grounding or an unsuitable speaker load safe.
For a typical car installation, check the manufacturer’s recommended fuse, cable gauge, grounding requirements and permitted operating voltage. For marine or powersports use, environmental protection becomes an additional consideration.
The KICKER KMA600.6 lists conformal-coated circuit boards and 316L stainless-steel hardware. The NVX MVPA6 is specified with an IPX67 rating and a coated circuit board. These features make them worth considering for suitable marine applications, but installation must still follow the manufacturer’s requirements for water exposure, mounting and electrical connections.
Don’t confuse weather resistance with unlimited waterproofing under every installation condition, and don’t assume a marine amplifier is automatically the best choice for a conventional road car.
Check Whether RMS Output Is Consistent Across All Six Channels
One detail buyers often overlook is whether an amplifier delivers the same power on every channel. Some models provide equal output across all six channels, while others use a staggered arrangement to supply different power levels to different speaker groups.
The Alpine R-A90S is a clear example of staggered output, with four lower-powered channels and two higher-powered channels at the specified loads. This can be useful in a carefully planned system, but it isn’t equivalent to six channels each delivering the higher figure.
For any model, read the complete power table and look for:
- RMS output per channel at 4 ohms.
- RMS output per channel at 2 ohms, if supported.
- Bridged output and the permitted bridged impedance.
- Whether the figures apply with all channels driven.
- The supply voltage and distortion conditions used for the ratings.
The supplied CT Sounds ATv2-150.6d specifications list power figures for four channels in stereo operation. Those figures alone don’t establish its output with all six channels driven, so check the complete manufacturer power table before finalising a system around it.
Ultimately, the right six-channel amplifier is the one whose verified power ratings, channel layout, input compatibility and installation requirements match your actual build. A thoughtful match will serve you better than choosing solely by advertised peak watts or the longest feature list.
DSP Tuning and Setup Essentials for a Six-Channel Car Amplifier
A six-channel amplifier with a built-in DSP gives you greater control over how your car audio system sounds, but the results depend on how carefully you configure it. Enabling every feature or increasing equaliser settings won’t automatically improve sound quality. The real goal is to make the speakers work together, send the right frequencies to each driver, improve timing at the listening position and maintain enough headroom for clean playback.
The AudioControl D-6.1200 and Mosconi D2 80.6 DSP combine amplification with integrated signal processing, allowing installers to manage several aspects of the system through one unit. Before changing settings, confirm the amplifier’s actual channel routing, available filters and software controls. DSP capabilities vary by model, so always follow the manufacturer’s manual rather than assuming every six-channel amplifier works the same way.
What DSP Tuning Actually Changes in Your Car
Digital signal processing adjusts the audio signal reaching each speaker before amplification. Depending on the available features, you can control frequency response, output levels, crossover behaviour, timing and signal routing independently across different outputs.
Three adjustments generally make the biggest difference:
- Soundstage and imaging: The goal is to create a coherent presentation across the dashboard instead of making the music seem to come separately from each door. Level matching, equalisation, speaker placement and time alignment all contribute.
- Crossovers: These determine which frequencies reach each speaker. Tweeters shouldn’t reproduce deep bass, and subwoofers shouldn’t be expected to handle the entire midrange.
- Time alignment: Speakers sit at different distances from the driver’s ears. DSP delay can compensate for some of those differences, helping sounds from separate drivers arrive in a more coordinated way.
Equalisation also matters, but it shouldn’t be used to compensate blindly for every acoustic problem. A deep cancellation caused by speaker placement or reflections may not respond well to a large boost. Adjusting positioning, polarity, crossover integration or installation quality may be more effective.
Step 1: Confirm the Speaker Layout and Signal Routing
Before touching the EQ, write down which amplifier channel powers each speaker. This is particularly important in an active setup, where tweeters, midrange drivers and midbass speakers may each have a dedicated output.
A basic six-channel allocation might look like this:
| Amplifier channels | Example assignment | Main requirement |
|---|---|---|
| 1 and 2 | Front left and right speakers | Matching crossover and level settings |
| 3 and 4 | Rear left and right speakers | Suitable filtering and rear-fill level |
| 5 and 6 | Additional drivers or another supported configuration | Correct routing, impedance and crossover settings |
This is only an example, not a universal wiring plan. An active front stage may use all six channels for tweeters, midrange drivers and midbass speakers, leaving no channels for rear speakers. A system with a subwoofer may require a different arrangement, a supported bridged output or an additional amplifier.
Before proceeding, verify the following:
- Each speaker is connected to the intended output.
- Left and right channels are assigned correctly.
- Every driver is identified in the DSP software.
- The selected output routing matches the actual wiring.
- Speaker impedance is compatible with the amplifier.
- Every driver has an appropriate protective high-pass or low-pass filter.
Incorrect routing can make even carefully chosen DSP settings ineffective. Get the channel map right first.
Step 2: Establish a Clean Baseline Before Calibration
Start with the system in a known, predictable state. If the amplifier or head unit has been tuned previously, record the existing settings before making changes. Where appropriate, load the manufacturer’s recommended starting configuration or reset the DSP according to its manual.
Initially, set the head unit’s EQ, loudness, bass boost and other sound enhancements to neutral. Disable overlapping processing that could interfere with measurements, and keep the amplifier’s input sensitivity conservative until the gain structure has been checked.
Next, confirm that every speaker operates correctly. Listen for rattles, distortion, missing channels and obvious differences in output. Check wiring polarity against the installation plan rather than assuming matching wire colours guarantee correct polarity.
Use a familiar recording with clean vocals and instruments for an initial listening check. At this stage, the goal isn’t to make the system sound spectacular; it’s to identify installation faults before attempting to correct them through software.
Important: Never disable all crossover filters simply to hear what every speaker can reproduce. Tweeters and other small drivers can be damaged by frequencies below their safe operating range, particularly at higher volume levels.
Step 3: Set Safe Crossovers for Each Speaker
Crossovers determine the frequency range sent to each driver. Correct settings protect speakers, reduce unnecessary distortion and help neighbouring drivers blend together.
There is no universal crossover frequency for every six-channel system. The correct starting point depends on the speaker’s design, manufacturer recommendations, installation location, available filters and intended system configuration.
| Speaker type | What to configure | What to avoid |
|---|---|---|
| Tweeters | Protective high-pass filter appropriate to the driver’s specifications | Sending deep midrange or bass to a driver not designed for it |
| Midrange speakers | Suitable high-pass filter and, in a multi-way system, a low-pass filter | Excessive overlap with neighbouring drivers |
| Midbass speakers | High-pass filter to control excessive excursion, plus low-pass filtering where required | Expecting door-mounted midbass speakers to reproduce deep sub-bass at high volume |
| Rear speakers | Filtering appropriate to the speaker’s capabilities and rear-fill role | Making the rear stage so prominent that vocals appear behind the driver |
| Subwoofer, if supported | Suitable low-pass filter and compatible amplifier channel or output | Assuming any pair of channels can safely be bridged |
Choose the filter slope and frequency using the speaker manufacturer’s guidance, then verify the result through measurement and listening. A steeper slope isn’t automatically better, and the same numerical crossover setting can behave differently depending on the driver’s acoustic response and filter type.
Pay particular attention to transitions between speakers. Poor overlap between a midrange driver and tweeter can make vocals sound harsh or recessed. Weak integration between midbass and subwoofer can make the bass seem disconnected from the music.
Step 4: Set Levels and Gain Before Fine EQ
Before making detailed tonal adjustments, establish a sensible gain structure. Head-unit volume, DSP output levels and amplifier gain interact, so changing one without understanding the others can introduce clipping or reduce usable headroom.
Begin with the source unit at a known clean volume level, following the manufacturer’s guidance or an appropriate gain-setting procedure. Set amplifier gains using suitable test signals and equipment where available, then adjust individual DSP output levels to balance the speakers.
Avoid assuming every channel needs the same gain value. Different speaker sensitivities, mounting positions and listening distances can require different output levels.
Listen for these warning signs:
- Distortion that appears as volume increases, particularly on vocals or bass transients.
- One speaker sounding substantially louder than its counterpart.
- Harshness that remains even at moderate volume.
- Excessive hiss when the music is paused.
- A noticeable change in tonal balance as head-unit volume increases.
Don’t use DSP output levels to conceal an amplifier that is clipping, and don’t keep increasing gain to compensate for inefficient speakers or poor placement. Resolve the underlying issue first.
Step 5: Use Time Alignment to Improve the Soundstage
In a typical left-hand-drive car, the driver sits much closer to the left-side speakers than to the right-side speakers. Without compensation, sound from the nearer side reaches the listener earlier, which can pull vocals and instruments towards that side.
Time alignment adds controlled delay to selected outputs so signals arrive more coherently at a chosen listening position. It doesn’t physically move the speakers or eliminate every reflection, but correctly configured delay can improve the perceived location of voices and instruments.
A practical starting procedure is:
- Select the driver’s seat as the primary listening position if the system is mainly for one person.
- Measure the distance from that position to each speaker’s acoustic centre as consistently as possible.
- Enter the measurements into the DSP if it supports distance-based alignment.
- Check whether the software converts distances into delays automatically. Avoid adding a second manual correction on top of an automatic calculation unless the manual requires it.
- Play a familiar vocal recording and listen for a stable, centred image.
- Make small adjustments while comparing the result with the previous setting.
A distance-based starting point is generally more reliable than guessing delays by ear alone. However, the best final result can still depend on speaker phase, crossover behaviour, reflections and the vehicle’s interior.
Real talk: Don’t chase a perfectly centred vocal by making large, random delay changes. If the image becomes unstable or loses body, return to the last reliable setting and check polarity, levels and crossover integration before continuing.
Step 6: Apply EQ to Correct Tonal Imbalances
Equalisation is most effective after the speakers are routed, filtered, level-matched and time-aligned. Otherwise, you may end up using EQ to compensate for a problem that should have been fixed elsewhere.
Start by listening to familiar recordings at a moderate volume. Identify one specific issue rather than changing several frequency bands at once. Vocals might sound overly bright, midbass may seem muddy, or a particular bass note may dominate the cabin.
If you have a calibrated measurement microphone and suitable software, use them to examine the response at the listening position. Car measurements can vary with microphone placement, seat position and reflections, so take repeatable measurements instead of attempting to flatten every narrow peak.
Follow these principles:
- Make small cuts first: Reducing a prominent peak often preserves headroom better than boosting surrounding frequencies.
- Use narrow filters selectively: A narrow EQ adjustment can address a distinct resonance, but don’t apply one automatically to every irregularity in a measurement.
- Avoid large boosts: Boosting a deep cancellation can consume substantial headroom without producing the expected increase in sound.
- Compare at matched volume: A louder version can seem better even when its tonal balance hasn’t improved.
- Recheck the whole system: Changes to one output can affect how it blends with neighbouring speakers, especially around crossover points.
The AudioControl D-6.1200 lists graphic and parametric EQ functions, providing different ways to shape frequency response. Available filters and adjustment ranges depend on the DSP model, so use the actual software controls rather than assuming every processor offers identical options.
Active Speaker Setup: Make Every Channel Do a Defined Job
An active system sends separate frequency bands to individual drivers instead of relying entirely on passive crossovers between the amplifier and speakers. This offers more precise control over crossover points, output levels, EQ and timing, but increases setup complexity.
A six-channel amplifier can support a three-way active front stage when six suitable, independently controlled outputs are available: one channel for each tweeter, midrange and midbass driver on both sides. This uses all six channels, so rear speakers need a separate amplification solution if they are to remain powered.
For a reliable active setup:
- Confirm that the DSP provides the required independent filters for every output.
- Set safe crossover limits for each driver before raising the volume.
- Verify left and right routing, speaker polarity and channel levels.
- Check the acoustic blend between the tweeter and midrange, then between the midrange and midbass.
- Tune one issue at a time and save a copy of the last working configuration.
- Use appropriate measurement equipment if available, particularly when integrating several drivers across overlapping frequency ranges.
Don’t assume identical crossover frequencies on the left and right will automatically produce identical results. Vehicle geometry and speaker placement can create different acoustic responses on each side, so final tuning may require measured adjustments.
Common DSP Tuning Problems and How to Fix Them
| What you hear | Possible cause | What to check first |
|---|---|---|
| Vocals pull strongly to one side | Unequal output levels, incorrect delay or routing | Confirm channel mapping, polarity, levels and time alignment |
| Tweeters sound sharp or strained | Crossover too low, excessive EQ boost or high distortion | Check the recommended high-pass settings and reduce aggressive boosts |
| Midbass sounds weak | Polarity mismatch, crossover cancellation or poor door sealing | Verify polarity and crossover integration, then inspect the installation |
| Bass is boomy on certain notes | Cabin resonance, excessive bass boost or response peaks | Reduce unnecessary boost and investigate the response with measurements |
| Rear speakers dominate the front stage | Rear level too high or poorly chosen processing | Lower rear output and reassess the intended rear-fill role |
| Hiss is audible with no music | Gain structure, source noise, grounding or equipment noise | Check input levels, grounding and signal connections |
| Distortion appears at higher volume | Clipping, excessive boost, insufficient headroom or speaker overload | Reduce the level, inspect clipping indicators and reset gains correctly |
| One driver is silent | Incorrect routing, wiring, filter configuration or protection activation | Check channel assignment, connections, output filter and amplifier status |
These are starting points for troubleshooting, not guaranteed diagnoses. One symptom can have several causes, and changing multiple DSP settings simultaneously makes the actual problem harder to identify.
Save Presets and Validate the Final Tune
Once the system sounds balanced, save the working configuration before experimenting further. If the DSP supports multiple presets, keep one reliable baseline and use another for controlled changes. Label them clearly so you can return to the original setup without rebuilding it.
Finish by testing several familiar tracks with different vocals, instruments and bass content. Listen at moderate and higher—but still safe—levels. Check that the soundstage remains stable, no driver becomes harsh and the system doesn’t develop distortion when the music becomes demanding.
A properly tuned six-channel system should sound coherent rather than simply loud. Safe crossovers protect the drivers, sensible gain settings preserve headroom, time alignment can improve imaging, and measured EQ can correct tonal problems without adding unnecessary distortion. The strongest result comes from combining DSP features with correct installation and methodical testing, not from maximising every available setting.
Installation Tips for a Six-Channel Car Amplifier
Installing a six-channel car amplifier takes more planning than simply finding a place to mount it and connecting the wires. You need to account for current draw, cable length, ventilation, grounding, signal routing and the number of speakers the amplifier will power. This becomes especially important with a DSP-equipped amplifier, because you also need access to its connections and adjustment controls after installation.
Before starting, check the manufacturer’s installation manual for the correct power-wire gauge, fuse rating, minimum speaker impedance, mounting clearances and wiring diagrams. These requirements vary between amplifiers, even when their advertised power ratings appear similar. A compact amplifier may save space, but it still needs a reliable electrical supply and a mounting location protected from excessive heat, moisture and physical damage.
Choose a Mounting Location That Allows Proper Cooling
The best mounting location isn’t necessarily the smallest space available. A six-channel amplifier can generate considerable heat when driving multiple speakers, particularly during extended listening at high volume. An unsuitable location can restrict airflow, complicate wiring and make routine troubleshooting unnecessarily difficult.
Common mounting locations include:
- Under a front seat: This can keep the installation discreet and shorten some wiring runs. Check seat movement, adjustment mechanisms, floor ducts, under-seat electronics and the risk of objects being pushed against the amplifier.
- Inside the boot or trunk: A side panel, secured equipment board or suitable section of the rear cargo area can provide space for the amplifier and wiring. Make sure luggage cannot strike the unit or cover its ventilation openings.
- Behind a removable trim panel: This can produce a clean, factory-style installation, provided there is sufficient clearance, airflow and service access.
- On a dedicated amplifier board: A properly secured board can organise the amplifier, distribution blocks and signal connections. Attach it firmly to a suitable structural mounting point.
Before drilling, inspect both sides of the mounting surface. Fuel lines, brake lines, wiring harnesses, the fuel tank and other components may sit behind panels or beneath the carpet. Never assume a clear-looking surface is safe to drill.
Follow the manufacturer’s mounting orientation and clearance instructions. Don’t cover cooling fins, ventilation slots or other heat-dissipating surfaces with carpet or foam. If the amplifier repeatedly overheats, enters thermal protection or shuts down during normal use, investigate the installation and electrical load rather than simply moving it into a tighter space.
Plan the Power Wiring Before Connecting the Amplifier
A six-channel amplifier requires a stable electrical supply capable of handling its actual current demand. The correct cable size depends on power requirements, supply voltage, cable length, installation conditions and the manufacturer’s recommendations. Don’t select a power cable solely by looking at the advertised peak wattage.
A typical installation includes a positive power cable from the battery, a properly rated fuse near the battery, a suitable chassis ground and a remote-turn-on connection or another supported activation method. RCA cables or speaker-level inputs may also be required, depending on the source unit and amplifier.
Use this approach when planning the installation:
- Check the wiring diagram. Confirm the required power and ground cable sizes, fuse specification, connector types and terminal requirements.
- Measure the complete cable route. Include the distance from the battery to the amplifier, bends, routing around trim and final connection length. Longer runs can increase voltage drop.
- Choose automotive-grade cable. Use cable suitable for the expected current, temperature and vehicle conditions. Confirm whether the published gauge refers to copper conductor size or a different construction.
- Protect the cable through metal panels. Use a suitable grommet and abrasion-resistant protection to prevent the insulation from wearing against sharp edges.
- Secure the cable along its route. Keep it away from moving parts, sharp edges, excessive heat and areas where water can collect.
- Inspect every connection. Make sure terminals are secure, cable strands are properly captured and no exposed conductor can contact the vehicle body or another terminal.
If the amplifier supports high output across several channels, don’t assume a small cable is adequate simply because the chassis is compact. Current requirements depend on the actual load and operating conditions, not the amplifier’s physical size.
Get the Ground Connection Right
A poor ground connection can cause intermittent shutdowns, excessive voltage drop, electrical noise and unreliable performance. Grounding deserves the same attention as the positive power connection.
Where the manufacturer specifies chassis grounding, choose a solid, suitable structural point close enough to the amplifier to keep the ground cable within the recommended length. The connection must be electrically sound, mechanically secure and protected against corrosion.
Follow these practices:
- Select an appropriate chassis location rather than attaching the ground to a thin trim bracket or unreliable fastener.
- Prepare the contact surface as directed so paint, coatings or contamination don’t compromise electrical contact.
- Use the correct terminal and hardware, tightening the connection to the manufacturer’s specification where provided.
- Keep the ground lead as short as practical while following the specified cable-size requirements.
- Protect the finished connection against corrosion using a suitable method that doesn’t interfere with electrical contact.
- Avoid drilling into safety-critical components or locations where modifications could compromise vehicle structure.
Don’t assume any existing bolt will make a suitable ground. Seat mounts, airbag-related hardware and other safety-critical mounting points should not be modified casually.
If you’re installing additional amplifiers or processors, follow each manufacturer’s grounding recommendations and consider the complete system layout. Randomly adding ground points or connecting signal grounds to the chassis can make noise problems harder to diagnose.
Install the Correct Fuse and Remote-Turn-On Connection
The main power fuse protects the power cable against dangerous overcurrent conditions. It isn’t simply a device selected to match the amplifier’s advertised wattage.
Install the specified fuse as close to the battery’s positive terminal as practical, following the manufacturer’s instructions and applicable vehicle-installation requirements. The fuse rating must suit the cable’s current-carrying capacity and the equipment’s protection requirements. Never increase the fuse rating just because it keeps blowing; identify the cause first.
Check whether the amplifier has an internal fuse, requires an external fuse or uses both. An internal fuse doesn’t eliminate the need to protect the long positive cable running from the battery.
The remote-turn-on connection tells a compatible amplifier when to power up. Depending on the system, activation may come from the head unit’s remote output, a supported signal-sensing feature or a dedicated interface.
- Confirm the correct turn-on method in the amplifier manual.
- Don’t connect a remote terminal directly to the battery’s constant positive supply unless the manufacturer explicitly specifies an appropriate arrangement.
- If the amplifier uses signal sensing, check whether it supports the input type being used and whether the factory audio system requires an interface.
- If the amplifier remains powered after the vehicle is switched off, investigate the activation signal before continuing to use the system. An incorrect connection can drain the battery.
Some modern vehicles keep parts of the audio system active for a period after shutdown. Account for the vehicle’s normal shutdown behaviour before concluding that the remote connection is faulty.
Check Voltage Drop and the Vehicle’s Electrical Capacity
An amplifier can be wired correctly and still perform poorly if supply voltage falls excessively under load. Voltage drop can result from undersized cables, long cable runs, weak connections, poor grounding or limitations in the vehicle’s charging system.
Before installation, check the amplifier’s operating-voltage range and compare it with the vehicle’s electrical system. Most conventional car-audio amplifiers are designed for nominal 12-volt vehicle systems, but the acceptable range varies by model.
For a reliable installation:
- Use the manufacturer’s recommended power and ground cable sizes.
- Keep high-current cable runs as short and direct as the installation reasonably allows.
- Check battery condition and charging-system health if the vehicle already experiences electrical problems.
- Inspect power and ground connections for looseness, corrosion or excessive resistance.
- If the amplifier resets, dims its status lights or shuts down during heavy bass passages, measure supply voltage at the amplifier under load rather than relying only on an idle battery reading.
A multimeter can help identify voltage drop, but measurements must be taken correctly and safely. If you’re unfamiliar with automotive electrical testing, have a qualified installer perform the checks.
Don’t automatically upgrade the alternator or battery because an amplifier advertises a large peak-power figure. First establish its actual current requirements, the vehicle’s electrical capacity and whether the problem comes from poor connections or inadequate wiring.
Keep Signal Cables Away From High-Current Wiring
Noise can enter a car-audio system through poor connections, grounding problems, interference or unsuitable cable routing. Alternator whine is a familiar symptom, often heard as a rising or falling pitch that changes with engine speed. However, not every noise problem is caused by RCA cables running beside power cables.
Plan the wiring route before reinstalling the trim. Where practical, keep low-level RCA signal cables and sensitive signal wiring separate from high-current power cables, ignition wiring and other potential sources of interference. If the cables must cross, crossing them at approximately a right angle can help reduce parallel exposure.
Additional precautions include:
- Use suitable, undamaged signal cables with secure connectors.
- Ensure the amplifier’s RCA or high-level input connections match the source unit.
- Route cables away from ignition components, high-current switching equipment and known sources of interference where practical.
- Keep excess cable neatly secured rather than tightly coiling it around power wiring.
- Avoid routing cables where seats, trim panels or cargo can crush them.
- Check the head unit, DSP and amplifier gain structure if hiss or noise is audible at normal listening levels.
If noise appears after installation, diagnose it systematically. Note whether it occurs with the engine off, with the engine running or only when a particular source or device is connected. Check grounding, connectors and input routing, then isolate components one at a time using safe diagnostic procedures.
Don’t cut off ground pins, defeat electrical safety features or install a ground-loop isolator as the first response. An isolator may suit a specific system, but it can also affect signal quality or mask the underlying issue. Correct the actual fault whenever possible.
Manage Speaker Wiring and Channel Labels Carefully
A six-channel amplifier introduces more speaker connections than a typical four-channel unit. Mistakes become easier when several wires are routed together behind trim panels.
Label each speaker wire at both ends before final installation. For an active front-stage system, use clear identifiers such as Front Left Tweeter, Front Right Tweeter, Front Left Midbass and Front Right Midbass. If the amplifier powers front and rear speakers, label those channels accordingly.
A useful installation checklist includes:
- Confirm that each speaker is connected to its assigned positive and negative terminals.
- Keep speaker-wire strands from touching neighbouring terminals or the vehicle chassis.
- Use the wire gauge and insulation rating appropriate to the installation and amplifier requirements.
- Secure wiring away from seat tracks, pedals, hinges and other moving components.
- Avoid crushing wires beneath trim clips, brackets or panels.
- Leave sufficient service slack to remove the amplifier without pulling on connectors, but avoid loose loops that can snag.
- Keep channel labels consistent with the DSP software so the physical wiring and digital configuration match.
Pay special attention to bridged operation. If the amplifier supports bridging, use only the specified terminal pair and follow the required minimum bridged impedance. Bridging changes the load seen by the amplifier, and not every channel combination is supported. Never assume two channels can be bridged simply because another amplifier model allows it.
Make a Compact Installation Easier to Service
A compact six-channel amplifier can be an excellent option for vehicles with limited space, but a smaller chassis doesn’t automatically make the complete installation smaller. You still need room for power cables, speaker wiring, signal connectors, fuse access, ventilation and any DSP control or USB connections.
For a space-conscious installation, consider the following:
- Use a dedicated mounting board: Keep the amplifier and necessary distribution hardware organised without spreading equipment across several panels.
- Measure connector clearance: Include space for RCA plugs, terminal blocks and cable bends, not just the amplifier’s listed dimensions.
- Plan cable entry points: Choose a mounting orientation that avoids forcing thick power cables into tight bends.
- Keep adjustment ports accessible: DSP USB ports, control connections and status indicators should remain reachable without dismantling much of the interior.
- Use suitable mounting hardware: Follow the manufacturer’s requirements and avoid obstructing cooling surfaces.
- Protect equipment from stored items: Under-seat and boot installations should be protected from shoes, luggage, tools and other objects that could damage wiring or block airflow.
A concealed installation can look cleaner, but it shouldn’t make troubleshooting impossible. Leave enough access to inspect connections, read status indicators and remove the amplifier for servicing.
For marine-focused models with conformal-coated circuit boards or water-resistance features, verify the manufacturer’s environmental rating and installation requirements. A protective coating or sealed chassis doesn’t mean every connector, cable termination or mounting location is waterproof. Install the unit within its specified environmental limits.
Perform a Safety Check Before Reconnecting the Battery
Don’t rush the final power-up. A short inspection can help prevent blown fuses, damaged equipment and electrical hazards.
Before reconnecting the battery or installing the main fuse, check the following:
- The amplifier is firmly mounted and cannot move during normal driving.
- The positive power cable is protected from abrasion and cannot contact the chassis.
- The ground connection is secure and appropriate for the installation.
- The fuse type and rating match the manufacturer’s requirements and cable protection needs.
- All speaker and signal connections are correctly routed and secured.
- No exposed conductors can short against other terminals or metal surfaces.
- The amplifier’s ventilation and service access remain unobstructed.
- No wiring interferes with seat movement, pedals, airbags or other vehicle safety systems.
- The amplifier’s minimum impedance and bridged-channel requirements are satisfied.
- The vehicle’s battery and charging system are in suitable condition.
Reconnect power according to the vehicle and equipment manufacturers’ procedures. Start at a low volume, confirm that the amplifier powers up normally and test each channel individually before playing music at higher levels.
If a fuse blows, a cable becomes hot, the amplifier produces an unusual smell or the unit immediately enters protection, switch the system off and investigate the fault rather than repeatedly trying to power it up.
When Professional Installation Is the Better Choice
A straightforward installation using a compatible head unit, accessible mounting location and clearly documented wiring may be manageable for someone with appropriate automotive electrical experience. The job becomes more complex when integrating a factory audio system, building an active three-way front stage, modifying interior panels, bridging channels or diagnosing persistent electrical noise.
Professional installation is worth considering if the vehicle uses a complex factory amplifier, network-controlled audio system, sensitive electrical architecture or integrated safety electronics. A qualified installer can also verify gain structure, measure voltage drop, configure the DSP and confirm that every driver receives a safe frequency range.
The key is to treat installation and tuning as one job. Even an amplifier with excellent power delivery and advanced DSP features cannot compensate for poor grounding, inadequate cable protection, incorrect channel routing or restricted cooling. A well-planned installation keeps the system reliable, makes future adjustments easier and gives the DSP a sound foundation to work with.
Six-Channel Car Amplifier Applications and Real-World System Configurations
A six-channel car amplifier is most useful when you need to power several speakers while keeping the system organised and controllable. Depending on its power ratings, channel configuration and built-in processing, it can run a conventional front-and-rear speaker system, support an active front stage or form part of a larger setup with a separate subwoofer amplifier.
The important distinction is that six amplifier channels don’t automatically mean six speakers plus a subwoofer. Each channel has its own power and impedance limits, and bridging channels changes how many independent outputs remain available. Some amplifiers also provide built-in DSP, while others offer basic crossover controls. Your ideal configuration depends on your speakers, the sound you want and whether you prioritise simplicity, sound quality or high output.
Using a Six-Channel Amplifier for an Active Speaker Setup
An active speaker system uses separate amplifier channels for individual drivers, with electronic crossovers determining which frequencies each driver receives. Unlike a conventional component-speaker setup that relies on passive crossovers, an active configuration gives the installer more direct control over each tweeter, midrange driver and midbass speaker.
A six-channel amplifier with suitable independent DSP outputs can power a three-way front stage consisting of six drivers:
| Amplifier channel | Speaker assignment | Required signal processing |
|---|---|---|
| Channel 1 | Left tweeter | Protective high-pass filter |
| Channel 2 | Right tweeter | Matching high-pass filter, adjusted for the installation |
| Channel 3 | Left midrange | High-pass and low-pass filtering |
| Channel 4 | Right midrange | High-pass and low-pass filtering |
| Channel 5 | Left midbass | Suitable high-pass and low-pass filtering where required |
| Channel 6 | Right midbass | Matching filtering, adjusted for the measured response |
This configuration dedicates all six channels to the front speakers. It doesn’t leave two channels for rear speakers or provide a dedicated subwoofer channel. You’ll need another amplifier or a supported alternative configuration to add those components.
Before wiring an active system, check that the DSP can independently route and filter all six outputs. Confirm the tweeters’ safe operating range, the midrange and midbass drivers’ specifications, and the amplifier’s output at the actual speaker impedance.
One critical detail: never connect an active tweeter directly to an unrestricted full-range amplifier output and assume the DSP will protect it automatically. The appropriate crossover must be configured correctly before playing the system at meaningful volume.
Can a Six-Channel Amplifier Power a Subwoofer?
Yes, some six-channel amplifiers can power a subwoofer through supported bridged channels or a suitable channel allocation. However, the amplifier must explicitly support the required bridging arrangement and the subwoofer’s impedance.
For example, a compatible six-channel amplifier might run four full-range speakers from four individual channels and use the remaining two channels bridged for a subwoofer. This can be practical when the subwoofer’s power requirements fall within the amplifier’s verified bridged rating.
There are important trade-offs:
- Bridging two channels normally combines them into one higher-output channel, so those channels are no longer independently available.
- The minimum permitted impedance in bridged mode may differ from the minimum impedance in normal stereo mode.
- The bridged RMS rating must be checked separately; it cannot be reliably calculated from advertised peak wattage.
- The subwoofer needs suitable low-pass filtering, while the full-range speakers need appropriate high-pass filtering.
- The available power must suit the subwoofer, its voice-coil configuration and your intended listening level.
If the subwoofer needs more power than the six-channel amplifier can deliver cleanly, a dedicated mono amplifier is often the better solution. That also allows the six-channel unit to focus on the main speakers.
Understanding RMS Power Across All Six Channels
When comparing six-channel amplifiers, check the RMS rating at the impedance you intend to use and establish whether the published figure applies with all six channels operating simultaneously.
A headline rating can be misleading if it combines peak power, bridged output or figures measured under different conditions. Some models also have different ratings for different channel pairs, which matters when planning a mixed speaker and subwoofer configuration.
| Power specification | What it tells you | What to check |
|---|---|---|
| RMS watts per channel at 4 ohms | Continuous output into a common speaker impedance | Whether all six channels have the same rating |
| RMS watts per channel at 2 ohms | Output at a lower supported impedance | Whether the amplifier supports that load on every intended channel |
| Bridged RMS output | Power from a supported pair of channels operating together | Minimum bridged impedance and supported channel pairs |
| Total RMS output | Combined continuous power across specified channels | Whether the total matches the individual ratings and test conditions |
| Peak or maximum power | A short-duration or marketing-oriented power figure, depending on the specification | Never use it as a substitute for continuous RMS output |
Consider the Alpine R-A90S, which uses a staggered-power design. Its supplied 4-ohm ratings are 75W RMS across four channels and 150W RMS across the remaining two channels. This layout can make sense when the front stage needs more power than the rear speakers or when different drivers have different power requirements.
The practical lesson is to match power to the intended role of each channel. A tweeter doesn’t necessarily need the same available power as a midbass driver, and a rear-fill speaker may not need as much output as the front stage. Nevertheless, every speaker must receive an appropriate signal and remain within its thermal and excursion limits.
One Six-Channel Amplifier or Multiple Amplifiers?
A single six-channel amplifier isn’t automatically better than a multi-amplifier setup. The right choice depends on power requirements, installation space, channel flexibility, subwoofer demands and how much system expansion you expect later.
| Consideration | One six-channel amplifier | Multiple amplifiers |
|---|---|---|
| Installation space | Usually fewer separate chassis and power connections | Requires room for additional units and wiring |
| Wiring complexity | Can simplify the overall layout | More power, signal and grounding connections to plan |
| Front-stage control | Excellent when sufficient independent DSP control is available | Can offer more flexibility when paired with a capable DSP |
| Subwoofer output | Limited by available channels and bridged rating | A dedicated mono amplifier can provide power specifically for the subwoofer |
| Future upgrades | Limited by available channels and output capacity | Often easier to expand or replace individual components |
| System tuning | Convenient when the amplifier includes a suitable DSP | Depends on the processing and integration of all components |
| Cost | May reduce the number of separate components | Can cost more overall, depending on equipment choices |
A single-chassis installation is attractive when you want a tidy system with fewer components. It’s particularly practical for a conventional front-and-rear speaker layout or an active front stage where the amplifier’s DSP and output ratings meet your requirements.
Multiple amplifiers make more sense when the front speakers require substantial clean power, the subwoofer has high power demands or you want to upgrade one part of the system without replacing everything. A dedicated DSP can manage signal routing across separate amplifiers, although this introduces more configuration work.
Don’t choose multiple amplifiers just because the system looks more advanced on paper. Additional equipment also means greater current demand, more wiring, more installation space and more opportunities for grounding or gain-setting problems.
Real-World Configuration 1: Front and Rear Speakers With a Separate Subwoofer Amplifier
This is a practical arrangement for drivers who want improved sound quality and stronger bass without building a fully active front stage.
System layout
- Channels 1 and 2 power the front left and right speakers.
- Channels 3 and 4 power the rear left and right speakers.
- Channels 5 and 6 remain unused or are reserved for another supported application.
- A separate mono amplifier powers the subwoofer.
In this configuration, the six-channel amplifier provides independent amplification for the four main speakers, while the mono amplifier handles the subwoofer’s power requirements. If the six-channel unit has DSP, it may also manage high-pass filters, output levels and timing for the main speakers, subject to its actual routing capabilities.
The subwoofer amplifier and DSP need compatible signal connections. If the DSP doesn’t provide the required outputs, you may need an appropriate signal-routing solution.
Why this setup works: It keeps the main speaker channels independent and avoids asking a six-channel amplifier to deliver all the system’s subwoofer power. It also leaves room for future adjustments to front and rear speaker balance.
What to watch: A separate amplifier doesn’t automatically improve sound quality. Correct gain matching, crossover integration, polarity and time alignment are still necessary to make the subwoofer blend naturally with the door speakers.
Real-World Configuration 2: Active Two-Way Front Stage With Rear Fill
An active two-way front stage uses separate amplifier channels for the front tweeters and midbass drivers. This provides more direct control over the front soundstage than a conventional passive component-speaker setup.
System layout
| Amplifier channels | Assignment |
|---|---|
| 1 and 2 | Left and right tweeters |
| 3 and 4 | Left and right midbass drivers |
| 5 and 6 | Left and right rear-fill speakers |
This arrangement uses all six channels and requires suitable independent DSP filtering. The tweeters receive appropriate high-pass signals, while the midbass drivers receive the necessary high-pass and low-pass filtering. The rear speakers are filtered and level-matched according to their role.
The main advantage is control. The installer can adjust the front drivers separately, improve crossover integration and reduce the rear speakers’ prominence so that vocals and instruments remain focused towards the front.
The limitation is that there are no dedicated channels left for a subwoofer. If you want a subwoofer as well, a separate amplifier is generally the straightforward option. A different channel allocation may work on some amplifiers, but verify the routing, output and crossover capabilities rather than assuming every six-channel unit supports it.
Real-World Configuration 3: Three-Way Active Front Stage With a Separate Subwoofer Amplifier
For a system focused on front-stage detail, a three-way active setup can dedicate all six channels to the front tweeters, midrange drivers and midbass drivers. A separate mono amplifier then powers the subwoofer.
System layout
- Channels 1 and 2 power the tweeters.
- Channels 3 and 4 power the midrange drivers.
- Channels 5 and 6 power the midbass drivers.
- A separate mono amplifier powers the subwoofer.
- Rear speakers are omitted or powered by an additional amplifier if required.
This approach offers extensive control over the front stage, particularly when the DSP supports independent crossovers, output levels, equalisation and time alignment. Each driver can be tuned according to its role rather than relying entirely on passive crossover components.
However, this is also the most demanding configuration to set up correctly. Incorrect crossover settings can damage drivers, while poor timing or level matching can make the system sound less coherent despite the additional control. It’s best suited to an installer who understands active crossover design and has access to suitable measurement tools.
Real-World Configuration 4: Marine or Powersports Audio
A six-channel amplifier can also be useful in a boat, side-by-side vehicle or other powersports application where several speakers need amplification from a compact installation.
Weather-resistant models such as the KICKER 48KMA6006 and NVX MVPA6 may be worth considering, provided their verified environmental ratings and installation requirements suit the application.
A possible setup could use four channels for the main left and right speaker pairs, with the remaining two channels available for another speaker pair or a supported bridged configuration. The precise arrangement depends on the amplifier’s channel ratings, available crossover controls and minimum impedance.
Marine and powersports installations require additional care:
- Confirm the environmental rating rather than assuming a coated circuit board makes the entire amplifier waterproof.
- Use appropriate marine-grade wiring and terminals where required.
- Protect connections against moisture and corrosion.
- Ensure the battery and charging system can support the amplifier’s current draw.
- Follow the manufacturer’s requirements for mounting orientation, ventilation and water exposure.
The same power and impedance rules apply as they do in a car, but the installation environment can place additional demands on the equipment and connections.
How to Choose the Right Configuration for Your System
Before buying a six-channel amplifier, decide which speakers you want to power now and which upgrades you may add later. This helps prevent you from paying for unnecessary features or running out of channels as soon as you add a subwoofer.
Use these guidelines as a starting point:
- Front and rear speakers with stronger bass: Use four channels for the main speakers and consider a separate mono amplifier for the subwoofer.
- Active two-way front stage with rear fill: Allocate four channels to the front tweeters and midbass drivers, and the remaining two to the rear speakers.
- Three-way active front stage: Dedicate all six channels to the front drivers and use another amplifier for the subwoofer if required.
- Compact installation: Consider a single six-channel amplifier with integrated DSP, provided its power ratings and channel routing meet your needs.
- High-output system: Compare continuous RMS power, impedance limits, electrical requirements and the need for separate amplification instead of relying on total peak wattage.
- Marine or powersports use: Prioritise verified environmental protection, appropriate wiring and the actual operating conditions.
The best six-channel amplifier is the one that fits your complete system plan, not simply the model with the highest advertised wattage. Once you know the channel allocation, required RMS output, DSP needs and subwoofer strategy, comparing amplifiers becomes much easier because you can focus on specifications that genuinely matter.
FAQs About Six-Channel Car Amplifiers
Can a six-channel car amplifier power all six channels at its advertised RMS rating simultaneously?
Not always. Check whether the manufacturer specifies power with all six channels driven, along with the test voltage, speaker impedance and distortion level. Some headline ratings combine different channel configurations or use peak power instead of continuous RMS output.
This matters when comparing amplifiers for a demanding setup. A model rated at a certain wattage per channel at 2 ohms may deliver a different output at 4 ohms, and its bridged rating may apply to only specific channel pairs. Compare like-for-like specifications rather than relying on total wattage alone.
Is a built-in DSP better than adding a separate DSP to a six-channel car amplifier?
A built-in DSP is often the simpler option when its inputs, outputs and tuning functions match your system. It can reduce equipment, wiring and installation space while allowing you to adjust crossovers, output levels, equalisation and time alignment.
An external DSP makes more sense when you need additional outputs, more flexible signal routing or a processor that can manage multiple amplifiers. The real deciding factor is not whether the DSP is built in, but whether it gives you enough independent control for your intended speaker layout.
Can you bridge a six-channel car amplifier to run a subwoofer without sacrificing the front speaker setup?
You can on models that explicitly support the required bridging configuration, but bridging changes the channel allocation. For example, using two channels as one bridged subwoofer output leaves four independent channels available for speakers.
Before connecting anything, verify the permitted bridged impedance, RMS output and specified terminal arrangement. If the subwoofer requires substantial power, a separate mono amplifier may be a better solution because it preserves all six channels for the main speakers and avoids forcing the system into a restrictive layout.
Why does a six-channel car amplifier sometimes produce weak bass even when its RMS power is sufficient?
The problem may not be a lack of amplifier power. Factory audio processing can reduce bass at higher volume levels, crossover settings can leave a gap between the midbass speakers and subwoofer, and incorrect polarity can cause frequencies to cancel around the crossover region.
Check the signal reaching the amplifier, the high-pass and low-pass settings, speaker polarity and gain structure before buying a more powerful unit. If the source signal has already lost bass information, additional amplification alone cannot reliably restore it. A compatible DSP or suitable signal-correction solution may be needed.
When should you choose a six-channel amplifier with DSP instead of a conventional six-channel amp?
Choose a DSP-equipped model when the system needs independent tuning, particularly for an active front stage, factory-audio integration or precise crossover and time-alignment adjustments. These features can help different speakers work together instead of sounding like separate sources.
A conventional six-channel amplifier can be the smarter purchase for a straightforward front-and-rear speaker upgrade using suitable passive crossovers. You avoid paying for processing you may never use. Before deciding, map out every speaker, the power each requires and whether you need subwoofer amplification; that tells you more than the channel count or advertised wattage alone.
Final Verdict: Which Six-Channel Car Amplifier Is Actually Worth Buying?
Choosing the best six-channel car amplifier comes down to one question: what do you need each channel to do, and how much control do you need over the final sound? The amplifier with the biggest wattage figure is not automatically the best choice, and paying extra for a built-in DSP makes little sense if your system will never use its advanced tuning features.
If precise speaker integration is your priority, the AudioControl D-6.1200 stands out for its extensive DSP controls, flexible signal routing and substantial configuration options. The Mosconi D2 80.6 DSP Mini is worth considering when compact installation and integrated processing matter, although you should verify its exact power specification before comparing it with other models. For a system that needs a different power distribution across the front stage, the Alpine R-A90S offers a more specialised channel layout.
The KICKER 48KMA6006 and NVX MVPA6 are more relevant to buyers planning marine or powersports installations, where environmental protection is part of the decision rather than an optional extra. Meanwhile, the CT Sounds ATv2-150.6d deserves closer inspection if output is your main concern, but confirm the complete six-channel RMS ratings instead of treating its advertised peak figure as usable continuous power.
Before making the final purchase, verify three things: the amplifier can supply the required RMS power at your speakers’ impedance, its channel arrangement supports your actual speaker and subwoofer plan, and its physical dimensions and electrical requirements suit your vehicle. If you intend to run an active front stage, confirm that the DSP provides the independent outputs and crossover controls you need.
One final point matters more than many buyers realise: a better amplifier cannot rescue a poorly planned system on its own. Incorrect crossover settings, weak electrical connections, factory signal processing and badly matched speaker levels can undermine even expensive equipment. Get the system layout right first, then choose the amplifier that meets those requirements without forcing unnecessary compromises.
That’s the smarter way to buy a six-channel car amplifier in 2026: not by chasing the highest number on the box, but by choosing the right combination of clean power, useful tuning, installation practicality and room for the system you actually want to build.
Also Check:


