
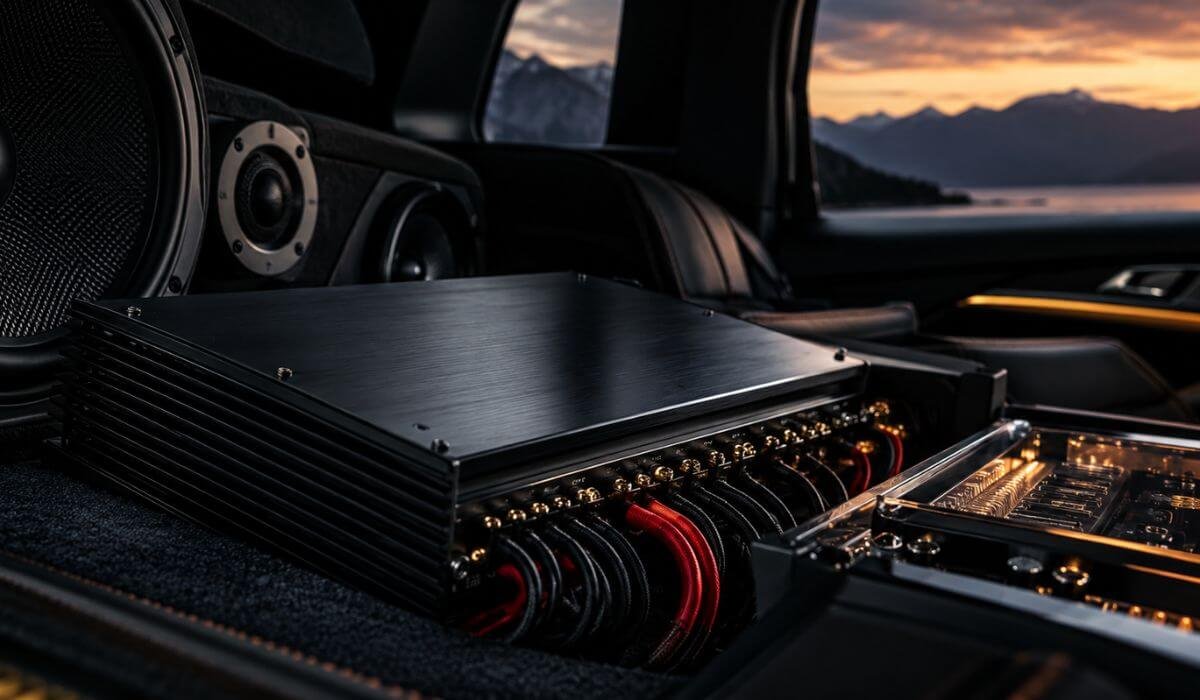
Best 8 Channel Car Amplifiers (2026): Premium DSP, Hi-Res Audio & Multi-Stage Power
An 8-channel amplifier only makes sense when the rest of the system can actually use it. That is why I would not pick one simply because the box says 8 × 100W. For a serious car audio build, the important questions are how cleanly the amplifier handles multiple channels, how much DSP control you get, whether the power is realistic at your intended impedance, and how well it integrates with the rest of the system. The Audison AF C8.14 bit is a good example of why those details matter: it combines eight amplified channels with a 14-channel DSP, 24-bit/96kHz processing, 65W × 8 at 4Ω and 100W × 8 at 2Ω, while also allowing channel pairs to be bridged when the system calls for a different configuration.
I also looked at these amplifiers from an installation-first perspective. An eight-channel system brings considerably more wiring, signal routing and tuning decisions than a conventional four-channel setup, while factory audio systems can add another layer of signal correction and integration. Check your available mounting space, ventilation, grounding, power cable requirements and electrical capacity before buying. If you are retaining the factory head unit, DSP, high-level input capability and OEM signal integration can be more valuable than another 20–30 watts of advertised output. The amplifier also needs to match the actual impedance and speaker layout you intend to run, not an idealised system shown on a product page.
The six models below were selected for different strengths rather than forcing every amplifier into the same ranking. Audison and Alpine bring serious DSP and tuning capability, JBL focuses on compact digital processing, Zapco takes a high-fidelity Class-AB approach, Kicker prioritises strong multi-channel output and rugged construction, while Blaupunkt offers a more accessible DSP-equipped route. That difference matters because the right amplifier for an active two-way or three-way front stage may not be the right choice for a full-range system, and the amplifier with the biggest power number is not automatically the one that will produce the best result after installation and tuning.
Best 8 Channel Car Amplifiers: Top 2026 Picks for DSP, Power & Tuning
#1. Audison AF C8.14 bit High-Resolution DSP Amplifier
Premium 8-Channel Car Audio Amplifier With 14-Channel DSP, 24-Bit/96kHz Processing, Active Speaker Control and High-Resolution Audio Tuning
#2. Alpine PXE-C80-88 OPTIM8 Hi-Res Amplifier
Advanced 8-Channel DSP Car Amplifier With AutoEQ, 31-Band Equalisation, OEM Signal Correction, Time Alignment and Precision Active System Tuning
#3. JBL DSP4086 Digital Sound Amplifier
Compact 8-Channel Car Audio Amplifier With Built-In DSP, 31-Band EQ, Flexible Crossovers, Time Delay and Factory Audio System Integration
#4. Zapco Harmony HB-410-II-8A Class-AB Amplifier
High-Fidelity 8-Channel Class AB Car Amplifier With 10-Channel DSP, 31-Band Parametric EQ, High-Level Inputs and Advanced Active Audio Control
#5. Kicker 48KXMA8008 KXMA800.8 Class-D Amplifier
High-Power 8-Channel Class D Car Audio Amplifier With 100W Per Channel at 2Ω, 200W Bridged Output, Flexible Crossover Control and Rugged Construction
#6. Blaupunkt BPA-HX80DSP Class-D Amplifier
Value-Focused 8-Channel DSP Car Amplifier With 31-Band EQ, Flexible HPF/BPF/LPF Control, Time Alignment, 2Ω Power and Multi-Speaker System Support
Expert Tip
Real talk: an 8-channel amplifier is not automatically better because it has more watts or more DSP controls. What matters is whether those eight channels actually suit your speaker layout. A 65W × 8 amplifier with serious DSP control can be a smarter choice for an active front stage than a louder amp that gives you less control over crossover points, time alignment and EQ.
Also, don’t buy one of these before checking the electrical and physical side of your installation. Look at the amplifier’s 4-ohm RMS output, current demand, mounting space, ventilation and input compatibility first. If you are keeping the factory stereo, OEM integration can become the deciding factor. For a new vehicle, I would rather have a properly integrated DSP amplifier than chase a larger wattage figure that the factory system cannot use properly.
How We Choose These 8-Channel Car Amplifiers
We did not treat this as a list where the amplifier with the biggest wattage automatically gets the first position. That would be an easy way to build a list, but it would be a poor way to recommend an amplifier.
The first thing we looked at was what each amplifier is actually designed to do. The Audison AF C8.14 bit, for example, brings eight amplified channels together with a 14-channel DSP, while the Alpine PXE-C80-88 OPTIM8 takes a different approach with extensive processing and automated tuning. Those capabilities matter because an eight-channel amplifier is often purchased to run a more sophisticated speaker arrangement, not simply to make the factory speakers louder.
We compared usable power, not just advertised numbers
Power ratings were checked at the impedance where they actually matter. An amplifier showing 100 watts per channel may look impressive, but that figure tells you very little without knowing the impedance, channel configuration and intended application.
That is why the Kicker KXMA800.8 gets recognition for its 8 × 100W output, while the Audison’s 8 × 65W at 4Ω should not be interpreted as automatically inferior. The Audison is bringing a much more extensive DSP platform into the equation. For an active system, that additional control can be worth considerably more than a larger number on the specification sheet.
DSP capability had to earn its place
For this particular list, DSP was not treated as a buzzword. We looked at channel count, equalisation, crossover control, time alignment, tuning flexibility and processing capability.
That is one reason the Alpine, Audison, Zapco and JBL models remain important choices even though their approaches are very different. The Zapco Harmony HB-410-II-8A, for instance, combines its eight amplified channels with a 10-channel DSP and 31-band EQ, giving it a very different appeal from a straightforward high-output amplifier.
We considered the car, not just the amplifier
A good amplifier on a workbench can still be the wrong amplifier for a particular vehicle.
Modern cars increasingly use complicated factory audio systems, integrated head units and vehicle-specific signal processing. So we gave additional weight to amplifiers that can make sense in an OEM-integrated installation, rather than assuming every buyer is starting with an aftermarket head unit and a blank wiring harness.
This is particularly important if you are upgrading a newer BMW, Mercedes-Benz, Ford, Toyota, Chevrolet or similar factory audio system. The amplifier needs to fit into the system you actually have.
We separated road-car choices from specialist applications
There is an important distinction in this list that is easy to miss.
The Kicker KXMA800.8 and Hertz HMD8 are marine-oriented products. We did not treat that category as interchangeable with conventional car amplifiers. Kicker remained in the final selection because its eight-channel output and compact Class-D design give it a legitimate use case for certain vehicle, truck, powersports and demanding full-range installations.
Hertz was left out because, for a best 8-channel car amplifier list, its marine-first positioning made it less convincing as an all-around recommendation than the six models selected.
We did not punish an amplifier for not being the loudest
This is probably the biggest difference in our selection.
A serious car-audio system is about how the channels work together, not how impressive one specification looks in isolation. We therefore considered sound-quality potential, processing flexibility, installation practicality, channel power and intended use together.
That gives each final pick a genuine reason to exist:
- Audison for extensive DSP control and high-end system building.
- Alpine for sophisticated processing and practical tuning.
- JBL for compact DSP-based factory upgrades.
- Zapco for its Class-AB design and detailed DSP control.
- Kicker for strong eight-channel output in a compact Class-D platform.
- Blaupunkt for bringing DSP functionality into a more accessible multi-channel setup.
And that is ultimately how we narrowed the list down: not by asking which amplifier looks best on paper, but by asking where each one makes the most sense once it is actually installed in a real vehicle. That distinction is especially important with newer amplifiers, where a specification sheet can tell you what the hardware is capable of, but it cannot tell you whether that capability fits your particular system.
#1. Audison AF-C8.14 bit High-Resolution DSP Amplifier
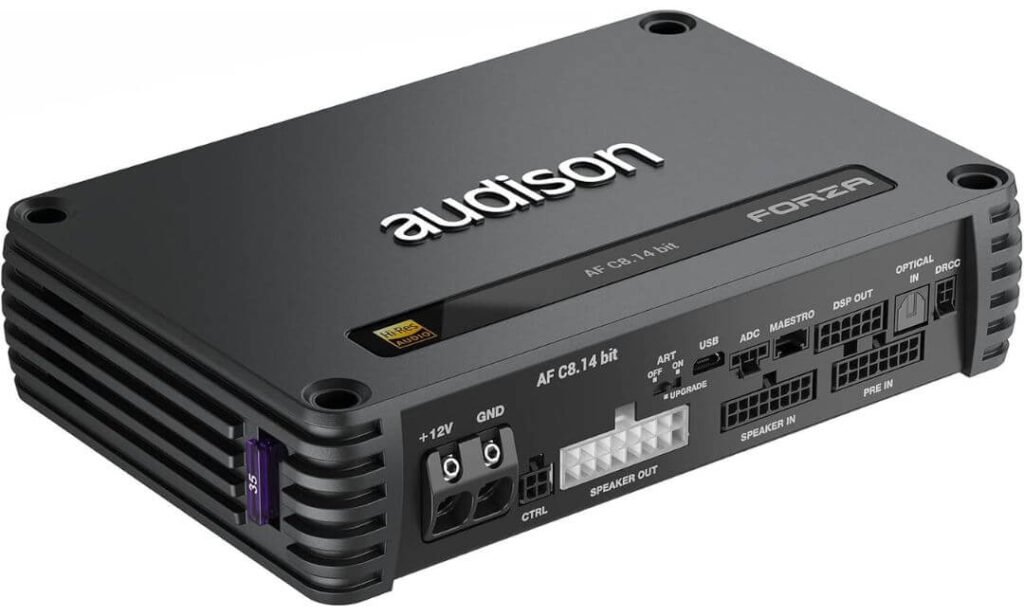
Quick Specs:
- Amplifier layout: 8 amplified channels
- RMS output: 65W × 8 @ 4Ω; 100W × 8 @ 2Ω
- DSP processing: 14 channels
- DSP resolution: 24-bit/96kHz
- Frequency bandwidth: Up to 40kHz
- Amplifier technology: Audison D-Class (ADT)
- Efficiency: Up to 82%
- Bridging: Each pair of output channels can be bridged
- Maximum DSP-controlled outputs: 14
- Pre-outs: 2 native + 4 optional
- Tuning platform: Audison bit Drive PC software
- Best suited to: Active front stages, multi-speaker systems and expandable OEM upgrades
If you’re building an active system where each speaker needs its own level, crossover and timing control, this is where the AF-C8.14 bit starts to justify its place. Eight amplified channels are already useful on their own, but the bigger story is the 14-channel DSP behind them. You can run the front stage actively and still have DSP-controlled outputs available when the system grows, rather than replacing the amplifier the moment your audio plan becomes more ambitious.
The 65W × 8 at 4Ω rating also deserves some context. This is not trying to win a wattage contest; it is a compact Class-D platform designed around controlled, efficient power. At 2Ω, output rises to 100W per channel, while the individual bridging capability gives you another route when a particular speaker or subwoofer section needs more headroom. That flexibility is far more useful in a real installation than simply having one oversized power figure on a spec sheet.
And then there is the part you actually hear after the installation is tuned properly: 24-bit/96kHz DSP processing with bandwidth extending to 40kHz. The hardware is Hi-Res capable, but the real advantage is the processing headroom and the ability to shape the system accurately. With Audison’s bit Drive software, you can work with graphical EQ, frequency correction and acoustic RTA rather than trying to make a complex system behave using basic gain and crossover controls alone. (Italian engineering aimed at system control, not just headline wattage.)
What We Like About the Design
- 14 DSP channels from an 8-channel amplifier — gives the system room to grow without immediately adding another processor.
- 100W × 8 at 2Ω — useful when your speaker configuration needs more current than the 4Ω rating suggests.
- 24-bit/96kHz processing — a serious foundation for a high-resolution system rather than a token DSP feature.
- Independent bridging across channel pairs — lets you adapt the same amplifier to different speaker and subwoofer arrangements.
- 82% claimed efficiency — particularly useful when you’re trying to keep a powerful multi-channel installation compact and manageable.
The One Installation Detail We’d Watch
The biggest thing to plan around is system design, not a flaw in the amplifier itself. Once you start using all eight amplified channels plus the additional DSP outputs, the wiring, signal routing and tuning become considerably more involved. If you’re replacing a factory system in a newer vehicle, have the OEM signal path, available mounting space, ventilation and power wiring worked out before buying; this is an amplifier worth installing properly rather than treating like a simple plug-and-play four-channel upgrade.
Where the AF-C8.14 bit Makes the Most Sense
This is the pick I would look at when the goal is a serious active 8-channel car audio system rather than simply adding volume. Eight powered channels can handle a substantial speaker layout, while the additional DSP outputs leave you options for future amplification. That combination is particularly attractive if you’re building around component speakers, separate tweeters and midbass drivers, because the processor gives you the control needed to make those individual drivers work as one coherent front stage.
It is also a sensible choice for an enthusiast who knows the system will evolve. You don’t have to use every DSP output on day one. Start with the channels you actually need, tune them properly, and retain the processing capacity for a later subwoofer amplifier or additional speaker sections. That expandability is one of the strongest reasons this model made our list.
The Insider Pro-Tip
Don’t look at the 65W × 8 figure and immediately assume you need something more powerful. In a properly designed active system, clean power plus accurate DSP control can outperform a higher-wattage setup that has poor crossover points, incorrect time alignment or badly matched gains. If you’re pairing this with efficient component speakers, spend your effort on speaker sensitivity, final impedance and DSP tuning before chasing another 50 watts.
One more thing: leave yourself some installation headroom. The compact size is attractive, but an 8-channel amplifier carrying multiple active channels still needs proper power delivery, secure mounting and adequate ventilation. I’d rather see this installed with sensible cable sizing and careful gain structure than squeezed into a tiny compartment simply because it fits. The processor gives you the tools; the installation determines whether you actually hear the benefit.
#2. Alpine PXE-C80-88 OPTIM8 Hi-Res DSP Amplifier
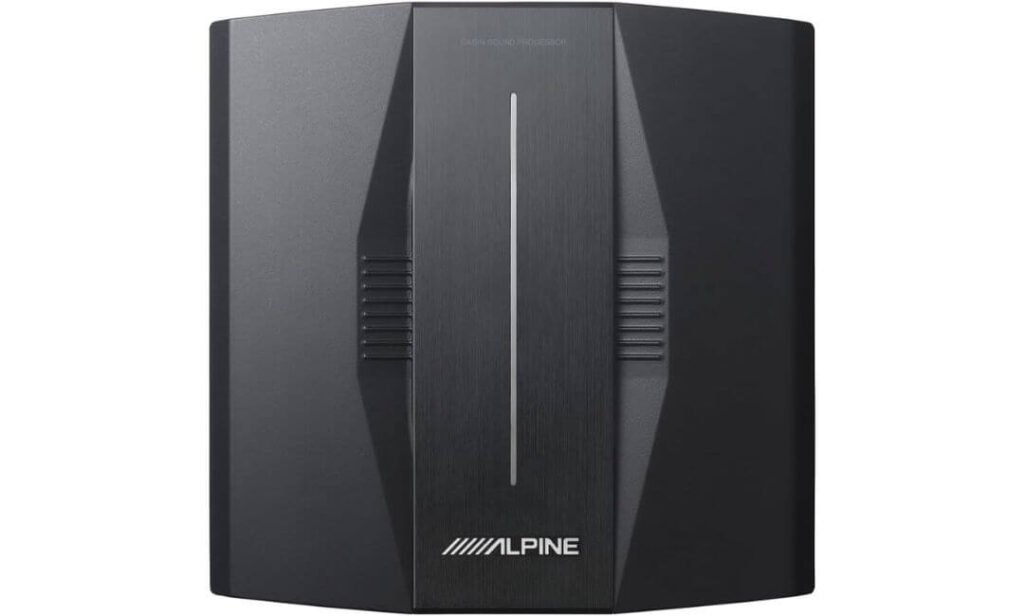
Quick Specs:
- Amplifier configuration: 8 channels
- Power output: 50W × 6 + 150W × 2 @ 4Ω; up to 50W × 6 + 300W × 2 @ 2Ω
- DSP processing: 24-bit/96kHz
- EQ control: 31-band parametric/graphic EQ
- Automatic tuning: 5-minute self-tuning via iPhone or PC
- Time correction: Available across all 8 channels
- OEM integration: Speaker-level inputs up to 30V
- RCA outputs: 8-channel, 4V
- Digital inputs: USB and coaxial
- Factory-system processing: Anti-EQ functionality
- Tuning: Automatic and manual control through Alpine software/apps
- Best suited to: OEM upgrades, active speaker systems and installations where fast DSP setup matters
The interesting thing here isn’t simply that Alpine managed to put an 8-channel amplifier and 96kHz/24-bit DSP into one chassis. It’s the way the OPTIM8 is built around the problem most people actually face after installing a complicated car-audio system: getting everything to sound right.
You can spend serious money on speakers and amplification and still end up with a disappointing system if the factory signal has its own EQ curve or the speakers are sitting at different distances from the driver’s seat. This is where the automatic 5-minute tuning becomes genuinely useful. The system can get you to a workable baseline through the iPhone or PC app, while manual controls remain available when you want to take the tuning further.
A Smarter Fit for Modern Factory Audio
For a newer vehicle where replacing the factory head unit isn’t realistic, the speaker-level inputs up to 30V are particularly useful. You can take the factory system’s signal, correct its behaviour with the Anti-EQ function and then use the DSP to build a much more controlled output stage. That makes this considerably more interesting for OEM integration than a conventional eight-channel power amplifier.
The power arrangement is also worth understanding. You get 50W × 6 at 4Ω alongside two higher-powered channels, with the latter reaching 300W at 2Ω. That makes the layout useful for a system where most channels handle speakers while the two stronger channels take on a more demanding low-frequency role. It isn’t simply eight identical channels, and that’s actually part of its appeal. (A very Alpine approach: make the processor do the complicated work so the installation doesn’t have to.)
What We Like About the OPTIM8
- Five-minute automatic tuning — one of the most practical features here for owners who don’t want to spend an entire weekend learning DSP software.
- 96kHz/24-bit processing — gives the processor plenty of digital resolution for a serious high-resolution system.
- 31-band EQ control — enough adjustment to properly address peaks and dips rather than relying on basic bass and treble controls.
- 30V speaker-level inputs — makes it far more relevant to modern factory systems where the OEM amplifier/head unit sends a stronger processed signal.
- Time correction across eight channels — particularly valuable when building a properly focused front stage around the driver’s listening position.
One Thing I’d Keep in Mind Before Buying
The automatic tuning is a starting point, not magic. It can get a system surprisingly close, but microphone position, speaker installation, cabin acoustics and the quality of the factory signal still matter. If you’re spending this kind of money on an OPTIM8, don’t assume pressing the self-tune button is the end of the installation. The best results will come from using the automatic calibration first and then making sensible manual adjustments.
Where This 8-Channel Car Amplifier Fits Best
This is arguably the easier recommendation for someone who wants a modern DSP-based car audio upgrade without becoming a full-time sound engineer. A factory head unit can remain in place, the OEM signal can be corrected, and the eight amplified channels give you enough flexibility for a serious multi-speaker setup.
It also makes sense when the car is likely to remain largely factory-looking. You can retain the original infotainment experience while moving the actual sound processing somewhere much more capable. For owners of newer cars where the dashboard electronics are tightly integrated, that can be a much cleaner solution than trying to replace the entire head unit just to gain better audio control.
The Insider Pro-Tip
If you’re installing this in a factory system, do the signal correction before chasing speaker upgrades. A good component set connected to a badly processed OEM signal can still sound wrong; the OPTIM8 gives you the tools to correct that signal before it reaches the speakers. I would start with the automatic calibration, verify the result manually, then work on time alignment and crossover points rather than immediately pushing the EQ sliders around.
And if your system includes a pair of dedicated subwoofers or another low-frequency section, plan those two higher-powered channels before you start wiring everything. The 300W × 2 capability at 2Ω can be genuinely useful, but only when the speaker impedance and system layout are designed around it. That’s the difference between simply owning an eight-channel DSP amplifier and actually building the system around what the amplifier is capable of doing.
#3. JBL DSP4086 8-Channel Class-D DSP Amplifier
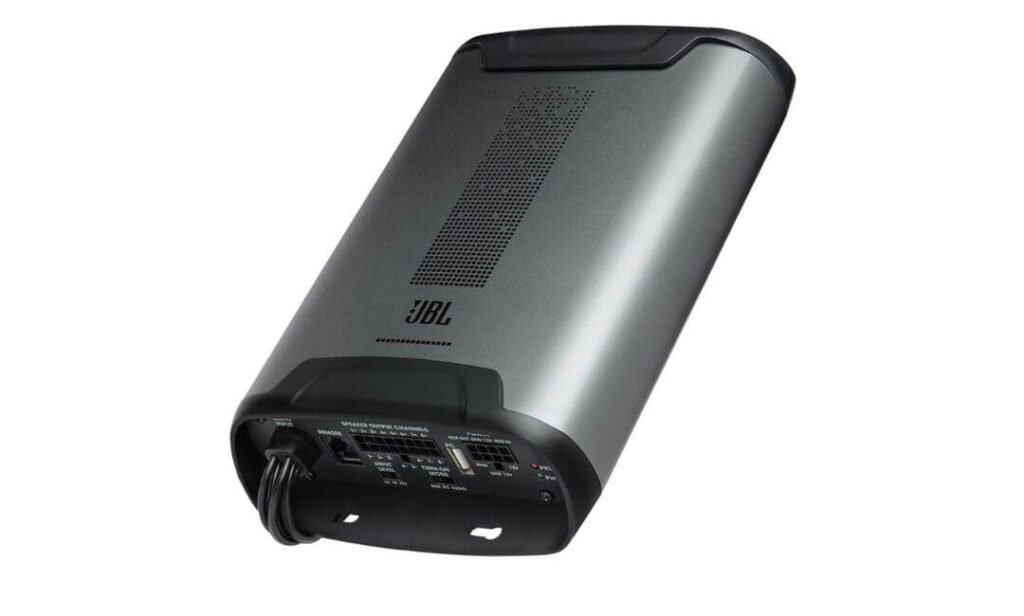
Quick Specs:
- Amplifier configuration: 8 full-range channels
- RMS output: 40W × 8 @ 4Ω; 60W × 8 @ 2Ω
- Amplifier design: Class-D
- DSP: Built-in digital signal processor
- EQ: 31-band parametric or graphic EQ
- Crossovers: High-pass, low-pass and band-pass
- Crossover slopes: Up to 48dB/octave
- Time delay: 0–20ms
- Presets: 10 tuning profiles
- Signal-to-noise ratio: >90dB
- THD+N: Less than 1%
- Inputs: RCA and speaker-level compatible
- Inputs/outputs: 6 RCA inputs and 8 RCA outputs
- Bass control: Wired remote with -30dB to +6dB adjustment
- Tuning: USB-connected Windows PC software
- Best suited to: Factory-system upgrades, compact installations and multi-speaker builds
The DSP4086 is the sort of amplifier I would consider when space, integration and control are more important than chasing a huge power figure. Its 40W × 8 output at 4Ω is modest compared with some of the heavier hitters in this list, but that isn’t necessarily a weakness for efficient door speakers, coaxials or a properly matched component system. The real value is having eight full-range channels and DSP processing in one compact package.
The input flexibility makes it particularly useful for cars where replacing the factory electronics isn’t an attractive option. It can accept RCA or speaker-level signals, while the balanced differential input design helps with noise rejection. In a real installation, that flexibility can save you from having to redesign the entire signal path just to add an eight-channel amplifier.
The DSP Is the Real Story Here
Once installed, the 31-band EQ, variable crossovers and up to 20ms of time delay give you considerably more control than a conventional multi-channel amp. You can tailor individual speaker sections, adjust the acoustic timing and save up to 10 presets rather than having one permanent tuning configuration.
The wired bass remote is another small feature that becomes surprisingly useful once you’re driving the car every day. A -30dB to +6dB adjustment from the driver’s seat means you don’t have to open the tuning software whenever you want to change low-frequency output. (Simple from the driver’s seat, surprisingly capable behind the installation panel.)
What We Like About the DSP4086
- Eight full-range channels — useful for running a complete multi-speaker layout without immediately adding another amplifier.
- 31-band EQ with flexible crossover control — gives an installer enough adjustment to properly shape individual sections.
- RCA and speaker-level compatibility — makes it easier to integrate with both aftermarket and factory audio systems.
- 0–20ms time delay — useful for improving front-stage focus when speaker distances vary considerably.
- Compact all-in-one architecture — particularly attractive when the vehicle has limited room for separate DSP and amplifier hardware.
One Thing We’d Consider Before Buying
The 40W × 8 at 4Ω output means this isn’t the model I’d choose simply because you want extremely high SPL from inefficient speakers. It is better matched to a well-designed system where speaker efficiency and DSP control are doing their part. Also, the tuning software deserves some patience; if you expect a polished smartphone-style interface, the PC-based approach can feel more installer-oriented than consumer-friendly.
Why This 8-Channel Amplifier Works for OEM Upgrades
The strongest case for this JBL is its balanced combination of amplification and processing. You can take a factory system, feed it through the available input options and start shaping each speaker section instead of simply increasing volume. That makes it particularly useful in vehicles where the factory head unit is integrated into the dashboard and replacing it would create more problems than it solves.
It is also a sensible option for a system that may grow later. The amplifier can function as a line driver when additional amplification is eventually required, so you aren’t necessarily throwing away the DSP platform when your audio ambitions move beyond eight amplified channels.
The Insider Pro-Tip
Don’t judge this amplifier by its 60W × 8 @ 2Ω figure alone. If you’re running efficient component or coaxial speakers, the smarter move is to use the DSP to establish the correct high-pass points, crossover slopes and time alignment before increasing gain. A properly balanced 40W-per-channel system can sound considerably more convincing than a louder system where every speaker is fighting for the same frequencies.
For a factory upgrade, I’d also pay close attention to where you take the signal from. Speaker-level integration can be convenient, but the factory system may already be applying its own equalisation. Get that signal path right first, then tune the JBL around it. That is where this unit earns its place: not as the loudest amplifier here, but as a compact way to turn a difficult factory audio system into something you can actually control.
#4. Zapco Harmony HB-410-II-8A Class-AB DSP Amplifier
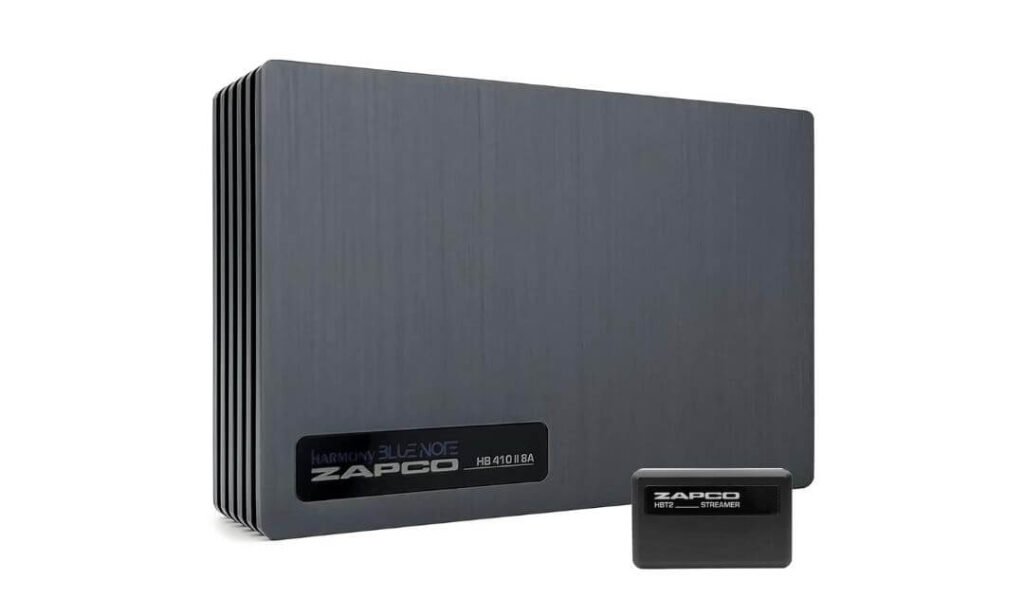
Quick Specs:
- Amplifier configuration: 8-channel Class-AB
- Amplifier output: Up to 70W per channel
- DSP processing: 10 channels
- EQ: 31-band parametric equalizer
- RCA outputs: 10 channels
- High-level inputs: 4 channels
- RCA inputs: 2 channels
- Digital playback: USB/OTG
- Supported audio: MP3, FLAC, WAV, ALAC and other formats
- Tuning: PC-based DSP software
- Expansion: Additional amplifiers can be connected through DSP outputs
- Optional control: Remote master volume, subwoofer level, presets and source selection
- Best suited to: Sound-quality-focused active systems and expandable multi-channel builds
There is a reason I would not judge the HB-410-II-8A by its 70W-per-channel figure alone. The real attraction is the combination of an 8-channel Class-AB amplifier and 10-channel DSP in one unit. That gives you enough amplified channels for a serious multi-speaker setup while leaving two additional processed outputs available for expansion.
Class-AB also changes the character of the hardware. I’m not saying Class-AB automatically sounds better than Class-D—installation, speakers, tuning and gain structure still matter—but it is a legitimate reason for a sound-quality enthusiast to consider this model when the goal is a more traditional amplifier architecture rather than maximum efficiency and minimum current draw.
Ten DSP Channels Give the System Somewhere to Go
The part I like most from a system-building perspective is the 10-channel DSP with 31-band EQ. You aren’t locked into using the eight amplifier channels and stopping there. The additional RCA outputs let you send processed signals to another amplifier later, which becomes useful if the system eventually gains a dedicated subwoofer stage or additional speaker sections.
The connectivity is equally practical. Four high-level inputs allow factory-system integration, while two RCA inputs cover a conventional aftermarket source. The built-in USB/OTG playback is another unusual touch, especially for people who keep high-quality FLAC or WAV files and want a direct digital playback option. (A genuinely expandable architecture rather than another eight-channel box that reaches its limit on day one.)
What We Like About This Harmony Setup
- 10-channel DSP behind eight amplified channels — gives you processing headroom for future system expansion.
- Class-AB amplification — an appealing architecture for listeners who prioritise traditional sound-quality-oriented designs.
- 31-band EQ — enough control to make detailed frequency adjustments across a complex multi-speaker system.
- High-level plus RCA inputs — gives the installer two very different routes into factory and aftermarket systems.
- Built-in USB/OTG playback — useful if your music library includes lossless files and you want direct playback capability.
One Thing We’d Plan Around
The Class-AB design is the trade-off to understand before buying. It is not the obvious choice if your first priority is the smallest possible power draw and maximum Class-D efficiency. An eight-channel Class-AB amplifier should be installed with sensible power wiring, ventilation and mounting clearance, particularly if you intend to use most of its channels continuously at higher levels.
Where This 8-Channel Car Amplifier Makes the Most Sense
This is the model I would put on the shortlist for someone who is building around sound quality and future expansion, rather than simply looking for an easy power upgrade. Eight amplified channels can handle a detailed front and rear layout, while the two additional DSP channels leave room for another amplifier when the system grows.
It also has a useful advantage for factory installations: you don’t necessarily need to replace the original head unit just to get proper DSP control. The high-level inputs can accept the factory signal, while the processor gives you the ability to shape that signal before it reaches the speakers. For an enthusiast who wants to retain the vehicle’s original interface but build a much more serious audio system underneath it, that’s a very practical approach.
The Insider Pro-Tip
If you’re buying this specifically for its Class-AB architecture, don’t undermine that choice with an installation that treats the amplifier as an afterthought. Give it proper ventilation, use appropriately sized power and ground wiring, and spend time setting gains before touching the 31-band EQ. A DSP can correct frequency response, but it cannot fix a badly installed speaker, a poor signal source or clipping caused by incorrect gain structure.
And don’t waste those 10 DSP outputs just because the amplifier itself has eight channels. If you’re planning a dedicated subwoofer amplifier later, leave the architecture ready for it. That is one of the smartest reasons to choose this model: you can build the system around eight amplified channels today without designing yourself into a corner tomorrow.
#5. Kicker 48KXMA8008 KXMA800.8 Full-Range Class-D Amplifier
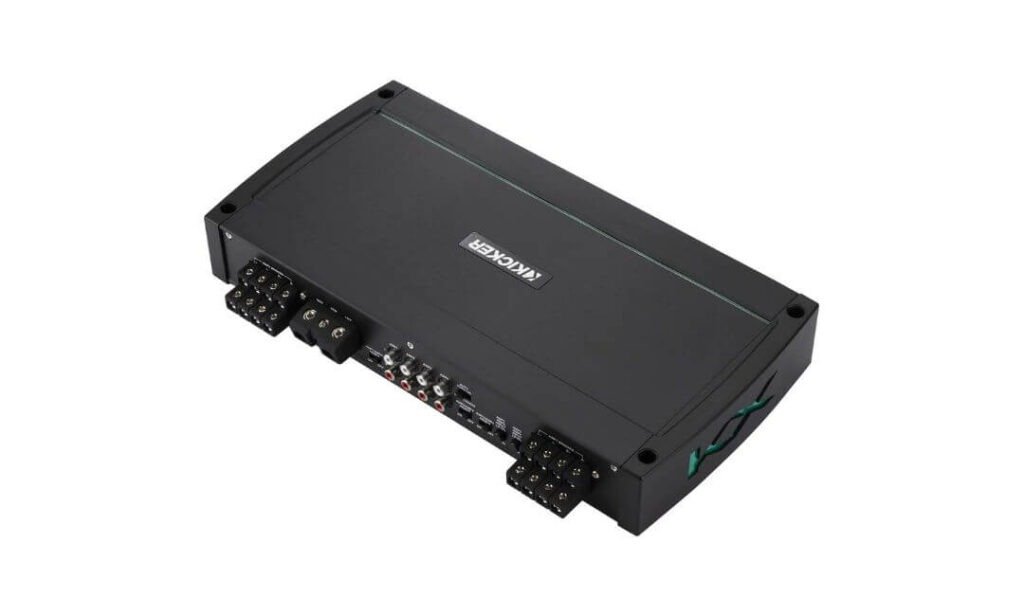
Quick Specs:
- Amplifier configuration: 8 full-range channels
- RMS output: 100W × 8 @ 2Ω; 50W × 8 @ 4Ω
- Bridged output: Up to 200W × 4 @ 4Ω
- Amplifier design: Class-D
- Crossover: Variable high-pass/low-pass
- Crossover slope: 24dB/octave
- Bass control: KickEQ+ with 0–6dB boost at 40Hz
- Subsonic filtering: 24dB
- Circuit protection: Conformal-coated circuit boards
- Hardware: 316L stainless steel
- Chassis: UV-treated aluminium
- Best suited to: High-output multi-zone systems, trucks, UTVs and marine-style installations
This Kicker Is About Power You Can Actually Use
The KXMA800.8 takes a very different route from the DSP-heavy amplifiers above it. There is no elaborate 10- or 14-channel processor hiding behind the amplifier section; instead, Kicker gives you eight straightforward full-range channels, with 100W per channel at 2Ω and the ability to bridge pairs to reach 200W × 4 at 4Ω. For someone who already has their signal processing sorted, that simplicity can actually be an advantage.
The 2Ω capability is particularly useful when a system contains multiple speakers sharing amplifier channels. Rather than treating eight channels as eight isolated numbers, you can configure the system around the actual speaker load. The variable crossover section then lets you set high-pass or low-pass filtering with a 24dB/octave slope, while the pair-level KickEQ+ control adds up to 6dB at 40Hz when the installation genuinely needs more low-end weight.
The Marine Construction Is Not Just a Marketing Detail
Here’s the important distinction with this model: it is a marine amplifier, and that changes how I would recommend it. The conformal-coated circuit boards, 316L stainless-steel hardware and UV-treated aluminium chassis are there for environments where moisture, corrosion and temperature exposure are real concerns. That’s excellent protection for a boat, UTV or exposed truck installation, but a normal road car sitting inside a dry cabin doesn’t necessarily need all of it.
That durability does, however, give the amplifier a useful advantage for harsh-use vehicles. The compact Class-D architecture also helps keep the installation manageable when eight channels are required. (Built for places where the amplifier may have to deal with considerably more abuse than a carpeted car trunk.)
What We Like About This KXMA800.8
- 100W × 8 at 2Ω — strong usable output for an eight-channel full-range design.
- 200W × 4 bridged at 4Ω — gives the installer another configuration when four higher-powered channels make more sense.
- Independent pair-level crossover control — lets different speaker groups receive more appropriate frequency ranges.
- Marine-grade construction — conformal coating and 316L hardware provide meaningful protection in harsh environments.
- Compact Class-D architecture — useful when you need eight channels without filling the vehicle with multiple amplifiers.
The Important Catch for a Car Installation
The main consideration isn’t performance; it’s application. This was designed as a marine amplifier, so if your vehicle is a normal daily-driven car, you may be paying for environmental protection you don’t really need. It also lacks the advanced DSP platform found in the Audison, Alpine, JBL and Zapco options, so you’ll want your head unit or separate processor to handle more sophisticated EQ, time alignment and system correction.
Where This 8-Channel Car Amplifier Fits Best
For a truck, UTV, powersports vehicle, boat or exposed installation, the KXMA800.8 becomes much easier to justify. Eight channels of Class-D power, variable filtering and rugged construction give you a very practical way to run multiple speaker zones without stacking several smaller amplifiers.
In a conventional car, I’d choose it when reliable channel power matters more than integrated DSP. If you already have a capable processor—or simply don’t need advanced time alignment and equalisation—there’s something refreshing about having an amplifier that concentrates on delivering power and letting the rest of the system handle the processing.
The Insider Pro-Tip
If you’re putting this into a normal car, don’t buy it simply because “marine-grade” sounds tougher. First ask whether your system actually benefits from the extra environmental protection. If it doesn’t, one of the DSP-equipped options on this list may give you more audible improvement because you’ll gain proper signal correction and tuning.
But if this is going into a truck bed, UTV, powersports build or wet environment, the equation changes completely. In that situation, the conformal-coated boards and stainless hardware are features I’d genuinely value. Set the crossover points before touching the KickEQ+ boost, and use the bass control to fill a real gap in the system—not to compensate for speakers that are being asked to play frequencies they shouldn’t. Eight clean channels with sensible filtering will always beat eight channels being pushed beyond what the installation can handle.
#6. Blaupunkt BPA-HX80DSP 8-Channel Class-D DSP Amplifier
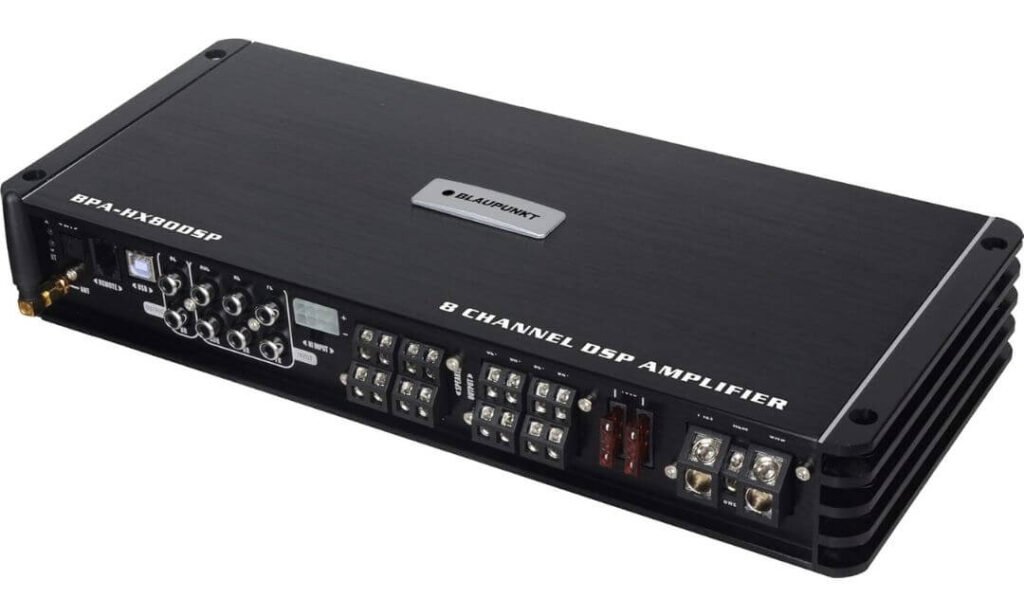
Quick Specs:
- Amplifier configuration: 8 channels
- RMS output: 60W × 6 + 80W × 2 @ 4Ω; 90W × 6 + 120W × 2 @ 2Ω
- Amplifier design: Class-D
- DSP: 8-channel processing
- EQ: 31-band EQ for each channel
- EQ adjustment: ±20dB
- Crossovers: HPF, BPF and LPF
- Crossover slopes: 6–48dB/octave
- Time delay: 0–20ms
- Signal-to-noise ratio: ≥100dB
- THD: ≤0.05%
- Frequency response: 20Hz–20kHz
- Channel separation: >60dB
- Inputs: 6 RCA + 2 AUX RCA
- Control: Remote controller with master/subwoofer adjustment
- Tuning: PC software
- Best suited to: Compact OEM upgrades and multi-speaker systems needing integrated DSP
The BPA-HX80DSP is an interesting choice for someone who wants the basic architecture of a serious DSP installation without turning the car into a wiring project. You get eight amplified channels, with the six main channels rated at 60W @ 4Ω and the two higher-output channels reaching 80W @ 4Ω. At 2Ω, those figures rise to 90W × 6 and 120W × 2, giving the installer some useful flexibility when choosing speakers.
What makes the package more interesting is the DSP. Each channel gets access to a 31-band EQ, alongside high-pass, band-pass and low-pass filtering with slopes from 6 to 48dB/octave. That is enough control to do much more than simply add volume. You can separate speaker duties properly, remove unwanted frequency overlap and use the 0–20ms time-delay range to compensate for the very different speaker distances found inside a car cabin.
A Practical Choice When Space Is Tight
The compact chassis is one of the more useful details here. At roughly 12.24 × 5.71 × 2.01 inches, it is considerably easier to hide than a collection of separate amplifiers and processors. That can be valuable in newer vehicles where trunk space is already occupied by factory electronics, spare-wheel equipment or hybrid/EV hardware.
The numbers also suggest a relatively quiet processing platform, with ≤0.05% THD and ≥100dB SNR on the supplied specifications. I wouldn’t buy an amplifier purely because of those two figures, but they do support the bigger picture: this is designed as an all-in-one DSP amplifier rather than a basic eight-channel power block. (A compact German-designed approach that prioritises useful system control over unnecessary hardware bulk.)
What We Like About This Blaupunkt
- 31-band EQ on all eight channels — gives you enough adjustment to address individual speaker behaviour instead of applying one broad correction.
- 90W × 6 + 120W × 2 at 2Ω — useful when the system needs more output from the available channels.
- 0–20ms time alignment — important for getting the front stage focused around the driver’s position.
- 6–48dB/octave crossover range — unusually flexible for an integrated amplifier at this level.
- Compact 2-inch-plus chassis — makes it easier to find a sensible mounting position without sacrificing an entire trunk compartment.
One Detail I’d Check Before Installation
The PC tuning environment is something I’d treat as part of the buying decision. The hardware gives you plenty of adjustment, but DSP capability is only valuable if you’re comfortable doing the tuning. If you’re installing it yourself, make sure you have access to the compatible Windows software and enough space to make the connections cleanly before mounting the amplifier permanently.
Where This 8-Channel DSP Amplifier Fits Best
This is the sort of unit I’d consider when a vehicle needs a complete multi-channel upgrade but has limited room for separate components. The eight amplified channels can cover a substantial speaker layout, while the DSP gives you the control needed to make the system behave properly inside the cabin.
It also makes sense for someone who doesn’t necessarily need the much larger processing architecture of the Audison or the automated tuning approach of the Alpine. The Blaupunkt gives you a more direct setup: install it, connect the factory or aftermarket signal, configure the channels and tune the cabin. For the right system, that simplicity can be more useful than paying for processing features you’ll never touch.
The Insider Pro-Tip
Before ordering, match the speaker impedance and channel layout to the amplifier’s two different power groups. Those two higher-output channels are worth planning around rather than simply assigning them randomly. If your system has a pair of speakers that genuinely needs more headroom, use those channels where they can make a difference.
And don’t try to “fix” the whole car by boosting every weak frequency on the 31-band EQ. Start with sensible crossover points and time alignment, then make small EQ corrections. A DSP amplifier becomes powerful when you remove problems rather than continuously adding gain. In a compact car cabin, a few careful adjustments can make a bigger difference than pushing the amplifier harder—and that’s exactly where this Blaupunkt makes the most sense.
Best 8 Channel Car Amplifiers (2026): Compare DSP, RMS Power, Impedance & Features
| 8-Channel Car Amplifier | Real Power Layout | DSP & Tuning | Signal & Expansion | Build Character | Best Real-World Fit | Our Take |
|---|---|---|---|---|---|---|
|
Audison AF-C8.14 bit
Top Pick
Hi-Res
Premium active-system platform
|
65W × 8 @ 4Ω 100W × 8 @ 2Ω Pairs can be bridged |
14-channel DSP 24-bit / 96kHz processing Up to 40kHz bandwidth Bit Drive PC tuning |
2 native pre-outs + 4 optional pre-outs Up to 14 DSP-controlled outputs Strongest expansion path here |
Audison D-Class (ADT) Up to 82% efficiency Compact architecture |
Active front stages, serious OEM upgrades and systems that may grow later. |
Best Overall The choice when DSP depth and system flexibility matter more than chasing headline wattage. |
|
Alpine PXE-C80-88 OPTIM8
Easy Tuning
OEM-focused DSP amplifier
|
50W × 6 @ 4Ω 150W × 2 @ 4Ω 300W × 2 @ 2Ω |
24-bit / 96kHz DSP 31-band EQ 0–20ms time correction 5-minute automatic tuning |
RCA and high-level inputs 8-channel RCA outputs USB + coaxial digital inputs Anti-EQ for OEM systems |
Class-D Compact all-in-one design iPhone + PC tuning |
Newer factory-integrated vehicles where keeping the original infotainment system matters. |
Best for OEM One of the easiest ways to get serious DSP control without making the installation unnecessarily complicated. |
|
JBL DSP4086
Compact
Straightforward DSP upgrade
|
40W × 8 @ 4Ω 60W × 8 @ 2Ω Full-range channels |
31-band EQ HPF / LPF / BPF Up to 48dB/octave slopes 0–20ms time delay 10 presets |
RCA + speaker-level compatibility 6 RCA inputs 8 RCA outputs Wired bass remote |
Class-D Differential inputs S/N >90dB |
Factory upgrades and compact installations where eight channels of controlled power are enough. |
Best Compact Option Less about brute force, more about giving a factory system usable DSP control. |
|
Zapco Harmony HB-410-II-8A
Class-AB
Sound-quality-focused architecture
|
Up to 70W × 8 Class-AB amplification Designed for clean, dynamic output |
10-channel DSP 31-band EQ Time alignment PC-based tuning |
4 high-level inputs 2 RCA inputs 10 RCA outputs USB / OTG playback |
Class-AB topology Built-in music player Lossless playback support |
Enthusiast builds where sound quality, traditional amplification and future expansion are priorities. |
SQ Specialist The unusual pick here—and that’s exactly why it earns its place. |
|
Kicker 48KXMA8008 KXMA800.8
High Output
Marine-grade full-range platform
|
50W × 8 @ 4Ω 100W × 8 @ 2Ω 200W × 4 bridged @ 4Ω |
Variable HPF / LPF 24dB/octave slope KickEQ+ 0–6dB @ 40Hz 24dB subsonic filter |
Designed for multi-zone systems Pair-level controls Flexible speaker loading |
Class-D Conformal-coated boards 316L stainless hardware UV-treated chassis |
Boats, UTVs, trucks, powersports and harsh environments; also useful in selected vehicle builds. |
Best for Harsh Use Pick it for power and durability, not because marine protection sounds impressive on paper. |
|
Blaupunkt BPA-HX80DSP
Value DSP
Compact multi-channel solution
|
60W × 6 + 80W × 2 @ 4Ω 90W × 6 + 120W × 2 @ 2Ω |
8-channel DSP 31-band EQ per channel HPF / BPF / LPF 6–48dB/octave slopes 0–20ms time delay |
6 RCA + 2 AUX RCA inputs Dedicated remote PC software tuning |
Class-D ≥100dB S/N ≤0.05% THD Compact 2-inch-plus chassis |
Space-conscious factory and aftermarket upgrades needing integrated DSP without excessive hardware. |
Best Value Angle A sensible choice when compact packaging and practical DSP control matter. |
8 Channel Car Amplifier Buying Guide: Match the Amplifier to the System You’re Actually Building
An eight-channel amplifier is best understood as a system-building tool, not simply a larger version of a four-channel amp. Eight powered channels can be used in several ways: a front stage with separate tweeters and midbass drivers, front and rear speakers with additional channels for a subwoofer section, or a fully active system where each driver receives its own amplified and processed signal. The right configuration depends on the speakers, impedance, factory audio system and DSP strategy you already have—or plan to install.
The biggest mistake is buying the amplifier first and trying to make the rest of the system fit around it. Start with the speaker layout, then work backwards into channel requirements, RMS power, impedance and processing.
First Decide What You Want All Eight Channels to Do
There is no single “correct” eight-channel configuration. For example, a three-way active front stage could use six channels for the left and right tweeters, midrange and midbass drivers, leaving two channels for another speaker pair. A simpler system might use four channels for front and rear speakers and reserve the remaining channels for additional drivers or a dedicated low-frequency section, provided the amplifier’s power and channel configuration support that job.
A useful way to think about it is:
| System layout | Typical channel use | Why it makes sense |
|---|---|---|
| Front + rear speakers | 4 channels | Leaves four channels for additional speakers or system expansion |
| Front component system + rear fill | 4–6 channels | Useful when the front stage needs more individual control |
| Active 2-way front + rear speakers | 6 channels | Separate tweeter/midbass control with rear fill |
| Active 3-way front stage | 6 channels | One channel per driver on each side |
| Active 3-way + additional speakers | 8 channels | Makes full use of the amplifier without extra hardware |
| Eight independent full-range speakers | 8 channels | Useful for multi-zone or large vehicle systems |
The important point is that eight channels do not automatically mean eight speakers. One channel can drive one speaker, but the final configuration depends on the speaker impedance, amplifier’s channel ratings and whether channels can be bridged.
RMS Power Is More Important Than the Biggest Wattage Number
When comparing an eight-channel car amplifier, look for RMS power at the impedance you will actually use. Peak or “maximum” wattage can make a specification sheet look impressive, but it tells you very little about how the amplifier will behave during sustained listening.
For example, the Kicker’s 100W × 8 at 2Ω looks very different from an amplifier rated at 65W × 8 at 4Ω, but that does not automatically make the former a better choice. Speaker sensitivity, impedance, enclosure design and the amount of power the speakers can safely handle all change the equation.
Before buying, check these three things together:
- Speaker nominal impedance: 2Ω, 4Ω or another supported load.
- Amplifier RMS output at that impedance: don’t compare a 4Ω figure with another model’s 2Ω figure as though they were equivalent.
- Speaker RMS handling: the amplifier should have enough clean power for the speaker without forcing you to run the system into clipping.
If you plan to bridge channels, check the amplifier’s minimum bridged impedance as well. Bridging is useful for increasing output, but it changes the load each amplifier channel effectively sees.
DSP Can Matter More Than Another 20 Watts
This is where an eight-channel amplifier becomes genuinely interesting.
A conventional eight-channel amplifier gives you more powered channels. An 8-channel DSP amplifier gives you both amplification and the ability to control how those channels interact. That can include crossover points, equalisation, time alignment, input correction and individual channel levels.
For a modern car, I would often value this control more than a modest difference in RMS output.
The Audison, for example, adds a 14-channel DSP to its eight amplified channels. Alpine takes a different approach with automatic tuning, time correction and OEM signal correction. The JBL and Blaupunkt models provide substantial EQ and crossover control, while the Zapco combines eight Class-AB channels with a 10-channel DSP.
That extra processing becomes particularly valuable when:
- tweeters and midbass drivers are being run separately,
- the factory head unit applies its own EQ curve,
- the speakers sit at very different distances from the driver,
- you want to correct cabin-related peaks and dips,
- you plan to add another amplifier later,
- or you are building an active system rather than a simple speaker replacement.
A DSP cannot fix a badly installed speaker or a poor electrical connection, but it can turn a good installation into a properly balanced system.
Why Class-D Makes Sense for an 8-Channel Car Amp
Eight channels can create a lot of heat and current demand if the amplifier is inefficient. That’s why Class-D designs are particularly attractive for multi-channel car audio.
A Class-D amplifier can deliver substantial output while generally wasting less energy as heat than a traditional linear design. In a vehicle, that can mean a smaller chassis, less heat accumulation and more practical packaging.
That doesn’t mean every Class-D amplifier will automatically run cool in every installation. Output level, impedance, ventilation and mounting location still matter.
The Zapco is an interesting counterpoint because its eight amplifier channels use Class-AB architecture. That makes it less focused on maximum efficiency, but potentially attractive to enthusiasts who specifically want that amplifier topology and its sound-quality-oriented design.
So don’t make the decision simply as:
Class-D = good, Class-AB = bad.
A better question is:
Does the amplifier’s topology suit the way you are going to install and use it?
Don’t Ignore THD, SNR and Damping Factor
These specifications are useful, but they should be treated as supporting evidence rather than buying criteria by themselves.
THD (Total Harmonic Distortion) indicates how much unwanted harmonic content the amplifier introduces. Lower is generally better, but extremely small differences in published THD figures are not necessarily something you will hear in a properly installed vehicle.
SNR (Signal-to-Noise Ratio) tells you how far the wanted audio signal sits above the amplifier’s noise floor. A higher figure is generally desirable, particularly in a quiet system where hiss can become noticeable.
Damping factor describes the amplifier’s ability to control speaker movement electrically. It can be useful when comparing designs, but don’t assume that the amplifier with the highest published number will automatically sound better.
In other words, don’t buy an amplifier because it says 0.05% THD instead of 0.08% THD and ignore its DSP, installation compatibility, power delivery and speaker matching. Those numbers are useful when the rest of the comparison is already close.
Factory Head Unit Compatibility Deserves Serious Attention
If you are upgrading a newer vehicle, this may be more important than the amplifier’s power rating.
Many modern vehicles don’t provide a simple flat preamp signal. The factory system can apply equalisation, filtering, volume-dependent processing or other signal shaping before the audio reaches the amplifier. Replacing speakers without accounting for that signal can leave you chasing problems that aren’t caused by the speakers at all.
This is why high-level inputs and OEM-processing features are valuable.
The Alpine, JBL, Zapco and Blaupunkt approaches all give you ways to work with factory signals, but their methods and capabilities differ. If you’re keeping the original infotainment system, verify:
- where you will obtain the audio signal,
- whether the amplifier accepts the factory signal level,
- whether an OEM EQ curve needs correction,
- how the amplifier detects turn-on,
- whether the factory system uses a separate amplifier,
- and whether the vehicle requires additional integration hardware.
For a newer BMW, Mercedes-Benz, Ford, Toyota, Chevrolet or another heavily integrated vehicle, vehicle-specific compatibility should be checked before ordering rather than assumed from the amplifier’s channel count.
Installation: Space Is Only the Beginning
An eight-channel amplifier needs more planning than a typical four-channel unit.
Before mounting it, physically measure the available area and allow room for power wiring, speaker wiring, signal cables and ventilation. Don’t choose a location simply because the amplifier technically fits. If the cables have to bend sharply against the chassis or airflow is blocked, that “perfect” location can become a problem later.
You should also think about:
- Power cable sizing: match it to the amplifier’s current requirements and cable length.
- Grounding: use a short, secure ground connection to a suitable chassis point.
- Fuse protection: place the main fuse appropriately close to the battery.
- Remote turn-on: confirm how the amplifier will wake up with the factory or aftermarket source.
- RCA routing: keep signal wiring away from major power wiring where practical.
- Speaker wiring: label every channel before final installation.
- Ventilation: leave adequate clearance around the amplifier.
- Mounting: secure the amplifier so vibration cannot damage connections or the chassis.
- Battery and alternator capacity: make sure the vehicle’s electrical system can comfortably support the additional load.
For a large eight-channel installation, good wiring is not optional finishing work. It is part of the amplifier installation.
How to Match the Amplifier to Your Speaker Layout
A simple matching process works better than starting with the brand name.
Step 1 — Count the actual drivers.
Don’t count speaker locations; count the individual drivers you intend to control separately. A component set with a separate tweeter and midbass is different from a coaxial speaker using one passive crossover.
Step 2 — Write down each speaker’s impedance.
A 2Ω speaker and a 4Ω speaker will not draw the same amount of power from the same amplifier.
Step 3 — Check RMS requirements.
Look at continuous power handling rather than peak numbers.
Step 4 — Decide whether the system will be active.
If each driver needs its own amplifier channel and DSP control, eight channels become much more valuable.
Step 5 — Decide whether DSP is required.
For a serious OEM upgrade or active front stage, I would strongly favour integrated DSP rather than adding processing later.
Step 6 — Plan the expansion.
If you expect to add a dedicated subwoofer amplifier, choose a model with enough processed outputs to make that future upgrade straightforward.
8-Channel Amplifier Features Worth Paying For
Not every feature deserves extra money. These are the ones I would actually prioritise:
| Feature | Why it matters |
|---|---|
| RMS output at your impedance | Tells you what the amplifier can realistically deliver |
| Individual DSP control | Lets you tune each speaker or channel properly |
| Time alignment | Helps create a focused front soundstage |
| Flexible crossovers | Prevents speakers from playing frequencies they shouldn’t |
| High-level inputs | Makes factory-system integration easier |
| Multiple DSP outputs | Useful when adding another amplifier later |
| Good thermal design | Important with eight channels in a confined vehicle |
| Compact chassis | Makes real-world installation easier |
| Reliable software | DSP hardware is only useful if you can actually tune it |
| Proper protection circuitry | Helps protect the amplifier and connected system |
The feature I would not pay extra for by itself is a giant peak-power number. If the rest of the amplifier does not fit your speaker impedance, signal source and installation, that number won’t rescue the system.
One Final Buying Check Before You Order
Take the amplifier you’re considering and answer these questions before putting it in the cart:
Will all eight channels be useful?
If you only need four channels today, don’t buy an eight-channel model simply because the number sounds better.
Can it handle your speaker impedance?
Check both stereo and bridged configurations if you intend to bridge channels.
Does it work with your factory signal?
This becomes critical in newer vehicles.
Do you actually need integrated DSP?
If you’re building an active or OEM-integrated system, the answer is often yes.
Will it physically fit with proper ventilation?
Measure the installation location, not just the amplifier itself.
Does your electrical system support it?
An eight-channel amplifier is still an electrical load, regardless of how compact the chassis looks.
The best eight-channel car amplifier is ultimately the one whose power, processing, inputs and physical design all make sense together. That’s why the models in this guide aren’t ranked simply from the biggest wattage figure to the smallest. Each one solves a slightly different installation problem, and understanding that difference is what makes the buying decision much easier.
8-Channel Car Audio Amplifier Configurations You’ll Actually Encounter
An eight-channel amplifier becomes much easier to understand once you stop thinking of it as “eight speakers worth of power.” The channels are simply eight independent amplifier paths, and how you use them depends on your speaker layout, impedance, DSP capability and whether you want to keep room for another amplifier later.
That flexibility is exactly why these amplifiers can be so useful. One installation may use all eight channels for a fully active speaker system, while another may use six channels for the main cabin and reserve two channels for a different section. There is no universal layout that is automatically best.
4Ω and 2Ω Loads Change What the Amplifier Can Deliver
The impedance of the speaker load is one of the first things to check because an amplifier does not deliver the same power into every load.
A typical eight-channel amplifier might produce something like 65W per channel at 4Ω and a higher figure at 2Ω. That does not mean the 2Ω rating is the amplifier’s “real” power and the 4Ω number is somehow less important. They describe different electrical loads.
At 4Ω, each channel generally sees an easier load, which can be useful for conventional component or coaxial speakers. At 2Ω, the amplifier can usually deliver more current and therefore more power, provided the amplifier is designed to support that load.
This is why you should compare RMS ratings at the same impedance. Comparing one amplifier’s 100W @ 2Ω against another’s 65W @ 4Ω without considering the load is not a meaningful power comparison.
Also, don’t confuse this with peak power. RMS output is the number to use when matching an amplifier to speakers. Peak figures may look impressive in a product listing, but they are not a sensible basis for deciding whether the amplifier is properly matched to your system.
A Simple 8-Channel Layout for Conventional Car Speakers
If you are not building an active system, you can still make very good use of eight channels.
For example, a larger vehicle could use:
- Channels 1–2: front left and right speakers
- Channels 3–4: rear left and right speakers
- Channels 5–6: additional front-stage drivers or another speaker pair
- Channels 7–8: additional rear, cabin or low-frequency duties, depending on the amplifier
This approach is especially useful when the vehicle has more than the usual four full-range speaker locations.
However, if a component speaker system already has a passive crossover handling the tweeter and midbass, you don’t automatically need separate amplifier channels for each driver. That’s an important distinction. A two-way component set with a passive crossover can use one amplifier channel per side, whereas an active configuration can give each tweeter and midbass driver its own channel.
Active 2-Way Systems Make Eight Channels Much More Interesting
An active system removes the passive crossover from the equation and gives the amplifier and DSP direct control over individual drivers.
A typical active 2-way front stage could use:
- Channels 1–2: left and right tweeters
- Channels 3–4: left and right midbass drivers
- Channels 5–6: rear speakers
- Channels 7–8: additional speakers or another section of the system
This configuration makes integrated DSP particularly valuable because the tweeters and midbass drivers need different crossover points, levels and time alignment.
Without DSP, you can still build the system, but you lose much of the reason for using individual channels in the first place.
A 3-Way Active Front Stage Can Use Six Channels by Itself
This is where an eight-channel amplifier starts to show its real potential.
A 3-way active front stage normally has a tweeter, midrange and midbass on each side. That means six independently amplified channels:
| Channel pair | Driver |
|---|---|
| 1–2 | Left/right tweeters |
| 3–4 | Left/right midrange |
| 5–6 | Left/right midbass |
| 7–8 | Rear speakers, subwoofer section or future expansion |
Now the amplifier is not simply making the entire car louder. The DSP can determine exactly where each driver starts and stops playing, how loudly it operates and when its signal reaches the driver’s seat.
This is one of the strongest reasons to choose an eight-channel DSP amplifier: you can build a sophisticated front stage without immediately needing multiple separate amplifiers.
Using the Last Two Channels for Low-Frequency Duty
Some installations may use six channels for the main speaker system and dedicate the remaining two channels to a low-frequency section.
Whether that makes sense depends entirely on the amplifier. You need to check its bridging capability, minimum impedance and power output in that configuration before connecting a subwoofer.
For example, an amplifier that can bridge two channels may produce substantially more power from that pair, but you cannot assume every eight-channel amplifier supports the same arrangement.
The Audison is particularly flexible here because each pair of power outputs can be bridged independently. That gives an installer more freedom to change the system layout without replacing the entire amplifier.
The Alpine takes a different approach, with two channels offering substantially higher output than its other six. That makes its channel allocation worth planning before installation rather than simply assigning channels in numerical order.
Bridging Four Pairs Creates a Completely Different System
Some eight-channel amplifiers allow their channels to be bridged in pairs.
In simple terms, two amplifier channels work together to produce more output for one load. An amplifier rated at 50W × 8 might, for example, support a significantly higher bridged output across four pairs.
But there is a catch: bridging changes the electrical load seen by the amplifier channels. You must follow the manufacturer’s minimum bridged impedance specification.
Do not connect a 2Ω subwoofer to a bridged pair simply because the amplifier supports 2Ω operation in stereo. The minimum impedance can be different in bridged mode.
This is one of those specifications that looks minor on a product page but can determine whether an installation works reliably.
Why the Same Eight Channels Can Produce Very Different Systems
Consider three hypothetical builds:
Build A — Simple cabin upgrade
Eight full-range channels drive front, rear and additional cabin speakers. No separate subwoofer amplifier is required.
Build B — Active front stage
Six channels handle a 3-way front stage, while the remaining two channels run rear fill or another speaker pair. DSP handles the crossover and time alignment.
Build C — Expandable enthusiast system
Six channels power the active front stage, while additional DSP outputs feed a separate amplifier for the subwoofer. The eight-channel amplifier handles the main speakers while the system remains expandable.
All three use an eight-channel amplifier, but they are completely different installations.
That is why choosing based purely on wattage can lead you in the wrong direction.
The DSP Changes How You Should Think About Channel Count
With a conventional amplifier, eight channels mainly mean eight amplified outputs.
With a DSP amplifier, you should think in terms of eight amplified channels plus however many processed channels the DSP provides.
That’s a major distinction in this group.
The Audison gives you 14 DSP-controlled output channels, while the Zapco provides 10 DSP channels around its eight Class-AB amplifier channels. Alpine also provides extensive processing, while JBL and Blaupunkt give you detailed per-channel EQ, crossover and time-delay control.
Those extra processed outputs can allow you to add another amplifier later without replacing the DSP unit.
So if you are planning a system that may grow, don’t just ask:
“How many amplifier channels do I get?”
Ask:
“How many independently processed channels will I have after the installation is finished?”
That is a much more useful question.
What Happens When You Mix 2Ω and 4Ω Speakers?
You don’t necessarily need every speaker in the system to have the same impedance.
An amplifier may be perfectly capable of running one pair of 4Ω speakers and another pair of 2Ω speakers, provided each individual channel remains within its specified operating range.
What changes is the amount of power available from each channel.
For example, if the amplifier provides 65W at 4Ω and 100W at 2Ω, the 2Ω speaker may receive more output from that channel. But that does not mean you should deliberately choose lower-impedance speakers just to get a bigger number.
The speaker must actually be rated for the amplifier’s output, and the amplifier must be designed to handle that impedance continuously.
The Configuration Mistake I’d Avoid
Don’t start by assigning channels based on the numbers printed next to the amplifier.
Start with your speaker diagram.
Write down:
- Every speaker you want to amplify.
- Its nominal impedance.
- Its RMS power handling.
- Whether it uses a passive crossover.
- Whether you want an active configuration.
- Whether a subwoofer will have its own amplifier.
- Whether you plan to add another amplifier later.
Then assign the eight channels.
That small amount of planning can prevent a surprisingly expensive mistake, especially when an amplifier has different power ratings across different channel groups or offers special bridged configurations.
The Real Advantage of Eight Channels
The biggest advantage is not that eight is a bigger number than four.
It is that eight channels give you options.
You can run a straightforward multi-speaker system today, move to an active front stage later, bridge selected channels where appropriate, or use additional DSP outputs to expand the system without throwing away the original amplifier.
That flexibility is why the best eight-channel amplifier for one vehicle may be completely different from the best one for another. The right choice comes down to how you want those eight channels to work together, not simply how much power the specification sheet promises.
8-Channel DSP Amplifier Setup and Tuning: From Wiring to a Properly Balanced Soundstage
A DSP amplifier can give you an enormous amount of control, but that control only becomes useful when the installation is built correctly first. A perfectly tuned processor cannot compensate for a weak ground, incorrect speaker wiring, poor signal routing or an incorrectly configured crossover.
The best approach is to separate the job into two stages: make the electrical and signal side reliable first, then tune the acoustics. Don’t start moving EQ sliders while the basic installation is still changing. It makes troubleshooting much harder and can hide problems that should have been fixed at the wiring stage.
Start With a Channel Map Before You Touch the Wiring
Before mounting the amplifier, write down exactly what every channel is going to drive.
For an active 3-way front stage, for example:
| Amplifier channels | Assignment | Processing required |
|---|---|---|
| 1–2 | Left/right tweeters | High-pass + time alignment + level |
| 3–4 | Left/right midrange | Band-pass + time alignment + level |
| 5–6 | Left/right midbass | Band-pass/low-pass + time alignment |
| 7–8 | Rear speakers or additional stage | High-pass + level |
| DSP outputs | Separate subwoofer amplifier | Low-pass + subsonic + time alignment |
The exact layout can be different, but the principle is the same: decide the signal path before installing anything.
If you are using passive component crossovers, the channel map will be simpler because one amplifier channel can feed a complete left or right component set. Don’t create unnecessary complexity just because the amplifier has eight outputs.
Power and Grounding Come Before DSP Tuning
Run the main power cable from the battery through an appropriately rated fuse and route it safely away from areas where it can be crushed, cut or exposed to excessive heat.
The ground connection deserves just as much attention. Keep it short, secure and connected to clean chassis metal. Paint, rust, loose hardware and poorly chosen grounding points can create noise and voltage-drop problems that later get mistaken for DSP or amplifier faults.
Before connecting speakers, it is worth checking:
- Battery voltage at rest.
- Voltage at the amplifier’s power terminals.
- Ground continuity and connection quality.
- Fuse rating and placement.
- Whether the power cable is appropriately sized for the amplifier.
- Whether the amplifier has adequate ventilation.
- Whether the mounting surface is secure.
An eight-channel amplifier can place a meaningful demand on the vehicle’s electrical system, especially when several channels are driven hard at the same time.
Keep Signal Wiring Deliberate
If you’re using RCA connections, route signal cables sensibly and avoid unnecessarily running them alongside the main power cable for long distances.
With a factory system, the signal path can be more complicated. You may be working with speaker-level inputs, a factory amplifier or an already processed signal. Confirm exactly where the signal is coming from before assuming that it is flat.
This matters because adding a DSP to a heavily equalised factory signal without correcting that behaviour can result in a system that still sounds wrong even after extensive tuning.
Remote Turn-On Needs to Match the Vehicle
Aftermarket head units commonly provide a conventional remote-turn-on signal, but modern factory systems may behave differently.
Depending on the vehicle and amplifier, turn-on may be handled through:
- A conventional remote lead.
- Signal sensing.
- A dedicated integration interface.
- Vehicle-specific control logic.
Do not connect a random switched wire simply because it shows voltage when the ignition is on. Confirm what the amplifier actually requires.
A clean turn-on sequence also helps avoid pops and unwanted noise when the vehicle starts or shuts down.
Set the Gain Before You Start Tuning
Gain is not a volume control.
Its job is to match the amplifier’s input sensitivity to the signal coming from the source. If you set it too high, you can introduce clipping and noise; if you set it excessively low, you may lose useful system headroom.
A sensible starting workflow is:
- Turn off loudness enhancements and unnecessary EQ at the source.
- Set the source to a known reference volume.
- Feed a suitable test signal.
- Adjust the amplifier input gain carefully.
- Confirm that the signal remains clean.
- Repeat for the relevant channels.
- Only then begin DSP calibration.
For serious installations, a multimeter or oscilloscope can be more useful for gain setting than trying to judge clipping by ear.
Set Crossovers Before Touching the EQ
This is one of the most important tuning rules.
Crossover first, EQ later.
Start by deciding what frequency range each speaker should handle. A tweeter should not be asked to reproduce deep bass simply because the amplifier allows it, and a midbass driver should not be forced to reproduce frequencies better handled by the midrange or tweeter.
A typical active 3-way system might use:
- Tweeter: high-pass filter.
- Midrange: high-pass + low-pass filters.
- Midbass: high-pass + low-pass filters.
- Rear speakers: high-pass filter.
- Subwoofer: low-pass + subsonic filtering.
The exact frequencies depend on the individual drivers, their installation and the manufacturer’s recommendations. There is no universal crossover frequency that should be copied into every vehicle.
High-Pass Filtering Protects More Than Your Speakers
A high-pass filter removes frequencies below the selected point.
This is particularly useful for door speakers because very deep bass can demand substantial cone movement without necessarily producing useful output in the vehicle.
Instead of trying to make a small door speaker reproduce subwoofer frequencies, let the subwoofer handle the low end and allow the door speaker to operate where it is more comfortable.
Start conservatively, listen, and adjust based on the actual speaker’s behaviour.
Low-Pass and Subsonic Filtering Need Different Jobs
A low-pass filter determines how much high-frequency information reaches a subwoofer or midbass section.
A subsonic filter works much lower in the spectrum, removing frequencies below the useful operating range of the subwoofer or enclosure.
Don’t confuse the two.
For a sealed subwoofer, a subsonic filter may have less importance than it does for some ported or specialised enclosures. The correct setting depends on the enclosure design and driver’s usable range.
Again, this is one area where copying a number from another vehicle can do more harm than good.
Use Time Alignment to Fix the Cabin’s Geometry
This is where a good DSP can make an ordinary installation sound dramatically more coherent.
The driver’s seat is rarely positioned equally far from every speaker. The nearest tweeter may be only a fraction of the distance of the far-side midbass driver. If every channel plays at exactly the same time, the sound waves reach the driver at different moments.
Time alignment compensates for those differences.
A practical method is:
- Sit in your normal driving position.
- Measure the distance from your listening position to each speaker.
- Record the measurements.
- Identify the farthest speaker.
- Use that speaker as your reference.
- Add delay to the closer speakers.
- Listen and make small adjustments.
The goal isn’t to make the numbers look perfect. The goal is to create a stable, centred image where vocals don’t appear to come from the nearest door speaker.
Don’t Expect a Tape Measure to Finish the Job
Distance measurements provide a useful starting point, but the cabin is not an anechoic chamber.
Reflections from the windshield, dashboard, seats and door panels change what reaches your ears. Speaker placement and phase relationships can also influence the final result.
So use measurements to establish the initial delay, then listen critically.
A good front stage should make the lead vocal feel anchored toward the centre of the dashboard, rather than pulling toward whichever speaker happens to be closest.
Build the Soundstage Before Chasing Bass
When tuning, temporarily keep the low-frequency section under control.
Get the front stage, vocal position and tonal balance working first. Once the front speakers are coherent, bring the subwoofer in gradually.
If you start with a huge amount of bass, it becomes difficult to hear problems in the midrange and upper frequencies.
The same applies to rear speakers. Rear fill should support the cabin rather than dragging the entire soundstage behind the driver.
Use an SPL Meter for Repeatable Levels
You don’t need laboratory equipment to establish useful reference levels.
An affordable SPL meter can help you set the relative output of different channels much more consistently than relying entirely on your ears.
A practical workflow is:
- Use a consistent test signal.
- Place the meter at the driver’s listening position.
- Set one reference channel or speaker group.
- Match the remaining channels carefully.
- Avoid making the rear speakers unnecessarily loud.
- Bring the subwoofer in after the main stage is balanced.
The exact target SPL is less important than consistency and repeatability. If one channel is dramatically louder than another, the DSP will spend much of its available adjustment range trying to compensate.
Use Reference Music You Know Extremely Well
After the technical calibration, use familiar recordings.
Don’t choose a song because it sounds impressive on a new system. Choose something where you already know:
- Where the lead vocal normally sits.
- How the kick drum should sound.
- How much low bass the recording contains.
- Where cymbals and high-frequency detail should appear.
- Whether the recording has a centred or deliberately wide image.
Lossless or high-quality source material is preferable during critical tuning because you don’t want low-quality compression artifacts influencing your decisions.
EQ Should Correct Problems, Not Paint Over Them
This is where many DSP installations go wrong.
If you see a large frequency peak, your first instinct might be to boost the frequencies around it. Usually, that’s the opposite of what you want.
Start by cutting obvious peaks rather than aggressively boosting weak areas. Excessive boost consumes amplifier headroom and can push a speaker toward distortion.
A useful sequence is:
- Establish crossover points.
- Set time alignment.
- Balance channel levels.
- Identify obvious frequency problems.
- Make small EQ cuts.
- Recheck the overall tonal balance.
- Save the configuration.
- Listen again from the driver’s seat.
Don’t chase a perfectly flat graph at the expense of a natural-sounding cabin.
Create More Than One DSP Preset
If the amplifier allows multiple presets, use them.
A sensible arrangement could be:
- Daily driving: balanced front stage with moderate bass.
- Driver-focused: tighter time alignment and reduced rear fill.
- Full-cabin: wider balance for passengers.
- Reference: neutral baseline used for further tuning.
The important part is to keep one untouched reference preset. If you make several experimental changes and lose track of what sounded right originally, that baseline gives you somewhere reliable to return.
The Final Check Should Happen on the Road
A car that sounds perfect while parked may behave differently once you’re actually driving.
Road noise changes the perceived balance, especially at lower frequencies. Engine noise, tyre noise and cabin vibration can also influence what you hear.
So after the stationary calibration is finished, drive normally and listen at sensible volume levels.
If you constantly need enormous bass boosts or dramatic EQ corrections while driving, don’t immediately blame the DSP. Check the installation, speaker location, crossover strategy and source signal first.
The best DSP tuning is usually the one that becomes almost invisible. You stop thinking about the amplifier and start hearing the music as one coherent system.
8-Channel Amplifier Installation: A Practical Guide for a Reliable Car Audio Build
Installing an eight-channel amplifier is not simply a matter of finding a place to bolt it down and running a power cable from the battery. With eight amplified channels, the installation has more wiring, more connections and potentially more electrical demand than a typical four-channel setup.
The good news is that a properly planned installation is very manageable. The key is to treat the amplifier as part of the entire electrical and signal system, rather than as an isolated component. Power delivery, grounding, speaker impedance, ventilation, signal routing and cable protection all affect how reliably the system performs.
Start With an Installation Checklist
Before removing panels or cutting any cable, have the complete installation plan in front of you.
A useful checklist includes:
- Confirm the amplifier’s RMS output at your actual speaker impedance.
- Confirm whether each channel supports 4Ω, 2Ω or both.
- Check the minimum impedance when channels are bridged.
- Map all eight amplifier channels to their intended speakers.
- Determine whether the system uses RCA, speaker-level or digital inputs.
- Check whether the vehicle requires OEM signal integration.
- Select the correct power and ground cable size for the amplifier and installation length.
- Install the main fuse close to the battery.
- Identify a solid, clean chassis grounding point.
- Plan the remote-turn-on or signal-sensing connection.
- Keep power, signal and speaker wiring organised.
- Leave sufficient space around the amplifier for cooling.
- Confirm that the amplifier physically fits before permanently mounting it.
- Check the vehicle’s battery and charging-system condition.
- Verify every speaker connection before applying power.
- Set gains, crossovers and DSP settings only after the electrical installation is confirmed.
That last point is easy to overlook. Do not use DSP tuning to compensate for an installation problem. If there is a poor ground, incorrect speaker polarity or an unstable power connection, fix that first.
Plan the Power Cable Before You Plan the Mounting Location
The amplifier’s physical location determines how long the power and ground runs will be.
A longer power run creates more opportunity for voltage drop, so don’t automatically choose the mounting position based on whichever piece of carpet has the most free space. Look at the entire installation.
Common mounting locations include:
- Under a seat.
- In the trunk.
- Behind a side trunk panel.
- On a custom amplifier rack.
- Behind a rear seat.
- Inside a dedicated audio enclosure.
Under-seat mounting can keep cable runs short, but available height and ventilation can become problems. Trunk mounting provides more room but may require substantially longer power, signal and speaker-wire runs.
Before drilling anything, check what is behind the mounting surface. Fuel lines, brake lines, wiring harnesses and airbags are not things you want to discover with a drill bit.
The Main Fuse Belongs Close to the Battery
The primary fuse protects the vehicle’s power cable in the event of a short circuit.
It should generally be installed as close to the battery as practical, rather than several feet away near the amplifier.
The fuse rating should follow the amplifier manufacturer’s requirements and the capability of the selected cable. Installing a much larger fuse simply because the amplifier occasionally draws high current is not a safe solution.
If your installation uses a distribution block for multiple amplifiers, the wiring and fusing strategy becomes more involved. Each branch needs to be protected appropriately, while the main feed also needs protection.
Grounding Is One of the Most Important Installation Steps
A poor ground can create noise, instability and voltage-drop problems.
Choose a substantial chassis point close to the amplifier and prepare the surface so the terminal contacts clean bare metal. Remove paint, rust or other insulating material where necessary, then secure the connection tightly.
Keep the ground cable as short as practical.
A good ground connection should have:
- Clean metal contact.
- A secure fastener.
- Appropriate cable size.
- Minimal cable length.
- No loose terminals.
- No dependence on thin body panels where a stronger structural point is available.
Don’t assume that a random factory bolt is automatically a good grounding point. Some bolts are attached to components or panels that are not suitable for high-current grounding.
Wiring an 8-Channel Amplifier at 4Ω
A 4Ω installation is straightforward when each channel drives one 4Ω speaker.
For example:
| Channel | Load |
|---|---|
| 1 | Left front tweeter or speaker |
| 2 | Right front tweeter or speaker |
| 3 | Left front midrange |
| 4 | Right front midrange |
| 5 | Left midbass |
| 6 | Right midbass |
| 7 | Left rear speaker |
| 8 | Right rear speaker |
The amplifier should be checked for its continuous RMS output at 4Ω, and each speaker should be matched accordingly.
Do not assume that an amplifier rated at a particular wattage can safely deliver that power to every type of speaker simply because the numbers look close. Speaker sensitivity, impedance and RMS handling all matter.
For a conventional passive component system, the layout may be considerably simpler because one channel can feed each side of a complete component set.
Wiring an 8-Channel Amplifier at 2Ω
A 2Ω load can allow an amplifier to produce more power, but it also demands more current from the amplifier.
Before using 2Ω speakers or creating a 2Ω load through parallel wiring, verify:
- The amplifier is 2Ω stable per channel.
- The manufacturer’s RMS rating at 2Ω is suitable.
- The speaker’s RMS handling is appropriate.
- The power and ground wiring can support the amplifier’s demand.
- The amplifier has adequate ventilation.
- The charging system is in good condition.
If two speakers are wired in parallel, their combined impedance can be lower than the impedance of either individual speaker. This is where people can accidentally create an unsafe load.
For example, two identical 4Ω speakers wired in parallel present a 2Ω load to that amplifier channel. That can be perfectly acceptable on a 2Ω-stable amplifier, but you should never assume it is acceptable in every installation.
Bridging Requires Its Own Impedance Check
Bridging two channels can increase available output for a suitable speaker or subwoofer, but the amplifier sees the load differently in bridged operation.
This is why the statement “the amplifier is 2Ω stable” is not enough.
You need to know whether it is:
- 2Ω stable in normal stereo operation.
- 2Ω stable when bridged.
- Rated for a specific minimum bridged impedance.
- Intended to be bridged at all.
If the manual specifies a 4Ω minimum bridged load, don’t connect a 2Ω subwoofer to that pair simply because the individual channels support 2Ω operation.
Check the Battery and Charging System
An eight-channel amplifier does not necessarily require a major electrical upgrade, but the answer depends on how hard you intend to drive it.
A system running moderate power at normal listening levels is very different from an installation where multiple channels are regularly pushed toward their limits.
Before adding a high-output amplifier, check:
- Battery condition.
- Alternator condition.
- Charging voltage.
- Existing electrical accessories.
- Total amplifier demand.
- Ground connections between battery, chassis and engine.
- Whether additional amplifiers are already installed.
A weak battery or failing alternator will not be fixed by buying a larger amplifier.
Battery Capacity and Alternator Output Are Different Things
This distinction matters.
The battery provides stored electrical energy, particularly during transient demand and when the engine is not running. The alternator supplies electrical power while the engine is operating and also recharges the battery.
If your system has multiple amplifiers and substantial sustained demand, alternator capacity becomes increasingly important.
Don’t automatically install a larger battery or alternator just because an amplifier has a large maximum-current specification. Look at the actual continuous system demand and the vehicle’s existing electrical condition first.
Use Appropriate Fuse and Cable Protection
The power cable should be protected from physical damage throughout its route.
Where it passes through metal, use an appropriate grommet or protective sleeve. Avoid sharp edges, moving components and areas exposed to excessive heat.
The battery-side fuse protects the cable, while additional fusing may be required depending on the distribution arrangement.
A clean installation should never leave a high-current power cable loosely sitting against a metal bracket or passing unprotected through a drilled hole.
Keep Power and Signal Cables Organised
Cable management is not just about making the installation look professional.
Good routing makes future troubleshooting much easier and reduces the possibility of electrical noise.
Where practical:
- Route power cables separately from sensitive signal cables.
- Keep RCA cables away from major power runs where possible.
- Secure cables so they cannot move or rub against metal.
- Label both ends of speaker wires.
- Group left and right speaker wiring logically.
- Leave enough slack for servicing.
- Avoid tightly bending cables at connectors.
- Keep wiring away from pedals, hinges and moving seat mechanisms.
If you ever need to remove the amplifier six months later, good cable management can save a surprising amount of time.
Speaker Polarity Is Small on the Wiring Diagram, Huge in the Sound
Every speaker connection should maintain the correct positive and negative polarity.
A reversed speaker can still produce sound, which makes this mistake particularly annoying to diagnose.
When multiple speakers are working together, incorrect polarity can cause phase cancellation, especially through the midbass region. The result may be weak bass, an unfocused centre image or a strange sense that the system is loud but lacks body.
Label your speaker wires before connecting them, and verify polarity rather than relying on memory.
Leave Room for Heat to Escape
Eight channels packed into a small chassis can generate meaningful heat.
Class-D amplifiers are generally attractive for multi-channel installations because of their efficiency and compact packaging, but efficient does not mean heat-free.
Do not bury the amplifier under dense carpet, insulation or other material that blocks airflow.
Avoid:
- Sealing the amplifier inside a completely unventilated compartment.
- Mounting it directly against heat-producing components.
- Blocking cooling fins or ventilation openings.
- Placing it where luggage can cover it.
- Installing it in direct heat from the vehicle’s exhaust system.
If the manufacturer specifies a clearance around the chassis, follow it.
Watch the Installation Environment
A trunk can look cool and dry while the vehicle is parked, but temperatures can rise significantly inside a closed vehicle.
Likewise, an amplifier mounted under a seat can be exposed to dust, moisture, spilled drinks and objects being pushed underneath it.
Choose a location that provides:
Ventilation + protection + service access + secure mounting.
You want the amplifier protected, but you also want to be able to reach its connections, controls and fuses without dismantling half the interior.
Test the System Before Final Assembly
Don’t reinstall every trim panel immediately after making the connections.
First:
- Inspect the complete power circuit.
- Confirm the fuse is correctly installed.
- Verify the ground connection.
- Check speaker polarity.
- Confirm every channel assignment.
- Check that no speaker wires are shorted.
- Power the system on.
- Listen for turn-on pops or abnormal noise.
- Confirm every speaker is producing output.
- Check that the amplifier remains stable.
- Only then begin DSP tuning.
- After tuning, perform another full-system check before replacing the interior panels.
This is much easier than discovering a dead rear speaker after everything has been put back together.
Don’t Ignore Noise During the First Test
A faint noise problem is easier to diagnose before the installation is finished.
Listen with the source paused and the amplifier at a normal system level.
If you hear:
- Alternator whine.
- Hissing.
- Popping.
- Buzzing.
- Intermittent crackling.
- One channel significantly noisier than another.
stop and diagnose it before continuing.
Don’t immediately increase DSP noise gates or EQ settings to hide the problem. Check the grounding, signal routing, gain structure and source connection first.
A Clean Installation Is Part of the Audio Upgrade
The best eight-channel amplifier cannot overcome an installation that ignores the electrical side of the vehicle.
A properly installed system should have correct fusing, secure power and ground connections, appropriate speaker impedance, protected wiring, sensible cable routing and adequate cooling before any serious tuning begins.
Once those fundamentals are right, the DSP becomes what it should be: a precision tool for shaping the system, rather than a way of compensating for mistakes elsewhere in the installation.
8-Channel Amplifier Class D vs Other Topologies
When an amplifier has eight output channels, the choice of amplifier topology becomes more important than it does with a basic two- or four-channel setup. Eight channels can mean more current demand, more heat and more installation space, especially when the amplifier is expected to drive multiple speakers continuously.
That is why Class D has become so common in modern multi-channel car audio. It allows manufacturers to put substantial amplification into a relatively compact chassis while keeping wasted energy and heat under control. But Class D is not automatically the best choice for every high-end system. Class AB still has a place, particularly when the priority is a certain amplifier architecture, analog signal path or installation philosophy rather than maximum efficiency.
Why Class D Makes So Much Sense for Eight Channels
The fundamental advantage of Class D is efficiency.
A traditional linear amplifier topology such as Class AB operates its output devices in a way that creates more continuous heat. Class D uses switching output stages and a reconstruction filter, allowing the output devices to spend much less time operating in their high-dissipation region.
That difference becomes increasingly useful when you have eight channels inside one chassis.
Consider an amplifier driving eight speakers. Even if each channel is only producing moderate power, the amplifier may be handling a substantial total load. With a less efficient topology, more of the electrical energy drawn from the vehicle is converted into heat rather than speaker output.
With Class D, manufacturers can generally achieve:
- Higher efficiency.
- Lower heat generation for a given output.
- Smaller amplifier chassis.
- Lower cooling requirements.
- Better suitability for compact installations.
- Reduced continuous electrical demand compared with an equivalent lower-efficiency design.
That does not mean every Class D amplifier is equally efficient. Topology, output power, impedance, design quality and operating conditions all matter. Published efficiency figures are useful, but they should not be treated as a universal number for every listening situation.
Eight Channels Change the Heat Equation
A four-channel amplifier can already become warm when driven hard. An eight-channel amplifier has twice as many amplified output paths, so thermal management deserves more attention.
This is one reason compact Class D designs are attractive for active systems.
An eight-channel amplifier may be powering:
- Front tweeters.
- Front midrange drivers.
- Front midbass drivers.
- Rear speakers.
- Additional fill channels.
- Or other speakers depending on the system architecture.
If several of those channels are producing sustained output at the same time, the amplifier has to dissipate the heat generated by its internal electronics.
A smaller Class D chassis can therefore be a genuine installation advantage, particularly in vehicles where there is limited space under a seat or behind interior panels.
Small does not mean thermally irrelevant. A compact amplifier still needs airflow and sensible mounting, especially when it is driven hard for extended periods.
Class D Does Not Mean Poor Sound Quality
One of the oldest assumptions in car audio is that Class D is automatically inferior for sound quality.
That is far too simplistic.
Modern Class D amplifier designs can deliver very low distortion, high signal-to-noise ratios and wide frequency response. The quality of the implementation matters far more than the label on the amplifier.
For a high-end system, pay attention to the complete design:
- Output-stage quality.
- Power-supply design.
- Signal-to-noise ratio.
- Total harmonic distortion.
- Frequency response.
- Input-stage quality.
- DSP implementation.
- Gain structure.
- Output filtering.
- Channel separation.
- Protection circuitry.
A well-engineered Class D amplifier with a properly tuned DSP can produce a cleaner and more convincing system than a poorly implemented Class AB amplifier.
That is the important distinction.
Class AB Still Has a Place in High-End Car Audio
Class AB remains attractive to some enthusiasts because of its linear output-stage architecture and traditional analog design approach.
In a well-designed Class AB amplifier, the output devices operate in a region where the transition between the positive and negative halves of the waveform is carefully controlled. Good implementations can achieve excellent linearity and very low distortion.
There is also a long history of high-end car audio amplifiers using Class AB designs, particularly where the manufacturer prioritises sound character, analog circuitry and premium build quality over absolute efficiency.
The trade-off is heat.
An eight-channel Class AB amplifier can require substantially more thermal management than an equivalent Class D design. That can influence:
- Chassis size.
- Heatsink requirements.
- Mounting location.
- Ventilation.
- Electrical demand.
- Long-duration reliability under heavy load.
For a serious installation, this is not a theoretical issue. The amplifier has to live somewhere inside the vehicle.
Class D vs Class AB for an 8-Channel System
| Factor | Class D | Class AB |
|---|---|---|
| Efficiency | Generally higher | Generally lower |
| Heat output | Lower for comparable output | Higher |
| Chassis size | Often more compact | Often larger |
| Electrical demand | Generally easier to manage | Can be higher |
| Multi-channel suitability | Excellent | Possible, but installation requires more planning |
| Active systems | Very well suited | Also capable |
| High-end sound quality | Can be excellent | Can be excellent |
| Installation flexibility | Strong advantage | Requires more thermal planning |
| Long-duration high output | Depends on design and cooling | Depends heavily on heatsinking |
| Main strength | Power density and efficiency | Linear architecture and traditional high-end design |
The table is useful, but don’t turn it into a rule that Class D is “better” and Class AB is “worse.” They solve slightly different engineering priorities.
What About Class G, Class H and Other Designs?
You may occasionally encounter other amplifier topologies in high-end audio, but they are much less common in mainstream eight-channel car amplifier shopping.
Class G and Class H designs attempt to improve efficiency over conventional linear amplification by using different supply-voltage strategies. They can be technically interesting, but they are not normally the first consideration when selecting a modern eight-channel automotive amplifier.
For a car audio buyer, the practical decision is usually much simpler:
Do you want the efficiency and compactness of a modern Class D design, or do you have a specific reason to choose a linear amplifier architecture such as Class AB?
That is a more useful question than chasing topology names.
When Class D Is the Better Choice
Class D is usually the sensible starting point when the system needs eight channels in a realistic vehicle installation.
It makes particular sense when:
- You are building an active front stage.
- You need multiple channels from one chassis.
- Space under the seat or in the trunk is limited.
- The system will be played at high volume for extended periods.
- You already have other electrical accessories or amplifiers.
- You want to minimise unnecessary heat.
- You are working with a modern OEM-integrated system.
- You want strong power density without a huge amplifier rack.
For many installations, these practical advantages outweigh theoretical arguments about amplifier topology.
When Class AB Can Be Worth Choosing
A Class AB eight-channel amplifier becomes more interesting when the buyer is deliberately building a sound-quality-focused system and is comfortable giving the amplifier more physical space and thermal headroom.
It can make sense when:
- You specifically prefer the design philosophy of linear amplification.
- The amplifier has a proven implementation and strong measured performance.
- Installation space is not a major limitation.
- Adequate ventilation is available.
- Electrical capacity is sufficient.
- The amplifier will be used as part of a carefully tuned high-end system.
The important word here is specific.
Don’t spend extra money on a Class AB amplifier purely because somebody says Class AB “sounds warmer” or “sounds more musical.” Those descriptions are subjective and can vary dramatically between amplifiers, systems and listeners.
Sound Quality Depends on More Than the Output Stage
This is where a lot of amplifier comparisons go off track.
A topology can influence the engineering characteristics of an amplifier, but it does not determine the complete sound of the finished car audio system.
The final result also depends on:
- Speaker quality.
- Speaker installation.
- Door treatment.
- Enclosure design.
- DSP processing.
- Crossover points.
- Time alignment.
- Equalisation.
- Gain structure.
- Factory signal processing.
- Listening position.
- Cabin acoustics.
A technically excellent Class AB amplifier connected to poorly installed speakers can sound worse than a well-designed Class D amplifier driving properly installed and tuned speakers.
The installation and tuning often have a much larger audible impact than the topology label suggests.
Don’t Confuse Amplifier Efficiency With Speaker Efficiency
These are two different things.
Amplifier efficiency describes how effectively the amplifier converts electrical power into output power.
Speaker efficiency or sensitivity describes how much acoustic output a speaker can produce from a given amount of electrical input.
A highly efficient amplifier does not automatically make an inefficient speaker efficient. Likewise, a high-sensitivity speaker can reduce the amount of amplifier power required for a given listening level.
For an eight-channel system, both should be considered when deciding how much amplifier power you actually need.
The Real Question Is System Balance
If your system needs eight channels, I would generally prioritise proper power matching, DSP capability, OEM integration, thermal behaviour and installation quality before choosing between Class D and Class AB.
For a compact active system, Class D is usually the practical winner.
For a high-end installation where space, heat and electrical efficiency are less restrictive and the amplifier itself has a compelling design and performance record, Class AB can still be a legitimate choice.
And if two amplifiers measure similarly but one is smaller, cooler and easier to install, there is no prize for choosing the harder installation.
The Insider Pro-Tip
Don’t buy an amplifier topology; buy the complete system. If a Class D eight-channel amplifier gives you the required RMS power, clean signal path, DSP control and thermal headroom, there is little reason to reject it because it is Class D. Choose Class AB when you have a genuine reason for its architecture, not because the label sounds more “audiophile.”
FAQs About 8-Channel Car Amplifiers
Is an 8-channel car amplifier actually better than a 4-channel amplifier for a full car audio system
Not automatically. An 8-channel amplifier is better when your system actually has eight amplification paths to use. That could mean an active front stage, multiple speaker sections, rear fill, or a more advanced DSP-controlled layout. If you only have four speakers and no realistic plan to expand, paying for four additional channels adds cost and installation complexity without improving sound by itself.
The real advantage is control and flexibility, not the channel number. An eight-channel amplifier lets you control different speaker groups independently, which becomes particularly valuable when you want separate crossover points, level adjustments and time alignment for tweeters, midrange and midbass. In an active system, that flexibility can be far more valuable than simply having a higher wattage rating.
There is also a practical catch: eight channels mean more wiring, more gain settings, more speaker connections and potentially greater electrical demand. So if a four-channel amplifier already matches your speakers and system layout, moving to eight channels just because it sounds like an upgrade is not a smart purchase.
Do I need an 8-channel amplifier with DSP, or can a regular 8-channel amp be better?
For a serious active car audio system, built-in DSP can be one of the biggest reasons to choose an eight-channel amplifier. The amplifier provides the power while the DSP gives you control over how that power reaches each speaker. That can include crossover points, slopes, equalisation, time alignment, input correction and individual channel levels.
A regular eight-channel amplifier can still be the better choice in a system that already has a dedicated DSP or an advanced source processor. In that situation, paying again for DSP inside the amplifier may add cost without giving you much additional functionality.
Real talk: don’t judge a DSP amplifier by the number of EQ bands printed on the specification sheet. What matters is whether the processor gives you enough independent control, sensible crossover options, accurate time alignment and a usable tuning interface. A badly implemented or frustrating DSP can be less useful than a simpler amplifier paired with a genuinely capable external processor.
For most buyers building an eight-channel system from scratch, however, an integrated DSP can reduce equipment count, simplify signal routing and make the entire system easier to configure.
How much RMS power should an 8-channel car amplifier have for a properly matched system?
There is no universal wattage target such as 100 watts per channel that automatically makes an eight-channel amplifier the right choice. RMS power needs to be matched to the speaker, impedance and intended role of each channel.
A tweeter, midrange, midbass and rear speaker do not necessarily need the same amount of amplifier power. An amplifier offering different power levels across its channels can therefore be perfectly logical if those channels are being used for different parts of an active system.
When comparing amplifiers, look at:
- RMS output at 4Ω and 2Ω, not peak or “maximum” wattage.
- The speaker’s actual impedance.
- Speaker RMS handling and sensitivity.
- Whether channels will be bridged.
- How many channels will run continuously at high output.
- Whether the vehicle’s electrical system can comfortably support the installation.
A useful rule is to compare the amplifier and speaker as a system, rather than trying to win a wattage competition. More power can provide useful headroom, but excessive power without proper gain setting does not automatically produce better sound.
Is a 2Ω 8-channel amplifier better than a 4Ω 8-channel amplifier?
Neither is inherently better. The correct impedance is the one that matches your speaker configuration and the amplifier’s design.
A 2Ω-capable amplifier gives you more flexibility because it can safely handle lower-impedance loads and often produces higher output at 2Ω. That can be useful when several speaker configurations are being considered. But lower impedance also means the amplifier has to deliver more current.
For example, if an amplifier is rated for substantially more power at 2Ω than at 4Ω, that additional output is not free. The electrical system, amplifier power supply and thermal management all have more work to do.
This is where installation quality becomes important. If you are running eight channels at relatively demanding loads, don’t look only at the amplifier’s 2Ω number. Consider the total system demand, power wiring, fuse strategy, alternator capacity and cooling.
And if you are creating a 2Ω load by wiring speakers in parallel, calculate the resulting impedance first. Never assume that an amplifier advertised as “2Ω stable” is automatically safe for every possible bridged or parallel configuration.
Is Class D really the best choice for an 8-channel car amplifier?
For most multi-channel vehicle installations, Class D is the practical choice, largely because eight channels can generate considerable heat and electrical demand when driven hard. The higher efficiency of modern Class D designs allows manufacturers to deliver multiple channels in a relatively compact chassis without wasting as much energy as heat.
That does not make Class AB obsolete, and it certainly does not mean every Class D amplifier sounds better.
A well-designed Class D amplifier can provide excellent low distortion, clean output and strong efficiency. A good Class AB amplifier can also deliver exceptional sound quality, but it may require more physical space, greater heatsinking and more attention to ventilation.
The real mistake is choosing based on topology alone. A genuinely good Class D amplifier with appropriate power, clean signal processing and a properly tuned DSP can outperform a mediocre Class AB amplifier in the actual vehicle. Speaker installation, crossover settings, time alignment, gain structure and cabin acoustics will often have a much larger influence on what you hear.
So if you are choosing an eight-channel amplifier for a modern active system, start with the system requirements. Choose Class AB when its particular design and performance justify the additional installation demands, not because “Class AB” sounds more premium on a product page.
Final Verdict: What Actually Matters in an 8-Channel Car Amplifier
An eight-channel amplifier is easy to misunderstand because manufacturers naturally make the channel count and wattage the headline. But after looking at the complete system, those numbers are only the starting point. The real value of an eight-channel amplifier appears when you use those channels to solve something specific: an active front stage, independent speaker control, factory-system integration, additional rear channels or a DSP-controlled system that needs more than four amplifier paths.
For a straightforward four-speaker setup, there is no prize for buying eight channels. You are paying for capability that may never be used. But once the system becomes more sophisticated, having eight properly powered and independently controlled channels can completely change how precisely the system can be built and tuned.
Our Picks Come Down to Different Strengths
There isn’t one amplifier here that makes every other option irrelevant. The right choice depends on what you want the amplifier to do after installation.
The Audison stands out when DSP depth, high-resolution processing and system expansion are the priority. Alpine is particularly compelling when factory integration and automated tuning are important. JBL takes a more compact approach for buyers who want eight channels and integrated DSP without turning the installation into a large project.
The Zapco takes a different route with its Class-AB architecture and serious DSP control, making it interesting for a sound-quality-focused build where efficiency and chassis size are not the only priorities. Kicker is the stronger fit when straight amplifier output and rugged construction matter more than having an advanced integrated DSP. Blaupunkt makes a convincing case when you want a compact eight-channel DSP solution without moving into the highest price tier.
That distinction is important because these amplifiers are not really competing on one specification. They are competing on system philosophy.
The Real Buying Decision Is Made Before You Place the Order
Before choosing one, draw your speaker layout on paper.
Write down exactly what each of the eight channels will power, the impedance of every speaker, the RMS power required, whether any channels will be bridged and where the DSP processing will happen. Then look at the amplifier’s real RMS ratings at those loads.
If the numbers work, move to the less glamorous details that often determine whether the installation is actually successful:
- Does it accept the signal your vehicle provides?
- Does its DSP offer enough independent control?
- Can you tune it without fighting terrible software?
- Is the amplifier physically suitable for your installation?
- Can your electrical system support it comfortably?
- Does it have enough thermal headroom for the way you listen?
- Will you still have the channels you need if the system grows later?
That is the checklist that separates a smart amplifier purchase from an expensive specification sheet.
Our Bottom Line
If you are building a serious multi-speaker system, an eight-channel amplifier can be one of the most useful pieces of equipment you buy. But its advantage is not that it says “8-channel” on the chassis. Its advantage is that it gives you more independent control over the acoustic system inside a very small environment where every speaker, crossover point and time delay affects what you hear.
And there is one final piece of real talk worth remembering: don’t spend your entire budget on the amplifier and then compromise on speakers, installation or tuning. A perfectly specified amplifier cannot rescue poorly installed speakers, incorrect polarity, bad gain structure or an untreated door.
Choose the amplifier around the system you are actually building, install it with enough electrical and thermal headroom, and use the DSP with restraint rather than chasing numbers. Do that, and an eight-channel amplifier stops being an impressive specification and becomes what it should be — the control centre of a properly engineered car audio system.
Also Check:


