

Best 2 Way Component Car Speakers (2026): Beyond Watts and Bass
Choosing the right component speakers is not just about making your car stereo louder; it is about getting clearer vocals, better instrument separation and controlled midbass without harsh treble. The Morel Tempo Ultra 602 MKII makes a compelling starting point, with 130W RMS power handling per speaker, 90dB sensitivity, 4-ohm impedance and a 55Hz–22kHz frequency response, alongside a separate soft-dome tweeter and crossover network. These specifications provide a useful starting point for evaluating its capabilities, but the final sound still depends on installation, amplification and cabin acoustics.
Before choosing a set, check your car’s speaker cutout diameter, mounting depth, tweeter locations and factory amplifier compatibility. A nominal 6.5-inch driver is not automatically a direct fit, and some vehicles require adapter brackets, wiring harnesses or additional installation work. The Morel’s 4-ohm load must also suit your audio system, while its RMS rating describes power handling rather than the amplifier power it requires. The following picks compare different approaches to sound quality, driver construction, crossover design and system matching, so you can choose according to your setup instead of buying on wattage alone.
Best 2 Way Component Car Speakers (2026): Clear Vocals and Tight Midbass
#1. Morel Tempo Ultra 602 MKII 6.5-Inch Component Speakers
Best 2 Way Component Car Speakers for Natural Vocals, Smooth Treble, 130W RMS Power Handling and Balanced Midbass
#2. HERTZ Mille Pro MPK 165.3 Component Speakers
Best 2 Way Car Component Speakers for Dynamic Midbass, 92dB Sensitivity, Tetolon Tweeters and Detailed Instrument Separation
#3. Focal ES 165 KX2E K2 EVO Component Speakers
Best Premium 2 Way Component Speakers for K2 Aramid-Fiber Woofers, High-Resolution Treble and Precise Stereo Imaging
#4. Alpine R2-S652 R-Series Component Speakers
Best 6.5-Inch Component Car Speakers for Amplifier Upgrades, Magnesium Tweeters, Glass-Fiber Woofer Cones and Extended High-Frequency Response
#5. Sony Mobile ES XS-162ES Component Speakers
Best 2 Way Component Car Speakers for Aramid-Fiber Woofers, Separated Notch Edge Surround Technology and Detailed High-Frequency Reproduction
Must Check: Best 3 Way Component Speakers
Expert Tip Before You Buy
Do not judge a component speaker by its RMS rating or price alone. Your car’s factory stereo, amplifier power and door installation can change how a speaker performs in the real world. A high-end set can sound underwhelming when it is poorly powered or installed, while correct tweeter positioning and proper door sealing can make a noticeable difference. Before ordering, confirm the mounting depth, cutout diameter, impedance and crossover arrangement against your vehicle and audio setup. If you are keeping the factory head unit, check amplifier compatibility rather than assuming every 6.5-inch component kit will deliver its advertised performance without an upgrade.
How We Chose These 2-Way Component Speakers
We selected these five component speaker systems for their distinct strengths, not simply because they carry familiar brand names. The Morel Tempo Ultra 602 MKII is included for buyers who prioritise balanced music reproduction and natural vocals. The HERTZ Mille Pro MPK 165.3 offers a performance-focused alternative for listeners who want an energetic presentation and clear separation between instruments. The Focal ES 165 KX2E K2 EVO brings a premium design with its K2 cone and FRAK tweeter, making it a candidate for a carefully matched high-end system.
We also considered how the Alpine R2-S652 R-Series fits an enthusiast-oriented, high-resolution audio upgrade and how the Sony Mobile ES XS-162ES approaches detailed playback with its extended published frequency response. These differences matter because not every buyer wants the same sound, uses the same amplifier or listens at the same volume. A speaker suited to one setup is not automatically the best choice for another.
Our selection criteria focus on published technical specifications, driver and tweeter design, power handling, impedance, installation considerations and intended use. We distinguish manufacturer specifications from subjective sound-quality claims rather than presenting unverified listening impressions as test results. Product availability, pricing and included accessories can vary by seller, so those details should be confirmed before purchase.
One final consideration is compatibility. Although these products belong to the 6.5-inch class, actual fit depends on your vehicle’s speaker openings, mounting depth, adapter requirements and tweeter locations. We therefore treat vehicle fitment and amplifier matching as essential parts of the buying decision, alongside sound quality. This approach helps readers compare the five options on practical grounds instead of relying on power figures or marketing language alone.
#1. Morel Tempo Ultra 602 MKII 6.5-Inch 2-Way Component Speakers
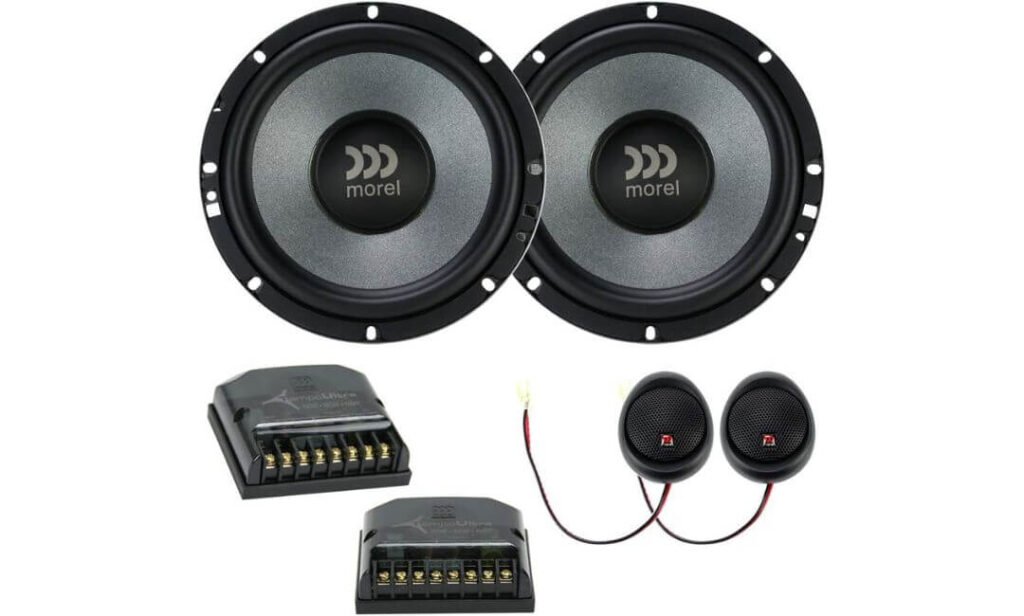
Quick Specs:
- Speaker Type: 6.5-inch, 2-way component speaker system
- Power Handling: 130W RMS per speaker / 260W RMS per pair
- Peak Power: 250W per speaker / 500W per pair
- Impedance: 4 ohms
- Sensitivity: 90dB
- Frequency Response: 55Hz–22,000Hz
- Woofer Cone: Treated paper composite
- Tweeter: 1.1-inch soft dome
- Crossover: MXR Direct Crossover
- Mounting Depth: 2.56 inches (65mm)
- Voice Coil: Copper voice coil wire
- Magnet: High-grade ferrite/neodymium magnet construction, as specified in the supplied product details
A good component-speaker upgrade should make vocals easier to follow and instruments easier to distinguish, not simply make the stereo louder. The Tempo Ultra 602 MKII is built around a 6.5-inch treated paper composite woofer and a 1.1-inch soft-dome tweeter, with an included crossover directing the appropriate frequencies to each driver. That separate-driver arrangement gives you more flexibility over tweeter placement than a conventional coaxial speaker, which can help create a more convincing front soundstage when installed and tuned correctly.
The 130W RMS rating per speaker, 4-ohm impedance and 90dB sensitivity give you useful figures for planning the rest of your system. The power rating is a handling specification, not a promise that the speakers will sound their best at 130 watts or require that much power to operate. A compatible factory stereo can still drive them, although a suitable aftermarket amplifier may provide more headroom and control at higher listening levels. Their published 55Hz–22kHz frequency response covers a broad range, but the lowest bass you hear will depend on installation, cabin acoustics and equalisation. For deep sub-bass, a dedicated subwoofer remains the more effective solution.
Installation deserves the same attention as the speaker specifications. The stated 2.56-inch (65mm) mounting depth is a useful starting point, but check the available space behind your car’s door panel, window mechanism and factory grille before ordering. You may need vehicle-specific mounting rings, wiring adapters or tweeter brackets, and the supplied crossover needs a suitable mounting location. The 4-ohm impedance also makes amplifier compatibility worth checking before connecting the system to an existing multi-channel amplifier.
What Stands Out in Daily Listening
- Natural-sounding woofer material: The treated paper composite cone is designed for balanced reproduction, making it a relevant choice for listeners who value vocal tone and musical consistency over exaggerated treble.
- Dedicated soft-dome tweeter: The 1.1-inch tweeter handles high frequencies separately from the woofer, with the potential for smooth, detailed playback when positioned and adjusted properly.
- Useful power-handling headroom: The 260W RMS-per-pair figure gives amplifier shoppers a clear reference when matching components, although clean power and correct gain settings matter more than chasing a high wattage number.
- Included crossover: The MXR Direct Crossover helps divide frequencies between the woofer and tweeter, avoiding the need to source a separate crossover just to complete the basic component system.
- Practical mounting information: The 65mm mounting depth helps narrow down fitment checks before purchase, reducing the risk of ordering a set that clashes with the door structure.
One Thing to Check Before Buying
The 55Hz lower frequency specification does not mean this set will replace a subwoofer. It can contribute to the midbass you hear in music, but low-frequency output varies with the vehicle, door sealing, amplifier power and listening level. If your priority is strong kick-drum impact or deep electronic bass, plan the complete system around those needs rather than relying on the component speakers alone.
Where This Component System Fits Best
This is a sensible option for a front-stage upgrade when you want separate woofers and tweeters, a supplied crossover and a published power rating that can be matched to an appropriate amplifier. Its 4-ohm impedance is a useful starting point for many conventional car-audio setups, but check the minimum supported load of your specific amplifier. The supplied specifications do not establish universal vehicle compatibility, so confirm the mounting dimensions and wiring requirements for your car before purchasing.
The Insider Pro-Tip
Before fitting the woofers, seal the mounting ring against the door and check that the speaker basket clears the window glass throughout its travel. Air leaks around the mounting surface can weaken midbass, while insufficient clearance can turn a speaker upgrade into an expensive installation problem. A suitable adapter ring and properly secured mounting points are often more valuable than adding extra amplifier power to a poorly fitted system.
For the best result, start with conservative amplifier gain, keep equalisation neutral and adjust the tweeter level only after listening from the driver’s seat. The included crossover handles frequency division, but it cannot correct poor speaker positioning or a badly sealed door. Get those fundamentals right first, then decide whether additional amplification or a subwoofer would genuinely improve your setup.
#2. HERTZ Mille Pro MPK 165.3 6.5-Inch 2-Way Component Speakers
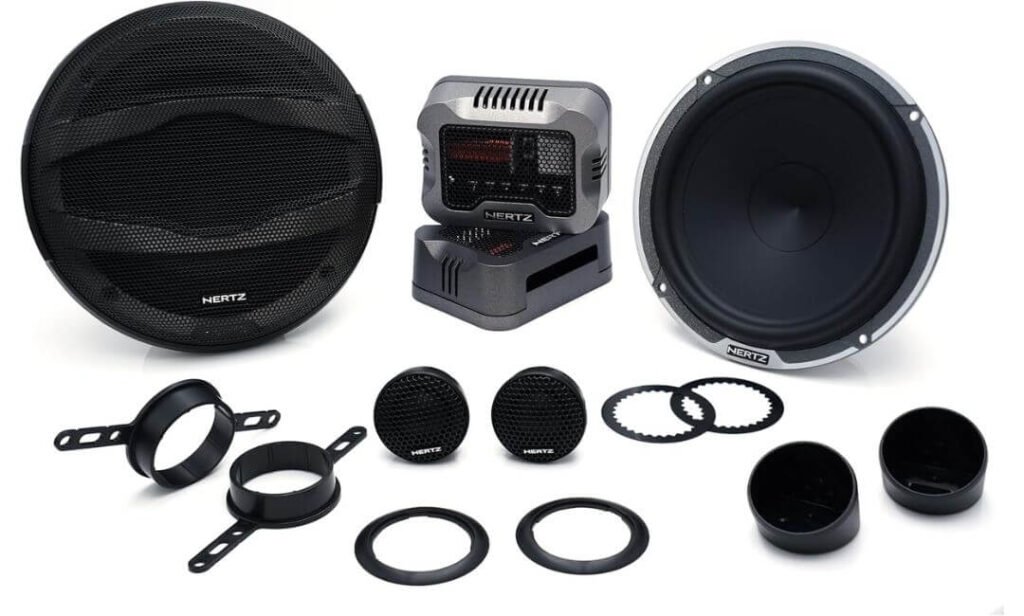
Quick Specs:
- Speaker Type: 6.5-inch, 2-way component speaker system
- Power Handling: 110W RMS per pair (55W per speaker, based on the supplied system rating)
- Peak Power: 220W per pair
- Impedance: 4 ohms
- Sensitivity: 92dB
- Frequency Response: 40Hz–22.5kHz
- Woofer: MP 165.3 with V-Cone design
- Woofer Cone: Pressed paper composite
- Tweeter: MP 25.3, 1.14-inch Tetolon fiber soft dome
- Crossover: MPCX 2.3 external crossover
- Voice Coil: Pure copper
- Surround: Boundary Free rubber surround
- Construction: Aluminum-alloy basket with ferrite magnet
- Installation: Low-mounting-depth design with tweeter mounting options
A component speaker should do more than make the top end brighter. The HERTZ Mille Pro MPK 165.3 combines a 6.5-inch V-Cone woofer with a dedicated 1.14-inch Tetolon fiber soft-dome tweeter, giving each driver a separate job. The woofer handles bass and midrange duties, while the tweeter reproduces higher frequencies. Its included MPCX 2.3 external crossover manages the handoff between them, and the adjustable tweeter level provides some flexibility when the factory dashboard or door locations make the treble sound too prominent.
The design also has practical strengths worth considering. The Boundary Free rubber surround, pressed paper composite cone and pure-copper voice coil are intended to support responsive midbass and controlled driver operation. Hertz lists a 92dB sensitivity rating, which is relatively high on paper and can help the system produce useful output without requiring as much input power as a less-sensitive speaker under comparable conditions. The supplied system rating is 110W RMS and 220W peak per pair; check the official regional specification sheet before matching an amplifier, because power figures should never be interpreted as a recommendation to feed the speakers their maximum rating continuously.
For installation, the low-mounting-depth design may help in doors with limited space, but it does not guarantee a direct fit in every vehicle. Measure the available depth, check window-glass clearance and confirm the mounting-hole pattern before buying. The crossover also needs a secure, dry location, and the tweeters should be positioned so their output reaches the listening area without becoming overly sharp. If you are retaining the factory stereo, confirm that its output and wiring are suitable for a 4-ohm component system; an aftermarket amplifier or DSP can offer more control, but neither automatically guarantees better sound.
What Makes This System Worth Considering
- Tetolon fiber soft-dome tweeter: Designed for detailed high-frequency reproduction, with a dedicated driver that can be positioned independently of the woofer.
- V-Cone woofer design: A distinctive cone profile intended to support dispersion, helping maintain a more consistent presentation when listening away from the speaker’s direct axis.
- Adjustable tweeter output: The crossover’s stated 0/+2dB adjustment gives installers a practical way to tailor treble output to the vehicle’s cabin and speaker placement.
- 92dB sensitivity: A useful specification when comparing systems for output efficiency, although sensitivity measurement conditions must match before making direct comparisons.
- Low-profile installation design: The shallow-mounting approach can be helpful in space-constrained doors, provided the actual basket dimensions and mounting depth suit the vehicle.
A Realistic Limitation to Keep in Mind
The 40Hz lower frequency specification does not guarantee deep, powerful bass in a car door. Actual low-frequency output depends on installation, door sealing, available power and cabin acoustics. The system may provide satisfying midbass for everyday listening, but buyers who want strong sub-bass should budget for a dedicated subwoofer rather than expecting a 6.5-inch woofer to do everything.
Where It Makes Sense in a Car Audio Build
This set is worth considering for a front-stage upgrade where clear vocals, an adjustable tweeter level and a dedicated crossover are priorities. The higher published sensitivity may also be attractive when comparing it with less-sensitive alternatives, particularly for systems where amplifier power is limited. Its final performance, however, will depend on the whole installation—not the speaker specification sheet alone.
The Insider Pro-Tip
Start with the tweeter at its flatter, lower-output setting if your car has reflective glass, hard dashboard surfaces or tweeters mounted close to ear level. Listen to familiar tracks with clear vocals and cymbals before increasing the level. A little extra treble can restore detail in some cabins, but too much can make voices and percussion tiring during longer drives.
Before final installation, seal the woofer mounting ring, secure the crossover and check that the window mechanism clears the speaker. These steps help avoid rattles and weak midbass that can otherwise be mistaken for a speaker-quality problem. If the system still sounds bright or uneven, adjust placement and equalisation before assuming the speakers need replacing.
#3. Focal ES 165 KX2E K2 EVO 6.5-Inch 2-Way Component Speakers
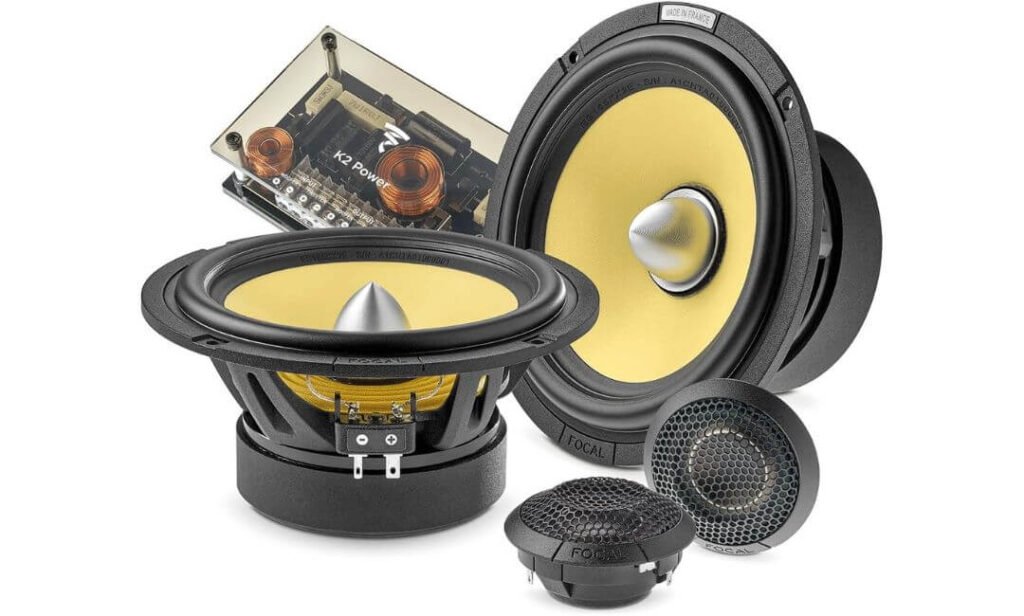
Quick Specs:
- Speaker Type: 6.5-inch, 2-way component speaker kit
- Woofer Cone: K2 aramid-fiber sandwich cone
- Tweeter: FRAK inverted-dome design with an aluminum/magnesium cone
- Power Handling: 120W RMS / 240W peak, according to the supplied specifications
- Sensitivity: 92.5dB, according to the supplied specifications
- Impedance: 4 ohms, according to the supplied specifications
- Frequency Response: 55Hz–22kHz, according to the supplied specifications
- Surround Technology: Tuned Mass Damper (TMD)
- Spider Design: Progressive profile
- Crossover: Included audiophile crossover network with bi-amplification capability
- Authenticity: Individually engraved serial number
- Installation: Separate woofers and tweeters for flexible placement
Some speaker upgrades improve volume but leave the music sounding much the same. The Focal ES 165 KX2E K2 EVO takes a different approach, combining a K2 aramid-fiber sandwich-cone woofer with an aluminium/magnesium FRAK inverted-dome tweeter. The woofer is designed to balance rigidity and low moving mass, while the tweeter handles the upper frequencies independently. For listeners who pay attention to vocal texture, guitar detail and the separation between instruments, this combination makes the kit worth considering as a premium front-stage upgrade.
The engineering goes beyond the cone material. Focal’s Tuned Mass Damper (TMD) surround is designed to control unwanted vibration, while the progressive-profile spider supports more consistent cone movement. Together, these features aim to keep reproduction controlled when the music becomes demanding. The included crossover network separates frequencies between the drivers, and its bi-amplification capability gives suitable systems additional configuration flexibility. That does not automatically mean lower distortion in every installation; amplifier matching, crossover setup and speaker placement still affect the final result.
The published 120W RMS rating, 92.5dB sensitivity and 4-ohm impedance provide useful starting points for planning an amplifier upgrade. Confirm these figures against the official specification sheet for the exact kit and region before purchase. The RMS rating describes power handling rather than the power the speakers constantly consume, and the 55Hz lower frequency figure should not be mistaken for deep subwoofer-level bass. Before installation, also measure the available mounting depth, check window clearance and plan where the separate tweeters and crossover will sit. The engraved serial number helps identify the individual kit, but purchase from an authorised or reputable seller if authenticity and warranty coverage matter to you.
What Sets This Premium Component Kit Apart
- K2 aramid-fiber woofer cone: A distinctive sandwich-cone construction intended to provide stiffness without excessive moving mass, supporting controlled midrange and midbass reproduction.
- FRAK inverted-dome tweeter: The aluminium/magnesium design gives the system a dedicated high-frequency driver for detailed treble and flexible soundstage positioning.
- TMD surround technology: Designed to reduce unwanted vibration and improve cone control, particularly when the woofer handles demanding musical passages.
- Progressive-profile spider: Supports controlled, linear movement of the woofer assembly, contributing to the design’s focus on accuracy and dynamics.
- Bi-amplification-capable crossover: Gives compatible installations more flexibility in how the woofer and tweeter are powered and integrated.
One Important Buying Consideration
This is a premium component kit, so installation quality and amplifier matching deserve a proper budget. Separate tweeters and external crossovers require more planning than a simple coaxial replacement. If your car’s factory system offers limited tuning or you want to use bi-amplification, confirm the crossover configuration and amplifier-channel requirements before ordering rather than assuming the kit will work optimally with every factory stereo.
Who Should Consider This Focal System?
The ES 165 KX2E makes the most sense for listeners building a carefully matched front soundstage and prioritising detailed reproduction over simply chasing loudness. Its specialist cone and tweeter designs offer a clear reason to consider it alongside the Morel and HERTZ alternatives, but they do not establish that it will outperform either system in every vehicle. The right choice depends on your listening preferences, installation and the rest of your audio chain.
The Insider Pro-Tip
When installing a premium component set, position and tune the tweeters before making aggressive equaliser adjustments. A tweeter mounted too far off-axis or aimed directly at a reflective surface can change perceived brightness and stereo imaging. Start with sensible placement, use the supplied crossover according to its instructions, and listen to familiar vocal recordings from the driver’s seat before fine-tuning the system.
If you intend to use bi-amplification, verify the exact crossover’s supported configuration and follow the manufacturer’s wiring diagram. Never assume that a crossover designed for bi-amplified operation can be wired like a conventional single-input network without checking its terminals and instructions. Getting these details right gives the K2 woofer, FRAK tweeter and crossover a fair chance to perform as intended.
#4. Alpine R2-S652 R-Series 6.5-Inch Component Speakers
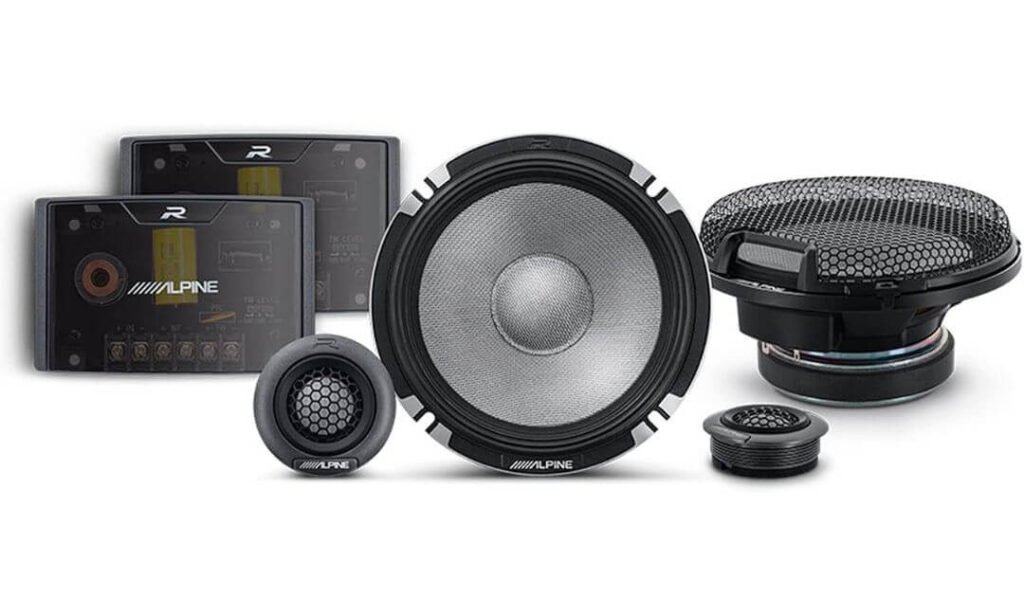
Quick Specs:
- Speaker Type: 6.5-inch, 2-way PRO component speaker system
- Woofer Size: 16.5cm (6.5-inch)
- Woofer Cone: Glass-fiber-reinforced cone
- Tweeter: 4.3cm (approximately 1.7-inch) magnesium hard dome
- Frequency Response: Up to 40kHz, according to Alpine’s supplied product description
- Power Handling: 100W RMS / 300W peak, according to the supplied specifications
- Impedance: 4 ohms, according to the supplied specifications
- Sensitivity: 88dB, according to the supplied specifications
- Woofer Basket: Rigid aluminium construction
- Crossover: PRO X-Over network, according to the supplied product details
- Tweeter Installation: Removable installation frame and trim ring for a more compact mounting arrangement
Some component speakers aim for a smooth, relaxed presentation, while others are designed around speed, detail and a more revealing top end. The Alpine R2-S652 R-Series PRO takes the latter approach, pairing a glass-fiber-reinforced woofer cone with a magnesium hard-dome tweeter. The lightweight, stiff cone material is intended to respond quickly to changes in the music, while the dedicated tweeter handles high frequencies independently. For listeners upgrading from basic factory speakers, the appeal is the potential for clearer instrumental detail and a more defined front soundstage—not simply a louder stereo.
The tweeter is a particularly notable part of this design. Alpine specifies playback extending up to 40kHz, placing the system in the high-resolution audio category. That extended response is a technical capability rather than a guarantee that every listener will hear an improvement; most adults cannot hear frequencies above roughly 20kHz, and the audible result depends on the recording, installation and rest of the system. The rigid aluminium woofer basket also helps maintain structural stability under operation. These construction choices make the R2-S652 an interesting option for a carefully planned system, but they do not remove the need for correct crossover setup and amplifier matching.
The supplied specifications list 100W RMS power handling, 88dB sensitivity and 4-ohm impedance. Verify those ratings against Alpine’s documentation for your exact regional version before purchasing. The RMS figure describes power handling, not a minimum amplifier requirement, and the sensitivity rating should be compared with other speakers only when the measurement conditions match. The tweeter’s removable frame and trim ring can help reduce its installation footprint, but you still need to check the available mounting space, woofer depth and window clearance. If you are keeping the factory stereo, check its compatibility first; an external amplifier may offer more headroom, but clean setup and appropriate gain remain essential.
What Makes the R-Series PRO Design Stand Out
- Glass-fiber-reinforced woofer cone: Combines stiffness with low weight, aiming for responsive midbass and accurate reproduction of changing musical details.
- Magnesium hard-dome tweeter: Handles high frequencies separately and supports the system’s published extended response up to 40kHz.
- Rigid aluminium basket: Provides a stable mounting structure for the woofer, helping maintain mechanical alignment during playback.
- Compact tweeter mounting option: Removing the installation frame and trim ring can help when the available dashboard or pillar space is limited, subject to the actual mounting arrangement.
- 100W RMS handling: Offers a useful reference when planning an amplifier upgrade, although the correct amplifier should be chosen by matching impedance, clean output and system requirements rather than wattage alone.
One Thing to Know Before Choosing It
The 88dB sensitivity rating is worth considering if amplifier power is limited. Sensitivity figures depend on the measurement method, so do not assume this system will play louder than every competitor simply because it carries an extended frequency-response specification. If your priority is strong output from a factory head unit, compare verified sensitivity ratings under equivalent conditions and consider how much clean power your setup can provide.
Where This Alpine Fits in a Component-Speaker Upgrade
The R2-S652 is a candidate for listeners who want a modern two-way system with a lightweight woofer cone, a magnesium tweeter and a rigid basket. It is particularly relevant to buyers who plan to tune their front stage carefully rather than replace the factory speakers without checking the rest of the system. Compared with the Morel, HERTZ and Focal options in this guide, the Alpine’s extended high-frequency specification and tweeter construction provide a distinct technical angle, but the best choice still depends on listening preference, installation and amplifier matching.
The Insider Pro-Tip
Before committing to a tweeter location, test the available space with the trim ring and installation frame removed, as Alpine allows. This can make the difference between a clean installation and a tweeter that protrudes awkwardly from a pillar or dashboard. Keep the driver in a position where it can be secured safely and where the grille or trim does not obstruct it.
Once installed, listen for vocal sharpness and cymbal detail before increasing treble through the equaliser. A hard-dome tweeter can reveal details in a recording, but aggressive EQ or poor positioning can also make the upper frequencies tiring. Set the crossover according to Alpine’s instructions, confirm polarity and check for door-panel rattles before judging the final sound.
#5. Sony Mobile ES XS-162ES 6.5-Inch 2-Way Component Speakers
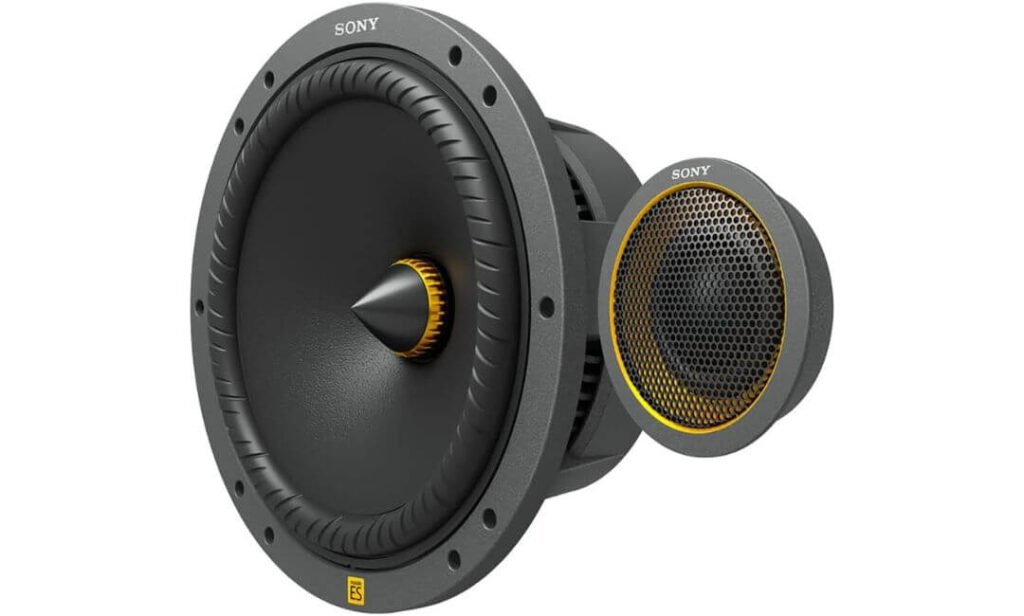
Quick Specs:
- Speaker Type: 6.5-inch, 2-way component speaker system
- Woofer Cone: Rigid cellular aramid-fiber construction
- Tweeter: Soft-dome design with extended high-frequency response
- Power Handling: 90W RMS / 270W peak
- Sensitivity: 89dB
- Frequency Response: 40Hz–40kHz, according to the supplied specifications
- Distortion Control: Separated Notch Edge Surround technology
- Impedance: 4 ohms, according to the supplied product details
- Crossover: External crossover included, according to the supplied product details
- Warranty: Three-year coverage, subject to the manufacturer’s terms and regional availability
A good daily-driver speaker should keep voices clear and music detailed without making every recording sound overly bright. The Sony Mobile ES XS-162ES uses a rigid cellular aramid-fiber woofer and a dedicated soft-dome tweeter to handle different parts of the frequency range. The woofer is designed to combine low weight with structural rigidity, while Sony’s Separated Notch Edge Surround technology aims to control unwanted distortion as the cone moves. Together, these design choices make the system worth considering for drivers who want a more refined front-stage upgrade than basic factory speakers provide.
Its published 40Hz–40kHz frequency response is another notable specification. The extended upper range supports Sony’s high-resolution audio positioning, although frequencies above the usual range of human hearing do not automatically translate into better audible sound. What matters more in everyday listening is how clearly the system reproduces vocals, percussion and instrument detail across the frequencies you can hear. The 89dB sensitivity rating is useful when comparing amplifier requirements, but it should be assessed alongside the measurement conditions and the sensitivity ratings of competing speakers—not treated as a guarantee of louder output.
The supplied ratings list 90W RMS power handling and 270W peak power, giving you a practical starting point when planning the amplifier and wiring. The RMS figure is the more useful number for system matching; peak power is not a recommended continuous operating level. Before buying, confirm the impedance and crossover details for the exact regional kit, then check the woofer’s mounting depth, door clearance and tweeter locations. A nominal 6.5-inch size does not guarantee direct fitment in every vehicle, and adapters or additional mounting work may be necessary. The listed three-year warranty should also be checked against the seller’s terms and your region.
What Makes the Sony Mobile ES Worth Considering
- Rigid cellular aramid-fiber woofer: Designed to combine low mass and stiffness, supporting responsive bass and accurate midrange reproduction.
- Dedicated soft-dome tweeter: Handles high frequencies independently, giving installers more freedom to position the tweeter than a conventional coaxial arrangement.
- Separated Notch Edge Surround: Aims to reduce unwanted distortion associated with woofer movement, helping maintain cleaner reproduction when the music becomes demanding.
- Extended frequency response: The published 40Hz–40kHz range makes this a high-resolution-oriented design, although real-world performance depends on the recording, installation and audio chain.
- Useful RMS rating for amplifier planning: The 90W RMS figure helps establish a sensible power-matching reference without encouraging buyers to choose an amplifier on peak watts alone.
One Practical Limitation to Remember
The 40Hz lower frequency specification is not a guarantee of strong deep bass inside your car. Door installation, sealing, available power and cabin acoustics all influence low-frequency output. If you listen to bass-heavy music and want substantial sub-bass, a dedicated subwoofer may still be necessary; the Sony components can then focus on the front-stage frequencies they are designed to reproduce.
Where This Sony Component Set Fits Best
The XS-162ES is worth considering for drivers who want detailed everyday listening, a dedicated tweeter and a woofer design focused on controlled reproduction. Its high-resolution positioning and distortion-control approach distinguish it from simpler component sets, but they do not automatically make it the best match for every car. Compare it with the Morel, HERTZ, Focal and Alpine options based on your sound preference, available amplifier power, installation space and total upgrade budget.
The Insider Pro-Tip
Before replacing your factory speakers, check whether your existing system applies factory equalisation or unusual crossover settings. Some original audio systems shape the signal specifically for their stock speakers, and that tuning can affect how an aftermarket component set sounds. If the new speakers seem unusually thin or bright, investigate the signal and installation before assuming the drivers themselves are the problem.
Mount the tweeters securely, keep the crossover protected from moisture and vibration, and seal the woofer mounting surface properly. Start with neutral EQ and moderate amplifier gain, then listen to familiar recordings from the driver’s seat. Those simple checks will give you a more reliable sense of the Sony’s actual performance than its extended frequency-response figure alone.
Best 2 Way Component Car Speakers (2026): RMS Power and Amplifier Compatibility
| Component speaker | Power handling | Sensitivity | Frequency response | Driver construction | Best suited to |
|---|---|---|---|---|---|
| Morel Tempo Ultra 602 MKII Balanced musical reproduction | 130W RMS / speaker 260W RMS per pair | 90dB | 55Hz–22kHz | Treated paper composite woofer; 1.1-inch soft-dome tweeter | Natural vocals and smooth highs A sound-quality-focused upgrade with a supplied MXR Direct Crossover. |
| HERTZ Mille Pro MPK 165.3 Dynamic sound and midbass | 110W RMS / pair* 220W peak per pair* | 92dB* | 40Hz–22.5kHz* | V-Cone pressed-paper woofer; 1.14-inch Tetolon soft-dome tweeter | Energetic playback and clear detail Includes an external crossover with tweeter-level adjustment, according to the supplied details. |
| Focal ES 165 KX2E K2 EVO Premium cone and tweeter design | 120W RMS* 240W peak* | 92.5dB* | 55Hz–22kHz* | K2 aramid-fiber sandwich woofer; aluminium/magnesium FRAK tweeter | Detailed treble and soundstage tuning TMD surround and a bi-amplification-capable crossover design. |
| Alpine R2-S652 R-Series PRO Extended high-frequency response | 100W RMS* 300W peak* | 88dB* | Up to 40kHz | Glass-fiber-reinforced woofer; magnesium hard-dome tweeter | High-resolution-oriented listening Rigid aluminium basket and a tweeter frame that can be removed to reduce mounting size. |
| Sony Mobile ES XS-162ES Detailed everyday listening | 90W RMS* 270W peak* | 89dB* | 40Hz–40kHz* | Rigid cellular aramid-fiber woofer; soft-dome tweeter | Clear vocals and extended response Separated Notch Edge Surround technology; check warranty terms for your region. |
*Verify starred figures against the manufacturer’s specification sheet for the exact model and regional version before purchasing. Power ratings, sensitivity and frequency response should only be compared directly when measurement conditions are equivalent. The Alpine figure supplied here states an upper response limit, not a complete frequency range. Check woofer mounting depth, tweeter placement, crossover wiring and amplifier compatibility for your vehicle; 6.5-inch sizing alone does not guarantee a direct fit.
Buying Guide for the Best 2-Way Component Car Speakers
Choosing the right 2-way component speakers involves more than comparing wattage, sensitivity or frequency response. A well-matched system can improve vocal placement, instrument separation and midbass clarity, but the final result also depends on your car’s factory stereo, amplifier, door construction, tweeter position and installation quality. Before spending money on an upgrade, understand which specifications genuinely affect compatibility and which are simply numbers on a product page.
What 2-Way Component Speakers Actually Mean
A 2-way component speaker system separates the main sound-producing drivers into two types: a woofer for lower and middle frequencies, and a tweeter for higher frequencies. The woofer generally handles vocals’ lower harmonics, guitars, piano fundamentals and much of the midbass, while the tweeter reproduces details such as cymbals, upper vocal harmonics and other high-frequency information. Their frequency ranges overlap around a crossover point, where the system divides the signal between the drivers.
Unlike a typical coaxial speaker, which mounts the tweeter in the same assembly as the woofer, a component system allows the tweeter to be positioned separately. That flexibility is the main reason enthusiasts consider component speakers for a better front soundstage. A correctly positioned pair can help vocals appear closer to the dashboard rather than sounding as though they are coming from the lower door panels.
However, component speakers do not automatically sound better in every car. A well-designed coaxial speaker installed correctly can outperform a poorly positioned component system. If the tweeters are aimed directly at reflective glass, the crossover is unsuitable, or the doors leak sound, the upgrade may produce bright treble without delivering the imaging improvement you expected.
Component Speakers vs Coaxial Speakers
| Comparison point | 2-way component speakers | Coaxial speakers |
|---|---|---|
| Driver arrangement | Separate woofer and tweeter, usually with an external or dedicated crossover | Tweeter is mounted within the woofer assembly |
| Tweeter placement | More flexible, subject to available mounting locations | Usually fixed near the woofer |
| Front-stage imaging | Greater potential for lifting vocals towards the dashboard | Depends heavily on the speaker design and factory location |
| Installation | Often requires extra wiring, tweeter mounting and crossover placement | Generally simpler to install |
| Factory-system compatibility | May require more attention to impedance, wiring and crossover integration | Often a more straightforward replacement, though fitment still needs checking |
| Best reason to choose | You want to improve the front soundstage and can install the drivers properly | You want a practical upgrade with fewer installation changes |
The genuine advantage of a component system is control over driver placement and integration, not simply the number of separate pieces in the box. If your car has suitable tweeter sail panels, dashboard grilles or factory tweeter locations, a component upgrade can make more sense than it would in a vehicle where mounting the tweeters cleanly requires extensive modification.
Choose the Right Tweeter Type and Position
The tweeter influences how high-frequency detail is presented, but its material alone cannot tell you whether it will sound smooth, bright or natural. Dome geometry, diaphragm mass, resonance, dispersion, crossover design and installation angle all affect the result. Two tweeters made from the same material can sound noticeably different because the rest of their designs are not identical.
| Tweeter design | What to understand before buying |
|---|---|
| Soft dome, including silk-based designs | Often selected for a smooth presentation, but the actual result depends on the complete tweeter and crossover design |
| Aluminium dome | Can provide crisp detail and controlled output when well engineered; poor integration or an unfavourable installation can make the upper frequencies sound sharp |
| Magnesium or aluminium-magnesium dome | Offers a rigid diaphragm design, but material alone does not establish superior sound quality |
| Waveguide-assisted tweeter | Uses surrounding geometry to influence dispersion and directivity; it needs to be evaluated as part of the complete design |
Tweeter placement can matter as much as the model you choose. A dashboard or sail-panel location may improve the apparent height of the soundstage, while a door-mounted tweeter can be easier to install but may leave vocals sounding lower. There is no universal rule that mounting a tweeter higher is always better, because the listening position, windshield reflections and left-to-right distance differences also affect imaging.
Before drilling or cutting a panel, test the available mounting options. Flush mounting gives a relatively integrated appearance, while angled surface mounts allow you to direct the tweeter towards the listening area. Use the manufacturer’s recommended mounting method, and avoid aiming both tweeters directly at the driver’s ears without listening to the result. Strong directivity or reflections can make the left and right channels sound unbalanced.
Practical buying advice: If you are sensitive to sharp treble or spend long periods driving, pay attention to the tweeter’s overall tuning and the availability of crossover-level adjustment. A nominal 0dB or -3dB setting can be useful, but the correct choice depends on the system and mounting position. Do not assume a soft dome will always sound warm or a metal dome will always sound harsh.
Select the Correct Woofer Size and Cone Material
The 6.5-inch size is common in aftermarket car audio because it offers a useful balance between installation space, cone area and midbass capability. Nevertheless, the advertised diameter is not enough to establish fitment. Manufacturers may specify the nominal driver size differently, and the cutout diameter, mounting depth, basket shape and adapter requirements vary between models.
A larger woofer does not automatically produce better bass, and a smaller one is not necessarily inferior. Low-frequency output depends on cone area, excursion, motor strength, enclosure conditions and the amount of power the driver receives. In a car door, the available space and sealing quality are especially important because the door is not a purpose-built speaker enclosure.
| Woofer material or construction | Potential benefit | What it does not guarantee |
|---|---|---|
| Treated paper or paper composite | Can offer a useful balance of mass, stiffness and damping | It does not automatically mean the speaker is less durable or less detailed |
| Glass-fiber-reinforced cone | Adds stiffness and helps control cone deformation when properly engineered | It does not guarantee more bass or greater accuracy than every paper cone |
| Aramid-fiber or sandwich construction | Can combine stiffness and low mass, depending on the construction | It does not prove the speaker is superior without considering the motor, suspension and tuning |
| Polypropylene-based cone | Often used in practical everyday systems and can be engineered for moisture resistance | It does not automatically outperform or underperform paper and composite alternatives |
For a daily-driven car, focus on the complete driver rather than treating cone material as a quality ranking. Surround design, voice-coil cooling, basket rigidity and the manufacturer’s specifications all matter. In addition, the woofer must suit the available door depth and mounting surface. A speaker with a strong motor and deep basket may require an adapter ring or may interfere with the window mechanism.
If your priority is music with clear vocals, acoustic instruments and controlled midbass, a well-integrated 6.5-inch system is often a sensible starting point. If you expect deep, physical sub-bass, remember that a component woofer is not a substitute for a dedicated subwoofer. A published lower frequency limit does not tell you how loudly the speaker can reproduce that frequency in a real door installation.
Understand the Crossover Network Before Comparing Speakers
The crossover directs different parts of the audio signal to the woofer and tweeter. In a passive component system, the crossover usually sits between the amplifier and the speaker drivers. An active system divides the signal before amplification, allowing separate amplifier channels to power the woofer and tweeter independently.
These approaches have different costs and installation requirements. A passive crossover is generally easier to use with a conventional two-channel front-speaker setup. An active arrangement can offer more control over crossover points, slopes, time alignment and equalisation, but it requires suitable signal processing, additional amplifier channels and careful tuning.
| Crossover consideration | Why it matters |
|---|---|
| Crossover frequency | Determines where the signal is divided between the woofer and tweeter. The correct value depends on the drivers’ response and power limits, not a universal target. |
| Slope | Describes how quickly output is reduced beyond the crossover region. A steeper slope can provide more protection or separation, but the complete acoustic response still matters. |
| Passive network | Simplifies system integration and can include tweeter-level adjustment. The network must match the supplied drivers and intended wiring. |
| Active crossover | Allows more independent tuning, but requires compatible processing and separate amplification channels for each driver section. |
| Tweeter protection | The correct high-pass filtering helps prevent excessive low-frequency energy from damaging a tweeter. Never bypass the supplied network without understanding the driver’s requirements. |
| Bi-amping | May allow the woofer and tweeter to use separate amplifier channels when the crossover supports the arrangement. It does not automatically mean the system will sound better. |
Do not choose a component system solely because its crossover has more adjustment switches or advertises a particular slope. A well-designed, correctly matched passive network can sound excellent. Conversely, an advanced active setup can sound poor if crossover points, polarity, levels and time alignment are configured incorrectly.
When installing a passive system, follow the manufacturer’s wiring diagram and keep the crossover away from moisture, moving window mechanisms and areas where loose wiring can rattle. If you intend to use active processing, confirm that the system can be configured safely before buying. Not every supplied crossover is designed for every possible active configuration.
Sensitivity, Impedance and Power Handling Explained
These three specifications help determine how a speaker will work with your existing stereo or an aftermarket amplifier. They are useful for screening products, but none should be treated as a standalone measure of sound quality.
Sensitivity indicates how much sound pressure a speaker produces for a given electrical input under specified measurement conditions. A higher sensitivity rating can be helpful when using a modest factory head unit, but comparisons are meaningful only when the ratings use equivalent measurement methods. A sensitivity figure measured at 2.83 volts is not always directly comparable with one measured at 1 watt, particularly when the speakers have different impedances.
Impedance is the speaker’s nominal electrical load. Many aftermarket component systems are rated at 4 ohms, but you should check the exact specification rather than assume every speaker uses the same load. Lower-impedance speakers can demand more current from an amplifier, and connecting a load below the amplifier’s supported minimum can cause overheating, protection shutdown or damage. The amplifier’s manual should always take priority.
Power handling describes the amount of power a speaker is designed to handle under a manufacturer’s stated test conditions. RMS ratings are generally more useful than peak or maximum figures when comparing products, but even RMS ratings should be checked against the same type of specification. A 130W RMS rating does not mean the speaker needs a 130W amplifier to operate, and a higher power rating does not automatically produce greater volume or better sound.
| Specification | What to check | Common mistake |
|---|---|---|
| Sensitivity | Rating value and measurement method | Assuming the highest number always means the best sound |
| Nominal impedance | Whether the amplifier supports the speaker’s load | Connecting a lower-impedance speaker without checking amplifier limits |
| RMS power handling | Continuous rating and whether it applies per speaker or per pair | Comparing a pair rating against a single-speaker rating |
| Peak power | Manufacturer’s definition of the peak figure | Choosing based on peak watts alone |
| Frequency response | Range, stated tolerances and measurement conditions where available | Assuming the widest published range guarantees the clearest sound |
A fair comparison also requires attention to how specifications are presented. Some brands list power per speaker, while others list the rating for the complete pair. Frequency response figures may use different tolerances, and sensitivity figures may use different test methods. If the manufacturer does not clearly state the conditions, treat the number as a reference rather than definitive proof that one product outperforms another.
Match the Speakers to Your Head Unit or Amplifier
A factory head unit can power many aftermarket component speakers, provided the impedance and power requirements are compatible. However, the result depends on the head unit’s real output capability, factory equalisation, built-in filtering and the speaker’s sensitivity. A high RMS rating does not mean an amplifier is mandatory, but it can indicate that the speaker is designed to handle more power than a basic factory stereo can deliver cleanly.
An aftermarket amplifier becomes useful when you need more clean output, better control at higher listening levels or additional channels for a more advanced system. The goal is not simply to match the amplifier’s advertised maximum wattage to the speaker’s peak rating. Instead, compare the amplifier’s continuous power output at the correct impedance, its supported load, the available channels and the system’s intended listening level.
Keep these points in mind when matching equipment:
- Factory stereo: Check the speaker’s nominal impedance and whether the factory system uses unusual wiring, built-in amplification or proprietary equalisation.
- Aftermarket amplifier: Compare continuous power at the intended load, and set gain correctly. Gain is not a volume control.
- DSP or active system: Confirm the number of available output channels and whether the processing supports the crossover and tuning you want.
- Existing rear speakers: Check whether the new front speakers will remain balanced with the rear stage, rather than overpowering it.
- Electrical system: If you plan to add a powerful amplifier, consider current demand, wiring gauge, fuse placement and the vehicle’s electrical capacity.
A clean, appropriately powered setup is more useful than a high-powered amplifier pushed into clipping. Distortion can damage speakers, including tweeters, even when the amplifier’s advertised wattage appears modest. If you hear harshness, crackling or compression at high volume, reduce the level and investigate the cause instead of assuming the speakers simply need more power.
Prioritise the Front Soundstage Over Rear Speaker Upgrades
For most drivers who want a more realistic listening experience, the front stage deserves the first upgrade. Music is generally mixed for a stereo image, and the left and right front speakers are primarily responsible for placing vocals and instruments across that image. Separate tweeter placement can help improve the apparent height and positioning of the sound when the installation is well executed.
Rear speakers still have a role, particularly when passengers regularly use the vehicle. However, replacing the rear speakers first may make the cabin louder without improving the driver’s sense of a stable front image. In some systems, excessive rear-speaker output pulls vocals behind the listener and reduces the impression that the music is coming from the front.
For a balanced setup, start with the front component speakers, correct installation and sensible crossover settings. Add an amplifier if clean output is insufficient, and consider a subwoofer if you want genuinely deeper bass. Upgrade the rear stage according to passenger needs and system goals rather than treating every speaker position as equally important.
Check Door Construction, Mounting Depth and Installation Space
The vehicle itself can determine whether a speaker performs well. A door panel may have limited mounting depth, an irregular cutout, a plastic factory bracket or a window that passes close behind the speaker. Even a high-quality driver can become a poor purchase if its basket interferes with the glass or the tweeter cannot be mounted securely.
Before ordering, verify the following measurements and installation details:
- Cutout diameter: Confirm the hole diameter needed by the actual woofer, not just the advertised nominal size.
- Mounting depth: Measure the available space behind the mounting surface with the window fully lowered and raised. Account for connectors and wiring as well as the magnet.
- Adapter rings: Check whether a vehicle-specific mounting bracket is required and whether it changes the final mounting depth.
- Window clearance: Ensure the glass, regulator and other moving parts cannot contact the speaker or its terminals.
- Door sealing: Use an appropriate gasket between the speaker and mounting surface to reduce air leaks and rattles.
- Moisture protection: Car doors can expose components to water entering past the outer window seal. Mount crossovers and connections in protected locations.
- Tweeter location: Confirm that the chosen mounting position allows secure installation without obstructing airbags, visibility or other safety-related equipment.
- Wiring and polarity: Use compatible harnesses where possible, follow the manufacturer’s diagram and verify polarity across the system.
Door treatment can also influence the result. Reducing unwanted panel vibration and improving the speaker’s mounting seal can help midbass sound more controlled. This does not mean covering every opening indiscriminately or blocking factory drainage paths. Any treatment should be suitable for automotive use and installed without interfering with water management, wiring, airbags or window mechanisms.
Decide Which Trade-Offs Matter Most to You
There is no single best 2-way component system for every driver. The right choice depends on how you listen, what equipment you already own and how much installation work you are willing to undertake. A speaker with premium materials may be worthwhile in a carefully tuned system, while a simpler model may be the more sensible purchase for a factory-stereo upgrade.
| Your priority | What deserves attention | What to avoid |
|---|---|---|
| Clear vocals and natural music | Tweeter tuning, crossover integration, imaging and installation quality | Choosing solely by maximum power |
| Stronger midbass | Woofer design, door sealing, mounting rigidity and available clean power | Expecting a published low-frequency limit to guarantee deep bass |
| High-volume listening | Sensitivity, amplifier compatibility, thermal handling and correct gain setting | Running an amplifier into clipping |
| Long-term daily use | Secure mounting, moisture protection, wiring quality and suitable materials | Ignoring fitment or placing crossovers where water can reach them |
| Easier installation | Vehicle-specific fitment, mounting accessories and a straightforward passive crossover | Assuming all 6.5-inch speakers are direct-fit replacements |
| Advanced tuning | DSP compatibility, active crossover options and enough amplifier channels | Buying active-capable equipment without a workable tuning plan |
Installation complexity should be part of the total budget. The speaker price may not include adapter rings, wiring harnesses, professional labour, door treatment or an amplifier. A lower-priced set installed properly can be a better overall investment than an expensive system installed without adequate sealing, safe wiring or correct tuning.
A Final Checklist Before You Buy
Before placing an order, confirm the exact model number and regional specification sheet. Check whether RMS power, sensitivity and frequency response are listed per speaker or per pair, and do not compare ratings measured under different conditions as if they were identical. Make sure the impedance is supported by your amplifier, and verify the woofer cutout, mounting depth and tweeter installation options for your vehicle.
Finally, decide what improvement you actually want. If vocals sound low or instruments lack separation, front-stage placement and crossover integration may matter more than higher wattage. If the sound becomes harsh at high volume, examine tweeter positioning, equalisation and amplifier clipping before blaming the speaker. If you want deeper bass, budget for a properly integrated subwoofer rather than expecting a two-way door-speaker system to reproduce the lowest frequencies at high output.
The best purchase is the one that fits your vehicle, works safely with your existing or planned electronics, and matches your listening priorities. Specifications narrow down the options; careful installation and tuning determine how much of that potential you hear.
How to Install 2-Way Component Car Speakers for Better Sound
Installing 2-way component car speakers correctly is just as important as choosing the right set. A quality woofer and tweeter can still produce weak midbass, harsh treble or a poorly positioned soundstage if the door leaks air, the crossover is wired incorrectly or the tweeters are installed without considering their direction. The aim is to create a secure, well-sealed installation that allows both drivers to work together, without interfering with the vehicle’s windows, wiring or safety systems.
The exact procedure varies by vehicle, speaker design and factory audio configuration. Some cars have dedicated tweeter grilles and speaker connectors, while others require adapter brackets, additional wiring or professional panel work. Before starting, check the vehicle service information and the speaker manufacturer’s installation instructions. Do not assume that every 6.5-inch component set will fit the original mounting points without modification.
Tools and Materials to Prepare Before Installation
Gather the necessary tools before removing the door panel. Using the correct tools reduces the risk of broken clips, scratched trim, damaged connectors and loose mounting hardware.
| Tool or material | Why you need it |
|---|---|
| Plastic trim-removal tools | Help release interior panels without damaging the surrounding trim as easily as metal tools can |
| Screwdrivers and suitable socket set | Remove the fasteners securing door panels, factory speakers and mounting brackets |
| Vehicle-specific wiring harnesses | Connect the new speakers without cutting factory wiring where compatible adapters are available |
| Speaker mounting adapters | Match the aftermarket speaker to the vehicle’s original mounting pattern |
| Measuring tape or depth gauge | Check mounting depth, cutout diameter and clearance behind the speaker |
| Multimeter | Check electrical continuity and identify wiring where the circuit and service information permit safe testing |
| Automotive speaker wire and terminals | Provide secure, correctly sized connections when additional wiring is needed |
| Foam speaker gasket or suitable sealing material | Helps prevent air leaks between the speaker and its mounting surface |
| Automotive sound-deadening material | Reduces selected door-panel vibrations when installed correctly |
| Cable ties and automotive cloth tape | Secure wiring and reduce rattles caused by loose cables |
| Safety gloves and eye protection | Help protect against sharp door-panel edges, metal fragments and accidental scratches |
You may also need a panel clip replacement kit, a drill and appropriate cutting tools if the vehicle requires mounting modifications. Do not cut a factory panel or drill into a door until you have checked for wiring, airbags, window mechanisms and other components behind it. If the installation involves structural changes, airbag-adjacent trim or unfamiliar factory wiring, professional installation is the safer option.
Step 1: Confirm Fitment and Disconnect Power Safely
Before removing anything, verify the exact speaker model, nominal impedance, mounting depth, cutout diameter and crossover configuration. Compare these measurements with the vehicle’s available mounting space. A nominal 6.5-inch woofer may still require a vehicle-specific adapter, and the basket, magnet or terminals may extend farther behind the mounting surface than the original speaker.
Park the car on a level surface, switch off the ignition and remove the key. Follow the manufacturer’s procedure for disconnecting the battery if required. Many modern vehicles have airbags, powered accessories and electronic modules connected to the door area, so consult the service information before disconnecting power. If the manufacturer specifies a waiting period after battery disconnection, follow it.
Do not probe yellow airbag connectors, tamper with restraint-system wiring or disconnect safety-related components to make installation easier. Battery disconnection can also reset vehicle settings or require special procedures on some models. If you are unsure how the door electronics are arranged, have a qualified installer handle the job.
Step 2: Remove the Door Panel Without Breaking Clips
Start by identifying all visible screws, hidden fasteners and trim pieces that need to be removed. Some vehicles conceal screws behind the interior door handle, armrest, switch panel or small plastic covers. Use a plastic trim tool to release clips gradually rather than pulling the panel away forcefully.
Once the panel begins to loosen, lift it carefully and check for electrical connectors, handle cables and courtesy-light wiring. Disconnect only the connectors required to remove the panel, using their release tabs instead of pulling on the wires. Keep screws and clips organised so they can be returned to their original locations.
With the panel removed, inspect the door before touching the speaker wiring. Look for moisture barriers, factory foam seals, drainage openings, wiring harnesses and the window regulator. Some vehicles use a sealed inner panel or a large access cover, and removing or resealing it incorrectly can lead to water leaks inside the cabin.
Real installation tip: Photograph the original speaker connections, mounting brackets and wire routing before removing anything. This gives you a reference when reconnecting the new system and helps identify which parts need to be restored.
Step 3: Remove the Factory Speaker and Check the Mounting Space
Disconnect the factory speaker using its connector release mechanism, then remove the mounting screws or bolts. Keep any factory bracket that may be needed for an adapter or future reinstallation. Do not assume the original speaker’s dimensions accurately represent the space available for the replacement.
Measure the new woofer’s mounting depth, including the space required by its terminals and wiring. Check the full movement of the window glass, not just its position when the window is closed. Where access allows, inspect the speaker area with the window both raised and lowered, keeping your hands and tools clear of moving parts. Never operate the window while hands or equipment are inside its mechanism.
Check the opening diameter and mounting surface, too. An adapter ring can improve compatibility, but it must be rigid, securely fastened and suitable for the door’s environment. If the speaker sits too far inward, the cone or surround may contact the grille or door trim. If it sits too far outward, the panel may not fit properly.
Before proceeding, confirm that the replacement will not interfere with the window regulator, door lock rods, side-impact components or other moving parts. If clearance is uncertain, stop and reassess the adapter or speaker choice rather than forcing the installation.
Step 4: Prepare the Door for a Secure, Sealed Mount
The door’s mounting surface affects how the woofer reproduces midbass. Air escaping around the speaker can reduce output and make bass sound weaker, while a loose adapter or vibrating panel can introduce rattles that become more obvious at higher volume.
Clean the mounting surface and remove loose debris. Fit the correct adapter ring if required, ensuring that it sits flat and does not cover drainage openings or interfere with factory components. Use an appropriate speaker gasket between the speaker and mounting surface, and seal the front mounting interface as recommended by the speaker or adapter manufacturer.
Automotive sound-deadening material can help reduce vibrations in suitable areas of the door. Apply it to appropriate metal surfaces, following the product’s instructions and avoiding moving parts, wiring, airbag equipment and drainage paths. More material is not automatically better, and covering every opening can create problems with water management or future servicing.
Check that the mounting ring is rigid and that every fastener is secure. Tighten screws evenly without overtightening them, as excessive force can damage plastic brackets or distort the speaker frame. Before reinstalling the panel, gently check for movement around the mounting assembly and make sure no cables are trapped behind it.
Step 5: Wire the Woofer and Tweeter Correctly
Use a compatible vehicle-specific harness whenever possible. It can preserve the factory wiring and make the installation easier to reverse. If new wire is necessary, use automotive-appropriate wire, secure it away from sharp metal edges and moving mechanisms, and protect any pass-through points against abrasion.
Follow the component set’s wiring diagram exactly. In a conventional passive system, the amplifier or head-unit output feeds the crossover input, and the crossover’s designated outputs connect to the woofer and tweeter. Do not connect the tweeter directly to a full-range amplifier output unless the manufacturer explicitly specifies a suitable alternative filtering arrangement. The correct crossover helps protect the tweeter from damaging low-frequency energy.
Pay attention to positive and negative polarity. Reversing polarity on one side can weaken the perceived centre image and reduce bass around the region where the left and right channels interact. Some systems use vehicle-specific wiring or factory amplification arrangements that are not obvious from wire colours alone, so verify connections with the correct service information rather than relying on colour assumptions.
Keep speaker wires away from window mechanisms, door locks and sharp edges. Secure excess wire so it cannot rattle against the door shell. Make sure all connectors are firmly seated, and do not leave exposed conductors where they could short against metal.
Step 6: Choose the Right Location for the Tweeters
Separate tweeter placement is one of the main advantages of a component system, but the best position depends on the vehicle’s layout and the tweeter’s dispersion characteristics. A higher mounting point may help lift the perceived soundstage, while an unsuitable angle can create excessive brightness or strong reflections.
| Tweeter location | Potential advantages | Points to check |
|---|---|---|
| Factory dashboard or sail-panel location | Can provide a tidy installation and use an existing mounting position | Confirm grille clearance, mounting depth and the direction in which the tweeter fires |
| A-pillar | Offers flexibility for aiming the tweeter towards the listening area | Keep clear of curtain airbags and follow the vehicle manufacturer’s rules for A-pillar trim |
| Door sail panel | Often provides a convenient location near the front side window | Check for reflections from glass, secure mounting and enough room behind the panel |
| Kick panel | Can be practical when upper mounting locations are unsuitable | Low placement may make the soundstage seem lower, and the driver’s feet must not obstruct the driver |
| Surface-mounted angled pod | Allows adjustment of tweeter direction without a flush cutout | Ensure the pod is secure, does not obstruct visibility and cannot interfere with airbags or controls |
Do not mount a tweeter over an airbag cover or modify an A-pillar that houses a curtain airbag unless the vehicle manufacturer explicitly permits the installation method. Airbag deployment areas are safety-critical, and a poorly placed speaker or bracket can interfere with deployment.
If you have multiple mounting options, test the position before drilling or cutting trim. Listen with familiar recordings, compare the centre vocal image and check whether cymbals or upper vocals become noticeably sharper when you move your head. Small changes in angle can make a difference, but avoid making irreversible modifications based on a brief listening test.
Step 7: Position and Secure the Crossover Network
For a passive component system, the crossover needs a dry, secure location where it will not rattle or interfere with the window regulator, door locks or other components. The door cavity may seem convenient, but it can be exposed to moisture entering past the outer window seal. If the crossover is not designed for that environment, a protected location inside the cabin may be preferable.
Use the manufacturer’s recommended mounting method. Secure the unit firmly, provide strain relief for the wiring and keep terminals protected from accidental contact with metal. Do not leave the crossover hanging by its wires or trapped loosely behind the door card.
If your system supports tweeter-level adjustment, start with the recommended default setting. If the treble sounds too prominent after installation, use the crossover’s approved adjustment options before making extreme equaliser changes. If the system will be actively crossed over through a digital signal processor, follow the specific system diagram and confirm that each driver receives the correct filtered signal.
Never assume that a crossover intended for one speaker set is suitable for another. Crossover components and settings are designed around the intended drivers, their electrical characteristics and their acoustic behaviour.
Step 8: Test the System Before Reinstalling the Door Panel
Reconnect the required connectors and restore power according to the vehicle’s service procedure. Start at a low listening level and check both channels before increasing the volume. Listen for output from the woofers and tweeters, unusual buzzing, crackling, intermittent connections or obvious imbalance between the left and right sides.
Test the system with several familiar recordings. Use clear vocals to evaluate the centre image, bass notes to check for weak midbass, and cymbals or other high-frequency sounds to identify excessive treble. Do not use maximum volume as the first test, because a wiring fault or incorrect crossover connection can damage a driver before you have a chance to identify the problem.
Operate the windows and door locks through their normal range while keeping clear of the mechanism. Confirm that the speaker, wiring and crossover do not interfere with movement. If the sound cuts out, one tweeter is silent or the bass suddenly becomes weak, stop and inspect the wiring, connectors, crossover and polarity before proceeding.
Only reinstall the door panel after the system has passed these checks. Align the clips and connectors carefully, replace all fasteners and confirm that the panel sits flush. Test the windows, locks, switches and other door functions again after assembly.
Acoustic Tuning After Installation
A new component system rarely reaches its full potential through speaker replacement alone. Correct mounting, suitable crossover settings, reasonable equalisation and balanced left-to-right output can have a larger audible effect than chasing a higher specification on paper.
Improve Door Sealing and Reduce Unwanted Vibration
Listen for rattles at moderate volume before deciding that the speaker itself is responsible. Loose wiring, door-panel clips, trim pieces, licence-plate hardware and poorly secured mounting rings can all vibrate in response to bass. Identify the source before adding more material or replacing components.
If the midbass seems weak, check the speaker gasket, mounting rigidity, polarity and door sealing first. A door speaker operates in a complicated acoustic environment, and leaks or cancellation can reduce output even when the driver is capable of reproducing the required frequencies. Sound-deadening material can reduce certain panel resonances, but it cannot fix incorrect wiring or a mismatched crossover.
Set the Crossover and Equalisation Conservatively
Begin with the speaker manufacturer’s recommended crossover configuration. If the woofer is connected through a passive network, do not change its wiring or bypass the network to experiment with crossover points. If a separate amplifier or digital signal processor controls the crossover, use settings appropriate to the drivers and system design.
Make small equaliser adjustments only after confirming that the installation is working correctly. Large boosts can consume amplifier headroom and increase distortion, particularly in the bass region. If the system sounds harsh, check tweeter direction, crossover-level settings and factory equalisation before adding broad treble cuts.
If a subwoofer is part of the system, adjust the front-speaker and subwoofer crossover settings together. The goal is a smooth transition rather than a gap or excessive overlap between the woofer and subwoofer. Exact crossover frequencies depend on the speakers, their installed response and the system configuration; there is no single setting that suits every vehicle.
Check Polarity, Phase and Left-to-Right Balance
Polarity refers to the positive and negative electrical connection of a driver. Phase describes the relationship between waveforms and can vary with frequency because of the drivers, crossover network, placement and cabin reflections. They are related concepts, but they are not interchangeable.
Begin by verifying that the wiring follows the manufacturer’s polarity markings and crossover diagram. If bass output seems unusually weak or the centre image is unstable, inspect the left and right connections before changing advanced settings. A polarity mistake can create cancellation, but changing polarity randomly is not a reliable tuning method.
For systems with a digital signal processor, time alignment can help account for the different distances between the listener and each speaker. Measure or estimate those distances carefully, then fine-tune the centre image using familiar recordings. Do not apply time alignment or phase changes blindly, because an incorrect adjustment can make the sound less coherent rather than more accurate.
Common Installation Mistakes and How to Avoid Them
| Common mistake | Why it causes trouble | Better approach |
|---|---|---|
| Buying by nominal size alone | The speaker may not fit the opening or clear the window glass | Check cutout diameter, mounting depth, adapter requirements and full window travel |
| Leaving gaps around the woofer | Air leakage can weaken midbass and create unwanted noise | Use a suitable gasket and a rigid, correctly fitted mounting surface |
| Connecting the tweeter without correct filtering | Low-frequency energy can damage the tweeter | Follow the supplied crossover diagram and manufacturer instructions |
| Reversing polarity on one channel | Can weaken bass and affect the centre image | Verify positive and negative connections before final assembly |
| Mounting a crossover in an exposed wet area | Moisture may damage components or connections | Choose a protected location and secure the network properly |
| Aiming tweeters without testing | Reflections or direct output may make treble unbalanced | Test available locations and listen before making permanent cuts |
| Overtightening screws | Can crack adapters or distort mounting parts | Tighten evenly and follow the hardware manufacturer’s guidance |
| Covering door drainage openings | Can trap water and create corrosion or interior-water problems | Preserve factory drainage paths and service access |
| Ignoring loose wires and clips | Can cause rattles that resemble speaker distortion | Secure cables and replace damaged panel clips |
| Turning the system up immediately | A wiring or crossover fault may damage a driver | Test at low volume first and increase gradually |
When Professional Installation Is the Better Choice
A straightforward replacement using factory mounting points and a compatible wiring harness may be manageable for an experienced do-it-yourself installer. However, professional help is advisable if the car has integrated factory amplification, active noise cancellation, complex digital audio, unusual speaker wiring, or airbags near the intended tweeter location.
Professional installation is also worth considering when the job requires cutting panels, fabricating mounting brackets, adding a high-power amplifier, installing a digital signal processor or modifying factory wiring. The cost should be weighed against the risk of damaging trim, creating electrical faults or ending up with a system that sounds worse than expected.
The important point is that installation quality is part of the speaker upgrade, not an optional finishing touch. A correctly fitted, sealed and tuned system gives the chosen components a fair chance to perform as intended.
Final Installation Checklist
Before considering the job complete, confirm that:
- The woofer and tweeter are compatible with the supplied crossover and amplifier.
- All mounting hardware is secure, with no contact between the speaker and the window mechanism.
- The speaker gasket is properly seated and the mounting ring does not leak air.
- Positive and negative wiring follows the manufacturer’s diagram.
- The crossover is firmly mounted in a suitably protected location.
- Wires are secured away from moving parts, sharp edges and hot components.
- Door drainage openings, factory seals and safety-related components remain unobstructed.
- Both channels produce clean sound at low and moderate volume.
- Windows, locks, switches and other door functions work normally after reassembly.
- The centre vocal image, bass response and treble balance have been checked using familiar recordings.
The best installation is not necessarily the one with the most sound-deadening material, the highest amplifier power or the most complicated tuning. It is the one that fits the vehicle safely, preserves the door’s normal functions and allows the woofer and tweeter to work together without leaks, rattles or avoidable distortion.
Audiophile Considerations for 2-Way Component Car Speakers
An audiophile-focused car audio system is not simply a collection of expensive speakers, high-wattage amplifiers and premium cables. The real objective is to reproduce music with convincing tonal balance, clearly positioned instruments, natural vocals and enough dynamic range to handle quiet passages and demanding musical peaks without obvious strain. In a car, achieving that result requires more attention to installation, acoustics and system integration than a product specification sheet can provide.
A well-chosen 2-way component system can form the foundation of a serious sound-quality build, especially when the front woofer and tweeter are installed correctly and supported by a suitable amplifier. However, the car’s cabin introduces reflections, resonances and differences in speaker-to-listener distance that do not exist in the same way in a treated listening room. The best approach is to build a balanced system in stages, correcting the most significant limitations before spending money on increasingly expensive equipment.
What Makes a Component Speaker Set Audiophile-Grade?
There is no universally accepted technical threshold that makes a car speaker an audiophile product. The term is commonly used for systems designed and marketed around sound quality, driver engineering, crossover design and installation flexibility. Premium materials and elaborate construction can be useful, but they are not proof of superior sound on their own.
A serious evaluation should focus on how the complete system performs across the audible range, rather than treating a single feature as decisive.
- Tonal accuracy: Vocals and instruments should sound convincing without excessive treble, an exaggerated midbass hump or unnatural changes in tone.
- Low distortion: The system should maintain clarity as playback level increases, within its intended operating range. Distortion performance cannot be established from RMS wattage alone.
- Consistent frequency response: The woofer, tweeter and crossover should integrate smoothly, without an obvious dip or peak around the crossover region.
- Controlled dispersion: Sound should remain reasonably balanced as listening position and head movement change. This is particularly important in a cabin where the driver sits closer to one side of the stereo system.
- Dynamic capability: The speakers should reproduce musical peaks without sounding compressed or strained at the listening levels you actually use.
- Build and installation quality: A rigid mounting surface, secure wiring, correct sealing and durable components matter just as much as the materials used in the drivers.
- Tuning flexibility: Useful crossover adjustments, compatible digital signal processing and suitable tweeter-level settings can help the installer integrate the system into the vehicle.
The distinction matters because a premium component set can still perform poorly when installed in a resonant door or paired with inappropriate crossover settings. Conversely, a less expensive set with good engineering and careful installation can deliver a coherent, enjoyable result without the cost of a high-end build.
Driver Materials Matter, but the Complete Design Matters More
Audiophile-oriented component speakers often advertise aramid-fibre cones, treated paper composites, glass-fibre reinforcement, soft-dome tweeters or rigid metal-dome designs. These materials influence stiffness, mass, damping and resonance, but none is automatically the best choice for every listener.
The Morel Tempo Ultra 602 MKII uses a treated paper-composite woofer and a soft-dome tweeter, while the HERTZ Mille Pro MPK 165.3 uses a pressed-paper composite woofer with a Tetolon-fibre soft-dome tweeter. Focal’s ES 165 KX2E K2 EVO uses an aramid-fibre cone and an aluminium/magnesium FRAK tweeter design, while the Alpine R2-S652 R-Series PRO combines a glass-fibre-reinforced woofer with a magnesium hard-dome tweeter. Sony’s Mobile ES XS-162ES uses a rigid cellular aramid-fibre woofer and a soft-dome tweeter.
These construction differences are useful when comparing design approaches, but they do not establish a definitive sound-quality ranking. The motor assembly, suspension, voice coil, crossover, frequency response and installation all influence the finished result. A rigid diaphragm may help control cone deformation, for instance, but its resonance behaviour still needs to be managed through the driver’s design and crossover integration.
A practical buying rule: Use driver materials to understand how a product is engineered, then compare the complete specification, installation requirements and tuning options. Do not pay a premium simply because a product uses a material associated with high-end audio.
Match the Amplifier to the Speakers and Listening Level
An amplifier should be selected according to the speaker’s nominal impedance, the system’s intended output and the amplifier’s continuous power rating at the relevant load. The aim is clean, controlled output with adequate headroom, not the largest wattage number available.
A component set rated for high power handling can still work with a modest amplifier or a compatible factory head unit. It simply may not reach the same clean output level as it would with a suitable aftermarket amplifier. Equally, a powerful amplifier does not guarantee better sound if the gain is set incorrectly, the signal clips or the speakers are installed poorly.
When comparing amplifiers, look for the following:
- Continuous power at the correct impedance: Compare the amplifier’s rated output at the load the speaker system will present, rather than relying on a maximum or peak figure.
- Clean output and distortion specifications: Published measurements can help establish whether the amplifier is suitable, provided the test conditions are comparable.
- Channel availability: A passive two-way component system normally uses one amplifier channel per side, while an active system typically needs separate channels for each woofer and tweeter.
- Input compatibility: Check whether the amplifier can accept the signal from your factory head unit or whether a suitable integration interface is required.
- Gain and filtering controls: These help match signal levels and configure the system, but they do not create extra clean power.
- Electrical requirements: Higher-power systems may need appropriately sized power and ground wiring, correct fusing and an assessment of the vehicle’s electrical capacity.
A common mistake is to match the amplifier’s advertised wattage to the speaker’s peak rating. RMS power handling and the amplifier’s continuous output are more useful starting points, but even these figures need context. The speaker’s sensitivity, the distance from the driver, cabin noise and the listening level all influence how much power is actually needed.
For a daily-driven car, a well-matched amplifier operating cleanly is generally a better investment than a much larger amplifier used without proper gain setting. If the sound becomes harsh or compressed at high volume, check for clipping, excessive equalisation and driver limitations before assuming that more power is the only solution.
Source Quality and Signal Processing
The source unit is part of the sound system, not just a screen for playing music. Its analogue output stage, digital signal processing, built-in equalisation, volume control behaviour and integration with the factory system can all affect the signal that reaches the amplifier.
A high-resolution audio file cannot automatically compensate for a poor installation, a distorted signal or unsuitable tuning. Likewise, a well-produced standard-resolution recording can sound excellent when reproduced by a properly configured system. The recording and mastering quality often matter more than the format label alone.
For an audiophile-focused build, check these aspects of the source:
- Recording quality: Use familiar, well-recorded tracks when evaluating changes. A poorly mastered recording may sound harsh or congested even on an excellent system.
- Source output: Confirm that the head unit or audio interface provides a clean signal at the volume levels you normally use.
- Factory equalisation: Some original systems apply frequency shaping, loudness compensation or other processing. These adjustments can affect how aftermarket speakers sound when connected to the factory output.
- Digital signal processing: A suitable digital signal processor can provide equalisation, time alignment and crossover control when the system needs them.
- Noise and clipping: Check for audible hiss, alternator-related noise, distortion or clipping before adding more components.
- Connection compatibility: Confirm whether the source uses speaker-level outputs, line-level outputs or a digital connection, and choose equipment that supports the actual signal path.
Do not replace the head unit solely because it does not advertise every modern audio format. If the existing source delivers a clean, compatible signal and provides the necessary controls, the budget may be better spent on installation, amplification or tuning. On the other hand, a factory system with heavy equalisation or limited integration options may benefit from a suitable interface or processor.
Passive vs Active Crossovers for High-Fidelity Listening
Crossover integration is one of the most important parts of a two-way component system. The woofer and tweeter must operate together through the transition region without a distracting change in tonal balance or a gap in output. The electrical crossover settings are only part of the equation because the drivers’ acoustic responses, their physical positions and the cabin’s reflections also influence the result.
A passive crossover sits between the amplifier and the speaker drivers. It is usually the more straightforward option for a conventional component installation and is designed to work with the supplied woofer and tweeter. Some networks also offer tweeter-level adjustment or support a specified bi-amplification arrangement.
An active crossover divides the signal before it reaches the individual amplifier channels. It allows more independent control over crossover frequency, slope, equalisation and time alignment, depending on the source or processor. However, it requires compatible processing, enough amplifier channels and a tuner who understands how to configure the system safely.
| Consideration | Passive configuration | Active configuration |
|---|---|---|
| System complexity | Usually simpler, with fewer amplifier channels required | More complex, with separate amplification channels for the woofer and tweeter |
| Tuning flexibility | Determined mainly by the supplied crossover and its adjustments | Can offer more control over frequency, slope, levels and timing |
| Installation cost | Often lower for a basic two-way front stage | Usually higher due to additional channels, processing and tuning |
| Tweeter protection | Provided by the correctly matched crossover network | Must be configured correctly in the active signal path |
| Best use case | Straightforward upgrades and systems where the supplied network meets the tuning requirements | Builds where independent control and detailed acoustic tuning justify the added complexity |
An active system is not automatically more accurate. Incorrect crossover points, poor time alignment or excessive equalisation can make it sound worse than a well-integrated passive system. For many drivers, the supplied passive crossover is a sensible starting point, and a digital signal processor becomes worthwhile when there is a clear limitation that requires more control.
Never bypass a supplied tweeter crossover without confirming that the replacement filtering is appropriate for the exact driver. Incorrect filtering can expose a tweeter to damaging low-frequency energy.
Tune the Soundstage for Accurate Imaging
A convincing stereo image is one of the main goals of an audiophile-focused front stage. Ideally, vocals appear to come from a stable position near the centre of the dashboard, while instruments occupy distinct positions across the width of the cabin. The image should remain reasonably coherent as the driver moves naturally, rather than shifting dramatically from one side to the other.
Cars make this difficult because the driver and passenger are not equally distant from the left and right speakers. The dashboard, windshield, side windows and door panels also create reflections that influence frequency response and perceived location. Tweeter position and direction, crossover integration and time alignment can therefore have a significant effect on the final result.
Start With Physical Placement
Before using digital processing, make sure the speakers are installed securely and the tweeters are positioned sensibly. Test available factory mounting locations and, where suitable, angled mounting options. Avoid assuming that aiming both tweeters directly at the driver’s head will always create the best image; the result depends on their directivity, the cabin and the rest of the system.
A-pillar and dashboard installations can offer useful placement options, but any work around airbags must follow the vehicle manufacturer’s safety requirements. A mounting location that produces a good listening result is not acceptable if it compromises an airbag or obstructs visibility.
Use Time Alignment Carefully
Time alignment allows a processor to compensate for differences in the distances between the listener and the speakers. This can improve the apparent position of vocals and instruments, especially in the driver’s seat, when the measurements and settings are appropriate.
Start with reliable distance measurements or the processor manufacturer’s recommended method. Then use familiar recordings to make small adjustments. The objective is a stable centre image and coherent presentation, not an arbitrary setting that simply makes one channel arrive earlier.
A setting optimised for the driver’s seat may not create the same image for every passenger. This is a normal limitation of car audio, not necessarily a sign of poor equipment.
Equalise the System After Placement and Timing
Equalisation should address meaningful tonal imbalances after the speakers, crossover and timing are configured. Broad, excessive boosts can increase distortion and consume amplifier headroom. Deep cancellations caused by reflections or speaker placement may not respond well to aggressive equalisation, so physical positioning and measurement should be considered first.
For a more rigorous setup, use a calibrated measurement microphone and suitable acoustic measurement software. Measurements can reveal response peaks and dips that are difficult to identify reliably by ear alone. They should still be interpreted in context: the microphone position, smoothing, measurement method and intended listening seat all affect the result.
Listening remains important, but use familiar tracks and make one change at a time. If several settings are changed simultaneously, it becomes difficult to identify which adjustment improved or degraded the sound.
Recommended Audiophile Setups Without Overspending
A good sound-quality system does not require buying every component at once. The more practical approach is to build the front stage first, ensure the installation is correct, then add amplification or processing when there is a specific reason to do so.
Setup 1: Factory Head Unit and Passive Components
This is a sensible starting point for drivers who want improved front-stage separation without a complete system rebuild. Choose a compatible component set, use the supplied passive crossover, confirm the factory system’s impedance requirements and install the speakers with suitable mounting adapters and seals.
The Morel Tempo Ultra 602 MKII or Sony Mobile ES XS-162ES may be worth evaluating for this type of build, depending on fitment, availability and the sound characteristics you prefer. Do not assume either set will work optimally with every factory stereo; check its sensitivity, nominal impedance and the vehicle’s original audio configuration first.
Spend money on secure mounting, correct wiring and sensible tweeter placement before adding an amplifier. This setup is best when you listen at moderate levels and the factory system can deliver a clean, compatible signal.
Setup 2: Component Speakers With a Dedicated Amplifier
If you want greater clean output and more headroom, add a suitable amplifier to the front component system. Compare continuous output at the speaker’s nominal impedance, verify input compatibility and use the correct crossover network. Set gain according to the signal source and amplifier instructions rather than turning it up until the system sounds loud.
The HERTZ Mille Pro MPK 165.3 or Alpine R2-S652 R-Series PRO may be candidates for a system built around their particular driver designs, but neither should be selected on power handling alone. Confirm the exact model specifications and decide whether its tweeter presentation, mounting requirements and available crossover options suit your priorities.
This arrangement can be a good middle ground for drivers who want more dynamic headroom without committing to a multi-amplifier active build. A correctly powered passive system can already provide excellent results when the installation and tuning are sound.
Setup 3: Component Speakers With a Digital Signal Processor
A digital signal processor becomes useful when the system needs more control over equalisation, crossover settings, channel levels or time alignment. It can help integrate the front speakers with a subwoofer and compensate for some of the cabin’s tonal and timing differences.
The Focal ES 165 KX2E K2 EVO may appeal to buyers considering a more elaborate sound-quality system, but the speaker’s premium construction does not remove the need for proper installation and tuning. Before purchasing, verify the exact crossover’s supported wiring modes, the amplifier-channel requirements and whether the intended processor can provide the controls you need.
This setup can become expensive because it may require additional amplifier channels, professional tuning and more installation time. It makes sense when you value precise control and are prepared to use that flexibility, rather than simply because a digital signal processor sounds like a premium feature.
Setup 4: Front Components, DSP and a Subwoofer
For listeners who want a fuller system, a properly integrated subwoofer can extend low-frequency output beyond what typical door-mounted component woofers can reproduce cleanly at higher levels. The front component speakers then focus on their intended range while the subwoofer handles the deepest bass.
The important part is the transition between the front speakers and the subwoofer. Crossover settings, phase relationship, relative output level and physical placement all affect whether the bass sounds connected to the front stage or detached from it. A large subwoofer or powerful amplifier cannot compensate for poor integration.
This is often the most expensive option, so it should come after the front speakers, installation and amplifier matching are working properly. For many drivers, the improvements from a sealed mounting surface, a well-positioned tweeter and sensible tuning will be more worthwhile than adding a subwoofer to an unfinished front stage.
Where to Spend Money First
When budget is limited, prioritise components in the order that addresses the system’s actual weaknesses.
| Priority | Investment | Why it deserves attention |
|---|---|---|
| First | Correct speaker fitment and installation | Prevents leaks, rattles, interference and avoidable performance losses |
| Second | A suitable front component set | Establishes the main drivers responsible for the stereo image |
| Third | Appropriate amplification, if needed | Provides clean output and additional headroom when the factory system is insufficient |
| Fourth | Crossover integration and basic tuning | Helps the woofer and tweeter work together and maintains balanced output |
| Fifth | Digital signal processing and measurement | Adds useful control when placement, response or timing needs further correction |
| Sixth | Subwoofer and rear-stage upgrades | Expands system capability once the front stage is properly integrated |
This order is a guide, not a rigid rule. A vehicle with a very limited factory source may need signal integration earlier, while a system that already has suitable amplification may benefit most from installation and tuning. The right decision depends on what is limiting the current setup.
Final Audiophile Buying Advice
An audiophile-focused 2-way component system should be selected as part of a complete audio plan. Look beyond cone materials, peak watts and advertised frequency limits. Evaluate the speaker’s engineering, crossover design, installation depth, impedance and compatibility with the electronics you intend to use.
For a practical upgrade, a good passive component set installed correctly can be more rewarding than a more expensive set fitted poorly. For a more ambitious build, a suitable amplifier and digital signal processor can offer greater control, but only when they are configured correctly. In either case, focus on tonal balance, coherent imaging, low distortion and reliable installation rather than the number of premium features on the product page.
The strongest sound-quality build is the one that suits your vehicle, music preferences and listening habits, while leaving enough budget to install and tune the system properly.
FAQs About 2-Way Component Car Speakers
Can 2-way component speakers improve sound quality without replacing the factory head unit?
Yes, provided the factory head unit can drive the speakers safely and delivers a reasonably clean signal. A well-installed component set can improve front-stage separation and tweeter placement without requiring a complete audio-system replacement. However, the improvement depends on the original system’s limitations, the new speakers’ sensitivity and impedance, and how effectively the woofer and tweeter integrate.
The real limitation is that better speakers cannot correct every weakness in a factory system. Built-in equalisation, limited clean output and factory amplifier processing can affect the final result. Before buying an aftermarket amplifier, check whether the current head unit is running out of clean output at your usual listening level. If it is not, proper installation and crossover integration may deliver more noticeable improvements than adding another electronic component.
Why can expensive 2-way component speakers sound worse after installation?
A premium component set can sound disappointing when its tweeters are poorly positioned, the woofer mounting surface leaks air, or the crossover and amplifier are not configured correctly. A bright tweeter may become fatiguing when aimed towards reflective glass, while loose mounting hardware can create rattles that sound like speaker distortion. These problems are installation-related, not necessarily evidence of a defective product.
Before replacing the speakers, check the following:
- Weak midbass: Inspect the woofer gasket, mounting rigidity and speaker polarity.
- Harsh vocals or cymbals: Check tweeter direction, crossover-level settings and factory equalisation.
- Vocals pulled towards one side: Verify left-right polarity, speaker balance and time-alignment settings if available.
- Distortion at high volume: Check amplifier clipping, excessive equaliser boosts and loose connections.
Spending more money will not automatically solve these problems. In many cars, correcting the installation and tuning the existing equipment is the more sensible first step.
Is a higher-sensitivity 2-way component speaker always better for a factory stereo?
Not necessarily. Higher sensitivity can help a speaker produce more output from a given input, which is useful when the factory stereo has limited clean power. However, sensitivity ratings are only directly comparable when they use equivalent measurement conditions. A rating measured at 2.83 volts may not represent the same efficiency as one measured at 1 watt, particularly when impedance differs.
There is also a practical trade-off: sensitivity alone does not tell you how smoothly a speaker responds, how much distortion it produces at higher levels or how well its tweeter integrates with the woofer. When comparing two sets, evaluate sensitivity, nominal impedance, frequency response, mounting requirements and the actual amplifier output together. A lower-sensitivity speaker may still be the better choice if its overall design better suits your listening preferences and system.
Should you use a passive crossover or an active crossover for a high-quality 2-way component system?
A passive crossover is usually the more practical choice for a conventional upgrade because it is designed to divide the signal between the supplied woofer and tweeter without requiring separate amplifier channels for each driver. A properly designed passive system can deliver excellent sound quality without complicated processing.
An active crossover, usually controlled by a suitable digital signal processor, offers more independent adjustment of crossover points, slopes, levels and time alignment. However, it also requires additional amplifier channels and careful configuration. Active does not automatically mean more accurate; incorrect settings can create poor tonal balance or expose the tweeter to damaging frequencies. Choose active processing when you need its additional control and can configure it correctly, rather than simply because it appears more advanced.
What should you upgrade first if your 2-way component speakers lack bass but the vocals already sound clear?
Start by identifying whether the problem is weak midbass or a genuine lack of deep bass. These are different issues and need different solutions. Weak midbass can result from air leaks around the woofer, a flexible mounting adapter, incorrect polarity or inadequate clean power. Deep bass below the useful operating range of a door-mounted woofer generally calls for a properly integrated subwoofer.
A sensible troubleshooting order is:
- Check the speaker’s mounting seal, adapter and door-panel vibrations.
- Verify polarity and confirm that the crossover is wired according to the manufacturer’s diagram.
- Check amplifier clipping and avoid excessive bass boosts that consume headroom.
- If the installation is sound but deeper extension is still missing, consider a subwoofer with suitable crossover and level integration.
The honest answer is that a 2-way component system is not designed to replace a dedicated subwoofer in every situation. Fixing an installation problem can restore missing midbass, but no amount of equalisation can reliably turn a small door speaker into a high-output deep-bass system without physical and distortion limits becoming relevant.
Final Verdict on the Best 2-Way Component Car Speakers
The right 2-way component speakers should make music sound more convincing, not simply louder. Clear vocals, controlled midbass and a stable front soundstage depend on how well the woofer, tweeter and crossover work together, but the installation and the car’s existing audio system ultimately determine how much of that performance you hear. That is why choosing a set based on peak watts, cone material or an impressive frequency range alone can lead to an expensive upgrade that feels underwhelming.
The Morel Tempo Ultra 602 MKII is worth considering if your priorities include balanced musical reproduction and a soft-dome tweeter design. The HERTZ Mille Pro MPK 165.3 offers a different approach, with its V-Cone woofer and Tetolon tweeter, while the Focal ES 165 KX2E K2 EVO targets buyers interested in premium driver construction and a more elaborate sound-quality system. The Alpine R2-S652 R-Series PRO and Sony Mobile ES XS-162ES bring their own driver designs and installation considerations, so the final choice should reflect your listening preferences rather than a presumed universal ranking.
Before buying, confirm the exact model specifications, amplifier compatibility, mounting depth and tweeter installation options for your vehicle. Budget for the mounting hardware and installation work where necessary, because a properly sealed woofer, correctly wired crossover and carefully positioned tweeters can make a greater audible difference than a specification-sheet advantage.
Ultimately, the best choice is the component set that works with your car, your music and your budget without requiring compromises you did not anticipate. Get the fitment and fundamentals right first, then invest in amplification, digital signal processing or a subwoofer only when they address a genuine limitation in your system. Good car audio is not about buying the most expensive equipment; it is about getting the entire system to work together.
Also Check:


