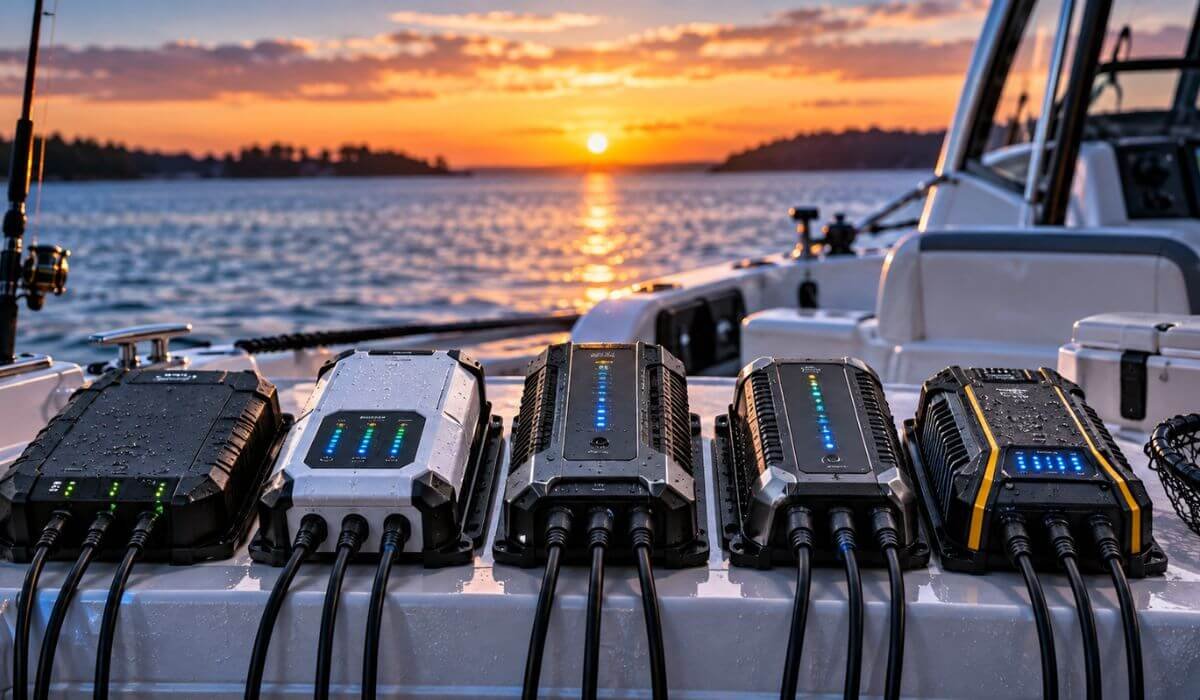
Best 3 Bank Marine Battery Chargers in 2026: 30A Onboard Power, Smart Maintenance & LiFePO4 Support
If your boat runs three separate 12V batteries, a 3-bank onboard charger makes far more sense than carrying a portable charger around and charging each battery one at a time. The right unit, however, depends on more than the amp rating. Battery chemistry, capacity, charging profile, marine protection, cable layout, and how those three batteries are actually used all matter.
This lineup focuses on chargers that bring something genuinely useful to a three-battery boat. The NOCO GENPRO10X3 stands out as the best overall choice because it combines 30A total output, independent 10A banks, selectable lead-acid/AGM/lithium modes, temperature compensation, IP68 protection, and both charging and maintenance in one permanent onboard system. The ProMariner takes a different approach with current distribution, while the other picks bring their own strengths for value, diagnostics, recovery, or lithium-focused setups.
One detail deserves to be clear before comparing them: 30A means 30A total, not 30A for each battery. On a 30A three-bank unit, that works out to 10A per bank. For many fishing boats using a starting battery alongside trolling or deep-cycle batteries, that is a practical balance—especially when the charger can remain connected and maintain the batteries between trips. The important step is matching that output and charging profile to the actual batteries installed, rather than choosing purely by the biggest number on the label.
Best 3 Bank Marine Battery Chargers 2026: Reliable Onboard Charging, Maintenance & Battery Protection
#1. NOCO GENPRO10X3 30A 3-Bank Charger
Best 3 Bank Onboard Marine Battery Charger for 30A Output, Independent 10A Charging & Smart Battery Maintenance
#2. ProMariner 44021 ProSport HD
Best 3 Bank Marine Battery Charger for Distributed-On-Demand Charging, Waterproof Protection & Precise Battery Management
#3. FirstPower Pro 10X3 30A Charger
Best 30A 3 Bank Boat Battery Charger for 10A-Per-Bank Charging, Mixed Battery Support & Advanced Diagnostics
#4. CXRCY 3-Bank 30A Charger
Best 3 Bank Onboard Battery Charger for 9-Stage Charging, IP68 Protection, Battery Recovery & Multi-Chemistry Support
#5. LiTime 3-Bank 12V 10A Charger
Best 3 Bank LiFePO4 Battery Charger for Independent 10A Charging, Lithium BMS Activation & Mixed Battery Compatibility
Expert Tip: Don’t choose a 3-bank charger just because the box says 30A. On a three-bank unit, that number needs context. A 30A/3-bank charger can mean roughly 10A available per bank, which may be perfectly sensible for maintaining three batteries but may not be the right choice if you expect very fast recovery from deeply discharged, high-capacity batteries. Also check the battery chemistry before buying—AGM, lead-acid, and LiFePO4 do not all want the same charging profile. Getting those two things right matters more than chasing the biggest number on the label.
How We Choose the Best 3 Bank Marine Battery Chargers
We did not rank these chargers by price, review count, or the highest wattage we could find. With 3-bank marine chargers, the more useful question is whether the charger makes sense for the way a boat owner actually uses three batteries.
First, we looked at charging output. The 30A models in this lineup are designed around 10A per bank, while the ProMariner provides 20A across three banks. That distinction matters because a higher total rating does not automatically mean faster charging for every battery. We considered how that output fits common starting, trolling, and deep-cycle battery setups rather than treating the largest number as the winner.
Second, battery compatibility came before convenience features. This list includes chargers aimed at different battery combinations, including AGM, SLA, deep-cycle, and LiFePO4 applications. That is important because a charger that looks impressive on paper is still the wrong purchase if its charging profile does not suit the batteries installed on your boat.
Third, we gave real weight to onboard use. These are not being judged like a garage charger that gets pulled out occasionally. An onboard marine charger needs to make sense when it is permanently installed on a boat, exposed to moisture, and expected to keep batteries ready between trips. Waterproof construction and maintenance capability therefore mattered, particularly on the NOCO, ProMariner, FirstPower, and CXRCY models.
Fourth, we separated broad-use chargers from specialist choices. The NOCO GENPRO10X3 stands out as the most balanced option because it combines 30A total output, three-bank charging, marine-focused construction, and support for multiple battery types. ProMariner earns its place because it is purpose-built for marine charging and offers a different 20A approach. FirstPower and CXRCY are interesting 30A alternatives for buyers who want more output and additional battery-care features without automatically stepping into the highest-priced option.
Finally, we did not treat LiTime as a weaker charger simply because it sits lower on the list. Its appeal is different. A 3-bank LiFePO4-focused setup can make much more sense for an owner whose boat is built around lithium batteries than a general-purpose charger with broader compatibility. We placed it lower only because this article targets the wider 3-bank marine battery charger market, not exclusively lithium owners.
That is also why this list is not simply five versions of the same charger. Each recommendation has a reason for being here, and each one makes more sense for a slightly different boat, battery setup, or buying priority. Before ordering, match the charger to your battery chemistry, bank count, battery capacity, and onboard wiring. That small check can save you from buying an expensive charger that is technically powerful but wrong for your setup.
#1. NOCO GENPRO10X3 12V 30A 3-Bank OnBoard Marine Battery Charger & Maintainer
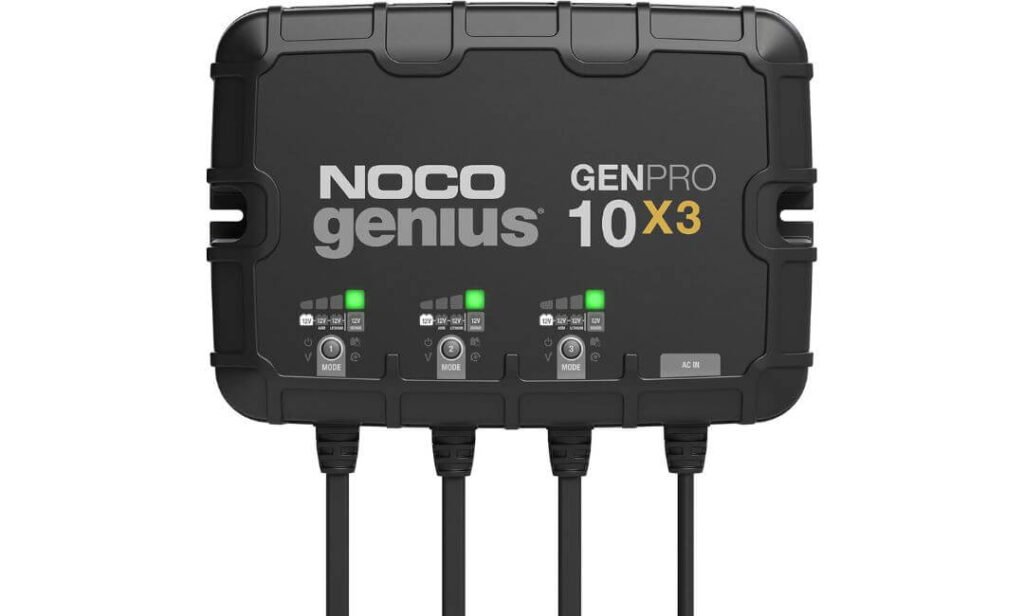
Quick Specs:
- Bank setup: 3 independent 12V banks
- Charging output: 30A total — 10A per bank
- Battery support: Lead-acid, AGM, and 12V lithium/LiFePO4
- Charging modes: 12V, AGM, Lithium, and Repair
- Water resistance: IP68 fully sealed
- Temperature control: Built-in thermal sensing
- Size: 10.51″W × 8.11″H × 2.83″D
- Weight: 13.43 lb
- Installation: Multi-orientation mounting with anti-vibration backing
- Warranty: 3 years
The first thing that stands out here isn’t simply the 30-amp rating. It’s how that power is divided. You get three independent 10A outputs, so three 12V batteries can be connected and managed at the same time instead of moving one charger between batteries. For a typical fishing setup, that can mean keeping a starting battery on one bank while the other two handle trolling or house-duty batteries.
The independent charging modes are another genuinely useful detail. One bank can be set for standard 12V, another for AGM, and another for lithium, so you’re not forced into one charging profile just because the batteries happen to share the same boat. That’s particularly useful on newer boats where a lithium trolling setup may sit alongside a conventional starting battery. The thermal sensor also adjusts charging for temperature, which is the kind of feature you appreciate more after leaving a charger connected through changing weather than when you’re simply reading the box.
Then there is the physical design. At roughly 10.5 inches wide and under 3 inches deep, it’s surprisingly compact for a three-bank 30A unit, and the mounting system lets it be installed in different orientations when available space is awkward. The IP68 sealed construction is especially relevant for permanent onboard use, while the 72-inch leads give you some practical freedom when positioning it near the battery compartment. And if you’re dealing with a battery that has been allowed to discharge extremely deeply, the ability to begin charging around 1V—and use Force Mode for batteries reading near zero—adds another useful recovery option rather than immediately writing that battery off.
(In short: this is built less like a charger you occasionally carry around and more like equipment you install once, connect properly, and leave doing its job.)
What We Like
- 30A across three independent banks gives this setup a very sensible balance for boats running three batteries.
- Mixed battery chemistry support is a real advantage if your starting and trolling batteries aren’t the same type.
- IP68 sealing makes much more sense for an onboard charger than ordinary splash-resistant construction.
- Temperature compensation adds useful protection when the boat sees both hot and cold conditions.
- Compact mounting footprint is a welcome advantage when battery compartments leave little room to work with.
What We’d Keep in Mind
The only thing to consider is the 10A-per-bank limit. That’s plenty for many three-battery recreational setups, but someone with very large batteries who prioritizes the quickest possible recharge should compare charging time against battery capacity before choosing it.
Where It Really Stands Out
For a three-battery boat, the strongest part of this setup is the combination of independent charging, 30A total output, broad battery compatibility, and permanent marine installation. You aren’t buying three separate chargers and trying to coordinate them; each bank has its own charging mode and can remain connected while the charger handles the routine work.
That makes it particularly compelling for owners who want a set-it-and-leave-it onboard system. A fishing boat with a conventional starting battery plus two trolling batteries is exactly the kind of setup where the design makes practical sense. The lithium mode also gives it room to stay useful if your battery setup changes later, rather than forcing you to replace the charger simply because you upgraded one part of the boat.
The Insider Pro-Tip
Don’t judge this charger by the 30A number alone. Think about what your three batteries actually need. If each bank is connected to a sensible 12V battery and you want all three maintained without constantly checking them, the 10A-per-bank arrangement is one of the reasons this unit works so well.
And before installation, spend a few extra minutes checking battery chemistry, bank-to-battery connections, cable routing, ventilation/clearance, and the correct AC supply. The charger is designed for permanent mounting and includes the necessary DC leads and mounting hardware, but a neat, secure installation is what turns a good charger into a genuinely convenient part of your boat. Once it’s installed correctly, the real benefit is simple: plug in at the dock, let the three banks do their own work, and spend less time thinking about whether the batteries will be ready for the next trip.
#2. ProMariner 44021 ProSport HD 20A 3-Bank Marine Battery Charger
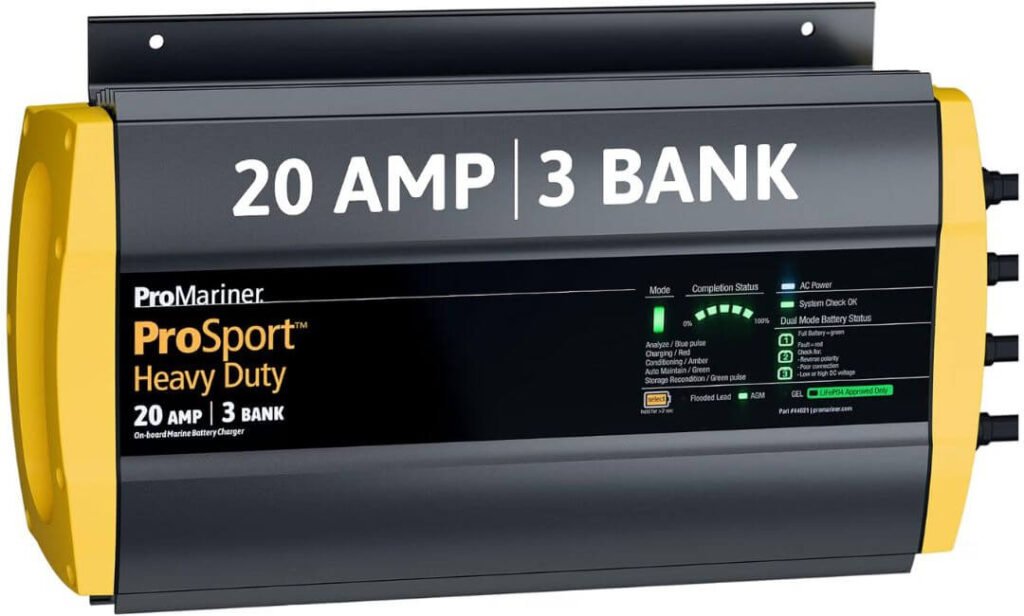
Quick Specs:
- Bank setup: 3-bank marine charging system
- Charging capacity: 20A total
- Charging technology: ProMar Digital microprocessor-controlled charging
- Current management: Distributed-On-Demand
- Battery compatibility: Flooded lead-acid, AGM, and gel
- Marine protection: Waterproof, salt-spray resistant design
- Cooling: Tri-surface extruded aluminum heat sink
- Status display: Multi-color LED charging and battery-status indicator
- Size: 16.4″W × 8.7″D × 6.3″H
- Weight: 7.2 lb
- Model note: 44021 replaces the earlier ProSport 20 Plus 43021
What makes this charger interesting is what happens after you connect all three batteries. Instead of treating the 20 amps as three permanently fixed portions, its Distributed-On-Demand technology can move unused charging capacity toward the battery or batteries that still need it. So if one bank reaches its charge level before the others, that available current doesn’t simply sit there unused.
That approach makes a lot of sense on a real fishing boat. Your starting battery, trolling batteries, or house battery won’t necessarily arrive at the same state of charge after every trip. The charger uses its microprocessor-controlled charging system to manage the cycle automatically, while the LED display gives you a quick visual check of charge progress, battery status, and battery type without having to guess what is happening behind the scenes.
There is also a practical reason to take the HD construction seriously. The tri-surface heat sink uses upper, lower, and rear-facing surfaces to move heat away during extended charging, while the waterproof marine construction is intended for permanent onboard use. At just 7.2 pounds, it is considerably lighter than some high-output three-bank alternatives, although its 16.4-inch width means you should still measure your mounting space before installation.
What We Like
- Distributed-On-Demand charging is the standout feature because current can be directed where it is actually needed.
- The LED status system makes checking three batteries much easier than relying on a single basic indicator.
- Microprocessor-controlled charging gives it a more refined approach than a simple fixed-output charger.
- The tri-surface heat sink is a meaningful design choice for longer charging sessions.
- Being the successor to the older 43021 ProSport 20 Plus makes the 44021 a particularly relevant choice for owners comparing older and newer ProMariner models.
What We’d Keep in Mind
The main consideration is simple: 20A total is less charging capacity than the 30A models in this lineup, so if your priority is maximum recharge output across three larger batteries, the higher-output options deserve a closer look.
Why This 3-Bank Charger Earns Its Place
The reason this one sits near the top isn’t because it tries to win the specification sheet. It wins on how intelligently it uses the power it has. Distributed-On-Demand makes the 20A rating more useful than a basic charger where each bank is locked into an equal share regardless of what the batteries actually need.
It is particularly appealing for a boat owner who values controlled charging, clear status feedback, marine-ready construction, and established charging technology over simply buying the highest amp rating available. If your three batteries don’t routinely need the fastest possible recovery, that balance can be more valuable than another 10 amps on the label.
The Insider Pro-Tip
If you’re replacing an older ProMariner charger, don’t automatically assume the new 44021 is just a cosmetic refresh. It specifically replaces the earlier 43021 ProSport 20 Plus, so checking the old installation, battery types, cable routing, and mounting location before ordering can make the upgrade much smoother.
And one detail is worth remembering: Distributed-On-Demand is the feature to watch here. The smartest comparison isn’t “20A versus 30A”; it’s whether your boat benefits more from additional total charging capacity or from a system that can intelligently redirect available current between three batteries. For a mixed-use boat where the batteries regularly finish at different times, that distinction can matter more than the headline number.
#3. FirstPower Pro 10X3 30A 3-Bank Marine Battery Charger
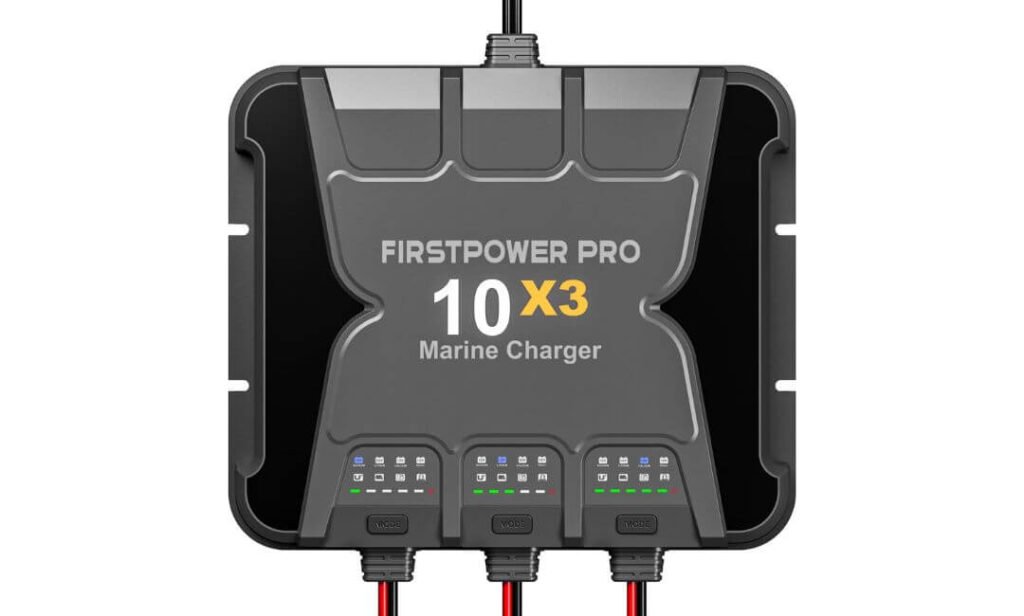
Quick Specs:
- Bank setup: 3 independent 12V charging banks
- Charging output: 30A total — 10A per bank
- Battery support: 12V SLA/AGM, lithium, and calcium
- Charging modes: SLA/AGM, Lithium, Calcium, plus Repair
- Protection: IP68 fully sealed
- Temperature control: Integrated thermal sensor
- Diagnostics: Reverse connection, over-voltage, bad battery, and over-temperature detection
- Charge indicator: 5-level display from 20% to 100%
- Size: 10.9″W × 10.23″H × 1.77″D
- Weight: 10.43 lb
- Warranty: 3 years
There is a good reason this model makes sense for a three-battery boat: each bank gets its own 10A output and its own charging mode. That sounds straightforward, but it becomes genuinely useful when your battery setup isn’t perfectly uniform. You can have a conventional AGM or SLA battery on one bank and lithium batteries on the others, selecting the appropriate mode independently instead of forcing every battery through the same charging profile.
The 30A total output also puts it in the same basic charging class as the higher-output options in this lineup. For a boat with a starting battery plus two trolling or house batteries, 10A per bank is a sensible middle ground between keeping batteries maintained and getting them ready for the next outing. It isn’t pretending to be a high-current rapid charger; its strength is having three banks working together while the charger handles the routine charging automatically.
Then there’s the part you don’t notice until something goes wrong. The built-in diagnostics can flag reverse connection, over-voltage, over-temperature, and bad-battery conditions, while the thermal sensor adjusts charging as ambient temperature changes. The IP68 sealed enclosure is also exactly the sort of construction you want from equipment intended to stay onboard. Add the supplied battery clips, connectors, spare fuses, and mounting screws, and there is less need to turn the installation into a separate parts hunt.
What We Like
- 10A per bank gives all three batteries meaningful charging capacity at the same time.
- Independent chemistry selection is especially useful for mixed AGM/lead-acid and lithium setups.
- Built-in diagnostics provide useful information when a battery or connection isn’t behaving normally.
- IP68 construction makes it appropriate for a permanent onboard environment.
- Clips, connectors, spare fuses, and mounting hardware make the package more installation-friendly.
What We’d Keep in Mind
The main trade-off is brand reputation. FirstPower Pro doesn’t have the same long-established marine-equipment name recognition as NOCO or ProMariner, so buyers who put maximum weight on brand history may prefer paying more for one of those established options.
Where This One Makes the Most Sense
This is the option I’d look at when 30A charging and broad battery compatibility matter, but you don’t necessarily want to pay premium-brand money. The combination is unusually practical: three independent banks, selectable charging profiles, temperature compensation, repair functionality, diagnostics, and IP68 protection.
The particularly useful detail is the per-bank mode selection. A boat owner upgrading gradually to lithium doesn’t necessarily have to replace every battery at once. If the starting battery remains AGM while the trolling batteries become lithium, the charger can accommodate that mixed setup. That’s the kind of flexibility that matters in a real boat far more than another decorative feature on the specification sheet.
The Insider Pro-Tip
Before mounting it, look at the actual battery compartment and cable path, not just the charger’s dimensions. The 1.77-inch depth is slim, but the 10.9 × 10.23-inch footprint still needs a secure mounting surface, sensible cable routing, and enough room to make clean connections.
One more thing: don’t use Repair Mode as a reason to ignore an aging battery. A charger can sometimes help with a neglected or sulfated battery, but it cannot turn a genuinely worn-out battery back into a healthy one. If the charger repeatedly reports a bad-battery condition, treat that information as useful diagnosis rather than simply trying to force another charging cycle.
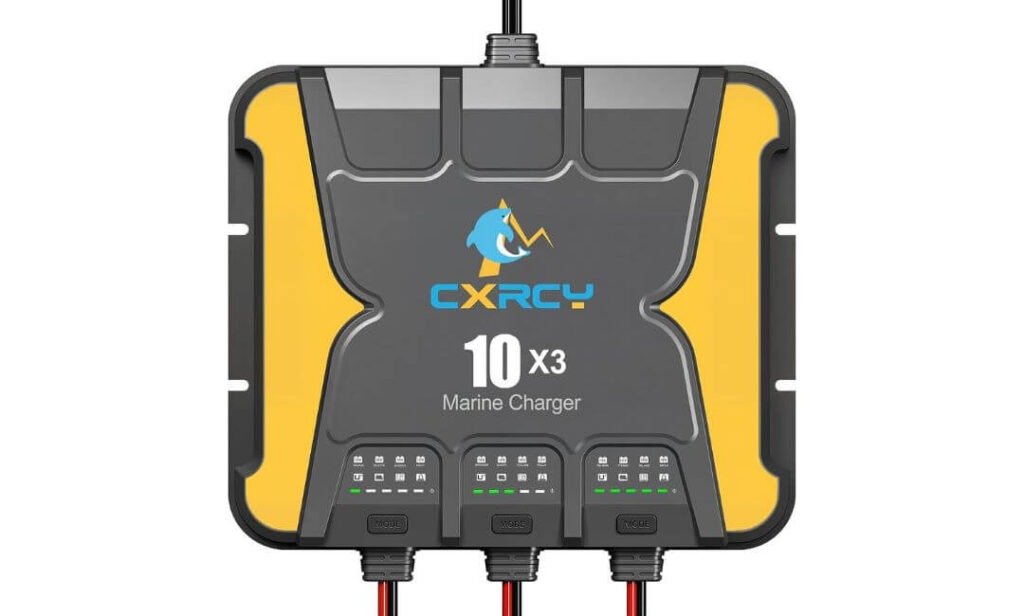
#4. CXRCY 12V 30A 3-Bank Onboard Marine Battery Charger & Maintainer
Quick Specs:
- Bank setup: 3 independent 12V banks
- Charging output: 30A total — 10A per bank
- Battery support: SLA/AGM, LiFePO4/lithium, calcium, and deep-cycle
- Charging system: 9-stage smart charging
- Charging modes: SLA/AGM, Lithium, Calcium, Repair, and Force Charging
- Protection: IP68 fully sealed
- Temperature range: -40°C to 60°C
- Diagnostics: Bad battery, over-voltage, over-temperature, and reverse connection
- Cable reach: 6.56-ft DC power cable
- Size: 11″D × 9″W × 2″H
- Weight: 10 lb
On paper, a lot of three-bank chargers can look almost identical: 30A total, 10A per bank, 12V batteries. The CXRCY becomes more interesting when you look at what it does around that basic charging output. Its three banks operate independently, while the charger uses a 9-stage charging process, temperature compensation, and separate charging modes for SLA/AGM, lithium, and calcium batteries.
That makes it a particularly flexible choice for a boat where the battery setup isn’t completely uniform. A starting battery and deep-cycle trolling batteries don’t necessarily have the same charging requirements, and having separate bank control means you’re not treating the entire battery system as one large load. The built-in diagnostics are useful here too: reverse connection, over-voltage, over-temperature, and bad-battery detection give you information when something isn’t behaving as expected.
The other standout is its recovery and maintenance capability. The charger can attempt a slow recovery of batteries showing extremely low voltage, while Force Charging provides a manual way to initiate charging when normal detection won’t start. That’s useful for neglected batteries, but it shouldn’t be confused with a magic battery-repair button. The IP68 sealed housing, 2-inch depth, and 6.56-foot DC cable also make the physical package well suited to permanent onboard installation where moisture and limited mounting space are part of the equation.
What We Like
- 30A total output with three independent 10A banks is strong for a multi-battery boat.
- 9-stage charging gives it a more controlled charging approach than a basic automatic charger.
- Multiple battery modes cover a wide range of common marine battery setups.
- Force Charging and diagnostics are genuinely useful when dealing with neglected or deeply discharged batteries.
- 2-inch-thick housing and IP68 protection make it practical where installation space and moisture are concerns.
What We’d Keep in Mind
The biggest consideration is brand track record. CXRCY offers an unusually broad feature set for the category, but buyers who prioritize a longer-established marine charging brand may still feel more comfortable with NOCO or ProMariner.
A Strong Feature Set for Mixed Battery Boats
The appeal here is flexibility rather than one headline specification. You get the same 30A/3-bank architecture that makes the higher-ranked options attractive, but the combination of battery recognition, 9-stage charging, repair functionality, diagnostics, and extreme-temperature specifications gives it a fairly complete feature package.
For someone building or upgrading a boat’s electrical system on a budget, that’s worth paying attention to. It can handle starting, marine, and deep-cycle applications, supports lithium alongside traditional battery types, and is designed to stay connected rather than being carried around after every trip. That’s exactly the sort of convenience a three-bank charger should provide.
The Insider Pro-Tip
The 0–1V recovery capability is useful, but don’t make it the deciding reason to buy this charger. A battery sitting that low has already been deeply neglected or heavily discharged, and recovery success depends on the battery’s actual condition. Use the feature as a recovery option—not as evidence that every “dead” battery is still healthy.
For installation, take advantage of the relatively shallow 2-inch profile, but leave yourself enough room for the DC leads and connections. Measure the mounting surface first, route the cables cleanly, protect connections from unnecessary moisture exposure, and verify each bank against the correct battery before switching it on. That little bit of care is what makes the difference between simply owning a waterproof charger and having a three-bank system you can confidently leave connected between trips.
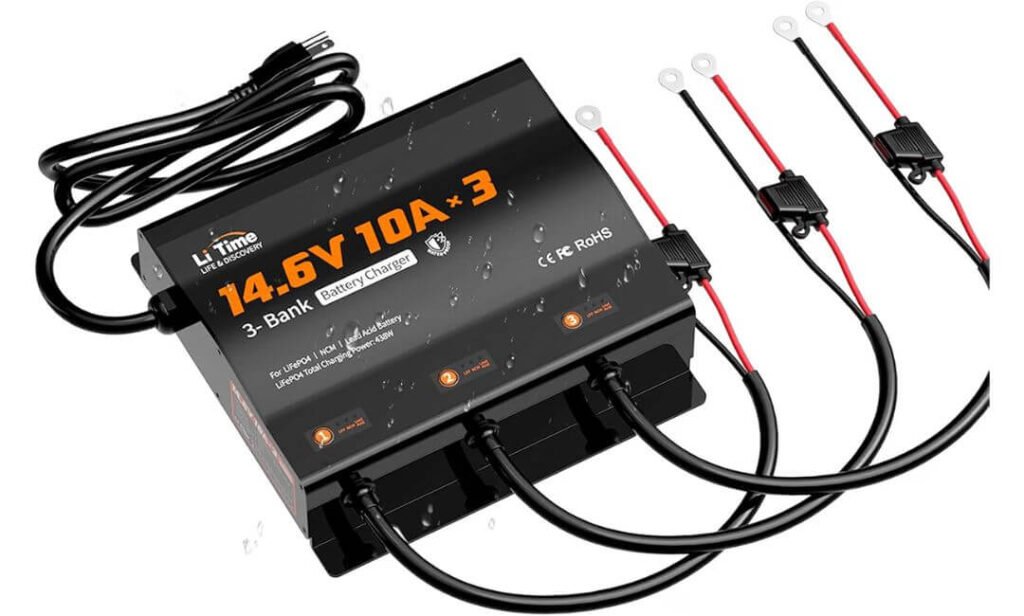
#5. LiTime 3-Bank 12V 10A LiFePO4 Battery Charger
Quick Specs:
- Bank setup: 3 independent 12V charging banks
- Charging output: 10A per bank — 30A total
- Output voltage: 14.6V DC
- Battery support: LiFePO4, NCM lithium-ion, AGM, GEL, and lead-acid
- Lithium feature: BMS-protected battery activation
- Protection: Over-temperature, reverse polarity, over-voltage, short circuit, low-voltage cutoff, and spark prevention
- Water/dust resistance: IP65
- Status monitoring: Individual LED charging/fault indication
- Size: 8.19″W × 3.58″D × 2.07″H
- Weight: 10.72 lb
If your boat is moving toward LiFePO4 batteries, this is the model that deserves a closer look. Instead of making lithium compatibility a side feature, the charger is built around a setup where three batteries can receive 10A each, while the charging system supports LiFePO4 as well as NCM lithium-ion, AGM, GEL, and traditional lead-acid batteries.
That matters when a boat has been upgraded in stages. You might have lithium trolling batteries while the starting battery is still lead-acid or AGM. Being able to charge those different battery types from one three-bank unit is considerably more useful than having a charger that only looks impressive because it has three outputs. The BMS activation function is another particularly relevant feature for lithium owners: when a protected LiFePO4 battery shuts itself down because of low voltage, the charger is designed to help bring it back into operation.
The physical design is also worth considering. At just over 2 inches high, it has a relatively compact profile for an onboard installation, while the IP65 housing provides protection against water and dust. Each bank has its own LED status indication, so you can see whether a battery is charging, full, in standby, or showing a fault without turning the system into a guessing game. And the built-in protection covers the common electrical mistakes and abnormal conditions you’d rather catch automatically than discover after a trip.
What We Like
- 10A independently delivered to each bank makes the three-bank arrangement genuinely useful.
- LiFePO4 and NCM support gives it strong appeal for newer lithium-based boat setups.
- BMS activation is a valuable feature when a protected lithium battery has entered a low-voltage shutdown.
- Compact 2.07-inch height can make mounting easier in tighter compartments.
- Individual LED status information gives you a quick way to check all three banks.
What We’d Keep in Mind
The IP65 rating is the main distinction to remember. It provides water and dust protection, but buyers looking for the highest level of sealed marine protection may prefer one of the IP68 units higher in this list.
The Lithium-Focused Choice
This charger makes the most sense when battery chemistry is driving the purchase. If you’re running three LiFePO4 batteries, or a mixed setup involving lithium and conventional batteries, its broad compatibility and 10A-per-bank output make it a practical proposition.
It also has a useful advantage for boat owners who are gradually modernizing their electrical system. You don’t necessarily have to replace every battery at the same time just to move toward lithium. The ability to work with LiFePO4, NCM, AGM, GEL, and lead-acid gives the charger room to remain useful while the rest of the boat evolves.
That’s why I wouldn’t call this simply a “budget 3-bank charger.” Its better description is a lithium-friendly onboard charging option with enough flexibility to work beyond an all-lithium setup.
The Insider Pro-Tip
If you’re buying this specifically for LiFePO4, check the battery manufacturer’s charging requirements before connecting it. “Lithium compatible” is not a substitute for confirming that the battery’s chemistry, voltage, capacity, and BMS specifications match the charger’s intended operating profile.
And don’t confuse the BMS activation feature with battery repair. If a lithium battery has gone into protection because of low voltage, activation can help wake the system back up; it doesn’t mean a physically damaged or genuinely failed battery has been restored. If everything checks out, though, having that recovery capability built into a three-bank charger can be one less piece of equipment to carry around—and that’s exactly the kind of small convenience that becomes valuable after a long day on the water.
Best 3 Bank Marine Battery Chargers (2026): See How the Top Picks Compare
3 Bank Marine Battery Charger Buying Guide: What Actually Matters Before You Buy
A three-bank charger is one of those purchases where the right specification matters more than the longest feature list. A charger can be waterproof, smart, and powerful, yet still be a poor match if its output, charging profile, or installation doesn’t suit your batteries. The five models above aren’t identical, so use the following criteria to narrow the choice to the one that actually fits your boat.
1. Understand What the Amp Rating Really Means
This is probably the easiest specification to misunderstand.
When a charger is advertised as a 30A 3-bank marine battery charger, that normally refers to 30 amps of total charging capacity, not 30 amps going into each battery. In the 30A models in this lineup, that means 10A per bank under their specified operating conditions.
That’s an important distinction when comparing chargers. A three-bank 30A unit and a 20A three-bank unit aren’t simply different versions of the same thing. The 30A option has more total charging capacity, while the ProMariner 20A uses Distributed-On-Demand technology to redirect available current toward batteries that still need it.
| Your setup | What to look for |
|---|---|
| Three smaller or moderate-capacity batteries | 10A per bank can be a sensible fit |
| Large deep-cycle batteries | Check battery capacity and expected recharge time carefully |
| Mixed starting + trolling batteries | Independent bank charging is particularly useful |
| Three batteries that regularly return at different charge levels | A charger with intelligent current distribution can be advantageous |
| You mainly maintain batteries between trips | Maintenance capability can matter more than maximum amperage |
Don’t assume that more amps automatically means a better charger. Higher output is useful when you regularly need faster recovery, but the correct charging profile and battery compatibility still come first.
2. Match the Charger to Your Battery Chemistry
Before looking at waterproof ratings or displays, identify exactly what is connected to each bank.
Common marine setups can include flooded lead-acid, AGM, GEL, calcium, and LiFePO4 batteries, and they don’t all use the same charging requirements. This becomes especially important when a boat has been upgraded gradually and contains different battery chemistries.
A useful three-bank charger should let you select or apply the appropriate charging profile independently for each bank when the battery types differ.
For example, a boat could have:
- A conventional lead-acid starting battery.
- An AGM house battery.
- A LiFePO4 trolling-motor battery.
That is a very different requirement from three identical flooded batteries.
The lithium options deserve extra attention. LiFePO4 compatibility should never be interpreted as “safe for every lithium battery.” Check the battery manufacturer’s recommended charging voltage, chemistry, capacity, and BMS requirements before connecting it. Features such as lithium activation can be useful when a BMS has disconnected a battery after a low-voltage event, but they don’t replace proper battery specifications.
3. Look at Maintenance Features, Not Just Charging Speed
For an onboard charger, the job doesn’t necessarily end when the batteries reach full charge.
The real convenience comes from what happens afterward. A good maintenance system can keep batteries at an appropriate state of charge while the boat sits unused, which is particularly useful during periods between fishing trips or longer storage.
Look for features such as:
- Automatic maintenance or float charging
- Temperature compensation
- Battery-status indicators
- Automatic charging stages
- Battery-type selection
- Low-voltage recovery
- Sleep or standby behavior, where applicable
- Remote monitoring, if your setup specifically requires it
Temperature compensation is especially practical. Charging conditions in a cold garage, a hot boat compartment, and a shaded dock are not identical. A thermal sensor can adjust charging behavior as ambient temperature changes rather than treating every environment the same.
That doesn’t mean every extra “smart” feature is necessary. If you simply need a reliable charger that remains connected between trips, automatic charging and maintenance may be far more valuable than a complicated monitoring system you’ll rarely check.
4. Pay Attention to Charging Stages and Recovery Functions
A charger that simply pushes current into a battery is not what you want for a permanent three-bank installation.
Modern marine chargers generally use multi-stage charging, adjusting their output as the battery moves through the charging cycle. The exact stages and terminology differ between manufacturers, so don’t compare chargers solely by counting the number of advertised stages.
Recovery features also need some common sense.
Some models in this list offer Repair Mode, while others provide low-voltage or Force Charging functions. These can be useful when a battery has been neglected or has entered a protection state, but they should not be treated as a guarantee that a failed battery can be brought back to life.
A battery sitting at an unusually low voltage may be deeply discharged, sulfated, damaged, or simply at the end of its service life. A charger can help diagnose or attempt recovery, but it cannot undo physical battery damage.
5. Treat Marine Protection as a Real Specification
“Marine charger” doesn’t automatically tell you how well a unit handles water.
Look at the actual IP rating and construction.
In this lineup, the difference between IP68 and IP65 is worth noticing. IP68-rated models provide a higher level of enclosure protection than the IP65-rated option, which can matter for installations where exposure to water and moisture is a serious concern.
Also consider:
- Reverse-polarity protection
- Over-temperature protection
- Over-voltage protection
- Short-circuit protection
- Overcurrent protection, where specified
- Ignition or marine safety certifications, where applicable
- Heat dissipation
- Sealed construction
- Corrosion resistance
The charger doesn’t have to be physically exposed to seawater to benefit from marine-oriented construction. Humidity, condensation, spray, temperature swings, and a confined battery compartment can all be harder on electrical equipment than a dry garage environment.
6. Make Sure the Physical Installation Actually Works
This is the part buyers often discover too late.
Before ordering, measure the available mounting area on your boat and compare it with the charger’s width, depth, and height, not just its advertised wattage.
Also think about where the cables will go. A charger may physically fit into a compartment but become awkward to install if the battery leads are too short or have to cross other equipment.
Check:
- Available mounting surface
- Charger dimensions
- Cable length
- Location of battery terminals
- AC power access
- DC cable routing
- Fuse and connection requirements
- Clearance around the unit
- Whether the mounting surface can handle vibration
- Whether the installation location stays reasonably accessible
An onboard charger is meant to stay with the boat, unlike a portable charger that you carry out when needed. That’s why a clean permanent installation is such an important part of the buying decision.
7. Don’t Ignore the Difference Between an Onboard Charger and a Portable One
If your batteries remain installed in the boat and you want charging to happen simply by connecting shore power, an onboard charger is usually the more convenient arrangement.
A portable charger makes more sense when you have occasional charging needs, move the charger between vehicles, or don’t want to modify the boat’s electrical setup.
For a three-battery marine system, however, the advantage of an onboard unit is obvious: each battery can remain connected to its designated bank, reducing the need to repeatedly open compartments, move cables, or remember which battery needs attention.
8. Compare the Features Against Your Actual Boat, Not the Product Page
The best charger for one three-battery boat can be the wrong choice for another.
A simple way to think about the five recommendations is:
| If your priority is… | Look more closely at… |
|---|---|
| Strong all-around marine capability | NOCO GENPRO10X3 |
| Intelligent distribution of available charging current | ProMariner 44021 |
| 30A output with practical battery-mode flexibility | FirstPower Pro 10X3 |
| Broad features, recovery functions, and 30A output | CXRCY 3-Bank 30A |
| LiFePO4 and mixed lithium-oriented setups | LiTime 3-Bank |
This is why there isn’t much value in declaring one specification the winner by itself. 30A, IP68, lithium support, repair mode, and independent banks all solve different problems. Your own battery setup determines which one matters most.
9. One Last Check Before Ordering
Before clicking Buy, confirm these six things:
- You actually have three 12V battery banks that the charger is designed to handle.
- The charger’s output current fits the capacity and recharge expectations of your batteries.
- Each battery’s chemistry is supported, especially if lithium is involved.
- The charger has the level of water and environmental protection appropriate for its mounting location.
- The physical dimensions and cable reach work with your boat.
- You understand how the charger divides or distributes its available current rather than assuming “30A” means 30A into every battery.
That final check takes a few minutes and can prevent the most common mistake with multi-bank chargers: buying a technically impressive unit that simply doesn’t match the way your boat’s battery system is configured.
3 Bank Marine Battery Charger & Maintainer Best Practices for Everyday and Seasonal Use
A good three-bank charger can take a lot of battery maintenance off your hands, but it still needs to be used correctly. The safest approach is simple: make the installation right, understand what each bank is connected to, and check the batteries periodically instead of assuming the charger can solve every problem automatically.
Give Each Bank a Clear Job
Before connecting shore power, make sure each charging lead is connected to the correct battery and that the positive and negative connections are secure. If your boat uses a starting battery plus trolling or house batteries, keep those connections consistent so you always know which bank is serving which battery.
With mixed battery chemistry, double-check the charging mode for each individual bank. This is particularly important when a conventional starting battery sits alongside LiFePO4 trolling batteries. Independent bank control is useful only when each bank is actually configured for the battery it is charging.
After installation, label the battery connections if they’re difficult to see. It sounds unnecessary until you’re working inside a cramped compartment months later.
Don’t Treat “Maintenance” as a Reason to Stop Checking the Batteries
Automatic maintenance is designed to reduce routine work, not eliminate inspection.
Every few weeks during active use, take a quick look at:
- Battery terminals for corrosion or looseness.
- Cable insulation for damage or rubbing.
- Fuses and connections for signs of overheating.
- Battery cases for swelling, cracking, or leakage.
- Charger indicators for unexpected fault conditions.
- Any unusual heat, smell, or noise around the charging area.
You don’t need to dismantle the system every time. A two-minute visual check can tell you a surprising amount about whether everything is behaving normally.
Let the Charger Finish Its Charging Cycle
If the boat is sitting at the dock and shore power is available, there is generally little benefit in repeatedly unplugging the charger simply because the batteries have reached full charge. A properly functioning onboard charger is designed to transition through its charging process and then maintain the batteries according to its charging strategy.
The important word is properly functioning. If an indicator repeatedly shows a fault, a battery never reaches a normal charged state, or one bank behaves differently from the others, investigate instead of leaving the system connected indefinitely and hoping it corrects itself.
A charger can maintain a healthy battery very well. It cannot compensate for a battery that is internally damaged or reaching the end of its useful life.
Seasonal Storage: Prepare the Batteries Before You Put the Boat Away
Long-term storage is where good battery habits pay off.
Before winter or another extended period without boating, give the batteries a proper inspection and allow the charger to complete its normal charging process. Clean corrosion from terminals, make sure connections are tight, and check that the battery compartment is reasonably clean and dry.
If the boat will remain connected to reliable shore power, an appropriate onboard maintenance charger can keep the batteries ready during storage. If shore power will be disconnected, follow the battery manufacturer’s storage recommendations instead of assuming every battery should be handled the same way.
Lithium and lead-acid batteries have different storage requirements, so mixed systems deserve particular attention.
Check More Often When the Boat Sits Unused
Battery condition can change even when the boat isn’t being used.
A boat may have small parasitic loads from electronics, alarms, memory circuits, bilge equipment, or other installed accessories. Over a long storage period, those loads can matter.
A practical schedule is:
- During the boating season: quick visual inspection every few weeks.
- Before and after extended trips: check connections, charger status, and obvious battery condition.
- During seasonal storage: inspect periodically rather than waiting until the next launch.
- Before the first trip after storage: verify every bank is charging normally and the batteries are in suitable condition.
These aren’t rigid manufacturer service intervals. They’re sensible inspection habits; the battery and charger manufacturers’ instructions should take priority where they specify a different schedule.
Keep the Installation Dry, Secure, and Easy to Inspect
Marine electrical equipment lives in a tougher environment than equipment in a garage.
Keep charging cables away from sharp edges, moving components, excessive heat, and areas where water can continuously collect. Connections should be tight, protected, and appropriately fused according to the manufacturer’s installation requirements.
The charger itself should be mounted securely rather than left loose inside the compartment. Vibration is part of normal boat use, so a solid mounting surface and sensible cable routing matter.
Also avoid burying the charger behind equipment where you cannot see its indicators or access its connections. The best installation is one that is protected but still inspectable.
Be Careful With Deeply Discharged Batteries
A very low battery voltage deserves attention rather than repeated blind charging attempts.
Some chargers provide Repair, Force Charging, or low-voltage recovery functions, and these can be useful in specific situations. But if a battery repeatedly drops to an unusually low voltage or the charger identifies it as faulty, investigate the battery itself.
Forcing a damaged battery through repeated recovery cycles isn’t good maintenance. If the battery is swollen, cracked, leaking, unusually hot, or otherwise visibly damaged, stop and follow the battery manufacturer’s safety instructions.
Use the Right Charging Mode for Lithium Batteries
LiFePO4 batteries deserve one extra layer of attention because their BMS can disconnect the battery when certain protection thresholds are reached.
If that happens, a charger with a lithium activation or recovery function may be able to re-establish charging, but don’t assume every low-voltage lithium battery should simply be forced back online.
Check the battery documentation first, especially for:
- Recommended charging voltage.
- Recommended charging current.
- Minimum and maximum charging temperature.
- BMS requirements.
- Storage instructions.
- Whether charging below freezing is permitted.
This is one area where reading the battery manual can be more valuable than reading another ten product reviews.
Don’t Mix Up Charger Maintenance With Battery Maintenance
This distinction is easy to overlook.
The charger maintains the electrical state of the battery. It does not maintain the battery terminals, cables, electrolyte level on applicable batteries, physical condition, mounting hardware, or the rest of the boat’s electrical system.
For conventional serviceable lead-acid batteries, follow the battery manufacturer’s instructions for inspection and electrolyte maintenance where applicable. For sealed AGM and lithium batteries, follow their specific maintenance guidance instead.
In other words, “maintenance-free charger” does not mean “maintenance-free battery system.”
Safe Operation on a Marine Vessel
Before energizing the system, make sure the battery connections are correct and the charger is installed according to its instructions. Use the specified cables, fuses, connectors, and AC supply requirements rather than improvising around them.
When working around batteries:
- Keep sparks and open flames away from the battery area.
- Provide the ventilation required by the battery manufacturer’s instructions.
- Disconnect power before changing charger wiring.
- Never work on wet electrical connections.
- Don’t use damaged cables or connectors.
- Don’t bypass fuses or protection devices.
- Keep battery terminals from accidentally contacting tools or other conductive objects.
- Stop charging if you notice unusual heat, swelling, leakage, burning smell, or other abnormal behavior.
And one habit is worth keeping permanently: don’t make electrical changes while the charger is energized. Turn off and isolate the appropriate power source first, then work on the wiring.
The Simple Routine That Keeps a Three-Battery System Healthy
You don’t need an elaborate maintenance ritual.
Connect it correctly, select the right battery profile, allow the charging cycle to work, inspect the connections periodically, and investigate anything unusual.
For seasonal storage, prepare the batteries before the boat goes idle and follow the storage instructions for each battery chemistry. When spring comes around, don’t assume everything is perfect simply because the charger remained connected—give every battery, cable, terminal, and charger indicator a quick check before heading back onto the water.
That combination of automatic charging and occasional human attention is ultimately what makes a three-bank onboard system so convenient.
3 Bank Onboard Battery Charger Installation and Setup Guide
Installing a three-bank charger is not difficult when the battery layout is clear, but it is also not a job where guessing is worth the risk. The charger needs to be mounted securely, each bank needs to reach the correct battery, and the protection and cable requirements need to follow the charger’s installation instructions.
Quick-Start Checklist for a 3 Bank Onboard Battery Charger
Before touching the wiring, identify all three batteries and decide exactly which charger bank will serve each one. A simple label such as Bank 1 — Starting, Bank 2 — Trolling, and Bank 3 — House can save confusion later.
Use this basic sequence:
- Read the charger and battery manuals first. Pay particular attention to supported battery chemistry, charging voltage, current limits, and installation requirements.
- Inspect the batteries. Do not install a charger onto a battery that is visibly damaged, leaking, swollen, or otherwise unsafe.
- Choose a suitable mounting location. It should be secure, reasonably protected from direct water exposure, and accessible enough to inspect the charger and connections later.
- Measure before drilling. Check the charger’s complete footprint, mounting-hole locations, cable reach, and available clearance.
- Plan the cable route. Keep charging cables away from sharp edges, excessive heat, moving parts, and areas where they can be pinched or rubbed.
- Identify each bank clearly. Connect Bank 1, Bank 2, and Bank 3 to the intended batteries rather than relying on memory.
- Install the specified protection. Use the fuse, breaker, wire gauge, and connectors required by the manufacturer’s instructions.
- Connect the battery-side wiring with power isolated. Don’t make or change battery connections while the charger is energized.
- Select the correct charging profile. Where individual bank selection is provided, verify the setting for each battery separately.
- Energize the system and check every bank. Confirm that each battery is recognized and charging normally before leaving the installation unattended.
A good installation should be easy to understand months later. If you open the battery compartment and immediately know which cable goes to which battery, you’ve already done part of the job correctly.
Mounting Location Matters More Than It Looks
Don’t choose the mounting position simply because the charger physically fits.
Think about water exposure, vibration, heat, cable routing, and service access together. A charger installed beside a battery may have short cable runs, but if it is sitting where water repeatedly collects, that’s not a good trade.
Likewise, hiding the unit behind another piece of equipment may protect it physically but make the status indicators and connections difficult to inspect.
For a permanent onboard installation, aim for a location that is:
- Firm enough to handle normal boat vibration.
- Protected from unnecessary direct spray and standing water.
- Away from excessive engine or exhaust heat.
- Accessible for inspection.
- Suitable for the charger’s specified mounting orientation.
- Large enough to accommodate the charger and cable bends without forcing connections.
Wiring: Think Bank-by-Bank, Not Charger-to-Battery-Group
A three-bank charger should be thought of as three separate charging paths sharing one enclosure.
At a high level, the arrangement looks like this:
                 SHORE POWER / AC SUPPLY
                         │
                         ▼
                ┌───────────────────┐
                │  3-BANK ONBOARD   │
                │     CHARGER       │
                └───────────────────┘
                   │       │       │
                 Bank 1  Bank 2  Bank 3
                   │       │       │
                   ▼       ▼       ▼
                Battery  Battery  Battery
                   1       2        3
The important point is that each charging bank must terminate at the battery it is intended to charge. Don’t assume that three batteries connected somewhere in the same electrical system are automatically equivalent to three correctly wired charging banks.
If the boat uses battery switches, parallel connections, trolling-motor wiring, house loads, or other distribution equipment, the actual electrical arrangement can become more complicated. That’s where the boat’s wiring diagram and the charger’s installation instructions take priority over a generic diagram like the one above.
Fusing and Wire Gauge: Follow the Manufacturer, Don’t Guess
This is one area where giving a universal fuse size or wire gauge would be misleading.
The correct protection depends on the charger’s output, cable length, conductor size, installation method, and the manufacturer’s specified requirements. A 30A total charger does not automatically mean you should install one 30A fuse somewhere and call the installation finished.
Use the manufacturer’s specified:
- Fuse or circuit-breaker rating.
- Cable gauge.
- Maximum cable length.
- Terminal or connector type.
- Fuse location.
- AC input protection.
- Grounding or bonding requirements.
Where individual DC outputs are separately protected, the protection should be appropriate to that individual circuit. The goal is for the protective device and conductor to work together correctly—not simply to choose the biggest fuse that happens to fit.
If the manufacturer’s instructions call for a particular fuse arrangement, follow that arrangement exactly.
Common Installation Mistakes to Avoid
Connecting the Wrong Bank to the Wrong Battery
This is probably the simplest mistake and one of the easiest to prevent.
Label the batteries before installation, then label the charger leads if necessary. If one bank is intended for the starting battery and another for a lithium trolling battery, make that relationship obvious.
Assuming All Three Batteries Need the Same Charging Mode
They may not.
A mixed setup can contain AGM, lead-acid, GEL, or LiFePO4 batteries. If the charger provides independent charging profiles, use the profile appropriate for that particular battery.
Choosing a Location Based Only on Size
A charger can fit physically and still be poorly installed.
Allow sensible room for cable routing, mounting hardware, inspection, and the manufacturer’s required clearances. Don’t bend or strain cables just to make an installation look tidy.
Running Cables Where They Can Rub
Boat vibration can turn a tiny contact point into a damaged cable over time.
Avoid sharp edges and moving components, secure cables appropriately, and use suitable protection where the cable passes near potential abrasion points.
Ignoring the Battery Manufacturer’s Limits
The charger’s maximum output isn’t necessarily the correct charging current for every battery. Check the battery manufacturer’s recommendations for charging current, voltage, temperature, and chemistry before connecting it.
What About Battery Switches and Parallel Connections?
This deserves extra caution.
Boat battery systems can include ON/OFF switches, selector switches, automatic charging relays, parallel connections, isolators, trolling-motor wiring, and house loads. The correct charging arrangement depends on how your particular boat is wired.
Don’t assume that turning a battery switch to OFF automatically isolates every electrical path, and don’t assume that connecting batteries in parallel turns multiple batteries into one appropriate charger bank.
If you’re unsure how the existing battery system is configured, get the boat’s wiring diagram or have a qualified marine technician verify it before modifying the installation.
A Clean Installation Should Look Boring
That’s actually a compliment.
You want short, sensible cable routes, secure connections, appropriate protection, clearly identified batteries, and no improvised wiring. There shouldn’t be loose cables hanging across the compartment or connections that require you to remember what you did six months ago.
Once everything is connected, check the system bank by bank. Verify that the charger recognizes the batteries, the expected charging indicators appear, and there are no unexpected fault messages or abnormal heat at the connections.
If anything looks wrong, shut the system down and troubleshoot it before leaving the charger connected unattended.
When It’s Better to Stop and Get Professional Help
If the boat has a complicated electrical system, multiple battery banks, lithium batteries with a sophisticated battery-management system, an inverter, shore-power equipment, or wiring you cannot confidently identify, this is a sensible point to involve a qualified marine electrician or technician.
The charger itself may be straightforward. The boat’s existing electrical system may not be.
The safest installation is not the one completed fastest; it is the one where every bank, cable, fuse, and connection has a known purpose and the finished system matches both the charger manufacturer’s instructions and the boat’s electrical design.
FAQs About 3 Bank Marine Battery Chargers
Is a 30A 3-bank marine battery charger actually delivering 30A to each battery?
No. This is one of the most important numbers to understand before buying a three-bank charger. A 30A three-bank charger generally means 30A of total charging capacity, not 30A for every battery. For example, the NOCO GENPRO10X3 is rated at 30A total, with 10A per bank.
That doesn’t make a 30A charger weak. For many recreational fishing boats, 10A per bank is a practical charging rate because all three batteries can be charged at the same time. The more useful question is whether 10A per bank is appropriate for your battery capacity and how quickly you need the boat ready again. If your batteries are very large and routinely come home heavily discharged, recharge time deserves more attention than the headline “30A” figure.
Can the NOCO GENPRO10X3 charge an AGM starting battery and LiFePO4 trolling batteries at the same time?
Yes, and this is one of the reasons its independent bank control is so useful. Each bank has its own selectable charging mode, allowing a conventional 12V battery on one bank and compatible lithium batteries on other banks without forcing the entire charger into one chemistry setting.
For a mixed boat, that can look something like this:
- Bank 1: AGM starting battery.
- Bank 2: LiFePO4 trolling battery.
- Bank 3: Another compatible lithium or deep-cycle battery.
The important part is not simply seeing the word “lithium” on the specification sheet. Check the battery manufacturer’s charging requirements, including charging voltage, recommended current, temperature limits, and BMS requirements. The charger needs to be compatible with the actual batteries installed, not merely the category they belong to.
Is the ProMariner 44021 a better choice than a 30A three-bank charger if my batteries finish charging at different times?
It can be, depending on the boat.
The interesting thing about the ProMariner 44021 is its Distributed-On-Demand charging system. Instead of assuming that every bank needs the same amount of current throughout the entire cycle, it can redirect available charging capacity toward batteries that still need it. So a 20A total charger shouldn’t automatically be dismissed simply because another model says 30A on the label.
Here’s the practical distinction: if your priority is maximum total charging capacity, a 30A model has the obvious advantage. If your batteries frequently arrive at different states of charge and you value intelligent current allocation, the ProMariner’s approach becomes much more interesting.
In other words, don’t compare 20A versus 30A without asking what happens to that current during an actual charging cycle. That’s where the specifications start becoming useful rather than just impressive.
Should I leave a 3-bank onboard battery charger connected all the time during boat storage?
If the charger and batteries are suitable for continuous maintenance charging, the installation is correct, and the manufacturer permits that operating arrangement, an onboard charger can be left connected to maintain the batteries during storage. That’s one of the biggest reasons people install these systems in the first place.
But “leave it connected” should never mean “forget the boat exists.” During longer storage periods, periodically check:
- Charger status and fault indicators.
- Battery terminals and cables.
- Battery condition and any unusual swelling, leakage, heat, or odor.
- Shore-power and AC connections.
- Whether the boat has parasitic electrical loads.
- Any change in battery voltage or charging behavior.
For lithium batteries, follow the specific storage instructions from the battery manufacturer. Lithium storage requirements can differ substantially from conventional lead-acid practice, particularly around temperature and state of charge.
What is the biggest mistake people make when installing a 3-bank marine battery charger?
It usually isn’t choosing the wrong brand. It is treating the charger as a standalone product instead of part of the boat’s electrical system.
A charger can have excellent specifications and still be poorly suited to an installation if the bank connections, fusing, cable size, battery chemistry, or mounting location are wrong. This becomes even more important when the boat already has battery switches, parallel connections, isolators, house loads, trolling-motor wiring, or lithium battery-management systems.
Before installation, verify the basics:
- Each charging bank is connected to the intended battery.
- The battery chemistry and charging profile are correct.
- The specified wire gauge, fuse or breaker, connectors, and cable lengths are followed.
- Cables are protected from abrasion, heat, movement, and sharp edges.
- The charger is mounted securely in a suitable location.
- AC power is isolated before making or changing battery-side connections.
And here’s the part worth remembering: a waterproof charger is not a waterproof installation. A sealed enclosure doesn’t protect a loose terminal, badly routed cable, incorrect fuse, or connection sitting where water continually collects. The quality of the installation ultimately matters just as much as the quality of the charger itself.
Final Verdict: Choosing the Right 3 Bank Marine Battery Charger
After comparing these five chargers by actual charging architecture, battery compatibility, marine protection, installation practicality, and long-term use, there isn’t a sensible reason to call every three-bank charger interchangeable. They solve slightly different problems.
For most boat owners, the NOCO GENPRO10X3 is the strongest all-around choice because its 30A total output, independent 10A banks, selectable chemistry modes, thermal sensing, IP68 construction, and maintenance capability cover the needs of a broad range of three-battery setups. It is the option I’d be most comfortable recommending when you want one permanent onboard charger that you don’t have to think about after every trip.
The ProMariner 44021 takes a different route. Its Distributed-On-Demand system makes the 20A rating more interesting than the number suggests, particularly when three batteries regularly finish at different charge levels. The FirstPower Pro 10X3 is the practical value play, offering 30A total output, independent modes, diagnostics, and IP68 protection. The CXRCY pushes further into feature territory with 9-stage charging, recovery functions, and broad battery support, while the LiTime makes the most sense when LiFePO4 is a major part of the equation.
The real takeaway is simple: don’t buy the charger with the most impressive specification sheet—buy the one that matches your batteries and the way your boat is actually used. A starting battery, two trolling batteries, and a lithium-heavy setup can all need different priorities even though all three are described as a “3-bank system.”
And before placing the order, check your battery chemistry, capacity, charging requirements, physical mounting space, cable routing, and existing boat wiring. That final five-minute check is worth far more than another page of marketing claims. When those details line up, a good onboard charger quietly does exactly what you bought it for: keep all three batteries ready without making battery maintenance another job every time you go boating.
Also Check: