7 Best Rooftop Tents for Jeep Gladiator in 2026: Lightweight, 4-Season, Solar & Aluminum Builds
If you own a Jeep Gladiator, a rooftop tent can turn it into a genuinely capable camping rig—but only when the tent, rack and truck are treated as one system. The Gladiator’s 5-foot bed measures 60.3 inches long and 56.8 inches wide, which gives you a practical foundation for a bed-rack setup while still leaving the truck usable for everyday driving and gear.
The first thing to get right is weight and mounting, not the number of people a tent claims to sleep. The tent, rack, mounting hardware, bedding and camping equipment all add to the overall load, while the rack has its own structural limits. Jeep lists up to 1,720 lb of 4×4 payload for the 2026 Gladiator Sport S, but that figure varies by configuration and should never be confused with a rooftop-tent or rack rating.
For this guide, I concentrated on rooftop tents that make practical sense for real Gladiator camping, including aluminum and hard-shell construction, manageable weight, 2–3-person sleeping layouts, four-season weather protection, quick deployment, insulation, condensation control and useful solar or power features. Some of the newer options have limited long-term owner history, so I have kept manufacturer claims separate from proven durability. The aim is simple: help you choose a rooftop tent that works with the Gladiator you actually have, not one that only looks good on a specification sheet.
Best Jeep Gladiator Rooftop Tent: Top 2026 Picks for Lightweight, Durable & Off-Grid Builds
#1. SanHima Aluminium Fold-Out Rooftop Tent
Best aluminum rooftop tent for Jeep Gladiator owners who want a sturdy fold-out design, practical sleeping space and a truck-friendly hard-shell setup.
#2. Bayati Naturnest Sirius 1 Plus Rooftop Tent
Best 4-season rooftop tent for Jeep Gladiator campers who prioritize a roomier 2–3-person interior, weather protection and comfortable longer stays.
#3. HEYFUN Adventurer Pro Hard Shell Rooftop Tent
Best lightweight rooftop tent for Jeep Gladiator owners looking for an aluminum hard-shell design with practical 2–3-person sleeping capacity.
#4. Jiadrooe Hard Shell Rooftop Tent
Best insulated rooftop tent for Jeep Gladiator camping when thermal protection, anti-condensation features and built-in USB power are high on the list.
#5. BAMACAR Naturnest Hard Shell Rooftop Tent
Best hard-shell rooftop tent for Jeep Gladiator owners wanting a straightforward 2–3-person setup for truck camping and overland trips.
#6. WildFinder Hard Shell Rooftop Tent
Best value rooftop tent for Jeep Gladiator owners seeking a simple hard-shell camping solution for truck and SUV setups.
#7. ARCTWONDER Solar Panel Rooftop Tent
Best solar rooftop tent for Jeep Gladiator campers who want an integrated power-focused setup alongside the convenience of a pop-up hard shell.
Expert Tip
Before choosing a rooftop tent for a Jeep Gladiator, look at the complete mounting system, not just the tent’s weight. The Gladiator’s 5-foot bed gives you a very workable platform, but the tent still depends on the bed rack or roof rack, mounting height, rack capacity and available payload. A lightweight tent can become a poor choice if the rack underneath it is not rated for the setup.
There is also a practical difference between these tents that product listings do not always make obvious. An aluminum hard shell is attractive for a Gladiator because it can give you a rigid enclosure without the bulk of a traditional soft tent, while a fold-out design can make better use of the truck’s available camping space. For colder or wetter trips, features such as an insulated liner, anti-condensation mat and four-season construction are more meaningful than a long feature list.
And one honest point: newer rooftop tents do not automatically deserve a higher ranking. When long-term owner feedback is limited, I would rather judge what can actually be verified—construction, dimensions, weight, sleeping capacity, setup design and useful hardware—than pretend a product has years of proven durability when it doesn’t. That’s the approach used throughout this list.
How We Choose These Jeep Gladiator Rooftop Tents
We did not rank these tents simply because they say “fits Jeep Gladiator” on the product page. That phrase is too broad to be useful on its own. A proper Gladiator setup has to work as a complete system, so the first question was whether each tent makes practical sense on a truck of this size and type.
1. We started with the mounting reality.
The Gladiator is a pickup, so we considered tents that make sense with a suitable bed rack or elevated mounting system rather than treating the truck like a conventional SUV. The rack’s own dynamic and static ratings still need to be checked against the specific tent and camping load.
2. Weight was treated as a real specification, not a marketing number.
The tent is only one part of the load. Rack weight, mattress, bedding and camping equipment all add up. That is why lighter constructions received attention, particularly where they offered a useful combination of rigidity and sleeping space.
3. We looked closely at construction.
For this list, hard-shell designs are important because they generally offer faster deployment, a rigid outer enclosure and better protection when the tent is closed. Aluminum construction was given particular consideration because several of the selected models use it as a core part of their design.
4. Sleeping capacity had to make sense for the tent’s footprint.
A “2–3 person” label is useful, but it does not tell the whole story. We considered whether the layout appears practical for two adults, occasional third-person use and real camping gear, rather than assuming the advertised capacity automatically means comfortable sleeping space.
5. Weather protection mattered more than flashy extras.
Water resistance, ventilation, condensation management, insulation and four-season positioning can have a much bigger effect on an actual camping trip than a handful of convenience features. That is why the Jiadrooe’s thermal liner and anti-condensation setup, for example, give it a different appeal from a simpler hard-shell tent.
6. We separated genuinely useful features from attention-grabbers.
A USB power hub can be convenient. Integrated solar capability can be useful. Adjustable crossbars can simplify installation. But none of those features automatically makes a tent better. The basic tent has to make sense first; extras only matter when they solve a real camping problem.
7. We also accounted for the lack of long-term feedback.
This is especially important with several of the newer models here. We have not treated limited review history as proof of poor quality, but we also have not turned manufacturer claims into “proven” durability. Where real-world evidence is thinner, the ranking relies more heavily on observable specifications, construction, layout and practical design.
The result is not a list of seven tents that are all good for exactly the same buyer. It is deliberately mixed: SanHima stands out for its aluminum fold-out approach, Bayati leans toward space and four-season comfort, HEYFUN targets a lighter 2–3-person hard-shell setup, while Jiadrooe brings more attention to insulation and condensation control. ARCTWONDER takes a different route with solar capability.
That distinction is intentional. The best rooftop tent for a Jeep Gladiator is not necessarily the most expensive, largest or most heavily advertised one. It is the one whose weight, mounting requirements, sleeping capacity and features make sense for how you actually use the truck.
#1. SanHima Aluminium Fold-Out Rooftop Tent
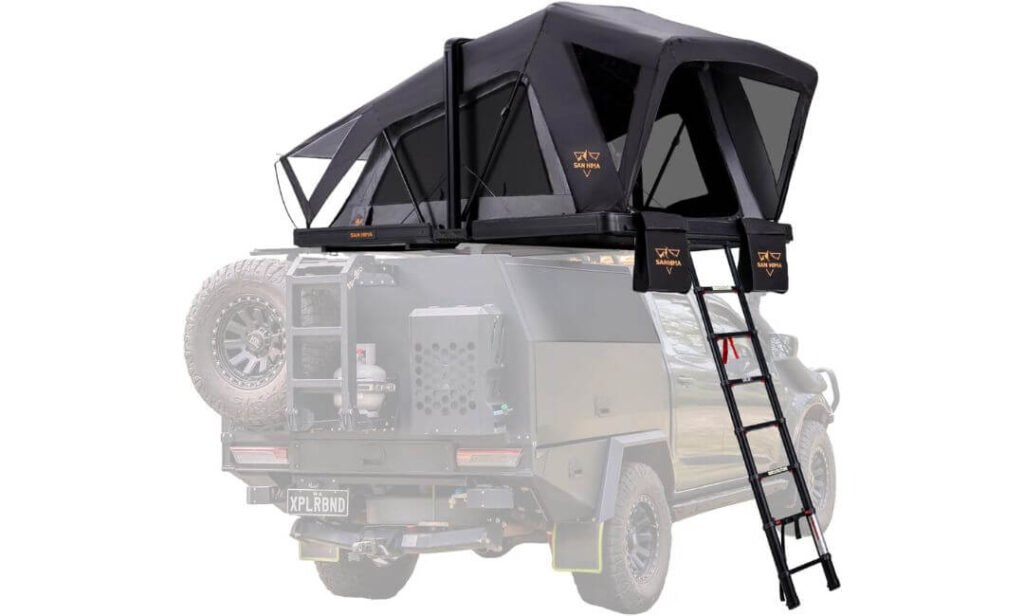
Quick Specs:
- Tent weight: 131.5 lb — a manageable figure for a full-size 3-person fold-out design
- Usable sleeping area: 84.65 × 51.18 in — generous length for two adults
- Packed size: 56.69 × 42.52 × 9.84 in — relatively low-profile when closed
- Sleeping capacity: Up to 3 people
- Weather protection: 2,000 mm main body and 3,000 mm canopy
- Fabric: 600D Oxford main body with full blackout lining
- Mattress: 2.17-in high-density foam
- Camping season: 4-season
- Power access: USB-C, USB-A and 12V CIG socket
- Included practical gear: Anti-condensation mat, LED strip and telescopic ladder
The interesting thing about this tent is that 131.5 lb does not tell the whole story. It is light enough to remain a realistic option for a Gladiator rack setup, yet it opens into an 84.65-inch-long sleeping area. That is a useful combination: you are not carrying an enormous closed tent just to gain a little extra room once you arrive at camp. The 9.84-inch closed height also keeps the package reasonably tidy above the truck.
Comfort is another area where the specification sheet actually translates into something useful. The 2.17-inch high-density mattress gives you a proper sleeping surface straight out of the box, while the full blackout lining is particularly welcome when the sun starts hitting the tent early in the morning. Add the 2,000 mm main-body and 3,000 mm canopy water-resistance ratings, and this is clearly designed for more than occasional dry-weather weekends.
The smart features are surprisingly well chosen. USB-C, USB-A and 12V CIG power access cover the devices most campers actually carry, while the LED strip takes care of nighttime lighting without immediately reaching for a flashlight. The anti-condensation mat, multiple mesh openings, storage organizers and AC duct opening are the kind of details you notice after spending a few nights inside a tent—not features that merely look good in a listing.
(In other words, this is a comfort-focused truck tent that happens to keep its footprint surprisingly sensible when packed.)
What We Like
- 84.65-inch sleeping length makes the interior considerably more useful than its compact closed dimensions suggest.
- 131.5-lb overall weight is reasonable for a 3-person fold-out design.
- The combination of blackout lining and a 2.17-inch mattress adds genuine sleeping comfort.
- USB-C, USB-A and 12V power make the interior much easier to live with on longer trips.
- The anti-condensation mat and ventilation openings show attention to real camping conditions rather than just exterior design.
What We Don’t
- The only thing worth planning around is the mounting system. At 131.5 lb, this is still a substantial piece of camping equipment, so it is worth confirming that your chosen Gladiator rack has the appropriate capacity and mounting dimensions before installation.
Jeep Gladiator Fitment
For the Jeep Gladiator, this tent makes the most sense as part of a properly matched bed-rack setup. The truck’s pickup-bed layout gives you more flexibility than a conventional SUV, but the tent should be treated as one component of the complete system—the rack, mounting hardware and camping load all need to work together.
The useful numbers to take to your rack manufacturer are the tent’s 56.69 × 42.52-inch closed footprint and 131.5-lb weight. Check the rack’s rated capacity and crossbar spacing against those dimensions before buying. That small bit of preparation can save you from discovering after delivery that the tent technically fits the truck but not the rack you planned to use.
The Insider Pro-Tip
I’d pay more attention to the 84.65 × 51.18-inch open footprint than the “3-person” label. Two adults can make much better use of that space, particularly when you have bedding and small personal items inside. For three people, the tent can work, but the experience naturally depends on how much gear you bring and how comfortable everyone is sharing the available floor area.
One more thing I genuinely like here is the combination of low closed height and full-size sleeping length. That is the kind of trade-off that makes sense on a Gladiator: keep the tent reasonably compact while travelling, then get meaningful interior space when you stop. If your rack checks out dimensionally and by load rating, this is a much more compelling reason to consider it than simply seeing “3-person, 4-season” on the product page.
#2. Bayati Naturnest Sirius 1 Plus Rooftop Tent
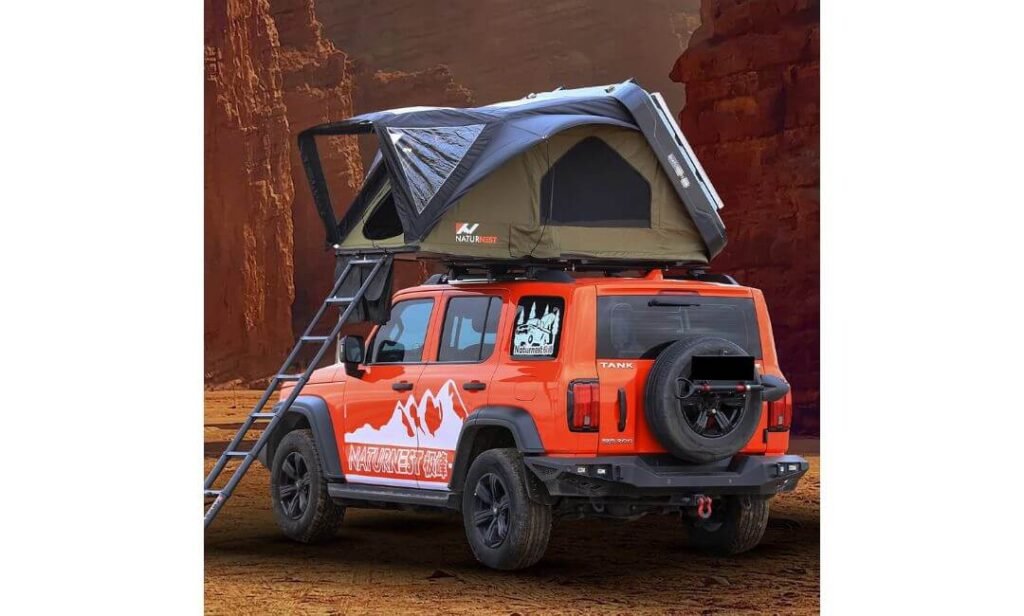
Quick Specs:
- Tent weight: 160 lb
- Sleeping capacity: 2 adults + 1 child
- Interior footprint: 82.7 × 63 in
- Open height: 47.2 in
- Mattress: 1.97-in non-deformed foam
- Construction: ABS hard shell with aluminum frame
- Insulation: Honeycomb thermal and sound-insulating panels
- Weather use: 4-season
- Deployment: About 30 seconds
- Hardware: 316 stainless-steel gas struts and YKK zippers
- Extra carrying option: Integrated crossbars for lightweight accessories
- Climate-control provision: Dedicated heater/cooler vent
What immediately separates this one from a typical hard-shell tent is how much usable space it creates without turning setup into a project. The 82.7 × 63-inch interior is genuinely generous for two adults, and the 47.2-inch interior height makes the space feel less like a sleeping box once you’re inside. For a Gladiator owner who actually intends to spend several nights in the tent rather than simply carry it for emergencies, that extra room matters.
The 30-second deployment is the feature I would care about most after a long day on the road. Release the shell, bring the ladder down and the basic shelter is ready. There is no large fabric body to unfold across the truck and no elaborate pole arrangement waiting for you after you’ve already driven for hours. The 1.97-inch mattress and blackout fabric then make the inside much more focused on sleeping comfortably rather than merely providing somewhere dry to lie down.
The construction is where the higher-end positioning becomes easier to understand. The ABS hard shell, aluminum frame and honeycomb insulating panels are designed to add rigidity while also helping with temperature and noise. The 316 stainless-steel gas struts and YKK zippers are similarly sensible choices for equipment that will spend its life exposed to weather and road grime. I also like the dedicated heater/cooler vent, because it acknowledges something many rooftop-tent descriptions gloss over: staying comfortable in extreme temperatures is often about ventilation and climate control, not just thicker fabric.
(This is the sort of tent that makes the most sense when camping comfort is part of the trip—not an afterthought once you reach the trailhead.)
What We Like
- 82.7 × 63-inch interior gives two adults genuinely useful sleeping room.
- 30-second setup is a major advantage for frequent overnight stops.
- The honeycomb insulation panels bring a more substantial feel than a basic single-layer hard shell.
- 316 stainless-steel gas struts and YKK zippers are reassuring hardware choices for repeated outdoor use.
- The included crossbar system gives you another way to carry lightweight accessories such as a solar panel, provided the overall rack and load limits are respected.
What We Don’t
- The 160-lb weight is reasonable for a large, insulated hard-shell tent, but it makes proper rack selection especially important. In return, you are getting substantially more interior width and insulation than many lighter designs.
Jeep Gladiator Camping Fit
For a Jeep Gladiator, the important part is not simply that the manufacturer lists Jeep vehicles among its compatible applications. The tent still needs a properly rated bed-rack or roof-rack system with suitable crossbar spacing and mounting hardware. Its 160-lb weight should be checked against that complete setup before installation, especially once bedding and camping equipment are added.
The dimensions also deserve attention. With an 82.7 × 63-inch open footprint, this is clearly aimed at campers who value interior space over keeping the smallest possible package. If your Gladiator rack gives you the required mounting width and capacity, that larger footprint can be a real advantage; if you are building an ultra-lightweight setup, one of the lighter tents in this list may make more sense.
The Insider Pro-Tip
The smart way to look at this tent is not “160 lb is heavy” but “what am I getting for those 160 lb?” Here, part of that weight is buying you a large sleeping platform, ABS shell, aluminum structure and insulated honeycomb panels. If you regularly camp in colder nights, hot weather or noisy environments, those features can be worth more to you than saving a few dozen pounds with a simpler tent.
One detail I would not overlook is the integrated crossbar capability. It can free up some space for lightweight accessories such as a solar panel without putting those items inside the sleeping area. Just keep that secondary load sensible and within the manufacturer’s limits. For a Gladiator that is being built as a genuine weekend-to-overland camper, this is one of the more comfort-oriented choices here—and its strongest argument is the combination of fast deployment, unusually wide sleeping space and insulated hard-shell construction, rather than any single headline feature.
#3. HEYFUN Adventurer Pro Hard Shell Rooftop Tent
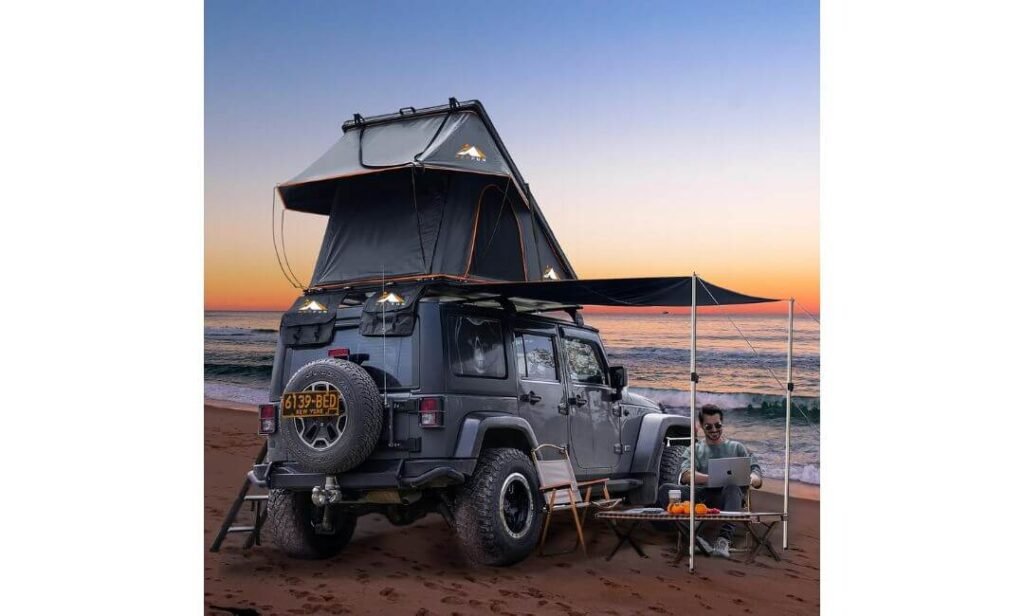
Quick Specs:
- Tent weight: 160 lb
- Sleeping capacity: 2 adults + 1 child
- Sleeping footprint: 83.86 × 51.57 in
- Closed height: About 7 in
- Open height: 62.99 in
- Shell: Aircraft-grade aluminum
- Mattress: Thick non-deformable sleeping mat
- Weather protection: Up to 5,000 mm water resistance
- Camping use: 4-season / all-season
- Deployment: About 5 seconds
- Load capacity: Up to 660 lb
- Included extras: Side awning, condensation mat, LED strip, ladder and shoe-storage bags
Five seconds sounds like a marketing number until you imagine arriving at camp after a long drive, getting out of the Gladiator and having the tent essentially ready before you’ve finished unpacking the basics. That is the real strength of this design. The hydraulic gas-strut system handles the opening and closing, while the 83.86 × 51.57-inch sleeping area gives you enough length for two adults without making the tent excessively wide.
The aircraft-grade aluminum shell is another reason this model deserves attention. It gives the tent a rigid exterior while the waterproof rubber seal helps protect the closed structure from the weather. Inside, the combination of a non-deformable sleeping mat, flocked floor lining and condensation mat is much more relevant to everyday camping than another list of decorative features. The 13 storage pockets are also a surprisingly useful touch when two or three people are sharing a relatively compact sleeping space.
Then there is the camping setup around the tent itself. The 5,000 mm water-resistance rating, windproof layers, mesh ventilation and all-season positioning make it better suited to changing weather than a basic summer RTT. The included side awning gives you a little sheltered space beside the truck, while the built-in LED strip handles nighttime lighting. These are small things, but they reduce the amount of extra equipment you need to carry—which is exactly what you want when the Gladiator is already loaded with camping gear.
(The clever part is not simply that it opens in five seconds; it is that the fast deployment, rigid shell and useful camp accessories all work toward the same low-fuss setup.)
What We Like
- 5-second opening and closing is genuinely useful for frequent overnight stops.
- Aircraft-grade aluminum shell gives the tent a solid, rigid feel without relying on a soft outer structure.
- The 83.86-inch length provides useful sleeping room for two adults.
- 5,000 mm water resistance, ventilation and condensation management make the design suitable for varied weather.
- The side awning, LED strip and 13 storage pockets add practical value rather than simply inflating the feature list.
What We Don’t
- The 160-lb weight puts this in the same serious mounting category as other larger hard-shell tents here, so it is best paired with a properly rated rack rather than choosing the rack as an afterthought.
Jeep Gladiator Mounting Setup
On a Jeep Gladiator, the right way to approach this tent is to start with the rack. The manufacturer calls for crossbars capable of supporting at least 165 lb, but that should not be interpreted as a universal guarantee that any Gladiator factory setup will be suitable. Your specific rack, crossbar spacing and mounting hardware need to accommodate the tent’s 160-lb weight and dimensions, with the rest of your carried load considered separately.
The compact 7-inch closed height is a nice advantage once mounted because it keeps the hard shell relatively low while travelling. Before purchasing, confirm that your rack provides the required mounting surface and that its dynamic and static ratings are appropriate for the complete setup. For a bed-rack installation, that check is particularly important because the rack becomes the actual foundation of the tent.
The Insider Pro-Tip
If your camping style involves Friday-night arrivals, short stops and moving again the next morning, I would put the five-second deployment near the top of your priority list. A tent that takes a few minutes to assemble may sound perfectly reasonable at home; after several hours behind the wheel, those extra minutes feel very different. Here, the hydraulic opening system genuinely changes how casually you can use the tent.
Also, don’t let the 2–3-person rating convince you that this is automatically a three-adult tent. The 83.86 × 51.57-inch sleeping area is much better thought of as a comfortable two-adult layout with occasional child capacity. That is a more realistic way to plan the space—and it leaves room for bedding without turning the interior into a gear pile. For a Gladiator owner who values speed, rigid aluminum construction and a ready-to-use camping setup, that combination is where this tent earns its place.
#4. Jiadrooe Hard Shell Rooftop Tent
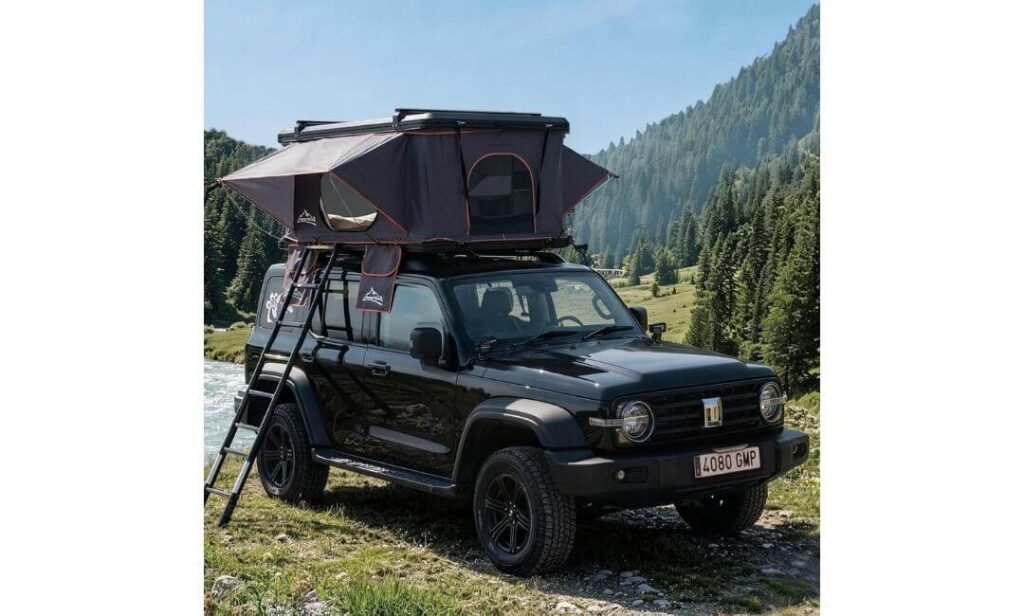
Quick Specs:
- Tent weight: 176 lb
- Sleeping capacity: 2 adults + 1 child
- Interior size: 77 × 64 × 40 in
- Construction: ABS hard shell with 600D waterproof fabric
- Waterproofing: Up to 5,000 mm claimed for the 600D material
- Season rating: 4-season
- Setup: Hydraulic pop-up system, about 60 seconds
- Mattress: High-density two-layer mattress with integrated anti-condensation mat
- Insulation: Detachable thermal liner
- Power: Built-in USB power controller
- Lighting: Dual cool/warm LED strips
- Integrated load bars: Adjustable aluminum crossbars rated at 150 lb
Some rooftop tents try to solve camping by simply making the sleeping area bigger. This one takes a different approach: it tries to make the tent itself part of your cargo system. The two adjustable aluminum crossbars sit above the hard shell and are designed to carry lightweight adventure equipment, so a solar panel, compact board or similar gear does not necessarily have to compete for space inside the Gladiator.
The more important story, however, is underneath the shell. At 176 lb, this is not a lightweight RTT, but the weight comes with features aimed squarely at extended camping: a detachable thermal insulation liner, two-layer high-density mattress and integrated anti-condensation mat. Those details are particularly useful when the temperature drops at night or humidity builds inside the tent. The 77 × 64-inch footprint also gives two adults a genuinely broad sleeping platform, with the third-person rating making more sense for a child than three adults.
Then there is the day-to-day convenience. The hydraulic pop-up system gets the tent open in roughly a minute, while the built-in USB power hub and dual-mode LED lighting mean fewer loose accessories inside the sleeping area. The ABS shell is also shaped with road travel in mind, which is a sensible consideration on a Gladiator that may spend more time moving between camps than sitting at one campsite.
(The clever part here is the combination of sleeping shelter and extra carrying capability—the tent is designed to help organize the whole camping setup, not just provide a mattress above the truck.)
What We Like
- Adjustable aluminum crossbars add useful carrying flexibility without using interior sleeping space.
- Thermal insulation liner + anti-condensation mat is a meaningful combination for colder and humid conditions.
- 77 × 64-inch floor area gives two adults plenty of width.
- 60-second pop-up setup keeps roadside or late-arrival camping relatively painless.
- USB power hub and dual-mode lighting are practical features that you can actually use every night.
What We Don’t
- At 176 lb, it belongs on a carefully selected rack, but that extra weight also reflects the tent’s larger footprint, insulation package and integrated cargo capability.
Jeep Gladiator Mounting Setup
For a Jeep Gladiator, I would treat the adjustable crossbars as an accessory rather than as a reason to skip checking the main mounting system. The tent itself weighs 176 lb, while its integrated crossbars have a separate stated capacity of 150 lb. Those are two different numbers with two different jobs, so your Gladiator’s supporting rack still needs to be appropriate for the tent before you add anything on top.
The 77 × 64-inch dimensions are also worth checking against your chosen bed rack or roof-rack arrangement. Make sure the mounting points and crossbar spacing work with the supplied universal hardware, and keep any additional equipment on the upper bars within their stated limit. For a Gladiator build carrying recovery gear, camping equipment and other accessories, leaving some margin is simply the sensible approach.
The Insider Pro-Tip
If you are building your Gladiator for real four-season use, I would pay more attention to the insulation and condensation setup than the headline “60-second setup.” Speed is great, but waking up to a damp mattress or losing heat through the tent walls is what actually changes whether you enjoy the next night. The detachable liner gives you some flexibility too—you can use the tent differently as temperatures change instead of treating it as a one-condition shelter.
And there is one easy mistake to avoid: do not treat the 150-lb crossbar rating as additional tent capacity for the rack itself. It refers to what you can carry on those integrated bars. Your supporting rack has its own limits, and the 176-lb tent has already consumed a substantial part of that system’s capacity. Get that foundation right, and the Jiadrooe becomes a particularly interesting choice for a Gladiator owner who wants insulation, quick deployment and extra cargo space in one package.
#5. BAMACAR Naturnest Hard Shell Rooftop Tent
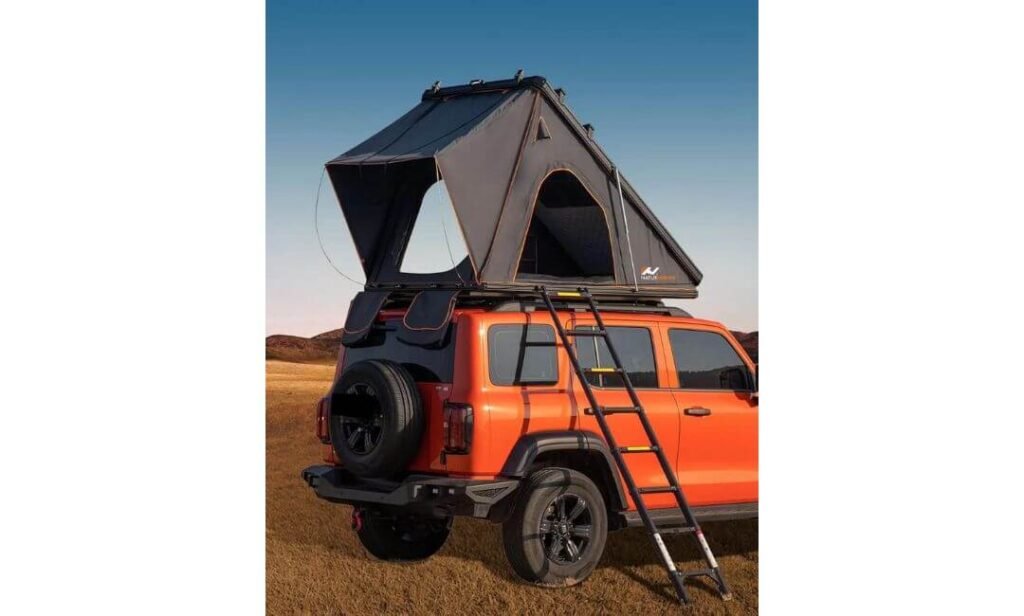
Quick Specs:
- Tent weight: 176 lb
- Sleeping capacity: 2 adults + 1 child
- Sleeping footprint: 83 × 51 in
- Open height: 59 in
- Shell: Aircraft-grade aluminum hard shell
- Fabric: 310G polyester
- Water resistance: Up to 5,000 mm
- Mattress: 5 cm thick
- Season rating: 4-season
- Setup: About 30 seconds
- Gas struts: 8,000N
- Power: USB socket and color-changing LED strip
- Extra cargo: Dedicated upper crossbars for lightweight accessories
- Other useful features: Condensation mat, marine-grade mat, AC/heater channel and 10 interior storage compartments
There is a very practical reason this tent catches my attention for a Jeep Gladiator: it focuses on making the entire camping routine easier, not just the sleeping compartment. The 30-second pop-up design, 7.5-foot retractable ladder and three access points mean you can arrive, open the shell and get settled without turning camp setup into another job. For a truck that is likely to be used for road trips and overlanding, that simplicity is worth more than a complicated tent with impressive specifications.
The 5 cm mattress is one of its stronger comfort points. That is noticeably more substantial than the thinner mattresses found in many compact RTTs, while the 99% blackout fabric is designed to keep the sleeping area dark when daylight arrives. The 83 × 51-inch footprint is a sensible two-adult layout, with the advertised third-person capacity being better suited to a child. Ten internal storage compartments and exterior shoe storage also help keep the sleeping area from becoming cluttered with the small items that usually end up everywhere in a rooftop tent.
Weather preparation is where the design becomes particularly interesting. The 310G polyester fabric, 5,000 mm waterproofing, sealed windows and internal condensation and marine-grade mats are all aimed at keeping moisture under control. The dedicated AC/heater channel is another genuinely useful feature for people who camp through changing seasons. You are not simply getting a hard shell over a fabric tent; the design attempts to deal with heat, cold and humidity as part of the overall camping experience.
(The standout here is the way fast deployment, substantial bedding and moisture management come together without making the tent dependent on a complicated setup.)
What We Like
- 30-second deployment makes frequent overnight stops much easier.
- 5 cm mattress is a meaningful comfort upgrade for longer stays.
- 5,000 mm water resistance and condensation mats give the tent a more serious wet-weather setup.
- 10 internal storage compartments plus exterior shoe storage are genuinely useful when three people share the space.
- The upper crossbars and AC/heater channel add flexibility for overlanding without changing the basic sleeping layout.
What We Don’t
- At 176 lb, this is best treated as a substantial hard-shell setup, so the supporting Gladiator rack should be selected around the complete installation rather than around the tent alone.
Jeep Gladiator Camping Fit
For a Jeep Gladiator, the advertised vehicle compatibility is only the starting point. The practical question is whether your particular bed rack or roof-rack system provides the required mounting width, spacing and load rating. At 176 lb before adding bedding and personal gear, this is not a tent I would pair with an undersized rack simply because the mounting hardware physically lines up.
The 83 × 51-inch tent footprint can work well with a properly selected Gladiator bed-rack setup, but check the rack manufacturer’s specifications before purchase. Also account for the weight of anything carried on the tent’s upper crossbars. Those bars are useful for lightweight equipment, but they should not be treated as unlimited extra cargo capacity.
The Insider Pro-Tip
The 8,000N gas struts are an interesting specification, but I would not choose this tent purely because the number sounds impressive. What matters to you in the real world is that the shell opens consistently, stays supported and does not turn every setup into a wrestling match. The 30-second deployment is therefore the more useful takeaway; the strut rating simply helps explain how the system achieves it.
One thing I particularly appreciate is that the manufacturer actually mentions condensation management and keeping the tent dry before closing. That is honest camping advice because even a highly water-resistant rooftop tent can develop moisture when people sleep inside it overnight. If you give the tent proper ventilation and let it dry before packing it away, the internal mats, ventilation design and blackout fabric can work much more effectively. For a Gladiator owner planning regular overland trips, that kind of maintenance discipline will matter far more over time than another flashy feature on the box.
#6. WildFinder Hard Shell Rooftop Tent
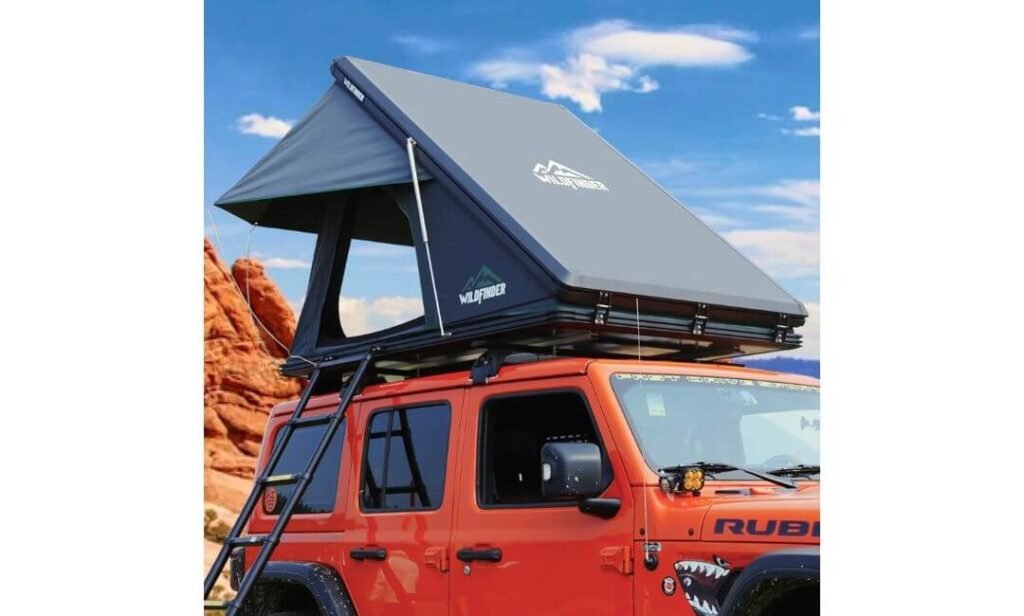
Quick Specs:
- Tent weight: 197.6 lb
- Sleeping capacity: Up to 3 people
- Footprint: 83 × 52 in
- Closed height: 9 in
- Shell: Aircraft-grade aluminum alloy
- Mattress: 5 cm non-deforming mattress
- Weather protection: 5,000 mm rainproof rating
- Season rating: 4-season
- Wind protection: Level 6 claimed
- Snow protection: Level 4 claimed
- Ventilation: 3 mesh windows
- Condensation control: Recessed marine pad + condensation pad
- Included gear: 7.5-ft telescoping ladder, LED strip, 10 organizer bags and 2 shoe organizers
A good hard-shell tent should make you forget about the tent once camp is set up. That is where this one takes a sensible approach. The 83 × 52-inch footprint gives you a proper sleeping platform, while the aircraft-grade aluminum shell keeps the structure rigid and the 9-inch closed height keeps the package reasonably low on the truck. It is not the lightest tent in this guide at 197.6 lb, but the construction is clearly aimed at people who prefer a substantial, durable enclosure over chasing the lowest possible number on the scale.
The sleeping setup is more thoughtful than the basic “3-person” label suggests. A 5 cm non-deforming mattress, recessed marine pad and separate condensation pad address three things you actually notice during a trip: comfort, moisture and keeping the sleeping surface away from accumulated humidity. The three mesh windows also give the interior a way to breathe while maintaining privacy through the blackout fabric. For two adults, the 83 × 52-inch floor is the more realistic sweet spot; three people can use it, but bringing less gear will make that arrangement considerably more comfortable.
Weather resistance is another strong part of the package. The manufacturer lists 5,000 mm rain protection, Level 6 wind resistance, Level 4 heavy-snow protection and 99.99% sun protection. I would treat those classifications as manufacturer claims rather than independent test results, but the overall design does show that this is intended for year-round outdoor use. The stainless-steel pressure hardware, aluminum shell and polyester fabric also make sense for a tent that will spend much of its life exposed to road travel and changing weather.
(What I like most here is the straightforward philosophy: solid shell, serious weather protection, a proper mattress and enough organization to keep the sleeping area usable.)
What We Like
- Aircraft-grade aluminum shell gives the tent a substantial, rigid construction.
- 5 cm mattress + condensation system is a strong combination for overnight comfort.
- 83 × 52-inch sleeping area works particularly well for two adults.
- 9-inch closed profile keeps the tent relatively tidy when travelling.
- The 10 storage organizers and two shoe organizers are genuinely useful once the interior starts filling with camping gear.
What We Don’t
- At 197.6 lb, it is one of the heavier choices here, so it makes the most sense for a Gladiator setup where the rack has been selected specifically around a heavier hard-shell tent.
Jeep Gladiator Fitment
On a Jeep Gladiator, I would focus on the supporting rack rather than relying on a generic “fits Jeep” statement. The tent’s 83 × 52-inch footprint is workable for a properly configured bed-rack system, but the 197.6-lb tent weight means your rack and mounting hardware need to be suitable for the complete installation, including anything you plan to carry inside.
The supplied mounting hardware is intended to work with compatible aftermarket rack systems, but the exact rack dimensions and load ratings still need to be checked before installation. Also remember that the optional upper luggage crossbar shown in the product description is not included, so any additional cargo solution needs to be planned separately.
The Insider Pro-Tip
With a tent this substantial, I would make rack capacity the first purchase decision and the tent the second. That sounds backwards, but it prevents one of the most common rooftop-tent mistakes: buying a tent because the dimensions look perfect, then discovering that the chosen rack leaves very little useful capacity once the tent and camping load are installed.
The other thing worth appreciating is the condensation setup. Even a waterproof tent can become damp inside simply because two people breathe and sleep in a relatively enclosed space. The marine pad and condensation pad are therefore more than filler in the specification sheet. Give the tent sensible ventilation and let the materials dry before closing it after a wet night. Do that consistently, and the combination of an aluminum shell, substantial mattress and moisture management makes this a particularly sensible choice for a Gladiator owner who values durability and comfort over keeping the absolute minimum weight.
#7. ARCTWONDER Solar Panel Rooftop Tent
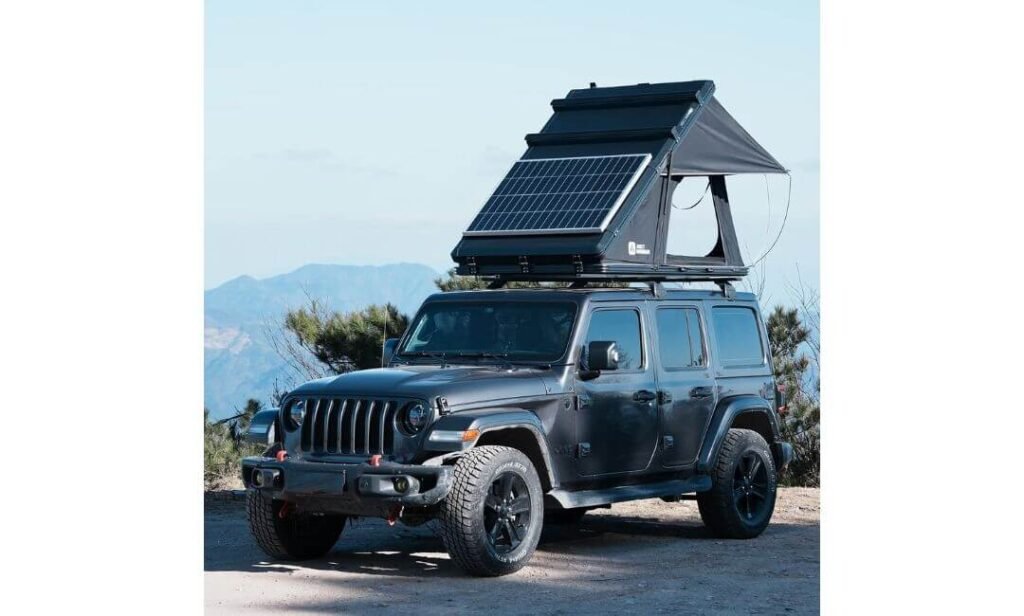
Quick Specs:
- Tent weight: 198 lb
- Sleeping capacity: 2 adults + 1 child or pet
- Interior size: 85 × 52 × 59 in
- Closed height: About 7 in
- Shell material: Aluminum alloy
- Main fabric: 320G polyester
- Water resistance: 5,000 mm
- Season rating: 4-season
- Setup: About 10 seconds
- Solar system: Integrated 12V 216W panel
- Ventilation: 3 large windows with awnings
- Power setup: Solar charging accessories included
The solar panel is the obvious headline, but it is not actually the most interesting thing about this tent. The more useful story is that ARCTWONDER has built the power source into a hard-shell camping package that already has a 7-inch closed profile and a roughly 10-second pop-up system. For a Gladiator owner who wants to spend more time off-grid, that combination can make sense: you get a sleeping platform and a way to replenish portable power without adding another large panel to your camping load.
The 85 × 52-inch interior is also worth paying attention to. It gives two adults a sensible amount of sleeping space, while the 59-inch height and three large windows make the interior feel considerably less enclosed. The windows have awnings, so ventilation does not have to mean leaving the opening completely exposed to rain or direct sun. The blackout treatment is another welcome detail when the morning starts earlier than you do.
Construction is reassuringly straightforward. The bottom plate, top cover and four corners use aluminum alloy, while the 320G polyester fabric uses seam sealing and a claimed 5,000 mm water-resistance rating. The black rubber sun-protection treatment is intended to help with UV exposure. I would still treat the advertised weather ratings as manufacturer specifications rather than independent laboratory guarantees, but the material choices make this a serious four-season-oriented design rather than a lightweight summer shelter.
(The real reason to consider it is simple: if you already carry a portable power station, the included 216W solar panel can turn the tent into part of your off-grid power strategy instead of another standalone piece of gear.)
What We Like
- 12V 216W solar panel gives the tent a genuinely distinctive purpose for off-grid camping.
- 85-inch interior length is useful for two adults.
- 7-inch closed height keeps the hard shell relatively low while travelling.
- 10-second deployment makes short stops and late arrivals much easier.
- Aluminum construction at the major shell points gives the design a more substantial feel than plastic-heavy alternatives.
What We Don’t
- At 198 lb, it is the heaviest tent in this lineup, so the solar capability and aluminum construction need to be weighed against the capacity of your particular Gladiator mounting system.
Jeep Gladiator Mounting Setup
For the Jeep Gladiator, this is another case where “fits Jeep vehicles” should not be confused with universal factory-rack compatibility. The 198-lb tent needs a properly rated bed-rack or roof-rack system, with mounting channels and crossbar spacing that match the supplied hardware. Your rack’s rating should be checked for the tent itself and then for the additional equipment you intend to carry.
The tent’s 85 × 52-inch sleeping footprint is quite practical for a Gladiator camping build, while the 7-inch closed height helps keep the package low. The solar system does add another consideration: plan where the charging equipment and power station will live, and avoid assuming that the tent’s solar panel alone determines the safe cargo capacity of the rack.
The Insider Pro-Tip
If you are buying this because of the 216W solar panel, first decide what you actually want to power. It makes much more sense when connected to a suitable portable power station or battery setup than when treated as a magic replacement for every other electrical component. Your real benefit comes from having a way to replenish stored energy during the day while the Gladiator is parked at camp.
And there is a small but important trade-off here: 198 lb is a serious rooftop-tent weight. The 10-second opening and integrated solar system are excellent conveniences, but they do not remove the need for a properly engineered mounting system. If your Gladiator rack is already built around a heavier RTT and has appropriate capacity, this becomes a genuinely different proposition from the other tents on the list. If your priority is keeping the truck’s camping system as light as possible, the lighter options above are likely to make more sense.
Best Jeep Gladiator Rooftop Tent Comparison (2026) — Weight, Capacity, Setup & Key Features
Jeep Gladiator Rooftop Tent Buying Guide: What Actually Matters Before You Mount One
Buying a rooftop tent for a Gladiator is less about finding the tent with the longest feature list and more about getting the vehicle, rack and tent working together. The Gladiator gives you a useful pickup-bed platform, but that does not mean every RTT advertised for trucks is automatically a sensible fit. Before comparing mattresses, windows or LED lights, work through the load, mounting and daily-use details below.
Start With the Weight, Then Look at Everything Else
Weight should be one of the first filters, but tent weight is only the beginning. The rack, mounting hardware, mattress, bedding and anything permanently stored inside the tent all contribute to the real load your Gladiator is carrying.
That is why a 130–140 lb tent can be considerably easier to integrate than a nearly 200 lb model. In this guide, the difference is significant: the SanHima is 131.5 lb, while the ARCTWONDER reaches 198 lb. Neither number automatically makes one “better,” but it changes what kind of rack and overall camping build makes sense.
For a Gladiator that already carries recovery equipment, tools, coolers and other trail gear, I would leave some capacity in reserve rather than designing the rack setup right up to its limit.
Rack Rating Matters More Than a Universal Fit Claim
This is probably the most important installation point.
A product page saying “fits Jeep Gladiator” usually means the manufacturer has designed the mounting hardware for a range of trucks, SUVs or crossbars. It does not mean every factory rack, bed rack or aftermarket crossbar will safely support that particular tent.
Check these four things against your actual rack:
- Dynamic load rating: the load the rack is designed to carry while the vehicle is moving.
- Static load rating: the greater load the system may support when parked, depending on the rack manufacturer’s specifications.
- Crossbar spacing: the tent’s mounting channels and hardware need to physically line up with the rack.
- Mounting surface and hardware: make sure the supplied brackets are suitable for the rack rather than assuming universal hardware means universal installation.
The distinction between dynamic and static capacity is especially important. Once the Gladiator is moving, bumps, braking, cornering and uneven trails place different stresses on the rack than simply having people sleep in the tent while parked.
Decide Where the Tent Will Actually Sit
For the Gladiator, a bed-rack installation can be a very practical solution because it keeps the tent independent of the vehicle’s factory roof structure. It also leaves the cab roof available for other equipment and can work well with the truck’s overall camping layout.
But measure before buying. Look at the tent’s closed dimensions, mounting-channel position, rack width and crossbar location, not just the open sleeping area. A tent can have an excellent interior and still be awkward if its mounting points do not cooperate with your rack.
Also think about overhang. Depending on the rack height and tent footprint, some tents may extend beyond parts of the bed or toward the front or rear of the truck. That is not automatically a problem, but you should know exactly where the shell will sit before you install it.
Choose the Setup Speed You Will Actually Use
Setup time sounds like a minor specification until you have driven for six hours and reach camp after dark.
A 30-second or 60-second pop-up can make a meaningful difference if you regularly move between campsites. The HEYFUN takes that idea even further with its claimed five-second deployment, while the SanHima uses a fold-out design that trades some of that instant opening for a larger sleeping layout once deployed.
Think about your camping style:
- Frequent one-night stops: prioritize very fast deployment.
- Longer stays: interior comfort, ventilation and storage become more important.
- Family camping: sleeping width and usable floor space matter more than a simple person-count rating.
- Overlanding: durability, weather protection and easy packing become increasingly valuable.
The best setup is the one that matches your routine. There is little benefit in saving a few seconds if you dislike the sleeping layout, just as there is little benefit in having a huge tent if you rarely stay anywhere long enough to enjoy it.
Hard Shell vs. Soft Shell: Where the Money Goes
For the products in this guide, the focus is heavily toward hard-shell rooftop tents, and there is a good reason. A hard shell generally gives you a more rigid closed structure, quicker deployment and a cleaner package while travelling.
An aluminum shell can be particularly appealing when durability and rigidity matter. SanHima, HEYFUN, BAMACAR, WildFinder and ARCTWONDER all use aluminum prominently in their construction, although their designs and weights differ considerably.
Soft-shell tents can still make sense if your priority is lower upfront cost or a particular fold-out layout, but a hard shell is usually the more natural choice for someone who wants a quick, repeatable setup and a compact travel profile.
The important part is not to assume that aluminum automatically means better in every situation. You are also carrying that material up high on the truck, so the gain in rigidity and structure has to justify the additional weight for your particular build.
Weatherproofing Is More Than a Waterproof Number
A 5,000 mm waterproof rating looks impressive on a specification sheet, but it should not be the only weather-related number you consider.
A good four-season setup also benefits from ventilation, condensation management, blackout treatment, insulation and properly sealed openings. Several tents in this list approach that problem differently.
The Jiadrooe uses a detachable thermal insulation liner and anti-condensation mat. BAMACAR combines moisture-control layers with its 5,000 mm-rated fabric and ventilation design. SanHima adds blackout lining, multiple windows and an anti-condensation mat. Bayati goes further toward an insulated hard-shell construction with honeycomb panels.
And there is a simple truth worth remembering: waterproof does not mean condensation-proof. Two people breathing overnight can put a surprising amount of moisture into a confined space. Ventilation and drying the tent properly before closing it can matter just as much as the fabric’s waterproof rating.
Think About Heat and Cold Before Buying
If your Gladiator travels between hot valleys, humid campsites and cold mountain nights, climate management deserves more attention than it usually gets.
Features such as the Jiadrooe’s thermal liner, Bayati’s insulating honeycomb construction and the AC/heater provisions on several models can become genuinely useful outside mild-weather camping.
For hot conditions, look for:
- Multiple ventilation openings
- Mesh windows
- Shade from window awnings
- Blackout or light-shielding materials
- A practical way to route cooled air if the tent supports it
For colder conditions, insulation, mattress thickness, condensation control and sealed openings become more important.
No rooftop tent should be treated as a substitute for proper cold-weather camping preparation, but a thoughtfully insulated design can make the difference between tolerable and genuinely comfortable nights.
Battery, USB and Solar: Buy for Your Power Habits
Modern rooftop tents increasingly include USB ports, LED lighting and solar options, but these features only become valuable when they fit the rest of your electrical setup.
The SanHima gives you USB-C, USB-A and a 12V CIG socket, while Jiadrooe adds an integrated USB power hub and dual-mode LEDs. ARCTWONDER is the unusual option here, with a 12V 216W solar panel included as part of the package.
Before paying extra for solar capability, ask what you actually need to power. Phones and small electronics require very little compared with refrigeration, lighting systems or climate-control equipment. A solar panel can replenish a compatible portable power station during daylight, but it does not remove the need for a suitable battery system, wiring and power management.
For most Gladiator campers, the sensible approach is build the battery system first, then decide how much solar generation you actually need.
Don’t Confuse Person Ratings With Real Sleeping Comfort
A rooftop tent marked “2–3 person” does not mean three adults will necessarily sleep comfortably with bags, bedding and clothing inside.
Look at the actual floor dimensions.
The Bayati Sirius 1 Plus, for example, offers a particularly wide 82.7 × 63-inch interior, while the ARCTWONDER provides 85 × 52 inches. SanHima stretches to 84.65 inches in length, making it particularly interesting for taller campers.
For two adults, width and mattress layout usually matter more than the advertised maximum capacity. For two adults plus a child, look at where everyone’s sleeping position leaves room for personal items and how easily the tent can be entered and exited.
Make a Quick Decision Before You Spend
Use this checklist before placing an order:
- Tent weight: Is the tent weight sensible for your complete Gladiator setup?
- Rack capacity: Have you checked both the rack’s dynamic and static ratings?
- Mounting footprint: Do the crossbars and mounting channels actually line up?
- Sleeping area: Are the real interior dimensions comfortable for your intended occupants?
- Setup: Will you realistically use the tent often enough to value fast deployment?
- Weather: Does it have the ventilation, condensation control and insulation you need?
- Shell: Is the extra weight of a hard shell worth the durability and convenience?
- Power: Do the USB, 12V or solar features match your existing battery setup?
- Cargo: Will bedding and other equipment push the complete system beyond a sensible load?
- Maintenance: Can you dry, ventilate and store the tent properly between trips?
The final check is the one I would never skip: verify the exact rack and tent combination before ordering. A rooftop tent is not an isolated accessory. On a Gladiator, the rack becomes the foundation, and getting that foundation right is what turns an expensive tent into a genuinely useful camping system.
Deep Dive: What Makes a 4-Season Rooftop Tent for Jeep Gladiator Actually Worth Using Year-Round
“4-season” is one of those labels that deserves a closer look. It does not simply mean a tent can survive rain, and a 5,000 mm waterproof rating alone does not make an RTT a true winter shelter. For a Jeep Gladiator that will see everything from hot summer camps to cold mountain nights, year-round performance comes from how the shell, fabric, insulation, ventilation, floor, mattress and moisture control work together.
Insulation Is What Separates Cold-Weather Camping From Simply Surviving It
The biggest difference between a basic rooftop tent and a more serious four-season design is often how well it manages heat loss.
A hard shell provides a rigid outer barrier, but the shell itself is not automatically well insulated. What matters is what sits between you and the outside environment. The Bayati Sirius 1 Plus uses honeycomb thermal and sound-insulating panels, while the Jiadrooe adds a detachable thermal insulation liner. Those are meaningful features because they address the temperature of the sleeping space rather than simply keeping rain outside.
The mattress matters too. You are sleeping directly above the truck, so the floor can become a significant path for heat loss on a cold night. A thicker mattress, such as the 5 cm mattress in the BAMACAR, can provide more separation from the cold structure beneath you while also improving sleeping comfort.
Weather Seals Matter More Than a Big Waterproof Number
Water resistance should be judged as a complete system.
Look for sealed seams, properly closing windows, durable shell seals, weather-resistant fabric and protected entry points. A tent can have impressive fabric specifications and still become unpleasant if wind-driven rain finds its way through poorly protected openings.
The tents in this guide take different approaches. SanHima uses a 2,000 mm main body and 3,000 mm canopy, while Jiadrooe, BAMACAR and ARCTWONDER list fabric ratings reaching 5,000 mm. HEYFUN also lists up to 5,000 mm water resistance. Those figures are useful for comparison, but they should be treated as manufacturer specifications, not a guarantee that every seam, zipper and opening will remain completely dry in every storm.
For actual four-season use, I would give equal attention to the construction around the waterproof fabric.
Ventilation Sounds Counterintuitive, But It Is Essential in Winter
Closing every opening on a cold night feels logical. It is also one of the easiest ways to create condensation.
Two people sleeping inside a compact rooftop tent release a surprising amount of moisture through normal breathing. When that warm, humid air meets a colder shell, floor or window, condensation can form. The result can be a damp mattress, wet bedding and moisture inside the tent the following morning.
That is why features such as mesh windows, roof ventilation, condensation mats and breathable fabric panels deserve serious attention. SanHima includes an anti-condensation mat, while Jiadrooe combines one with its thermal liner. BAMACAR uses both condensation and marine-grade mats, and WildFinder includes a recessed marine pad alongside a dedicated condensation pad.
The goal is not to make the tent completely sealed. The goal is to control airflow without allowing rain and wind to turn the sleeping area into an uncomfortable environment.
Which Tents Here Make the Most Sense for Four-Season Use?
All seven are marketed for all-season or four-season camping, but their strengths are different. I would not treat them as identical simply because they carry the same seasonal label.
Bayati Sirius 1 Plus is one of the strongest comfort-oriented choices for colder camping because its honeycomb thermal and sound insulation, blackout fabric and 1.97-inch mattress address several parts of the cold-weather experience at once.
Jiadrooe is particularly interesting if temperatures vary significantly during your trips. Its detachable thermal liner, anti-condensation mat and two-layer mattress make its weather strategy more comprehensive than simply adding a waterproof outer fabric.
BAMACAR Naturnest takes a similarly practical approach, combining 5,000 mm water resistance, condensation and marine-grade mats, a 5 cm mattress and an AC/heater channel. That makes it particularly appealing for campers who want one setup that can adapt across seasons.
SanHima is a strong choice when you want to balance weather protection with lower overall tent weight. Its 131.5-lb weight, blackout lining, anti-condensation mat and 2,000/3,000 mm water-resistance ratings give it a sensible all-season package without moving into the heavier end of this group.
HEYFUN Adventurer Pro brings a rigid aluminum shell, condensation mat, all-season positioning and strong water-resistance specification, with its biggest advantage being the extremely fast deployment.
WildFinder leans toward a substantial aluminum build, with 5,000 mm rain protection, condensation management and a 5 cm mattress. Its 197.6-lb weight makes it more of a heavy-duty setup than a lightweight one.
ARCTWONDER combines its aluminum shell and 5,000 mm-rated fabric with blackout treatment and a 216W solar system. Its biggest four-season advantage is less about insulation and more about creating a self-contained off-grid camping setup.
The important distinction is this: weather rating, insulation and condensation control are different jobs. A tent that is excellent in one category does not automatically excel in all three.
Winter Comfort Starts Before You Climb the Ladder
Cold-weather comfort is partly about the tent and partly about how you use it.
Keep the following habits in mind:
- Ventilate the tent: Leave appropriate ventilation open even when temperatures are low. A little controlled airflow is usually better than waking up inside a damp enclosure.
- Keep wet gear outside the sleeping area: Wet jackets, towels and boots add moisture surprisingly quickly.
- Use the mattress as insulation: A quality sleeping bag and insulating sleep system can make a larger difference than trying to heat the entire tent continuously.
- Dry the tent before closing it: If you wake up to condensation, wipe down affected surfaces and allow the tent to air out when conditions permit.
- Do not block ventilation: Adding blankets or gear around vents can trap moisture.
- Use climate-control ports properly: Models with dedicated AC/heater channels can make external heating or cooling easier to route, but the heating equipment itself must be appropriate for enclosed-tent use.
- Protect the battery from extreme cold: Portable power stations and batteries can lose usable performance in low temperatures, so keep them within their manufacturer’s operating range.
Energy Efficiency Is Mostly About Not Fighting the Weather
A common mistake in winter camping is trying to compensate for poor insulation with more heating.
A better strategy is to reduce heat loss first.
Use the tent’s insulation, close unnecessary openings, choose an appropriate sleeping bag, and keep ventilation controlled rather than completely shut. If your tent has a thermal liner, use it when conditions call for it. If the design supports an external heater or cooler through a dedicated duct, keep the equipment outside the sleeping compartment and follow its safety requirements.
The same principle works in hot weather. Blackout and heat-reflective materials, shaded windows and cross-ventilation can reduce the amount of heat that builds up inside before you reach for powered cooling.
This is where a feature such as the Bayati’s insulated honeycomb construction or Jiadrooe’s removable liner becomes more meaningful. You are not simply buying a “4-season” label; you are buying materials and design choices that can reduce how hard your heating or cooling system has to work.
The Real Four-Season Test Is the Whole System
If I had to reduce the entire discussion to one rule, it would be this: do not judge a four-season rooftop tent by its rain rating alone.
For a Gladiator that will genuinely see changing seasons, I would look for the combination of insulation, weather sealing, controlled ventilation, condensation management, a sensible mattress and a practical way to manage temperature. Then consider the tent’s weight and rack requirements before installation.
That is why the strongest four-season choices in this guide are not necessarily the tents with the biggest waterproof number. They are the ones where several small engineering decisions work together to make the sleeping environment more comfortable when conditions outside are far less forgiving.
Installation and Setup Guidance: Mounting a Rooftop Tent on a Jeep Gladiator the Right Way
A rooftop tent installation is one of those jobs where “it fits” is not the same as “it is correctly installed.” With a Jeep Gladiator, the safest approach is to treat the tent, rack, mounting hardware and vehicle as one system. The exact procedure varies with the rack and tent, so the instructions supplied with both should always take priority over a generic guide.
Start With the Rack, Not the Tent
Before lifting the tent onto the truck, confirm that the bed rack or roof-rack system is specifically rated for rooftop-tent use and can accommodate the tent’s weight.
Check:
- The rack’s dynamic load rating for driving.
- Its static load rating for a parked, occupied tent, where the manufacturer provides one.
- Crossbar width and spacing.
- Mounting-channel position.
- Clearance around the cab, bed and other accessories.
- The rack manufacturer’s approved mounting hardware.
This matters because the tents in this guide range from roughly 131.5 to 198 lb before you add bedding or other equipment. That is a meaningful difference on a truck-mounted rack.
Also, do not use the vehicle’s general payload rating as a substitute for a rack rating. Payload tells you about the vehicle; the rack has its own structural limits.
Position the Crossbars Before You Lift the Tent
Measure the tent’s mounting channels and compare them with the rack’s crossbars. You want the tent supported at the locations intended by its mounting system, rather than improvising a position because it happens to sit on the bars.
For a Gladiator bed-rack installation, check the tent’s position relative to:
- The front of the bed.
- The rear tailgate area.
- The cab roof.
- Any bed accessories.
- The rack’s vertical supports.
- Your intended opening direction.
Leave enough clearance for the tent to open fully. This sounds obvious, but a rooftop tent can have a surprisingly large open footprint compared with its closed dimensions.
Get the Tent Onto the Rack With Enough Help
This is not a sensible one-person lifting job for a 160–198 lb hard-shell tent.
Use two or more capable people, or an appropriate lifting method, to place the tent onto the rack. Keep hands clear of pinch points, particularly around hinges, gas struts and mounting channels.
Once positioned, center the tent as the installation instructions specify. Do not deliberately offset a heavy tent simply to create room for another accessory unless the rack manufacturer confirms that arrangement is acceptable.
Secure the Mounting Rails Evenly
With the tent sitting correctly, install the mounting plates, rails, brackets or bolts supplied for the rack and tent combination.
Work methodically:
- Align the mounting hardware with the rack’s crossbars or channels.
- Install all fasteners loosely first, rather than fully tightening one side immediately.
- Check that the tent remains centered and the mounting points are evenly loaded.
- Tighten the hardware progressively from one mounting point to the next.
- Use the manufacturer-specified torque where a torque value is provided.
- Recheck every fastener once the complete installation is finished.
Do not guess a torque value or substitute random hardware because it looks similar. The correct fastener size, washer arrangement and torque specification depend on the particular rack and tent.
Check the Tent Before You Put Weight Inside It
Once the shell is secured, open and close the tent several times before loading bedding or camping gear.
Look for:
- Smooth opening and closing.
- Proper gas-strut operation.
- No interference with rack uprights.
- No contact between the shell and the cab.
- Ladder clearance.
- Correct engagement of latches and buckles.
- Fabric that is not being pinched.
- Doors and windows that open normally.
- Mounting hardware that remains firmly seated.
If something feels forced, stop and investigate. A rooftop tent should not require you to bend, pull or twist part of the structure into position.
The Ladder Deserves Its Own Safety Check
The ladder is effectively your staircase, so treat it as a structural component rather than a convenience accessory.
Before climbing in:
- Confirm it is fully deployed.
- Make sure its feet have a stable contact point.
- Check that the ladder angle is appropriate.
- Ensure locking sections are properly engaged.
- Avoid climbing with loose equipment in your hands.
- Keep the ladder and entry area clear of wet mud, ice or other slippery material.
For children, the safest practice is to have an adult assist with climbing rather than treating the ladder as ordinary household stairs.
Understand Dynamic Weight vs. Sleeping Weight
This is where many rooftop-tent articles oversimplify things.
Dynamic load is the load the rack and mounting system experience while the Gladiator is travelling. Static load refers to the parked vehicle with the tent occupied, where the rack manufacturer provides a separate static rating.
You should therefore consider at least three different loads:
While driving:
Tent + rack + permanently carried rooftop equipment.
While parked:
Tent + rack + occupants + bedding + equipment.
During rough travel:
The same basic equipment can experience additional forces from bumps, braking, cornering and uneven terrain.
That is why I would never recommend calculating compatibility by simply saying, “The tent weighs 176 lb and the rack is rated for 176 lb, so it is fine.” A rating should not be treated as a target. Leaving reasonable capacity in reserve is the more sensible approach.
Keep Additional Cargo Under Control
Several tents in this guide offer upper crossbars or provisions for carrying lightweight equipment. That can be useful, but it also makes it easy to forget that every additional item becomes part of the load.
Before adding a solar panel, recovery board, awning accessory, luggage carrier or other equipment, check:
- The tent’s own accessory-bar rating.
- The rack’s load rating.
- The mounting hardware rating.
- Whether the additional load changes the manufacturer’s approved configuration.
- Whether the equipment can be securely restrained while travelling.
Never assume that an accessory bar’s rating adds directly to the vehicle rack’s capacity.
Watch Your Total Vehicle Payload
The rooftop tent is not the only thing consuming payload.
A properly equipped Gladiator may already be carrying:
- Passengers.
- Bed-rack hardware.
- Recovery equipment.
- Spare fuel or water.
- Coolers.
- Camping boxes.
- Tools.
- Spare tire equipment.
- Other trail accessories.
Add those together rather than looking at the rooftop tent in isolation. The vehicle’s actual configuration and payload rating should be considered, especially on heavily equipped trucks.
Common Installation Mistakes Worth Avoiding
Choosing a rack because the tent physically fits
A tent can sit on a crossbar and still be an unsuitable installation. Dimensions and structural ratings are separate questions.
Treating a factory rack as automatically suitable
Factory equipment varies by configuration, and a vehicle being equipped with crossbars does not automatically mean those bars are designed for an occupied rooftop tent.
Tightening one side completely before aligning everything
This can pull the mounting hardware out of alignment and make the final fit uneven. Install everything loosely, center the tent, then tighten progressively.
Ignoring the closed height
Measure the final height of the truck + rack + closed tent, not the tent alone. Remember that the real-world height can matter in garages, parking structures, low branches and trail obstacles.
Forgetting to check the opening direction
A tent can be perfectly secure but poorly positioned for the way you want to camp. Make sure doors, ladders and fold-out sections have adequate clearance.
Packing the tent while it is wet
Waterproof fabric still needs maintenance. Dry the tent properly before long-term closure to reduce the chance of trapped moisture, odors and mildew.
The Final Safety Check Before Your First Trip
Before taking the Gladiator onto the highway, perform a complete walk-around.
Confirm that every mounting fastener is secure, the tent is fully latched, the ladder is stored correctly, all straps are tightened, and nothing can move or catch airflow while driving.
Then recheck the mounting hardware after your first trip, particularly if the installation is new. A second inspection after the initial drive is cheap insurance and can reveal settling or hardware movement that was not obvious in the driveway.
The most important rule is simple: follow the specific installation instructions for your rack and tent before relying on any general advice here. If their requirements conflict with a generic recommendation, their specifications should win. A properly installed rooftop tent should feel boringly secure—that is exactly what you want when your sleeping quarters are sitting above your Jeep Gladiator at the end of a long trail.
Solar and Power Optimization for Jeep Gladiator Rooftop Tent Camping
Solar power can be a useful upgrade for a Jeep Gladiator camping setup, but it is easy to overestimate what a rooftop-tent solar system can actually do. A panel does not magically make a camping setup energy independent. Your real-world result depends on panel output, sunlight, battery capacity, charging losses, temperature, shading, wiring, and how much electricity you use each day.
For most Gladiator campers, the sensible goal is not to run every appliance from solar. It is to use solar to reduce how often you need to recharge the battery from the vehicle or another source, while keeping the electrical system simple enough that it remains reliable away from home.
Solar-Ready Rooftop Tents: What You Actually Get
A solar-ready rooftop tent generally means the tent has a practical way to integrate a solar panel, route wiring, or connect to an external power system. It does not necessarily mean the tent includes a complete off-grid electrical system.
That distinction is important.
A rooftop tent may have:
- A built-in or integrated solar panel.
- A dedicated solar-panel mounting area.
- A cable-routing provision.
- USB-A or USB-C charging ports.
- A 12-volt outlet.
- An Anderson-style or similar external connection.
- Interior lighting.
- A connection point for a portable power station.
These features solve different problems. A USB port is not a battery, and a solar panel is not a complete power system. You still need somewhere to store the energy if you want electricity after sunset or during cloudy periods.
For the Gladiator setups covered in this guide, solar is most useful when it is treated as one part of a larger system: solar panel → charge controller → battery or power station → individual camping loads.
How Much Solar Power Do You Really Need?
The right panel size depends on your daily consumption, not on the size of the tent.
For example, a relatively simple camping setup might use electricity for:
- LED lighting.
- Phones and cameras.
- A laptop.
- Portable fans.
- Small USB devices.
- A refrigerator or cooler.
- Occasional 12-volt accessories.
A weekend camper who mainly charges phones and runs lights may need very little generation compared with someone operating a refrigerator, camera equipment and several electronic devices every day.
The important calculation is daily energy consumption in watt-hours, not simply the wattage printed on an appliance.
If a device draws 20 watts and operates for five hours, that is approximately:
20 W × 5 hours = 100 Wh
Do that calculation for your regular devices, add them together, and then leave some margin for charging losses and unexpected use.
This gives you a much more realistic starting point than buying the largest solar panel you can physically mount.
Solar Performance Is Never the Same as the Rated Wattage
This is one of the biggest points people overlook when shopping for a solar-equipped rooftop tent.
A panel rated at 216 watts, for example, does not mean you will continuously receive 216 watts from it throughout the day.
Actual output changes with:
- Sun angle.
- Time of day.
- Cloud cover.
- Dust and dirt on the panel.
- Heat.
- Partial shading.
- Panel orientation.
- Charge-controller efficiency.
- Cable and connection losses.
- Battery charging characteristics.
Even a small shadow across part of a panel can have a noticeable effect depending on the panel design and electrical configuration.
So, if a rooftop tent advertises a high solar rating, treat that number as the maximum rated generation under favorable conditions, not as the amount of electricity you should expect every camping day.
A Rooftop Solar Panel Works Best in Open Sun
The biggest limitation with vehicle camping is often not the panel itself, but where you park.
A beautiful campsite underneath dense trees can be excellent for sleeping and terrible for solar generation.
If you have a solar-dependent setup, think about where the vehicle will sit during the strongest part of the day. A clear section of sky can be more valuable than simply having a larger panel.
This also creates a practical compromise:
- Tree-covered campsite: better shade and potentially cooler sleeping conditions, weaker solar production.
- Open campsite: stronger solar production, but potentially more heat and less natural shade.
- Portable solar panel: more flexibility because you can park in shade and position the panel separately in sunlight.
For longer stays, a portable panel can therefore be more useful than relying entirely on a panel permanently attached to the tent.
Battery Capacity Matters More Than Most Beginners Expect
Solar generates electricity, but the battery determines how much energy you can actually carry into the evening and through poor weather.
For a simple setup, a portable power station can be the easiest option because it combines battery storage, charging electronics, outputs and protection circuitry in one package.
A more permanent 12-volt system can make sense for frequent overland use, particularly if you already have other vehicle electrical accessories. But it requires more planning around battery chemistry, fusing, cable sizing, charging sources and installation.
When comparing batteries, look beyond the headline amp-hour figure. What matters for camping is usable energy, commonly expressed in watt-hours (Wh).
As a rough example, a 1,000 Wh battery does not mean you should plan to consume exactly 1,000 Wh every day. You need reserve capacity, and the usable amount can vary with the battery system, inverter losses and operating conditions.
Lithium Batteries Make Sense for Many Modern Camping Setups
Lithium iron phosphate batteries, commonly called LiFePO4, are popular for portable camping power because they offer a useful combination of energy density, cycle life and relatively stable performance.
They are particularly attractive when you want to power a refrigerator, camera equipment, laptop or other moderate electrical loads without carrying an excessively large battery.
However, cold-weather camping requires additional attention. Lithium batteries generally should not be charged below their manufacturer’s permitted temperature range. Some battery systems include low-temperature charging protection or built-in heating, while others require you to manage the battery environment yourself.
That is an important consideration for winter camping in the mountains.
Use Solar During the Day and the Battery at Night
The most efficient camping routine is usually to let solar handle daytime consumption whenever possible while the battery stores the remaining energy.
For example:
- Let solar power or recharge devices during daylight.
- Charge phones, cameras and power banks during the strongest solar period.
- Run a refrigerator efficiently rather than repeatedly opening it.
- Use LED lighting after dark.
- Keep high-draw appliances to a minimum.
- Preserve battery capacity for overnight and poor-weather use.
This is much more effective than waiting until evening and discovering that the battery has been heavily depleted before the solar system has had a chance to replenish it.
Heating Is Where Expectations Need to Stay Realistic
Do not confuse a solar-equipped rooftop tent with a solar-powered heating system.
Heating a tent electrically requires substantial energy, especially in cold weather. A small solar panel that works perfectly for phones, lights and small electronics may be completely inadequate for sustained electric heating.
For winter camping, it is generally more sensible to focus first on:
- Good insulation.
- A suitable sleeping bag.
- An insulated mattress.
- Proper ventilation.
- Minimizing unnecessary heat loss.
- An appropriate heating solution designed for camping.
The electrical system can then support lighting, charging and other low-to-moderate loads without being overwhelmed by an unrealistic heating demand.
Keep the Power System Efficient
Energy efficiency is often cheaper than adding more solar capacity.
A few practical changes can make a substantial difference:
- Use LED lighting rather than high-draw lighting.
- Charge devices during daylight when solar production is available.
- Avoid leaving inverters switched on when nothing requires AC power.
- Use direct USB or 12-volt charging when practical instead of converting 12 volts to AC and then converting it back down through a charger.
- Keep refrigerator temperatures sensible rather than unnecessarily cold.
- Pre-cool food and drinks before leaving home when possible.
- Turn off devices completely instead of leaving them in standby.
- Keep solar panels clean and unobstructed.
The principle is simple: every watt you do not consume is a watt you do not have to generate or store.
Build a Charging Backup Into Your System
Solar should ideally be your primary replenishment source, not your only source.
Weather can change quickly, particularly in mountainous areas. Several cloudy days can dramatically reduce solar generation, while a shaded campsite can make a large panel perform like a much smaller one.
A practical off-grid Gladiator setup may therefore have more than one charging method, such as:
- Solar charging.
- Vehicle-based charging.
- Shore power when available.
- A portable power station with multiple charging inputs.
This gives you flexibility without requiring you to carry an enormous battery purely to survive a few bad-weather days.
Think About Cable Routing and Weather Protection
A rooftop tent’s electrical system needs to survive the same environment as the rest of the camping equipment.
Any external solar cable or connector should be:
- Properly secured.
- Protected from sharp edges.
- Kept away from moving tent components.
- Protected from unnecessary water exposure.
- Routed so it cannot become a trip hazard.
- Disconnected or secured before the vehicle moves.
Do not allow a cable to hang loosely around the ladder, hinge points or opening mechanism. A small wiring shortcut can become a genuine safety problem when the tent is being folded down.
For permanent electrical installations, use properly sized cables, fuses and connectors rather than adapting household wiring or improvised automotive connections.
Solar Is More Valuable on Longer Trips Than Short Weekends
If you normally camp for one night, a moderate battery charged before leaving may be enough for your basic needs. Solar becomes increasingly valuable when you stay away from electrical hookups for several days.
That is when the system begins to make practical sense:
One night: battery capacity may matter more than solar.
Two to three nights: solar starts reducing the need for external charging.
Several days: solar can become a major part of maintaining your battery, assuming good sunlight.
Extended off-grid travel: solar, battery storage and vehicle charging should be designed as one system rather than chosen independently.
The Realistic Expectation for a Solar Rooftop Tent
A solar panel mounted to a rooftop tent is best viewed as a battery-maintenance and energy-replenishment tool, not an unlimited power source.
It can comfortably support relatively modest loads such as lighting, phones, cameras and other small electronics when sunlight is favorable. With a suitably sized battery and enough solar generation, you can also support larger camping loads such as a refrigerator.
But once you add electric cooking, heating, high-powered appliances, large inverters or continuous electronics, energy consumption rises quickly.
For a Jeep Gladiator, the smartest setup is usually the one that matches your actual camping habits rather than the one with the biggest advertised solar number. Calculate your daily energy requirement, choose enough battery capacity to cover overnight use and poor-weather periods, then size solar generation around how long you normally stay off-grid. That approach is more dependable, lighter on the truck, and far more useful in the real world than assuming a solar panel alone will make the entire camping setup energy independent.
Maintenance, Durability, and Care for a Jeep Gladiator Rooftop Tent
A rooftop tent usually spends far more time closed on the vehicle than open at the campsite, which means durability is not just about how strong the shell looks when you first unpack it. Dirt, road salt, rain, ultraviolet exposure, vibration, condensation, and repeated opening and closing all affect the tent over time. On a Jeep Gladiator, the rack and mounting hardware also deserve attention because the tent is exposed to road vibration every time the truck moves.
Good maintenance does not need to be complicated. The important part is making it a routine, particularly after wet trips, winter camping, dusty trails, or long periods of storage.
Clean the Tent According to the Material
Start with simple cleaning rather than aggressive chemicals.
For the aluminum shell and other hard exterior surfaces, use clean water, mild soap, and a soft cloth or sponge. Road grime can contain fine particles that behave like an abrasive when rubbed into the finish, so rinsing loose dirt away before wiping the surface is better than immediately scrubbing it.
Avoid:
- Abrasive pads and harsh brushes.
- Strong solvents unless specifically approved by the manufacturer.
- High-pressure water directed at seals, hinges, electrical connections, or ventilation openings.
- Automotive polishing compounds that are not intended for the tent’s finish.
- Household cleaners that may damage rubber seals or coated fabrics.
After washing, allow the exterior to dry properly before closing the tent.
Give the Fabric More Attention Than the Shell
The hard shell may look like the main structural component, but the fabric walls, seams, windows, zippers, and mesh sections often see more direct exposure to weather.
Brush away loose dirt first, then clean fabric with mild soap and water where the manufacturer permits it. Do not aggressively scrub waterproof coatings, because unnecessary abrasion can gradually affect the surface treatment.
Pay particular attention to:
- Zipper tracks.
- Window seams.
- Fabric attachment points.
- Door corners.
- Roof-to-fabric junctions.
- Areas where mud collects.
- Mesh ventilation panels.
If the tent has been exposed to saltwater, road salt, or heavily contaminated winter roads, rinse it thoroughly with fresh water. Salt residue is particularly undesirable around metal hardware and fasteners.
Dry the Tent Completely Before Closing It
This is probably the most important maintenance habit for any rooftop tent.
A tent can be waterproof from the outside and still contain moisture inside after a night of rain, snow, condensation, or even several people sleeping inside it. If you fold everything down while it is damp and then leave it closed for days, you create exactly the environment where mildew, unpleasant odors and fabric deterioration can develop.
If conditions allow, open the tent after returning home and let the mattress, fabric and internal surfaces dry completely.
This is especially important after:
- Rainy camping.
- Snow camping.
- High-humidity nights.
- Winter trips.
- Back-to-back camping days.
- Trips where condensation was noticeable inside the tent.
Do not confuse a condensation problem with a leaking tent. Two people sleeping in a relatively enclosed space produce a surprising amount of moisture overnight. Good ventilation and proper drying are part of normal rooftop-tent care.
Maintain the Zippers and Moving Hardware
Zippers are small components, but a failed zipper can make an otherwise excellent tent frustrating to use.
Keep zipper tracks reasonably clean and remove sand, dust and mud rather than repeatedly forcing the zipper through contamination. If the manufacturer recommends a particular zipper lubricant, use that product according to its instructions.
The same principle applies to hinges, latches, gas struts, telescoping ladders and other moving components.
During inspections, look for:
- Loose mounting screws.
- Bent brackets.
- Unusual movement.
- Damaged ladder sections.
- Struts that appear weak or inconsistent.
- Latches that no longer engage cleanly.
- Cracked plastic components.
- Corrosion around fasteners.
If something requires excessive force, investigate it rather than simply applying more force.
Protect the Aluminum Shell Without Overdoing It
Aluminum is one reason hard-shell rooftop tents are attractive for long-term use. It provides a rigid exterior without the weight of a comparable steel structure, and it does not require the same type of corrosion protection as untreated steel.
That does not mean aluminum is maintenance-free.
Keep the shell clean, particularly after winter driving or coastal trips. Inspect exposed fasteners and mounting points for corrosion, surface damage or galvanic corrosion where dissimilar metals meet.
A wax or manufacturer-approved protective sealant can be useful on painted or finished aluminum surfaces if the tent manufacturer allows it. The purpose is mainly to protect the finish from contamination and environmental exposure, not to turn the shell into a maintenance-free surface.
Do not automatically apply automotive wax, ceramic coating, polish, or other chemicals to every rooftop-tent surface. Check whether the shell has a painted, powder-coated, anodized, or otherwise treated finish first.
Do Not Treat Sealant as a Permanent Fix
Waterproofing products and sealants can be useful, but applying more sealant is not always the answer.
Inspect the actual seals and joints first. If a rubber gasket is damaged, compressed, cracked, or displaced, adding a layer of sealant over it may only hide the problem temporarily.
Check:
- Shell seams.
- Hinges and hardware penetrations.
- Roof accessories.
- Cable-entry points.
- Window and door seals.
- Fabric attachment areas.
- Any location where an accessory has been added later.
If resealing is necessary, use a product compatible with the material and follow the tent manufacturer’s instructions. Avoid randomly sealing ventilation openings, because those openings are part of the tent’s moisture-management system.
Inspect the Mounting System Regularly
The tent itself may be perfectly healthy while the mounting system gradually develops a problem.
A Gladiator rooftop-tent setup experiences vibration, impacts and repeated loading from normal driving. After installation, inspect the rack and mounting hardware periodically rather than waiting until something feels loose.
A useful inspection routine is:
- Check the rack mounting points.
- Inspect crossbars for movement or visible damage.
- Check the tent mounting brackets.
- Look for loose or displaced washers and fasteners.
- Inspect the underside of the tent around mounting locations.
- Confirm that the tent remains properly aligned.
- Check the ladder and other load-bearing components.
- Recheck everything after particularly rough off-road travel.
Follow the rack and tent manufacturers’ torque specifications rather than repeatedly tightening hardware by feel.
Off-Road Driving Changes the Maintenance Schedule
A Gladiator is capable of travelling well beyond ordinary paved roads, but the rooftop-tent installation still has to deal with the consequences of that use.
Corrugated dirt roads, rocky trails and repeated suspension movement can expose the rack and mounting hardware to more vibration than normal highway driving.
If you regularly travel off-road, inspect the installation more frequently, particularly after:
- Long washboard-road sections.
- Rough rocky trails.
- Deep potholes.
- Heavy braking or impacts.
- Water crossings.
- Long-distance trips with a heavily loaded setup.
You do not need to dismantle the entire installation after every trip, but a quick visual inspection can catch loose hardware before it becomes a major problem.
Winter Storage Requires More Than Just Closing the Tent
If you are not going to use the tent for several months, do not simply close it after the final trip and forget about it.
First, clean and dry everything thoroughly.
Then inspect the:
- Mattress.
- Interior fabric.
- Condensation mat.
- Waterproof layers.
- Zippers.
- Seals.
- Gas struts.
- Ladder.
- Mounting hardware.
- Rack components.
Remove unnecessary moisture and dirt before long-term closure.
If the manufacturer’s storage instructions allow it, storing the mattress or soft internal components in a dry environment can help reduce trapped moisture. Follow the specific tent manufacturer’s guidance, however, because some designs are intended to remain assembled and closed during vehicle storage.
Cold Weather Can Affect Gas Struts and Materials
Gas struts can behave differently in very cold temperatures. A tent that opens quickly in warm weather may feel slower or less energetic during freezing conditions.
That does not automatically mean the struts have failed.
Do not force the shell open if it is frozen, iced over, or obstructed by accumulated snow. Clear the obstruction carefully and allow the mechanism to operate normally.
Similarly, frozen fabric can become less flexible. Trying to fold or compress ice-covered fabric aggressively can damage coatings, stitching, or attachment points.
For winter camping, remove snow accumulation from the tent when practical, particularly if a substantial amount has collected on the shell.
Protect the Mattress and Interior
The mattress is one of the components that most directly affects sleeping comfort, yet it is often ignored during maintenance.
Keep the interior clean and dry, and periodically inspect the mattress and condensation layer underneath it. If moisture is repeatedly collecting below the mattress, improve ventilation and allow the internal surfaces to dry rather than simply adding more bedding.
Do not store wet sleeping bags, towels, clothing, or other damp gear inside a closed tent for extended periods.
A rooftop tent is a sleeping system, not a sealed storage box.
Use a Cover Only When It Makes Sense
A protective cover can be useful for long-term storage, particularly if the tent remains mounted on the Gladiator for months without use. But a cover should not trap moisture against the shell.
If you use one, choose a breathable cover appropriate for the tent and follow its instructions. Avoid wrapping a wet tent tightly in an impermeable material and assuming that this provides better protection.
The same principle applies to the truck itself: ventilation is still important even when the equipment is being stored.
How to Extend Tent Life on a Jeep Gladiator Roof Rack
The simplest way to make a rooftop tent last longer is to reduce unnecessary stress on it.
Keep these habits:
- Stay within the manufacturer’s loading limits.
- Do not use the roof or rack as a place to carry excessive accessories.
- Keep the tent closed securely while driving.
- Check the mounting hardware after rough trips.
- Keep the shell and fabric clean.
- Dry the tent completely after wet camping.
- Lubricate or maintain moving components only with manufacturer-approved products.
- Repair damaged seals, fabric and hardware before the next major trip.
- Avoid leaving unnecessary weight on the tent when it is stored.
- Keep the rack itself clean and corrosion-free.
- Inspect the underside of the tent because damage is easier to miss there.
One particularly useful habit is to photograph the installation after you have confirmed everything is correctly positioned. You can use those reference photos later to notice whether a bracket, crossbar or mounting point has shifted.
When Should You Stop Using the Tent?
Do not wait for a dramatic failure before taking a structural problem seriously.
Stop and inspect the setup if you notice:
- Cracks in the shell.
- Significant deformation around mounting points.
- Damaged rack brackets.
- Repeatedly loosening fasteners.
- A ladder that no longer locks correctly.
- Gas struts that cannot reliably support the opening mechanism.
- Water entering through a previously sealed area.
- Torn structural fabric or stitching.
- Unusual movement between the tent and rack.
If the rack itself has been damaged, the correct response is not simply to tighten the tent mounting bolts. The rack is the foundation of the entire installation, so any structural concern should be resolved before continuing to carry the tent.
A Practical Maintenance Schedule
You do not need a complicated workshop routine. A simple schedule is enough for most owners.
After every wet or dirty trip:
Rinse or clean the exterior as appropriate, dry the tent completely, remove debris from zippers and inspect for obvious damage.
Every few trips:
Check mounting hardware, rack components, ladder operation, hinges, latches, seals and fabric condition.
Before winter or extended storage:
Clean everything thoroughly, dry the complete interior, inspect the shell and hardware, and follow the manufacturer’s storage recommendations.
Before a long trip:
Perform a full inspection of the tent and rack, confirm mounting security, check all closures and make sure the final vehicle height and configuration have not changed because of added accessories.
The goal is not to obsess over the tent. It is to catch small problems while they are still small. A loose bracket, dirty zipper or damp mattress is easy to deal with at home; the same issue becomes much more inconvenient when you discover it hundreds of miles from the nearest town.
The Real Long-Term Durability Test
A rooftop tent’s advertised shell material, waterproof rating and number of opening cycles can tell you something about its design, but they cannot completely predict how it will perform after years of real use.
That is especially relevant for some of the newer models in this guide, where long-term owner feedback is naturally more limited. In those cases, the sensible approach is to judge the construction, hardware, warranty, replacement-part availability and maintenance requirements rather than assuming an impressive specification automatically proves long-term durability.
For a Jeep Gladiator, durability ultimately comes down to the entire setup: a well-supported rack, correct mounting, sensible loading, regular inspection, proper drying and careful storage. A premium tent can still develop problems if it is overloaded, poorly mounted or repeatedly stored wet. Conversely, a well-maintained system can remain dependable for years without requiring complicated maintenance.
That is the real advantage of treating the rooftop tent as part of the truck rather than simply another camping accessory.
FAQs About the Best Rooftop Tents for Jeep Gladiator
Can a Jeep Gladiator safely carry a rooftop tent, or is the bed rack the bigger limitation?
A Jeep Gladiator can be an excellent platform for a rooftop tent, but the vehicle itself is not automatically the limiting factor. In practice, the rack and its mounting system are often the part that deserves the most scrutiny. A tent weighing 130–200 lb may look reasonable against the truck’s overall payload, but that does not mean any bed rack or crossbar arrangement can safely support it while driving.
There are two different loads to think about. The first is the dynamic load while the Gladiator is moving, which includes the tent, rack and permanently mounted accessories. The second is the static load when you are parked, when occupants, bedding and camping equipment are added. You cannot simply use the truck’s payload figure as the rooftop-tent limit.
The real-world check is therefore: tent weight + rack weight + accessories + occupants + mounting configuration, followed by the manufacturer’s limits for the exact rack and tent combination. If those numbers are close to the limit, I would not treat that as a comfortable margin just because the setup technically fits on paper.
Is a hard-shell rooftop tent actually better for a Jeep Gladiator, or is that just the premium option?
For a Jeep Gladiator that sees frequent road trips, changing weather and regular setup and teardown, a hard shell can be genuinely useful rather than simply being a more expensive version of a soft tent.
The biggest practical advantage is deployment and protection. A well-designed hard shell can open quickly, gives the tent a rigid outer structure while travelling, and generally creates a cleaner closed package. Aluminum construction can also provide a useful balance of rigidity and weight, although it does not make a 160–200 lb tent “light” in any meaningful sense.
But there is a catch that is often skipped in rooftop-tent buying guides: hard shell does not automatically mean better winter performance. Shell construction, insulation, fabric, mattress, ventilation, condensation management and weather sealing all matter. A rigid tent with poor thermal management can still be uncomfortable in freezing conditions.
For the Gladiator, I would choose hard shell primarily when fast deployment, weather protection and long-term convenience matter to the way you camp. If your priority is simply maximum sleeping volume for the lowest possible weight, the answer can be different.
What is the biggest mistake people make when choosing a rooftop tent for a Jeep Gladiator?
They choose the tent first and try to make the truck accommodate it afterward.
That sounds backwards, but it is exactly how many expensive rooftop-tent setups become unnecessarily complicated. The better sequence is vehicle → rack → tent → mounting hardware → accessories. Once the rack and its limitations are understood, you can eliminate tents that create a poor structural or dimensional match before spending money on them.
The other mistake is focusing heavily on the tent’s advertised weight while ignoring everything that stays on the truck. A 150 lb tent is not really a 150 lb rooftop system once you add a heavy rack, mounting hardware, awning, recovery equipment or other accessories.
There is also a less obvious problem: people shop by sleeping capacity instead of actual sleeping dimensions. A “three-person” tent may technically accommodate two adults and a child, but that does not mean three adults will sleep comfortably for several nights. Floor dimensions, mattress width, headroom and the way the tent opens matter far more than the number printed on the product listing.
Which matters more for winter camping in a Jeep Gladiator: a high waterproof rating or better insulation and ventilation?
For genuine four-season use, waterproofing alone is nowhere near enough.
A high hydrostatic-waterproofing number can tell you something about resistance to water penetration, but it does not tell you how warm the sleeping area will feel at night, how effectively condensation will escape, or how comfortable the tent will be when temperatures drop sharply.
Winter comfort is a combination of several things:
- Thermal insulation in the shell or tent structure.
- Mattress thickness and insulation underneath the sleeper.
- Proper weather seals around doors and windows.
- Wind protection.
- Ventilation that allows moisture to escape.
- Condensation management beneath the mattress.
- A sensible sleeping system suited to the actual temperature.
- A heating method appropriate for enclosed camping.
Here is the part that many buyers learn only after their first cold night: two people sleeping inside a relatively compact rooftop tent can produce a surprising amount of moisture. Closing every vent because it is cold may keep some warmth inside, but it can also leave condensation on the interior surfaces by morning.
So if you are choosing a four-season rooftop tent for serious winter use, I would put insulation + ventilation + condensation control + weather sealing ahead of simply choosing the tent with the biggest waterproofing number.
Does a solar-panel rooftop tent make the Jeep Gladiator genuinely off-grid?
Not by itself, and this is where solar marketing can create unrealistic expectations.
A rooftop solar panel can be extremely useful for maintaining or replenishing a battery during multi-day camping, especially for relatively modest loads such as phones, cameras, lighting, fans and a refrigerator. But the advertised panel wattage represents a maximum rated output under favorable conditions, not the amount of electricity you will continuously receive at a campsite.
Cloud cover, shade, panel angle, heat, dirt, wiring losses and charging efficiency all reduce real-world production. A panel that looks impressive on the specification sheet can therefore produce much less energy when the truck is parked under trees or the weather turns cloudy.
The smarter approach is to design the electrical system backwards from your actual consumption. Work out approximately how many watt-hours you use per day, choose enough battery capacity to cover overnight demand and poor-weather periods, then use solar to replenish that energy during daylight. For longer trips, having another charging option can be valuable because relying entirely on solar leaves you vulnerable to several days of poor conditions.
And there is one important reality check: solar is excellent for reducing your dependence on external charging; it is not a free pass to run high-draw electric heaters, cooking appliances and large inverters indefinitely. For most Gladiator camping builds, efficiency is just as important as panel size.
Final Verdict: Choosing the Right Rooftop Tent for Your Jeep Gladiator
A Jeep Gladiator is a very capable camping platform, but that does not mean every rooftop tent marketed as “truck compatible” is automatically a good choice. The better way to approach this purchase is to stop thinking about the tent as an isolated product. The rack, mounting system, tent, vehicle payload, sleeping load, weather conditions and the way you actually travel all have to work together.
That is also why there is no single winner for every Gladiator build.
If your priority is keeping the setup relatively manageable while still getting a serious four-season tent, a lighter aluminum construction makes more sense than automatically choosing the largest shell available. If winter comfort is the priority, insulation, ventilation and condensation management deserve more attention than a waterproofing number on a product page. If you move campsites frequently, fast deployment can genuinely improve the experience. And if you are building around solar, the battery and charging strategy matter just as much as the panel itself.
What We Would Prioritize Before Buying
For a real-world Gladiator setup, I would work through the decision in this order:
- Confirm the rack first. Make sure its dynamic rating, mounting method and crossbar arrangement are appropriate for rooftop-tent use.
- Check the complete loaded weight. Include the tent, rack, mounting hardware and accessories, rather than comparing tent weights alone.
- Measure the actual mounting footprint. A tent can have suitable sleeping dimensions and still be awkward for a particular rack.
- Decide how you camp. Weekend trips, extended overlanding, winter camping and frequent campsite changes can lead to very different ideal tent choices.
- Look beyond “three-person” labels. Sleeping dimensions tell you more about genuine comfort than the marketing capacity.
- Treat four-season claims carefully. Look for insulation, ventilation, condensation control and weather sealing, not just a high waterproof rating.
- Build the electrical system around consumption. Solar is useful, but battery capacity and charging flexibility determine whether an off-grid setup actually works.
- Consider maintenance before buying. Seals, fabric, zippers, gas struts, ladders and mounting hardware all need occasional attention.
The Part I Would Not Compromise On
The temptation with a truck like the Gladiator is to build the biggest possible camping setup because the vehicle appears capable of carrying it. That is not necessarily the smartest approach.
Every additional pound eventually becomes part of the truck’s working load, and every accessory adds another mounting point, another component to inspect and another thing that can make the setup more complicated. A well-balanced 150–170 lb tent on a properly engineered rack can be a much better long-term solution than a significantly heavier tent surrounded by accessories that you rarely use.
The same applies to expensive features. Built-in lighting, USB charging, solar integration, insulation and quick-opening mechanisms can all be worthwhile, but only when they solve a problem you actually have. Paying for features that remain unused does not make a camping setup more capable.
One Final Reality Check
Some of the newer rooftop tents available today have impressive specifications, but a specification sheet cannot prove how a tent will perform after years of vibration, weather exposure and repeated use. That is particularly important when long-term owner feedback is still limited.
So the rankings in this guide should be read as a practical comparison of construction, weight, usable space, weather features, setup design, power options and overall suitability, not as a promise that one tent will be perfect for every Gladiator owner.
If you get the foundation right, the rest becomes much easier: choose the right rack, keep sufficient load margin, mount the tent correctly, manage condensation, respect winter conditions, and size your power system around real consumption rather than marketing numbers.
That is what turns a rooftop tent from an expensive accessory sitting above the bed into a genuinely useful Jeep Gladiator camping system—one that you can live with on a two-night weekend, a long-distance road trip, or several days away from hookups without constantly fighting the equipment you bought to make camping easier.
Also Check: