
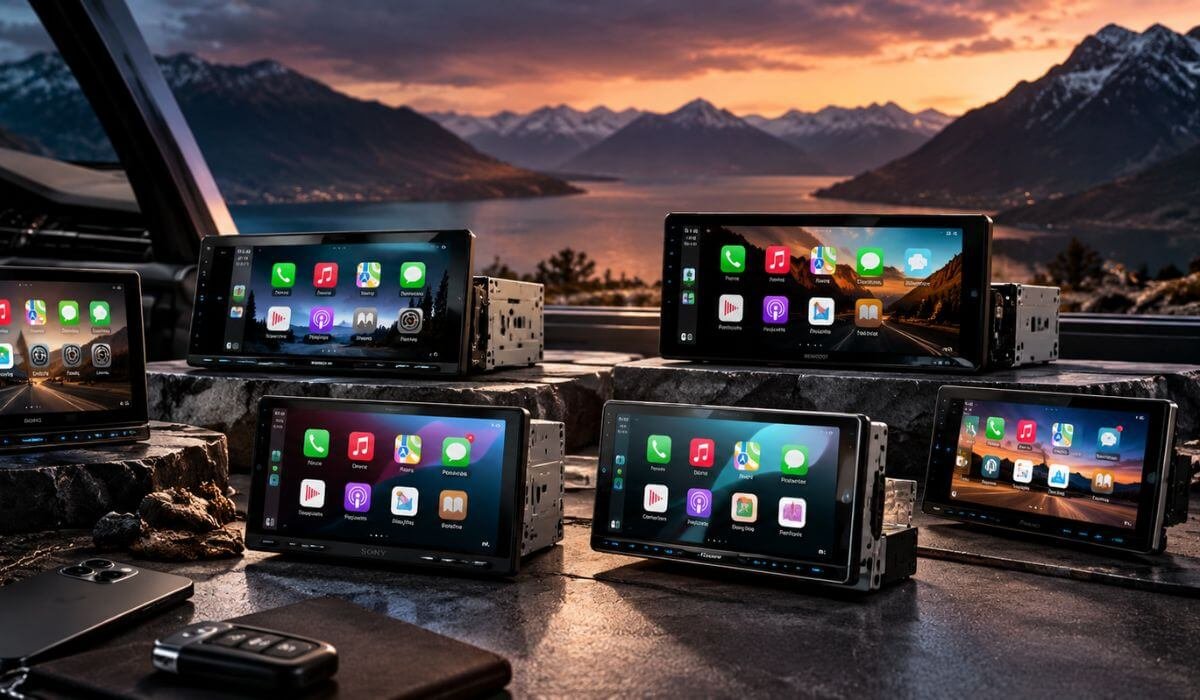
Best Wireless Apple CarPlay Head Units (2026): Floating Displays, Fast Pairing & Hi-Res Audio
If you are replacing an older factory radio or upgrading a newer car that still feels restricted by its built-in infotainment, wireless Apple CarPlay can completely change how the dashboard feels in everyday driving. But choosing the right receiver is not simply about buying the biggest touchscreen. A large display can be awkward if it sits too high or interferes with the dash, while a smaller unit can be the smarter choice when space is tight. Fitment, screen position, wireless stability, audio control, camera support, and the room available behind the radio all matter once the installation becomes real.
The Kenwood Excelon Reference DMX1058XR is a good example of why specifications need to be looked at as a complete system. Its 10.1-inch 1280×720 capacitive display uses a four-way floating adjustment, so the screen can be positioned around the dashboard rather than simply bolted into one fixed position. You also get wireless and wired Apple CarPlay, wireless Android Auto, wireless Hi-Res Audio, four camera inputs, 5V preouts, optical digital output, a 13-band EQ, and time alignment. That combination gives it considerably more room to grow than a basic CarPlay receiver, particularly if an amplifier, multiple cameras, or a more serious audio system is part of the plan.
For older vehicles, the important question is not simply whether the radio supports CarPlay; the receiver has to physically and electronically work with the car you are installing it in. Before buying, check the dash opening, chassis depth, floating-screen clearance, wiring, steering-wheel controls, factory amplifier, backup-camera setup, USB routing, and any vehicle-specific integration hardware. After comparing those details with screen quality, wireless connectivity, sound processing, amplifier support, camera capability, installation flexibility, and long-term upgrade potential, these are the wireless Apple CarPlay stereos I would consider strongest for different vehicles and real-world audio setups.
Best Apple CarPlay Head Units With Wireless Connectivity and Large Displays (2026)
#1. Kenwood Excelon Reference DMX1058XR — Premium Choice
Best Wireless Apple CarPlay Stereo for 10.1-Inch Floating Displays, Hi-Res Audio, 5V Preouts and Multi-Camera Integration
#2. Pioneer DMH-WT8600NEX — Large-Screen Pick
Best Wireless CarPlay Head Unit for 10.1-Inch Floating Displays, Single-DIN Installation and Hands-Free Voice Control
#3. Sony XAV-AX8500 — Versatile Upgrade
Best Large-Screen Apple CarPlay Stereo for 10.1-Inch HD Display, Wireless Android Auto, HDMI and Camera Integration
#4. Sony XAV-AX6000 — Compact Performer
Best Compact Apple CarPlay Stereo for Double-DIN Dash Installations, 14-Band EQ, 5V Preouts and Custom Audio Systems
#5. Pioneer DMH-WT8000NEX — Audio Specialist
Best Single-DIN CarPlay Head Unit for 10.1-Inch Floating Displays, Dolby Atmos, Auto Tuning and Amplifier Integration
#6. JVC KW-M690BW — Value Pick
Best Value Wireless Apple CarPlay Stereo for Compact Dash Spaces, Wireless Android Auto, 13-Band EQ and Everyday Audio
Expert Tip
Before buying a wireless Apple CarPlay head unit, check the chassis before you check the screen. That sounds backwards, especially when a 10.1-inch display looks far more impressive than a 6.8- or 7-inch unit, but the screen is only the part you see. What matters behind the dash is the radio chassis, mounting depth, wiring, steering-wheel-control compatibility, camera connections and whether the floating panel can actually sit where you want it.
There is also a simple distinction worth knowing: single-DIN describes the radio chassis, not the size of the display. That is why a unit such as the Pioneer DMH-WT8600NEX can use a 1-DIN chassis while carrying a much larger 10.1-inch screen. For an older vehicle with limited space behind the dashboard, that can be a much smarter solution than assuming a conventional double-DIN receiver will fit.
And for wireless CarPlay, do not judge a receiver only by the word “wireless.” The better question is whether the unit gives you the right combination of connection reliability, screen visibility, audio adjustment and vehicle integration for the car you actually drive. That is the standard we used here.
How We Chose These Wireless Apple CarPlay Head Units
We did not rank these receivers by screen size, brand popularity or the number of features listed on the box. The ranking reflects what each unit actually brings to a real installation, and that matters because these six receivers are not interchangeable despite all supporting wireless Apple CarPlay.
1. We looked at the hardware behind the screen
The first filter was physical design and installation flexibility.
The JVC KW-M690BW is deliberately different from the large floating-screen models. Its 6.8-inch capacitive display sits on a relatively short 85.7 mm chassis, making it interesting for vehicles where dash depth is a bigger concern than having a giant display.
At the other end, the Pioneer DMH-WT8600NEX and DMH-WT8000NEX use a 1-DIN chassis with a large floating display. That distinction is important because some older vehicles have enough room for the chassis but not enough room for a conventional deep double-DIN receiver.
The Kenwood DMX1058XR and Sony XAV-AX8500 take the large-screen approach from a different angle, while the Sony XAV-AX6000 is much more compact behind its 6.95-inch display.
We considered that difference when ranking them instead of treating every “10.1-inch” receiver as the same product.
2. Wireless CarPlay had to be more than a checkbox
Wireless Apple CarPlay is the main reason someone searches for this category, so it received considerably more weight than secondary features.
We looked at how complete the infotainment package is once the phone is connected: screen usability, Bluetooth functionality, smartphone integration, controls and whether the receiver still makes sense when you are using it every day rather than showing it off in a product photo.
That is why a smaller Sony or JVC can still make sense against a much larger Pioneer. A bigger screen is useful, but it is not automatically a better CarPlay experience.
3. We paid close attention to audio hardware
This is where many CarPlay lists become too shallow.
A head unit is still the control centre of the car’s sound system, so we looked beyond basic “built-in amplifier” claims and considered EQ capability, preamp outputs, time alignment, high-resolution audio support and tuning flexibility where those specifications were available.
The Kenwood DMX1058XR stands out here because it combines wireless smartphone connectivity with a more serious audio platform, while the Sony XAV-AX6000 gives buyers useful sound-shaping tools despite its smaller footprint.
For someone building a system around an aftermarket amplifier, subwoofer or upgraded speakers, those details can matter more than another inch of screen.
4. Camera and vehicle integration mattered
A replacement receiver has to work with the rest of the car.
We considered backup-camera support, additional camera inputs, steering-wheel-control integration and Maestro compatibility because these features can determine whether an upgrade feels factory-integrated or like an aftermarket box added to the dashboard.
The Kenwood is particularly strong for buyers who want multiple camera options, while the Sony XAV-AX6000 and XAV-AX8500 are attractive to vehicles where Maestro compatibility and HDMI connectivity are part of the upgrade plan.
We did not give a receiver extra credit simply for listing a feature. The question was whether that feature makes a meaningful difference to the type of installation the receiver is designed for.
5. We separated large-screen appeal from actual usability
A 10.1-inch floating display gets attention immediately, but screen size alone does not tell you whether it will work well in your vehicle.
We considered display adjustment, viewing position, physical layout and the type of dashboard each receiver is likely to suit. The Kenwood’s adjustable floating display, for example, gives it an advantage for buyers who need more control over screen positioning.
The Pioneer floating-screen receivers appeal to a different buyer: someone who wants a large modern display without giving up the installation advantages of a 1-DIN chassis.
That distinction is one of the main reasons the products are ranked separately rather than simply ordered from largest screen to smallest.
6. We considered what happens after installation
A good head unit should not only look impressive on the day it is installed. It should make sense six months later.
That means we considered the things you interact with repeatedly: wireless smartphone connection, audio controls, camera functionality, physical installation requirements and expansion potential.
We also avoided treating every buyer as if they needs the same thing. Someone replacing an older factory stereo in a tight dashboard may be better served by the JVC or a compact Sony. Someone building a more ambitious system may have a much better reason to spend more on the Kenwood or one of the Pioneer floating-screen units.
7. Finally, we ranked them by the buyer they serve best
There is no honest reason to call one receiver “best” for every vehicle.
The Kenwood leads this list because it offers the strongest overall balance of large-screen usability, wireless connectivity, audio capability and camera integration. The Pioneer DMH-WT8600NEX follows because its 10.1-inch display paired with a 1-DIN chassis solves a very specific installation problem particularly well.
The Sony XAV-AX8500 earns its place for buyers who want a large-screen Sony setup with HDMI and vehicle integration, while the XAV-AX6000 makes more sense where a smaller footprint and strong everyday functionality matter more than screen size.
The Pioneer DMH-WT8000NEX is especially relevant to buyers specifically looking for a premium single-DIN floating-screen setup, and the JVC KW-M690BW rounds out the list for drivers who want wireless CarPlay without automatically moving into the largest and most complicated installation.
That is ultimately what this list is built around: not six similar radios with different logos, but six different answers to the same problem — getting a better smartphone, audio and infotainment experience without choosing a receiver that does not suit the vehicle.
#1. Kenwood Excelon Reference DMX1058XR
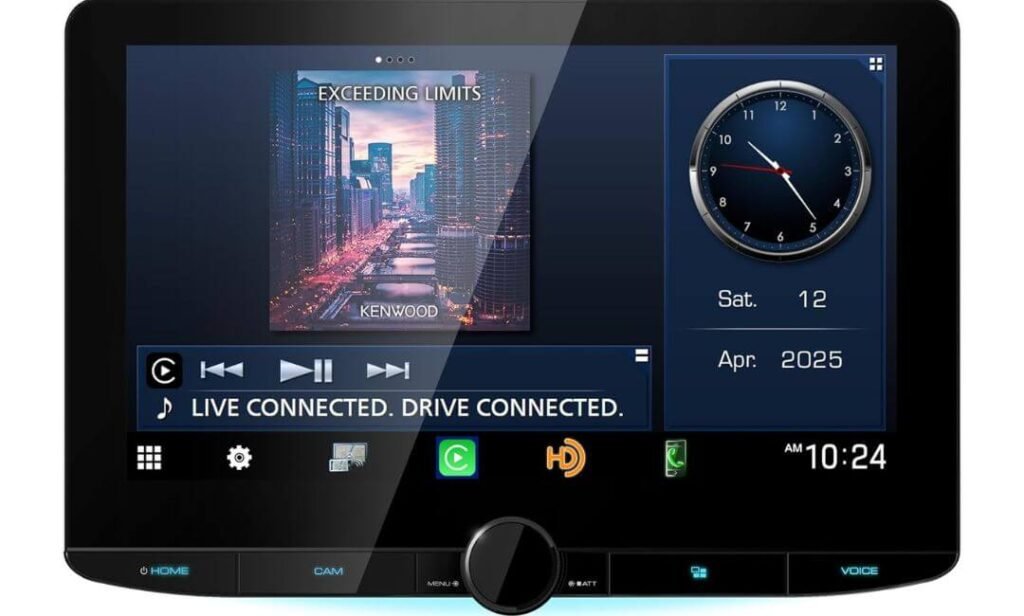
Quick Specs:
- Display: 10.1-inch HD capacitive touchscreen, 1280 × 720
- CarPlay: Wireless and wired Apple CarPlay
- Android Auto: Wireless and wired Android Auto
- Screen Design: 4-way adjustable floating display
- Camera Support: 4 camera inputs with HD rear-camera support
- Audio: Hi-Res Audio, LDAC Bluetooth and 13-band EQ
- Audio Outputs: 5V preouts plus optical digital output
- Connectivity: Bluetooth, built-in Wi-Fi, HDMI and USB
- Vehicle Integration: iDatalink Maestro Ready
- Fitment: Double-DIN receiver chassis with floating 10.1-inch monitor
If you are putting a new stereo into a truck or SUV and want the dashboard to feel genuinely upgraded rather than simply replacing one factory screen with another, this is where the DMX1058XR starts to stand out. The 10.1-inch 1280×720 display is obviously the attention-grabber, but the more interesting part is behind it: the receiver uses a compact double-DIN chassis while the floating monitor sits separately above the dash. That gives the installer considerably more freedom when positioning the screen.
Wireless CarPlay is the everyday reason to buy a receiver like this, but it is not where the hardware stops. You get wired and wireless Apple CarPlay, wireless Android Auto, built-in Wi-Fi, Bluetooth and wireless high-resolution audio. The audio side becomes particularly interesting if your factory speakers are only the beginning of the system. With 5V preouts, optical digital output, a 13-band EQ and time-alignment controls, this can serve as the control centre for a more serious amplifier or DSP setup rather than simply acting as a phone display.
Then there is the part many buyers only appreciate once they start planning the installation: four camera inputs. You can build the system around rear, front and side cameras while leaving room for additional video sources. Compatible HD cameras can also take advantage of the receiver’s high-resolution display, which is especially useful on a large 10.1-inch panel.
(The important detail: the value here is in the combination of a large adjustable screen, serious audio connections and unusually flexible camera support.)
What We Like About It
- 4-way floating display adjustment gives installers useful control over screen position.
- Four camera inputs are genuinely valuable for trucks, SUVs and multi-camera setups.
- 5V preouts and optical output leave plenty of room for an upgraded audio system.
- Wireless CarPlay and Android Auto keep everyday phone use cable-free.
- 13-band EQ and time alignment provide meaningful control over speaker staging and sound.
The One Trade-Off Worth Knowing
The large floating monitor requires more careful installation planning than a conventional fixed-screen receiver. Check the vehicle-specific dash kit, mounting position and available clearance before ordering.
Where This Head Unit Stands Out
The strongest reason to choose this receiver is not simply the 10.1-inch screen. It is the amount of hardware supporting that screen. Four camera inputs, 5V preouts, optical digital output, wireless high-resolution audio, extensive sound adjustment and Maestro compatibility give it a much broader role than a basic CarPlay receiver.
For a vehicle that only needs wireless CarPlay, a smaller receiver can be enough. But if you are planning an amplifier, DSP, upgraded speakers, multiple cameras or factory-feature retention, this unit gives you considerably more to work with without immediately forcing another head-unit upgrade.
The Insider Pro-Tip
Before installation, decide what you want the finished system to look like six months from now, not just on installation day. If an amplifier, DSP, front camera or side cameras are even a possibility, plan those connections while the dashboard is already apart. The available 5V preouts, optical output and four camera inputs are much more useful when the installation is designed around them from the beginning.
That is also why I would not buy this receiver purely for its screen. The 10.1-inch panel gets your attention; the audio outputs, camera architecture and adjustment options are what give the receiver its long-term value.
#2. Pioneer DMH-WT8600NEX
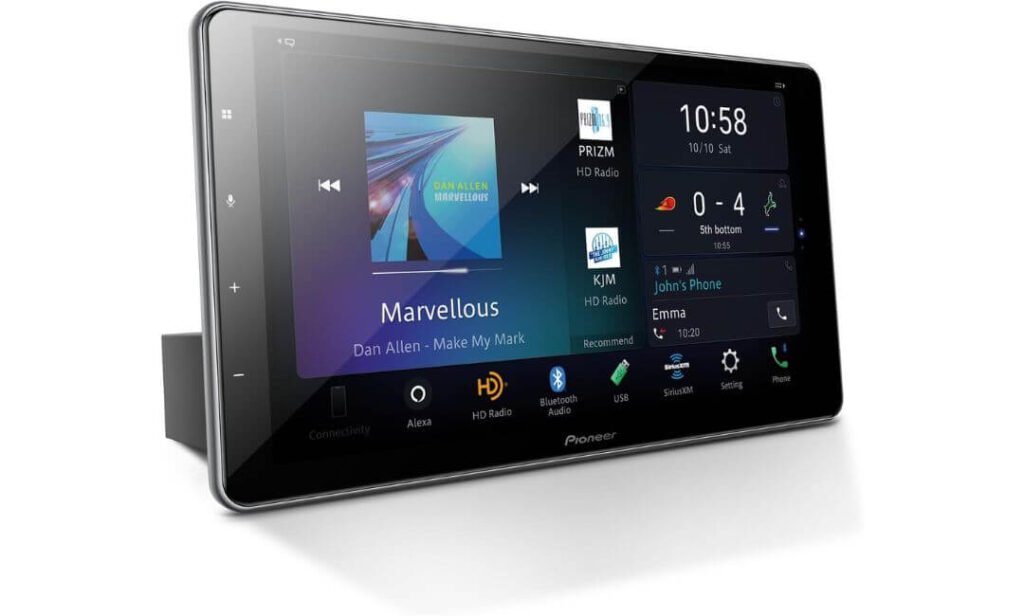
Quick Specs:
- Display: 10.1-inch HD capacitive touchscreen, 1280 × 720
- CarPlay: Wireless Apple CarPlay
- Android Auto: Wireless Android Auto
- Chassis: Single-DIN floating-screen design
- Screen Format: 10.1-inch floating display with adjustable positioning
- Audio: FLAC and other high-quality digital audio playback
- Connectivity: Bluetooth, built-in Wi-Fi, USB and HDMI input
- Voice Control: Amazon Alexa built in
- Screen Function: Split-screen display for compatible sources
- Camera: Rear-view camera input
- Radio: HD Radio and SiriusXM Ready
- Integration: iDatalink Maestro compatible
If you want the dashboard to look dramatically newer without giving up the installation advantage of a single-DIN chassis, this Pioneer takes a very different approach from a conventional car stereo. The receiver sits in the dash while its 10.1-inch 1280×720 capacitive display floats above it, giving you the visual impact of a much larger infotainment system without requiring a 10.1-inch radio body behind the dashboard.
The clever part is that the screen is not there simply to make maps bigger. With wireless Apple CarPlay and Android Auto, you can keep navigation, calls, messages and music available without running a phone cable across the console. The split-screen capability is also useful when you want CarPlay information visible while retaining access to another compatible receiver source, rather than repeatedly jumping between screens. That is the kind of feature you appreciate after living with the stereo rather than on the day you unbox it.
There is another reason this unit stands out: Amazon Alexa is built in. That gives the Pioneer a different voice-control angle from most of the receivers in this list. Add Bluetooth, Wi-Fi, HDMI, HD Radio, SiriusXM compatibility and a rear-camera input, and it becomes a broad multimedia replacement rather than a CarPlay-only screen. The HDMI input is particularly useful if you have a compatible video source, although the required adapter should be accounted for when planning the installation.
(The real attraction here is the combination of a single-DIN installation footprint, a genuinely large floating screen and voice control that goes beyond standard CarPlay.)
What We Like About It
- The 1-DIN chassis with a 10.1-inch floating screen is the biggest practical advantage for vehicles where conventional double-DIN installation is difficult.
- Built-in Amazon Alexa gives this receiver a useful hands-free option outside the normal Siri and Google Assistant experience.
- Split-screen functionality can reduce the constant switching between navigation and other receiver functions.
- Wireless Apple CarPlay and Android Auto keep the everyday smartphone experience clean and cable-free.
- The large capacitive display gives maps, album artwork and other CarPlay content considerably more visual space than a conventional 6.8- or 7-inch receiver.
The One Trade-Off Worth Knowing
The floating design looks excellent, but installation requires more planning than a standard fixed-screen unit. You need to check the single-DIN opening, mounting hardware, screen position and clearance around the display before assuming it will fit your dashboard exactly as pictured.
Where This Pioneer Stands Out
The strongest argument for this receiver is the way it solves two problems at once: limited radio space behind the dash and the desire for a much larger modern display.
A single-DIN chassis can be particularly useful in older trucks, SUVs and other vehicles where the factory radio opening does not provide the depth or configuration needed for a conventional double-DIN installation. Instead of forcing the entire electronics package into the larger opening, the receiver separates the screen from the chassis.
That also explains why this model sits high on our list. It is not simply competing with other wireless CarPlay radios on screen resolution. It is aimed at the buyer who specifically wants large-screen navigation, wireless smartphone integration and a floating installation without abandoning the flexibility of a single-DIN chassis.
The Insider Pro-Tip
Before ordering, take a photo of your dashboard with the factory radio removed and measure the actual opening and available depth. The 10.1-inch display is only one part of the installation; the single-DIN chassis still has to occupy a suitable mounting location, and the floating monitor needs enough room to sit naturally without interfering with vents, switches or visibility.
Also, if you think you will use the HDMI input, plan for the adapter and cable routing before the installation begins. It is a small detail, but routing video and USB connections while the dash is already apart is far cleaner than trying to add them later.
For the right vehicle, that is what makes this Pioneer interesting: you get the visual impact of a large-screen infotainment system without requiring the entire head unit to occupy that same space behind the dash.
#3. Sony XAV-AX8500
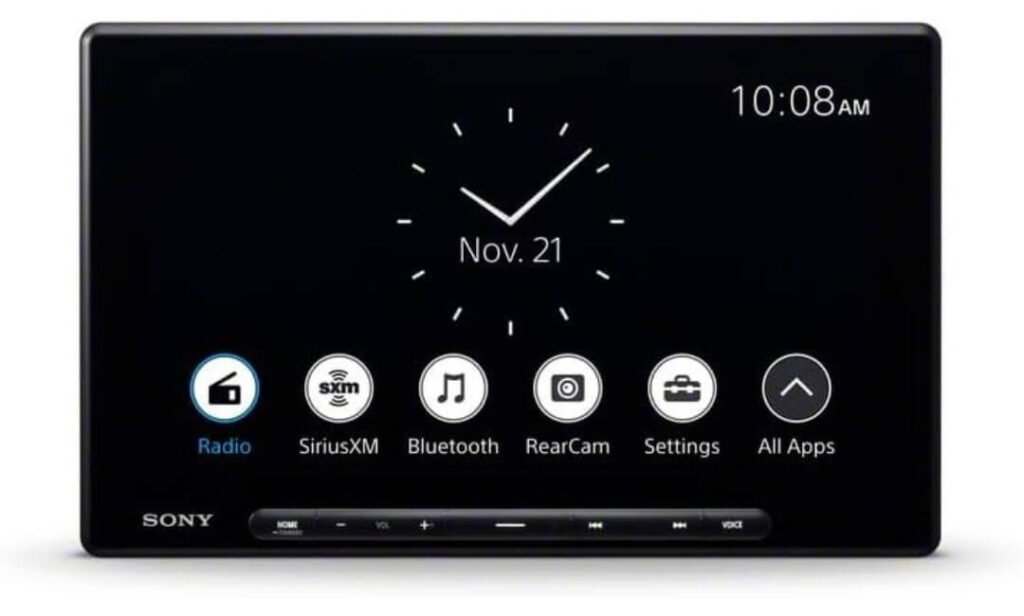
Quick Specs:
- Display: 10.1-inch HD capacitive touchscreen
- CarPlay: Wireless Apple CarPlay
- Android Auto: Wireless Android Auto
- Screen Adjustment: Adjustable tilt and swivel mechanism
- Camera Support: 3 camera inputs with individual triggers
- Audio Tuning: 14-band parametric EQ with time alignment
- Amplifier: 55W × 4 maximum power
- Preouts: 3 RCA preamp outputs
- Connectivity: Bluetooth, USB-C and HDMI
- Vehicle Integration: iDatalink Maestro Ready
- Satellite Radio: SiriusXM Ready
- Warranty: 3 years
If you like the idea of a 10.1-inch floating display but do not want the screen locked into one fixed position, the XAV-AX8500 takes a particularly practical approach. Its updated monitor joint allows both tilt and swivel adjustment, so the screen can be positioned around the driver’s sightline rather than simply sitting wherever the original mounting geometry dictates. That matters in real dashboards, where the ideal screen angle is rarely identical from one vehicle to another.
The wireless side covers the essentials with Apple CarPlay and Android Auto, while the large capacitive HD display gives navigation, music and phone controls plenty of room. Sony also gives the receiver a stronger audio-control package than its clean exterior might suggest: a 14-band parametric EQ, time alignment and three RCA preouts give you useful room to tune an upgraded speaker or amplifier setup instead of treating the receiver as a basic factory-radio replacement.
The other feature worth paying attention to is the camera architecture. There are three camera inputs with individual triggers, which gives installers more flexibility when a vehicle needs more than a simple reversing camera. Add HDMI, USB-C, Bluetooth and Maestro compatibility, and this becomes a well-rounded option for someone who wants a large-screen wireless CarPlay system without moving all the way into a highly specialised audio build.
(The standout combination here is simple: a genuinely large display, useful physical adjustment and enough audio and camera flexibility for a serious everyday installation.)
What We Like About It
- Tilt and swivel adjustment gives the 10.1-inch display more useful positioning freedom than a fixed panel.
- Three individually triggered camera inputs are valuable for vehicles using front, rear or additional camera views.
- 14-band parametric EQ and time alignment give you meaningful control over sound staging.
- Three RCA preouts leave the door open for external amplifiers.
- Three-year warranty is a welcome advantage when comparing premium head units.
The One Trade-Off Worth Knowing
The large adjustable monitor is the attraction, but it also means dash clearance and screen positioning need to be checked before installation. The physical opening may accept the receiver while the preferred screen position still needs adjustment around vents, controls or the driver’s view.
Where This Sony Stands Out
The XAV-AX8500 sits in an interesting middle ground. It is not trying to win purely through the largest collection of audio connections, nor is it simply a giant screen attached to a basic receiver.
Its strength is the balance between display flexibility and everyday integration. Wireless CarPlay handles the phone side, the 10.1-inch panel gives navigation plenty of visual space, the tilt-and-swivel mechanism helps with real-world positioning, and the three camera inputs give the installation more flexibility than a basic backup-camera setup.
The audio controls also deserve attention. If you are replacing factory speakers or adding an amplifier later, the 14-band parametric EQ, time alignment and three RCA outputs mean the receiver can remain useful as the rest of the system develops.
The Insider Pro-Tip
Before the installer permanently fixes the screen position, sit in the driver’s seat and check the display from your normal driving posture. A floating 10.1-inch screen can look perfect from outside the vehicle and still sit too high, too low or at the wrong angle once you are actually behind the wheel. The tilt-and-swivel mechanism is there for exactly this reason, so use it to prioritise visibility rather than simply choosing the most dramatic-looking position.
And if you are adding cameras, decide their roles before the wiring is finished. With three individually triggered inputs, you can build a more useful camera setup than rear-only coverage, but only if the installer plans those trigger connections from the start.
The result is a Sony that feels less like a screen upgrade and more like a properly adjustable command centre for wireless CarPlay, cameras and an upgraded sound system.
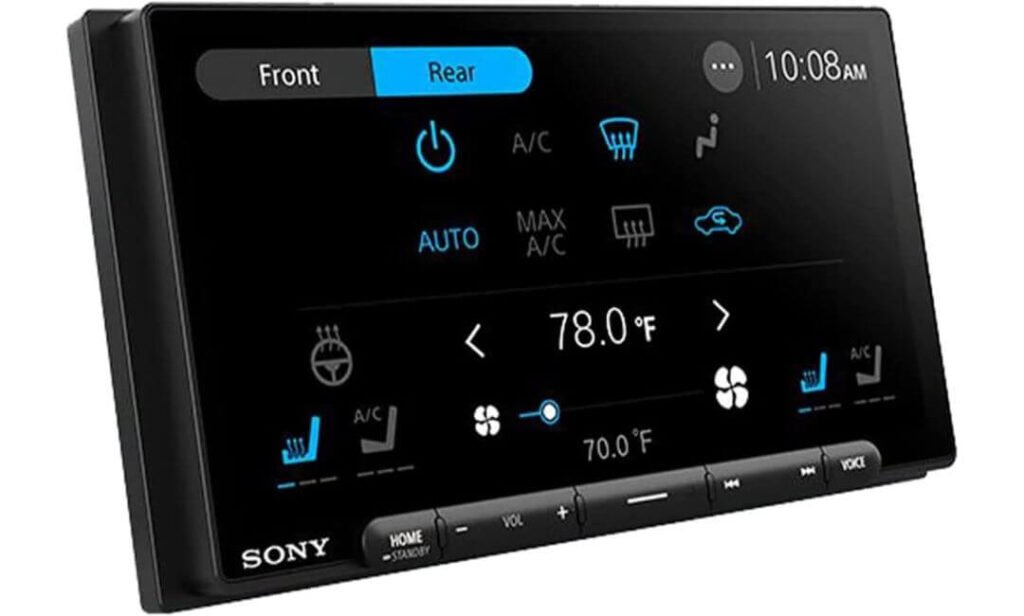
#4. Sony XAV-AX6000
Quick Specs:
- Display: 7-inch bezel-less capacitive touchscreen with anti-glare surface
- CarPlay: Wireless Apple CarPlay
- Android Auto: Wireless Android Auto
- Chassis: Compact rear chassis for easier installation
- Audio: 14-band parametric EQ and time alignment
- Preouts: 5V front, rear and subwoofer RCA outputs
- Connectivity: Bluetooth, USB and HDMI input
- Camera: Rear-camera input
- Vehicle Integration: iDatalink Maestro Ready
- Radio: SiriusXM Ready
- Warranty: 3 years
Not every dashboard needs a giant floating display. In fact, there are plenty of vehicles where a compact receiver is the smarter upgrade, especially when space behind the factory radio is limited. That is where the XAV-AX6000 earns its place. The 7-inch bezel-less screen keeps the front of the unit clean and modern, while the compact rear chassis makes installation easier in dashboards where a deeper receiver can become a problem.
The more interesting part is what Sony has packed behind that relatively restrained screen. You get wireless Apple CarPlay and Android Auto, HDMI connectivity, a rear-camera input and iDatalink Maestro compatibility, but the audio hardware is what separates it from many basic CarPlay receivers. Its 5V front, rear and subwoofer preouts, 14-band parametric EQ and time-alignment controls give an installer considerably more control when the factory speakers are being replaced or external amplification is added.
The 7-inch display also has one practical advantage that is easy to overlook: anti-glare treatment. You are looking at this screen in daylight, at night and from changing angles every time you drive, so a clean, readable panel can be more useful than simply chasing the biggest possible diagonal measurement. If your priority is a tidy installation with strong audio expansion rather than a dashboard dominated by a huge screen, this Sony is a very different proposition from the floating units above it.
(Its appeal is less about spectacle and more about getting a capable wireless CarPlay system into a dashboard where space, audio control and clean installation all matter.)
What We Like About It
- Compact rear chassis makes it a strong candidate for tighter dashboard installations.
- 5V front, rear and subwoofer outputs give an aftermarket amplifier plenty of signal flexibility.
- 14-band parametric EQ and time alignment provide serious tuning control for a relatively compact receiver.
- Bezel-less anti-glare display keeps the dashboard looking clean without unnecessary bulk.
- Three-year warranty adds useful reassurance for a long-term installation.
The One Trade-Off Worth Knowing
The obvious compromise is the 7-inch screen. It is considerably smaller than the 10.1-inch displays higher on this list, so buyers who spend most of their time using navigation may prefer the extra screen area of a floating receiver.
Where This Sony Earns Its Place
This is the receiver I would look at when the question is not “How big can my screen be?” but “How much capability can I fit without making the installation unnecessarily complicated?”
The compact chassis can be particularly valuable in older vehicles or dashboards with limited depth. At the same time, the 5V preouts mean you are not giving up much of the audio-system flexibility simply because the screen is smaller. Add wireless CarPlay, wireless Android Auto, HDMI, camera support and Maestro integration, and the package covers the features most people actually use after the novelty of a new screen wears off.
There is also a useful upgrade path here. You can start with the factory speakers and later add an amplifier, subwoofer or other audio components without immediately needing another receiver. The 5V outputs and dedicated subwoofer connection are the important pieces to notice.
The Insider Pro-Tip
If your vehicle has a shallow or crowded dashboard, measure the space behind the factory radio before choosing your screen size. A 10.1-inch floating display may look better in a product photo, but a compact receiver that installs cleanly and leaves your vents, controls and wiring unobstructed is the better upgrade if the dashboard cannot comfortably accommodate a larger design.
For an audio-focused build, I would also take advantage of the 5V preouts from the beginning. If you already know an amplifier or subwoofer is coming later, have the installer plan those signal and power paths while the dash is open. It saves unnecessary rework and lets this small-screen Sony become the foundation of a much more capable system.
The key takeaway is simple: this is the compact choice for buyers who care more about installation freedom and audio control than having the biggest display in the dashboard.
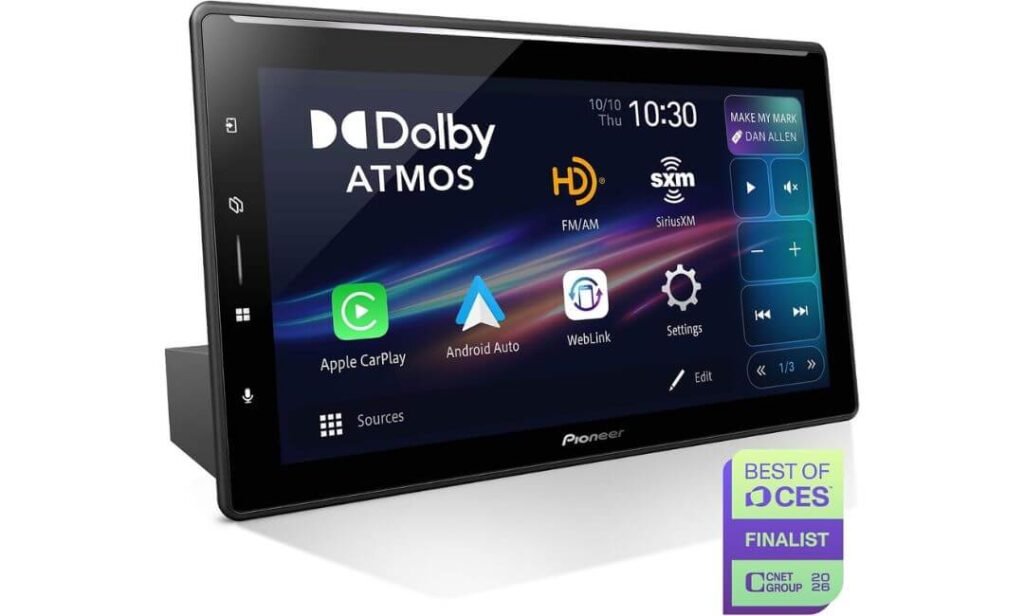
#5. Pioneer DMH-WT8000NEX
Quick Specs:
- Display: 10.1-inch HD floating touchscreen
- CarPlay: Wireless and wired Apple CarPlay
- Android Auto: Wireless and wired Android Auto
- Chassis: Single-DIN
- Audio: Dolby Atmos spatial audio
- Sound Tuning: PURE automatic tuning system and 13-band EQ
- Preouts: 4V RCA preamp outputs
- Screen: Adjustable tilt floating display
- Cameras: Dual rear-camera inputs with parking guides
- Connectivity: Bluetooth, built-in Wi-Fi and USB
- Radio: HD Radio and SiriusXM Ready
- Control: Pioneer PxLink app and split-screen functionality
- Integration: iDatalink Maestro compatible
The interesting thing about this Pioneer is that the 10.1-inch screen is not actually the reason I would put it on a serious shortlist. The screen gets your attention first, but the audio processing underneath it is what separates this model from the usual large-screen CarPlay receiver. Dolby Atmos support and the PURE automatic tuning system give the unit a much more ambitious role in the vehicle than simply providing a large interface for Maps and Apple Music.
That matters particularly if you listen to compatible spatial-audio content. Dolby Atmos is designed to create a more three-dimensional presentation from supported material, while PURE is intended to help compensate for the acoustic differences inside a real vehicle. Add a 13-band EQ and 4V preamp outputs, and there is enough adjustment and signal flexibility here for someone building around aftermarket amplifiers or upgraded speakers.
The other half of the package is much easier to appreciate every day. You get wireless and wired Apple CarPlay and Android Auto, Bluetooth, Wi-Fi, a 10.1-inch floating display and Pioneer’s PxLink app for interface customisation and firmware updates. The single-DIN chassis is also important: it lets the receiver deliver a huge screen without requiring the entire electronics section to occupy a conventional 10.1-inch-sized space behind the dashboard.
(This is the specialist pick in the list: large-screen CarPlay on the outside, serious audio processing underneath.)
What We Like About It
- Dolby Atmos support gives compatible spatial-audio content a genuinely different reason to choose this receiver.
- PURE automatic tuning can take some of the guesswork out of setting up the system inside the vehicle.
- 4V preouts provide a stronger foundation for external amplifiers and more advanced audio systems.
- 10.1-inch floating display with adjustable tilt delivers excellent visibility without requiring a large chassis behind the dash.
- Wireless and wired CarPlay give you flexibility when you want cable-free convenience or a direct wired connection.
The One Trade-Off Worth Knowing
The advanced audio hardware comes with a premium price and a more involved installation, so it is harder to justify if your only requirement is wireless CarPlay and basic factory-speaker use.
Where This Pioneer Stands Out
This is the receiver for the buyer who keeps asking a different question from everyone else: “What can I do with the sound once the head unit is installed?”
A normal wireless CarPlay receiver can already handle navigation, calls and music. The WT8000NEX goes further by putting its attention on the actual listening environment. PURE tuning, Dolby Atmos processing, a 13-band EQ and 4V preouts give you considerably more to work with when the rest of the audio system matters.
The single-DIN chassis is equally important. If the vehicle has limited room behind the dashboard but you still want a 10.1-inch display, the floating-screen architecture solves a real installation problem. You get the visual scale without needing the entire receiver to occupy that same amount of space.
That combination is why this Pioneer belongs in the list even though it is not the obvious choice for every buyer. It is deliberately aimed higher than basic smartphone integration.
The Insider Pro-Tip
If you are buying this specifically for Dolby Atmos or PURE tuning, do not let the installer treat it like an ordinary CarPlay receiver. The microphone placement and system calibration are part of the experience, so the tuning process deserves as much attention as the physical mounting.
Also decide whether you are actually going to build around the 4V preouts. If an amplifier, subwoofer or DSP is planned, run the installation with those future connections in mind while the dashboard is open. If you are keeping the factory speakers and have no plans for an audio upgrade, much of what makes this Pioneer special will remain unused.
The smart reason to buy it is not simply that it has a huge screen. You buy it when the screen, wireless CarPlay and advanced sound processing all matter at the same time.
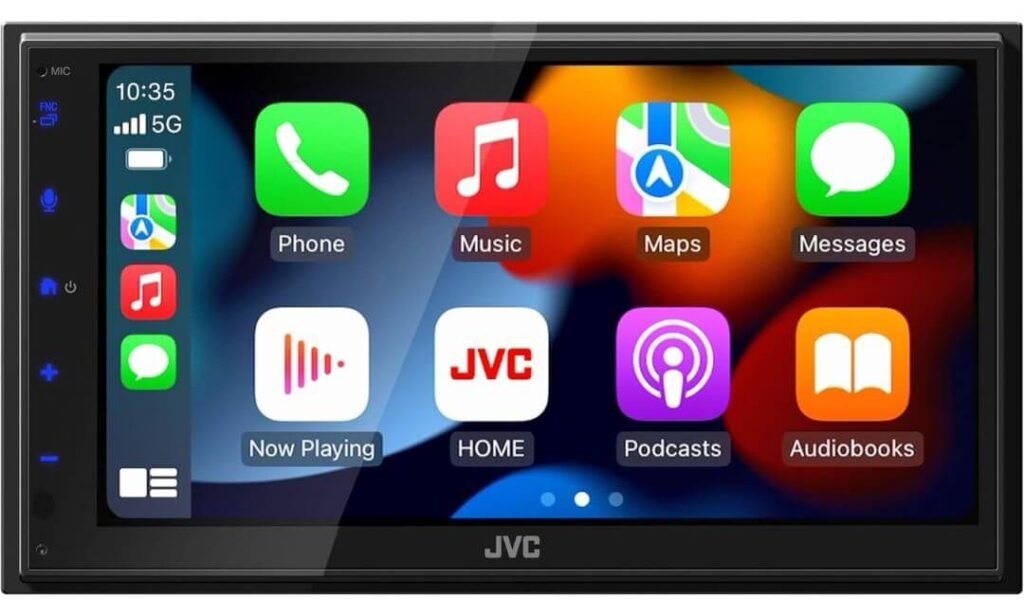
#6. JVC KW-M690BW
Quick Specs:
- Display: 6.8-inch capacitive touchscreen
- CarPlay: Wireless Apple CarPlay
- Android Auto: Wireless Android Auto
- Chassis: Short-depth design for easier installation
- Audio: 13-band graphic equalizer
- Phone Mirroring: USB mirroring for compatible Android devices
- Connectivity: Bluetooth, USB and AUX
- Camera: Rear-camera input
- Interface: Capacitive touchscreen with straightforward controls
- Installation: Designed for space-conscious aftermarket installations
There is a reason not every wireless CarPlay upgrade needs to end with a giant floating screen. Some dashboards simply benefit more from a short chassis and a straightforward receiver, especially older vehicles where space behind the factory radio can be surprisingly tight. The KW-M690BW takes that route with a 6.8-inch capacitive touchscreen and a short-depth chassis, keeping the installation considerably less demanding than some of the larger floating-screen alternatives above it.
The important part is that JVC has not stripped away the feature that actually brought you to this category. You still get wireless Apple CarPlay and wireless Android Auto, along with Bluetooth for hands-free calling and audio streaming. For someone moving from an older factory radio, that alone can completely change the daily experience: your phone stays in your pocket or on the console while navigation, calls and music appear directly on the receiver.
Audio control is another nice surprise for a receiver positioned as the value option. The 13-band graphic EQ gives you considerably more room to shape the system than the basic bass-and-treble controls found on many entry-level units. USB mirroring for compatible Android devices adds another useful connection option, while the rear-camera input gives you a practical upgrade path if the vehicle does not already have a reversing camera.
(This is the straightforward choice: less screen, less bulk and fewer complications, but the wireless CarPlay experience you actually came for.)
What We Like About It
- Short chassis design is particularly useful when dashboard depth is limited.
- Wireless Apple CarPlay and Android Auto cover the main smartphone features without requiring a permanent cable.
- 13-band EQ gives useful control over the sound for an affordable receiver.
- 6.8-inch capacitive display keeps the interface clean and responsive without adding a large floating panel.
- USB mirroring and rear-camera support give the unit more flexibility than a basic Bluetooth stereo.
The One Trade-Off Worth Knowing
This is not the receiver I would choose for a large amplifier, DSP and multi-zone audio build. Its feature set is much more appropriate for a straightforward factory-speaker or modest upgraded-audio installation.
Where This JVC Stands Out
The real strength here is installation simplicity.
A short-depth receiver can solve a problem that is almost invisible when you are shopping online. You can have the perfect screen size, wireless CarPlay and every feature on the specification sheet, only to discover that the space behind your factory dashboard is too shallow for the receiver you chose. That is where a compact design becomes genuinely valuable.
It also avoids making the buyer pay for hardware they may never use. If your goal is wireless CarPlay, hands-free calling, Android Auto, decent sound adjustment and a backup-camera connection, this JVC covers those fundamentals without turning the dashboard into a large multimedia project.
That is why it remains on this list even though the five receivers above it offer more ambitious hardware. It is the practical choice for the buyer who wants a clean upgrade rather than a complete audio-system rebuild.
The Insider Pro-Tip
For an older car, measure the depth behind the factory radio before buying anything. This is one of those specifications that rarely gets attention until an installation goes wrong. The short chassis is one of this JVC’s biggest advantages, so use that advantage when choosing your vehicle rather than assuming every double-DIN or single-DIN receiver has the same physical requirements.
And if you already know you will eventually add multiple amplifiers, a DSP or a more complex camera system, look higher up this list instead. The money saved here is useful only if the receiver already covers what you intend to build. For a simple wireless CarPlay upgrade, however, keeping the system compact can be the smarter decision than paying for features that will never be used.
Best Wireless Apple CarPlay Head Units in 2026 (6 Models Compared for Screen, Sound and Installation)
| What Actually Matters | Kenwood DMX1058XR System Builder | Pioneer DMH-WT8600NEX Large 1-DIN | Sony XAV-AX8500 Large Screen | Sony XAV-AX6000 Compact Audio | Pioneer DMH-WT8000NEX Audio Focus | JVC KW-M690BW Value |
|---|---|---|---|---|---|---|
| Screen & Interface | 10.1″ HD 1280×720 · 4-way adjustment Highly Adjustable | 10.1″ HD 1280×720 · floating display Large Screen | 10.1″ HD tilt + swivel adjustment Flexible Viewing | 7″ Bezel-Less anti-glare capacitive display Compact | 10.1″ HD floating display · adjustable tilt Immersive | 6.8″ Capacitive straightforward touchscreen interface Space Friendly |
| Wireless CarPlay | Wireless + Wired | Wireless + Wired | Wireless + Wired | Wireless + Wired | Wireless + Wired | Wireless |
| Wireless Android Auto | Yes | Yes | Yes | Yes | Yes | Yes |
| Chassis / Installation Character | Double-DIN + Floating Requires attention to screen clearance | Single-DIN + Floating Useful where radio depth is limited | Floating Monitor Check tilt/swivel clearance carefully | Compact Chassis Strong option for tight dashboards | Single-DIN + Floating Plan screen and dash clearance | Short Chassis One of its biggest practical advantages |
| Audio Tuning | 13-Band EQ Time alignment + advanced processing Advanced | Advanced EQ High-quality digital audio support Strong | 14-Band EQ Parametric EQ + time alignment Tuning Focus | 14-Band EQ Parametric EQ + time alignment Audio Focus | 13-Band EQ PURE automatic tuning + Dolby Atmos Immersive Audio | 13-Band EQ Useful control for everyday systems Good Control |
| Preamp / Expansion Potential | 5V RCA + Optical Built for serious system expansion Best Expansion | Strong Suitable for upgraded audio systems Expandable | 3 RCA Preouts Useful for amp-based systems Expandable | 5V Front / Rear / Sub Excellent foundation for custom audio Amp Friendly | 4V RCA Good match for upgraded amplifier systems System Ready | Limited Better suited to simpler systems Keep It Simple |
| Camera / Vehicle Integration | 4 Camera Inputs HD camera support + Maestro Ready Most Flexible | Rear Camera Maestro-compatible integration | 3 Camera Inputs Individual trigger control + Maestro Multi-Camera | Rear Camera Maestro Ready | Dual Rear Cameras Parking guides + Maestro Ready Flexible | Rear Camera Input Camera hardware sold separately |
| Best Real-World Fit |
Serious Audio Build
Best when amps, DSPs, multiple cameras or future expansion are part of the plan.
|
Large Screen + 1-DIN
A strong choice when the dashboard benefits from a floating 10.1-inch display.
|
Large Screen Everyday Use
Great balance when screen adjustment and vehicle integration matter.
|
Tight Dash + Audio
Better for buyers who want serious sound controls without a large floating monitor.
|
Immersive Audio Build
Best suited to buyers who specifically value Dolby Atmos and automatic sound tuning.
|
Simple Wireless Upgrade
Ideal when compact installation and wireless CarPlay matter more than expansion.
|
| What You Should Know Before Buying |
Don’t buy it just for the screen. Its real advantage is the underlying audio and camera architecture. |
Measure twice. The 10.1-inch display is excellent, but floating-screen clearance matters. |
Think about viewing angle. Tilt and swivel are useful only when the installation leaves room to use them. |
Measure behind the radio. Its compact chassis is a major advantage in difficult installations. |
Use the tuning features. Dolby Atmos and automatic tuning are more valuable when the rest of the system can take advantage of them. |
Know your upgrade ceiling. It is a better fit for straightforward systems than ambitious multi-amp builds. |
Best Wireless CarPlay Head Unit Buying Guide: How to Choose the Right One for Your Car
Buying a wireless Apple CarPlay head unit looks simple until you start comparing actual receivers. A 10.1-inch floating screen may look more impressive than a compact 7-inch receiver, but that does not automatically make it the better upgrade. The right head unit has to fit the vehicle, work with the factory electronics, suit the audio system you plan to build, and still be useful several years after installation.
The biggest mistake is choosing by screen size or wireless CarPlay alone. Those are important features, but they are only part of the equation. Before buying, work through the following checks in order.
1. Start With the Vehicle and Dash Fitment
Before comparing EQ bands, display resolution or wireless features, confirm that the receiver can actually be installed in your vehicle.
Aftermarket head units do not all use the same physical layout. A receiver can be marketed as a double-DIN unit, yet the dashboard opening, mounting brackets, rear depth, wiring and surrounding trim can still make installation difficult. Floating-screen receivers add another consideration because the screen sits outside the main chassis and needs adequate clearance around the dashboard.
Pay particular attention to:
- Factory radio opening: Determine whether your vehicle uses a single-DIN, double-DIN or manufacturer-specific opening.
- Available depth: This is especially important in older vehicles and dashboards with wiring or factory modules directly behind the radio.
- Floating-screen clearance: Check whether the display will interfere with air vents, climate controls, switches or the top of the dashboard.
- Screen adjustment: Tilt, swivel and height adjustment are useful only if there is enough physical room to use them.
- Dash kit: Many vehicles require a vehicle-specific mounting and trim kit rather than simply bolting the new receiver into the factory opening.
- Wiring harness: A plug-and-play installation is not guaranteed. Steering-wheel controls, factory amplifiers, USB ports and other original equipment may require additional interfaces.
- Factory camera: If the vehicle already has a reversing camera, verify that the new receiver can accept its signal and whether an adapter is required.
This is where the short chassis of the JVC KW-M690BW can be genuinely useful. Its advantage is not that a shorter receiver sounds better; it is that less depth behind the dashboard can make an otherwise difficult installation considerably easier.
On the other hand, the larger floating displays from Pioneer, Sony and Kenwood require you to think about the space in front of the dashboard as well as behind it.
2. Decide Whether You Actually Need a Floating Display
A large screen is one of the easiest specifications to notice, but it should not be the first reason you buy a head unit.
A 10.1-inch floating display gives you a much larger navigation and media interface than a conventional 6.8- or 7-inch receiver. It can also make Apple Maps, Google Maps and music controls easier to see at a glance. But the larger panel takes up more physical space and may not suit every dashboard.
There are two very different approaches here.
| If your priority is… | Look for… | Why it matters |
|---|---|---|
| Large navigation display | 10.1-inch floating screen | More usable map and media area |
| Clean factory-style appearance | 6.8–7-inch fixed display | Less visually dominant |
| Limited radio depth | Short or compact chassis | Easier physical installation |
| Flexible viewing angle | Tilt or swivel adjustment | Helps position the screen for the driver |
| Older dashboard | Compact chassis + correct dash kit | Reduces installation problems |
| Bright daytime driving | Anti-glare display | Can reduce distracting reflections |
| Simple controls | Responsive capacitive touchscreen | Easier everyday operation |
There is also a glare and viewing-angle question that specifications rarely explain well. A huge screen positioned badly can be less pleasant to use than a smaller display sitting at the correct angle.
For a floating unit, sit in the driver’s seat and imagine where the display will actually sit. Check whether it blocks vents, catches sunlight or interferes with controls before committing to the installation.
3. Treat Wireless CarPlay as a Daily-Use Feature, Not Just a Specification
Wireless Apple CarPlay is the main reason many buyers are replacing their factory radio, but there is more to the experience than seeing the words “Wireless CarPlay” on a product page.
The real benefit is not having to connect your iPhone with a cable every time you get into the vehicle. Navigation, calls, music, Siri and compatible apps become available through the receiver without dedicating a USB cable to the connection.
Before buying, check:
- Whether CarPlay is wireless, wired or both.
- Whether Android Auto is also wireless if multiple phones will use the vehicle.
- How the phone reconnects after the initial setup.
- Whether a USB connection remains available as a wired fallback.
- Whether Bluetooth handles hands-free calling and music independently.
- Where the USB port is located and whether it is easy to access.
- Whether the receiver supports the phone and operating-system versions you use.
A useful point that gets overlooked: wireless CarPlay does not mean the receiver operates independently of your phone. Your iPhone still provides much of the navigation, communication and app functionality. The receiver is essentially providing the interface and vehicle connection.
That is why a simpler receiver can still be an excellent purchase if its wireless integration works well for the way you drive.
4. Look Beyond CarPlay When Comparing Audio Hardware
If you are only replacing a factory radio and keeping the original speakers, you probably do not need the most elaborate audio-processing platform available.
But if you are planning new speakers, subwoofers, amplifiers or a DSP, the audio section becomes much more important.
Do not judge audio capability by the number of watts printed on the box. Aftermarket receivers generally use their internal amplification for basic speaker power, while serious system upgrades rely on the receiver’s preamp outputs and external amplification.
Pay attention to:
- Preamp output count: Front, rear and subwoofer outputs give you much more flexibility than a receiver designed around a single subwoofer connection.
- Preamp voltage: Higher-voltage outputs can provide a stronger signal to compatible external amplifiers and are particularly useful in upgraded systems.
- Equalizer: A 13- or 14-band EQ provides considerably more control than basic bass and treble adjustments.
- Time alignment: Useful for correcting differences in speaker distance and improving the driver’s listening position.
- Parametric EQ: Gives more precise control over frequency, bandwidth and level than a simple graphic EQ.
- High-resolution audio support: Worth considering if your music library and rest of the system can actually take advantage of it.
- Digital outputs: Optical or other digital connections can be valuable when integrating an external processor or DSP.
- Automatic tuning: Helpful, but it should not be treated as a replacement for proper system setup.
This is one reason the Kenwood sits at the top of this particular selection. Its 5V preamp outputs, optical output, 13-band EQ, time alignment and multiple camera inputs give an enthusiast considerably more room to build around the receiver.
The Sony XAV-AX6000 takes a different approach. Its compact chassis combined with 5V front, rear and subwoofer outputs, 14-band parametric EQ and time alignment makes it particularly interesting when the dashboard is tight but the audio system is not going to stay completely stock.
5. Think About Your Future Audio System Before Buying
A head unit should not only match the system you have today. It should also be compatible with the upgrade you are realistically likely to make later.
For example:
Factory speakers only
You can concentrate more heavily on wireless CarPlay, screen usability, installation and everyday convenience.
Factory speakers + subwoofer
A dedicated subwoofer output and suitable level of audio control become more important.
Amplifier + upgraded speakers
Look for front and rear preamp outputs, useful output voltage and proper audio tuning.
Multi-amplifier system + DSP
This is where output architecture, digital connectivity, signal control, time alignment and EQ flexibility become much more important than screen size.
Multiple cameras
Camera inputs, trigger control and the ability to switch between camera views can become more valuable than another inch or two of display.
This is also where a cheaper receiver can become expensive in the long run. Saving money on the head unit does not help much if you later need to replace it because it lacks the outputs or processing required for the system you want to build.
6. Check Vehicle Integration Before Assuming Everything Will Work
Modern vehicles contain considerably more electronics than the radio itself.
Depending on the vehicle, replacing the factory receiver can affect:
- Steering-wheel audio controls
- Factory amplifier communication
- Backup-camera operation
- USB ports
- Vehicle information
- Parking sensors
- Retained accessory power
- Factory microphone
- Chimes and warning sounds
- Other OEM controls
This is why iDatalink Maestro compatibility can be an important buying consideration for supported vehicles. It can allow certain factory functions and vehicle information to be retained through the appropriate interface and installation setup.
But do not assume that “Maestro Ready” means every factory feature will automatically work. Compatibility depends on the vehicle, factory equipment, receiver and interface combination.
The same principle applies to cameras. A receiver having a camera input does not necessarily mean your factory camera can simply be plugged into it. Some OEM camera systems use different connectors, voltages or signal formats.
7. Compare Connectivity, Not Just the Number of Ports
Wireless CarPlay is only one part of the connectivity package.
A good everyday receiver should give you enough flexibility that one failed connection does not leave you without another option.
Look at:
- Wireless Apple CarPlay
- Wireless Android Auto
- Bluetooth calling
- Bluetooth audio streaming
- USB media playback
- USB phone connection
- HDMI, if you actually need video input
- AUX input where relevant
- Wi-Fi functionality
- Smartphone apps
- Firmware update support
The USB connection remains useful even on a wireless CarPlay receiver. It can provide a wired fallback, support compatible media devices and, depending on the receiver, offer additional functionality that is not available wirelessly.
Do not pay extra for a connection simply because it appears impressive on the specification sheet. HDMI, multiple camera inputs and advanced digital connections are valuable when your installation needs them, not because the product page lists them.
8. Pay Attention to Firmware and Long-Term Support
Wireless smartphone integration is software-dependent, so the buying decision should not end with hardware specifications.
A receiver may have an excellent display and audio section, but its long-term usefulness also depends on how the manufacturer handles firmware, compatibility and software support.
Before buying, check:
- The manufacturer’s current firmware page.
- Whether firmware updates are available for the exact model.
- How updates are installed.
- Whether updates require USB or another connection method.
- Whether the manufacturer continues supporting the receiver.
- The warranty period and what it actually covers.
This matters more for a head unit than it does for a simple passive car accessory because your phone’s operating system will continue changing after you install the receiver.
You should not buy a receiver solely because someone says an update might fix a problem in the future. Buy the product based on the functionality it provides today, then treat ongoing firmware support as an additional advantage.
9. Installation Cost Is Part of the Real Price
The price printed next to the head unit is rarely the final cost of a professional installation.
Depending on your vehicle, you may need:
- Dash installation kit
- Wiring harness
- Steering-wheel-control interface
- Factory amplifier interface
- Antenna adapter
- USB retention adapter
- Camera adapter
- Microphone extension or replacement
- iDatalink Maestro module
- Additional RCA cables
- Installation labour
A $300 receiver that requires several adapters and professional installation can end up costing considerably more than expected.
Likewise, a more expensive receiver can sometimes be the better purchase if it eliminates compromises in a system you already plan to upgrade.
The correct comparison is therefore:
Head unit price + required installation hardware + labour + future upgrade requirements
rather than simply comparing the prices printed on two product pages.
10. Choose the Audio Architecture Before Chasing the Screen
This is probably the most useful rule in the entire buying process.
If two receivers have the same wireless CarPlay capability, ask what happens after the phone connects.
Will you keep the factory speakers?
Will you add a subwoofer?
Will you install a four-channel amplifier?
Do you want a DSP later?
Do you need multiple cameras?
Do you want a large floating screen?
Once those questions are answered, the shortlist becomes much smaller.
For example, the Pioneer DMH-WT8000NEX is more interesting to an enthusiast who specifically wants its Dolby Atmos and automatic tuning features than to someone who simply wants wireless navigation. Likewise, the JVC KW-M690BW is more attractive when compact installation and everyday smartphone integration matter more than building a complicated multi-amplifier system.
That is the difference between buying a head unit based on a specification sheet and buying one based on how you will actually use the vehicle.
11. Use This Final Pre-Purchase Checklist
Before placing the order, verify these points against your exact vehicle:
- Dash opening: Does the chassis physically fit?
- Depth: Is there enough room behind the factory radio?
- Display clearance: If floating, can the screen move without hitting vents or controls?
- CarPlay: Is wireless CarPlay supported?
- Android Auto: Is wireless Android Auto available if required?
- Factory amplifier: Will you need an integration interface?
- Steering-wheel controls: Can they be retained?
- Backup camera: Is the factory camera compatible?
- USB: Do you need to retain the original USB port?
- Audio outputs: Are there enough RCA outputs for your planned system?
- EQ: Does the receiver provide the level of tuning you actually need?
- Future upgrades: Will it support the amplifier, subwoofer or DSP you may add later?
- Installation hardware: Have you priced the required adapters and dash kit?
- Warranty: Is the warranty long enough and valid through the seller you are using?
- Firmware: Is current software support available for the exact model?
12. The Right Choice Depends on What You Are Building
There is no universal winner simply because one receiver has the largest screen or the longest feature list.
If you want the strongest overall platform for an expandable audio and camera system, the Kenwood DMX1058XR is the most complete choice in this group.
If your dashboard benefits from a 10.1-inch floating display with a single-DIN installation, the Pioneer DMH-WT8600NEX deserves serious consideration.
If you want a large screen with flexible positioning and strong everyday integration, the Sony XAV-AX8500 takes a more balanced approach.
If your priority is compact installation with serious audio controls, the Sony XAV-AX6000 is the more focused option.
If advanced processing such as Dolby Atmos and automatic tuning is genuinely important to your system, the Pioneer DMH-WT8000NEX has a more specialist appeal.
And if you mainly want wireless CarPlay in a compact, space-conscious installation without turning the car into a major audio project, the JVC KW-M690BW is the practical value choice.
The important thing is not to ask, “Which head unit has the most features?” Ask, “Which receiver gives my vehicle the features I will actually use, while leaving enough room for the system I may build later?” That question usually leads to a much better purchase.
Wireless CarPlay Head Unit Installation Guide: What to Check Before You Remove the Factory Radio
Installing a wireless Apple CarPlay head unit is not simply a matter of removing the old radio, connecting a few wires and sliding the new receiver into the dashboard. The physical fitment, vehicle wiring, factory amplifier, steering-wheel controls, camera system and antenna connection can all affect how well the finished installation works.
The good news is that the installation becomes much easier when you treat it as a vehicle-integration project rather than just a stereo replacement. The exact wiring varies by vehicle, but the workflow below gives you the right order to approach a wireless CarPlay head unit installation without creating unnecessary problems.
Before Installation, Confirm the Complete Hardware List
Do not start removing the factory receiver until you have everything required for your particular vehicle.
At minimum, check these items:
- Head unit: Confirm the exact model and verify its dimensions against the vehicle.
- Dash or mounting kit: Required when the factory opening does not directly accept the aftermarket chassis.
- Vehicle-specific wiring harness: Allows the aftermarket receiver to connect to the factory wiring without cutting the original harness.
- Steering-wheel-control interface: Needed when you want to retain factory volume, track, source or phone controls.
- Antenna adapter: Many vehicles use a factory antenna connector that does not directly match the aftermarket receiver.
- Antenna booster or phantom-power adapter: Some factory antenna systems require power for the antenna amplifier to maintain proper radio reception.
- Factory amplifier interface: Important if the vehicle has a separate factory amplifier.
- Camera adapter: May be required to retain the factory reversing camera.
- USB retention adapter: Useful if you want to continue using the original USB port.
- iDatalink Maestro or similar interface: Required on supported vehicles when retaining certain factory functions.
- Microphone: Use the supplied external microphone when appropriate rather than assuming the factory microphone will work.
- RCA cables: Necessary when connecting external amplifiers, DSPs or other audio equipment.
A common installation mistake is ordering the head unit first and trying to figure out the adapters afterwards. The vehicle determines much of the installation hardware, not the other way around.
Verify the Dash Before Touching the Factory Radio
Physically test the installation requirements first.
Check:
- The factory radio opening.
- The available depth behind the opening.
- The location of factory wiring and modules.
- The clearance around vents and climate controls.
- The position of the new touchscreen.
- The clearance required for a floating display to tilt or swivel.
- Whether the new chassis requires a specific mounting bracket.
This is particularly important with the 10.1-inch floating receivers in this guide.
The screen may be much larger than the actual receiver chassis. A Pioneer or Sony floating-screen unit can therefore fit behind the dashboard while the display itself still interferes with a vent, trim piece or factory control.
The opposite problem occurs with compact receivers. The JVC KW-M690BW’s short chassis can be an advantage in a tight dashboard because the receiver does not require the same amount of space behind the radio.
Disconnect the Battery Before Working on the Wiring
Once the fitment and parts have been confirmed, disconnect the vehicle’s battery according to the vehicle manufacturer’s recommended procedure before working on the electrical connections.
This reduces the possibility of short circuits while connecting the aftermarket harness and protects against accidentally powering circuits while connectors are being removed.
However, modern vehicles can have important electronic systems connected through the factory radio. Do not assume disconnecting the battery is completely consequence-free.
Depending on the vehicle, you may need to consider:
- Anti-theft radio codes
- Clock and memory settings
- Window or vehicle-system reinitialisation
- Factory alarm behaviour
- Saved vehicle settings
- Airbag-related wiring near the dashboard
Never disconnect or interfere with connectors that are not part of the audio installation simply because they are physically nearby.
Remove the Factory Head Unit Carefully
The exact trim-removal procedure is vehicle-specific, but the general workflow is:
- Remove the required dashboard trim using appropriate trim tools.
- Locate and remove the factory receiver mounting screws or bolts.
- Pull the receiver forward carefully.
- Do not pull aggressively against connected wiring.
- Disconnect the factory harnesses one connector at a time.
- Disconnect the factory antenna connection.
- Identify the camera, USB and other relevant connectors before removing the receiver completely.
- Keep the factory hardware and trim pieces in a safe place.
Take photographs before disconnecting anything.
This sounds unnecessary until you are staring at several factory connectors later and trying to remember which one originally connected where. A few photographs can save considerably more time than they take.
Build the Aftermarket Wiring Harness Before Installing the Receiver
Whenever possible, connect the aftermarket wiring harness to the vehicle-specific adapter outside the dashboard.
This makes it much easier to inspect every connection before the new receiver is installed.
The common connections include:
| Connection | What it normally does |
|---|---|
| Constant power | Maintains receiver memory and settings |
| Accessory power | Turns the receiver on and off with the vehicle |
| Ground | Provides the electrical return path |
| Speaker outputs | Connect the receiver to the speakers when applicable |
| Illumination | Allows the receiver to respond to vehicle lighting |
| Reverse trigger | Tells the receiver when reverse gear is selected |
| Parking-related input | Used according to the receiver and local installation requirements |
| Remote or amplifier trigger | Turns compatible external equipment on and off |
| Steering-control connection | Communicates with the steering-wheel-control interface |
The colours of aftermarket wires are commonly standardised, but never rely on wire colour alone when working on an unfamiliar vehicle.
Use the wiring documentation for the specific head unit, vehicle and interface.
Do Not Cut the Factory Harness Unless There Is a Specific Reason
A vehicle-specific harness is usually the cleaner approach.
It allows you to prepare the aftermarket wiring away from the vehicle and keeps the original wiring intact. This is particularly useful if the vehicle will ever be returned to the factory configuration or sold later.
A properly prepared harness should have:
- Secure connections
- Proper insulation
- No loose copper strands
- Correctly supported wiring
- Appropriate crimping or soldering where suitable
- No exposed connections touching the chassis
- Clear identification of unusual connections
Do not bundle everything tightly and hide it behind the radio until you have tested the system.
Handle CAN Bus Integration Separately From Basic Power Wiring
Many newer vehicles communicate with the factory radio through a CAN bus or another vehicle communication network.
This is where aftermarket installation becomes significantly different from older, simpler vehicles.
A CAN bus interface may allow the aftermarket receiver to receive information such as:
- Ignition status
- Steering-wheel commands
- Reverse status
- Illumination information
- Vehicle-specific signals
The exact functions depend on the vehicle and interface.
Do not randomly connect CAN bus wires to the aftermarket receiver because they look similar to conventional wiring. CAN bus wiring is not a generic power or speaker connection.
Use the correct vehicle-specific interface and follow its installation instructions.
Connect Steering-Wheel Controls Through the Correct Interface
Factory steering-wheel controls are one of the features that can stop working when an aftermarket receiver is installed incorrectly.
Depending on the vehicle, you may need a dedicated steering-wheel-control interface between the factory controls and the new receiver.
After wiring the interface:
- Confirm that the receiver recognises the interface.
- Configure the correct vehicle or receiver profile where required.
- Test volume up and down.
- Test track or station controls.
- Test source selection.
- Test phone-answer and hang-up controls if supported.
- Remap buttons if the interface allows custom assignments.
If the controls work but the functions are assigned incorrectly, this is usually an interface configuration problem rather than a failed head unit.
Integrate the Factory Amplifier Correctly
This is another area where a basic installation diagram can be misleading.
If the vehicle has a factory amplifier, the speaker wires behind the radio may not behave like a conventional aftermarket speaker connection.
Depending on the vehicle, you may need an integration interface to:
- Provide the correct signal to the factory amplifier.
- Preserve factory volume behaviour.
- Maintain amplifier activation.
- Prevent noise or incorrect signal levels.
- Retain other vehicle functions.
If you are replacing the factory system with aftermarket amplifiers, the approach can be completely different.
This is also why preamp output configuration matters when choosing the head unit. A receiver intended for a future multi-amplifier system should be selected before the installation begins, not after everything is already wired.
Connect the Backup Camera Before Final Assembly
If the vehicle has a factory camera, determine first whether it outputs a signal compatible with the new receiver.
For an aftermarket camera, the typical installation involves:
- Camera power
- Camera ground
- Video connection
- Reverse-trigger signal
- Proper cable routing
The receiver must know when the vehicle is in reverse so it can automatically switch to the camera view.
If the camera image appears only when manually selected but does not activate when reverse is engaged, check the reverse-trigger connection before assuming the camera is defective.
For multiple-camera systems, plan the trigger strategy before routing the cables. Receivers such as the Kenwood DMX1058XR and Sony XAV-AX8500 offer more camera flexibility than a simple single-camera installation, but the additional inputs are useful only when the vehicle and wiring plan actually take advantage of them.
Route the Antenna and Antenna Booster Correctly
Radio reception problems are often blamed on the new head unit when the actual problem is the antenna connection.
Depending on the vehicle, you may need an antenna adapter or powered antenna adapter.
Before final assembly:
- Connect the correct antenna adapter.
- Connect the antenna booster power lead if required.
- Confirm AM/FM reception.
- Test several stations rather than checking only one.
- Make sure the antenna cable is not sharply bent or trapped behind the receiver.
Some vehicles use amplified factory antennas, meaning the antenna system needs power to operate correctly.
If you suddenly receive fewer stations after the installation, check the antenna adapter and booster connection before replacing the receiver.
Connect USB, HDMI and Other External Cables Before Sliding the Receiver In
This is a small step that prevents a surprising amount of frustration.
Before pushing the receiver into the dashboard, connect all cables that will be difficult to access later:
- USB
- HDMI
- Microphone
- RCA outputs
- Camera inputs
- External audio connections
- Antenna
- Interface cables
Then route each cable to its final location.
Do not leave a cable hanging directly behind the chassis where it can become trapped between the receiver and the dashboard.
For an HDMI-equipped receiver, decide where the external HDMI connection will be accessible before finishing the installation. The same applies to USB if you intend to use wired smartphone connectivity as a backup.
Power the System and Test Everything Before Final Assembly
This is the stage where you should slow down.
Do not reinstall every dashboard panel immediately after the receiver powers on.
Test the complete system first.
Basic receiver tests
- Receiver powers on and shuts down correctly.
- Touchscreen responds consistently.
- Buttons or controls operate correctly.
- Display brightness changes appropriately.
- Bluetooth pairing works.
- Microphone works during a test call.
- Audio plays from all speakers.
Wireless CarPlay tests
- Pair the iPhone correctly.
- Confirm wireless CarPlay launches.
- Disconnect and reconnect the phone.
- Turn the vehicle off and restart it.
- Confirm CarPlay reconnects normally.
- Test navigation.
- Test music playback.
- Test Siri.
- Test phone calls.
The important test is not just “Does wireless CarPlay work once?”
The better question is:
“Does it reconnect correctly after I leave the vehicle and come back later?”
That is the real-world behaviour you will experience every day.
Troubleshoot Wiring Problems in the Right Order
If something does not work, do not start changing random wires.
Use a logical troubleshooting sequence.
| Problem | First things to check |
|---|---|
| Receiver does not power on | Constant power, accessory power, ground, fuse |
| Receiver resets | Power connection, ground, vehicle interface |
| No sound | Speaker wiring, factory amplifier interface, mute settings |
| One speaker is silent | Speaker connection and channel assignment |
| Steering controls do not work | Interface connection, receiver settings, programming |
| Camera does not appear | Camera power, video connection, reverse trigger |
| Camera works manually but not in reverse | Reverse-trigger signal |
| Poor radio reception | Antenna adapter, antenna booster power, antenna cable |
| Bluetooth works but CarPlay does not | Wireless pairing, CarPlay permission, phone settings |
| CarPlay does not reconnect | Wireless pairing configuration and phone permissions |
| Touchscreen behaves strangely | Connector seating, software and screen calibration where applicable |
| Audible electrical noise | Grounding, RCA routing, amplifier integration |
Grounding Problems Deserve Special Attention
A poor ground can produce several symptoms that look unrelated.
You might experience:
- Intermittent operation
- Random receiver resets
- Electrical noise through the speakers
- Unstable amplifier behaviour
- Touchscreen or system problems
- Excessive noise when the engine is running
The ground connection should be secure and appropriate for the installation.
Do not simply attach a ground wire to a random painted section of the dashboard structure and assume it will work. The quality of the electrical connection matters.
For amplifier installations, grounding and power-cable routing become even more important.
Do Not Blame Wireless CarPlay for Every Connection Problem
Wireless CarPlay depends on several systems working together, including the phone’s wireless connection, Bluetooth pairing, Wi-Fi communication and the receiver’s software.
If CarPlay fails to connect:
- Confirm the phone is paired correctly.
- Confirm CarPlay is enabled for the vehicle on the iPhone.
- Restart the receiver if necessary.
- Remove and recreate the vehicle pairing if the connection remains unreliable.
- Check for firmware updates from the manufacturer.
- Test another compatible phone if available.
If another phone connects normally, the problem may be phone-specific rather than a receiver failure.
Finish the Installation Only After a Full Road-Test Check
Once every function works while parked, reinstall the dashboard trim carefully.
Make sure:
- No cables are being pinched.
- The receiver is securely mounted.
- The floating display has sufficient clearance.
- The touchscreen remains accessible.
- The microphone is positioned appropriately.
- The USB connection remains reachable.
- The camera image remains visible.
- Steering-wheel controls still operate.
- No dashboard warning lights have appeared.
Afterward, perform a short road test in a safe environment.
Check the controls, audio, Bluetooth calling, navigation and camera operation under normal driving conditions. A system that works perfectly while the dashboard is open can still reveal a loose connection or clearance issue once everything is secured.
DIY or Professional Installation?
A simple older vehicle with an uncomplicated aftermarket wiring harness can be a reasonable DIY project if you are comfortable reading wiring diagrams, using trim tools and testing electrical connections.
A professional installation is the safer choice when the vehicle has:
- A factory amplifier
- Complex CAN bus integration
- Multiple factory cameras
- Advanced steering-wheel controls
- Premium OEM audio
- Integrated vehicle controls
- Airbag-related components around the installation area
- A complicated dashboard
- A custom multi-amplifier or DSP system
The biggest advantage of professional installation is not simply having someone connect the wires. It is having someone who understands how the aftermarket receiver needs to communicate with the vehicle’s existing electronics.
If you are installing a premium unit such as the Kenwood DMX1058XR or one of the larger Pioneer and Sony floating-screen receivers, professional installation can also help with the physical positioning of the screen, cable routing and long-term reliability.
The Installation Rule That Saves the Most Problems
Do not treat the installation as finished when the receiver turns on.
A proper installation is finished when the receiver, smartphone connection, speakers, cameras, steering-wheel controls, factory integration, radio reception and charging connections all work together as intended.
That is the difference between a head unit that was merely fitted into a dashboard and a wireless CarPlay system that you can use every day without constantly fighting small installation problems.
For that reason, the best wireless CarPlay head unit installation starts before the first trim panel is removed. Confirm the vehicle compatibility, buy the correct integration hardware, prepare the harness outside the car, test every function before final assembly, and only then put the dashboard back together.
Wireless CarPlay Head Unit Features Explained: What Actually Matters Beyond the Screen
A modern wireless CarPlay receiver can look impressive on a specification sheet, but some features matter far more in everyday driving than others. A 10.1-inch display, wireless connection, high-resolution audio support and multiple camera inputs are useful only when the underlying hardware, software and vehicle integration are good enough to deliver them consistently.
This is where it helps to separate genuine advantages from marketing language. A large display can improve navigation, but poor positioning can create glare. Wireless CarPlay can remove cables, but a slow connection can become irritating. Hi-Res Audio support can look impressive, but it will not transform a factory speaker system by itself.
The following features are the ones worth understanding before deciding which wireless Apple CarPlay head unit deserves your money.
Floating Displays Are About Positioning, Not Just Screen Size
A floating display places the touchscreen in front of the main receiver chassis instead of keeping everything inside the traditional radio opening.
That design allows manufacturers to use a much larger display without requiring a physically large chassis behind the dashboard. This is particularly useful when the vehicle has a relatively shallow radio cavity but the owner wants a 9- or 10-inch screen.
The advantages are obvious:
- Larger navigation maps
- Easier-to-read media controls
- More space for split-screen information
- Better visibility of camera images
- More comfortable touchscreen targets
- Greater flexibility in positioning the display
But there is an important trade-off.
A 10.1-inch screen does not automatically provide a better driving experience than a 7-inch display. The position of the screen matters just as much as its size.
A screen mounted too high can interfere with your natural line of sight. One positioned too low can require excessive eye movement away from the road. A screen that catches direct sunlight can also be harder to read than a smaller anti-glare display positioned correctly.
Daylight Visibility Depends on More Than Brightness
When comparing large touchscreen receivers, do not look only for claims about screen resolution.
A display’s real-world visibility depends on several factors:
- Screen brightness
- Anti-glare treatment
- Viewing angle
- Screen surface reflectivity
- Dashboard position
- Direct sunlight
- Tint on the windshield
- Screen tilt or swivel adjustment
The Sony XAV-AX6000’s bezel-less anti-glare display, for example, approaches the problem differently from a large floating-screen receiver. Its smaller physical size can also make it easier to keep within a natural viewing position.
With a floating screen, adjustment becomes more important. The Pioneer DMH-WT8600NEX, Sony XAV-AX8500 and Pioneer DMH-WT8000NEX all give you more flexibility than a conventional fixed-screen design, but the available adjustment should be used to position the display correctly rather than simply moving it to its most visually dramatic position.
Floating-Screen Installation Requires More Planning
There are really two installation measurements to make.
Behind the dashboard:
Will the receiver chassis fit without hitting wiring, brackets or factory modules?
In front of the dashboard:
Will the display have enough room to tilt, swivel or move without contacting vents, trim or controls?
This distinction is easy to miss when shopping online.
A receiver can technically fit the factory radio opening while its floating display still creates an installation problem.
Before permanently mounting a large display, check:
- Air-vent movement
- Climate-control access
- Hazard-light button access
- Steering-wheel clearance
- Instrument-cluster visibility
- Sunlight reflections
- Screen adjustment range
- USB and HDMI cable routing
- Camera and microphone cable routing
Do not choose a floating receiver solely because its screen is larger. Choose it when the larger screen can actually be positioned well in your particular dashboard.
Wireless CarPlay Pairing Is More Than Bluetooth
Wireless Apple CarPlay can appear almost magical when it works properly: you enter the vehicle, the phone connects and the CarPlay interface appears without plugging in a cable.
Behind that simple experience, however, several wireless communication steps are involved.
The initial connection generally uses Bluetooth for discovery and authentication, after which Wi-Fi provides the higher-bandwidth wireless connection required for the CarPlay experience.
That is why wireless CarPlay is not simply “Bluetooth CarPlay.”
Bluetooth alone does not provide the bandwidth required for the complete CarPlay interface, navigation data, audio and other information. The receiver and iPhone establish the appropriate wireless relationship before the CarPlay session becomes active.
Why Some Wireless CarPlay Systems Feel Faster Than Others
The difference between a connection that feels immediate and one that takes noticeably longer is not necessarily caused by one single component.
Possible contributors include:
- Receiver startup time
- Wireless chipset performance
- Firmware optimisation
- Phone model
- Existing Bluetooth connections
- Wi-Fi interference
- Saved vehicle pairings
- Background phone activity
- Receiver software
- Other connected devices
A receiver can therefore have excellent wireless hardware and still feel slow if its software takes too long to initialise the system.
This is why real-world reconnection behaviour is more important than simply seeing “wireless CarPlay” on the box.
How to Minimise Wireless CarPlay Delay
There are several practical things you can do.
- Keep the receiver’s firmware current when official updates are available.
- Remove old Bluetooth or CarPlay pairings that are no longer needed.
- Avoid maintaining unnecessary wireless connections in the vehicle.
- Keep the iPhone’s software updated.
- If connection problems begin after an update, remove and recreate the vehicle pairing.
- Give the receiver enough time to complete its startup process rather than repeatedly disconnecting and reconnecting the phone.
- Test the system after a complete vehicle shutdown, not just immediately after installation.
If the connection is consistently slow with one phone but works normally with another compatible phone, the problem may not be the head unit itself.
Wireless CarPlay Does Not Mean You Should Throw Away the USB Cable
A wireless connection is more convenient, but wired CarPlay still has practical advantages.
A USB connection can provide:
- A fallback if wireless pairing fails
- A stable connection for troubleshooting
- Phone charging while driving
- An alternative when wireless connectivity is unreliable
- Compatibility with devices or situations that do not support wireless operation
For this reason, receivers that support both wired and wireless CarPlay can be more versatile than models that rely exclusively on the wireless connection.
The Kenwood DMX1058XR, Pioneer DMH-WT8600NEX, Sony XAV-AX8500, Sony XAV-AX6000 and Pioneer DMH-WT8000NEX all follow this more flexible approach.
Hi-Res Audio Needs the Right System Around It
Hi-Res Audio is another feature that is easy to misunderstand.
A head unit supporting high-resolution formats does not automatically mean your vehicle will sound dramatically better.
The final result depends on the complete audio chain:
Source → receiver processing → digital-to-analogue conversion → preamp signal → amplifier → speakers → subwoofer → vehicle acoustics
If the factory speakers are heavily limited, adding support for a higher-resolution file will not suddenly turn them into audiophile components.
Hi-Res support becomes more meaningful when the rest of the system is capable of revealing the additional detail.
What Hi-Res Audio Actually Refers To
High-resolution audio generally refers to digital music stored at a resolution above standard CD-quality audio, commonly involving higher sample rates and/or greater bit depth.
Depending on the receiver, you may encounter formats such as:
- FLAC
- WAV
- ALAC
- High-quality Bluetooth codecs
- Other manufacturer-supported digital formats
But supported file format, maximum sample rate, bit depth and playback method vary by receiver.
That is why it is not accurate to assume that two head units labelled “Hi-Res Audio” provide identical audio capabilities.
When comparing models, check the manufacturer’s exact supported formats and specifications rather than relying on the marketing label alone.
DAC Quality Matters, But It Is Not the Whole Story
The DAC, or digital-to-analogue converter, changes digital audio data into the analogue signal used by the analogue audio chain.
A high-quality DAC can contribute to a clean signal, but it is only one part of the receiver’s audio architecture.
Other factors include:
- Digital signal processing
- Noise floor
- Signal-to-noise performance
- Preamp output design
- Amplifier quality
- Equalisation
- Time alignment
- Installation quality
- Speaker quality
This is why a receiver with an impressive DAC specification is not automatically the best-sounding choice for every vehicle.
For most casual listeners using factory speakers, wireless CarPlay reliability, clean amplification and useful EQ controls will usually have a larger practical impact than chasing the highest theoretical digital specification.
Audiophile or Everyday Listener? Buy Accordingly
If you mainly listen to Spotify, Apple Music, podcasts and internet radio through factory or moderately upgraded speakers, you do not need to build your entire purchasing decision around Hi-Res Audio.
Prioritise:
- Reliable wireless CarPlay
- Fast startup
- Good touchscreen visibility
- Clean amplifier performance
- Useful EQ
- Bluetooth calling
- Easy vehicle integration
If you have a higher-end audio system with dedicated amplifiers, upgraded speakers and a subwoofer, then the priorities change.
You may care more about:
- Higher-quality digital sources
- High-quality Bluetooth codecs
- Low-noise preamp outputs
- Higher output voltage
- Advanced equalisation
- Time alignment
- Digital connectivity
- External DSP integration
That is where the Kenwood DMX1058XR becomes particularly interesting because its 5V preamp outputs, optical output, 13-band EQ and time-alignment capability give an enthusiast much more to work with.
Wireless CarPlay Multitasking Is More Useful Than It Sounds
Large-screen receivers can do more than simply display one application at a time.
Depending on the receiver, you may have access to features such as:
- Split-screen displays
- Navigation alongside media information
- Camera views
- Smartphone-based navigation
- Voice control
- Audio controls
- Vehicle information
The Pioneer DMH-WT8600NEX, for example, makes its large display more useful through split-screen functionality rather than relying entirely on screen size.
That distinction matters.
A large screen becomes genuinely useful when the software takes advantage of the additional space.
A 10.1-inch panel displaying an oversized version of the same basic interface is not necessarily a better experience than a well-designed 7-inch receiver.
App Stability Is Part of the Head Unit Experience
Wireless CarPlay puts your phone’s apps on the receiver, but the head unit still determines how smoothly that experience feels.
Look for:
- Responsive touchscreen controls
- Consistent wireless reconnection
- Stable Bluetooth calling
- Quick switching between functions
- Predictable camera activation
- Smooth transitions between menus
- Sensible physical controls where provided
You should also separate phone-app problems from receiver problems.
If Apple Maps behaves differently from another navigation application, that does not automatically mean the receiver is malfunctioning. Similarly, if one phone connects normally and another does not, investigate the phone and pairing configuration before blaming the head unit.
Over-the-Air Updates Can Be Useful, but Do Not Buy on the Promise of Future Fixes
Software updates can improve compatibility, correct bugs and occasionally add functionality.
For a connected head unit, firmware support is particularly relevant because smartphones and operating systems continue to change.
However, there is a sensible rule here:
Buy the receiver for what it can do today. Treat future firmware support as a bonus.
Do not purchase a head unit because a retailer suggests that a future update will solve a feature limitation unless the manufacturer has specifically documented that update.
Check the manufacturer’s support page for the exact model and verify the available update method before assuming updates are wireless.
Backup Camera Integration Is a Safety Feature, Not Just Another Input
A backup camera becomes considerably more useful when the receiver switches to the camera view automatically as soon as reverse is selected.
For a basic installation, you need:
- Compatible camera
- Video connection
- Camera power
- Reverse-trigger signal
- Correct receiver configuration
For more advanced systems, multiple camera inputs can support front, rear or other views depending on the receiver and vehicle.
This is one area where the differences between the six receivers become meaningful. The Kenwood DMX1058XR provides four camera inputs, while the Sony XAV-AX8500 provides three camera inputs with individual trigger control. The Pioneer DMH-WT8000NEX also supports dual rear-camera connections.
If you only need one reversing camera, you do not need to pay for multiple inputs simply because they are available. If you own a large truck, frequently tow, or plan additional cameras, however, that extra hardware can become genuinely useful.
Wireless Charging and Wireless CarPlay Are Two Different Things
This causes confusion surprisingly often.
Wireless CarPlay means your phone communicates with the head unit without requiring a USB cable.
Wireless charging means the vehicle or charging accessory transfers power to a compatible phone without a physical charging cable.
One does not automatically provide the other.
If you want both, verify that the vehicle has a compatible wireless charging pad or that you are adding a separate Qi-compatible charging solution.
There is also a practical issue: wireless CarPlay and wireless charging can generate more heat than simply keeping the phone idle. If your phone becomes hot while navigating and charging wirelessly for long periods, charging performance may be reduced by the phone’s own thermal management.
So if you drive for hours at a time, a properly routed wired charging option can still be preferable, even when CarPlay itself is wireless.
The Feature Hierarchy That Actually Helps You Choose
When comparing wireless CarPlay receivers, I would prioritise the features in this order:
- Vehicle compatibility and installation fit
- Reliable wireless CarPlay and Android Auto
- Display visibility and physical positioning
- Audio outputs and processing appropriate to your system
- Camera and factory-vehicle integration
- Bluetooth calling and microphone performance
- USB and other connectivity
- Firmware and long-term support
- Hi-Res Audio capability
- Extra features you will genuinely use
That order may look less exciting than a specification sheet, but it reflects how these products are actually used.
A 10.1-inch screen cannot compensate for poor fitment. Hi-Res Audio cannot compensate for weak speakers. Wireless CarPlay cannot compensate for unreliable pairing. And a long feature list cannot compensate for a receiver that does not integrate properly with your vehicle.
The best wireless CarPlay head unit is therefore not necessarily the one with the largest display or most impressive specification sheet. It is the one whose wireless connection, screen, audio architecture and vehicle integration all match the way you actually use your car.
How to Compare Wireless Apple CarPlay Head Units Without Getting Distracted by the Spec Sheet
The six receivers in this guide are not really competing for exactly the same buyer. That is important when comparing them.
A 10.1-inch floating receiver can score higher for screen usability while a compact 7-inch model can be the better choice for a difficult dashboard. Another receiver may offer stronger audio outputs for an amplifier build, while a less expensive model may be perfectly adequate for someone keeping the factory speakers.
So rather than declaring one receiver the winner in every category, a better comparison looks at what each model does particularly well, where it compromises, and whether those strengths matter for your vehicle.
The Scoring Rubric We Use
For a practical comparison, I would score each receiver across six areas:
| Category | What We Look At | Why It Matters |
|---|---|---|
| Display | Screen size, visibility, adjustment, interface and glare management | Determines how comfortable navigation, media and camera views are to use |
| Sound | Equalisation, time alignment, preamp outputs, processing and audio flexibility | Matters more as the system becomes more advanced |
| Speed | Wireless CarPlay connection, startup, touchscreen response and general interface behaviour | Affects how pleasant the receiver feels every day |
| Ease of Installation | Chassis design, screen clearance, vehicle integration and wiring requirements | Affects both installation difficulty and final cost |
| Value | Feature set relative to the buyer’s actual requirements | A cheaper receiver is not better value if it requires replacement later |
| Reliability | Connectivity consistency, software support, hardware design and long-term usability | Determines whether the upgrade remains enjoyable after installation |
Kenwood DMX1058XR: The Strongest Overall System Foundation
Why it scores highly: The underlying hardware is unusually flexible for someone who does not want to replace the receiver again when the audio system becomes more ambitious.
Pros
- 10.1-inch HD display with four-way adjustment.
- Strong audio architecture with 5V preamp outputs and optical output.
- 13-band equalisation and time alignment.
- Four camera inputs, giving it more expansion room than most basic receivers.
- Wireless and wired Apple CarPlay and Android Auto.
- iDatalink Maestro compatibility.
- Particularly strong choice for amplifier, DSP and multi-camera installations.
Cons
- The large floating display requires careful physical positioning.
- Its extensive feature set is unnecessary if the vehicle will remain a simple factory-speaker system.
- Installation planning is more important than with a basic compact receiver.
Who should buy it: Someone building around the receiver rather than simply replacing the factory radio.
Pioneer DMH-WT8600NEX: The Large-Screen 1-DIN Specialist
Why it scores highly: It combines a single-DIN chassis with a 10.1-inch floating display, making it particularly interesting for vehicles where a conventional large-screen chassis is not practical.
Pros
- Large 10.1-inch HD touchscreen.
- Single-DIN chassis gives the installation a different set of fitment possibilities.
- Wireless Apple CarPlay and Android Auto.
- Adjustable floating display.
- Split-screen functionality makes the large panel more useful.
- HDMI, Bluetooth, Wi-Fi and USB connectivity.
- Amazon Alexa integration.
- Maestro compatibility.
Cons
- Floating-screen clearance must be checked carefully.
- A large display is not automatically better for every dashboard.
- Its installation advantage depends heavily on the specific vehicle.
Who should buy it: Someone who wants a large display but needs the flexibility of a single-DIN receiver chassis.
Sony XAV-AX8500: The Balanced Large-Screen Choice
Why it scores highly: It avoids making the entire buying decision about audio processing or screen size alone. The tilt and swivel mechanism, camera flexibility and useful audio controls make it a well-rounded large-screen option.
Pros
- 10.1-inch HD touchscreen.
- Wireless Apple CarPlay and Android Auto.
- Tilt and swivel adjustment.
- Three camera inputs with individual trigger capability.
- 14-band parametric equaliser and time alignment.
- Three RCA preamp outputs.
- HDMI and USB connectivity.
- Maestro Ready.
- Three-year warranty.
Cons
- The floating display still requires careful dash clearance.
- Buyers who want extensive multi-channel expansion may prefer the more elaborate Kenwood architecture.
- Buyers who only want basic CarPlay may not need all of its additional hardware.
Who should buy it: Someone who wants a large, adjustable display without giving up serious audio and camera functionality.
Sony XAV-AX6000: The Compact Audio-Focused Pick
Why it scores highly: This receiver proves that a smaller screen can actually be the better choice when the dashboard is tight and the audio system matters.
Pros
- Compact rear chassis.
- 7-inch bezel-less anti-glare touchscreen.
- Wireless Apple CarPlay and Android Auto.
- 5V front, rear and subwoofer preamp outputs.
- 14-band parametric equaliser.
- Time alignment.
- HDMI and USB connectivity.
- Maestro Ready.
- Three-year warranty.
- Particularly good foundation for an amplifier-based audio system.
Cons
- The 7-inch display cannot compete with a 10.1-inch floating screen for visual size.
- Less visually dramatic than the larger receivers.
- Not the obvious choice for someone prioritising a giant navigation display.
Who should buy it: Someone who wants a clean, compact dashboard installation but still plans to take the audio system seriously.
Pioneer DMH-WT8000NEX: The Audio-Feature Specialist
Why it scores highly: This model is less about simply adding wireless CarPlay and more about adding advanced audio features around a large display.
Pros
- 10.1-inch HD floating touchscreen.
- Wireless and wired Apple CarPlay.
- Wireless and wired Android Auto.
- Dolby Atmos spatial audio.
- PURE automatic tuning.
- 13-band equaliser.
- 4V RCA preamp outputs.
- Dual rear-camera capability.
- Adjustable screen.
- Split-screen functionality.
- Maestro compatibility.
Cons
- More involved installation than a conventional fixed-screen receiver.
- Its advanced audio features are harder to justify if the rest of the system is basic.
- The premium feature set can be unnecessary for someone who simply wants wireless navigation and music.
Who should buy it: An enthusiast who specifically wants the combination of a large floating screen and more advanced audio processing.
JVC KW-M690BW: The Practical Value Choice
Why it scores highly: It does not try to compete with the 10.1-inch receivers on screen size. Instead, it focuses on wireless smartphone integration, compact installation and useful everyday audio control.
Pros
- Short chassis is useful in space-constrained dashboards.
- Wireless Apple CarPlay and Android Auto.
- 6.8-inch capacitive touchscreen.
- 13-band graphic equaliser.
- USB mirroring for compatible Android devices.
- Bluetooth and USB connectivity.
- Rear-camera support.
- Straightforward feature set.
Cons
- Smaller screen than the floating 10.1-inch receivers.
- Less suitable for elaborate multi-amplifier system expansion.
- Fewer advanced audio and camera features than the higher-end models.
- Better suited to straightforward upgrades than complex custom builds.
Who should buy it: Someone who wants wireless CarPlay in an older or space-constrained vehicle without paying for features they are unlikely to use.
Display: Which One Actually Wins?
If screen size and viewing flexibility are the priority, the 10.1-inch models naturally lead the group.
The Kenwood, Pioneer WT8600NEX, Sony AX8500 and Pioneer WT8000NEX all provide a much larger viewing area than the Sony AX6000 or JVC KW-M690BW.
But there is an important distinction:
Largest does not mean best for every vehicle.
A 7-inch anti-glare display positioned correctly can be easier to use than a 10.1-inch screen that reflects sunlight or blocks an air vent.
For a large-screen installation, I would prioritise screen positioning and daylight visibility before another small increase in display size.
Sound: Which One Has the Most Room to Grow?
For a serious audio build, the Kenwood and Sony AX6000 stand out for different reasons.
The Kenwood offers a particularly broad architecture with 5V preamp outputs, optical connectivity, 13-band EQ, time alignment and multiple camera inputs.
The Sony AX6000 takes the compact route but gives you 5V front, rear and subwoofer outputs, 14-band parametric EQ and time alignment.
The Pioneer WT8000NEX is also compelling for enthusiasts who specifically want Dolby Atmos and automatic tuning.
The JVC, by contrast, is better viewed as an everyday audio receiver with useful adjustment, rather than the starting point for a highly complex DSP-based system.
Installation: The Physical Design Can Change the Winner
This category is where online comparisons often become misleading.
The JVC’s short chassis can be a major advantage in an older vehicle with limited space behind the radio.
The Sony AX6000 follows a similar philosophy, combining a relatively compact receiver body with a conventional 7-inch display.
The Pioneer and Sony 10.1-inch floating units solve a different problem: they provide a large display without requiring the entire screen assembly to occupy the traditional radio cavity.
But they introduce front-of-dashboard considerations.
So the installation winner depends on your vehicle:
- Very limited depth: JVC or Sony AX6000 may be easier.
- Single-DIN opening with desire for a large display: Pioneer WT8600NEX becomes particularly interesting.
- Large display with flexible positioning: Sony AX8500 or Pioneer WT8000NEX.
- Complex multi-camera and audio system: Kenwood DMX1058XR.
Value: Do Not Compare Prices Without Comparing the Installation
Value is not simply the lowest purchase price.
A better formula is:
Head unit + required adapters + installation hardware + labour + future upgrade requirements
For example, a cheaper receiver can become poor value if you later discover that it lacks the preamp outputs needed for your amplifier setup.
Likewise, paying substantially more for a receiver with four camera inputs makes little sense if you will never install more than one reversing camera.
The JVC is therefore valuable for the buyer whose requirements stop at wireless CarPlay, Android Auto, Bluetooth, a useful touchscreen and basic audio adjustment.
The Kenwood earns its higher position because the additional hardware can remain useful as the rest of the system grows.
Reliability: Look at the Whole Ownership Experience
Reliability should not be reduced to a customer-review star rating.
For an aftermarket receiver, I would consider:
- Wireless CarPlay reconnection.
- Bluetooth call stability.
- Touchscreen responsiveness.
- Firmware support.
- Vehicle integration.
- Camera reliability.
- Physical installation quality.
- Availability of replacement or integration hardware.
- Warranty support.
Installation quality can have a surprisingly large effect on perceived reliability.
A perfectly good receiver can appear unreliable if its ground is poor, the wiring harness is incorrectly configured, the factory amplifier is not properly integrated or the antenna booster is not powered.
That is why hardware quality and installation quality should be considered together.
The Comparison Changes When Your Priorities Change
If I were narrowing these six down by buyer rather than by specification count, the decision would look like this:
- Best overall foundation for an advanced system: Kenwood DMX1058XR
- Best large-screen option for a single-DIN installation: Pioneer DMH-WT8600NEX
- Best balanced 10.1-inch installation: Sony XAV-AX8500
- Best compact choice for an audio-focused build: Sony XAV-AX6000
- Best large-screen choice for advanced audio features: Pioneer DMH-WT8000NEX
- Best practical value for a simpler installation: JVC KW-M690BW
That is a more useful comparison than simply ranking them from one to six.
The Kenwood is not automatically the right choice for everyone, just as the JVC is not automatically a lesser purchase because it costs less and uses a smaller screen. They are designed around different priorities.
The Real Way to Pick Between Two Finalists
If you are still deciding between two models, ignore the marketing for a moment and ask yourself five questions:
- Will both physically fit my vehicle without compromising the dashboard?
- Will the screen be comfortable to use in direct daylight?
- Does the audio output architecture support the system I have now and the one I may build later?
- Will I actually use the extra cameras, processing, HDMI or other features?
- After adapters and installation, which one gives me the better ownership experience?
If both receivers pass those checks, then choose based on the feature that you will interact with most often.
For most people, that will be wireless CarPlay reliability and screen usability.
For an audio enthusiast, it may be the preamp architecture and tuning controls.
For someone installing an older vehicle, it may simply be whether the receiver physically fits without turning the installation into a complicated project.
That is the comparison that matters. The best wireless Apple CarPlay head unit is not the one that wins every specification battle; it is the one that has the right strengths for your particular vehicle and your actual upgrade plans.
Wireless CarPlay Head Unit Maintenance and Care: Keep the Screen, Software and Connections Working Properly
A wireless Apple CarPlay head unit does not require much routine maintenance, but small habits can make a noticeable difference over several years. Most problems are not caused by someone failing to clean the touchscreen often enough. They are more likely to come from outdated firmware, excessive heat, poor cable management, aggressive cleaning, loose connections or settings being changed without a backup plan.
The best approach is simple: keep the software reasonably current, keep the display clean without damaging its surface, protect the receiver from unnecessary heat, and pay attention to changes in behaviour before a minor issue becomes a larger installation problem.
Keep Firmware Updated, but Do It With a Reason
Firmware updates can improve smartphone compatibility, correct bugs, improve system stability and sometimes change how certain features behave.
However, there is no universal rule such as updating every month. The correct update schedule depends on the manufacturer and the specific receiver.
A sensible routine is:
- Check the manufacturer’s support page every few months.
- Look specifically for the exact model number.
- Read the update notes before installing anything.
- Confirm whether the update addresses a problem you are experiencing or improves compatibility.
- Follow the manufacturer’s installation procedure exactly.
- Do not interrupt power while firmware is being installed.
- Keep the vehicle stationary during the update.
- After updating, test wireless CarPlay, Bluetooth, audio and camera functions.
Do not install firmware intended for a similar-looking model. A head unit that shares the same display size or product family may still use different software.
Also, do not update simply because a newer file exists if everything is already working perfectly and the manufacturer provides no relevant reason to change. Updates can be useful, but they should be treated as maintenance rather than a hobby.
Wireless CarPlay Problems Can Sometimes Be Software Problems
If wireless CarPlay suddenly becomes unreliable after months of normal operation, do not immediately assume the receiver’s wireless hardware is failing.
Check:
- Whether the iPhone has recently received a software update.
- Whether the head unit has available firmware.
- Whether other phones experience the same problem.
- Whether deleting and recreating the CarPlay pairing solves the issue.
- Whether Bluetooth and Wi-Fi are behaving normally.
- Whether another wireless device is creating unnecessary interference.
If only one phone has the problem, the receiver may not be the cause.
This is particularly important with wireless systems because the phone and receiver are effectively working as a pair. Changes on either side can affect the experience.
Clean the Touchscreen Without Damaging It
The touchscreen is one of the most frequently touched parts of the system, but aggressive cleaning is unnecessary.
For normal cleaning:
- Turn the receiver off first.
- Use a clean, soft microfiber cloth.
- Remove dust gently before wiping.
- Slightly dampen the cloth if needed rather than spraying liquid directly onto the screen.
- Use a cleaner specifically confirmed as safe for the display surface if a cleaning solution is necessary.
- Keep moisture away from openings, buttons and the edges of the screen.
Avoid:
- Paper towels
- Rough cloths
- Abrasive cleaners
- Excessive pressure
- Spraying liquid directly onto the receiver
- Household glass cleaners unless the manufacturer specifically says they are safe
The objective is to remove fingerprints and dust, not polish the display like glass.
Repeated aggressive wiping can gradually affect surface treatments, particularly on displays with anti-glare coatings.
Pay Attention to Heat
Heat is a much more important long-term concern than most buyers realise.
A vehicle dashboard can become extremely hot when parked in direct sunlight, particularly in warm climates. The head unit is designed to operate within a specified temperature range, but repeated exposure to extreme heat is still something worth minimising.
Heat can affect:
- Display components
- Internal electronics
- Battery-powered smartphones connected to the system
- Adhesive used around certain components
- Plastic trim
- Touchscreen behaviour
- Wireless performance under extreme conditions
You cannot control the outside temperature, but you can reduce unnecessary exposure.
When practical:
- Park in shade.
- Use a windshield sunshade.
- Avoid leaving the phone directly on a hot dashboard.
- Allow the cabin to cool before demanding heavy use from the system.
- Do not block ventilation around the receiver.
- Do not cover vents or cooling openings with cables or accessories.
A large floating display deserves particular attention because the screen is exposed directly to the cabin environment, rather than being recessed inside the dashboard.
Do Not Block the Receiver’s Ventilation
Cable management is not just about making the installation look tidy.
If cables are packed tightly around the rear of the receiver, they can restrict available airflow and put unnecessary pressure on connectors.
During installation, leave enough room for:
- Wiring bends
- Connector clearance
- Receiver ventilation
- Future servicing
- Removal of the receiver if an update or repair is required
Do not force a large bundle of RCA, USB, HDMI and interface cables into a space that barely accommodates the chassis.
This is particularly relevant to complex installations using an external amplifier, DSP, multiple cameras and several interface modules.
Store Your Audio Settings Before Changing Them
Modern receivers can contain a surprising amount of audio tuning work.
If you have spent time adjusting:
- Equaliser settings
- Time alignment
- Speaker levels
- Subwoofer settings
- Crossover points
- Fader and balance
- Other sound-processing settings
keep a written record or photograph of the important values.
If the receiver supports user profiles or memory presets, use them.
This becomes particularly useful after:
- Firmware updates
- Battery replacement
- Electrical service
- Factory resets
- Major audio-system changes
Do not assume every receiver will preserve every custom setting indefinitely.
A simple note containing your final tuning settings can save a lot of time if the system ever needs to be reset.
Keep Track of the Wireless CarPlay Pairing
If several people regularly drive the vehicle, wireless pairing can become confusing.
Old phones may remain saved even though they are no longer used.
Periodically remove devices that are no longer relevant.
This can help keep the system easier to manage and reduce the possibility of the receiver attempting to connect to the wrong phone.
For a family vehicle, it is also useful to decide which phone should normally connect first rather than allowing several previously paired devices to compete whenever the car starts.
Common Long-Term Wear Points
A head unit has fewer moving parts than many mechanical vehicle components, but certain areas naturally receive more wear.
Touchscreen Surface
Constant tapping, swiping and cleaning can eventually show wear.
The most important protection is avoiding excessive pressure and abrasive cleaning.
Physical Buttons and Knobs
If the receiver has physical controls, repeated use over several years can cause cosmetic wear or reduced tactile feel.
That is normal wear rather than necessarily an electronic failure.
USB Connections
Repeatedly inserting and removing cables can eventually loosen a USB connection.
Do not pull the cable sideways while it is connected. Remove it straight and avoid using damaged or excessively tight cables.
RCA and Other Rear Connections
In a permanent installation, RCA and other rear connectors should not be under constant tension.
Poor cable routing can put stress on the connectors and create intermittent problems that are difficult to diagnose later.
Floating-Screen Adjustment Mechanisms
This is especially relevant to large floating displays.
If the screen has tilt, swivel or another adjustment mechanism, move it deliberately rather than repeatedly forcing it through its range.
Do not use the display as a handle when entering or exiting the vehicle.
If the mechanism becomes stiff, loose or develops unusual movement, stop forcing it and inspect the mounting hardware.
Watch for Early Signs of an Installation Problem
Some symptoms are worth investigating before they become persistent.
Pay attention to:
- Wireless CarPlay suddenly taking much longer to connect.
- The receiver restarting unexpectedly.
- Screen flickering.
- Touch inputs becoming inconsistent.
- Audio cutting out over bumps.
- One camera intermittently losing its signal.
- Steering-wheel controls working only sometimes.
- Radio reception becoming noticeably weaker.
- New electrical noise through the speakers.
- USB connections disconnecting when the cable is moved.
These symptoms do not automatically mean the head unit is failing.
A loose connector, weak ground, damaged cable, software issue or vehicle-interface problem can produce similar behaviour.
The important point is not to ignore a change simply because the receiver still works most of the time.
Protect the Receiver During Vehicle Electrical Work
If the vehicle is receiving electrical service, tell the technician that an aftermarket receiver and any associated amplifier or DSP are installed.
Major electrical work, battery replacement, jump-starting and charging-system problems can affect aftermarket electronics.
This does not mean the receiver needs to be disconnected every time someone opens the hood. It means you should understand what is connected to the vehicle and avoid unnecessary electrical experiments.
If the vehicle has an aftermarket amplifier or DSP, make sure its power and ground connections are properly installed and protected.
Keep the Installation Documentation
This is one of the easiest maintenance steps to overlook.
Keep copies of:
- Head unit manual
- Firmware information
- Wiring diagram
- Vehicle-specific interface documentation
- Steering-wheel-control instructions
- Camera adapter information
- Dash-kit information
- Warranty details
- Audio tuning settings
If you sell the vehicle later, this information can also help the next owner or installer understand what has been fitted.
For a complex installation, take photographs of the wiring before the dashboard is fully assembled. You may never need them, but if you need to troubleshoot the system three years later, those photographs can be extremely valuable.
When Should You Consider Professional Service?
Basic cleaning, software checks and settings management can normally be handled by the owner.
Professional inspection becomes more sensible when you have:
- Intermittent power loss
- Persistent electrical noise
- Repeated receiver resets
- Multiple camera failures
- Complex amplifier integration
- CAN bus communication problems
- Steering-wheel-control failures
- Physical damage to a floating display
- Loose mounting hardware
- Suspected wiring damage
Do not repeatedly pull the receiver out of the dashboard to troubleshoot a problem without knowing what you are looking for. Every unnecessary removal creates another opportunity to damage trim, connectors or mounting hardware.
A Simple Long-Term Care Routine
A practical maintenance schedule does not need to be complicated.
Every few months
Check the manufacturer’s support page for relevant firmware updates and inspect the receiver for unusual behaviour.
When cleaning the interior
Clean the display gently with a suitable microfiber cloth and keep liquids away from the receiver.
After vehicle electrical work
Check that wireless CarPlay, Bluetooth, audio, cameras and steering-wheel controls still operate normally.
After a firmware update
Test the functions you actually use rather than assuming everything remained unchanged.
Once or twice a year
Review your saved devices, remove old phones, inspect accessible cables and make sure the floating display or receiver mounting remains secure.
Whenever something changes
Investigate intermittent symptoms early rather than waiting for a complete failure.
The Real Goal Is Consistent Operation, Not Constant Maintenance
A good wireless CarPlay receiver should not require daily attention. Once properly installed, the main maintenance is software awareness, sensible cleaning, heat management and paying attention to changes in behaviour.
The most important long-term lesson is that reliability starts with installation. A receiver with excellent hardware can still develop frustrating problems if its wiring is poorly grounded, cables are under tension, the dashboard restricts ventilation or the factory electronics were not properly integrated.
Take care of the screen, keep the software appropriate to the receiver, preserve your audio settings and avoid unnecessary physical stress on the connectors and floating mechanism. Done properly, that is usually enough to keep a wireless Apple CarPlay head unit feeling like a useful factory upgrade rather than another piece of electronics you have to constantly troubleshoot.
FAQs About Wireless Apple CarPlay Head Units
Is a 10.1-inch floating Apple CarPlay head unit actually better than a 7-inch receiver?
Not automatically. A 10.1-inch screen is better when you genuinely benefit from the extra viewing area, particularly for navigation, camera views and split-screen information. The Kenwood DMX1058XR, Pioneer DMH-WT8600NEX, Sony XAV-AX8500 and Pioneer DMH-WT8000NEX all take this larger-screen approach, but they also require more thought about screen position, sunlight and dashboard clearance.
A smaller receiver such as the Sony XAV-AX6000 can actually be the better installation when the dashboard is tight or when you care more about audio hardware than having the biggest possible display. Its compact chassis and 7-inch anti-glare screen keep the installation relatively restrained while still providing wireless CarPlay, strong preamp outputs and advanced sound adjustment.
The honest rule is simple: do not pay for a 10.1-inch screen if your dashboard cannot position it properly. A badly positioned large screen is not an upgrade simply because the specification sheet looks more impressive.
Does the Kenwood DMX1058XR justify its higher-end positioning if I am not building a full aftermarket audio system?
Only if you are likely to use its additional hardware. The DMX1058XR is particularly strong because its 5V preamp outputs, optical output, 13-band equalisation, time alignment and multiple camera inputs give you considerably more room to expand than a basic wireless CarPlay receiver.
If you are keeping the factory speakers, adding no external amplifier and using only one reversing camera, much of that capability may sit unused. In that situation, spending substantially more simply to obtain wireless CarPlay and a large screen would be difficult to justify.
Where it becomes more compelling is when the installation is expected to grow:
- External amplifiers
- Subwoofer system
- DSP integration
- Multiple cameras
- More serious speaker upgrades
- More precise sound tuning
So the real advantage is not that it is automatically louder or better sounding out of the box. Its advantage is that you are less likely to outgrow the receiver when the rest of the system becomes more sophisticated.
If wireless CarPlay is slow to connect, is the head unit defective?
Not necessarily, and this is one of the most misunderstood parts of wireless CarPlay.
Wireless CarPlay normally uses Bluetooth for the initial discovery and authentication process and Wi-Fi for the higher-bandwidth connection. That means several pieces have to cooperate before the CarPlay interface appears.
A slow connection can be influenced by:
- Receiver startup time
- Phone software
- Receiver firmware
- Existing Bluetooth pairings
- Wireless interference
- Saved devices
- The phone itself
- How quickly the receiver’s operating system becomes ready
The useful test is not whether it connected quickly once in a showroom. Test it after the vehicle has been completely switched off and then started again, preferably over several days.
If one iPhone connects slowly while another connects normally, investigate the phone and pairing configuration before replacing the receiver. If every compatible phone behaves the same way, then the receiver’s firmware, startup behaviour or wireless hardware becomes much more relevant.
For persistent problems, the sensible sequence is:
- Check the receiver’s current firmware.
- Remove unused paired devices.
- Delete and recreate the CarPlay connection.
- Test another compatible phone.
- Compare behaviour after a complete vehicle restart.
That is much more useful than immediately blaming “weak Bluetooth.”
Can a wireless Apple CarPlay receiver improve an existing factory audio system, or is an amplifier still necessary?
A new head unit can improve the source and control side of the system, but it cannot magically turn mediocre factory speakers into high-end speakers.
A better receiver can give you:
- More sophisticated equalisation
- Time alignment
- Cleaner preamp architecture
- Better smartphone integration
- More control over a subwoofer
- Better system configuration
- More flexible amplifier connections
But the audible improvement depends heavily on what is connected downstream.
This is where the differences between the receivers in this article become important. The Sony XAV-AX6000, for example, gives you 5V front, rear and subwoofer outputs and a 14-band parametric equaliser, making it a strong foundation for an amplifier-based system despite its smaller screen. The JVC KW-M690BW is much more appropriate when the goal is a straightforward factory-speaker or modest upgrade rather than a complex multi-amplifier build.
If you already have good speakers and an amplifier, the receiver’s preamp quality and tuning capability can matter considerably. If everything remains factory, wireless CarPlay convenience and installation quality may be more noticeable than chasing high-end audio specifications.
What is the biggest mistake people make when buying a wireless CarPlay head unit for an older car?
They check whether the radio opening is compatible and stop there.
The physical opening is only the beginning. An older vehicle can have surprisingly little space behind the radio, while a newer vehicle can have complicated electronics that require interfaces to retain factory functions.
Before buying, confirm all of these:
- Radio opening and chassis dimensions
- Available depth behind the dashboard
- Floating-screen clearance, if applicable
- Dash or mounting kit
- Wiring harness
- Steering-wheel-control interface
- Factory amplifier compatibility
- Antenna adapter and possible antenna-booster requirements
- Factory camera compatibility
- USB retention requirements
- Vehicle-specific integration hardware
- Total installation cost
There is another mistake that is even more expensive: buying the head unit based on today’s system when you already know you will upgrade it later.
If you know an amplifier, subwoofer, DSP or additional cameras are coming, buy around that future system now. Otherwise, the “cheaper” receiver can become the expensive one when you eventually have to replace it because its output architecture cannot support what you want to build.
That is why this comparison does not treat the cheapest wireless CarPlay receiver as automatically the best value. The right value is the receiver you will not immediately outgrow.
Final Verdict: Which Wireless Apple CarPlay Head Unit Is Actually Worth Buying?
After looking past the screen sizes, feature lists and wireless CarPlay labels, the decision becomes much clearer: these six receivers are solving different problems. The best choice is not the one with the longest specification sheet, and it is not automatically the most expensive model.
If you want one receiver that gives you the most room to build around later, the Kenwood DMX1058XR is the strongest overall pick. Its 10.1-inch adjustable display gets the attention, but the more important part is underneath it: 5V preamp outputs, optical connectivity, 13-band equalisation, time alignment and extensive camera support. That is the kind of hardware that can remain useful when a simple radio replacement eventually becomes a serious audio system.
The Pioneer DMH-WT8600NEX is the more specialised answer for someone who wants a large 10.1-inch display but needs the flexibility of a single-DIN chassis. The Sony XAV-AX8500 is the more balanced large-screen option, particularly if adjustable viewing, camera integration and audio control all matter. Neither should be bought simply because “10.1-inch” sounds better; the dashboard still decides whether that screen will be genuinely useful.
For a tighter installation, the Sony XAV-AX6000 deserves more attention than its smaller screen might suggest. Its compact chassis, anti-glare display, 5V front/rear/subwoofer outputs and 14-band parametric EQ make it a particularly sensible choice when audio architecture matters more than having the biggest display in the dashboard.
The Pioneer DMH-WT8000NEX is the enthusiast-oriented choice. Its Dolby Atmos, PURE automatic tuning, 13-band EQ, 4V outputs and large floating display give it a distinct identity, but those features are worth paying for only when you actually intend to use them. If your system is going to remain simple, some of that capability may never earn its place.
And then there is the JVC KW-M690BW, which is arguably the easiest one to misunderstand. It does not compete with the others on screen size or system expansion, and that is fine. Its short chassis, wireless CarPlay, wireless Android Auto, 6.8-inch touchscreen and 13-band EQ make it a much more sensible purchase for someone who wants a clean everyday upgrade without turning the vehicle into a major audio project.
The most important conclusion from this comparison is therefore not a ranking. It is this:
Buy the head unit around the vehicle and the system you actually intend to build.
If the dashboard is tight, chassis depth matters. If you drive in strong sunlight, display positioning matters. If you are adding amplifiers, preamp architecture matters. If you are keeping factory speakers, paying for advanced audio hardware may not be the best use of your money. If you rely on wireless CarPlay every day, consistent reconnection matters more than another feature buried three menus deep.
And before ordering, remember that the head unit price is only part of the upgrade. A proper dash kit, wiring harness, steering-wheel interface, antenna adapter, camera integration and installation can materially change the final cost.
That is ultimately what separates a good CarPlay upgrade from an expensive frustration: the receiver has to work with the car, not just look good on the product page.
For most buyers, I would narrow the decision to three questions: Does it fit my vehicle properly? Does its audio and integration hardware match my future plans? And will I genuinely use the features I am paying for? If the answer is yes to all three, you are probably looking at the right head unit — regardless of whether it has a 6.8-inch screen or a 10.1-inch one.
Also Check:


