
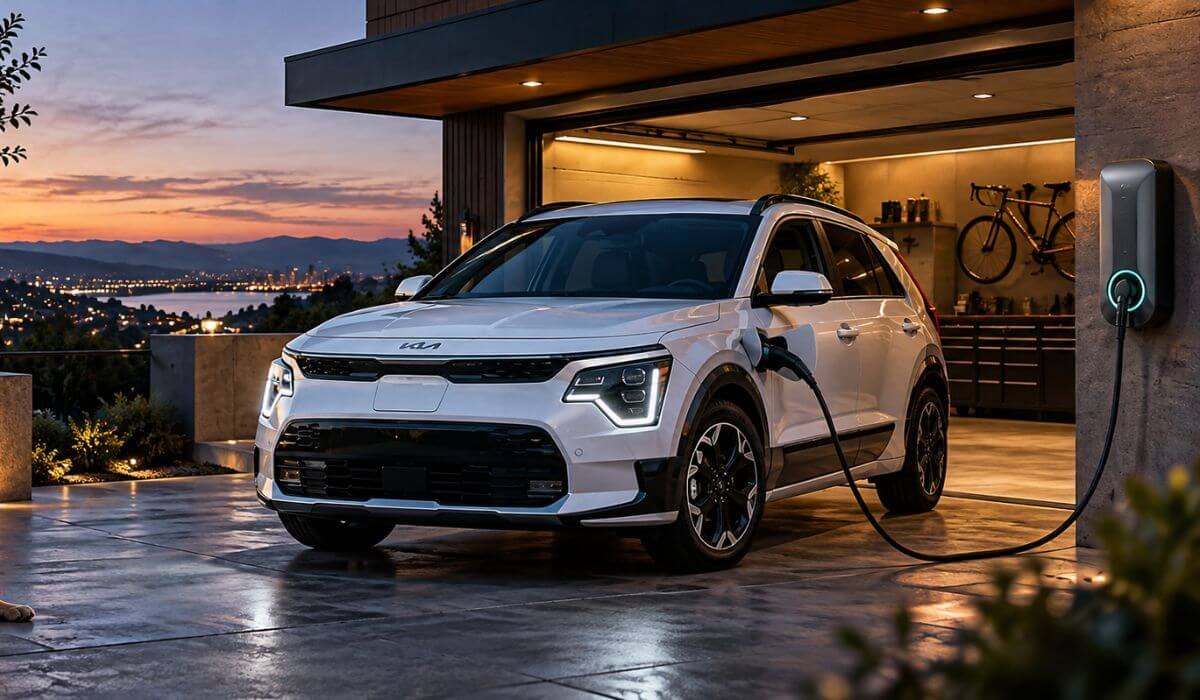
5 Best Home Chargers for Kia Niro EV in 2026: 48A Level 2, 240V & J1772
The Kia Niro EV is one of those cars where a good home charger can make a bigger difference to daily ownership than simply chasing the highest number on the charger box. The Niro EV uses a 64.8-kWh battery and an 11-kW onboard AC charger, making a properly installed 240V Level 2 setup the practical choice for regular home charging. Kia lists roughly 6 hours 5 minutes for a full AC charge at 11 kW, compared with around 9 hours when charging at 7 kW.
The important part is that buying a higher-amperage EVSE does not automatically make the Niro EV charge faster. A J1772 connector, 240V supply, correctly sized circuit and proper electrical protection matter more for dependable everyday charging. The same principle applies across the 2023–2025 Niro EV generation and newer models, although the exact vehicle charging capability and installation requirements should always be checked for the specific model. A 48A charger can provide useful headroom for future EVs, but the Niro EV will only draw the power its onboard charger is designed to accept.
That is why these five chargers are selected around real home-charging needs rather than headline amperage. The lineup covers smart WiFi charging, NEMA 14-50 plug-in options, adjustable current, long cables and rugged indoor/outdoor designs. Whether the Niro EV is parked in a garage, on a driveway or outside the house, the right charger is ultimately the one that matches the car’s charging capability, the home’s electrical setup and the way it is actually used every day.
Best Kia Niro EV Home Chargers: Top 2026 Picks for 40A–48A Level 2 Charging
A 48A label may look impressive, but it does not make the Niro EV charge at 48A. The smarter choice is the charger that matches the car, the electrical setup and your real charging routine.
#1. EMPORIA Level 2 EV Charger 48 Amp
Best Kia Niro EV Home Charger with 240V Level 2 Charging, J1772 Compatibility, WiFi Energy Monitoring, NEMA 14-50 Plug and 48A Hardwired Support
#2. EVIQO Level 2 EV Charger 40A
40A Kia Niro EV Home Charging Station with 240V J1772 Charging, NEMA 14-50 Plug, 25-Foot Cable, WiFi App Control and Outdoor Protection
#3. Autel MaxiCharger Level 2 EV Charger 40A
40A Kia Niro EV 240V Charger with J1772 Connector, 25-Foot Flexible Cable, Adjustable Charging Current, NEMA 14-50 Plug and NEMA 4X Protection
#4. Wallbox Pulsar Plus Level 2 EV Charger 40A
Compact Kia Niro EV Wall Charger with 240V Level 2 Power, J1772 Compatibility, WiFi and Bluetooth Control, 25-Foot Cable and Smart Charging Features
#5. Grizzl-E Classic Level 2 EV Charger 40A
Rugged Kia Niro EV J1772 Charger with 240V Level 2 Charging, NEMA 14-50 Plug, Adjustable 16A–40A Output, Metal Enclosure and IP67 Outdoor Protection
Expert Tip
A 48A label should not be the reason you buy a charger for a Niro EV. The car decides how much AC power it can actually accept, not the charger. With a properly installed Level 2 setup, expect roughly 6–7 hours for a full Niro EV charge, depending on the starting battery level, temperature and charging conditions. A 48A charger does not automatically cut that time down simply because it can supply more current.
For most owners, a dependable 240V J1772 charger with the right circuit, sensible cable length and good electrical protection is more useful than paying extra for amperage the vehicle cannot use. If you are installing a new circuit, a higher-capacity charger can still make sense as future EV flexibility. Always have the outlet, breaker and wiring matched to the charger’s installation requirements by a qualified electrician.
How We Chose These Kia Niro EV Home Chargers
This list was built around a simple question: what actually makes a home charger useful for a Niro EV every night? We did not put a charger higher simply because its box advertised more amps.
First, we checked J1772 compatibility because that is the connection that matters for these Niro EV home-charging setups. We then looked at the charging input, with particular attention to 240V Level 2 operation and the 40A–48A range represented by these products. This gives the list a useful spread without pretending that every Niro EV can make use of every advertised amp.
We also looked closely at the things that become important after the first few weeks of ownership: cable length, NEMA 14-50 connectivity, WiFi/app controls, indoor/outdoor suitability, enclosure design and safety certification. A charger can look impressive on a product page, but a short cable, awkward mounting arrangement or lack of useful controls can become irritating every single night.
The EMPORIA was included for its smart charging controls and higher-capacity 48A option. EVIQO brings a practical 40A setup with a 25-foot cable and connected features. Autel adds a more premium 40A charging option with a long cable and flexible installation. Wallbox was considered for its compact design and connected charging controls, while Grizzl-E earns its place for a much more straightforward approach with a metal enclosure and indoor/outdoor-focused design.
Just as importantly, we did not treat a higher amperage number as an automatic advantage. The Niro EV’s onboard AC charger remains the limiting point, so buying a 48A EVSE does not turn the car into a 48A AC-charging vehicle. That distinction is easy to miss when comparing chargers, and it is one of the reasons this list focuses on the whole charging setup rather than one headline specification.
Finally, we considered the different ways people actually live with a Niro EV. Someone charging in a garage may care most about smart scheduling and cable management. Someone parking outside may care more about weather resistance and enclosure protection. And someone installing a dedicated 240V circuit may prefer additional electrical capacity for a future EV.
That is the reasoning behind the five selections: not the loudest specifications, but the combination of compatibility, electrical capability, installation practicality and features that make sense for a Niro EV at home.
#1. EMPORIA Level 2 EV Charger 48 Amp
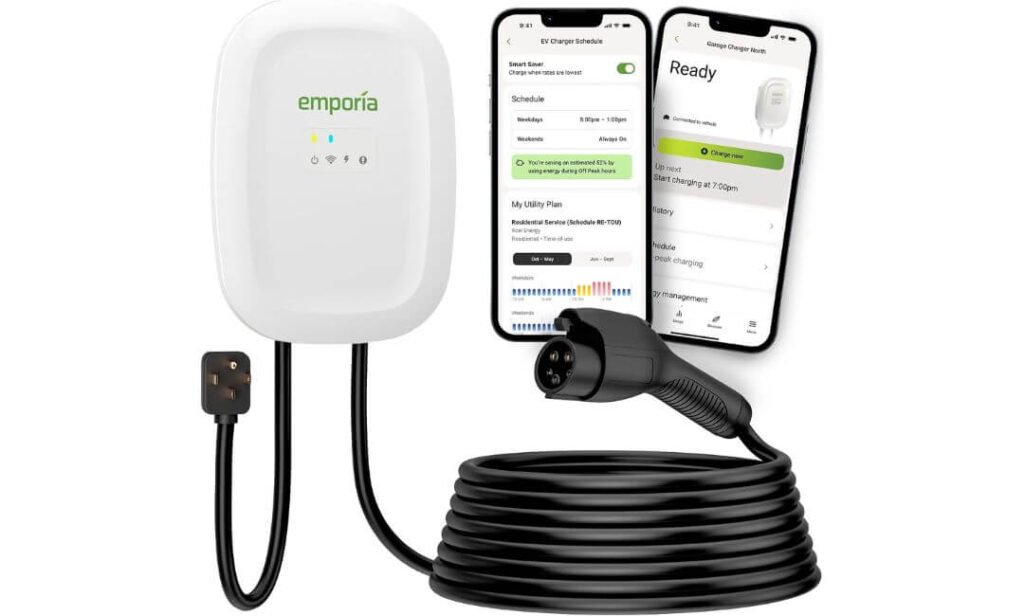
Quick Specs:
- Connector: SAE J1772
- Charging Output: Up to 48A hardwired / 40A plug-in
- Power: 240V Level 2
- Cable Length: 25 feet
- Connection: NEMA 14-50 or hardwired
- Smart Control: 2.4GHz WiFi + Mobile App
- Charging Features: Scheduling + Energy Monitoring
- Certifications: UL Listed + ENERGY STAR
- Warranty: 3 years
A home charger should make the Niro EV easier to live with, not turn every charging session into a technical exercise. That is where this unit gets the fundamentals right. The SAE J1772 connector matches the Niro EV’s standard AC charging connection, while the 25-foot cable gives considerably more freedom when the parking position is not directly beside the wall. With the NEMA 14-50 setup, it can deliver up to 40A at 240V, which is already a substantial Level 2 setup for regular overnight charging.
There is also a useful difference between the two installation options that is easy to overlook. Plugged into a properly installed NEMA 14-50 circuit, the charger can operate at up to 40A. If permanently hardwired and the electrical installation is sized appropriately, it can reach 48A. The Niro EV itself remains the deciding factor for how much AC power it actually accepts, so the 48A capability is more about installation flexibility and future EV use than making today’s Niro charge at 48A.
The smart side is where it becomes more than just a power box on the garage wall. Through 2.4 GHz WiFi, the app can show charging activity and energy use, while scheduled charging can be useful for owners whose electricity rates change during the day. The 25-foot lead, UL listing, ENERGY STAR certification and weather-ready construction also make it a practical choice when the charger needs to work reliably through normal daily use rather than only look impressive on a specification sheet.
(The useful combination here is simple: proper J1772 compatibility, serious 240V charging capability, a long cable and smart control without making the installation unnecessarily complicated.)
What We Like
- Two installation paths: NEMA 14-50 plug-in for a straightforward setup, or hardwired installation when a permanent higher-capacity connection makes more sense.
- 25-foot cable: Plenty of reach for many garage and driveway layouts, especially when the charging port is not positioned right beside the charger.
- Useful WiFi controls: Charging data and scheduling are available from the phone instead of leaving everything to the vehicle.
- Real certification behind the hardware: UL listing and ENERGY STAR certification add meaningful reassurance for a device handling high electrical loads every day.
- Good long-term flexibility: The 48A hardwired capability can make more sense if the same electrical setup may eventually serve another EV with a higher AC charging requirement.
One Thing to Keep in Mind
The installation option determines the available output. The NEMA 14-50 setup supports up to 40A, while the full 48A capability is available through a properly configured hardwired installation. That gives you a simple choice based on the electrical setup you already have or plan to install.
Why It Earns the First Spot for Home Niro EV Charging
The strength here is not one flashy specification. It is the way the pieces fit together. J1772 compatibility, 240V Level 2 charging, a 25-foot cable, smart monitoring and flexible installation cover the things a Niro EV owner is most likely to care about after the charger has been mounted and the novelty has worn off.
It also avoids forcing the buyer into one installation style. Someone who wants a removable NEMA 14-50 setup has that route, while someone planning a dedicated hardwired installation can take advantage of the higher 48A capability. For a home charger that may stay on the wall for years, that flexibility is genuinely useful.
The Insider Pro-Tip
Before buying the outlet or booking the electrician, decide where the Niro will actually sit while charging. A 25-foot cable gives you generous reach, but the cleanest installation is still the one where the charger sits close enough to the normal parking position without the cable being stretched across a walking path. It sounds like a small detail; after hundreds of charging sessions, it is not.
And do not size the electrical work around the “48A” number alone. If you choose the hardwired route, have the electrician size the branch circuit, breaker, wiring and charger settings together according to local electrical requirements. If you choose the NEMA 14-50 route, make sure the receptacle and circuit are specifically suitable for continuous EV charging. The charger can provide the capability, but the electrical installation is what makes that capability safe and useful for your Niro EV.
#2. EVIQO Level 2 EV Charger 40A
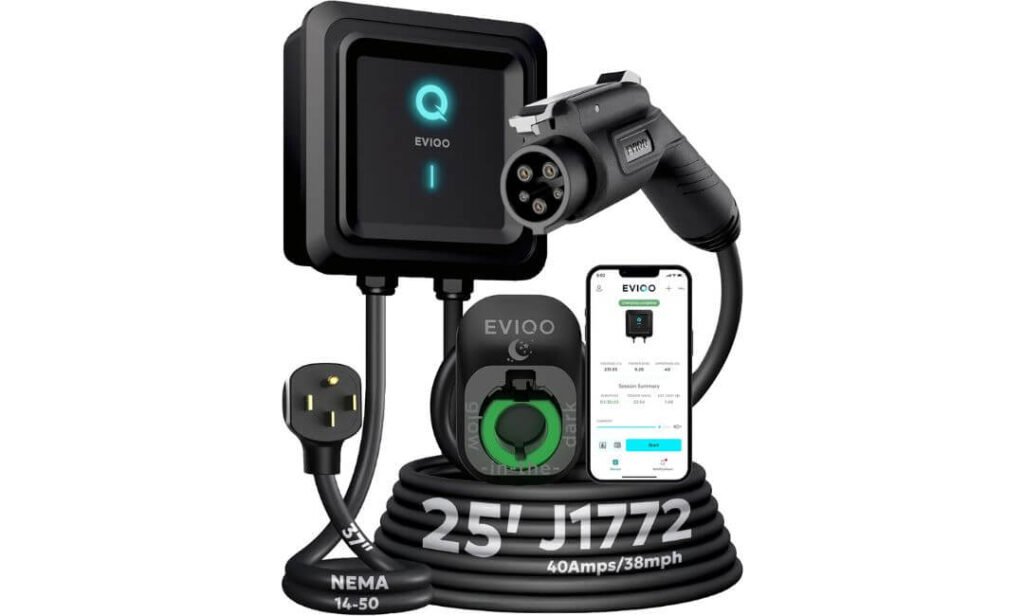
Quick Specs:
- Connector: SAE J1772
- Output: 40A / 9.6 kW
- Voltage: 240V Level 2
- Cable: 25 feet
- Plug: NEMA 14-50
- Amperage Control: 6A–40A
- Connectivity: 2.4 GHz WiFi + mobile app
- Protection: IP66 / NEMA 4
- Certification: UL, ETL, FCC and ENERGY STAR
- Warranty: 3 years
Some home chargers try to win you over with a giant amperage number. This one takes a more useful approach: 40A, 240V charging, a 25-foot cable and a proper NEMA 14-50 plug in one straightforward package. For a Niro EV owner, that combination makes sense because you get serious Level 2 charging without turning the installation into a permanent hardwired project.
The SAE J1772 connector plugs directly into the Niro EV, so there is no adapter sitting between the car and charger. At 40A, the unit can deliver up to 9.6 kW, which is comfortably within the Niro EV’s AC charging capability. For an owner who comes home, plugs in and wants the car ready the next morning, this is the kind of specification that matters more than chasing a number the vehicle cannot fully use.
Then there are the details that only become valuable once you actually live with a home charger. The 25-foot cable gives you room to park from either side of a typical garage or reach a driveway position, while the glow-in-the-dark holster makes finding the connector at night surprisingly convenient. The charger can also adjust between 6A and 40A, allowing the charging rate to be tailored to the situation rather than forcing one setting every time.
(For a Niro EV parked outside or in a less-than-perfect garage, the IP66 / NEMA 4 enclosure and weather-focused construction are just as important as the 40A output.)
What We Like
- Native J1772 connection: The Niro EV can plug in directly without adding another adapter to the charging routine.
- 25-foot reach: A genuinely useful length when the parking position changes or the wall outlet is not directly beside the vehicle.
- Adjustable 6A–40A output: Useful when you want to control the charging rate rather than always running at maximum output.
- Outdoor-ready construction: The IP66 / NEMA 4 enclosure gives this charger a much more reassuring profile for garages, driveways and exposed installations.
- Small touches that matter: The illuminated holster and side reset button are the sort of practical details you appreciate after months of nighttime charging.
One Thing to Keep in Mind
The biggest convenience of this model comes from its NEMA 14-50 plug-in design. If you already have a correctly installed 240V NEMA 14-50 circuit in the right location, setup is straightforward; if you do not, the outlet and dedicated circuit still need to be installed properly before the charger is connected.
Why It Fits the Niro EV So Well
The appeal here is how little you have to compromise. 40A at 240V provides a strong Level 2 setup for the Niro EV, while the direct J1772 connection keeps the charging routine simple. You also get WiFi controls, charging schedules and energy tracking without sacrificing the basic plug-in convenience that many home owners actually want.
It is particularly well suited to someone who wants the charger mounted once and then largely forgotten. The 25-foot lead, adjustable current, weather-resistant enclosure and NEMA 14-50 connection cover the practical side of ownership, while the app adds control when you want to monitor or schedule a session.
The Insider Pro-Tip
The best place for this charger is not necessarily the shortest route from the electrical panel. Think about the actual position of the Niro’s charging port and where the car normally stops. With a 25-foot cable, you have enough flexibility to place the charger where it is convenient rather than forcing the car into one exact parking position.
And if you are installing the NEMA 14-50 outlet specifically for EV charging, treat it as an EV charging circuit, not simply another household receptacle. Have the electrician verify the breaker, wiring, receptacle and continuous-load requirements together. Once that part is right, the plug-in design becomes exactly what it should be: connect the charger, plug in the Niro, and let the car charge without making the process a project every evening.
#3. Autel MaxiCharger Level 2 EV Charger 40A
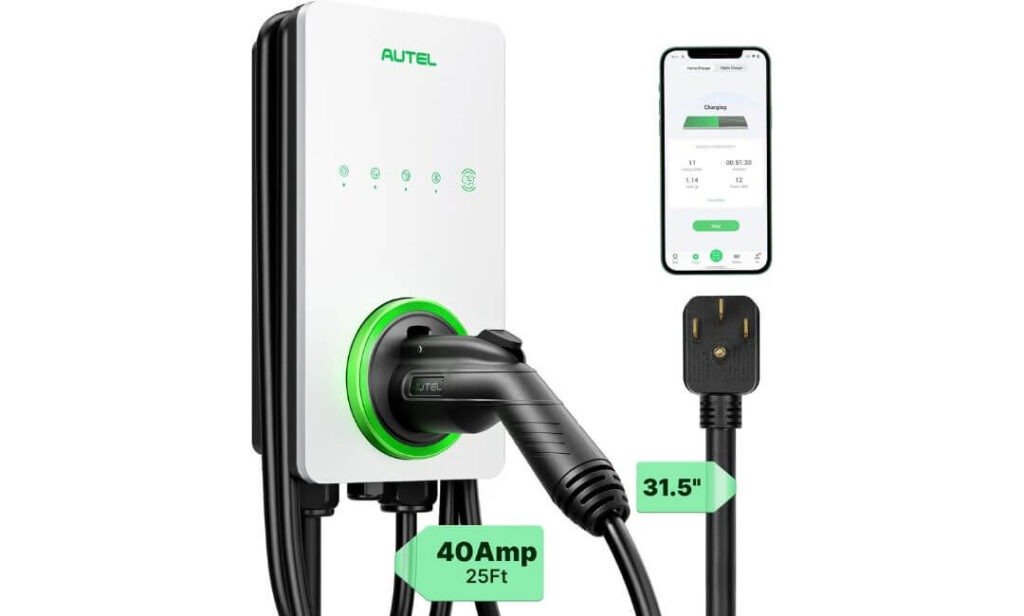
Quick Specs:
- Connector: SAE J1772
- Output: Up to 40A / 9.6 kW
- Voltage: 240V Level 2
- Cable: 25 feet, flexible in cold weather
- Plug: NEMA 14-50
- Adjustable Current: 16A–40A
- Smart Control: Autel mobile app
- Protection: NEMA 4X
- Installation: Plug-in or hardwired
- Warranty: 3 years
There is something reassuring about a charger that feels designed around real daily use rather than a specification race. The MaxiCharger brings 40A of Level 2 power through a 240V NEMA 14-50 connection, giving the Niro EV a substantial home-charging setup without requiring you to commit to a permanent hardwired installation from day one.
Its 16A–40A adjustable output is particularly useful. You can run it at a lower current when your electrical setup or charging needs call for it, then increase the setting when you want the full available output. At its maximum 40A setting, it reaches up to 9.6 kW, while the Niro EV’s onboard AC charging system determines how much power the vehicle actually draws.
Then there is the part you notice when the weather stops cooperating. The 25-foot charging cable is designed to remain flexible in cold conditions, which can make a surprising difference if the charger lives in an unheated garage or outside. Add the NEMA 4X enclosure, and this becomes a charger that is comfortable being installed indoors or exposed to the elements rather than something that needs to be treated delicately.
(The real attraction is the balance: strong 240V charging, adjustable current, a long cold-weather cable and serious weather protection in one plug-in package.)
What We Like
- Adjustable charging current: The 16A–40A range gives you more control over how the charger uses your available electrical capacity.
- Cold-weather cable: A 25-foot lead that remains flexible in low temperatures is a meaningful advantage for outdoor or unheated-garage charging.
- NEMA 4X protection: Dust, rain, splashing water and external ice are all considered in the enclosure design.
- Useful app controls: Charging schedules and session monitoring are available from your phone, making off-peak charging easier to manage.
- Portable installation: The NEMA 14-50 plug-in format is convenient if you move homes or want the ability to remove the charger later.
One Thing to Keep in Mind
The NEMA 14-50 plug-in configuration is the key to its convenience. If you already have a suitable 240V receptacle in the right location, installation is straightforward; if not, having the correct dedicated circuit and receptacle installed first is the important part of getting the most from the charger.
Why It Stands Out for Niro EV Owners
This is a strong option for someone who wants more control over the charging experience without making the setup unnecessarily complicated. The adjustable 16A–40A range lets you adapt the charger to different situations, while the Autel app gives you scheduling and charging information without having to stand beside the vehicle.
Its outdoor credentials also deserve attention. The NEMA 4X rating and flexible 25-foot cable make it especially interesting for owners who do not have a perfectly climate-controlled garage. It feels more like a charger built to be part of the property than a temporary accessory sitting beside the car.
The Insider Pro-Tip
If your Niro normally charges overnight, there is little reason to obsess over getting the maximum amperage during every session. Set the charger around your actual daily mileage and electricity schedule, then let the car sit plugged in while you sleep. The app’s scheduling capability becomes much more useful when it is doing that work automatically instead of you remembering to start charging every night.
And if the charger will live outside, take the 25-foot cable and NEMA 4X enclosure seriously when deciding where to mount it. Keep the unit positioned where the cable reaches the Niro comfortably without creating a trip point, and give the plug and holster a sensible amount of clearance. A good charging setup should disappear into your routine—that is usually the sign that it was installed in the right place.
#4. Wallbox Pulsar Plus Level 2 EV Charger 40A
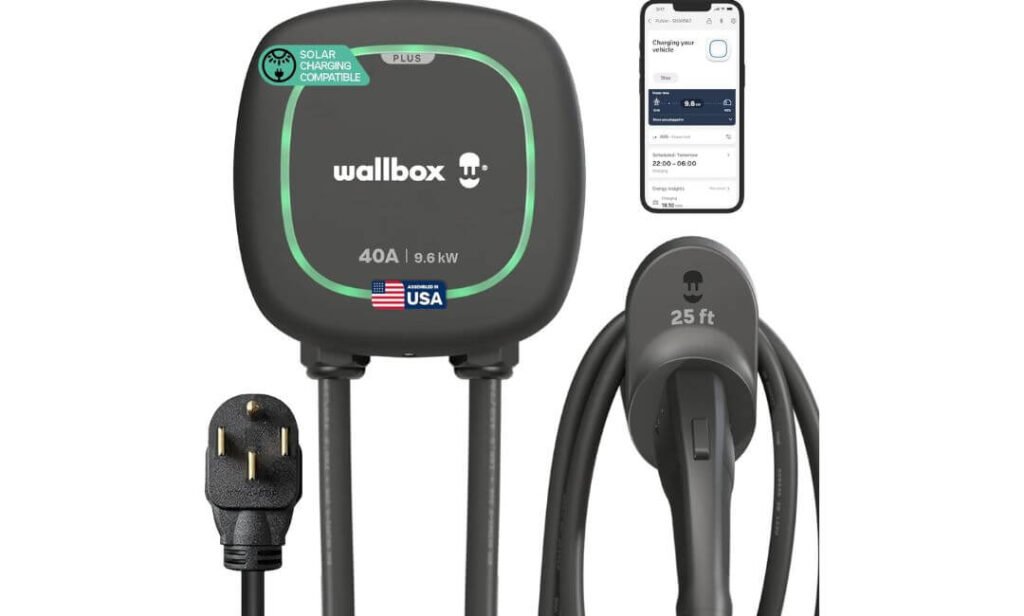
Quick Specs:
- Connector: SAE J1772
- Output: Up to 40A / 9.6 kW
- Charging Type: 240V Level 2
- Cable: 25 feet
- Connection: NEMA 14-50 plug-in version
- Controls: WiFi + Bluetooth
- Current Adjustment: Up to 40A
- Solar: Compatible with Wallbox energy-management equipment
- Protection: Weather-resistant indoor/outdoor design
- Certification: UL Listed + ENERGY STAR
- Warranty: 3 years
A good home charger does not need to dominate the garage wall. The Pulsar Plus takes a noticeably more compact approach while still delivering 40A of 240V Level 2 charging through a standard J1772 connector. For the Niro EV, that means a serious overnight charging setup without filling the wall with a large piece of equipment.
The 25-foot cable is another reason this model makes sense in a real garage. You have enough reach to work around different parking positions, while the compact enclosure keeps the installation relatively unobtrusive. The NEMA 14-50 version is also convenient when a suitable receptacle is already available, making the move from Level 1 charging to a dedicated Level 2 setup much simpler.
Where Wallbox really separates itself is on the connected side. WiFi and Bluetooth let you monitor, control and schedule charging through the app, while its solar-energy compatibility can become interesting for households that already have or plan to add compatible energy-management equipment. You are not forced to use those features, either—the basic charging function remains straightforward.
(The appeal is less about chasing maximum output and more about getting a compact, connected charger that fits naturally into the way a Niro EV is used at home.)
What We Like
- Compact footprint: The smaller enclosure is useful when garage-wall space is limited or you simply want a cleaner installation.
- 25-foot cable: Enough reach for many common garage and driveway arrangements without constantly repositioning the charger.
- WiFi + Bluetooth: Gives you two ways to connect with the charger and manage sessions through the Wallbox app.
- Solar compatibility: A worthwhile feature for owners interested in combining home EV charging with a compatible solar-energy setup.
- Indoor/outdoor flexibility: Weather-resistant construction means the charger does not have to live exclusively inside a garage.
One Thing to Keep in Mind
The smart features are an extra layer rather than a requirement. If you mainly want to plug in the Niro EV and walk away, the charger can do that perfectly well; the WiFi and Bluetooth functions become valuable when you want scheduling, monitoring or energy-management controls.
Why It Makes Sense for the Niro EV
The Pulsar Plus gets the everyday fundamentals right without making the installation feel excessive. 40A charging, J1772 compatibility, a 25-foot cable and a compact body make it an easy fit for the Niro EV, particularly when garage space is limited.
The connected features give it another useful dimension. You can schedule charging around your electricity routine, check charging information remotely and potentially integrate the charger with a compatible solar setup. That makes this more than a basic power source while still keeping the actual charging process refreshingly simple.
The Insider Pro-Tip
Think about where you want the charger to disappear rather than simply where there is an empty section of wall. Its compact design makes it easy to position neatly, but the 25-foot cable gives you enough flexibility to place it around the natural parking position of the Niro rather than directly beside the electrical connection.
If you already have solar or are considering it later, the solar-compatibility angle is worth keeping in mind before installation. A little planning around charger location, cable routing and energy-management equipment can save you from having to rearrange the setup later. And for everyday charging, remember that the Niro EV—not the 40A label on the charger—ultimately determines how much AC power the vehicle draws.
#5. Grizzl-E Classic Level 2 EV Charger 40A
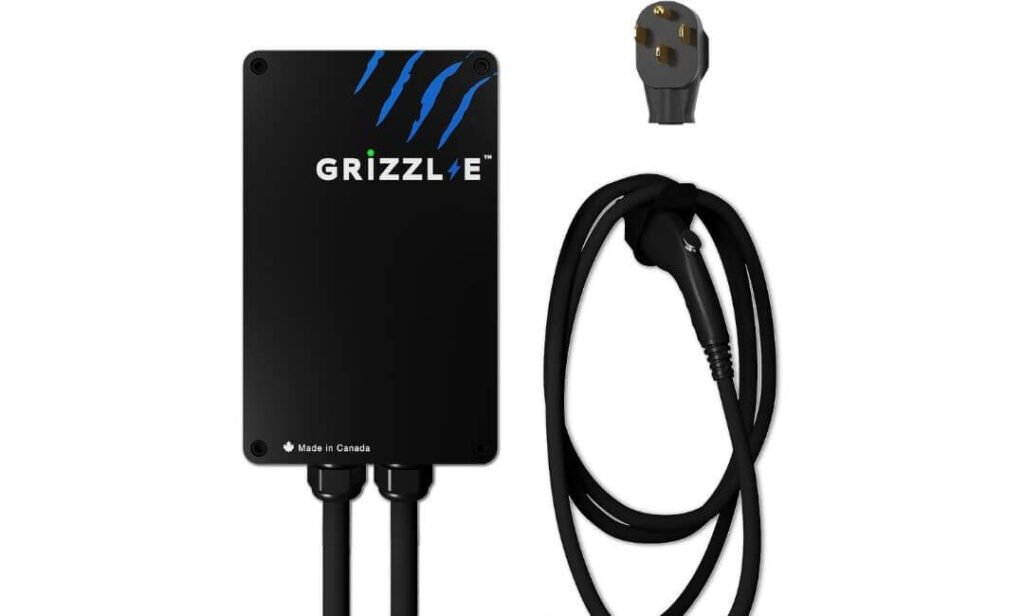
Quick Specs:
- Connector: SAE J1772
- Output: Up to 40A
- Voltage: 240V Level 2
- Cable: 24 feet
- Plug: NEMA 14-50
- Current Settings: 16A, 24A, 32A and 40A
- Enclosure: Heavy-duty metal case
- Protection: IP67 + built-in GFCI
- Safety: UL Certified
- Use: Indoor or outdoor
Not every Niro EV owner wants another app on the phone just to charge a car. The Grizzl-E Classic takes the opposite approach. It gives you 40A Level 2 charging through a J1772 connector, four selectable current settings and a rugged metal enclosure, then gets out of the way. Plug the Niro in, let the vehicle manage its charging, and there is very little else to think about.
The 40A setting provides up to 9.6 kW at 240V, while the selectable 32A, 24A and 16A settings give you room to match the charger to the electrical circuit available at home. That is a genuinely useful feature because you do not have to treat maximum output as the only usable setting. The 24-foot cable also gives enough reach for most garage and driveway arrangements without making the charger unnecessarily bulky.
Where this model becomes particularly interesting is its construction. The IP67 enclosure, metal case, built-in GFCI and multiple electrical protections give it a much more rugged character than a charger designed primarily around screens and connectivity. Over-current, over-voltage, under-voltage, ground-fault and over-temperature protection are built into the system, along with power-outage recovery and self-monitoring.
(This is the charger for someone who values physical toughness and straightforward operation over a long list of connected features.)
What We Like
- No app dependency: There is no WiFi account or phone setup standing between you and charging the Niro EV.
- Four current settings: 16A, 24A, 32A and 40A make it easier to work with different electrical setups.
- Rugged enclosure: The metal housing and IP67 protection make this a natural candidate for exposed or demanding installations.
- 24-foot cable: A useful middle ground between compactness and the reach needed around a typical garage.
- Built-in electrical protection: GFCI plus over-current, over-voltage, ground-fault and temperature protection provide important layers of protection during everyday charging.
One Thing to Keep in Mind
Its simple design is intentional. You will not get the WiFi scheduling, remote monitoring or energy tracking found on some of the other chargers in this list. For an owner who prefers straightforward charging, that is part of the appeal; if phone-based control is important to you, the connected models above are better suited to that style of ownership.
Why It Makes Sense for the Niro EV
The Classic makes a strong case by concentrating on the parts of a home charger that actually handle the electrical load. J1772 compatibility, 240V Level 2 charging, adjustable current and rugged protection give the Niro EV a dependable home-charging foundation without adding unnecessary complexity.
It is also one of the more interesting choices for a garage or outdoor location where durability matters. The IP67 rating, metal enclosure and built-in GFCI are not features you notice while looking at the car, but they become much more meaningful when the charger has to deal with temperature changes, moisture and years of repeated plug-in cycles.
The Insider Pro-Tip
If your Niro EV is going to charge in the same place every night, simplicity can be a feature in itself. Set the current appropriately for the dedicated circuit, plug in when you get home and let the vehicle take care of the rest. There is no reason to run a 40A setting simply because the charger offers it if a lower setting already covers your overnight driving.
Also, pay attention to the NEMA 14-50 circuit rather than treating the plug as an ordinary household outlet. The charger can adjust down to 32A, 24A or 16A when needed, but the circuit should still be installed correctly for continuous EV charging. Once the electrical side is properly sorted, the Classic’s biggest advantage becomes obvious: it is a charger you can use every day without having to think about the charger itself.
Best Kia Niro EV Level 2 Home Chargers Compared
| What Matters for a Niro EV | EMPORIA Level 2 EV Charger Smart + Flexible | EVIQO Level 2 EV Charger Practical Plug-In | Autel MaxiCharger Connected + Rugged | Wallbox Pulsar Plus Compact Smart | Grizzl-E Classic No-Fuss Charging |
|---|---|---|---|---|---|
| J1772 Compatibility | Native J1772 Direct Niro EV connection |
Native J1772 Direct Niro EV connection |
Native J1772 Direct Niro EV connection |
Native J1772 Direct Niro EV connection |
Native J1772 Direct Niro EV connection |
| Charging Capability | 40A plug-in 48A hardwired |
40A / 9.6 kW 240V Level 2 |
40A / 9.6 kW 240V Level 2 |
40A / 9.6 kW 240V Level 2 |
Up to 40A 240V Level 2 |
| Adjustable Current | Up to 40A plug-in 48A hardwired capability |
6A–40A 1A adjustments |
16A–40A Multiple charging levels |
Up to 40A Flexible charging control |
16A / 24A / 32A / 40A |
| Home Connection | NEMA 14-50 or hardwired |
NEMA 14-50 Plug-in setup |
NEMA 14-50 Plug-in setup |
NEMA 14-50 Plug-in version |
NEMA 14-50 Plug-in setup |
| Cable Reach | 25 ft Good garage and driveway reach |
25 ft Useful for flexible parking |
25 ft Designed to stay flexible in cold weather |
25 ft Pairs well with compact mounting |
24 ft Strong everyday reach |
| Smart Features | WiFi app Charging schedules Energy monitoring | WiFi app Scheduling Energy and cost tracking | WiFi app Charging schedules Optional RFID access | WiFi + Bluetooth Smart scheduling Energy management | No WiFi required Simple plug-and-charge operation |
| Weather & Build | Weather-resistant Designed for indoor/outdoor use |
IP66 / NEMA 4 Sealed weather-resistant housing |
NEMA 4X Dust-tight and water-resistant design |
Weather-resistant Indoor/outdoor installation |
IP67 Heavy-duty metal enclosure |
| Safety & Certification | UL Listed ENERGY STAR |
UL + ETL FCC + ENERGY STAR |
NEMA 4X Built for demanding conditions |
UL Listed ENERGY STAR |
UL Certified Built-in GFCI + electrical protection |
| What Sets It Apart |
48A hardwired option Smart monitoring with two installation paths. |
Adjustable 6A–40A Long cable, illuminated holster and practical plug-in design. |
Cold-weather flexibility NEMA 4X protection with connected charging controls. |
Compact smart design WiFi/Bluetooth control with solar-energy compatibility. |
Rugged simplicity Metal enclosure, IP67 protection and no app dependency. |
| Best Suited To | Owners who want smart controls and future installation flexibility. | Owners who want a straightforward plug-in charger with strong weather protection. | Owners who want adjustable charging, app control and a charger built for indoor/outdoor use. | Owners who prefer a compact connected charger with solar-management potential. | Owners who value durability and simple plug-in charging over connected features. |
Buying Guide: What Actually Makes a Great Kia Niro EV Level 2 Home Charging Setup
Choosing a home charger for the Niro EV is easier when you stop looking at the highest number on the box and start looking at how the car, electrical circuit, charger and parking space work together. A 40A charger can already be a very capable daily solution, while a 48A model can make sense when you are installing a suitable hardwired circuit and want additional capacity for a future EV.
The important thing is to match the charger to the vehicle’s AC charging capability and your home’s electrical installation, rather than paying for capacity the car cannot use. The charger is an EVSE; it supplies controlled power, while the vehicle’s onboard charger determines how much AC power the Niro actually accepts.
Start With the Niro EV’s Actual AC Charging Limit
The Niro EV uses a J1772 connection for AC charging, making J1772 Level 2 equipment the straightforward choice for home charging. Current Niro EV specifications list an 11-kW onboard AC charger, so a properly installed 240V Level 2 charger is the sensible home setup for making full use of its AC charging capability.
This is also why a Kia Niro EV home charger 40 amp can be perfectly adequate. At 240V, 40A represents roughly 9.6 kW, already close to the vehicle’s maximum AC charging capability.
A Kia Niro EV home charger 48 amp can still be worthwhile, particularly if you are installing a new hardwired circuit and expect to keep the electrical setup for another EV later. Just do not confuse the charger’s maximum output with what the Niro itself will draw.
40A vs 48A: Which Capacity Actually Makes Sense?
| Charger capacity | Approx. 240V output | Practical Niro EV use | What to consider |
|---|---|---|---|
| 32A | 7.7 kW | Strong overnight charging | Useful where electrical capacity is limited |
| 40A | 9.6 kW | Very capable Level 2 setup | Excellent fit for everyday home charging |
| 48A | 11.5 kW | More capacity than the Niro necessarily needs | More useful for future EV flexibility |
| 50A+ | Depends on charger | Not automatically faster for the Niro | Requires careful electrical planning |
The figures above are electrical capacity, not a promise of a specific miles-per-hour gain. Weather, battery temperature, state of charge and the vehicle’s charging system can all affect the actual charging session.
For most Niro owners, 40A is already a sensible sweet spot. Going higher should be an installation decision, not simply a shopping decision.
Why 240V Matters for Home Charging
A standard household outlet is useful for emergency or occasional charging, but 240V Level 2 charging is what turns home charging into a practical everyday routine.
At 240V, the charger can deliver substantially more power than a typical Level 1 setup. That means you can arrive home with a partially depleted battery, plug in overnight and start the next day with a much larger amount of usable range restored.
The real benefit is not necessarily charging from completely empty to full every night. Most owners will not do that. The advantage is having enough charging power to replace the day’s driving comfortably during the hours when the vehicle is sitting at home.
J1772 Compatibility Is More Important Than a Fancy Charger App
When shopping specifically for a Kia Niro EV J1772 charger, look for a charger with a genuine SAE J1772 AC connector.
That gives you a direct connection to the Niro EV’s AC charging inlet without introducing another adapter into the normal charging routine.
Pay attention to the difference between:
- J1772 connector — the plug that connects to the vehicle.
- NEMA 14-50 — the household-side plug used by many plug-in Level 2 chargers.
- Hardwired connection — the charger is permanently connected to the electrical circuit rather than using a receptacle.
These are three different parts of the installation. A charger can have a J1772 vehicle connector and still use either a NEMA 14-50 plug or a hardwired electrical connection at the other end.
NEMA 14-50 Is Convenient, But the Outlet Still Needs to Be Right
A NEMA 14-50 plug makes installation convenient when the home already has a correctly installed receptacle in a suitable location.
But an EV charger is a continuous electrical load, so you should not treat a NEMA 14-50 outlet like a normal household receptacle simply because the plug fits.
For a 40A charging setup, the electrical circuit needs to be appropriately sized for continuous EV charging. The breaker, wiring, receptacle and charger settings should all be considered together.
If the required outlet does not already exist, have a qualified electrician assess:
- Available panel capacity
- Dedicated circuit requirements
- Correct wire size
- Breaker rating
- Receptacle quality and suitability
- Distance between the panel and charger
- Local permit and inspection requirements
- Indoor or outdoor installation conditions
That preparation is much more important than choosing between two chargers with nearly identical headline specifications.
Smart Charging: Useful When It Solves a Real Problem
WiFi and apps are nice, but they should not be the reason you buy a particular charger.
The smart features that genuinely matter are:
- Charging schedules for overnight or off-peak electricity periods
- Energy monitoring so you can see how much electricity a session uses
- Remote start and stop when you actually need it
- Adjustable current for adapting the charger to your electrical setup
- Load management or power sharing where the home installation supports it
- Solar integration if your energy system is compatible with the charger
For someone with time-of-use electricity rates, scheduling can be genuinely useful. Instead of remembering to change charging times manually, the charger can follow a schedule while the car sits plugged in.
If your electricity rate does not change throughout the day and you rarely use the app, however, a basic charger can be just as effective at delivering energy to the vehicle.
Adjustable Amperage Is One of the Most Underrated Features
A charger capable of changing its current gives you more control over the installation.
For example, the products in this roundup offer different adjustment ranges, including settings such as 16A, 24A, 32A and 40A, while some models allow finer adjustments.
That can be useful if:
- Your home’s electrical capacity changes.
- You want to temporarily reduce charging load.
- You are sharing electrical capacity with other equipment.
- You move the charger to another property.
- A future installation requires a lower charging setting.
It also reinforces an important point: maximum amperage is not the same thing as required amperage.
Installation Location Matters More Than Most Buyers Expect
Before choosing the charger, decide where the Niro EV will actually sit.
A 25-foot cable can be extremely convenient, but only if the charger is mounted in a sensible position. Ideally, the cable should reach the vehicle without being stretched tightly, dragged through a doorway or left across a regular walking route.
For a garage, think about:
- Where the charging port sits when parked
- Whether the car can reverse or pull in from either direction
- Where the cable can be hung
- Whether the charger will be hit by a vehicle door
- Distance from the electrical panel
- Clearance around the charging unit
For an outdoor installation, also consider direct rain, standing water, sunlight, snow and how the cable will be stored.
Outdoor Charging Requires More Than a Weatherproof Label
If the charger is going outside, look beyond the words “weatherproof” or “outdoor rated.”
A useful outdoor setup should have appropriate enclosure protection, a properly installed electrical connection and sensible cable storage.
Among the chargers in this article, you will see ratings such as IP66, IP67 and NEMA 4X. These ratings describe different levels of enclosure protection, so they should not simply be treated as marketing badges.
A rugged enclosure is valuable, but the installation itself still needs to protect the electrical connection from inappropriate exposure.
Safety Certification Is Worth Checking Before Price
A home EV charger handles substantial electrical power for potentially several hours at a time. Certification therefore matters.
Look for recognised certification such as:
- UL Listed or UL Certified
- ETL Listed
- ENERGY STAR, where applicable
- Appropriate electrical protection such as ground-fault protection
- Over-current and over-temperature protection
- Suitable enclosure protection for the installation environment
This is one area where saving a little money on an uncertified unit is difficult to justify. The charger is going to become part of your home’s electrical system, so proper testing and certification should be part of the buying decision, not an afterthought.
Do You Need an Electrician?
If there is already a properly installed NEMA 14-50 receptacle in the right location, a plug-in charger can make the final connection relatively simple.
That does not mean every homeowner should install the circuit themselves.
If you need a new 240V circuit, new receptacle, panel work or a hardwired connection, use a qualified electrician and check your local permit requirements.
For a hardwired 48A charger in particular, the electrical installation needs to be designed around the charger’s continuous-load requirements. Do not simply replace a breaker with a larger one and assume the existing wiring can handle it.
What About Future-Proofing?
Future-proofing is useful when it costs you little more in the right circumstances. It becomes less useful when you buy substantially more electrical capacity purely because a product advertises a bigger number.
A 48A-capable charger can be attractive if you are already installing a new dedicated circuit and expect a future EV with a higher AC charging requirement.
If the Niro EV is the only vehicle you expect to charge at home for years, a properly installed 40A Level 2 charger can already provide a very capable setup.
The smarter question is not, “What is the biggest charger I can buy?”
It is:
“What charging capacity will I actually use, and what electrical infrastructure makes sense for my home?”
That is the difference between buying a charger because the specification looks impressive and building a home charging setup that remains useful long after the purchase page has been forgotten.
Practical Tips for Safe Kia Niro EV Level 2 Home Charging Installation
A good charger can only perform as well as the electrical work behind it. For a Kia Niro EV Level 2 home charging installation, the goal is not simply to get a 240V outlet onto the wall. The circuit, breaker, wiring, receptacle, charger settings and installation location all need to work together. Done properly, you should be able to plug in after getting home and rarely think about the electrical side again.
1. Start With the Electrical Panel, Not the Charger
Before ordering a charger, have a licensed or qualified electrician inspect the home’s electrical panel.
The electrician should check:
- Available panel capacity
- Existing electrical loads
- Whether a dedicated EV charging circuit is required
- Available breaker positions
- Main service capacity
- Distance from the panel to the charging location
- Whether the panel needs an upgrade
- Local electrical-code requirements
This is particularly important with 40A and 48A charging. An EV charger is considered a continuous load, so the circuit needs to be designed accordingly rather than sized like an occasional household appliance.
If the panel is already heavily loaded, simply adding another breaker may not be the correct solution. A professional can determine whether the existing service can support the additional load or whether another approach is needed.
2. Choose the Charger Current Before Sizing the Circuit
Do not install the electrical circuit first and decide on the charger later.
The charger and circuit should be planned together.
For example:
| Charging setting | Approx. 240V power | Typical circuit planning |
|---|---|---|
| 16A | 3.8 kW | Lower-load Level 2 setup |
| 24A | 5.8 kW | Moderate home charging |
| 32A | 7.7 kW | Strong overnight charging |
| 40A | 9.6 kW | High-capacity Niro EV setup |
| 48A | 11.5 kW | Higher-capacity hardwired setup |
These are approximate electrical output figures. The Niro EV can still limit the actual power it accepts based on its onboard charging system.
For a 40A charging setting, the circuit needs to be appropriately sized for continuous EV charging. A 48A setup generally requires a properly sized hardwired installation, commonly involving a 60A branch circuit, but the exact design should be confirmed against the charger’s installation instructions and local electrical code.
3. Use the Correct Wire and Breaker Combination
This is one area where shortcuts are simply not worth taking.
The correct wire gauge depends on the circuit design, conductor material, installation method, temperature rating, distance and applicable electrical code. It should not be chosen from a generic internet chart alone.
The same applies to the breaker. A larger breaker does not make undersized wiring safe.
Your electrician should verify the complete combination:
charger setting → continuous load → breaker → conductor size → receptacle or hardwire connection
That chain needs to make sense from beginning to end.
4. Treat a NEMA 14-50 Receptacle as EV Equipment
A NEMA 14-50 connection is convenient because many Level 2 chargers use it, but the receptacle should not be treated as just another household outlet.
For EV charging, the receptacle can remain under load for several hours at a time. A properly installed, high-quality receptacle on a dedicated circuit is therefore important.
If you are installing a new NEMA 14-50 outlet specifically for the Niro EV:
- Use a receptacle suitable for the application.
- Install it on the correctly sized dedicated circuit.
- Confirm the breaker and wiring are appropriate.
- Position it where the charging cable can reach the vehicle naturally.
- Follow the charger’s installation instructions.
- Have the installation inspected where local rules require it.
This is also why a plug-in charger should not simply be connected to an old NEMA 14-50 receptacle without checking what is actually behind that outlet.
5. Hardwired 48A Charging Needs More Planning
A 48A charger can look attractive on a specification sheet, but the electrical installation becomes more important at that level.
A properly installed hardwired setup can offer a cleaner permanent installation and higher available charger output. It can also make sense if you are preparing the electrical system for a future EV with a larger onboard AC charger.
But there is no reason to choose 48A purely because it sounds faster.
The Niro EV’s onboard charger remains the limiting factor. If the vehicle cannot accept the full output, the additional charger capacity will not make that particular charging session faster.
6. Put the Charger Where the Niro Actually Parks
This sounds obvious, yet it is one of the easiest things to get wrong.
Before drilling holes, park the Niro exactly where it normally sits and consider where the charging port ends up.
Then check:
- Can the cable comfortably reach the charging port?
- Can you park in the same position every night?
- Does the cable cross a walkway?
- Is the charger protected from accidental vehicle contact?
- Can the cable be hung without touching the ground?
- Is there enough clearance around the unit?
- Can you reach the charger controls comfortably?
A 24- or 25-foot cable gives you useful flexibility, but more cable does not fix a poorly chosen mounting location.
7. Outdoor Installation Needs Extra Attention
If the Niro is parked outside, choose a charger specifically designed for outdoor use and pay attention to its enclosure rating.
The products in this article include models with ratings such as IP66, IP67 and NEMA 4X. Those ratings provide useful information about protection against water and environmental exposure, but they do not eliminate the need for a properly installed electrical connection.
For an outdoor setup, think about:
- Direct rainfall
- Snow and ice
- Standing water
- Sun exposure
- Freezing temperatures
- Cable storage
- Drainage around the electrical connection
- Physical protection from vehicles
Keep the charger and cable connection positioned so water cannot collect around the electrical components.
8. Do Not Ignore Cable Management
The charger may be electrically perfect and still become annoying if the cable is constantly lying across the garage floor.
Use the supplied holster or an appropriate cable-management system to keep the connector elevated when it is not plugged into the Niro.
The goal is simple:
The cable should reach the car without becoming something people have to walk over.
That matters even more with a 25-foot cable because the extra reach is useful only when it can be managed safely.
9. Check Local Permits Before Installation
Electrical requirements vary by location, so there is no single permit process that applies everywhere.
Before installation, ask the electrician or local authority whether the project requires:
- An electrical permit
- Inspection
- Specific receptacle requirements
- Load calculation
- Service-capacity documentation
- EV charger-specific installation requirements
Do this before the work starts, not after the charger is already mounted.
A professional electrician familiar with EV installations can normally tell you what local requirements apply and whether the planned circuit needs inspection.
10. Test the Complete Setup Before Calling It Finished
Once the installation is complete, do not stop at “the charger turned on.”
The electrician should verify the installation according to the equipment instructions and applicable electrical requirements.
As the owner, it is also worth checking that:
- The charger powers up normally.
- The J1772 connector locks and releases correctly.
- Charging starts without unusual warnings.
- The cable reaches the vehicle comfortably.
- The charger remains stable during a sustained charging session.
- There are no unusual smells, excessive heat or visible damage.
- The circuit protection operates as intended.
- The charger is mounted securely.
If anything looks or feels abnormal, stop using the equipment and have it checked rather than trying to diagnose a high-voltage electrical issue yourself.
The Installation Mistakes Worth Avoiding
Most home-charging problems are not caused by the Niro EV itself. They usually come down to the installation being treated too casually.
Avoid:
- Using an undersized circuit for the selected charging current.
- Choosing wire size from a generic chart without considering the actual installation.
- Installing a cheap receptacle simply because the plug fits.
- Sharing the EV circuit with unrelated heavy loads where the installation does not permit it.
- Using extension cords or improvised adapters for permanent charging.
- Mounting the charger where the cable becomes a trip hazard.
- Ignoring outdoor exposure when installing the charger outside.
- Changing breaker size without verifying the wiring and equipment.
- Assuming a 48A charger means the Niro will charge at 48A.
The Best Kia Niro EV Level 2 Installation Is the One You Stop Thinking About
The ideal setup is surprisingly unexciting. The Niro comes home, the J1772 connector reaches the car comfortably, you plug it in, and the vehicle charges safely while you sleep.
That usually comes from doing the less exciting work correctly: proper load assessment, correctly sized wiring, suitable circuit protection, a quality receptacle or hardwired connection, sensible charger placement and appropriate weather protection.
If you are installing a new 240V circuit, let the electrician design the electrical side around the charger you actually intend to use. That small amount of planning is what turns a Level 2 charger from an expensive wall-mounted box into a home charging system you can depend on every day.
Cost Considerations and Long-Term Value of a Kia Niro EV Home Charger
The price printed on the charger is only the beginning of the calculation. A cheaper unit can become more expensive if it requires additional electrical work, while a more capable charger can make sense if the same installation will serve you for many years or another EV later. For the Niro EV, the smarter approach is to look at the total cost of ownership, not simply the purchase price.
Look Beyond the Charger Price
Your real installation cost can include several separate pieces:
- The EV charger itself
- NEMA 14-50 receptacle, if required
- Dedicated circuit
- Breaker and wiring
- Electrical panel work, if necessary
- Labour
- Permit or inspection fees where applicable
- Cable-management hardware
- Potential electrical service upgrades
This is why two owners can buy the same charger and end up with very different total costs.
If a suitable 240V circuit already exists in the correct location, a plug-in charger can be relatively straightforward to install. If the panel is on the opposite side of the house and a new circuit needs to be routed through finished walls or a long distance, the electrical work can become the larger part of the project.
A 40A Charger Can Already Deliver Strong Value
For the Niro EV, there is not necessarily a financial advantage to buying the highest-amperage charger available.
A 40A 240V Level 2 charger can provide approximately 9.6 kW of electrical capacity, which is already close to the Niro EV’s 11-kW onboard AC charging capability.
That means a well-installed 40A unit can provide the charging performance most owners need without paying for additional capacity that the current vehicle may not fully use.
A 48A charger can still have a legitimate reason to exist in your setup, particularly if:
- You are already installing a new hardwired circuit.
- You expect to own another EV later.
- A future vehicle may have a higher AC charging capability.
- You want additional electrical capacity available at the charging location.
The key is to pay for useful capacity, not capacity that simply looks impressive in the product title.
Smart Charging Can Save More Than a Few Extra Charging Amps
The most valuable smart feature is not a flashy app. It is charging when electricity costs less.
If your utility offers time-of-use pricing, scheduling the Niro to charge during cheaper periods can reduce the cost of regular home charging. The exact savings depend entirely on your electricity tariff, driving distance and charging schedule, so there is no honest universal percentage to promise.
A smart charger can make this easier by allowing you to:
- Schedule charging automatically.
- Start or stop sessions remotely.
- Monitor electricity consumption.
- Review charging history.
- Track energy usage through the app.
- Adjust charging current when needed.
If your electricity price remains the same throughout the day, the financial advantage of scheduling becomes much smaller. In that situation, smart features are mainly about convenience and monitoring rather than direct savings.
Calculate Charging Cost From Your Electricity Rate
A simple calculation gives you a much more realistic picture than an advertised “cost per charge.”
The basic formula is:
Energy used × electricity price = charging cost
For example, if a charging session adds 40 kWh and your effective electricity rate is $0.15 per kWh:
40 kWh × $0.15 = $6.00
That is the electricity cost for that amount of energy before considering any applicable fees, taxes or utility-specific charges.
Your actual wall-to-battery efficiency will also vary, so the amount drawn from the electrical system can be somewhat higher than the energy ultimately stored in the battery.
Your Driving Pattern Matters More Than Maximum Charger Output
Suppose you normally drive 30–50 miles a day and the Niro sits at home overnight.
You may not need the charger operating at its maximum output every night.
A Level 2 charger has several hours to replace the energy used during the day. That is why overnight charging is such a natural match for the Niro EV.
The charger does not need to refill the entire battery from empty every night. It simply needs to replace the energy you actually consumed.
This is also where adjustable-current chargers become useful. If 32A comfortably covers your normal driving requirements, there may be little reason to run at 40A every night.
Electricity Rates Can Change the Value Equation
Before buying a smart charger, check your utility’s current residential rate structure.
Look for:
- Time-of-use pricing
- Off-peak electricity rates
- EV-specific electricity plans
- Demand charges, where applicable
- Fixed monthly charges
- Seasonal rate differences
- Renewable-energy or solar programs
A charger with scheduling capability becomes much more valuable when the price of electricity changes significantly throughout the day.
On a flat-rate electricity plan, however, paying extra solely for scheduling may not produce meaningful financial savings.
Solar Owners Have a Different Calculation
If your home has solar panels, charging the Niro EV can become part of a broader energy-management strategy.
Some connected chargers, including options in this roundup, support solar-energy integration or energy-management equipment.
The important question is not simply whether the charger says “solar compatible.” Check exactly what additional equipment is required and whether the system can actually coordinate the home’s solar generation, household load and vehicle charging.
If you already have solar, this can be a worthwhile feature. If you do not, there is little reason to pay a premium simply because a charger mentions solar capability.
Rebates and Incentives Need to Be Checked Locally
Potential incentives can materially change the cost of a home charger, but they are location-specific and time-sensitive.
Depending on where you live, assistance may come from:
- Federal programs
- State or provincial programs
- Local governments
- Utility companies
- EV-specific electricity programs
- Manufacturer promotions
Do not assume that a charger automatically qualifies for a rebate because another charger does.
Before purchasing, check the current requirements for your location, including whether the incentive applies to:
- The charger itself
- Installation labour
- Electrical upgrades
- A specific charger certification
- A primary residence
- A specific installation date
Also check whether the program requires pre-approval, approved contractors, specific equipment or documentation. A rebate that looked attractive before installation is much less useful if the required paperwork was skipped.
Where the Long-Term Value Really Comes From
A home charger can stay with you much longer than the Niro EV.
That changes how you should think about the purchase.
A charger with a slightly higher upfront price may make sense if it gives you:
Better installation flexibility
You can move between plug-in and hardwired configurations where the equipment supports it.
Better control
Scheduling and energy monitoring can become useful every night rather than only during the first few months.
Better physical protection
A properly rated outdoor enclosure can matter if the charger is exposed to weather.
Better future compatibility
A higher-capacity charger may continue to make sense when the Niro EV eventually gets replaced by another EV.
The Cheapest Charger Is Not Always the Cheapest Setup
Imagine two situations.
In the first, a lower-priced charger requires a new circuit, additional cable routing and electrical work because of where it must be mounted.
In the second, a slightly more expensive charger works naturally with the planned electrical connection, has a long enough cable and fits the preferred mounting location.
The second option could produce the lower total installed cost, even though its purchase price is higher.
That is why the right comparison is:
charger + electrical work + installation + operating cost + useful features + expected service life
rather than simply comparing the prices printed beside five product listings.
A Simple Way to Judge the Investment
Before purchasing, ask yourself five questions:
- How many miles do I normally drive each day?
- Do I have time-of-use electricity pricing?
- Do I already have a suitable 240V circuit?
- Will the charger be indoors or outdoors?
- Could this charger eventually be used with another EV?
Your answers will usually tell you more about the right charger than a long specification sheet.
For most Niro EV owners, the best long-term value comes from a properly installed 240V Level 2 charger that matches the home’s electrical capacity, provides enough overnight charging for the owner’s driving pattern and has smart features only where those features genuinely provide value.
That is the real ROI of home charging: not chasing the biggest number, but building a setup that quietly saves time, makes daily charging effortless and continues making sense long after the purchase receipt is forgotten.
Real-World Kia Niro EV Home Charging Scenarios That Actually Change What You Should Buy
The right home charger can look completely different depending on where the Niro EV lives, how far it travels each day and what electrical equipment is already available. Someone driving a short distance through town does not need the same setup as a family running two EVs from one garage, and an apartment resident may care more about cable reach and installation restrictions than maximum charging output.
The examples below are meant to show how the same charger specifications translate into everyday ownership, rather than pretending there is one perfect setup for every Niro EV driver.
Scenario A: Urban Home With a Short Daily Commute
Imagine a Niro EV owner who drives around 20–30 miles a day, parks in a private garage each evening and has access to a suitable 240V electrical connection.
This driver does not need to refill the entire battery every night. They may use a relatively small portion of the battery during the day, then leave the vehicle plugged in for several hours overnight.
A 40A Level 2 charger is already more than capable of handling this routine.
What matters most here is convenience:
- J1772 connection for direct Niro EV charging
- 240V Level 2 operation
- A cable long enough to reach the charging port comfortably
- Scheduling if the utility offers cheaper overnight electricity
- A reliable NEMA 14-50 or properly installed hardwired connection
- Simple cable storage so the garage remains easy to use
For this type of owner, spending considerably more for maximum amperage may not change the daily experience much. The Niro has plenty of time to charge while the owner sleeps.
A charger such as the Wallbox Pulsar Plus can make sense when compact size and connected controls matter, while the Grizzl-E Classic is attractive for someone who would rather skip the app entirely.
The real win here is not charging as quickly as physically possible. It is plugging in when you get home and waking up with enough range for the next day’s driving.
Scenario B: Suburban Family With Solar and More Than One Vehicle
Now consider a larger home where the Niro EV shares the property with other vehicles, household appliances and a solar-energy system.
This situation changes the buying decision.
The owner may want to charge the Niro when solar generation is available, schedule charging around household electricity use or monitor how much energy the vehicle consumes over the course of a month.
Here, smart charging and energy management can become genuinely useful rather than simply being features listed on the box.
Important considerations include:
- WiFi or Bluetooth connectivity
- Charging schedules
- Energy-use monitoring
- Solar-energy compatibility
- Adjustable charging current
- Available electrical panel capacity
- Future EV charging requirements
- Cable placement for multiple parking positions
The Wallbox Pulsar Plus becomes interesting in this scenario because of its connected controls and solar-energy compatibility with appropriate Wallbox energy-management equipment.
The EMPORIA can also make sense for an owner who values energy monitoring and scheduling, particularly if the home already has other energy-management equipment in the ecosystem.
If another EV could eventually be added, this is also where a higher-capacity hardwired installation can have more long-term value. The important distinction is that the extra capacity is being installed for future flexibility, not because the current Niro EV suddenly needs more than its onboard charger can accept.
Before doing any of this, the homeowner should have the electrician assess the panel and overall household load. Solar panels do not automatically mean the home has unlimited electrical capacity.
Scenario C: Apartment Garage or Tight Parking Space
Apartment and condominium charging can be a completely different problem.
The first question is often not, “Which charger has the highest output?”
It is:
“Am I actually allowed to install one here?”
A resident may need approval from a property manager, condominium association or building owner before modifying an electrical circuit or mounting charging equipment.
Space can also be limited. A long charging cable can help, but only if the installation allows it to be routed safely.
For this situation, focus on:
- Building approval
- Dedicated electrical circuit availability
- Distance from the panel to the parking space
- Cable length
- Charger dimensions
- Secure mounting
- Cable storage
- Indoor or outdoor exposure
- Access to the electrical meter
- Responsibility for electricity costs
A compact charger such as the Wallbox Pulsar Plus can be useful where wall space is limited. Its smaller physical footprint can make the installation less intrusive.
A plug-in option can also be attractive if the building already provides a suitable 240V NEMA 14-50 receptacle. But if the parking space has no appropriate electrical supply, the charger itself is only one part of the project.
Scenario D: Outdoor Driveway With No Garage
Some Niro EV owners have no garage at all.
In that case, weather protection becomes a buying criterion rather than a bonus feature.
Look for an EVSE specifically designed for outdoor use, then consider the entire installation:
- Rain exposure
- Snow and ice
- Direct sunlight
- Freezing temperatures
- Water drainage
- Cable storage
- Distance from the house
- Protection from accidental vehicle impact
The EVIQO and Autel MaxiCharger, for example, have enclosure designs aimed at outdoor use, while the Grizzl-E Classic takes a particularly rugged approach with its metal enclosure and IP67 rating.
The charger rating alone is not enough. The electrical connection and receptacle also need to be installed appropriately for outdoor conditions.
Scenario E: A Home With Limited Electrical Capacity
This situation is more common than many buyers realise.
Perhaps the house has an older electrical panel, several large appliances and limited spare capacity.
The answer is not automatically to buy a lower-priced charger and hope for the best.
Instead, have an electrician assess the existing service and determine what charging level the home can support safely.
An adjustable charger can then provide useful flexibility. A unit capable of 16A, 24A, 32A and 40A settings, for example, can be configured according to the electrical installation rather than being permanently locked to maximum output.
This is one reason adjustable-current capability is worth paying attention to when comparing Level 2 chargers.
Scenario F: You Plan to Keep the Charger After Selling the Niro
This is where future-proofing becomes sensible.
The Niro EV may eventually be replaced by another electric vehicle. Your next EV could have a different onboard charging capability, different energy requirements or simply remain at home for longer periods.
If you are already paying an electrician to install a new circuit, it can make sense to consider whether a 40A or 48A-capable charger will remain useful for the next vehicle.
But future-proofing should still be practical.
There is little value in installing a significantly larger electrical system if:
- The panel cannot support it economically.
- The current vehicle cannot use the additional capacity.
- Your daily driving requirements are already easily covered.
- The extra installation cost is difficult to justify.
The best future-proofing is usually flexibility, not simply maximum amperage.
Scenario G: Two Drivers Sharing One Charger
A household with two drivers can make cable length, scheduling and installation location much more important.
If both vehicles use the same charging area, a 24- or 25-foot cable can provide useful flexibility. You may be able to park either vehicle without having to reposition the charger.
If both vehicles need charging overnight, scheduling becomes more valuable. You may also need to consider whether the home’s electrical service can support simultaneous charging at the desired levels.
This is another situation where load management or power-sharing capabilities can become useful, depending on the equipment and installation.
What These Scenarios Really Tell You
There is no single Niro EV home-charging setup that makes sense for every property.
| Your situation | What deserves the most attention |
|---|---|
| Short urban commute | Reliable 240V charging and simple overnight use |
| Solar-equipped suburban home | Smart scheduling and energy management |
| Apartment or shared garage | Approval, space and electrical access |
| Outdoor driveway | Weather protection and cable management |
| Limited electrical capacity | Adjustable current and professional load assessment |
| Future EV planned | Installation flexibility and higher-capacity capability |
| Two EV household | Cable reach, scheduling and electrical load |
| Dedicated garage | Mounting position, cable routing and convenience |
The common thread is simple: buy around your actual routine.
A Niro EV that drives 25 miles a day and spends ten hours parked overnight does not need the same strategy as a household running two EVs from one circuit. Once you look at the charger through that lens, the important specifications become much easier to separate from the marketing noise.
FAQs About Kia Niro EV Home Charging
Is a 48A home charger actually better for the Kia Niro EV than a 40A charger?
Not automatically. This is one of those specifications that looks more important on a product page than it is in everyday Niro EV ownership. The current Kia Niro EV has an 11-kW onboard AC charger, so a 40A charger at 240V already provides about 9.6 kW of available charging power. The vehicle, rather than the EVSE’s headline amperage, determines how much AC power it actually takes.
A 48A unit can still be a smart purchase when you are installing a new hardwired circuit and want the installation to remain useful for a future EV with a higher AC charging capability. But if the Niro EV is the only vehicle you expect to charge and your daily mileage is modest, paying more purely for the 48A number may not produce a noticeable improvement in your routine.
Can I leave my Kia Niro EV plugged into a Level 2 charger overnight every night?
Yes, that is essentially what a properly installed home Level 2 charging setup is designed for. You do not need to wait until the battery is nearly empty before plugging the Niro EV in. In fact, regular overnight charging after normal daily driving is often a much more practical routine than trying to calculate exactly when the battery needs attention.
The more important consideration is the electrical installation. The charger should be connected to a correctly designed circuit with appropriate protection, wiring and receptacle or hardwired connection. Once that is done, you can use the vehicle’s charging controls or the charger’s scheduling functions to fit charging around your normal routine.
For example, if you normally drive 30 miles during the day, there is little reason to think about a complete battery refill every night. Plugging in when you get home and allowing the car to replace the energy used during the day is the simpler approach.
Does a 40A Kia Niro EV home charger need a 50A circuit?
A 40A continuous EV charging load generally requires a properly sized circuit capable of supporting that load under the applicable electrical code. Under the common 80% continuous-load rule, 40A charging is typically paired with a 50A branch circuit, but the exact installation must follow the charger’s instructions and local electrical requirements.
That distinction matters because the charger setting, breaker, wiring and receptacle are not independent choices. You should not install a 40A charger and then assume an existing 50A receptacle is automatically suitable.
For a new installation, have the electrician verify:
- The branch-circuit rating
- Conductor size and installation method
- Breaker suitability
- NEMA 14-50 receptacle, if used
- Panel capacity
- Local permit and inspection requirements
For a 48A charger, the electrical requirements become more demanding; a properly designed hardwired installation is generally required, commonly using a 60A branch circuit where permitted by the equipment and local code.
Is a smart WiFi charger worth paying more for if I only charge my Niro EV at home?
It depends on whether you will actually use the features. WiFi itself does not make the Niro EV charge faster. What can make it valuable is what happens around the charging session.
If your electricity plan has different rates throughout the day, scheduling can be genuinely useful. You can leave the Niro plugged in and have charging occur during the cheaper period rather than remembering to start it manually. Energy tracking can also show how much electricity the vehicle is consuming over time.
On the other hand, if you have a flat electricity rate and prefer a simple routine, a non-connected charger can do the core job perfectly well. You are paying for convenience and information with a smart model, not magically better electricity delivery.
That is why this article includes both approaches. The EMPORIA, EVIQO, Autel and Wallbox options add connected features, while the Grizzl-E Classic deliberately keeps things much simpler. Neither philosophy is inherently right for every owner.
What should I check before installing a 240V J1772 charger for my Kia Niro EV?
The charger itself should actually be one of the last things you worry about. First, confirm where the Niro EV will park, where its charging port sits in that position, and how the cable will reach it without crossing a walkway or creating a trip hazard.
Then have the electrical installation assessed before purchasing or installing the equipment. A proper 240V Level 2 setup should account for:
- Available panel capacity
- Dedicated circuit requirements
- Breaker and conductor sizing
- NEMA 14-50 versus hardwired installation
- Cable distance and voltage drop considerations
- Indoor or outdoor exposure
- Charger certification
- Local permits and inspection requirements
- Future EV needs, if relevant
One detail that gets overlooked constantly is the physical location of the charger. A 25-foot cable sounds generous until it has to travel around a parked vehicle, garage door and walkway. Mounting the charger in the right place can make a bigger difference to everyday convenience than another few amps of theoretical capacity.
The best installation is ultimately the boring one: the Niro parks normally, the J1772 cable reaches without being stretched, the circuit is correctly sized, charging starts when expected, and you do not have to think about the electrical system every time you come home.
Final Take: Choose the Charger That Fits Your Niro EV Life
The interesting thing about home charging is that the best charger rarely looks like the biggest charger on paper. Once the Niro EV is sitting in the driveway every night, what matters is whether the cable reaches comfortably, the electrical installation is right, charging happens when you want it, and the system keeps doing its job without demanding your attention.
That is why the five chargers in this guide are different in useful ways. EMPORIA makes sense when smart monitoring and installation flexibility matter. EVIQO keeps the plug-in experience practical while adding strong weather protection and adjustable charging. Autel brings connected controls with a particularly useful outdoor-focused design. Wallbox is appealing when compact size, smart management and solar compatibility are priorities. Grizzl-E Classic takes the refreshingly simple route for owners who would rather plug in and forget about apps altogether.
The Niro EV does not need a charger chosen around marketing numbers. Its J1772 connection, 240V Level 2 capability and onboard AC charging limit give you a much clearer starting point. From there, the right choice comes down to your home, your daily mileage, your electricity rate and how you expect to use the charger for years—not just what looks impressive in a product listing.
And there is one final piece worth remembering: the charger is only half of the charging system. A properly designed circuit, suitable breaker and wiring, sensible mounting position and correct installation are what turn a good EVSE into a genuinely dependable home charging setup.
If those pieces are right, the whole experience becomes wonderfully uneventful. You arrive home, plug in the Niro EV, walk away, and let the car be ready for tomorrow. That is what a great home charger should ultimately do—not give you another piece of technology to think about, but make owning an electric car feel completely normal.
Also Check: