
5 Best Home Chargers for Tesla Model 3 in 2026: NACS, 48A Power & Smarter Charging
If you own a Tesla Model 3, choosing a home charger is pretty simple once you stop looking only at the biggest amp number. What really matters is how much power your car can take, what your home electrical system can handle and how you normally charge. Model 3 versions can have different AC charging limits, so a charger rated for 48A does not automatically mean your car will charge at 48A.
That is especially important when you compare 48A and 11.5 kW chargers. Tesla lists up to 48A at 11.5 kW for the Model 3 Long Range and Performance, while the Model 3 Rear-Wheel Drive is limited to 32A at 7.7 kW. So there is no real benefit in paying extra for charging capacity your particular Model 3 cannot use.
For this list, I looked at the things that actually matter when you live with a Model 3 every day: NACS connection, 240V Level 2 charging, cable length, installation type, smart controls and overall practicality. There is a Tesla option here, along with third-party chargers that take a different approach. The right one really comes down to your Model 3, your garage and how you charge at home.
Best Home EV Charger for Tesla Model 3: Top 2026 Picks for NACS and 48A Charging
#1. Tesla Wall Connector
Best Tesla Model 3 home charger with native NACS, up to 48A and 11.5 kW capability, 24-foot cable, hardwired 240V installation and Wi-Fi connectivity
#2. Autel Level 2 Home Smart EV Charger NACS
Best Tesla Model 3 smart charger with NACS, up to 50A output, hardwired 240V Level 2 charging, 25-foot cable and app-based controls
#3. ChargePoint HomeFlex Level 2 EV Charger
Best Tesla Model 3 NEMA 14-50 charger with NACS, 40A Level 2 output, plug-in 240V installation, indoor or outdoor use and smart charging controls
#4. Lectron Tesla NACS Level 2 EV Charger
Best Tesla Model 3 48A charger with NACS, 11.5 kW Level 2 charging capability, 240V hardwired installation, 23-foot cable and ETL-listed protection
#5. EVIQO Level 2 EV Charger NACS 48A
Best Tesla Model 3 240V charger with NACS, adjustable 6A–48A output, 25-foot cable, hardwired installation, Wi-Fi connectivity and smart charging controls
Must Check: Best Home Charger for Tesla Model Y
Expert Tip
Here is the part I would pay attention to before buying anything on this list: do not buy a 48A charger simply because the number looks better. Your Model 3 controls how much AC power it actually takes. If you have a Long Range or Performance Model 3 and your electrical setup supports it, a 48A-class charger can make full use of the car’s higher AC charging capability. If you have a Rear-Wheel Drive model with a lower onboard charging limit, a more powerful charger will not make the car charge faster than its own limit.
Also look at the installation before looking at the app. A hardwired 240V charger can make excellent sense for a dedicated home setup, while a NEMA 14-50 option gives you a different level of installation flexibility. Cable length matters too. A charger that technically fits your car but leaves the connector stretched across the driveway is not a good home-charging solution. That is why the products below are not selected simply by their highest advertised amperage.
How We Chose These Tesla Model 3 Home Chargers
We did not build this list by taking five chargers with the biggest numbers and calling them the best. The Model 3 is unusually sensitive to the difference between what the charger can deliver and what the car can actually accept, so that distinction was one of the first things we considered.
First, we looked at the connection. Every charger here is relevant to a Model 3 using the NACS connection, rather than forcing the owner to make an unnecessary adapter decision for normal home charging. That gives the list a much clearer purpose: these are chargers intended to work with the charging hardware Model 3 owners actually use.
Then we looked at useful charging capacity. The Tesla Wall Connector, Lectron and EVIQO offer 48A-class charging, while Autel goes up to 50A. Those figures matter most for Model 3 versions capable of taking higher AC power. We deliberately did not treat the highest number as an automatic advantage because a charger’s maximum output is only useful when the vehicle and electrical installation can support it.
Installation was another major filter. Autel, Tesla Wall Connector, Lectron and EVIQO are hardwired choices, while ChargePoint gives buyers a NEMA 14-50 plug-in option. That difference is important enough to influence a buying decision on its own. Someone planning a permanent dedicated circuit may want one solution, while another owner may specifically prefer a plug-in installation.
We also paid attention to the details that become surprisingly important after the charger is installed. Cable reach, 240V operation, outdoor suitability, charging controls and the overall installation format can matter more in daily use than a small difference in maximum amperage. That is why the Autel’s 25-foot cable and the Tesla Wall Connector’s 24-foot cable are meaningful details, while the Lectron’s 23-foot reach gives it a different practical fit.
Finally, we looked at why someone would choose each charger instead of simply buying the first one they see. Tesla’s Wall Connector brings the factory-branded experience. Autel adds a smart, high-output alternative with a long cable. ChargePoint covers the NEMA 14-50 route. Lectron focuses on a 48A hardwired NACS setup with ETL listing, while EVIQO gives buyers another 48A hardwired option.
That is the real reason these five made the list. They are not five copies of the same charger. Each one solves a slightly different home-charging requirement, and that distinction is far more useful to a Model 3 owner than another generic list built around “fastest” and “most powerful.”
For this article, the final choice should always come down to your exact Model 3 configuration, your home’s electrical capacity and how you want the charger installed. The charger should fit the car and the house—not the other way around.
#1. Tesla Wall Connector
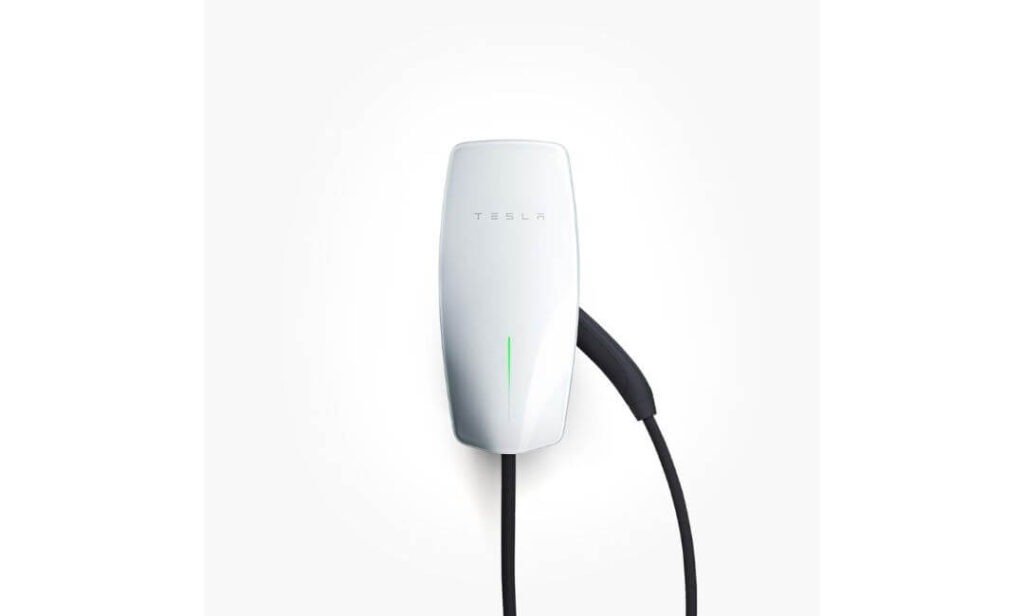
Quick Specs:
- Output: Up to 48A / 11.5 kW at 240V
- Cable: 24 feet
- Installation: Hardwired, indoor or outdoor
- Power Setup: Configurable to match the available circuit
- Model 3 Fit: Model 3 RWD, Long Range and Performance, with charging speed determined by the vehicle
- Connectivity: Local Wi-Fi for setup, monitoring and firmware updates
- Power Sharing: Supports coordinated charging with additional Wall Connectors
There is something reassuring about using a charger built around the same charging ecosystem as the car. The Wall Connector connects directly to a Tesla without introducing an adapter into the normal home-charging routine, and the 24-foot cable gives you enough reach to make parking position less of a daily annoyance. It is also designed for both indoor and outdoor mounting, so the installation does not have to be limited to a garage wall.
The important part is the charging figure. 48A at 240V means up to 11.5 kW, but that is the ceiling of the charging equipment, not a promise that every Model 3 will pull 48A. Tesla currently lists the Model 3 Long Range and Performance at up to 48A/11.5 kW, while the Model 3 Rear-Wheel Drive is limited to 32A/7.7 kW. The charger can also be configured at lower output when the home’s electrical supply calls for it.
What I particularly like here is that the unit does not force every installation into the same electrical setup. Tesla’s installation system allows the available circuit capacity to determine the configured output, so an electrician can set it appropriately rather than treating 48A as an all-or-nothing requirement. At the maximum 48A setting, Tesla specifies a 60A circuit breaker; lower configurations are available when the home’s electrical system cannot support that level.
The Wi-Fi connection is another practical touch rather than a feature added just for a product-page checklist. It allows firmware updates and commissioning, while residential owners can access charging information and history through the Tesla app after setup. That makes the charger easier to live with over time instead of leaving you with a box that simply supplies electricity and never changes.
(The real advantage here is not simply “48A”; it is having the charging hardware, vehicle compatibility and electrical configuration working together.)
What We Like
- The 24-foot cable is genuinely useful — it gives you more freedom when the charge port is not perfectly positioned beside the wall.
- Variable output is a smart detail — the installation can be configured around the home’s available electrical capacity rather than requiring maximum output in every situation.
- Wi-Fi connectivity has a purpose — firmware updates and charging information make this more useful after installation, not just on day one.
- Indoor or outdoor installation makes it easier to build the charging setup around where the car actually parks.
- Power management becomes valuable in multi-EV homes because Tesla provides features for coordinating multiple Wall Connectors when available electrical capacity is limited.
One Thing to Know Before Buying
The main consideration is the installation itself. This is a hardwired charger, so you are committing to a proper electrical installation rather than plugging it into a normal household outlet. For maximum 48A output, Tesla specifies a 60A circuit; the actual breaker and wiring arrangement should be selected for your property by a qualified electrician and according to local electrical requirements.
Why This Is a Strong Match for Tesla Model 3 Owners
The biggest strength is how naturally the charger fits into a Model 3 ownership setup. You get up to 11.5 kW/48A capability, a long 24-foot cable, adjustable output and Wi-Fi connectivity in one permanent installation. More importantly, the system can be sized around the car’s actual onboard charging capability instead of pretending every Model 3 needs the same electrical setup.
That makes it a particularly sensible choice for someone who wants a permanent home charger and does not want to make the buying decision around a single specification. A Long Range or Performance owner can take advantage of the higher available AC charging capacity when the electrical installation supports it, while a lower-capacity Model 3 can still use the same hardware at an appropriate configured output.
The Insider Pro-Tip
Before asking an electrician for a “48A Tesla charger installation,” check the maximum AC amperage shown by your Model 3 first. Tesla specifically recommends matching the Wall Connector’s circuit to the vehicle’s onboard charger, and the car’s touchscreen can show its maximum amperage. For a Model 3 Long Range or Performance, Tesla lists a 60A circuit for the 48A/11.5 kW configuration; for the Model 3 Rear-Wheel Drive, Tesla lists a 40A circuit for 32A/7.7 kW charging.
That small check can save you from paying for electrical capacity your car cannot use. Buy the charger for the way your Model 3 actually charges, then size the installation around it. That is a much better approach than simply choosing the largest number printed on the box.
#2. Autel Level 2 Home Smart EV Charger NACS
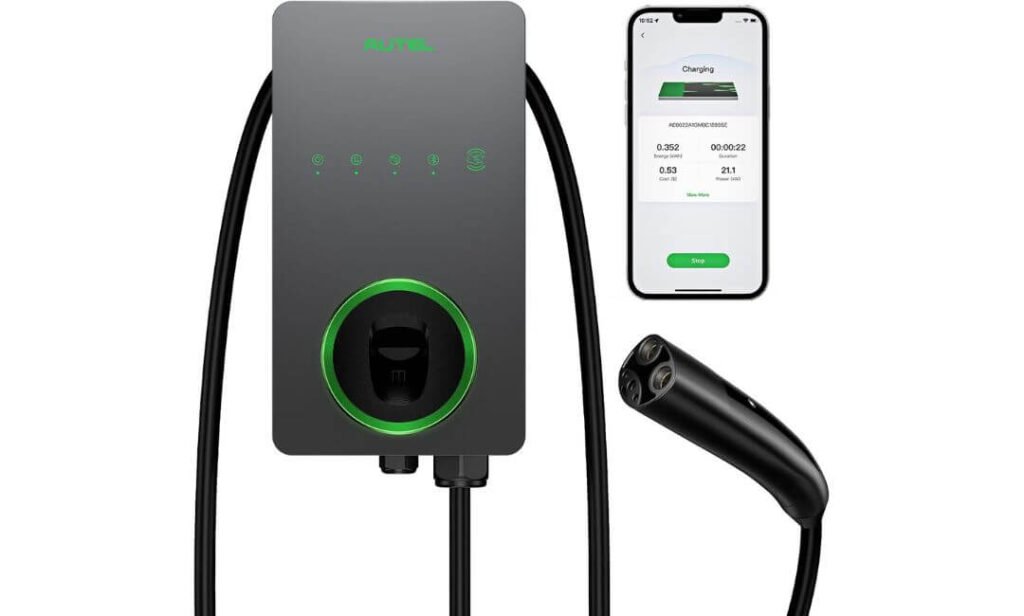
Quick Specs:
- Charging output: Up to 50A / 12 kW
- Input: 240V
- Connector: NACS
- Cable: 25 feet
- Installation: Hardwired
- Protection: NEMA 4X-rated enclosure
- Connectivity: Wi-Fi, Bluetooth and Ethernet
- Controls: Autel Charge app, scheduling and remote management
- Security: Optional RFID access control
- Charging environment: Indoor or outdoor
The interesting thing about this charger is not simply the 50A number. The extra capacity is useful on a compatible electrical installation, but your Model 3 still decides how much AC power it actually accepts. What makes this option stand out is everything surrounding that charging hardware: a 25-foot cable, NACS connection, app control and a weather-resistant enclosure that gives you considerably more freedom over where the unit can live.
That 25-foot cable is one of those specifications that looks ordinary until you have a garage where the electrical panel is on one side and the car parks on the other. Instead of treating cable reach as an afterthought, this setup gives you room to position the vehicle without constantly thinking about whether the connector will reach. Autel also rates the enclosure NEMA 4X, making it suitable for indoor or outdoor installations where protection against dust, rain and other environmental exposure matters.
The smart side is equally practical. Through the Autel Charge app, you can manage charging schedules and remotely control the unit, while Wi-Fi, Bluetooth and Ethernet provide several ways to keep the charger connected. That is useful for owners who want to schedule charging around their electricity plan rather than simply plugging in and forgetting about it.
There is also a nice bit of future-proofing here. The NACS connector means a compatible Model 3 can connect directly without adding an adapter to the normal charging routine, while OTA firmware updates give the charger a way to receive improvements after installation. For a permanent home charger, those are the sorts of details that matter more six months into ownership than a flashy headline about maximum charging speed.
(The 50A rating is the charger’s capability—not a guarantee that every Model 3 will charge at 50A.)
What We Like
- The 25-foot cable is genuinely useful for awkward garage layouts and outdoor parking positions.
- NACS keeps the setup straightforward for a compatible Model 3, without making an adapter part of everyday charging.
- NEMA 4X protection gives the unit considerably more installation flexibility than a charger intended only for sheltered indoor use.
- Wi-Fi, Bluetooth and Ethernet give owners multiple connectivity options rather than forcing everything through one connection method.
- The app actually adds useful control, particularly for scheduled charging and remote management.
One Thing to Know
This is a hardwired installation, so it belongs in the category of permanent home charging rather than plug-and-play equipment. Have the circuit, breaker and wiring sized by a qualified electrician for the charger’s configured output and your property’s electrical capacity. The product information supplied for this unit contains inconsistent circuit wording, so I would not rely on the listing’s “20A or 80A” statement when planning the installation; the electrician should follow Autel’s current installation documentation and applicable local electrical requirements.
Why It Fits the Model 3 Home-Charging Setup
For a Model 3 owner who wants more than a basic charging box, this is a compelling combination of NACS, high-output Level 2 charging, long cable reach and genuine smart-home functionality. The 240V hardwired design makes it suitable for a dedicated charging circuit, while the configurable charging behaviour means you can build the installation around the home’s electrical setup rather than treating the advertised maximum as mandatory.
Its biggest practical advantage is the balance. You get the 50A-class hardware, but you also get the 25-foot cable, outdoor-rated enclosure and connected controls that can make everyday charging noticeably easier. If your priority is a permanent charger that can sit outside the garage or reach a less convenient parking position, those details can be more valuable than another small increase in the headline amperage.
The Insider Pro-Tip
Before ordering, check your exact Model 3 variant and the circuit your electrician intends to install. If your car cannot use the charger’s full output, there is no reason to spend extra money upgrading the electrical system simply to chase the 50A specification. The smarter approach is to install the charger at a capacity your vehicle and home can use comfortably.
And if this is going on an exterior wall, take advantage of what makes this unit different: the 25-foot cable and NEMA 4X enclosure. Those two details can turn an awkward parking arrangement into a genuinely convenient one. Just keep the installation professional—the charger can be weather-resistant, but the electrical connection still needs to be designed correctly for the property.
#3. ChargePoint HomeFlex Level 2 EV Charger
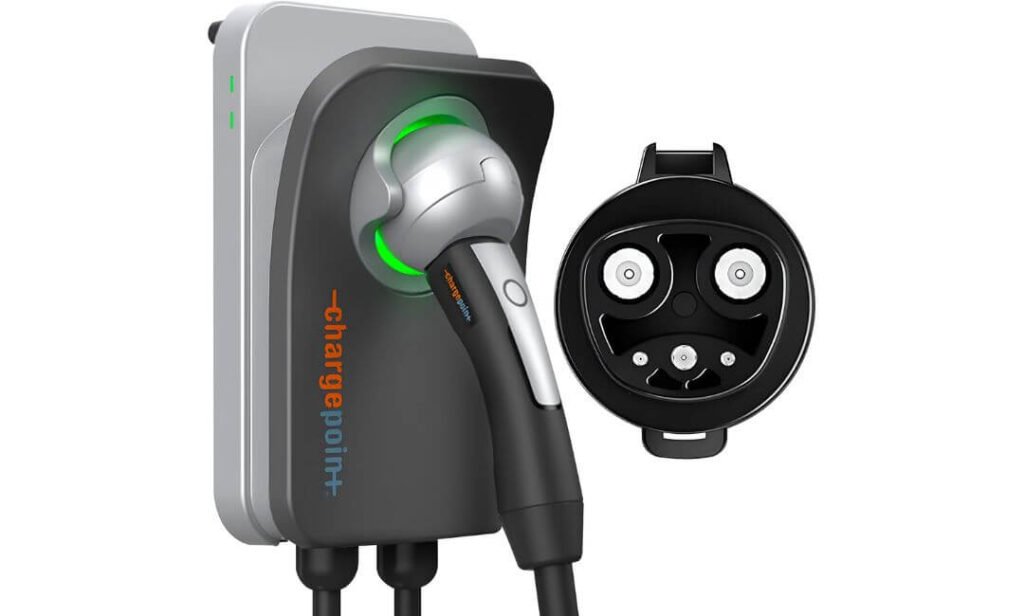
Quick Specs:
- Charging setup: 240V Level 2
- Maximum output: Up to 40A / 9.6 kW
- Connector: NACS for Tesla
- Connection: NEMA 14-50 plug
- Installation: Plug-in or wall-mounted
- Cable: Cold-resistant charging cable
- Use: Indoor or outdoor
- Controls: ChargePoint mobile app
- Safety: UL-certified
Sometimes the smartest home-charging setup is not the one with the biggest electrical number. This is where the HomeFlex makes sense. Instead of committing to a hardwired installation, you get a NEMA 14-50 plug-in design that can work from an appropriately installed 240V outlet. If your garage already has the right receptacle, the setup becomes considerably simpler: mount the unit, plug it in and configure it rather than turning the project into a new electrical installation.
The 40A / 9.6 kW output is also a sensible match for overnight Model 3 charging. ChargePoint quotes up to 30 miles of range per hour, although actual charging speed depends on the vehicle, battery state, temperature and electrical supply. That distinction matters because “30 miles per hour” should be treated as an estimate, not a fixed promise every time you plug in.
Then there is the part that makes this more than a simple plug-in box. The ChargePoint app gives you charging information, reminders and scheduling controls, so you can set charging around your normal routine rather than manually managing every session. The NACS connector also gives a compatible Tesla a direct connection without making an adapter part of everyday home charging.
The cold-resistant cable is another quietly useful detail. If the charger is mounted where winter temperatures are a concern, cable flexibility becomes a real-world issue—not something you notice while reading a specification sheet. Add indoor/outdoor installation capability and wall mounting, and this becomes an especially practical option for owners who want simple 240V home charging without hardwiring the charger itself.
(Its strongest selling point is flexibility: a 240V NEMA 14-50 setup with smart controls and direct NACS charging.)
What We Like
- NEMA 14-50 plug-in design gives it a very different installation path from the hardwired chargers above.
- 40A / 9.6 kW output is plenty for many owners who primarily charge overnight.
- NACS connection keeps everyday Tesla charging straightforward.
- ChargePoint app controls make scheduling and charging information easy to manage.
- Cold-resistant cable and indoor/outdoor capability make it practical beyond a temperature-controlled garage.
One Detail Worth Knowing
The plug-in advantage depends on already having a properly installed 240V NEMA 14-50 circuit capable of supporting the charger’s requirements. If you do not have that outlet, an electrician may still be needed to install the circuit. In other words, “plug-in” does not automatically mean “no electrical work.”
Why This Makes Sense for a Model 3
The HomeFlex fills an important gap in this lineup. The first two choices are permanent hardwired installations; this one gives the Model 3 owner a NEMA 14-50 route without giving up Level 2 charging or app-based control. For someone who already has the right 240V receptacle, that can be a much cleaner ownership experience.
The 40A ceiling also should not be viewed as a weakness by itself. A charger does not need to be the highest-rated unit available to be useful. If your charging routine is mainly “plug in at night and leave with plenty of range in the morning,” 9.6 kW can provide a very practical balance between charging speed and installation flexibility.
The Insider Pro-Tip
If your home already has a NEMA 14-50 outlet, check what circuit it is actually connected to before buying. Do not assume that every 14-50 receptacle is automatically suitable for EV charging at 40A continuous load. The circuit, breaker, wiring and outlet should all be appropriate for the intended EV charging load.
And there is another reason I like this option for the right owner: you are not paying for 48A just to say you have 48A. If your Model 3 spends most nights plugged in for several hours, the convenience of a proper plug-in installation can matter more than squeezing out the last few miles of charging per hour.
#4. Lectron Tesla NACS Level 2 EV Charger
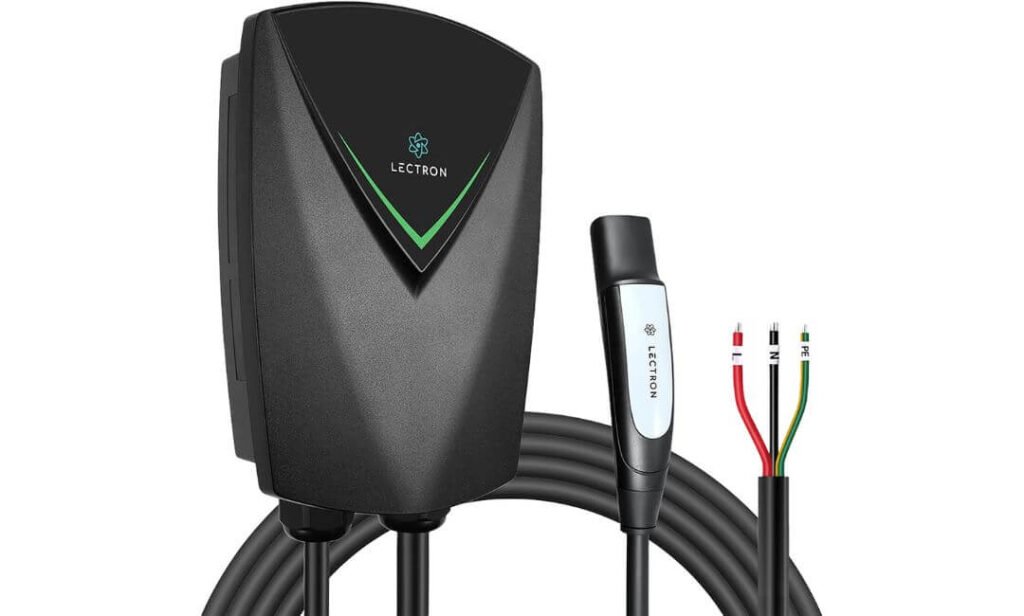
Quick Specs:
- Charging output: Up to 48A / 11.5 kW
- Input: 240V
- Connector: SAE J3400 NACS
- Cable: 23 feet
- Installation: Hardwired only
- Protection: IP66 weather-resistant enclosure
- Certifications: UL 2594, UL 2231 and UL 2251, ETL listed
- Cable management: Included Tesla-style holder
- Warranty: 3 years
- Vehicle fit: Tesla Model 3 and other NACS-equipped EVs
Some chargers make their case with an app. This one makes its case at the wall and cable. The combination of a native J3400 NACS connector, 48A/11.5 kW capability and a 23-foot cable makes it particularly interesting for a Model 3 owner who is planning a permanent 240V installation and wants plenty of reach without adding an extension cable.
The 48A figure is worth putting into context. At 240V, that is approximately 11.5 kW, but the car remains the final decision-maker. A Model 3 Long Range or Performance that supports the higher AC input can take advantage of the available capacity; a lower-capacity configuration will simply draw what its onboard charging system permits. That is exactly why I would treat the 48A rating as available headroom rather than a promise of 48A charging on every Model 3.
Where this unit gets genuinely practical is the 23-foot cable. If your parking position changes depending on which side of the garage you use, or the wall-mounted charger cannot sit directly beside the charge port, that extra reach can eliminate a surprisingly annoying daily compromise. The included holder also gives you somewhere to put the connector instead of leaving a heavy charging handle hanging or sitting on the floor.
The outdoor capability is another meaningful part of the package. An IP66-rated design is intended to handle dust and powerful water exposure, making it suitable for a properly planned exterior installation as well as a garage. Combined with built-in protections for conditions such as overcurrent, overvoltage, overheating and ground faults, it is designed as permanent charging equipment rather than something you move around whenever you need it.
(The real appeal is straightforward: 48A-class charging, a long reach and a purpose-built NACS connection in one permanent installation.)
What We Like
- 23-foot cable gives the charger excellent reach for less-than-perfect parking layouts.
- 48A / 11.5 kW capability gives compatible Model 3 configurations the electrical headroom for high-output AC charging.
- Native J3400 NACS connector keeps the connection simple for Tesla owners.
- IP66 protection makes it suitable for properly installed indoor or outdoor charging locations.
- ETL-listed safety certification adds useful reassurance when choosing third-party permanent charging equipment.
One Detail Worth Knowing
This is hardwired only, so it is not the right choice if you specifically want a NEMA 14-50 plug-in charger. The electrical installation should be planned around the charger’s configured output and the home’s capacity; for a full 48A continuous charging setup, the installation commonly requires a 60A circuit and appropriately sized wiring.
Why It Makes Sense for a Model 3
For an owner who has already decided on a permanent 240V installation, this is a very focused package. You are getting the important pieces together: NACS connection, 48A-class output, long cable reach, outdoor protection and safety certifications without adding an adapter or relying on a short cable.
It also earns its place in this list because it offers a different proposition from the Tesla Wall Connector. The Tesla option is the obvious factory-branded route; this one is aimed at the owner who is comfortable choosing a third-party charger and values long cable reach, rugged protection and a straightforward hardwired setup.
The Insider Pro-Tip
If you are planning the installation from scratch, tell the electrician where the car will actually park, not just where the electrical panel happens to be. A 23-foot cable gives you plenty of flexibility, but the best installation still keeps the cable path clean and avoids unnecessary bends or places where the connector can be driven over.
And one more thing: do not judge this charger against the Model 3 by its 48A label alone. Check your exact car’s AC charging capability first. If your vehicle can use the higher input, the extra capacity has a real purpose; if it cannot, the biggest benefit here becomes the excellent cable reach, NACS convenience and permanent-installation flexibility rather than charging faster than the car allows.
#5. EVIQO Level 2 EV Charger NACS 48A
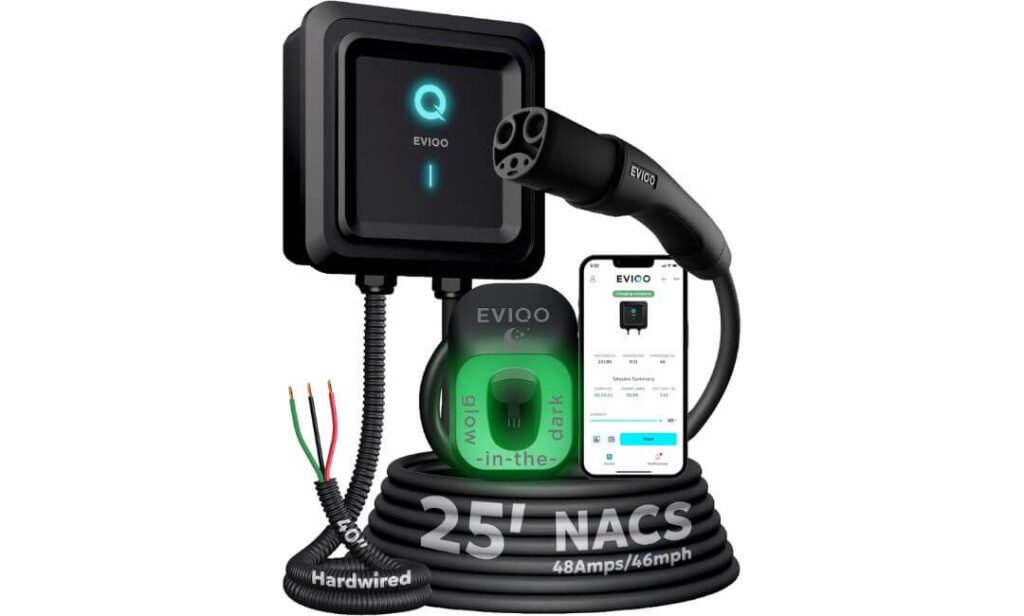
Quick Specs:
- Charging output: Up to 48A / 11.5 kW
- Input: 240V
- Connector: NACS
- Cable: 25 feet
- Installation: Hardwired
- Current adjustment: 6A–48A
- Connectivity: 2.4 GHz Wi-Fi and mobile app
- Protection: IP66 / NEMA 4 enclosure
- Certifications: UL, ETL, FCC and Energy Star
- Warranty: 3 years
- Holster: Glow-in-the-dark connector holder
A charger can have all the usual numbers—240V, 48A, Level 2—and still be awkward to live with. What caught my attention here is the combination of 25-foot cable reach and adjustable 6A–48A charging. That gives a Model 3 owner much more control over how the charger fits the actual home rather than forcing every installation into a single charging configuration.
At its maximum setting, the unit can provide up to 48A / 11.5 kW, but the same rule applies here as with the other high-output chargers: the Model 3 decides what it can actually accept. That makes the adjustable current control particularly useful. You can configure the charging current around the vehicle and electrical installation instead of assuming maximum output is always necessary.
The 25-foot cable is another genuinely useful feature. If the car sometimes parks closer to one side of the garage or outside in the driveway, having that extra reach can save you from rearranging the car simply to reach the charger. And the built-in NACS connector means a compatible Tesla can connect directly without turning an adapter into part of the daily routine.
Then there is the smart-control side. The app lets you schedule charging, adjust current and monitor energy use, while the built-in 2.4 GHz Wi-Fi connection keeps the charger connected. The side reset button is also a thoughtful little detail—you can restart the unit without opening the enclosure or immediately reaching for the breaker.
For an exterior installation, the IP66/NEMA 4-rated housing adds another layer of practicality. The charger is designed to handle exposure to rain, snow, dust and heat, while the included glow-in-the-dark holster makes the connector easier to find and dock when you are plugging in after dark.
(It is the kind of charger where the useful details show up after installation: long reach, adjustable current, easy reset and simple night-time cable handling.)
What We Like
- 25-foot cable gives excellent freedom for garage and driveway parking.
- 6A–48A adjustment lets the installation be configured around the vehicle and available electrical capacity.
- NACS connector provides direct charging for compatible Tesla Model 3 vehicles.
- IP66/NEMA 4 protection makes indoor or properly installed outdoor use practical.
- Glow-in-the-dark holster is a small feature, but genuinely handy when charging after dark.
One Detail Worth Knowing
This is a hardwired charger, so it requires a proper electrical installation rather than a NEMA 14-50 plug. The advertised 48A output requires an appropriately sized dedicated circuit; the product information specifies a 60A circuit for 48A operation. The optional higher-output configuration mentioned by the manufacturer should only be used if the vehicle, wiring, breaker and local electrical requirements all support it.
Why It Deserves a Place in the Model 3 Lineup
The appeal here is not that it somehow makes a Model 3 charge beyond the car’s own limit. Its strength is the amount of control built around the charging hardware. You get 48A-class capability, adjustable current, app scheduling, energy monitoring and a 25-foot cable in a weather-resistant permanent installation.
That makes it particularly interesting for an owner whose charging location is not perfectly predictable. The long cable handles awkward parking positions, while the adjustable current lets the electrical installation be configured sensibly instead of forcing maximum output every night. It is a practical combination rather than a specification-sheet race.
The Insider Pro-Tip
If you are installing this outside, do not let the IP66/NEMA 4 rating give you the impression that installation location no longer matters. The enclosure can be weather-resistant, but the circuit, connections and cable routing still need to be installed correctly and protected according to local electrical requirements.
For the Model 3 specifically, I would set the charger around how you actually use the car. If you plug in every evening and have hours before departure, there is little reason to chase maximum current every night. The ability to turn the charging level down is one of this charger’s more useful features—use the 48A capability when your car and electrical system can take advantage of it, and otherwise let the charger work at the level that makes sense for your home.
Best Tesla Model 3 Home Charger Compared (RWD, Long Range & Performance)
Why These Model 3 Charging Choices Matter Now
The home-charging market around the Tesla Model 3 has changed in a meaningful way. The important shift is not simply that more chargers now advertise higher amperage; it is that NACS has become the native charging standard for Tesla vehicles in North America, making direct-connect home chargers much easier to compare. For a Model 3 owner, that means the connector itself is no longer the main decision. The bigger questions are how much AC power your particular car can accept, how the charger will be installed, how far the cable needs to reach, and which connected features you will actually use.
NACS Has Changed the Home-Charging Equation
For a compatible Model 3, a native NACS charger provides a direct connection to the vehicle’s charge port. That removes an extra adapter from the normal home-charging routine and makes the overall setup cleaner.
It also changes what buyers should look for when comparing third-party chargers. A charger can advertise excellent output and still be a poor fit if the connection requires unnecessary hardware, the cable is too short for the parking position, or the installation does not suit the electrical system. That is why this list focuses on chargers with NACS connections, rather than treating the connector as a minor specification.
There is also an important distinction for owners of different Model 3 versions. NACS compatibility does not mean every Model 3 charges at the same rate. The vehicle’s onboard charging system remains the final limit, so the charger should be selected with the exact Model 3 configuration in mind.
48A Is Useful, But It Is Not the Whole Story
A 48A / 11.5 kW Level 2 charger can provide substantial AC charging capability, particularly for Model 3 configurations that can accept the higher input. But it is easy to misunderstand what that number means.
The charger supplies available power; the vehicle controls how much power it actually draws. If your Model 3 has a lower AC charging limit, installing a 48A charger will not force the car to charge at 48A. The extra capacity can still be useful for future vehicles or another compatible EV, but it should not be presented as an automatic speed increase for every Model 3.
That is also why a 40A charger such as the NEMA 14-50 ChargePoint option can still make perfect sense. If your normal routine is plugging in after work and leaving the car connected overnight, 9.6 kW may already provide all the charging time you need. Conversely, owners with higher-capacity Model 3 configurations and a suitable electrical installation may have a genuine reason to choose a 48A-class charger.
Smart Charging Is Becoming Part of the Buying Decision
The difference between a basic Level 2 charger and a modern connected charger is increasingly found in what happens after the electricity reaches the vehicle.
Scheduling can be useful when your utility offers time-of-use rates, because you can arrange charging for the hours when electricity costs less. App access can also make it easier to check charging activity, adjust settings, or see whether a session is actually running without walking back to the garage.
The five chargers in this roundup take different approaches. The Tesla Wall Connector fits naturally into the Tesla ecosystem, while Autel, ChargePoint and EVIQO offer their own connected controls and charging management features. Lectron takes a more straightforward approach, where the core attraction is its 48A hardwired capability, long cable and safety certifications.
That difference matters because smart features should solve a real problem, not simply make a specification sheet look impressive. If you regularly schedule charging, monitor energy use or need remote control, connected features can be genuinely useful. If you simply plug in every night and leave the car charging until morning, the electrical setup and physical convenience may matter more.
Installation Deserves More Attention Than the Amp Number
This is the part buyers should not rush.
A hardwired 240V Level 2 charger is a permanent electrical installation. The circuit, breaker, wire sizing, disconnect requirements where applicable, grounding and installation method all need to comply with the electrical requirements for the property and jurisdiction. For a full 48A continuous charging configuration, the electrical system must be sized accordingly; Tesla’s own Wall Connector documentation, for example, specifies a 60A circuit for its 48A configuration.
A NEMA 14-50 plug-in charger is different, but “plug-in” does not automatically mean “no electrician.” The receptacle and circuit still need to be appropriate for EV charging and the intended continuous load. If the outlet already exists and is correctly installed, the charging equipment can be much easier to deploy; if it does not, electrical work may still be required.
Cable placement matters too. A 23- or 25-foot cable can be a genuine advantage when the charger is mounted away from the usual parking position, but the cable should still be routed safely and stored properly. Avoid placing it where vehicles can drive over it, where it creates a walking hazard, or where the connector can be repeatedly dropped.
The Safest Way to Compare These Chargers
Before choosing a charger, work through these points in order:
- Check your exact Model 3 configuration and its AC charging capability.
- Confirm the vehicle connection and choose a native NACS setup where appropriate.
- Look at the home’s electrical capacity, not just the charger’s advertised maximum.
- Decide between hardwired and NEMA 14-50 charging based on your installation and long-term plans.
- Measure the real cable distance from the proposed mounting point to the car’s charge port.
- Consider smart charging features if scheduling and energy monitoring are useful to you.
- Check outdoor protection ratings if the charger will be mounted outside.
- Use a qualified electrician for the electrical installation and have the circuit designed for the charger’s intended continuous load.
The important takeaway is simple: a bigger number on the charger does not automatically mean a better charging experience. The best setup is the one where the Model 3, charger, cable, circuit and daily charging routine all make sense together. That is why the differences between these five options are more important than simply comparing their maximum amperage.
Buying Guide: How to Choose the Right Tesla Model 3 Home Charger
A good home charger should fit three things at the same time: your Model 3, your electrical system and your charging routine. That sounds obvious, but this is where many buying guides go wrong. They compare 32A, 40A, 48A and 50A as if the highest number automatically wins. It does not.
For a Model 3 owner, the better question is, “What charging setup will I actually be able to use every night?” Once you answer that, the choice becomes much easier.
Start With Your Model 3 and Its Charging Capability
First, identify your exact Model 3 configuration. Do not assume that every Model 3 has the same AC charging limit simply because the cars use the same charging connector.
For example, Tesla’s current documentation distinguishes between Model 3 configurations when specifying maximum AC charging capability. The Long Range and Performance versions can take advantage of higher AC input, while the Rear-Wheel Drive version has a lower maximum. That means a 48A home charger can provide useful headroom for one Model 3 but may not make the car charge any faster than its own onboard charger allows.
This is also why you should not automatically dismiss a 32A or 40A charger. If your vehicle cannot use the extra current, paying for a larger electrical installation simply to reach a higher charger rating may not provide a meaningful improvement to your daily charging routine.
Check the Connector Before Looking at Charging Speed
For a current North American Tesla setup, NACS is the connection you want to pay attention to.
A Tesla Model 3 NACS charger connects directly to the vehicle’s charging port, keeping the normal home-charging setup simple. You do not want to buy a charger first and then discover that you need an adapter for every charging session.
For this article, the relevant search terms all describe slightly different parts of the same buying intent:
- Tesla Model 3 Level 2 charger — identifies the charging category.
- Tesla Model 3 NACS charger — focuses on the direct Tesla connection.
- Tesla Model 3 240V charger — identifies the electrical supply needed for Level 2 home charging.
- Tesla Model 3 48A charger — targets higher-output Level 2 equipment.
- Tesla Model 3 home charger — covers the broader residential charging requirement.
One important distinction: NACS compatibility does not determine charging speed by itself. The charger and the car have to be considered together.
Understand 32A, 40A, 48A and 50A Before You Pay More
Here is the simplest way to think about the numbers.
| Charger rating | Approx. power at 240V | What it means in practice |
|---|---|---|
| 32A | 7.7 kW | Suitable for Model 3 configurations with a lower AC charging limit |
| 40A | 9.6 kW | A useful middle ground for many overnight charging routines |
| 48A | 11.5 kW | Higher-output option for compatible Model 3 configurations |
| 50A | 12 kW | Higher charger capacity, but the Model 3 still controls actual draw |
These are electrical output figures calculated from the nominal 240V supply; actual charging power can vary with the vehicle, supply conditions and installation.
The important point is that 50A does not mean your Model 3 will necessarily charge at 50A. Likewise, a 48A charger does not turn a lower-capacity Model 3 into a higher-capacity one.
If you plug in every evening and have eight or more hours before leaving in the morning, a 40A setup may already fit your life extremely well. If you regularly return home with a low battery and need to recover a large amount of range during a shorter overnight window, the higher-output options become more interesting—provided your particular Model 3 and electrical system can use them.
Decide Between Hardwired and NEMA 14-50
This is one of the biggest practical differences in this roundup.
Hardwired charging is generally the cleaner choice when you are building a dedicated permanent installation. The charger is connected directly to the electrical circuit, there is no plug and receptacle taking up space, and the installation can be designed specifically around the charging equipment.
The trade-off is that you need proper electrical work. You cannot treat a hardwired 48A charger like a normal household appliance.
A NEMA 14-50 charger gives you a different type of flexibility. If you already have a correctly installed, EV-suitable 240V NEMA 14-50 receptacle, a plug-in charger can be considerably easier to deploy.
But do not confuse “plug-in” with “electrically simple.” The circuit, breaker, receptacle and wiring still need to be appropriate for the continuous EV charging load.
Look at the Cable Before You Look at the App
Cable length is one of those specifications people tend to ignore until the charger is installed.
A 23-foot or 25-foot cable can be extremely useful when the charging unit is mounted on a side wall, when the electrical panel is not near the ideal parking position, or when the car sometimes parks outside the garage.
Before buying, physically consider:
- Where will the charger be mounted?
- Where does the Model 3 normally park?
- How far is the charge port from that wall?
- Will the cable need to pass around the front or rear of the vehicle?
- Where will the connector be stored when the car is not charging?
A longer cable is useful, but it should never be allowed to create a trip hazard or sit where a vehicle can drive over it.
Smart Features: Pay for the Ones You Will Actually Use
Modern home chargers increasingly offer Wi-Fi, mobile apps, charging schedules, energy monitoring and firmware updates.
Those features can be genuinely useful, especially if your electricity plan has cheaper off-peak periods. Scheduling allows you to tell the charger when to operate rather than remembering to start every session manually.
But there is no reason to pay extra for a long list of connected features if you will never use them.
Think about your routine:
- Want scheduled overnight charging? Look for reliable scheduling.
- Want to monitor energy use? Look for useful charging-session data.
- Want remote control? Make sure the app supports the functions you actually need.
- Have unreliable Wi-Fi near the garage? Do not make cloud connectivity the only reason you choose a charger.
- Want a simple setup? Prioritise dependable charging hardware over unnecessary software features.
The Tesla option naturally fits the Tesla ecosystem, while Autel, ChargePoint and EVIQO take different approaches to app-based control. The Lectron option is more focused on the physical charging hardware, cable reach and permanent installation.
Check the Electrical Panel Before Ordering
This is the step I would never skip.
A higher-output charger can require a substantially larger circuit than a basic Level 2 setup. Tesla’s installation documentation, for example, specifies a 60A circuit for a 48A Wall Connector configuration. The exact requirements for other chargers should be taken from their current installation documentation and confirmed by a qualified electrician.
Before purchasing, find out:
- Whether your panel has enough available capacity.
- Whether there is room for the required breaker.
- How far the charger will be from the panel.
- Whether the wiring needs to pass through finished walls or other difficult areas.
- Whether a subpanel or electrical upgrade may be required.
- Whether your local electrical rules require additional equipment.
- Whether the proposed installation location is suitable for indoor or outdoor use.
Do not choose a charger first and assume the house will automatically support it. The electrical installation is part of the charger purchase.
Think About the Total Cost, Not Just the Charger Price
The cheapest charger on the product page is not necessarily the cheapest setup.
Your real project cost can include:
- Charger
- Breaker
- Wiring
- NEMA 14-50 receptacle, if applicable
- Electrical conduit or other installation materials
- Electrician labour
- Panel or service upgrades, if required
- Mounting hardware or cable-management equipment
This is especially important when comparing a plug-in option with a hardwired 48A charger. If you already have a suitable 240V NEMA 14-50 circuit, the calculation can look very different from a home that needs a completely new high-current circuit.
Warranty and Certification Still Matter
A home charger is not something you want to replace every few months. It is permanently connected to a high-voltage electrical system, so safety certification, manufacturer support and warranty coverage deserve real attention.
Look for recognised certification appropriate to the product and market, such as UL or ETL listing, and check what the warranty actually covers.
Do not stop at the phrase “certified” on a product page. Check the manufacturer’s documentation for the exact model and certification information, particularly when the charger will be installed outdoors or used at its maximum continuous output.
A Simple Model 3 Charger Checklist
Before clicking the purchase button, I would want these questions answered:
| What to check | What you want to know |
|---|---|
| Model 3 configuration | What is the car’s maximum AC charging capability? |
| Connector | Does the charger provide the correct NACS connection? |
| Output | Is 32A, 40A, 48A or 50A actually useful for your car? |
| Voltage | Is the charger designed for your home’s 240V supply? |
| Installation | Hardwired or NEMA 14-50? |
| Circuit | Can your electrical panel support the required circuit? |
| Cable | Will the supplied cable comfortably reach the charge port? |
| Smart controls | Do you actually need scheduling, monitoring or remote access? |
| Outdoor use | Is the enclosure appropriately rated for the installation location? |
| Certification | Is the exact charger properly certified for its intended market? |
| Warranty | What support and coverage do you receive after purchase? |
The Buying Decision Comes Down to Your Home
There is no single specification that makes a home charger right for every Model 3 owner. A Long Range owner with a suitable 60A circuit, a garage with a distant mounting point and a preference for scheduled charging has a very different requirement from an RWD owner who already has a NEMA 14-50 outlet and simply wants dependable overnight charging.
That is why the five chargers in this guide are deliberately different. One prioritises the Tesla ecosystem, another combines high output with extensive smart controls, one focuses on NEMA 14-50 convenience, and the remaining options emphasise high-output hardwired charging, cable reach and weather protection.
The best purchase is the one where the charger’s electrical capability matches the Model 3, the installation matches the house, and the features match the way you actually live with the car. Once those three pieces line up, the amp number becomes much less complicated.
Installation Guide: Setting Up a Tesla Model 3 Home Charger
A home charger is only as good as the electrical installation behind it. With a Model 3, the temptation is to buy a 48A charger first and worry about the wiring later. That is the wrong order. Start with the home’s electrical capacity, then choose the charger and circuit around the actual requirement.
The five chargers in this guide are not installed the same way. Tesla, Autel, Lectron and EVIQO are hardwired options, while the ChargePoint configuration covered here uses a NEMA 14-50 connection. That difference affects the circuit, installation work, cost and how easily the equipment can be changed later.
Check the Electrical Service Before Buying Anything
Start at the electrical panel, not the Amazon product page.
Before ordering a high-output Level 2 charger, have a qualified electrician determine:
- The home’s service size and available capacity.
- Whether the panel has room for the required breaker.
- Whether the existing service can support the additional continuous EV load.
- The approximate distance between the panel and charger location.
- Whether a subpanel or service upgrade could be necessary.
- Whether the installation will run through a garage, exterior wall, finished space or other difficult area.
- Whether local rules require a permit or inspection.
A charger rated for 48A does not mean you can simply add a 48A breaker to any available space in the panel. EV charging is a continuous electrical load, so the circuit needs to be designed accordingly.
Tesla’s documentation, for example, specifies a 60A circuit for a 48A Wall Connector configuration. Other manufacturers can have different requirements, so use the installation instructions for the exact charger rather than copying the breaker size from another model.
Choose the Installation Type First
There are three approaches worth separating.
Hardwired Level 2 Charging
Hardwiring is the route used by the Tesla Wall Connector, Autel, Lectron and EVIQO options in this guide.
The charger is permanently connected to its dedicated circuit rather than plugged into a receptacle. This makes sense when you are creating a long-term home charging station and already know where the charger should live.
The advantages are straightforward:
- Clean permanent installation.
- Suitable for higher-output configurations.
- No large NEMA receptacle taking up wall space.
- The circuit can be designed specifically for the charger.
- A good fit for a dedicated garage or exterior charging position.
The trade-off is equally straightforward: you need proper electrical installation, and relocating the charger later is more involved.
NEMA 14-50 Plug-In Charging
The ChargePoint configuration in this guide takes the plug-in route.
If you already have a correctly installed 240V NEMA 14-50 receptacle that is suitable for EV charging, this can make installation considerably simpler. The charger can be mounted and connected to the receptacle rather than permanently wired into the panel.
That does not mean the outlet itself can be ignored. The receptacle, breaker, wiring and installation method must all be appropriate for the continuous EV load.
If you do not already have the correct circuit, an electrician may still be required to install it.
A Normal Wall Outlet
A standard 120V household outlet can technically be used for EV charging with suitable equipment, but it is a completely different proposition from the Level 2 chargers covered in this article.
It is much slower and is generally better suited to situations where daily mileage is low or where installing a dedicated 240V circuit is impractical.
For a Model 3 owner who wants regular overnight Level 2 home charging, a properly installed 240V solution is the more relevant approach.
Match the Breaker to the Charger, Not the Other Way Around
This is where a lot of online charging advice becomes confusing.
The charger’s advertised amperage is the maximum charging output, while the breaker and wiring have to be selected according to the electrical requirements of that specific equipment and the applicable code.
For example, this guide includes:
- 40A-class charging, as used by the ChargePoint configuration.
- 48A charging, offered by the Tesla Wall Connector, Lectron and EVIQO.
- 50A-class capability, offered by Autel.
Those numbers should not be interpreted as instructions to install matching-size breakers.
A full 48A continuous EV load requires an appropriately sized circuit. Tesla specifies a 60A circuit for the Wall Connector’s 48A configuration. A different charger may specify a different circuit arrangement, so always follow the exact manufacturer’s installation documentation.
The electrician should also verify:
- Conductor size and type.
- Breaker rating and compatibility.
- Grounding requirements.
- Conduit requirements.
- Disconnect requirements where applicable.
- Voltage at the charging equipment.
- Termination torque and connection requirements.
- Local inspection and permitting requirements.
Check the Model 3 Before Selecting Maximum Output
The car is the final part of the electrical equation.
A charger capable of 48A or 50A does not force the Model 3 to accept that amount of power. The vehicle’s onboard charging system controls the actual AC charging rate.
That means the installation should not automatically be oversized simply because a charger advertises 50A.
If your particular Model 3 can use the higher AC charging capacity, a properly installed 48A charger can make sense. If your configuration has a lower AC charging limit, the vehicle will draw less, regardless of the charger’s maximum rating.
This is one reason I would check the exact Model 3 configuration before asking for a quote from an electrician.
Give the Charger a Proper Location
Placement is not just about whether the charger fits on the wall.
The ideal location should allow the cable to reach the charge port without being stretched across a walkway or driveway. Keep the connector accessible, provide enough clearance around the charger and think about where the cable will rest when the vehicle is not connected.
For outdoor installation, consider:
- Direct rain and water exposure.
- Snow accumulation.
- Standing water.
- Sun exposure.
- Drainage.
- Cable routing.
- Vehicle movement.
- Accessibility during poor weather.
The weather rating of the charger matters here. The Autel option, for example, uses a NEMA 4X-rated enclosure, while Lectron and EVIQO advertise IP66-class protection. These ratings are useful, but they do not make poor electrical installation acceptable.
A weather-resistant enclosure still needs properly installed wiring and connections.
Hardwired or Plug-In: Which Installation Makes More Sense?
| Installation | Main advantage | Main consideration |
|---|---|---|
| Hardwired | Permanent, clean, well suited to dedicated high-output charging | Requires electrical installation |
| NEMA 14-50 | Easier equipment connection when the correct receptacle already exists | Receptacle and circuit still need to be suitable for EV charging |
| 120V outlet | Minimal electrical work | Much slower charging |
| Exterior hardwired | Convenient when the car parks outdoors | Requires careful weatherproofing and cable placement |
For most owners choosing among the five chargers in this article, the real decision is hardwired versus NEMA 14-50, rather than Level 1 versus Level 2.
DIY Installation vs. Hiring an Electrician
What DIY Can Look Like
A technically experienced homeowner may be comfortable handling the non-electrical parts of the project, such as:
- Choosing the mounting location.
- Measuring cable reach.
- Installing approved mounting hardware where permitted.
- Planning cable management.
- Setting up the charging app.
- Configuring charging schedules.
But the fact that someone is comfortable with household electrical work does not automatically mean a high-current EV circuit is an appropriate DIY project.
Why Professional Installation Makes Sense
A qualified electrician can assess the service, calculate the circuit requirements, select appropriate wiring and protection, and handle local permit or inspection requirements where applicable.
That matters because an EV charger may operate at a substantial continuous load for several hours at a time. A connection that appears acceptable during a short test can become a serious problem when it carries sustained current night after night.
For a new 240V circuit, especially a 48A-class installation, professional electrical work is the sensible route.
Tesla Model 3 Home Charger Installation Checklist
Before switching the charger on for the first time, I would want every item below checked:
- Confirm the exact Model 3 configuration and its AC charging capability.
- Confirm the charger uses the correct NACS connection.
- Decide whether the installation will be hardwired or NEMA 14-50.
- Have the electrical service and panel capacity assessed.
- Confirm the required breaker and circuit from the charger’s installation documentation.
- Use appropriately sized conductors and approved electrical equipment.
- Confirm grounding and other required protection.
- Check whether a local permit or inspection is required.
- Mount the charger securely at an appropriate height and location.
- Keep the charging cable away from vehicle tires and walking paths.
- Confirm the enclosure rating is appropriate for indoor or outdoor installation.
- Keep outdoor connections properly protected from water exposure.
- Verify the charger powers on correctly before beginning regular charging.
- Confirm the Model 3 recognises the charger and begins charging normally.
- Test the app, scheduling and connectivity features if the charger supports them.
- Keep the manufacturer’s installation and warranty information for future reference.
One Installation Rule Worth Remembering
Do not design the electrical system around the number printed in the charger title. Design it around the actual charger configuration, the Model 3’s charging capability and the home’s electrical capacity.
That approach avoids two common mistakes at once: underbuilding the circuit for a high-current charger, and spending heavily on electrical capacity that the vehicle cannot actually use. A properly matched installation should feel almost boring after it is finished—plug in at night, charge safely, unplug in the morning and never have to think about the wiring behind the wall.
Real-World Tesla Model 3 Charging Scenarios
A charger that looks perfect in a comparison table can behave very differently once you put it into a real home. The garage layout, parking arrangement, electrical service, utility rate and even whether you own the property can change what makes sense.
That is why the most useful way to look at these chargers is not simply by asking which one has the highest output. Think about where your Model 3 sleeps, how long it stays plugged in, what electrical infrastructure you already have and how much control you want over charging.
Urban Apartment With Limited Parking
Apartment living changes the decision completely.
If you have an assigned parking space but cannot easily run a new circuit from your apartment’s electrical panel, a 48A hardwired charger may not even be a realistic starting point. The first question is whether your building provides dedicated EV charging infrastructure or permits residents to install their own equipment.
If a suitable 240V circuit and NEMA 14-50 receptacle already exist at your assigned space, a plug-in NACS charger can be attractive because the equipment itself does not need to be permanently wired into the building’s electrical system.
But there is another issue people often overlook: cable management. In a shared parking area, a 23- or 25-foot cable is useful only if it can be routed safely. You do not want a cable crossing a pedestrian path or extending into another parking space.
For an apartment owner or renter, I would check these points before purchasing:
- Does the parking space belong exclusively to you?
- Does the building permit personal EV charging equipment?
- Is there already a suitable 240V circuit?
- Who pays for electricity?
- Can the charger connect to reliable Wi-Fi?
- Where can the cable be stored when it is not being used?
- Does the installation require building approval or a permit?
- Who is responsible for maintenance if the circuit develops a problem?
If the building already has the electrical infrastructure, installation simplicity becomes more valuable than chasing the highest possible amperage. A 40A NEMA 14-50 setup may be more practical than trying to create a new 48A hardwired circuit where the building was never designed for one.
Suburban Home With a Large Garage
This is where a higher-output hardwired charger starts to make much more sense.
A detached or attached garage with adequate electrical service gives you much more freedom to choose the mounting position, install a dedicated circuit and run the cable exactly where you need it.
For a Model 3 configuration capable of using higher AC charging power, a 48A / 11.5 kW-class installation can provide useful charging headroom. Tesla’s own documentation specifies a 60A circuit for the Wall Connector when configured for 48A output. The exact requirements for other chargers should always be taken from their manufacturer documentation.
This is also the scenario where the longer cables in this roundup become genuinely valuable.
Imagine the electrical panel is at the front of the garage, while the Model 3 normally parks near the rear. A charger with a 23- or 25-foot cable may allow the installation to remain close to the electrical infrastructure while still reaching the vehicle comfortably.
Before installation, I would physically park the car in its normal position and measure the route. Do not measure from the charger to the front bumper and assume that is enough. Consider the actual location of the charge port, the cable’s bend radius, the position of the connector and where the cable will hang when charging is finished.
For a large garage, a good installation often looks like this:
- Dedicated 240V circuit.
- Charger mounted close enough to the panel to keep wiring practical.
- Enough cable reach for the normal parking position.
- Cable holder positioned where it is easy to reach.
- No cable running across a pedestrian route.
- Adequate clearance around the charger.
- Proper protection if the garage is exposed to moisture or temperature extremes.
The result is more important than the headline number: you plug in, close the garage and forget about the charger until morning.
Solar-Rich Home With Rooftop Solar
Solar changes the charging conversation because the cheapest electricity is not always the electricity you buy from the grid.
If your home produces substantial solar power during the day, charging the Model 3 while your panels are producing can allow more of the vehicle’s energy to come directly from your own generation rather than from the grid.
But there is an important distinction here: a smart EV charger does not automatically equal solar charging.
Basic scheduling can tell the charger when to operate, but genuine solar-aware charging may require compatibility with your inverter, energy-management system or a dedicated solar-EV charging solution.
For example, a homeowner might have:
- Rooftop solar producing strongly from late morning through afternoon.
- The Model 3 parked at home during those hours.
- A smart charger capable of scheduled charging.
- An energy-monitoring system that can determine when solar production exceeds household demand.
That setup can potentially be configured to make better use of excess solar generation.
The smart chargers in this roundup can be useful here because scheduling and energy monitoring give you more control than a basic charger. But I would not promise that any particular charger will automatically divert surplus solar power unless the manufacturer specifically supports that functionality with the homeowner’s solar system.
If You Drive Mostly at Night
This is a surprisingly common situation.
If you leave home early, return in the evening and keep the Model 3 plugged in overnight, your charging window may be long enough that maximum amperage becomes less important.
For this type of owner, a 40A Level 2 charger can already be extremely practical. You may not need to install a more demanding electrical circuit simply because another charger advertises 48A or 50A.
The more useful features could instead be:
- Reliable overnight charging.
- A convenient cable length.
- Scheduled charging.
- Direct NACS connection.
- Easy-to-use controls.
- A properly installed 240V circuit.
This is where the ChargePoint configuration can make sense: its 40A / 9.6 kW capability gives the Model 3 a substantial Level 2 charging supply without requiring every buyer to pursue the highest-output installation.
If You Drive Long Distances Every Day
The equation changes if your Model 3 regularly arrives home with a large amount of energy used and needs to recover substantial range before the next morning.
Here, higher-output charging becomes more useful—provided your particular Model 3 can accept the additional AC power and your home can support the required circuit.
A 48A-class charger can shorten the time needed to replenish the battery compared with a lower-output Level 2 setup when the vehicle can actually use that additional power.
But even here, I would still look at your schedule.
If the car is parked for ten hours every night, a 40A charger may already replenish everything you need. If the car is parked for only a few hours between trips, the higher-output installation has a stronger practical argument.
If the Charger Will Be Outside
Outdoor charging is not a problem when the equipment and installation are designed for it, but the environment needs to be considered from the beginning.
Look for an appropriate enclosure rating, secure mounting, protected electrical connections and sensible cable storage.
In this roundup, the Autel, Lectron and EVIQO options provide weather-resistant enclosure ratings suited to properly planned outdoor installations. That is useful when the Model 3 parks on a driveway rather than inside a garage.
Still, the rating on the charger does not protect a badly installed circuit. The electrical connections, conduit, mounting and cable routing must all be handled correctly.
For an outdoor setup, I would also choose the mounting position based on where the car actually parks during bad weather. A few extra feet of cable can be worth far more than it appears on the specification sheet.
If You Own More Than One EV
A second EV changes the calculation again.
The Tesla Wall Connector includes Power Management/Power Sharing capabilities for coordinating multiple Wall Connectors, which can be useful in households where more than one Tesla needs to charge without simply installing oversized electrical infrastructure.
If the second vehicle uses a different connector, a multi-EV household should also think about connector compatibility, charging schedules and how much simultaneous charging the electrical service can realistically support.
The important question becomes less “Which charger is fastest?” and more “How do I distribute the home’s available electrical capacity intelligently?”
If You Rent Your Home
Renters should approach the decision differently from homeowners.
A permanent hardwired charger may be an excellent technical solution but a poor financial decision if you may move within a year. A suitable plug-in installation can be easier to remove and take with you, provided the property owner and electrical installation allow it.
Before spending money, get clear approval for:
- The charging equipment.
- The electrical work.
- The mounting location.
- Any new circuit.
- The use of the parking space.
- Responsibility for future removal.
In a rental, portability can be worth more than maximum charging output.
The Real-World Rule
The same Model 3 can legitimately need five different charging solutions depending on where it lives.
An apartment owner may value existing infrastructure and installation simplicity. A suburban homeowner may have the electrical capacity to take advantage of 48A-class charging. A solar homeowner may care more about charging schedules and energy management. A high-mileage driver may value available charging power, while someone who drives only 20–30 miles a day may barely notice the difference between several Level 2 output levels.
That is why the charger should be chosen after looking at the way the car is actually used, not before.
The best home setup is ultimately the one that makes charging disappear from your daily routine: park the Model 3, connect the cable, let the system do its job, and start the next day with the amount of energy you actually need.
FAQs About Tesla Model 3 Home Charging
Is a 48A home charger actually worth installing for a Tesla Model 3?
For the right Model 3, yes, but the important word is right. A 48A charger can deliver up to about 11.5 kW at 240V, yet the charger does not decide how much power the car takes. Your Model 3’s onboard charging system remains the limiting factor. Tesla’s documentation currently lists higher AC charging capability for certain Long Range and Performance configurations, while the Rear-Wheel Drive version has a lower limit.
This is why I would not upgrade an electrical panel simply because a charger advertises 48A. If your normal routine is plugging the Tesla in overnight, a 40A Level 2 setup can already replace a substantial amount of energy while you sleep. The higher-output installation becomes more meaningful when your particular Model 3 can use it and you regularly need to recover a large amount of range in a shorter charging window.
A good rule is:
- Check the exact Model 3 configuration first.
- Check the charger’s maximum output second.
- Check the home’s electrical capacity third.
- Then decide whether the extra installation cost has a real benefit.
Can I use a 50A NACS charger on a Tesla Model 3 without actually charging the car at 50A?
Yes. This is one of the most misunderstood parts of buying a home charger.
A charger rated for 50A is capable of supplying up to that amount under the right electrical conditions, but the Model 3 controls the actual AC current it accepts. If the vehicle is limited below that level, it simply will not pull the full 50A.
That is not a problem with the charger. Think of the charger as making a certain amount of electrical capacity available, while the car decides how much it needs.
It also means you should not automatically choose the Autel 50A option over a 40A or 48A charger simply because “50A” looks better on the specification sheet. Consider the complete setup:
- Your Model 3’s actual AC charging capability.
- The circuit required by the charger.
- The distance from the electrical panel.
- Installation cost.
- How many hours the car normally remains plugged in.
For many owners, a correctly installed 40A charger running for several overnight hours is more useful than an expensive electrical upgrade built around a number the car cannot fully use.
Does a Tesla Model 3 need a hardwired charger, or is NEMA 14-50 still a sensible choice?
Both can be sensible; the better choice depends heavily on the house rather than the Tesla itself.
A hardwired charger makes particular sense when you are building a permanent charging station and want a clean installation with higher-output capability. The Tesla Wall Connector, Autel, Lectron and EVIQO options in this guide follow this approach.
A NEMA 14-50 setup takes a different route. If your property already has a properly installed 240V NEMA 14-50 circuit suitable for EV charging, a plug-in charger such as the ChargePoint configuration can make deployment much simpler.
The twist is that NEMA 14-50 does not automatically mean “no electrician.” If you need a new 240V circuit, that circuit still needs to be designed and installed correctly for continuous EV charging.
How do I know whether my Tesla Model 3 can actually benefit from an 11.5 kW home charger?
Start with the car, not the charger.
An 11.5 kW charger is essentially the headline figure associated with 48A at 240V, but that does not mean every Model 3 can use 11.5 kW continuously. Tesla’s published charging information differentiates charging capability by Model 3 configuration, so the exact vehicle matters.
There is also a practical way to think about this. Ask yourself how much energy you normally need to replace overnight.
If you arrive home with plenty of battery remaining and leave again eight or ten hours later, a lower-output Level 2 charger may already replenish everything comfortably. If you regularly return with a low battery and have only a few hours before another long trip, higher available AC power becomes more valuable.
Before paying for a larger circuit, check:
- Your exact Model 3 configuration.
- The vehicle’s maximum AC charging rate.
- The charger’s required circuit.
- Your home’s available electrical capacity.
- Your typical overnight charging window.
The goal is not to make the charger capable of more than the car needs. The goal is to make the charging window fit your life.
What should I look for if my Tesla Model 3 charger will be installed outside?
Look beyond the words “outdoor compatible.”
A proper outdoor installation needs an appropriately rated charger enclosure, suitable mounting, protected electrical connections and sensible cable management. A weather-resistant charger does not make an improperly installed electrical circuit weatherproof.
For an exterior Model 3 charging position, I would pay particular attention to enclosure rating, cable length and the physical route to the charge port. A 23- or 25-foot cable can be extremely helpful if the vehicle parks several feet away from the wall, but it should never be allowed to cross a pedestrian path or sit underneath vehicle tyres.
Also consider the small things you notice at 10 p.m., not just the things that look impressive on a product page. Can you reach the connector without stretching the cable? Can you return the handle to its holder easily? Does the mounting position keep the connector out of standing water? Can you access the charger comfortably during rain or snow?
For this reason, an outdoor charger should be evaluated as a complete installation, not simply as a weather-rated box.
The most reassuring home-charging setup is ultimately the least dramatic one: the charger is correctly sized, the circuit is professionally installed, the cable reaches without strain, and your Model 3 can remain plugged in without you having to think about the electrical system every time you come home.
Final Take: Choose the Charger Around the Car, Not the Number
A Tesla Model 3 changes the way you should think about home charging. You are not really buying “a 48A charger” or “a 240V charger”; you are building a small electrical system around the car you drive every day. The Model 3 configuration, available household power, charging schedule, cable reach and installation method all matter together.
That is why the five chargers in this guide are intentionally different. The Tesla Wall Connector makes sense when you want a deeply integrated Tesla setup. Autel brings a strong combination of high output, smart controls and a 25-foot cable. ChargePoint takes a more flexible NEMA 14-50 route. Lectron focuses on 48A hardwired charging, long reach and rugged protection, while EVIQO adds adjustable current control, smart management and another 25-foot cable option.
The real buying decision comes down to something much simpler than a specification race: how much charging power can your Model 3 actually use, what can your home safely provide, and how do you normally park and charge? If those three answers line up, you are unlikely to care whether another charger on the internet advertises one or two more amps.
And that is ultimately what a good home charger should do. It should become part of the background of owning the car. You arrive home, connect the NACS cable, let the scheduled charging run when appropriate, and leave in the morning with the energy you need. The best charger is not the one with the loudest specification—it is the one that quietly fits your Model 3, your home and your real life.
Also Check:


