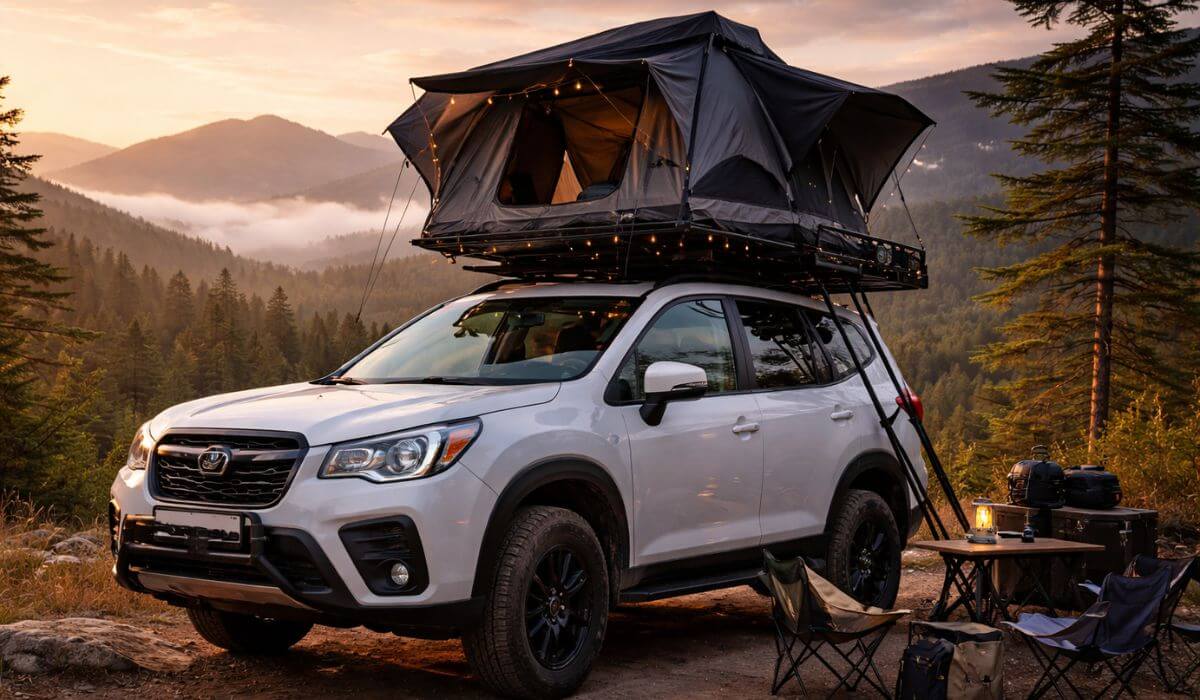
6 Best Rooftop Tents for Subaru Forester in 2026: Lightweight, Fast Setup & Built for Real Camping
If you’re shopping for a rooftop tent for your Subaru Forester, you already know the usual problem—most tents fit on paper, but once they’re on the roof, weight, setup time, and real-world comfort start to matter a lot more than spec sheets.
I’ve spent enough time around compact SUVs like the Forester to know this: anything too heavy, too complicated, or poorly balanced will ruin the whole experience—from fuel economy to stability on highways and rough tracks. What actually works here is a tent that opens fast after a long drive, doesn’t overload your roof system, and still feels solid when the weather turns.
The picks below aren’t random listings. These are the kind of tents people actually end up keeping after their first few trips—the ones that don’t feel like a compromise between convenience and comfort. Some are hard-shell quick-deploy setups for weekend runs, others trade a bit of setup time for extra space. But all of them make sense on a Forester without turning it into something it’s not.
If you want something that works every time you pull over, not just on day one, start here.
Best Subaru Forester Rooftop Tents: Top 2026 Picks for 2–4 Person Comfort & Real Fitment
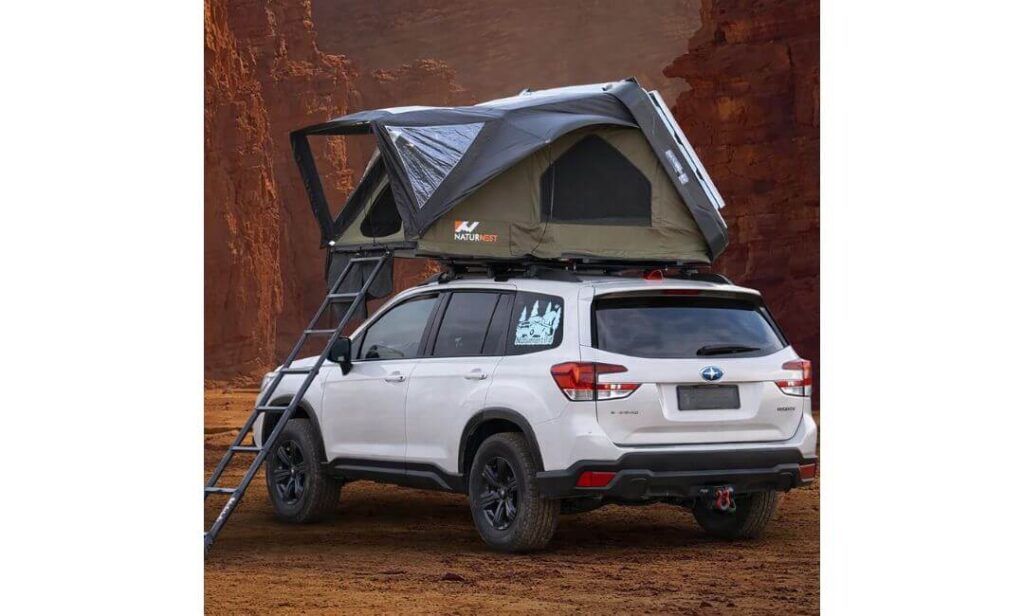
#1. Naturnest Sirius 1 Plus Hard Shell — Best Hard Shell Rooftop Tent for Subaru Forester (Quick Setup 2–3 Person)
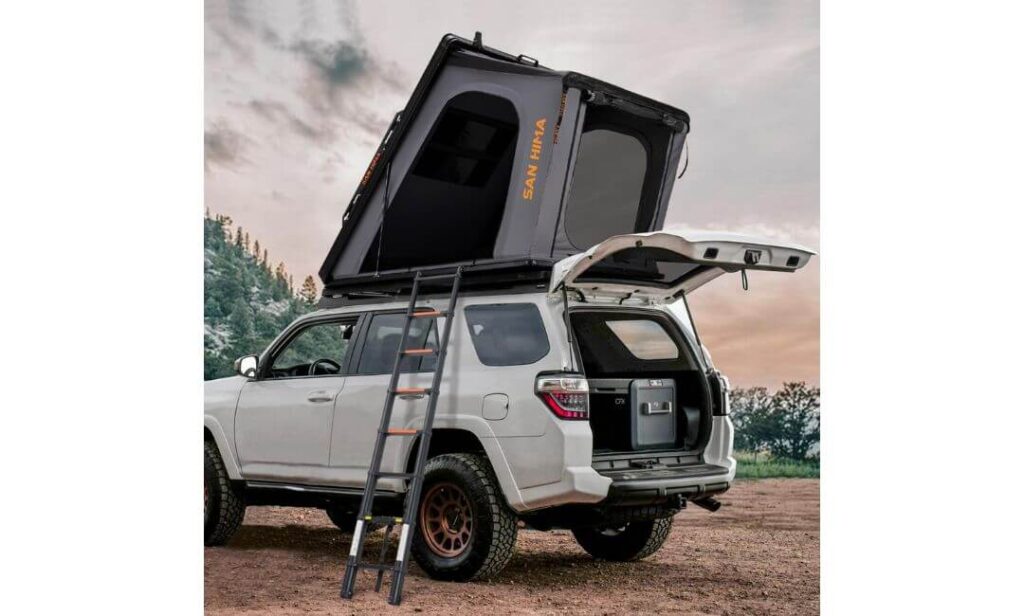
#2. Sanhima Hotham Lite Aluminium — Slimline Lightweight Rooftop Tent for Forester (Low Profile Overland Pick)
#3. JOYINRUTE Aluminium Hard Shell Pro — Best Budget Hard Shell Rooftop Tent for Forester (Winter-Ready 2 Person)
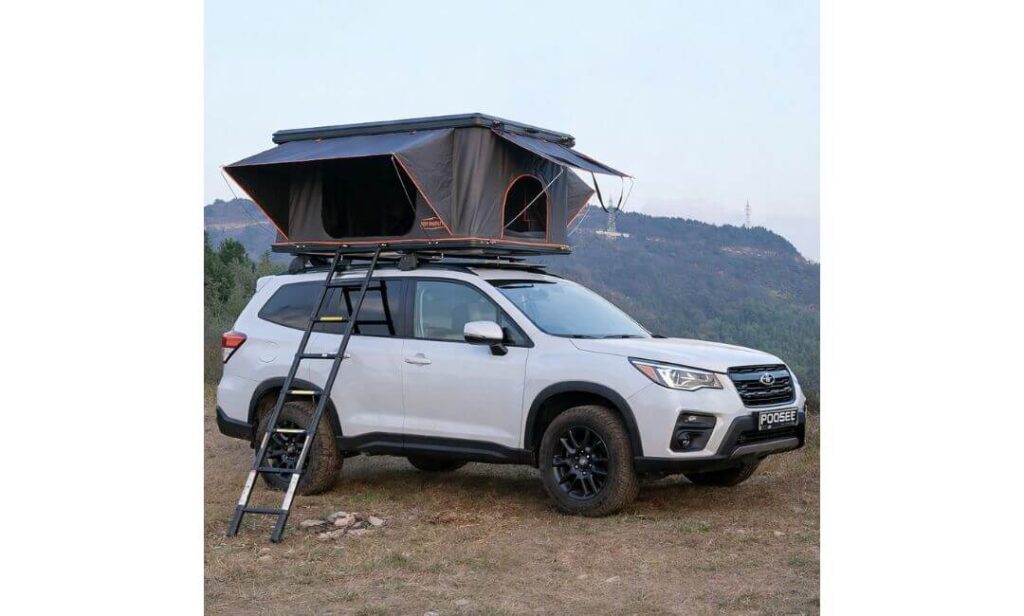
#4. ROVEROLL Aluminium Hard Shell Tent — Spacious Rooftop Tent for Forester (2–4 Person with Ladder & LED)
#5. WildFinder Hard Shell Series — Balanced Lightweight Rooftop Tent for Subaru Forester (Daily Use Friendly)
#6. Overland Vehicle Systems Nomadic 4 Extended — Best Soft Shell Family Rooftop Tent for Forester (4-Person Overland Setup)
Expert Tip (Read This Before You Buy)
Most people mess this up: they chase features and ignore what their Subaru Forester can realistically carry. On paper, every tent looks “compatible.” In real use, a heavy hard shell with a slow setup will quietly ruin your trips—more wind noise, worse mileage, awkward installs, and you’ll start avoiding using it.
Here’s the simple rule that actually works:
If you camp often and move every day, pick a true quick-deploy hard shell under a sensible weight. If you camp longer in one spot with family, then a bigger soft shell makes sense—but only if your rack setup is solid.
The tents in this list are the ones people don’t return after their first trip. They open fast, sit right on the roof, and don’t turn the Forester into something it’s not.
How We Selected the Best Rooftop Tents for Subaru Forester
There’s a big gap between what looks good in a product listing and what actually works once it’s bolted onto a Subaru Forester and driven for a few hundred kilometers. That gap is exactly where most bad buying decisions happen. So instead of chasing specs or brand hype, the selection here is grounded in what holds up after repeated use—loading, driving, setting up, packing down, and doing it all over again.
The first filter was weight and true compatibility with the Forester’s roof system. This isn’t a body-on-frame truck where you can throw anything on top and forget about it. With a Forester, the wrong tent—especially a heavy hard shell—changes how the car feels on the road. You’ll notice it in crosswinds, braking, and even in how often you hesitate to take the car out. Every tent on this list sits within a realistic working range for factory rails or properly rated crossbars, so you’re not compromising the core driving experience just to camp.
Next came setup speed, but not the “first-time unboxing” version. A lot of tents feel quick in a demo. The real test is after dust gets into the hinges, after you’ve packed it in a hurry, after you’ve opened and closed it ten or twenty times. We prioritized designs that still deploy cleanly and predictably without needing extra effort. Because after a long drive, the difference between a true quick-deploy system and a fiddly one is the difference between enjoying the stop and dreading it.
Sleeping space and comfort were judged by usable reality, not labels. “2–3 person” means nothing if two adults feel cramped or if the mattress bottoms out after a few nights. The tents included here offer genuinely usable space with support that holds up, especially for couples who actually plan to sleep well, not just crash for a few hours.
Weather resistance was treated the same way—no attention to marketing claims, full attention to structure and materials that handle bad conditions without drama. That means shell rigidity in wind, seals that don’t start leaking after a few uses, and fabrics that keep the inside dark and livable. Because once you’re out there, you don’t care what the product page promised—you care whether you stay dry and comfortable through the night.
Mounting was another area where we stayed practical. A tent can technically “fit” and still be a pain to live with. The focus here was on mounting systems that align properly with standard crossbars or track setups, sit stable at speed, and don’t turn installation into a project every time you need to adjust or remove them.
Finally, we looked at long-term value, not just price. Newer tents especially can look impressive, but the real question is whether they still feel worth it after a few trips. The options here balance build quality, included features, and ease of use in a way that makes sense once the initial excitement wears off.
One more thing that matters more than most people realize: before choosing any tent, take a minute to understand your own setup. Know your roof load limits, make sure your crossbars or rack are properly rated, and check the mounting requirements against your bar spacing. This isn’t overthinking—it’s what separates a setup that works effortlessly from one that constantly feels slightly off.
This entire selection is built around that mindset. Not what sounds good, but what actually works on a Subaru Forester without compromise.
#1. Naturnest Sirius 1 Plus Hard Shell
Quick Specs:
- Weight: ~160 lbs (manageable for Forester with proper crossbars)
- Capacity: Real 2 adults + 1 child (not cramped)
- Setup: Gas-strut pop-up, ~30–60 seconds once mounted
- Shell: ABS hard shell + aluminum frame (lighter than full metal builds)
- Fabric: 420D Oxford, 5000mm waterproof, UV50+, blackout interior
- Mattress: Dual-layer (1.38” foam + anti-condensation layer)
- Packed Size: ~62” x 51” x 12” (low-profile enough for daily driving)
The first time you open this on a Forester after a long drive, you’ll get it. No wrestling with fabric, no awkward unfolding—just release, lift, and it’s done. That gas-strut system isn’t a gimmick; it’s the difference between actually using your tent every trip and silently avoiding it because setup feels like work.
Space-wise, it hits a sweet spot that most “2–3 person” tents miss. The 82.7” x 63” sleeping area gives two adults proper room to stretch without elbows touching walls all night, and the extra height makes it feel less boxed in. The dual-layer mattress does more than expected too—it doesn’t collapse after a couple of nights, and the condensation pad actually keeps things dry underneath (something most listings never talk about).
Where it quietly wins is in bad conditions. The 5000mm waterproof rating, blackout fabric, and solid shell mean you don’t wake up to damp gear or early sunlight killing your sleep. Add in YKK zippers and stainless gas springs that don’t start acting up after a few uses, and it starts feeling less like a “new product gamble” and more like something you can rely on trip after trip.
(You don’t think about it once it’s set up—and that’s exactly the point.)
What Stands Out in Real Use
- True quick-deploy system — not just fast once, but consistently easy every trip
- Balanced weight for a hard shell — doesn’t overwhelm the Forester when paired with good crossbars
- Usable interior space — actually comfortable for two adults, not marketing math
- Weather confidence — rain, wind, UV… it holds up without drama
- Hardware quality — gas struts, zippers, frame all feel built to last
What Could Be Better
- Latch system feels decent, but for rough trails, adding a backup strap for peace of mind isn’t a bad idea
Subaru Forester Fitment (Real-World Check)
On a Forester, this works well if your setup is right—that means at least two properly rated crossbars (not cheap ones). At ~160 lbs, it sits within a usable range, but you’ll feel the difference if your rack isn’t solid. With a good setup, though, it stays stable and doesn’t mess with daily driving as much as heavier metal-shell tents.
For newer Forester models, especially Wilderness trims, this size and weight combo fits naturally. Just make sure your crossbar rating + mounting width line up properly, and you’re good—no weird adjustments or custom hacks needed.
Installation Notes (Practical, Not Theoretical)
Install is straightforward, but don’t rush it. Lay everything out once, understand the mounting plates, and do the first fit calmly—it saves time later. Two people make it easier, especially lifting it onto the roof without scratching anything.
Once mounted, tighten properly but don’t overdo it, then drive a short distance and re-check bolts. Open and close it once before your first trip so you’re not figuring things out in the dark. After that, it becomes second nature—exactly how it should be.
#2. Sanhima Hotham Lite Aluminium
Quick Specs:
- Weight: ~163 lbs (borderline for stock setup, ideal with upgraded rack)
- Profile: Ultra-slim ~5.4 inches closed (garage-friendly, low wind drag)
- Capacity: Comfortable 2 adults + 1 child
- Setup: Gas-assisted pop-up, ~30–60 seconds
- Fabric: 420D Ripstop Oxford + poly-cotton, 5000mm waterproof, UV50+
- Mattress: 1.97” memory foam + anti-condensation base
- Extras: Skyview window, tri-color LED strip, integrated crossbars
You notice this one before you even open it. That 5.4-inch slimline profile changes everything on a Forester—less wind noise, less drag, and it actually fits into places where most rooftop tents force you to rethink parking. It doesn’t feel like you’re carrying a box on the roof; it feels integrated.
Open it up, and the experience shifts completely. The gas-assisted pop-up is quick, but what stands out is how refined it feels—no jerks, no fighting the frame. Inside, the space is smarter than it looks from outside. The 78+ inch length with a near 2-inch memory foam mattress gives proper support, not that thin padding you end up replacing later. Add the skyview window, and suddenly it doesn’t feel like a closed shell—you get airflow, light, and on clear nights, an actual view worth stopping for.
Where it earns real respect is in detail work. The AquaShield coating, ripstop fabric, and insulated honeycomb base handle weather without drama, while the tri-color LED (white, warm, amber) is one of those features you don’t think about—until you use it and realize how much easier nighttime setup and inside use becomes.
(It’s the kind of tent that feels thought through, not just assembled.)
What Stands Out in Real Use
- Ultra-slim design — noticeable difference in driving comfort and noise
- Refined setup mechanism — smooth, repeatable, no effort over time
- Memory foam comfort — actually supports full nights, not short naps
- Skyview + ventilation combo — makes the interior feel open, not boxed
- Integrated lighting system — genuinely useful, not just an add-on
What Could Be Better
- On a stock Forester setup, weight pushes limits, so a proper rack upgrade is the safer move
Subaru Forester Fitment (Real-World Check)
This is where honesty matters. At ~163 lbs, it sits right at the edge of what a stock Forester roof setup should handle. Physically, it fits without issue—but to use it properly, you’ll want quality aftermarket crossbars or a rated roof rack system.
Once paired with a solid rack, though, this tent actually feels made for the Forester. The slim profile keeps the drive stable, and the weight distribution doesn’t feel top-heavy like bulkier builds. Done right, it works cleanly without compromises.
Installation Notes (Practical, Not Theoretical)
Don’t attempt this solo unless you enjoy unnecessary struggle—get two people for lifting. The included mounting system is straightforward, and once the crossbars are aligned (around 55-inch spacing), everything locks in without guesswork.
After mounting, take a short drive, recheck all bolts, and open it once at home. Test the ladder, lighting, and ventilation so nothing surprises you later. Once dialed in, it becomes one of those setups you don’t have to think about again—which is exactly what you want.
#3. JOYINRUTE Aluminium Hard Shell Pro
Quick Specs:
- Weight: ~178 lbs (heavy side — rack upgrade almost necessary)
- Capacity: True 2-person (focused, not oversized)
- Setup: 4 hydraulic struts, fast pop-up
- Shell: Aircraft-grade aluminum (stronger, long-term durability)
- Fabric: 320G polyester, 5000mm waterproof, UV protection, windproof
- Special: Removable winter thermal liner (rare in this price range)
- Floor: Flocked anti-condensation base
- Extras: Ladder, LED strip, storage bags, organizers
This is the one you look at when you’re tired of lightweight compromises and want something that feels solid the moment it’s mounted. The full aluminum hard shell changes the character completely—it doesn’t flex, doesn’t feel fragile, and doesn’t age like plastic shells do after sun exposure. On a Forester, it feels more like a “serious build” than a weekend add-on.
Open it up, and the hydraulic support rods do the work without hesitation. No awkward lifting, no uneven movement—it just rises cleanly and locks in place. Inside, it’s not about space, it’s about control. The 83” length with focused 2-person layout keeps everything tight, warm, and efficient. And that’s where it separates itself—the removable winter thermal liner actually makes a difference. Cold air doesn’t creep in the same way, and heat retention is noticeably better than standard setups.
What really earns trust here is how it handles conditions. The 5000mm waterproof rating, blackout coating, and wind resistance aren’t just specs—they show up when weather shifts unexpectedly. Add in the flocked anti-condensation floor, and you avoid that damp feeling under the mattress that ruins sleep in colder climates. It’s not flashy—it’s built for people who camp when others stay home.
(This is less about convenience, more about control in real conditions.)
What Stands Out in Real Use
- Full aluminum shell — stronger, more durable than ABS over time
- Winter-ready insulation — not common at this level, actually usable
- Stable hydraulic system — smooth opening without effort
- Condensation control — dry sleeping surface even in temperature shifts
- Complete kit — ladder, organizers, lighting… nothing extra needed
What Could Be Better
- Weight is on the higher side, so skipping a proper rack upgrade isn’t a smart move
Subaru Forester Fitment (Real-World Check)
Let’s be clear—at 178 lbs, this pushes beyond what a stock Forester roof setup should handle. Physically, it mounts fine, but to use it properly and safely, you’ll need a rated aftermarket roof rack system. Without that, you’re forcing the setup.
With the right rack, though, it sits planted and secure. The aluminum build actually helps with long-term stability, especially if you’re driving rough roads or carrying extra gear. It’s not the lightest option—but it’s one of the most confidence-inspiring once properly set up.
Installation Notes (Practical, Not Theoretical)
Take your time on the first install—this isn’t a rush job. The weight alone means two people minimum, and aligning the base evenly across crossbars is key. Tighten bolts gradually in a balanced pattern so the load distributes correctly.
Once mounted, open and close it fully before your first trip. Check ladder stability, test the liner setup, and re-tighten everything after a short drive. After that, it becomes routine—but skipping these steps early is where most problems start.
#4. ROVEROLL Aluminium Hard Shell Tent
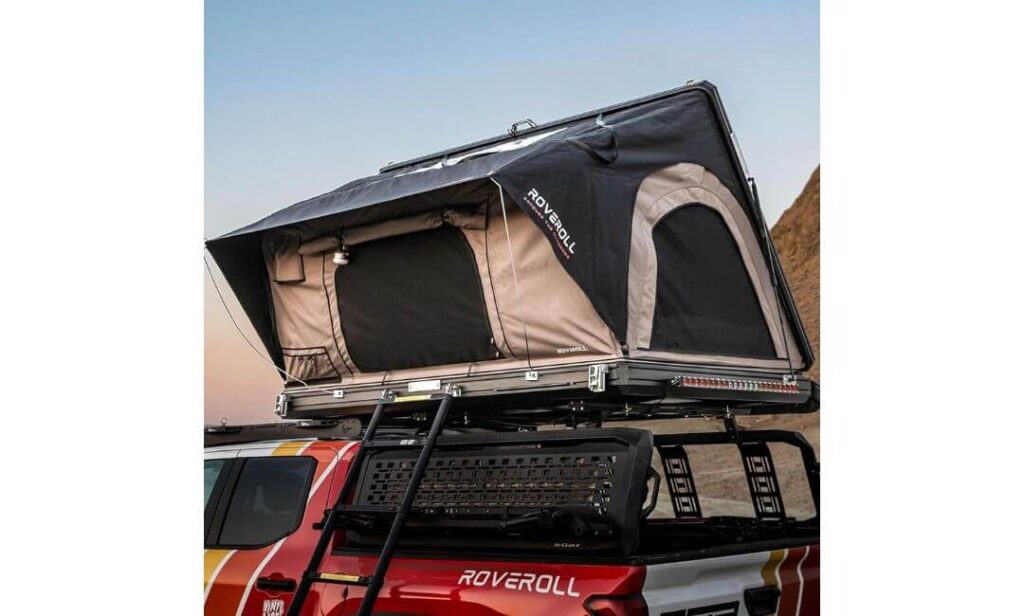
Quick Specs:
- Weight: ~159 lbs (balanced for hard shell, still needs solid rack)
- Capacity: Real 2–3 adults (can stretch to 4, but ideal for 2–3)
- Setup: German gas struts, true self-deploy
- Shell: CNC aluminum + honeycomb panels (strong + lightweight balance)
- Fabric: 280G polycotton + 600D Oxford, 3000mm waterproof, blackout layers
- Mattress: High-density foam + condensation pad
- Extras: LED strip, USB ports, ladder, ventilation fan
Some rooftop tents feel compact the moment you step inside—this one doesn’t. The longer 88.7-inch footprint changes how it feels immediately. On a Subaru Forester, that extra length gives you real sleeping freedom, not the usual “stay in one position” compromise. You can stretch out, shift around, and still have space left.
The setup is exactly what you want after a long drive. Lift it slightly, and the gas struts take over completely—no balancing act, no half-open awkward stage. It opens clean and holds firm, which is where the CNC aluminum frame with honeycomb panels starts to make sense. It’s not just about strength—it’s about stability when you’re inside, moving around, or dealing with wind.
Inside, it leans more toward comfort than minimalism. The high-density foam mattress, blackout fabric, and proper ventilation (windows + fan) make it usable beyond just “sleep and leave.” Add in USB ports and LED lighting, and it starts feeling like a setup you can actually live in for a couple of nights, not just crash in.
(This one feels less like a tent and more like a mobile sleeping space you control.)
What Stands Out in Real Use
- Longer sleeping platform — noticeable difference in comfort for adults
- Effortless deployment — gas struts do all the work, consistently smooth
- Solid aluminum structure — stable feel, no flex under movement
- Built-in convenience — USB, LED, ventilation… actually useful features
- Balanced build — not overly bulky despite the larger interior
What Could Be Better
- 3000mm waterproof rating is decent, but not as strong as higher-end 5000mm setups in heavy rain
Subaru Forester Fitment (Real-World Check)
At ~159 lbs, this sits right in that “manageable but not careless” range for a Forester. It will mount on standard crossbars, but to keep things safe and stable, a properly rated aftermarket rack is the smarter choice—especially if you plan to load extra gear.
Once mounted correctly, the tent feels planted. The weight distribution is well-balanced, and the longer design doesn’t create the top-heavy feel some larger tents do. Done right, it works surprisingly well on a Forester without affecting daily usability too much.
Installation Notes (Practical, Not Theoretical)
This one arrives mostly ready, so installation is more about positioning than assembling. Still, don’t rush the lift—two people make it safer and cleaner, especially aligning it evenly across crossbars.
Tighten everything firmly, test stability by pushing from different angles, and do one full open-close cycle before your first trip. After your first drive, re-check bolts. Once locked in, it’s a setup you won’t need to constantly adjust—and that’s exactly how it should be.
#5. WildFinder Hard Shell Series
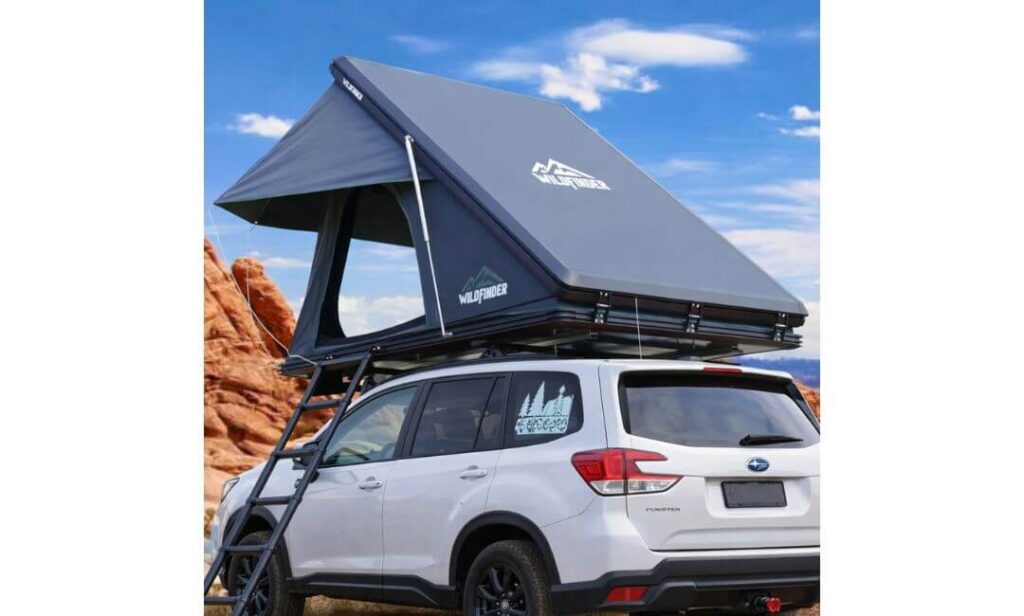
Quick Specs:
- Weight: ~169 lbs (needs proper rack, not for stock rails)
- Capacity: Comfortable 2–3 person layout
- Setup: Air-pressure struts, ~1–2 min deploy
- Shell: Full aluminum alloy (long-term durability, no plastic fatigue)
- Fabric: Polyester + blackout coating, ~5000mm waterproof, UV protection
- Mattress: ~5cm foam + condensation pad + marine pad
- Extras: 10 organizer bags, LED strip, ladder, multi-window ventilation
This is the kind of tent that doesn’t try to impress you in the first 5 minutes—it earns it over time. Once it’s on a Forester and you’ve used it a couple of trips, you start noticing what matters: no weird flex, no material fatigue, no small annoyances building up. The full aluminum shell plays a big role here—it feels stable in a way plastic shells never quite do after months of sun and temperature changes.
Open it up, and it’s straightforward—no drama, no learning curve. The air-pressure struts lift it cleanly, and within a minute or two, you’re done. Inside, the layout feels practical more than flashy. The 83” x 52” sleeping space gives enough room for two adults to actually sleep properly, and the 5cm mattress with layered condensation control keeps things dry underneath—something you only appreciate after a cold or humid night.
Where it quietly stands out is usability. The multiple organizer bags, LED strip, and proper ventilation with 3 mesh windows make it feel lived-in, not empty. And the weather protection—5000mm waterproofing, wind resistance, snow handling—means you’re not constantly checking forecasts before heading out.
(It doesn’t try to be premium—it just works every time you need it.)
What Stands Out in Real Use
- All-aluminum construction — better long-term durability vs mixed materials
- Consistent setup experience — quick, no adjustment needed over time
- Dry sleeping system — layered base actually reduces condensation
- Highly usable interior — storage + airflow make a real difference
- Strong value balance — features you actually use, not just listed
What Could Be Better
- Zippers and latches need a bit of care during use, especially in colder conditions
Subaru Forester Fitment (Real-World Check)
This will mount on a Forester, but let’s be real—not on a stock setup. At ~169 lbs (and more with gear), you’ll need a properly rated aftermarket rack system to run this safely.
Once you’ve got that sorted, though, it sits well. The weight distribution is even, and the aluminum shell keeps things stable even when driving longer distances or dealing with uneven roads. It’s not the lightest—but it’s one of the more confidence-inspiring once installed right.
Installation Notes (Practical, Not Theoretical)
Get help—2 to 3 people makes this much easier to place and align. Once on the crossbars, mounting is simple and doesn’t require anything unusual, but positioning evenly is key.
Before your first trip, open and close it a couple of times. Learn how the fabric folds in, check the ladder, and make sure all bolts are tight after your first short drive. After that, it becomes routine—and that’s exactly what you want from a setup like this.
#6. Overland Vehicle Systems Nomadic 4 Extended
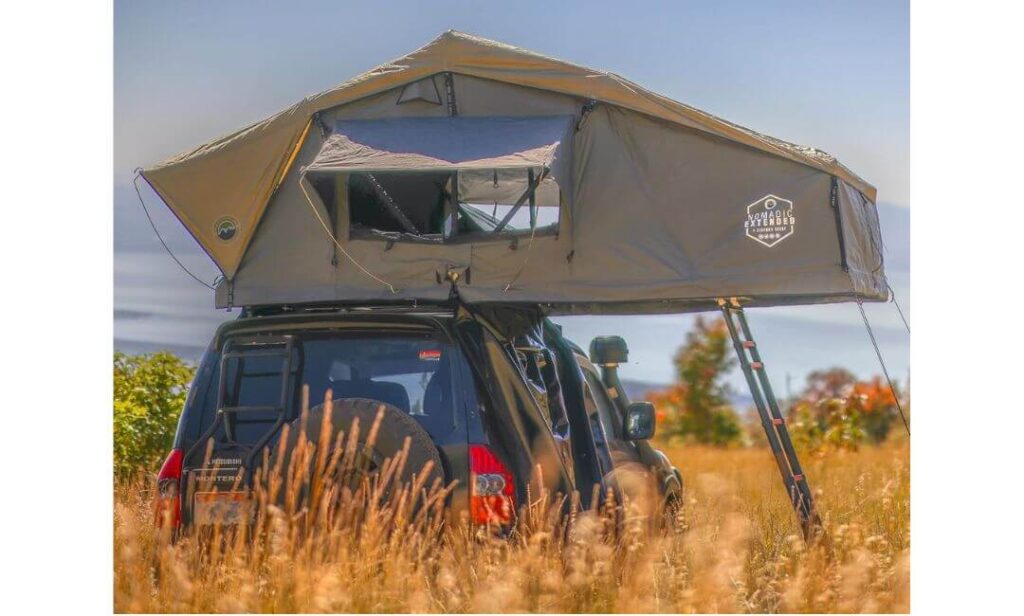
Quick Specs:
- Weight: ~185 lbs (heavy — requires strong aftermarket rack)
- Capacity: True family-size 4-person (not marketing, actual space)
- Setup: Fold-out soft shell, ~10–15 min first time, faster after
- Fabric: 600D ripstop poly-cotton + 420D rainfly, heat-sealed seams
- Waterproofing: ~2000–3000mm range (with full rainfly protection)
- Mattress: 3” high-density foam (thicker than most)
- Base: Insulated diamond plate (strong + stable)
- Extras: Storage loft, LED light, 96” ladder, heavy-duty travel cover
This isn’t trying to be compact—and that’s exactly why it works. The moment you unfold it on a Subaru Forester, you realize this is built for a completely different kind of trip. The 122-inch extended length and 75-inch width turn your roof into a full sleeping platform, not a tight camping box. For families or anyone who hates feeling restricted, this changes everything.
Setup is different from hard shells, but it’s honest. First time, it’ll take a bit longer—10 to 15 minutes while you understand the flow. After that, it becomes routine. And once it’s open, the payoff is clear. The 3-inch mattress, breathable canvas, and wide-open interior don’t feel like a temporary setup—they feel like a proper sleeping space. You can sit up, move around, organize gear using the built-in storage, and actually stay comfortable for multiple nights.
Where it earns respect is durability. The 600D ripstop body, heat-sealed seams, marine-grade hardware, and insulated base are built for repeated use, not just occasional trips. Add the full rainfly and wind-stable structure, and it holds up when conditions shift. It’s not about quick convenience—it’s about having space and reliability when you stay out longer.
(This is what you choose when comfort matters more than speed.)
What Stands Out in Real Use
- Massive usable space — one of the few that truly fits a family comfortably
- Thick 3” mattress — noticeably better sleep over multiple nights
- Heavy-duty build — feels made for long-term use, not occasional trips
- Organized interior — storage loft, pockets, lighting… practical setup
- Stable in rough conditions — structure holds up well in wind and rain
What Could Be Better
- Setup takes longer than hard shells, especially on the first few uses
Subaru Forester Fitment (Real-World Check)
Let’s be real—this pushes the limits of what a Forester should carry. At ~185 lbs (plus ladder and gear), a factory setup isn’t enough. You’ll need a proper heavy-duty aftermarket roof rack system (225+ lbs rated) to run this safely.
With the right rack, though, it works. The large footprint distributes weight well, and once set up, it feels stable. But this is not a casual setup—it’s for users who are okay upgrading their build to support it properly.
Installation Notes (Practical, Not Theoretical)
This is not a one-person lift—get help, minimum two people. Positioning matters more here because of the size, so take your time aligning it evenly across crossbars.
Before your first trip, practice the full open and close cycle once. Understand how the rainfly attaches, how the ladder supports the extension, and how the fabric folds back in. After your first drive, re-check all mounting points.
Once you get used to it, it’s consistent—but rushing the first setup is where most people struggle.
Best Subaru Forester Rooftop Tents Comparison Guide: Hard Shell vs Soft Shell Picks Explained
| Product | Weight | Capacity | Setup | Comfort | Weather | Best For |
|---|---|---|---|---|---|---|
|
Top Pick Naturnest Sirius 1 Plus
|
~160 lbs | 2–3 Person | Ultra-fast (30s) | Balanced space + dual-layer mattress | 5000mm, UV50+, blackout | Daily use + no-fuss camping |
|
Slimline Pro Sanhima Hotham Lite
|
~163 lbs | 2–3 Person | Quick pop-up | Memory foam + skyview | 5000mm + insulated base | Low profile, silent driving |
|
Smart Buy JOYINRUTE Hard Shell Pro
|
~178 lbs | 2 Person | Hydraulic fast open | Warm, insulated interior | 5000mm + winter liner | Cold weather + durability |
|
Comfort Build ROVEROLL Aluminium
|
~159 lbs | 2–3 Person | Effortless gas strut | Spacious + high-density foam | 3000mm + blackout | Extra sleeping space lovers |
|
Best Value WildFinder Series
|
~169 lbs | 2–3 Person | 1–2 min setup | 5cm mattress + dry base | 5000mm + snow capable | Long-term reliability |
|
Family Setup OVS Nomadic 4 Extended
|
~185 lbs | 4 Person | 10–15 min (after practice) | 3” mattress + huge space | 2000–3000mm + rainfly | Family trips / long stays |
Buying Guide: How to Choose the Right Rooftop Tent for Your Subaru Forester
Choosing a rooftop tent for a Subaru Forester isn’t about picking the “best” tent—it’s about picking the one that actually works with how you drive, camp, and use your vehicle every day. This is where most buyers go wrong. They look at features, not how those features behave on a compact SUV after weeks of use.
If you get this part right, any tent from the list above will feel like a perfect fit. If you get it wrong, even a premium tent will start feeling like a mistake after a few trips.
Weight and Payload Compatibility (This Decides Everything)
Before anything else, understand this clearly: your Forester has limits, and ignoring them will cost you in stability, safety, and long-term wear.
Most factory setups aren’t designed for 160–185 lbs rooftop tents + ladder + gear. On paper, it might “fit,” but in real driving—especially highways and crosswinds—you’ll feel the difference immediately.
A good setup means:
- A properly rated roof rack or crossbar system, not just factory rails
- Keeping total load within a realistic working range, not maxing it out
- Even weight distribution across bars
If your plan includes heavier aluminum tents or family-sized soft shells, upgrading your rack isn’t optional—it’s part of the build.
Size vs. Sleeping Capacity (Don’t Trust Labels Blindly)
“2–3 person” and “4 person” are often marketing terms. What matters is how that space feels after 6–8 hours of sleep.
For a Forester:
- 2-person tents = best balance (space + weight + daily usability)
- 2–3 person tents = comfortable if layout is efficient
- 4-person tents = only make sense if you truly need the space and accept the trade-offs
Bigger isn’t always better. Larger tents add weight, increase wind resistance, and change how the car drives. Choose space based on how you actually sleep—not what sounds better on paper.
Setup Speed vs. Durability (What You’ll Feel After 5 Trips)
Quick setup sounds like a convenience—until you’ve had a long drive and just want to rest. That’s when it becomes essential.
Hard shell tents:
- Open in seconds
- Stay consistent over time
- Ideal for frequent stops and short trips
Soft shell tents:
- Take longer to deploy
- Offer more space
- Better for longer stays in one location
The real difference shows up after multiple uses. A tent that opens smoothly every time is something you’ll keep using. A complicated one slowly becomes something you avoid.
Weather Resistance and Insulation (Real Conditions, Not Marketing)
Weather ratings look similar across products, but performance isn’t.
What actually matters:
- Fabric density and coatings (5000mm holds up better in sustained rain)
- Seal quality and stitching (prevents slow leaks over time)
- Blackout capability (better sleep, less heat buildup)
- Condensation control layers (keeps mattress dry in cold or humid conditions)
If you plan to camp beyond perfect weather, insulation becomes important. Features like thermal liners or insulated bases aren’t extras—they directly affect comfort at night.
Rack Compatibility and Required Accessories
A rooftop tent is only as good as the system holding it.
You need to think beyond the tent:
- Crossbars or full rack system (rated properly for your load)
- Ladder quality and height (stable access matters more than you think)
- Mounting hardware compatibility (width, spacing, ease of install)
Additional accessories depend on how you camp:
- Annex rooms for extended stays
- Storage solutions inside the tent
- Lighting setups (integrated or external)
A clean setup is one where everything works together—not forced to fit.
Budget vs. Long-Term Value (Where Most People Misjudge)
It’s easy to focus on price upfront, but rooftop tents are long-term gear. The real question is whether the tent still feels worth it after multiple trips.
Higher-quality tents:
- Use better materials (hardware, fabric, frame)
- Stay consistent over time
- Require less adjustment and maintenance
Lower-cost options can still be good—but only if they balance weight, usability, and durability properly.
Don’t just ask “Is it cheaper?”
Ask “Will I still be happy using this after a few months?”
Maintenance Tips to Extend Tent Life
This is the part almost no one talks about—but it’s what keeps your setup working like new.
After each trip:
- Let the tent dry completely before closing (prevents mold and odor)
- Clean off dust, especially from hinges and zippers
- Check mounting bolts for tightness
Over time:
- Lubricate moving parts (gas struts, hinges) lightly
- Store the tent properly if not in use for long periods
- Inspect fabric and seals before trips
A well-maintained tent doesn’t just last longer—it performs the same way every time you use it.
Final Thought (What Actually Matters)
The right rooftop tent for a Subaru Forester is the one that fits your driving style, camping frequency, and setup discipline—not just your budget or feature list.
When everything is aligned—weight, setup, comfort, and compatibility—you stop thinking about the tent entirely.
And that’s when you know you chose right.
Real-World Setup & Takedown Guide for Subaru Forester Rooftop Camping
This is the part most people underestimate. A rooftop tent isn’t just about buying the right model—it’s about how smoothly you can set it up, live in it, and pack it down without frustration. When your process is dialed in, camping feels effortless. When it’s not, even the best tent starts feeling like work.
What follows isn’t theory—it’s how experienced Forester owners actually run their setups so everything feels quick, stable, and repeatable every single trip.
Step-by-Step Quick Setup That Actually Works on a Forester
Start with positioning your vehicle properly. Before touching the tent, take a minute to choose a flat, stable surface. Even a slight tilt becomes noticeable when you’re sleeping on the roof.
Once parked:
- Engage parking brake and keep the car in gear (or park mode)
- Step out and quickly check ground level visually—don’t ignore this
Now move to the tent:
For hard shell setups, release the latches and let the gas struts do the work. Don’t force anything—if it’s aligned properly, it should open smoothly without resistance.
For soft shell setups, unfold step-by-step without rushing:
- Extend the base fully before adjusting poles
- Attach rainfly only after structure is stable
Then:
- Deploy ladder carefully and use it to support the tent angle
- Adjust ladder length so it sits firmly—not too steep, not too flat
Before stepping inside, always do a quick stability check:
- Lightly shake the ladder
- Press on tent base edges
- Make sure nothing shifts
This entire process, once learned, should feel automatic—not something you think through every time.
Reducing Wind Risk & Getting a Stable, Quiet Setup
Wind is where most rooftop setups either feel solid or start to annoy you.
First, orientation matters more than people think. Park your Forester so the lowest profile side of the tent faces the wind. This reduces pressure on hinges and fabric.
Next, tension:
- Keep fabric tight but not overstretched
- Make sure rainfly is properly secured, not loose
In stronger winds:
- Slightly lower ladder angle for better support
- Avoid opening windows fully on wind-facing side
A well-set tent doesn’t flap, doesn’t shake excessively, and doesn’t wake you up at 2 AM. That’s the difference between a rushed setup and a proper one.
Ladder Safety & Interior Comfort (Small Details, Big Difference)
The ladder isn’t just access—it’s part of the structure. If it’s unstable, the whole setup feels off.
Always:
- Place ladder on solid ground, not loose gravel or mud
- Adjust height so steps feel natural, not stretched
- Keep it angled—not vertical
Inside the tent, comfort is about small adjustments:
- Crack open opposite-side windows slightly for cross ventilation
- Use the condensation pad properly—don’t remove it thinking it’s optional
- Arrange gear in a way that keeps weight balanced inside
These aren’t big changes—but they’re the difference between restless sleep and a proper night outdoors.
Smart Packing List for Rooftop Camping (Forester-Friendly)
Space is limited, so everything you carry needs to earn its place.
Essentials that actually matter:
- Compact sleeping bag or blanket suited to weather
- Small pillow (don’t rely only on mattress comfort)
- Headlamp or internal light backup (even if tent has LEDs)
- Basic tool kit (for bolts, ladder adjustments)
- Weather cover or tarp for unexpected rain situations
Optional but highly useful:
- Shoe bag or hanging organizer (keeps interior clean)
- Portable power bank (for lights, charging)
- Microfiber cloth (for condensation or quick cleaning)
Keep it simple. The more clutter you bring inside, the less usable your space becomes.
Takedown Routine That Saves Time and Prevents Problems
Packing down properly is what keeps your tent performing like new.
Before closing:
- Let moisture dry, even if it means waiting a few extra minutes
- Shake out dust, leaves, or debris
- Fold fabric inward carefully—don’t force it under the shell
When closing:
- Make sure nothing is trapped between seals
- Lock latches evenly, not one side first
After driving a short distance:
- Stop and re-check everything once
- Confirm nothing loosened or shifted
This routine might feel slow at first, but it becomes second nature—and it’s what prevents long-term issues like leaks, fabric wear, or alignment problems.
Final Thought (What Makes It Feel Effortless)
A good rooftop tent setup on a Subaru Forester isn’t about speed—it’s about consistency.
Once your process is clean:
- Setup becomes automatic
- Sleep becomes better
- Packing becomes faster
And most importantly, you stop thinking about the tent entirely—and start enjoying why you bought it in the first place.
Installation & Ownership Specs by Model (What You Actually Need to Know Before Mounting)
This is the part most buyers skip—and later regret. Specs on a product page don’t tell you how a tent behaves once it’s on a Subaru Forester with real load limits, real crossbars, and real driving conditions.
So instead of dumping raw specs, this is a clean, reality-based snapshot of what each tent demands from your setup—how it mounts, what it expects from your rack, how long it takes to live with it, and what kind of ownership you’re stepping into.
Naturnest Sirius 1 Plus Hard Shell
- Mounting System: Universal clamp-on rails (straightforward, no modification needed)
- Real Payload Expectation: ~160 lbs base → safe with rated crossbars (200+ lbs recommended)
- Setup Time (Real Use): ~30–60 seconds consistently
- Dry vs Wet Weight Behavior: Minimal water retention (hard shell advantage)
- Warranty Reality: Standard coverage (acceptable, not standout)
- Ownership Insight: One of the easiest to live with daily—low friction, low maintenance
Sanhima Hotham Lite Aluminium
- Mounting System: Integrated crossbars + clamp system (clean fit, but needs proper alignment)
- Real Payload Expectation: ~163 lbs → aftermarket rack strongly recommended
- Setup Time (Real Use): ~30–60 seconds, smooth gas-strut action
- Dry vs Wet Weight Behavior: Stays light due to slimline shell + insulation base
- Warranty Reality: ~2-year coverage (above average in this segment)
- Ownership Insight: Best suited if you care about daily drivability + low profile, not just camping
JOYINRUTE Aluminium Hard Shell Pro
- Mounting System: Universal mounting plates (takes slightly more time to align properly)
- Real Payload Expectation: ~178 lbs → rack upgrade is not optional here
- Setup Time (Real Use): ~1 minute (hydraulic rods do most of the work)
- Dry vs Wet Weight Behavior: Aluminum shell stays consistent; insulation adds slight bulk
- Warranty Reality: Basic coverage (not the main selling point)
- Ownership Insight: Built more for durability and cold-weather use than convenience
ROVEROLL Aluminium Hard Shell Tent
- Mounting System: Clamp-based system (quick install, minimal adjustments needed)
- Real Payload Expectation: ~159 lbs → manageable, but still better with reinforced crossbars
- Setup Time (Real Use): ~30 seconds (one of the smoothest deployments)
- Dry vs Wet Weight Behavior: Slight fabric absorption, but dries quickly due to ventilation
- Warranty Reality: Standard (focus is on build quality over warranty claims)
- Ownership Insight: Balanced choice—space, ease, and comfort without going oversized
WildFinder Hard Shell Series
- Mounting System: Universal crossbar mount (simple, but requires careful positioning)
- Real Payload Expectation: ~169 lbs → aftermarket rack strongly advised
- Setup Time (Real Use): ~1–2 minutes (consistent, no surprises)
- Dry vs Wet Weight Behavior: Good moisture control due to layered base system
- Warranty Reality: Average (value-driven product, not warranty-focused)
- Ownership Insight: Reliable long-term option—less about flash, more about consistency over time
Overland Vehicle Systems Nomadic 4 Extended
- Mounting System: Multi-point mounting plates (more involved install, but very secure)
- Real Payload Expectation: ~185 lbs → heavy-duty rack (225+ lbs rated) required
- Setup Time (Real Use): ~10–15 minutes initially, faster with practice
- Dry vs Wet Weight Behavior: Can retain some moisture (soft shell), needs proper drying routine
- Warranty Reality: One of the strongest warranties in this category
- Ownership Insight: Not for casual users—this is a commitment setup for longer trips and family use
What Most Buyers Miss (But Matters More Than Specs)
- Mounting ease is not equal across tents — some feel “plug and play,” others need careful alignment
- Weight isn’t just a number — it directly affects how your Forester drives
- Setup time changes after real use — smooth systems stay smooth, poor ones get worse
- Moisture handling separates good tents from frustrating ones
- Warranty sounds important, but real-world build quality matters more
This section isn’t about comparing features—it’s about understanding what each tent demands from you as an owner.
Once you see it this way, choosing becomes much clearer.
Real-World Camping Scenarios with a Subaru Forester Rooftop Tent (What Actually Works, When, and Why)
Most rooftop tent advice stops at features. Real decisions happen when you match a tent to how you actually travel—short solo runs, family trips, cold mornings, windy ridgelines, mixed terrain days. The Forester is capable, but it rewards setups that respect its size, weight limits, and daily usability.
Below is how these tents behave in real scenarios, not ideal conditions.
Solo Weekend Runs (Drive, Stop, Sleep, Move Again)
If your trips look like this—leave Friday, drive long, stop late, wake up and move again—then setup speed and low hassle matter more than anything else.
Hard shells shine here:
- Naturnest Sirius 1 Plus and ROVEROLL Aluminium open in seconds and close just as quickly
- Minimal thinking, minimal effort, no “do I really want to set this up tonight?” hesitation
On a Forester, this matters even more because you’re often using the vehicle daily. A tent that feels like a burden after a few trips quickly stops getting used.
What works best in this scenario:
- Lightweight-to-midweight hard shell
- Simple deployment mechanism
- Minimal exterior bulk for daily driving
What doesn’t:
- Large soft shells that take time to open and pack
- Heavy setups that make short trips feel like overkill
Family Trips with Kids (Space, Comfort, and Patience)
Family camping changes everything. Space becomes non-negotiable, and setup time becomes less important than how comfortable everyone feels once inside.
This is where something like the OVS Nomadic 4 Extended makes sense:
- True 4-person layout
- Room to move, sit, organize
- Better for staying in one place instead of moving daily
But here’s the real trade-off on a Forester:
- Heavier load → requires proper rack upgrade
- Larger footprint → more planning for parking and driving
For smaller families (2 adults + 1 child), a 2–3 person hard shell like Sanhima or WildFinder often works better. You keep things manageable without sacrificing comfort.
What works best:
- Honest capacity (not pushing limits of smaller tents)
- Good mattress + airflow
- Organized interior (storage, lighting)
What doesn’t:
- Overloading the roof just for “extra space”
- Tight tents where sleep becomes uncomfortable
Cold Weather & Shoulder Season Camping (Where Gear Gets Tested)
This is where specs stop being theory. Cold air, condensation, wind chill—everything feels different on a rooftop.
Tents that handle this well:
- JOYINRUTE Aluminium Pro (with thermal liner)
- Sanhima Hotham Lite (insulated base + better airflow control)
What actually matters here:
- Insulation layers (not just waterproofing)
- Condensation control (base + ventilation)
- Fabric thickness and sealing
On a Forester, smaller enclosed spaces actually help retain heat—but only if the tent is designed for it.
What works best:
- Controlled airflow (not wide-open mesh everywhere)
- Blackout + insulation combo
- Dry base system
What doesn’t:
- Thin fabric setups in cold conditions
- Ignoring condensation (this ruins sleep faster than cold)
Remote Drives & Wind-Prone Areas (Where Stability Shows Up)
This is where you stop trusting specs and start noticing build quality.
Driving into open terrain, hills, or coastal areas:
- Wind hits harder
- Stability matters more
- Noise and movement become noticeable
Tents that feel solid here:
- ROVEROLL Aluminium (stable frame + balanced weight)
- Naturnest Sirius 1 Plus (tight shell, less flex)
- WildFinder (all-aluminum durability over time)
What actually makes the difference:
- Rigid shell structure
- Proper mounting alignment
- Lower profile (reduces wind drag)
On a Forester, this is critical because:
- It’s lighter than trucks
- You feel roof weight more directly
What works best:
- Slimline or well-balanced hard shells
- Tight fabric tension and secure mounting
What doesn’t:
- Poorly installed tents (even good ones feel unstable)
- High-profile soft shells in strong wind zones
Mixed Trips (Highway + Trails + Daily Driving)
This is the most common real-world use—and where balance matters.
You want:
- A tent that doesn’t kill fuel economy
- Something you don’t need to remove after every trip
- Enough comfort for 1–2 nights without overbuilding
Best fits here:
- Naturnest Sirius 1 Plus (all-rounder)
- Sanhima Hotham Lite (low profile + refined feel)
- ROVEROLL Aluminium (space without going oversized)
This is where most Forester owners end up—needing something that works both on the road and at camp without compromise.
What This Really Comes Down To
Every scenario above isn’t about the tent—it’s about how the tent fits your routine.
- If you move often → speed matters
- If you stay longer → space matters
- If you camp in cold → insulation matters
- If you drive far → weight and stability matter
The Forester rewards setups that stay balanced.
Once that balance is right, everything else—comfort, usability, reliability—falls into place naturally.
FAQs About Subaru Forester Rooftop Tents
Can a Subaru Forester realistically handle a hard shell rooftop tent long-term without affecting driving?
Yes—but only if you respect the setup, not just the spec sheet. A Forester can carry hard shell tents like Naturnest or Sanhima without issue when paired with a properly rated rack system, but the real difference shows up in daily driving. You’ll feel it in crosswinds, braking, and highway stability if the setup is pushing limits.
The key isn’t “can it carry it?”—it’s does it still drive like a Forester after mounting it?
If the answer is yes, your setup is right. If it starts feeling heavy, noisy, or slightly unstable, that’s your signal—not the spec sheet.
Is a 4-person rooftop tent actually practical on a Subaru Forester, or just overkill?
It’s practical—but only for a specific type of user. A tent like the OVS Nomadic 4 works if you’re doing planned trips, longer stays, and you’ve already upgraded your rack system properly.
But for most Forester owners, it becomes overkill after the first few trips. Not because it doesn’t fit—but because:
- Setup takes longer
- Weight affects daily usability
- You start avoiding removing it
If you’re not consistently camping with family, a 2–3 person setup ends up being used far more often. Real-world use always beats theoretical capacity.
What actually makes a rooftop tent feel “premium” on a Forester after multiple trips?
It’s not branding, and it’s not even the material alone. What feels premium over time is consistency.
- A tent that opens the same way every time
- Zippers that don’t fight back after dust exposure
- A mattress that doesn’t flatten after 5–6 nights
- A shell that doesn’t develop noise or flex
You stop noticing these things when they work—and that’s exactly what makes a setup feel premium. The moment you start adjusting, fixing, or thinking about it too much, it’s not.
How do you actually reduce noise, drag, and that “heavy roof feeling” on a Forester?
Most people assume it’s just weight—but it’s more about profile and mounting quality.
A slimline tent like Sanhima will feel quieter than a bulkier one even if the weight is similar. Proper alignment across crossbars matters just as much—if the load isn’t balanced, you’ll feel subtle instability even at normal speeds.
Small things that make a big difference:
- Keep the tent centered, not offset
- Use low-profile designs where possible
- Avoid stacking unnecessary gear on top
Done right, the tent becomes part of the car. Done wrong, it always feels like something sitting on top of it.
What’s the one mistake people realize only after buying their first rooftop tent?
They buy based on features instead of how often they’ll actually use it.
A big, feature-loaded tent sounds great—until setup takes longer than expected, or the weight makes daily driving less enjoyable. That’s when usage drops.
The setups people stick with are usually simpler:
- Fast to open
- Easy to live with
- No extra thinking required
Because in real life, after a long drive, you don’t care about specs—you care about how quickly you can stop, open, and rest without effort.
Closing Thoughts (What Actually Matters After Everything You’ve Seen)
At this point, it’s not about which rooftop tent is “best.” It’s about which one you’ll actually use without second-guessing it every time you plan a trip.
A Subaru Forester is a balanced vehicle—it’s not built to carry extremes, and it doesn’t need to. The setups that work best on it are the ones that respect that balance. When the tent, rack, and usage all align, something interesting happens: the whole system disappears. You stop thinking about weight, setup, and fitment—and you just use it.
That’s the difference between a tent that looks good in a list and one that becomes part of your routine.
If you’re someone who moves often, stops late, and wants things to work instantly, the faster hard shell setups will make more sense. If you care about space, slower mornings, and longer stays, the larger soft shell builds start to justify themselves—but only if you’re ready to support them properly.
There’s no perfect choice here—only the one that fits your pattern.
And that’s the part most people skip.
They choose based on specs, not habits. Then they adjust their trips around the tent instead of the other way around. The right setup does the opposite—it adapts to you, quietly, every single time.
So don’t overthink the list.
Pick the one that feels natural for how you already travel.
Because the best rooftop tent isn’t the one with the most features—it’s the one that makes you stop less, set up faster, and wake up exactly where you wanted to be without any friction.
Also Check:


