
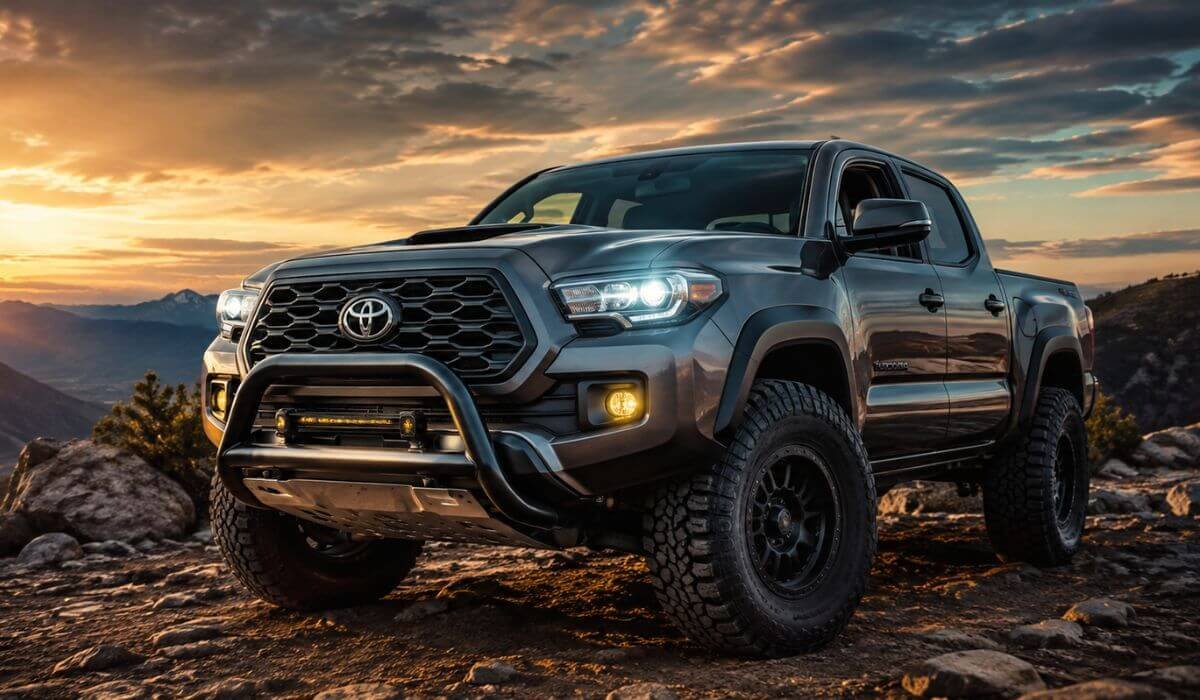
5 Best Bull Bar for Toyota Tacoma in 2026: Stainless Steel, Radar-Safe & Off-Road Ready Picks
If you drive a 2024–2026 Toyota Tacoma, choosing a bull bar is not really about finding the biggest tube or the most aggressive-looking front end. The details that matter are much less obvious: 2.5-inch versus 3-inch tubing, stainless steel versus coated steel, mounting design, skid-plate coverage, lighting provisions, and—most importantly—what sits behind the factory bumper. A bull bar can look perfect in a product photo and still be the wrong choice if its brackets or structure conflict with your Tacoma’s front-mounted equipment.
That is why this list is built around the things I would check before spending my own money. The five options here cover both polished stainless and black-finished steel, with different approaches to protection, appearance and installation. Some are deliberately clean and minimal, while others add a skid plate, support structure or lighting provisions. Sensor compatibility also deserves a serious check, because not every Tacoma configuration has the same front-end equipment.
And there is an important generation detail worth clearing up: these picks are specifically centred on the fourth-generation Tacoma introduced for 2024, covering the 2024–2026 model years. They should not be treated as interchangeable with older Tacoma bull bars simply because the product title says “Tacoma.” If you want a front-end upgrade that actually makes sense once the truck is on the road—not just something that looks tough sitting in a listing photo—fitment comes first, construction second, and styling third.
Best Toyota Tacoma Bull Bars: Top 2026 Picks for 2.5-Inch & 3-Inch Tubing
#1. Vanguard SS 2.5-Inch T304 Stainless Steel Bull Bar
Best Stainless Steel Bull Bar for 2024–2026 Toyota Tacoma With Mirror-Polished T304 Construction and a Clean Front-End Profile
#2. Vanguard BK 2.5-Inch Q235 Steel Bull Bar
Best Black Steel Bull Bar for 2024–2026 Toyota Tacoma With E-Coated Protection and a Rugged Powder-Coated Finish
#3. TAC 3-Inch Marine-Grade Stainless Steel Bull Bar
Best Stainless Steel Front Bull Bar for 2024–2026 Toyota Tacoma With 3-Inch Tubing, Skid Plate and Light Mounting Provisions
#4. TAC 3-Inch Heavy-Duty Black Steel Bull Bar
Best Black Steel Bull Bar for 2024–2026 Toyota Tacoma With Textured Powdercoat, Skid Plate and Optional Light Mounting Points
#5. PARTREE 3-Inch Carbon Steel Bull Bar
Best Feature-Rich Bull Bar for 2024–2026 Toyota Tacoma With Support Beams, Integrated LED Lighting and Rugged Front-End Coverage
Must Check: Best Grille Guard for Toyota Tacoma
Expert Tip
With the 2024–2026 Tacoma, I would not choose a bull bar just because the photos look good. This is a newer generation, and the front end has more to consider than an older Tacoma. Measure the mounting area, check your sensor setup, and confirm the exact model-year fitment before ordering. A bull bar should sit cleanly without creating unnecessary interference with the truck’s factory equipment. If you want a tougher appearance with some front-end coverage, these compact 3-inch options make more sense than jumping straight to a heavy full-width guard.
How We Choose These Bull Bars
We kept the selection deliberately tight because all five options are designed around the 2024–2026 Tacoma, and there is still much less long-term owner feedback available than you would find for older Tacoma accessories. Rather than pretending there is years of field data behind every product, we looked at what can actually be verified from the product specifications and fitment information.
Construction came first. The Vanguard SS and TAC stainless-steel models stand out for buyers who want a corrosion-resistant metal finish, while the black Vanguard and TAC options appeal to owners building a darker, more aggressive front end. We did not treat a black finish as a performance upgrade; it is primarily a style and finish choice.
Tube size also mattered. The TAC options use 3-inch tubing, giving them the substantial appearance most people expect when searching for a Tacoma bull bar without moving into the size and weight of a full grille guard.
Fitment was a bigger filter than appearance. A bull bar that looks perfect in a listing photo is still a poor recommendation if it does not work with your particular front-end equipment. That is why the PARTREE model sits lower in our ranking: its stated limitation for front radar sensor models is something a buyer should know before spending money, not after the package arrives.
We also separated the products by what they genuinely do well rather than forcing every model into the same “best overall” category. Stainless steel, black finish, tubing size, front-end appearance, and compatibility considerations give each product a different reason to make the list.
Most importantly, we have not ranked these simply by popularity or inflated review numbers. These are newer Tacoma accessories, so we would rather be transparent about the available information than manufacture confidence that does not exist yet. The result is a shortlist built around real specifications, stated fitment, construction and practical buying considerations—the things that actually matter once you move past the product photos.
#1. VANGUARD SS Bull Bar
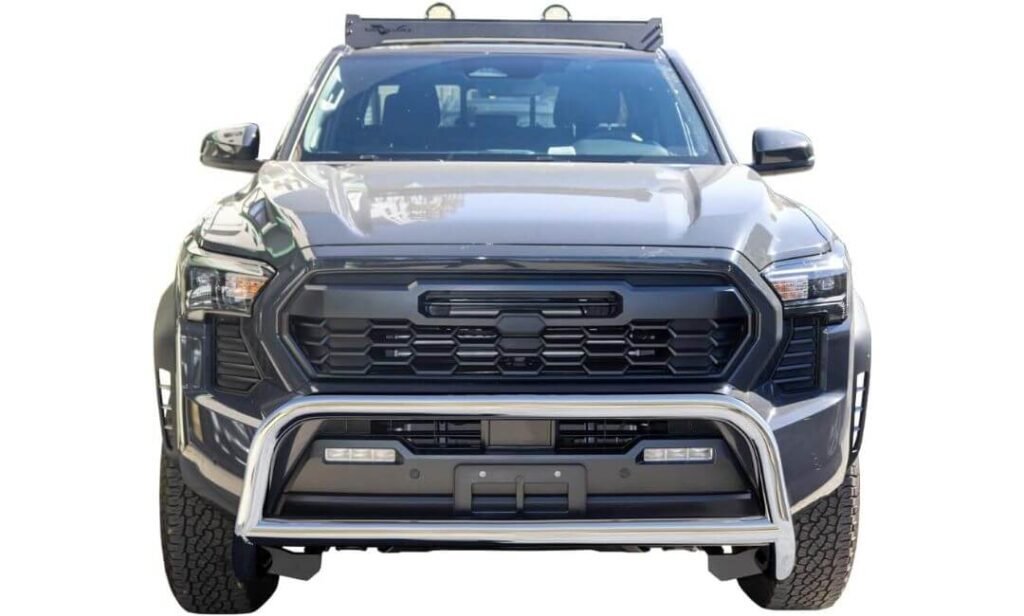
Quick Specs:
- Construction: 2.5-inch T304 stainless steel tubing
- Finish: Mirror-polished chrome
- Fit: Vehicle-specific design for the 2024–2026 Toyota Tacoma
- Installation: Bolt-on setup with mounting hardware included
- Modification: Minor undercarriage cover trimming may be needed
- Lighting: Built-in provision for two integrated LED lights
- Design: Slim front-end profile without a bulky skid plate
If you want the Tacoma to look tougher without covering its entire front end in steel, this is the kind of bull bar that gets the balance right. The 2.5-inch T304 stainless steel tubing gives it a substantial presence, while the mirror-polished finish keeps the front of the truck looking clean rather than overly built. It follows the factory bumper contour instead of trying to turn the Tacoma into something it is not.
The vehicle-specific construction is one of the reasons this option makes sense for a newer Tacoma. You are not dealing with a generic bar that happens to fit a pickup; the design is made around the truck’s front-end shape. The included mounting hardware also keeps the installation straightforward, although some trucks may need minor trimming of the undercarriage cover to get everything sitting correctly.
There is also a practical detail that is easy to miss in product photos: the design leaves room for two integrated LED lights. They are more of a useful finishing touch than the main reason to buy it, but they give the front end another layer of functionality without adding a bulky light bar. (A clean stainless-steel setup that adds presence without overwhelming the factory front end.)
What We Like About It
- T304 stainless steel gives the bar a more premium feel than ordinary painted tubing.
- The mirror-polished finish works especially well when you want protection without a blacked-out appearance.
- Its vehicle-specific shape keeps the front end looking intentional rather than aftermarket-for-the-sake-of-it.
- Bolt-on mounting hardware is included, which makes the project much more approachable for a home installation.
- The minimalist design avoids adding a large skid-plate structure where you may not actually need one.
What We Would Keep in Mind
- Minor undercarriage trimming can be part of the installation on some Tacoma configurations, so have the right cutting/trimming tools available before starting.
Tacoma Fitment & Installation Notes
This bar is listed specifically for 2024–2026 Toyota Tacoma models, making it a much more relevant choice for the current-generation truck than simply buying a universal pickup bull bar. The vehicle-specific construction is intended to follow the Tacoma’s factory contours, and the supplied hardware keeps the installation in the bolt-on category.
For installation, plan for a little more than simply tightening four bolts. Most vehicles require some undercarriage-cover trimming, so it is worth test-fitting the assembly before making any cuts. That small preparation step can make the difference between a clean finished installation and a bar that looks slightly out of place.
The Insider Pro-Tip
The smartest way to install a polished stainless bull bar is to test-fit everything before touching the undercarriage cover. Get the mounting points aligned, check the clearance around the bumper, and only then trim what genuinely needs to move. You preserve the factory look and avoid removing more material than necessary.
And one more thing: don’t judge this style of bull bar only by how aggressive it looks in a product photo. Its real appeal is the combination of T304 stainless construction, clean contour, compact footprint and easy bolt-on approach. If your goal is to give the Tacoma a stronger front-end presence while keeping the truck looking like a Tacoma, that balance is exactly where this setup earns its place.
#2. VANGUARD BK Bull Bar
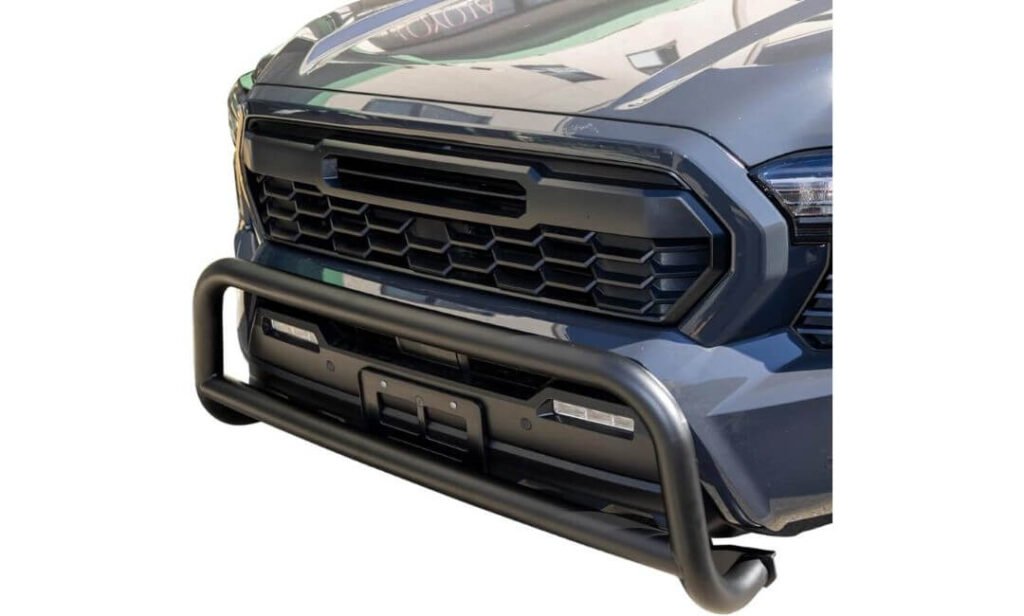
Quick Specs:
- Construction: 2.5-inch Q235 structural steel tubing
- Finish: Electrophoretic black primer with black powdercoat top layer
- Fit: Vehicle-specific design for 2024–2026 Toyota Tacoma
- Installation: Bolt-on mounting with assembly hardware included
- Modification: Undercarriage plastic trimming is required on most vehicles
- Lighting: Two integrated LED lights
- Profile: Compact design without an added skid plate
A black bull bar can easily make a Tacoma look overbuilt, but this one takes a more restrained route. The 2.5-inch Q235 structural steel tubing gives the front end some visual weight without turning it into a massive bumper replacement. The black finish also works particularly well if the rest of your truck already has dark exterior accessories.
What makes the finish more interesting than a simple coat of black paint is the electrophoretic primer underneath the powdercoat. That two-stage approach gives the steel an additional layer of protection against corrosion while keeping the outside looking clean and uniform. For a truck that actually sees rain, dirt and road grime, that is a detail worth paying attention to rather than treating the finish as purely cosmetic.
The mounting design is equally practical. It is built around the Tacoma’s front-end contour and comes with the required assembly hardware, so there is no need to start fabricating brackets just to make the bar sit correctly. Most installations do require some trimming of the plastic undercarriage cover, and access to the hidden frame bolts can require small holes through the plastic trim. That sounds more dramatic than it is; it is simply the part of the installation that deserves a little patience. (The appeal here is simple: structural steel, a properly layered black finish and a compact profile that does not fight the Tacoma’s original design.)
What We Like About It
- Q235 structural steel gives this version a more substantial feel than lightweight decorative tubing.
- The electrophoretic primer plus powdercoat is a thoughtful finish combination for a truck exposed to weather and road debris.
- The vehicle-specific shape keeps the bar visually integrated with the Tacoma’s bumper.
- Two integrated LED lights add a useful finishing touch without requiring a separate light bar.
- The compact design gives you front-end presence without adding a bulky skid-plate assembly.
What We Would Keep in Mind
- Undercarriage trimming and access holes for hidden mounting bolts may be required, so installation is easier when you take your time with the initial test fit.
Tacoma Fitment & Installation Notes
This is designed specifically around the 2024–2026 Toyota Tacoma, rather than being a universal steel bar adapted to several trucks. Its vehicle-specific mounting points and contoured profile are intended to keep the finished installation close to the factory bumper.
The important installation detail is behind the plastic trim. Some mounting hardware sits out of direct reach, so creating access points in the trim may be necessary. It is worth laying out the brackets and hardware first, marking exactly where access is needed, and then making the smallest possible openings. That keeps the finished installation much cleaner.
The Insider Pro-Tip
If you are installing this yourself, don’t rush the plastic-trimming stage. Bolt the structure loosely, check the alignment from both sides, verify bumper clearance, and only then make your access cuts. That sequence gives you far more control than cutting first and trying to make everything line up afterward.
The bigger reason I like this option is that it does not pretend to be something it isn’t. It is not a full-width recovery bumper or a heavy-duty grille guard. It is a compact structural-steel bull bar designed to add a tougher front-end character while retaining the Tacoma’s original shape. For an owner who wants that middle ground, that honesty is part of the value.
#3. TAC 3-Inch Stainless Steel Bull Bar
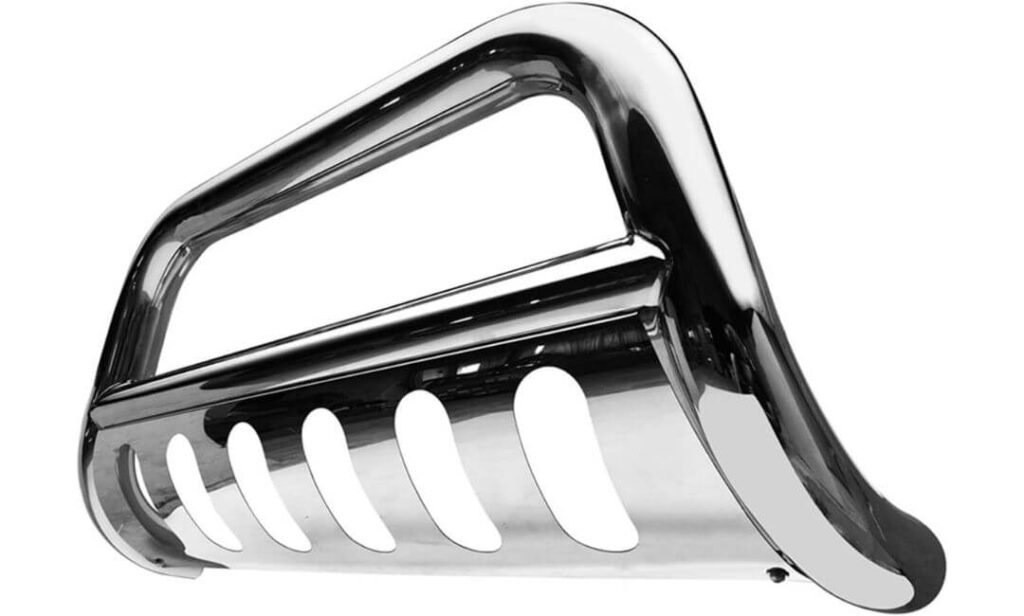
Quick Specs:
- Tubing: 3-inch marine-grade stainless steel
- Finish: Mirror-polished stainless steel
- Fit: Vehicle-specific front fit for 2024–2026 Toyota Tacoma
- Protection: Integrated skid plate for added lower-front coverage
- Installation: Direct bolt-on with mounting hardware and instructions
- Fabrication: CNC-bent tubing with custom-made mounting brackets
- Lighting: Pre-drilled mounting points for an optional light bar
- Important: Front-mounted sensors may be affected; fitment should be confirmed before ordering
This is the kind of bull bar that makes sense when you want more than a visual upgrade. The 3-inch marine-grade stainless-steel tubing gives the front of the Tacoma a noticeably heavier presence, while the integrated skid plate adds coverage underneath the bar. It feels more purposeful than a simple tube sitting across the bumper.
The mirror-polished finish is another reason this one stands apart. Instead of hiding the metal behind black paint, the stainless steel becomes part of the truck’s appearance. The tubing is CNC-bent for consistent curves, and the custom brackets are designed around the Tacoma rather than relying on a universal mounting arrangement. That combination is what helps the finished bar look properly fitted instead of added on as an afterthought.
Installation is kept reasonably straightforward with a direct bolt-on design, supplied hardware and instructions. There are also pre-drilled points for adding an optional light bar later, which is useful if your build is still evolving. The one detail I would verify before placing the order is front-sensor compatibility; TAC specifically warns that the bar may interfere with front-mounted sensors on some configurations. (That check takes a few minutes and is far better than finding out after the box is opened.)
What We Like About It
- 3-inch marine-grade stainless steel gives it a substantial, premium construction.
- The integrated skid plate adds useful lower-front coverage that smaller bull bars leave exposed.
- CNC-bent tubing gives the front profile smoother, more deliberate curves.
- Pre-drilled light mounting points leave room for a future lighting upgrade.
- The mirror-polished stainless finish gives the Tacoma a distinctive look without relying on a painted coating.
What We Would Keep in Mind
- Front sensor compatibility needs to be confirmed before ordering if your Tacoma has front-mounted sensing equipment.
Tacoma Fitment & Installation Notes
The listing is specifically built around the 2024–2026 Toyota Tacoma, with vehicle-specific brackets and a front-mounted configuration rather than a generic universal fit. That is exactly what you want from an accessory sitting this close to the truck’s bumper and sensor hardware.
The installation itself is designed as a direct bolt-on job, with the necessary mounting hardware and instructions supplied. Still, I would treat the fitment check as part of the installation process—not an optional extra—because TAC explicitly notes possible interference with front-mounted sensors.
The Insider Pro-Tip
Before ordering this one, take a clear look at everything mounted across the lower front of your Tacoma, especially any radar or sensor hardware. If there is any doubt, confirm the setup with TAC first. A five-minute compatibility check is a much smarter move than trying to solve sensor clearance after installation.
What I particularly like here is the combination of 3-inch stainless tubing, a real skid plate and future light-bar provision. Those are three separate details that actually change how useful the accessory can be. If your goal is a more substantial front-end build without replacing the entire bumper, this is one of the more complete approaches in this group.
#4. TAC 3-Inch Black Bull Bar
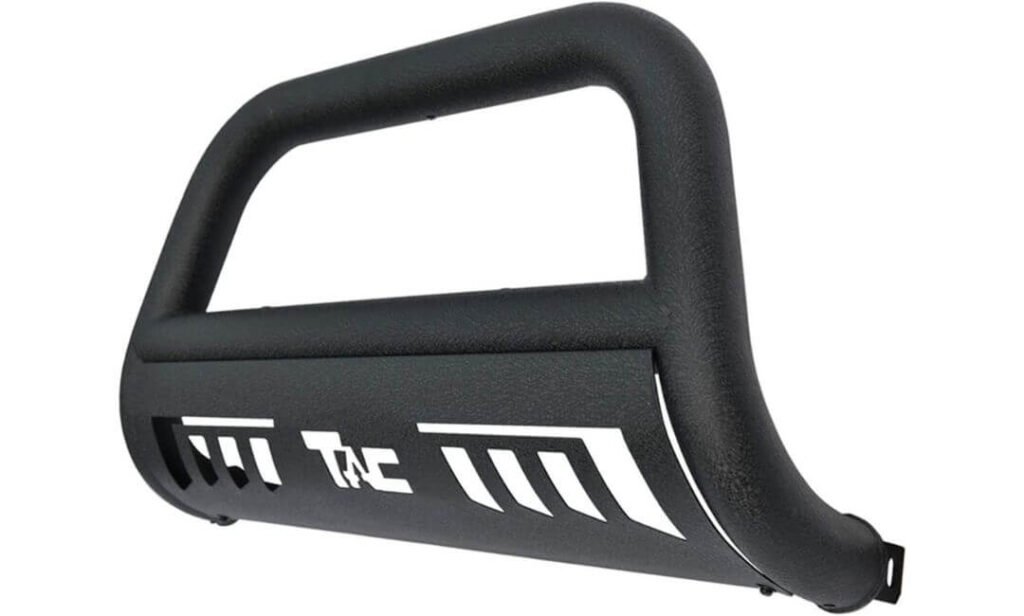
Quick Specs:
- Tubing: 3-inch heavy-duty mild steel
- Finish: E-coating with heavy-texture black powdercoat
- Fit: Vehicle-specific front fit for 2024–2026 Toyota Tacoma
- Protection: Integrated skid plate for lower bumper coverage
- Installation: 100% bolt-on with supplied hardware and instructions
- Fabrication: CNC-bent tubing with welded custom brackets
- Lighting: Pre-drilled mounting points for an optional light bar
- Important: Front-mounted sensors may require compatibility confirmation
If the stainless version is about showing off the metal, this one takes the opposite approach: black steel, textured finish and a more purposeful off-road attitude. The 3-inch mild-steel tubing gives the front end plenty of visual weight, while the included skid plate fills in the lower section that a simpler tube-style bar would leave open.
The finish is actually one of the more practical details here. Instead of relying only on powdercoat, the steel receives an E-coating underneath the heavy-texture black topcoat. That combination is intended to help with corrosion and everyday scratches, which matters on a truck that spends time around dust, gravel and road debris. The textured surface also hides minor marks better than a highly polished finish.
There is a nice bit of flexibility built into the design too. The CNC-bent tubing and welded custom brackets keep the shape clean, while pre-drilled light mounting points mean you can add auxiliary lighting later without changing the whole setup. Installation is advertised as 100% bolt-on with no drilling or cutting, although I would still check the front sensor area carefully before ordering because TAC specifically warns about possible sensor interference. (For a Tacoma build that leans toward blacked-out off-road styling, this is the more natural personality match.)
What We Like About It
- 3-inch mild-steel tubing gives the bar a properly substantial appearance.
- The E-coating plus textured powdercoat is a sensible finish combination for an accessory exposed to weather and trail debris.
- The included skid plate adds useful lower-front coverage.
- Pre-drilled light mounts make future lighting upgrades easier.
- The black textured finish is forgiving when the truck actually gets used rather than kept spotless.
What We Would Keep in Mind
- Front sensor clearance should be confirmed before purchase, particularly if your Tacoma has factory equipment positioned behind the front bumper area.
Tacoma Fitment & Installation Notes
This model is listed specifically for 2024–2026 Toyota Tacoma, with vehicle-specific brackets and a front-end design intended for the current-generation truck. The construction is not a universal tube adapted to several unrelated pickups, which is important when you’re dealing with bumper clearance and factory equipment.
The advertised bolt-on installation requires no drilling or cutting, with mounting hardware and instructions supplied. Even so, I would still do a complete dry fit before tightening everything down. That gives you the opportunity to check bumper alignment, skid-plate clearance and sensor spacing while the bar is still easy to reposition.
The Insider Pro-Tip
The textured black finish is the reason I would choose this over the polished version only if it matches the rest of your Tacoma build. If you already have black wheels, steps, recovery gear or other dark exterior accessories, this bar will look like part of the truck rather than one isolated shiny accessory.
And don’t overlook the skid plate and light provisions. They make this more than a styling piece: you get lower-front coverage now and an easy path toward auxiliary lighting later. Just settle the sensor question before ordering, and the rest of the installation is refreshingly straightforward.
#5. PARTREE Bull Bar
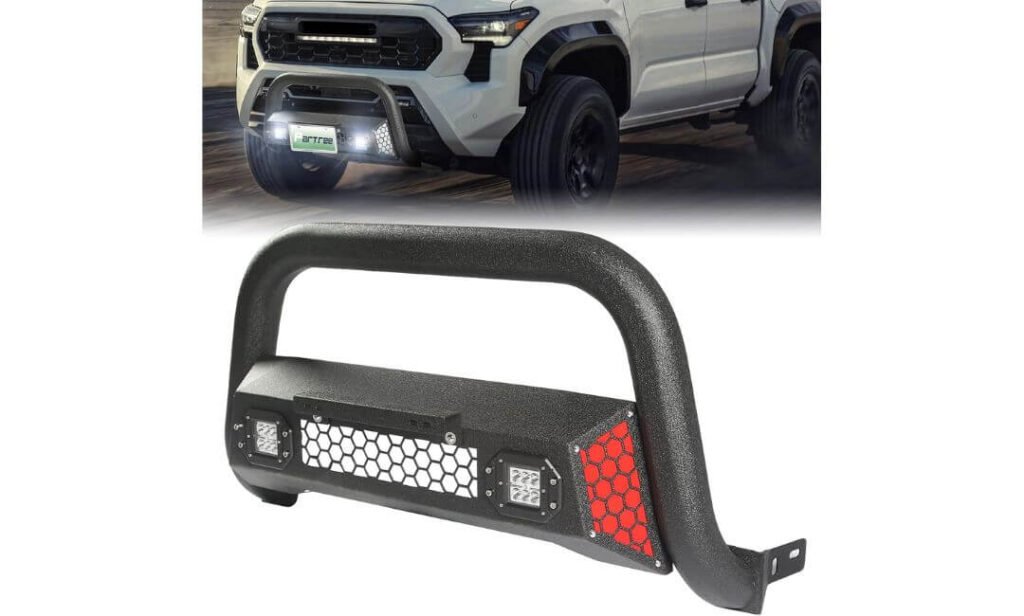
Quick Specs:
- Tubing: 3-inch heavy-duty carbon steel
- Finish: Thick powder-coated black surface
- Fit: Vehicle-specific design for 2024–2026 Toyota Tacoma
- Structure: Additional support beams for greater rigidity
- Lighting: Integrated 18-watt LED light
- Plate support: Dedicated license-plate bracket
- Installation: Direct bolt-on with hardware and instructions; no drilling required
- Warranty: Lifetime manufacturer warranty
- Important: Not compatible with Tacoma models equipped with a front radar system
There is one reason this bull bar deserves attention even though it sits fifth on our list: the extra support beams. That is not the sort of feature that jumps out in a product photograph, but structurally it gives the assembly a more substantial feel than a simple single-tube design. The 3-inch carbon-steel construction also gives it the chunky, rugged profile many Tacoma owners are actually looking for.
The thick powder-coated finish is built for the kind of environment a truck accessory has to live through. Dirt, moisture, road spray and trail debris are not exactly friendly to exposed steel, so having a corrosion-resistant coating matters. It also has a useful integrated 18-watt LED, along with a dedicated license-plate bracket, making the design feel more complete than a basic protective bar.
Installation stays in the DIY-friendly category with a bolt-on design and no drilling, although access around the brackets can take some patience on certain bumper configurations. The LED also needs a separate switch harness, so factor that into the lighting installation rather than assuming everything required for wiring comes in the box. (It is a rugged, feature-heavy option for buyers who want more hardware built into the front-end package.)
What We Like About It
- Support beams add a useful structural element that is not common across every bull bar.
- The 3-inch carbon-steel tubing gives the front end a strong, substantial profile.
- Integrated 18-watt LED lighting is handy for trail visibility without requiring an immediate separate light mount.
- The dedicated license-plate bracket is a small but genuinely practical touch.
- A lifetime manufacturer warranty adds confidence for buyers planning to keep the accessory long-term.
What We Would Keep in Mind
- Front radar-equipped Tacoma models are not supported, so this is one product where checking your truck’s equipment before ordering is essential.
Tacoma Fitment & Installation Notes
The bull bar is specifically listed for 2024–2026 Toyota Tacoma models, but its fitment has a firm boundary: front radar-equipped versions are excluded. That limitation is more important than the model year itself, so check the equipment on your particular truck before making the purchase.
The actual installation is designed to be straightforward, with no drilling required and the necessary mounting hardware supplied. On some configurations, reaching the bracket nuts can be awkward, particularly around the aluminum bumper area. That is more of a patience issue than a complicated fabrication job, but having a second set of hands can make the process considerably easier.
The Insider Pro-Tip
The integrated light is useful, but don’t mistake 18 watts for a high-output trail lighting system. It is better viewed as a built-in convenience light. If you regularly drive genuinely dark trails, plan your auxiliary lighting separately and budget for the required switch harness.
The bigger story here is the combination of 3-inch carbon steel, support beams, integrated lighting and a lifetime warranty. Those features make this a surprisingly complete package for someone who wants a rugged front-end upgrade. Just make the radar-compatibility check your first step—if your Tacoma is equipped with the excluded front radar system, this is simply not the right fit.
Best Toyota Tacoma Bull Bars (2024–2026) Compared for Steel, Finish & Front-End Protection
| Bull Bar | Build & Finish | Protection Approach | Installation | Useful Extras | Fitment Watch | Best For |
|---|---|---|---|---|---|---|
|
Best Premium Finish Vanguard SS Bull Bar |
2.5-inch T304 stainless steel Mirror-polished chrome finish |
Compact front-end coverage with a clean, minimalist profile |
Bolt-on mounting Minor undercarriage trimming may be needed |
Two integrated LED light provisions | Vehicle-specific 2024–2026 fit | Owners who want stainless construction and a refined front-end look without a bulky guard |
|
Best Black Finish Vanguard BK Bull Bar |
2.5-inch Q235 structural steel Electrophoretic primer + black powdercoat |
Sleek steel protection that keeps the factory bumper profile visible |
Bolt-on mounting Plastic trimming and access to hidden bolts may be required |
Two integrated LED lights | Vehicle-specific 2024–2026 fit | Builds that favour a dark, rugged appearance and practical steel construction |
|
Best Complete Setup TAC 3-Inch Stainless Steel Bull Bar |
3-inch marine-grade stainless steel Mirror-polished finish |
Heavier front-end presence with an integrated skid plate |
Direct bolt-on Hardware and installation instructions included |
Pre-drilled light mounting points + skid plate | Front sensors may require compatibility confirmation | Owners wanting stainless steel plus added lower-front coverage |
|
Best Black Off-Road Look TAC 3-Inch Black Bull Bar |
3-inch heavy-duty mild steel E-coating + heavy-texture black powdercoat |
Substantial front protection with an integrated skid plate |
Bolt-on installation Hardware and instructions included |
Pre-drilled light mounting points + skid plate | Front sensors may require compatibility confirmation | Owners building a blacked-out Tacoma with a tougher front-end stance |
|
Best Feature-Rich Pick PARTREE Bull Bar |
3-inch carbon steel Thick corrosion-resistant powdercoat |
Rugged construction with additional support beams |
Direct bolt-on, no drilling Bracket access can take patience on some configurations |
18W LED + license plate bracket + paintable trim panel | Not compatible with front radar sensor models | Buyers wanting extra structure and built-in features in one package |
Buying Guide: What to Look For in a Toyota Tacoma Bull Bar
A bull bar is one of those Tacoma upgrades that looks simple until you actually start comparing them. Tubing size, steel grade, finish, sensor clearance and mounting design can change the ownership experience more than a product photo ever will. For the current-generation Tacoma, I would make fitment and front-end compatibility the first checks, then choose the material and appearance that suit how you actually use the truck.
Start With the Construction, Not the Finish
The five options in this article are built around steel or stainless steel, so the meaningful comparison is not simply “metal versus metal.” The Vanguard SS uses 2.5-inch T304 stainless steel tubing, while the Vanguard BK uses 2.5-inch Q235 structural steel. The TAC options move up to 3-inch tubing, with the stainless model using marine-grade stainless steel and the black version using heavy-duty mild steel. PARTREE also uses 3-inch carbon steel.
For a Tacoma that sees wet roads, winter grime or regular outdoor use, stainless steel has an obvious appeal because it does not rely on a painted surface for its basic corrosion resistance. A polished finish also gives the truck a cleaner, more premium appearance. Powder-coated and E-coated steel, meanwhile, makes sense when you prefer a black off-road look and want a finish designed to resist corrosion and everyday scratching.
One important distinction: larger tubing does not automatically mean a better bull bar. A 3-inch bar generally looks more substantial, but your decision should also consider mounting structure, lower coverage, weight and how much front-end hardware you actually want.
Treat Front Sensor Compatibility as a First-Step Check
This is the part I would never skip on a newer Tacoma.
Some bull bars can sit close to factory front-mounted sensors, and manufacturers do not all make the same compatibility claims. TAC specifically warns that its stainless and black bull bars may interfere with front-mounted sensors, while the PARTREE model is explicitly listed as not compatible with front radar sensor models.
Do not assume that a product advertised for “2024–2026 Tacoma” automatically works with every truck from those years. The safest approach is to identify the equipment mounted around your front bumper, compare it with the manufacturer’s fitment information, and contact the manufacturer when there is any uncertainty.
A bull bar should complement the truck’s electronics, not create a problem you only discover after installation.
Decide How Much Front-End Coverage You Actually Need
Bull bars are not all trying to do the same job.
A compact tube-style bar is a sensible choice when you mainly want added front-end presence and some additional protection without changing the character of the truck. That is where the Vanguard options make sense, particularly if you prefer a cleaner, less bulky appearance.
The TAC stainless and black models add an integrated skid plate, giving the lower bumper area additional coverage. That makes them more interesting for owners who spend time on rough roads or trails where the lower front end is more exposed.
PARTREE takes another route with additional support beams, giving its structure a more substantial feel. If you want the most hardware built into the bull-bar assembly, that detail is worth considering.
Check the Installation Before Ordering
“Bolt-on” does not always mean “ten-minute installation.”
All five products are designed around bolt-on installation, but the amount of preparation can differ. The Vanguard models may require trimming of the undercarriage cover, while the BK version can also require access through plastic trim to reach hidden mounting bolts.
The TAC models are designed for direct bolt-on installation with mounting hardware and instructions supplied. PARTREE also uses a no-drilling bolt-on approach, although access around the brackets can require patience on some configurations.
Before starting, have the correct sockets, basic hand tools, a safe way to support the vehicle, and enough working space. Test-fit first, tighten later. If plastic trimming is required, mark the exact clearance you need rather than removing a large section unnecessarily.
Look at the Finish as Part of the Truck’s Overall Build
The finish is not just a cosmetic afterthought because it changes how the accessory will age and how easily it fits into the rest of your Tacoma.
Mirror-polished stainless steel gives the Vanguard SS and TAC stainless versions a brighter, more premium appearance. It works particularly well when you want the bull bar to stand out against the bodywork.
The black powder-coated finishes on the Vanguard BK, TAC black and PARTREE models create a more subdued off-road appearance. If your Tacoma already has dark wheels, steps or other black accessories, a black bull bar will generally look more intentional than a single polished component sitting on an otherwise dark build.
For buyers who actually use their truck off-road, a textured black finish can also be easier to live with because minor dust and trail marks are less visually obvious than on a polished surface.
Think About Lighting Before You Buy
Built-in or pre-drilled lighting provisions can be useful, but they should not be treated as the main reason to choose a bull bar.
The Vanguard models include two integrated LED lights, while both TAC designs provide pre-drilled mounting points for optional lighting. PARTREE includes an 18-watt integrated LED, but its separate switch harness is required for wiring.
That means the products offer different approaches. If you want a clean, ready-made lighting detail, an integrated setup is convenient. If you already have a preferred auxiliary light, pre-drilled mounting points give you more freedom to build the front end around your own equipment.
Do Not Confuse a Bull Bar With a Full Grille Guard
This distinction matters when deciding what you are actually buying.
A bull bar generally provides central front-end protection and a stronger visual barrier, while a full grille guard extends much farther across the front and around the grille and headlights. They are different products with different levels of coverage.
If your goal is a relatively compact upgrade that preserves the Tacoma’s original bumper design, the bull bars in this article are the more appropriate category. If you need extensive protection around the grille and lighting assemblies, you should be looking at a full grille guard instead.
Consider Your Actual Driving, Not the Toughest Product Photo
For daily driving, a clean 2.5-inch stainless option can be the smarter choice than adding a larger, heavier-looking assembly simply because it appears more rugged.
For trail use and rough roads, an integrated skid plate, stronger structural design and useful lighting provisions become more relevant. For a blacked-out build, the powder-coated steel options make more visual sense. And if corrosion resistance and a premium finish are high on your list, stainless steel deserves serious consideration.
The best bull bar is ultimately the one that matches your Tacoma’s equipment, your installation ability and the way you actually drive it. That is a much better buying decision than choosing the biggest tube or the most aggressive photograph.
Installation & Fitment Tips for a Toyota Tacoma Bull Bar
A bull bar can be a straightforward bolt-on upgrade, but fitment is decided before the final bolt is tightened. With the newer Tacoma, the biggest mistakes usually come from rushing the first test fit, trimming too much plastic, or overlooking factory equipment around the front bumper. Take your time during the positioning stage, and the finished result will look much more factory-integrated.
Confirm Everything Before You Touch the Truck
Before opening the toolbox, verify the exact model year and front-end equipment against the product’s fitment information. This matters particularly when the truck has front-mounted radar or other sensors.
Lay out the bull bar, brackets, hardware and instructions on the floor first. Make sure nothing is missing, then compare the brackets with the vehicle mounting points. If the manufacturer has warned about sensor compatibility, resolve that question before installation, not after the bar is already fitted.
Also check whether your particular setup requires undercarriage-cover trimming. Some of the options in this guide do, while others are designed as no-cut installations.
Test-Fit the Assembly Before Final Tightening
The smartest installation habit is simple: leave everything slightly loose at first.
Attach the brackets and position the bar without fully tightening the hardware. Step back and look at the spacing from both sides. Check that the bar sits level, follows the bumper contour and has even clearance around the surrounding bodywork.
This is especially important with a vehicle-specific accessory because even a small amount of movement at the mounting points can change how the finished bar sits. Do not use the final tightening stage to correct an alignment problem that should have been fixed during the test fit.
Handle Undercarriage Trimming Carefully
If trimming is required, do not start cutting based solely on the shape of the bracket.
First install the assembly loosely, mark only the area that actually interferes, remove the necessary trim, and test-fit again. A small opening that provides the required clearance is preferable to cutting away a large section of the factory plastic.
Use a proper cutting tool and clean the edges afterward. If you are uncomfortable modifying the undercarriage cover, this is one part of the job where paying an experienced installer can save time and prevent an unnecessarily rough-looking result.
Align the Bar Before Applying Final Torque
Once the bar is sitting correctly, tighten the mounting hardware gradually rather than fully tightening one side immediately.
A good sequence is:
- Centre the bar against the vehicle.
- Check left-to-right spacing around the bumper.
- Confirm that the bar is sitting level.
- Check clearance around sensors, wiring and nearby bodywork.
- Tighten the mounting hardware progressively from side to side.
- Recheck the alignment after everything is secure.
For torque, use the manufacturer’s specified torque value for the supplied hardware whenever one is provided. Do not guess a torque figure simply because the bolt looks similar to something you have used elsewhere. If no specification is supplied, an experienced installer should determine the correct value based on the hardware and mounting arrangement rather than blindly tightening everything as hard as possible.
Pay Attention to Hidden Mounting Points
Some installations place mounting hardware behind factory plastic trim. That can make the job feel awkward even though the actual assembly is mechanically simple.
Do not force a socket into an opening that is too small or start cutting blindly. Identify exactly where the fastener needs access, mark the location, and create the smallest practical access opening if the installation instructions call for it.
This is also where having a second person helps. One person can hold and align the bar while the other starts the hardware, which reduces the chance of cross-threading or pulling the bracket out of position.
Check Sensor and Wiring Clearance Again
Once the bar is installed, perform another inspection around the front bumper.
Look for anything touching or sitting unnecessarily close to factory sensors, wiring, lighting components or moving parts. If auxiliary lights are being installed, route the wiring away from sharp edges, hot components and areas where it could be pinched.
A clean installation is not simply one where the bar looks straight. The surrounding equipment should have enough clearance to operate as intended.
Common Installation Mistakes to Avoid
- Fully tightening one side first: This can pull the bar out of alignment and make the opposite side difficult to position.
- Cutting plastic before test-fitting: You may remove material that was not actually in the way.
- Ignoring sensor warnings: A model-year match does not automatically guarantee compatibility with every front-end configuration.
- Using excessive force on mounting bolts: More torque is not automatically better and can damage hardware or mounting points.
- Skipping the second clearance check: Always inspect the finished installation after tightening everything.
- Routing light wiring carelessly: Keep cables protected from abrasion, heat and moving components.
- Working alone with a heavy assembly: A second person makes alignment safer and considerably easier.
- Treating bolt-on as zero-preparation: Bolt-on describes the mounting method; it does not guarantee that every piece of factory trim will remain untouched.
When Professional Installation Makes More Sense
If you are comfortable with basic hand tools and careful vehicle-accessory work, these installations are generally approachable. However, professional installation is sensible if you are uncertain about sensor clearance, uncomfortable trimming factory plastic, unable to safely support the assembly, or unsure about the correct torque procedure.
The goal is not simply to get the bull bar onto the truck. The goal is to have it level, secure, properly aligned and clear of the Tacoma’s factory equipment when the job is finished.
Radar & Sensors Compatibility Guide for a Toyota Tacoma Bull Bar
On a newer Tacoma, sensor compatibility deserves more attention than the finish or tube size. A bull bar sits directly in the area where the truck’s factory front-end hardware may need a clear field of view. That is why two products advertised for the same model years can still have very different compatibility requirements.
Why a Bull Bar Can Affect Front Sensors
Aftermarket front protection changes the physical space around the bumper. Depending on the vehicle’s equipment and the exact mounting position, a tube, bracket, skid plate, or even an auxiliary light can sit where a sensor needs an unobstructed view.
The important point is that model-year fitment and sensor compatibility are not the same thing. A product can physically bolt onto a 2024–2026 Tacoma and still require additional verification if the truck has front-mounted sensing equipment.
That is particularly relevant with the products in this guide. Some listings specifically warn about possible interference, while the PARTREE option clearly excludes models equipped with a front radar system. Those warnings should be treated as actual fitment information, not as small-print marketing language.
Check the Product Listing for More Than the Model Year
Before ordering, look for specific wording about:
- Front radar compatibility
- Front-mounted sensors
- Sensor clearance around the bumper
- Vehicle-specific mounting brackets
- Restrictions for particular factory equipment
- Whether the manufacturer recommends confirming fitment before purchase
If the listing says the accessory may interfere with front-mounted sensors, do not assume that means it will definitely work on your truck. It means the manufacturer has identified a potential compatibility issue and wants the buyer to verify the configuration.
Likewise, if a product specifically says not compatible with front radar sensor models, treat that as a hard restriction rather than something that can be solved by adjusting the bar during installation.
What to Check on Your Tacoma
Before buying, inspect the front of the truck and identify the equipment positioned around the bumper area. You do not need to dismantle anything just to perform this check.
Look for factory sensors or radar hardware positioned behind or around the front bumper, then compare that location with the bull bar’s mounting area and manufacturer documentation. If you are unsure what equipment your truck has, the safest route is to confirm it through the vehicle documentation or a Toyota service professional.
Also remember that adding accessories after the bull bar can change the equation. An auxiliary light, wiring, mounting bracket, or other front-end accessory can create clearance issues even when the bull bar itself was compatible.
Why the Included Skid Plate Matters Too
A skid plate is useful for lower-front protection, but it also becomes another physical component around the front of the truck.
The TAC options in this guide include an integrated skid plate, so the complete assembly should be considered when checking clearance rather than looking only at the upper tube. The same principle applies to support brackets and auxiliary lighting.
Think about the entire installed assembly, not just the piece that is easiest to see in the product photograph.
Do Not Assume a Clear Installation Means Perfect Sensor Operation
This is an easy mistake to make.
A bull bar can appear perfectly centred, sit away from the bumper and have no obvious physical contact with a sensor, yet that does not automatically prove that every factory sensing function will operate normally.
That is why manufacturer confirmation is more valuable than visual guesswork. If the product listing raises a sensor warning, send the manufacturer your exact Tacoma model year and equipment configuration and ask for confirmation before purchasing.
For this article’s options, that step is especially important with the TAC models because their listings warn about possible front-sensor interference.
A Safe Approach to Aftermarket Front Protection
The safest process is straightforward:
- Identify the factory front sensing equipment on your Tacoma.
- Read the complete fitment notes, not just the headline model-year range.
- Check whether the manufacturer specifically mentions radar or front sensors.
- If compatibility is uncertain, contact the manufacturer before ordering.
- Install the bar according to the supplied instructions.
- Check physical clearance around sensors, wiring and other factory equipment.
- If a factory sensing system reports an error after installation, do not ignore it or assume it will correct itself.
- Have the vehicle inspected by a qualified technician if the warning persists.
The Most Important Rule
Do not choose a bull bar by asking only, “Will it fit my Tacoma?”
The better question is, “Will this exact bull bar fit my Tacoma without conflicting with the equipment already on it?”
That small change in thinking is what separates a clean aftermarket installation from an accessory that creates an avoidable headache. With a newer truck, confirmed compatibility is worth more than an aggressive photograph, a larger tube, or a cheaper price.
Maintenance & Longevity for a Toyota Tacoma Bull Bar
A bull bar does not need complicated maintenance, but the way you look after the finish and mounting hardware will determine how it looks and behaves years from now. This matters even more when the truck regularly sees mud, standing water, gravel roads or winter road grime. A few minutes of attention after a hard trip is far easier than trying to repair neglected corrosion later.
Clean It Before Dirt Becomes a Problem
Do not wait until the entire truck needs washing to clean the bull bar.
After driving through mud, salty roads, or heavy dust, rinse the tubing, brackets and lower sections with clean water. Pay particular attention to joints, mounting areas, the underside of the tubing and the skid-plate area, where dirt can stay trapped.
Use a mild automotive soap and a soft cloth or wash mitt for normal cleaning. Avoid aggressive abrasive pads on polished stainless steel because they can leave fine scratches that are surprisingly visible once the surface catches the light.
After washing, dry the metal rather than allowing dirty water to evaporate on its own. This is especially useful on polished stainless surfaces where water spots can quickly take away the clean finish.
Looking After the Stainless-Steel Finish
The stainless-steel options in this guide have a natural advantage when it comes to corrosion resistance, but stainless steel is not maintenance-free.
Road salt, brake dust, mud and other contaminants can sit on the surface for long periods and eventually affect its appearance. Regular washing is usually enough for normal use, while a suitable stainless-steel cleaner or polish can help maintain the mirror finish when necessary.
Keep harsh chemicals and strongly abrasive products away from the polished surface. If you notice a small mark, clean the area first rather than immediately trying to polish it aggressively.
For a truck that spends a lot of time near coastal roads or heavily salted winter roads, more frequent rinsing is worthwhile.
Caring for Black Powder-Coated Steel
The black finishes need a slightly different mindset.
A powder-coated surface provides a protective barrier over the steel, so chips and scratches deserve attention. If a stone or trail obstacle exposes the underlying metal, clean and address the damaged area rather than leaving bare steel exposed to moisture.
The textured black finish can hide everyday dust and minor marks better than polished stainless steel, but that does not mean dirt should be left sitting on it indefinitely.
A simple rinse, mild soap and soft cloth are usually all that is needed for routine care. Avoid aggressive pressure directly into seams, brackets or electrical connections.
Give the Mounting Hardware a Proper Inspection
The tubing gets most of the attention because it is what you see, but the mounting hardware is what actually keeps the accessory attached to the truck.
After installation, inspect the bolts and brackets periodically for signs of movement, corrosion, damaged threads or unusual gaps around the mounting points. If you notice the bar sitting differently from when it was installed, stop and investigate rather than simply tightening everything blindly.
Use the manufacturer’s recommended torque specification whenever one is provided. Do not substitute a random torque value based on the size of the bolt.
When to Recheck the Bolts
There is no universal re-torque interval that applies to every bull bar because hardware, mounting design and manufacturer instructions can differ.
A sensible approach is to perform an early inspection after the first few drives, particularly after the initial installation, and then include the mounting points in your normal vehicle-maintenance routine.
For trucks used off-road, make the inspection more frequent. Rough terrain, vibration and repeated impacts can place more stress on brackets and fasteners than ordinary road driving.
A practical routine is:
- Check the mounting hardware after the first few drives.
- Inspect everything after a significant off-road trip.
- Recheck after encountering unusually rough terrain or an impact.
- Include the brackets and bolts during regular vehicle servicing.
- Follow the manufacturer’s instructions if they specify a different inspection or torque schedule.
Give It a Post-Trail Inspection
After a serious off-road trip, do not just wash the truck and call it finished.
Look underneath the bull bar and inspect the brackets, skid plate, tubing, fasteners and surrounding plastic trim. Mud packed behind a bracket can hide corrosion or a loose fastener, while a small impact can move an assembly without leaving an obvious mark from the front.
Also check that any integrated or auxiliary lighting remains firmly mounted and that its wiring has not been pulled, pinched or rubbed against a sharp edge.
This is particularly important for a bull bar that has been used around rocks, branches or deep ruts. Five minutes with a flashlight can reveal something that would otherwise become a much bigger repair later.
What About Surface Rust?
If you spot discoloration or corrosion, deal with it early.
For stainless steel, start with gentle cleaning and use an appropriate stainless-steel product if needed. For coated steel, determine whether the mark is only on the coating or whether the underlying metal has been exposed.
Do not aggressively sand or scrape a coated surface just to make a small cosmetic mark disappear. If the protective coating has been damaged, the priority is cleaning, drying and restoring protection, not making the scratch invisible at any cost.
Long-Term Care Is Mostly About Consistency
The best maintenance routine is not complicated: keep the metal clean, inspect the mounting points, protect damaged finishes and check everything after hard use.
A well-maintained bull bar should continue to look like part of the truck rather than an accessory that has gradually become neglected. For the Tacoma, that means giving the polished stainless versions the care needed to retain their finish, while paying close attention to scratches and exposed steel on the black-coated options.
And after every genuinely rough trip, take a few minutes to look underneath. The front of the bar tells you how it looks; the brackets underneath tell you how well it is actually holding up.
FAQs About Toyota Tacoma Bull Bar
Does a 2024–2026 Toyota Tacoma bull bar interfere with the factory front radar or sensors?
It can, and this is one of the few questions I would answer before buying rather than after installing. The fact that a bull bar is advertised as fitting the 2024–2026 Toyota Tacoma only confirms the physical vehicle fitment; it does not automatically confirm compatibility with every factory sensor configuration.
The product information for some options in this guide specifically warns about possible front-sensor interference, while the PARTREE model is explicitly listed as not compatible with front radar sensor models. If your Tacoma has front-mounted sensing equipment, confirm compatibility with the manufacturer using your exact configuration before ordering. That is a much safer approach than assuming the bar will simply clear the sensor once installed.
Is a 3-inch bull bar actually better than a 2.5-inch bull bar for a Toyota Tacoma?
Not automatically. Tube diameter changes the physical presence of the bar, but bigger does not mean universally better. The Vanguard options use 2.5-inch tubing, while the TAC and PARTREE choices use 3-inch tubing, so there is a noticeable difference in how substantial they look and how much material is used.
If you want a cleaner, more restrained front end, a 2.5-inch design can be the better match. If you prefer a heavier visual stance and additional structure, 3-inch tubing makes more sense. I would judge the complete design—tubing, mounting brackets, skid plate, finish and intended use—rather than choosing purely by diameter.
Will installing a bull bar require cutting or permanently modifying my Toyota Tacoma?
That depends on the specific design. Several of the options here use bolt-on mounting, but bolt-on does not always mean that every piece of factory trim remains untouched.
Some configurations may require minor trimming of the undercarriage cover, while hidden mounting points can make access through plastic trim necessary. Other designs are marketed as no-drilling installations.
The sensible approach is to test-fit first, mark only the interference point, and then remove the minimum amount of trim required. If you are uncomfortable modifying factory plastic or cannot safely support the assembly during installation, professional installation is worth considering.
Can I add auxiliary lights to a bull bar later, or should I decide on lighting before installation?
You do not necessarily need to decide everything at once. Several designs in this guide already account for future lighting, either through integrated lights or pre-drilled mounting points.
The important part is understanding what is actually included. A built-in light is not the same thing as a complete high-output lighting system. For example, the PARTREE option includes an 18-watt LED, but its separate switch harness is required for wiring. The TAC designs provide mounting points for optional lighting rather than automatically turning the bull bar into a complete lighting package.
If you expect to add lights later, route and secure the wiring properly from the beginning. A clean installation now makes a future upgrade dramatically easier.
After installing a Toyota Tacoma bull bar, what should I check before considering the job finished?
Do not judge the installation only by whether the bar looks straight from ten feet away. The final inspection is part of the installation.
Check these areas carefully:
- Confirm the bar is evenly aligned from left to right.
- Make sure the mounting hardware is tightened according to the manufacturer’s specifications.
- Check clearance around the bumper, sensors, wiring and factory equipment.
- Look underneath for contact between the bar, brackets and surrounding trim.
- Verify that any integrated or auxiliary lights are securely mounted and correctly wired.
- Take the truck for a short road test, then inspect the mounting points again.
After the first few drives, it is also sensible to recheck the hardware. If you take the Tacoma onto rough trails, make post-trip bracket and fastener inspections part of your routine. A bull bar can look perfectly fine from the front while a loose bracket is developing underneath, so that five-minute inspection is one of the easiest pieces of maintenance to justify.
Final Thoughts
A good bull bar should make sense before it makes the truck look tougher. That is the biggest takeaway from comparing these five options. The current-generation Tacoma has enough front-end technology and model-specific hardware that buying purely from a product photo is an easy way to end up with the wrong accessory.
For a cleaner, premium appearance, the stainless-steel options have a strong argument. If you prefer a darker off-road build, the powder-coated choices fit that personality better. The larger 3-inch designs bring a more substantial presence, while the simpler 2.5-inch options keep the front end comparatively restrained. None of those choices is automatically “best” for everyone; the right one depends on how your Tacoma is equipped and how you actually use it.
The part I would take most seriously is fitment. Check your front sensors, mounting area and installation requirements before ordering. If a manufacturer asks you to confirm compatibility, do it. That small step is worth far more than saving a few minutes during the buying process.
And once the bar is installed, do not forget about it. Keep the finish clean, inspect the hardware after the first few drives, and give the brackets a proper look after rough off-road use. That is how an aftermarket accessory stays looking like a deliberate part of the truck instead of something bolted on and forgotten.
If I were narrowing the choice down, I would not ask, “Which one looks the most aggressive?” I would ask, “Which one gives my Tacoma the protection, appearance, construction and compatibility I can genuinely live with?” That is the decision that tends to feel right long after the excitement of opening the box has disappeared.
Also Check:


