6 Best Rooftop Tents for Subaru Crosstrek in 2026: Lightweight, Instant Setup & All-Weather Ready
If you drive a Subaru Crosstrek, you already know it’s not built like a full-size overland rig—and that’s exactly where most rooftop tent guides get it wrong. They recommend bulky, overweight setups that kill fuel economy, stress your roof rails, and turn a simple weekend trip into a headache.
This list is different. Every tent here is picked with the Crosstrek in mind—weight, mounting ease, real-world usability, and how it actually feels after a long drive when all you want is a quick, no-drama setup. I’ve focused on hard-shell options because they make the most sense for this car: faster deployment, better weather resistance, and less hassle when you’re packing up early morning.
Also, let’s be real—most of these models are newer, and reviews are still limited. So instead of hype, this is based on specs that actually matter on a Crosstrek: load compatibility, shell strength, insulation quality, and practical features you’ll use on every trip—not just marketing fluff.
If you’re here, you’re not browsing—you’re trying to pick one that won’t disappoint once it’s bolted to your roof. So let’s get straight to the ones that actually make sense.
Best Subaru Crosstrek Rooftop Tents: Top 2026 Picks for Quick Setup & Comfort
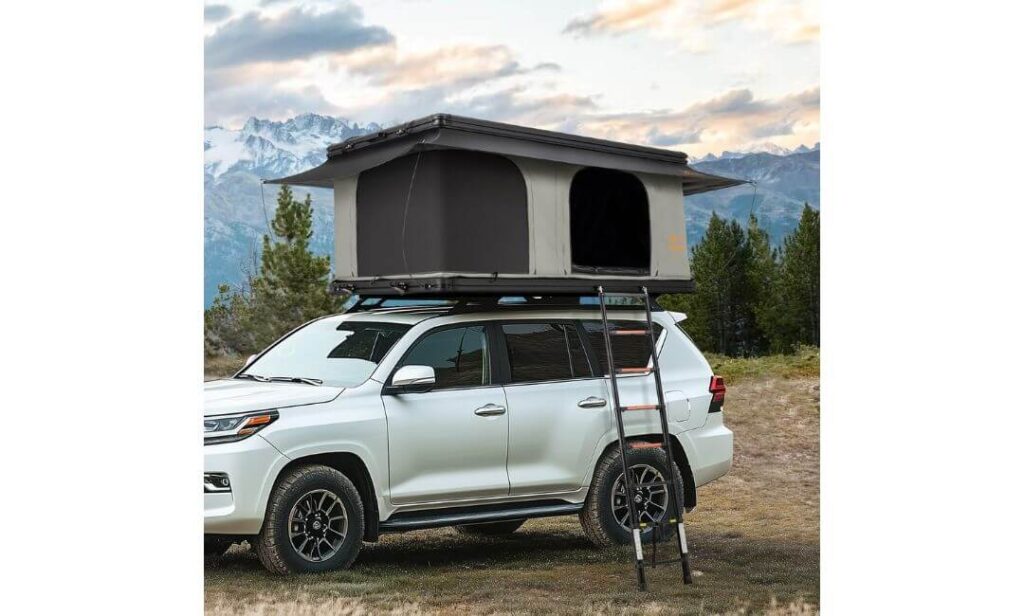
#1. JOYINRUTE Aluminum Hard Shell Rooftop Tent — Best lightweight rooftop tent for Subaru Crosstrek (winter-ready insulation)
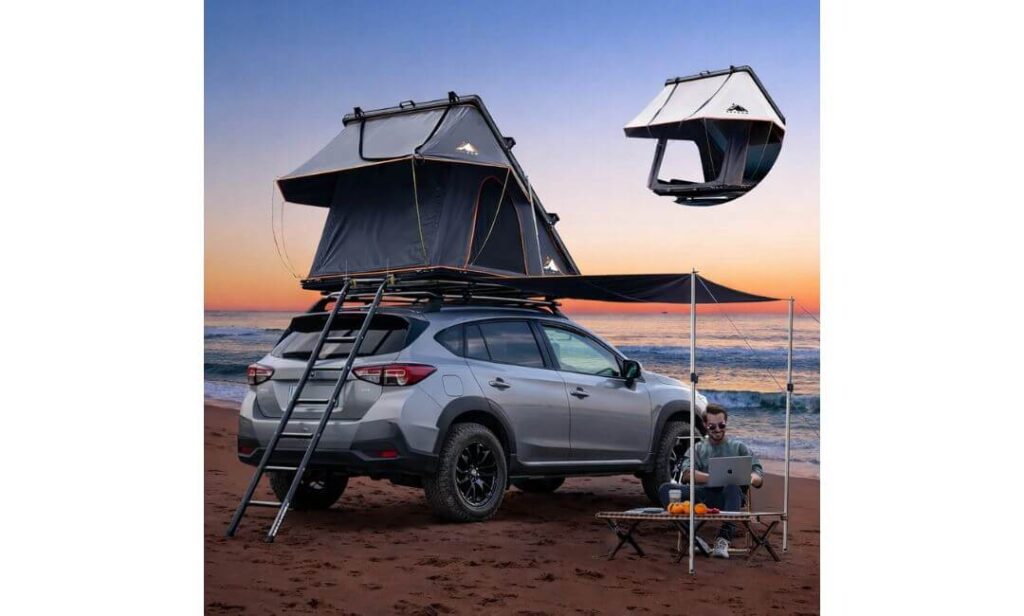
#2. HEYFUN Adventurer Pro Hard Shell Tent — Feature-packed rooftop tent for Crosstrek with awning & USB setup
#3. SanHima Gibb Overland Hard Shell Tent — Premium rooftop tent for Subaru Crosstrek with 360° view & LED lighting
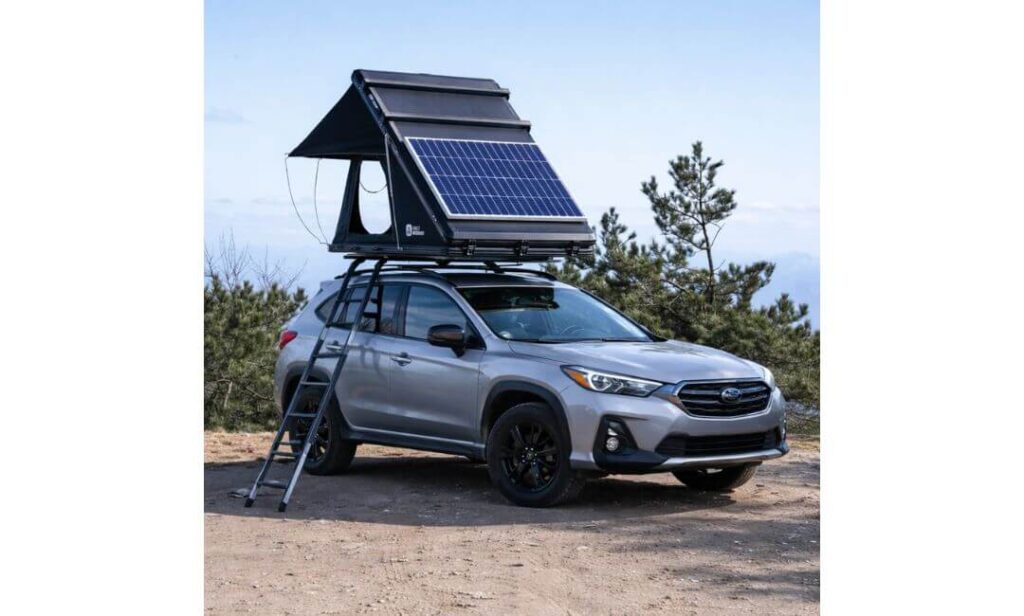
#4. ARCTWONDER Hard Shell Rooftop Tent — All-weather rooftop tent for Crosstrek with thermal layer & solar support
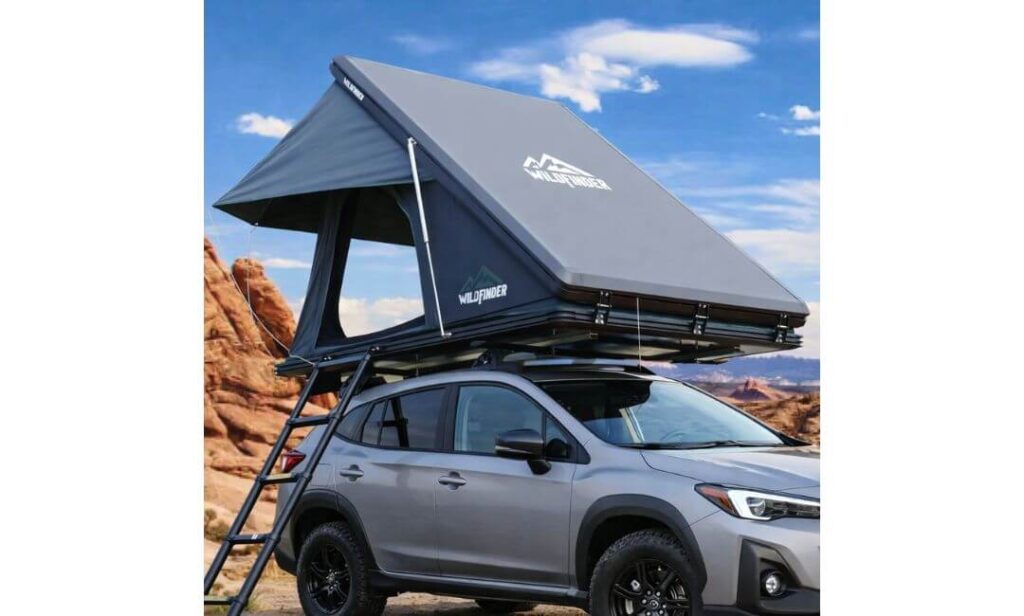
#5. WildFinder Hard Shell Rooftop Tent — Best value rooftop tent for Subaru Crosstrek (simple, reliable build)
#6. ILANDER Aluminum Rooftop Tent — Durable waterproof rooftop tent for Crosstrek with UV-resistant shell
Expert Tip (From Someone Who’s Actually Mounted These on a Crosstrek)
Here’s the thing most people realize after buying—your Crosstrek doesn’t fail because of the tent, it fails because of the setup around it.
Before you even think about brands or features, lock this in:
run a solid crossbar + rack system rated for dynamic load, not just static numbers. The Crosstrek can handle rooftop tents—but only when the weight is properly distributed. Cheap crossbars or factory rails alone? That’s where problems start—noise, flex, even long-term damage.
Also, don’t chase the biggest tent. On a Crosstrek, lighter and faster always wins. A 2–3 person hard shell that pops open clean in under a minute will get used every weekend. A bulky, heavy setup? It ends up sitting in your garage.
If you get this part right, everything else becomes easy—and that’s the difference between actually using your rooftop tent vs regretting it.
How We Chose the Best Rooftop Tents for Subaru Crosstrek
Let’s be clear—this isn’t a random list pulled from specs sheets. These tents were filtered specifically for how they behave on a Subaru Crosstrek in real conditions, not on bigger SUVs or trucks.
1. Weight & Crosstrek Roof Compatibility
The Crosstrek has limits, and ignoring them is the fastest way to waste money.
We prioritized aluminum hard shell tents that stay within a safe dynamic load range, so you’re not stressing the roof rails or compromising handling. Every pick here makes sense once mounted, not just on paper.
2. Real-World Setup Speed (Not Marketing Claims)
“Fast setup” means nothing if you’re fighting latches in the dark.
We focused on true pop-up and gas-strut systems that open clean in seconds—especially important on a smaller vehicle where you don’t want to climb around struggling. These tents are built for quick stops, not complicated setups.
3. Sleeping Comfort & Insulation That Actually Matters
Most listings talk about mattress thickness—but skip insulation quality.
We looked for usable comfort on cold nights, including winter layers, dense foam, and proper sealing. Because on a Crosstrek trip, you’re often in exposed spots—wind and temperature hit harder than expected.
4. Weather Resistance You Can Trust
Not “water-resistant”—actual rain-ready and wind-stable builds.
Hard shells were prioritized for a reason:
they handle sudden weather shifts better, pack down cleaner, and don’t leave you dealing with wet fabric in the morning.
5. Mounting System Compatibility (Crosstrek Reality Check)
A lot of tents look good—until you try installing them.
We filtered for models that work with standard crossbars and rack systems compatible with the Crosstrek, without requiring extreme modifications. Less guesswork, cleaner install, no surprises.
6. Practical Features That You’ll Actually Use
Not gimmicks—real usability upgrades:
USB ports that matter on road trips, integrated lighting, thermal layers, or roof storage that doesn’t interfere with driving. Every feature here was judged by one question:
Will you actually use this on a weekend trip?
7. Value for Money (Not Just Price)
These are newer models—so hype isn’t enough.
We compared build quality, materials, and included features vs cost, not just brand reputation. The goal: options that feel worth it after months of use, not just on day one.
How to Check Compatibility with Your Specific Crosstrek
Not every model year behaves exactly the same, so do this before buying:
- Check your roof’s dynamic load rating (usually around 150 lbs, but confirm your year)
- Subtract your crossbar/rack weight from that limit
- Make sure the tent + mounting hardware stays within range
- Use aftermarket crossbars if you’re unsure about factory rails
If your numbers check out, you’re good. If not, no tent—no matter how good—will feel right on your car.
This selection isn’t about throwing the most popular tents at you.
It’s about picking ones that actually work on a Subaru Crosstrek without compromise—and once you mount the right one, you’ll feel the difference immediately.
#1. JOYINRUTE Aluminum Hard Shell Rooftop Tent
Quick Specs:
- Weight: 178 lbs (borderline for Crosstrek—setup matters more than spec sheet)
- Shell: Aircraft-grade aluminum (no flex, no cheap plastic fatigue)
- Setup: Hydraulic pop-up (true instant deploy, not manual struggle)
- Capacity: 2 person (realistically comfortable for 1 + gear)
- Weather Rating: 5000mm waterproof + blackout UV coating
- Insulation: Removable winter thermal liner (rare at this price)
- Ventilation: 4-window airflow system (mesh + wind layer combo)
- Extras: Ladder, LED strip, storage system, condensation pad
The first time you mount something like this on a Crosstrek, you immediately feel whether it belongs there or not—and this one actually does. The aluminum shell keeps things solid without that cheap plastic flex, and once it’s locked on properly, it feels planted, not sketchy. That matters more than people admit.
Where this setup wins is how it behaves after a long drive. You pull over, release the latches, and those hydraulic struts just lift it clean—no wrestling, no awkward climbing. On a smaller vehicle like the Crosstrek, that “no effort” setup isn’t luxury—it’s the difference between using it every trip or avoiding it.
Cold nights are where it quietly proves its worth. The thermal liner + flocked floor combo actually controls condensation, so you’re not waking up to damp gear or a cold mattress. Add in the 5000mm rain rating and wind resistance, and it’s clear this wasn’t built just for fair-weather camping.
(once it’s mounted right, this feels less like an accessory and more like part of the car—exactly what you want on a Crosstrek)
What Stands Out in Daily Use
- True instant setup — gas struts do the work, not you
- Aluminum shell confidence — no flex, no long-term cracking issues
- Winter-ready insulation — usable beyond summer trips
- Condensation control floor — small detail, big comfort upgrade
- Complete kit included — nothing extra to chase before your first trip
What Could Be Better (Honest Take)
- Weight pushes limits — not ideal on stock crossbars without upgrades
Crosstrek Compatibility Reality Check
This is where most people mess up—the tent itself is fine, but your setup decides everything. At 178 lbs, it sits right at the edge of what a Crosstrek can safely handle dynamically. With proper crossbars, it works. Without them, it doesn’t—simple as that.
Size-wise, it fits clean within the roof footprint, and once mounted correctly, it doesn’t feel oversized or awkward. But you need to respect the platform—this isn’t a full-size SUV.
Installation Notes (Don’t Skip This)
Use heavy-duty crossbars rated above 200 lbs combined load, not basic factory ones. Keep spacing tight (around 28–31 inches), and always torque everything properly—loose mounts are where issues start, not the tent itself.
After installation, do a short drive test before any trip. If it feels stable, quiet, and planted—you’ve done it right. If not, fix it before heading out.
#2. HEYFUN Adventurer Pro Hard Shell Rooftop Tent
Quick Specs:
- Weight: 174 lbs (slightly better than most hard shells, still needs proper rack setup)
- Shell Build: Aircraft-grade aluminum + stainless gas struts
- Setup Speed: True 5-second hydraulic pop-up
- Capacity: 2–3 person (realistically 2 adults + 1 child)
- Weather Rating: Up to 5000mm waterproof + UV-resistant fabric
- Mattress: 3-layer detachable system (noticeably better comfort)
- Extras: Side awning, USB outlet, LED strip, luggage racks, 13 storage pockets
- Max Load Inside: 660 lbs (strong internal support structure)
This is the kind of tent that doesn’t just sit on your Crosstrek—it adds functionality you didn’t know you needed until you use it. From the first setup, the 5-second hydraulic pop feels almost unreal—you barely touch it, and it’s ready. No exaggeration, this is one of the fastest deployments you’ll experience in this category.
Where it separates itself is in the details. The built-in USB outlet, LED strip, and side awning aren’t gimmicks—they change how you camp. You’re not digging for lights, not struggling for shade, not juggling gear. Everything feels integrated, like it was designed for actual trips, not just product listings.
Inside, the 3-layer mattress and moisture-controlled floor make a noticeable difference after a full day outdoors. Add the panoramic opening and multiple storage pockets, and it feels more like a compact mobile setup than just a sleeping space. On a Crosstrek, that efficiency matters—you’re maximizing every inch without overloading the car.
(this is one of those setups where after your first trip, you start planning the next one before you even get home)
What Makes It Stand Out on Trips
- True 5-second setup — no effort, no adjustment, just open and go
- Side awning included — instant shade/rain cover without extra gear
- USB + LED integration — small feature, massive real-world convenience
- 3-layer mattress comfort — noticeably better sleep quality
- Built-in storage system — keeps everything organized without clutter
What Could Be Better (Honest Take)
- Still heavy for stock Crosstrek rails — proper crossbars are non-negotiable
Crosstrek Fitment Insight (Real Talk)
This fits the Crosstrek’s roof footprint clean, and the slightly lower weight compared to similar models helps—but don’t get comfortable. You still need upgraded crossbars, no shortcuts here.
Once mounted correctly, though, it feels balanced—not oversized, not awkward. The added features (awning, racks) don’t make it feel bulky while driving, which is rare in this category.
Installation Reality (Do It Right Once)
Use crossbars rated minimum 165–200 lbs, and double-check spacing before mounting. The universal hardware works fine, and installation is honestly straightforward—but the key is tightening everything evenly and testing before your first trip.
Also, plan your power setup early if you want to use the USB system—bring a proper power bank or external source. Once that’s dialed in, everything else just works.
#3. SanHima Gibb Overland Hard Shell Rooftop Tent
Quick Specs:
- Weight: 167.5 lbs (one of the lighter hard shells here—big advantage)
- Profile: Ultra-slim 7.1″ closed height (garage-friendly, low drag)
- Setup: Manual assist (latch → lift → rods) — still quick, no struggle
- Capacity: 2–3 person (ideal for 2 adults comfortably)
- Weather Rating: 5000mm waterproof + UV50+ protection
- Mattress: 2″ cloud foam (balanced comfort, not too soft, not stiff)
- Shell: Aluminum honeycomb (better insulation than standard shells)
- Highlight: Full 360° mesh window system + tri-color LED
You notice this one before you even camp in it—it doesn’t mess with your drive. The low 7.1-inch profile keeps wind noise down, doesn’t kill your mileage, and actually lets you park in places where bulkier tents won’t fit. On a Crosstrek, that’s a huge win most people ignore.
Then comes the experience inside. The 360° window setup completely changes how this tent feels—it’s open, breathable, and doesn’t give you that boxed-in rooftop vibe. Early morning airflow, sunset views, even just sitting inside—it feels less like a tent and more like a proper elevated space.
Build quality is where it quietly earns trust. The aluminum honeycomb shell + 420D Oxford + poly-cotton combo isn’t just for specs—it actually stabilizes temperature better than most. Add the raised base and full rainfly coverage, and you’re not dealing with random leaks or cold drafts. It just works, without needing attention.
(this is the kind of setup you forget about once it’s installed—and that’s exactly why it’s good)
What Stands Out in Real Use
- Low-profile design — less drag, less noise, better daily driving
- 360° ventilation & views — genuinely changes the camping feel
- Balanced mattress comfort — no sinking, no stiffness
- Tri-color LED lighting — practical at night, not just cosmetic
- Solid insulation build — handles heat and cold without drama
What Could Be Better (Honest Take)
- Not hydraulic pop-up — still quick, but not “hands-free” like gas struts
Crosstrek Fitment Perspective (Where It Makes Sense)
This is one of the few tents that actually feels naturally suited to a Crosstrek, not forced onto it. The lighter weight and slim profile reduce strain on the roof and keep the car’s balance intact.
It still needs proper crossbars—no exceptions—but once installed, it doesn’t feel oversized or top-heavy. If you care about daily drivability + camping balance, this hits that sweet spot.
Installation Reality (Keep It Clean & Simple)
Mounting is straightforward with the included hardware—just make sure your crossbars are properly rated and spaced correctly. The lighter build makes installation easier than heavier models, especially if you’re doing it solo or with one extra hand.
After mounting, check latch alignment and seal closure once—if everything sits flush, you’re set for long-term use without constant adjustments.
#4. ARCTWONDER Hard Shell Rooftop Tent
Quick Specs:
- Weight: 198 lbs (heaviest in this list — requires serious setup planning)
- Shell Build: Full aluminum alloy (top, base, corners — no weak points)
- Setup: Air-pressure pop-up (true 10-second one-person deploy)
- Capacity: 2 person (comfortable, not cramped)
- Weather Rating: 5000mm waterproof + blackout + UV protection
- Insulation: Removable winter thermal layer (dual-layer warmth system)
- Power Setup: Built-in solar panel + 12V outlet
- Extras: 6cm mattress, luggage bars, LED strip, storage system
Let’s not sugarcoat it—this is the kind of tent that either makes perfect sense for your setup… or becomes a mistake if you ignore the basics. At 198 lbs, it’s heavy. But once you actually mount it properly on a Crosstrek with the right rack system, it turns into something else entirely—a self-sufficient camping unit, not just a tent.
The first thing you notice is independence. The solar panel + 12V outlet combo changes how you camp—charging devices, running lights, staying powered without relying on the car constantly. It’s one of those features that sounds optional… until you use it once.
Then comes the comfort side. The thermal liner + dual-layer fabric setup actually traps heat in cold conditions, while the blackout coating keeps things cool and dark when the sun hits. Add the thick mattress and moisture control, and it feels more like a controlled space than a basic rooftop shelter.
(this isn’t just about sleeping on your roof—it’s about not needing anything else once you’re out there)
What Actually Makes It Worth Considering
- Built-in solar system — real off-grid advantage, not a gimmick
- True 4-season insulation — handles cold far better than standard tents
- 10-second one-person setup — no help needed, no effort wasted
- Full aluminum construction — long-term durability, no plastic fatigue
- Loaded with gear support — luggage bars + storage + power system
What Could Be Better (Honest Reality)
- Too heavy for stock Crosstrek setup — requires upgraded rack system, no shortcuts
Crosstrek Fitment Reality (This Part Matters Most)
This is where you need to be honest with yourself. On paper, it fits. In reality, the weight pushes beyond what a stock Crosstrek is designed to handle.
If you’re running heavy-duty aftermarket crossbars (200+ lbs rated) and understand load distribution, then yes—it can work. But if you’re planning to mount this on factory rails and forget about it, this is not the right choice.
That said, once installed properly, the size and low packed height (7″) actually sit well on the vehicle without looking oversized.
Installation Notes (No Guesswork Here)
You’ll need upgraded crossbars with wider spacing (around 31″), and everything must be torqued evenly—this isn’t a “quick install and go” setup. Take your time here.
Also, install and test the solar system connections properly before your first trip—once that’s dialed in, it becomes one of the most useful features of the entire setup.
If you’re willing to do it right, this turns your Crosstrek into something far more capable than it looks.
#5. WildFinder Hard Shell Rooftop Tent
Quick Specs:
- Weight: ~169 lbs (mid-range for hard shells, still needs proper setup)
- Shell Build: 100% aircraft-grade aluminum (no plastic weak points)
- Setup: Air pressure rod system (~2-minute real-world deploy)
- Capacity: 2–3 person (best for 2 adults + light gear)
- Weather Rating: 5000mm rainproof + Level 6 wind + snow-rated
- Mattress System: 5cm foam + condensation pad + marine base
- Extras: Ladder, 10 storage bags, LED strip, dual mattress setup
This is the kind of tent that doesn’t try too hard—and that’s exactly why it works. No flashy extras, no overbuilt gimmicks—just a solid aluminum shell and a setup that holds up trip after trip. On a Crosstrek, that simplicity actually matters more than people think.
The first thing you’ll notice is how planted it feels once mounted. The all-aluminum construction doesn’t flex, doesn’t creak, doesn’t feel temporary. You’re not second-guessing it when the weather turns or when you’re parked unevenly. It just stays consistent.
Inside, the comfort setup is smarter than it looks on paper. The condensation pad + marine base + foam mattress combo keeps things dry and stable, especially when temperatures shift overnight. Add the blackout fabric and airflow windows, and you get a space that actually feels usable—not stuffy, not damp.
(this is for people who want reliability without overthinking every feature—and that’s exactly why it works)
What Actually Works in Real Trips
- Pure aluminum build — long-term durability, no seasonal damage issues
- Balanced comfort system — dryness + support, not just soft foam
- All-weather capability — handles wind, rain, and even snow confidently
- Clean, simple setup — no complicated mechanisms to deal with
- Useful storage layout — keeps gear organized without clutter
What Could Be Better (Honest Reality)
- No premium features like solar or awning — more basic compared to others
Crosstrek Fitment Reality (Don’t Ignore This Part)
At around 169 lbs, this sits in the same zone as most hard shells—it’s not light enough for stock rails, but manageable with the right crossbars.
Once mounted properly, though, it feels stable and balanced. The size fits well within the Crosstrek’s roof, and it doesn’t create that oversized “top-heavy” feel while driving. It’s a safe middle ground if you want durability without going extreme.
Installation Notes (Keep It Practical)
You’ll need crossbars rated at least 175–200 lbs, and lifting this onto the roof isn’t a one-person job—plan for 2–3 people during install.
Once it’s on, setup becomes easy. The air rod system opens smoothly, and there’s nothing complex to maintain long-term. Just check bolts occasionally, and you’re good to go.
#6. ILANDER Aluminum Hard Shell Rooftop Tent
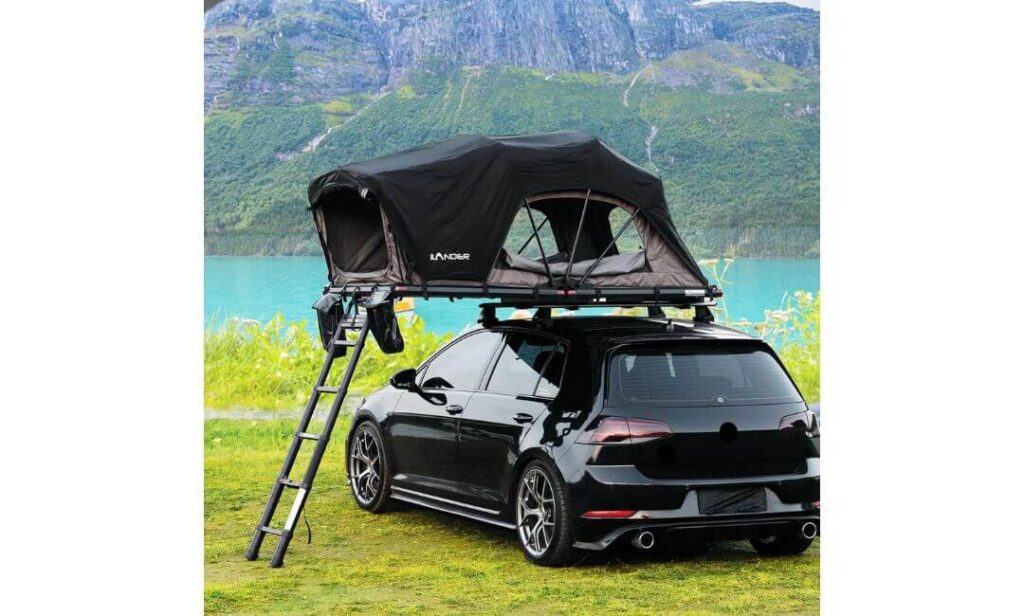
Quick Specs:
- Weight: ~96 lbs (finally something Crosstrek-friendly without hacks)
- Shell Build: Aerospace-grade aluminum (light but structurally strong)
- Setup: 30-second deploy with strap-assisted opening
- Capacity: 2–3 person (best for 2 adults, relaxed fit)
- Weather Rating: 2000mm waterproof + 99% UV protection
- Mattress: 6cm high-density foam (balanced support, not overly soft)
- Profile: ~10.3″ closed height (clean, practical for daily use)
- Extras: LED strip, ladder (330 lbs rated), storage pockets
If you’ve been reading this list carefully, you already know—most rooftop tents here technically fit the Crosstrek, but push its limits. This one doesn’t play that game. At around 96 lbs, it actually respects the car you’re driving, which changes everything from installation to daily driving.
The biggest difference shows up before you even camp. No heavy-duty rack stress, no constant second-guessing weight limits—just a setup that feels natural on the roof. And once you deploy it, the 30-second open system keeps things simple. No hydraulic drama, no fighting mechanisms—just quick, controlled setup.
Inside, it’s clean and functional. The 6cm mattress + silver-coated privacy fabric gives you a quiet, dark space without overheating. Ventilation is decent, not overkill, but enough for real trips. It’s not trying to be flashy—it’s trying to be usable every weekend.
(this is the one you end up using the most—because it never feels like a burden on your car)
What Actually Makes It Click
- Crosstrek-friendly weight — no extreme upgrades needed
- Simple 30-sec setup — fast, controlled, zero frustration
- Efficient design — doesn’t mess with daily driving feel
- Comfortable, no-nonsense interior — sleep well without overcomplication
- Reliable all-weather basics — handles sun, rain, and regular trips easily
What Could Be Better (Honest Take)
- Lower waterproof rating (2000mm) — fine for normal rain, not extreme storms
Crosstrek Fitment Insight (Finally a Clean Fit)
This is the first tent here that genuinely feels made for a Crosstrek, not adapted to it. The weight sits within typical roof limits, meaning you can use standard crossbars (if properly rated) without going into heavy-duty territory.
Size-wise, it fits clean without overhang or awkward proportions. Driving with it doesn’t feel like you’ve strapped a box on top—it stays composed, even at highway speeds.
Installation Notes (Keep It Simple, Keep It Right)
You don’t need a complex setup here—just make sure your crossbars are properly secured and spaced (28–31 inches), and you’re good. Installation is quick, manageable even with two people, and doesn’t require special adjustments.
Once mounted, it’s the kind of setup you don’t think about again—and honestly, that’s exactly what most Crosstrek owners are looking for.
Best Subaru Crosstrek Rooftop Tents Side-by-Side: Features, Comfort & Compatibility
| Model | Weight Reality | Setup Speed | Weather Strength | Standout Feature | Crosstrek Fit |
|---|---|---|---|---|---|
| JOYINRUTE Winter Ready |
178 lbs Needs strong crossbars |
Instant (Hydraulic) | 5000mm + thermal liner | Best cold-weather comfort | Good (with upgrade) |
| HEYFUN Adventurer Pro Feature Loaded |
174 lbs Borderline heavy |
5-sec pop-up | 5000mm all-season | USB + Awning + Storage | Good (with upgrade) |
| SanHima Gibb Balanced Pick |
167.5 lbs Lighter side |
Quick manual | 5000mm + UV50+ | 360° airflow + low profile | Very Good |
| ARCTWONDER Overbuilt |
198 lbs Too heavy for stock |
10-sec pop-up | 5000mm + thermal | Solar panel + power system | Limited (advanced setup only) |
| WildFinder Simple Durable |
~169 lbs Mid-heavy |
~2 min setup | 5000mm + snow rated | Pure aluminum durability | Good (with upgrade) |
| ILANDER Best Fit Crosstrek |
~96 lbs Safe range |
30-sec setup | 2000mm + UV | Lightweight daily usability | Excellent (no stress) |
How to Install and Use Your Rooftop Tent on a Subaru Crosstrek
If you get this part right, everything else becomes easy. If you rush it, even the best rooftop tent will feel like a mistake. The Crosstrek isn’t a full-size SUV—you have to respect its limits and work with it, not against it. Here’s how to do it properly.
Mounting Basics (Do This Before You Even Lift the Tent)
Start with your foundation—crossbars and rack system. This is where most people go wrong.
First, check your Crosstrek’s dynamic roof load rating (not static). Then subtract the weight of your crossbars. Whatever remains is your real usable capacity. If your tent exceeds that, you must upgrade to heavy-duty crossbars—there’s no workaround here.
When mounting:
- Keep crossbar spacing between 28–31 inches (most tents in this list are designed around this range)
- Center the tent evenly across the roof, not pushed forward or backward
- Use all mounting brackets provided—never skip hardware just to “make it fit”
When tightening:
- Don’t just crank bolts randomly—use a torque wrench if possible
- Tighten gradually in a cross pattern (left-front → right-rear → right-front → left-rear)
- Re-check after your first short drive (things settle more than people expect)
Rack Compatibility Check (This Decides Everything)
Not all racks are equal—even if they “fit”.
You want:
- Metal crossbars (not plastic-coated weak rails)
- A load rating above your tent weight + margin (at least +20–30%)
- Solid mounting points—no wobble when you shake them by hand
If your rack flexes before the tent even goes on, it’s already wrong.
Also check:
- Garage clearance after installation (especially with thicker tents)
- Sunroof clearance if your Crosstrek has one
- Wind noise after install—if it’s excessive, your alignment is off
Safety Checks (This Is Where People Get Careless)
This isn’t optional—this is what keeps your setup safe long-term.
Before every trip:
- Check all mounting bolts and brackets
- Make sure latches are fully locked down
- Inspect crossbars for any sign of bending or stress
Driving considerations:
- Avoid high-speed driving in strong crosswinds
- Take turns slightly slower—your center of gravity is higher now
- Don’t overload the tent with extra gear on top unless it’s designed for it
Weight reality:
- Dynamic load = while driving
- Static load = when parked (this is higher, and safe for sleeping)
Don’t confuse the two—this is a common mistake.
Setup Tips (Where Real Comfort Comes From)
Once you reach camp, this is where your setup either feels effortless… or frustrating.
Positioning:
- Park on level ground or slightly head-up (better sleeping angle)
- Avoid setting up directly into strong wind—face the hinge side away if possible
Opening:
- Let the gas struts or support rods do the work—don’t force anything
- Make sure the ladder is properly angled (not vertical, not too flat)
Inside comfort:
- Use the condensation pad properly aligned under the mattress
- Crack open at least one window for airflow—even in cold weather
- In summer, open opposite windows to create cross ventilation
Small detail that matters:
Don’t leave bedding bulky inside when closing unless the tent supports it—it can mess with seals over time.
Storage & Maintenance (This Is What Extends Life)
A rooftop tent isn’t something you just “leave and forget”—but maintaining it is simple if you stay consistent.
After every trip:
- Dry it completely before closing if it got wet
- Wipe down the shell to avoid dust buildup
Every few weeks:
- Air it out—even if you didn’t use it (prevents moisture smell)
- Check seals and edges for wear
Fabric care:
- Clean using mild soap + water only (no harsh chemicals)
- Reapply waterproof coating occasionally if you camp often in rain
Hardware check:
- Inspect bolts, hinges, and struts periodically
- Tighten anything that feels slightly loose—don’t wait for it to worsen
The Part Most People Realize Too Late
A rooftop tent on a Crosstrek isn’t about having the biggest or most expensive setup—it’s about having one that feels easy every single time you use it.
If mounting is solid, weight is respected, and setup is smooth…
you’ll actually use it.
And that’s the whole point.
Choosing the Right Rooftop Tent for Your Subaru Crosstrek Based on Real Use Cases
Most people pick a rooftop tent by looking at features. The smarter way—the one that actually works long term—is choosing based on how you’ll use your Crosstrek in real life. Because the same tent that feels perfect on paper can become a burden if it doesn’t match your driving style, trip length, and habits.
Let’s break it down the way it actually plays out on the road.
For Weekend Trips & Quick Escapes (Lightweight + Zero Hassle Setup)
If your trips are short—2 to 3 days, spontaneous drives, quick getaways—then your priority isn’t features, it’s effortlessness. You don’t want to think about weight limits, complicated installs, or long setup times after a tiring drive.
This is where lighter setups like ILANDER make the most sense. On a Crosstrek, the difference between a 96 lb tent and a 170+ lb tent isn’t small—it changes how the car drives, how easy installation feels, and how often you actually use it.
You’ll appreciate:
- Quick 30-second setup without climbing around
- Minimal impact on fuel economy and handling
- Easy removal if needed
This is the setup you end up using every weekend because it never feels like a chore.
For Year-Round Camping (Cold Nights, Wind, Unpredictable Weather)
If you’re someone who camps beyond summer—early winters, high-altitude spots, unpredictable weather—then comfort and insulation matter more than anything else.
This is where tents like JOYINRUTE or ARCTWONDER come in. The thermal liners, thicker insulation layers, and better sealing systems actually make a difference when temperatures drop.
But here’s the real trade-off:
You’re adding weight. And on a Crosstrek, that means you must commit to a proper rack setup.
What you gain:
- Warmer interior during cold nights
- Better resistance to wind and heavy rain
- More controlled sleeping environment
What you accept:
- Heavier load, more setup responsibility
If you’re serious about all-season use, this trade-off is worth it. If not, it becomes unnecessary weight.
For Road Trips with Partner or Family (Space + Usability Over Specs)
If your Crosstrek is your travel base—long drives, multiple stops, maybe camping with a partner or a child—then space and usability matter more than raw features.
Tents like HEYFUN Adventurer Pro or SanHima Gibb work better here because they balance:
- Interior space that doesn’t feel cramped
- Smart storage (pockets, LED, access points)
- Better airflow and comfort over longer stays
The difference shows up after day two or three.
You’re not just sleeping—you’re living out of that space. And small details like storage, lighting, and ventilation start to matter more than specs.
This is where a tent feels like a setup, not just a place to crash.
For Budget-Conscious Buyers (Solid Build Without Overpaying)
If you’re trying to stay practical—no overspending, just something reliable that works—then you don’t need the most advanced model. You need something that won’t fail after a few trips.
That’s where WildFinder stands out. It focuses on:
- Strong aluminum construction
- Proper weather protection (rain, wind, snow)
- Simple, durable setup
You’re not paying for extras like solar systems or advanced integrations—you’re paying for consistency.
And honestly, for many Crosstrek owners, that’s enough. Because once it’s mounted and working, you don’t care about features—you care that it just does its job every time.
What Most People Miss (And Real Users Don’t)
The best rooftop tent for your Crosstrek isn’t the one with the most features—it’s the one that fits your actual routine.
- If it’s too heavy → you’ll worry every drive
- If it’s too complex → you’ll avoid using it
- If it’s too basic for your needs → you’ll outgrow it fast
The right choice feels natural on your car, easy on your mind, and reliable every time you use it.
And once you experience that balance, you stop comparing specs—and just start planning your next trip.
Buying Guide: Smart Decisions Before You Put a Rooftop Tent on Your Subaru Crosstrek
This is the part most people rush—and later regret. A rooftop tent isn’t just another accessory on a Crosstrek. It changes how your car drives, how it handles weight, and how reliable your setup feels on every trip. If you get these fundamentals right, everything else becomes easy. If not, even the best tent will feel like the wrong choice.
Understanding Your Crosstrek’s Real Roof Load Capacity (Not What You Think It Is)
Most buyers look at one number and assume they’re safe. That’s where mistakes begin.
Your Crosstrek has two different load ratings:
- Dynamic load (while driving) — this is the critical one
- Static load (when parked) — this is much higher and safe for sleeping
What actually matters when choosing a tent is the dynamic load capacity, because that’s what your roof handles on the road.
Now here’s the part people skip:
You don’t get to use the full number.
You need to subtract:
- Weight of your crossbars / roof rack system
- Any extra gear mounted with the tent
What’s left is your true usable capacity.
That’s why lightweight options like ILANDER feel stress-free, while heavier tents demand upgraded racks. It’s not about “can it fit”—it’s about can your setup handle it long-term without strain.
Balancing Weight vs Durability (The Real Trade-Off Nobody Explains Properly)
Everyone wants a tent that’s strong, weatherproof, and long-lasting. But on a Crosstrek, strength usually comes with weight—and weight changes everything.
Heavier tents (like full aluminum builds with insulation):
- Feel more solid
- Handle extreme weather better
- Last longer under harsh conditions
But:
- Increase roof stress
- Affect fuel economy
- Require stronger crossbars and careful installation
Lighter tents:
- Keep the car stable and efficient
- Are easier to install and remove
- Encourage more frequent use
But:
- May sacrifice extreme weather capability
- Feel less “overbuilt” in harsh conditions
The smart move is not picking the strongest or lightest—it’s choosing the one your Crosstrek can handle comfortably without constant compromise.
Insurance, Liability & Real-World Responsibility (Most People Ignore This)
This part isn’t talked about enough—but it matters.
When you mount a rooftop tent:
- You’re changing your vehicle’s weight distribution
- You’re adding a permanent load structure on the roof
In case of an accident or damage:
- Some insurance providers may question non-OEM modifications
- Overloading beyond recommended limits can affect claims
Also consider:
- Parking in low-clearance areas (garages, malls)
- Long-term wear on roof rails and mounting points
This doesn’t mean you shouldn’t install one—it means you should do it properly, within limits, and with awareness.
Warranty & After-Sale Support (What Actually Matters After Purchase)
With newer rooftop tent brands, warranty isn’t just a bonus—it’s your safety net.
Here’s what to look for:
- At least 1–2 year manufacturer warranty
- Clear coverage on structural components (shell, hinges, struts)
- Availability of replacement parts (ladders, seals, brackets)
Because the reality is:
It’s not about whether something breaks—it’s about how easy it is to fix when it does.
Brands that offer lifetime accessory support or easy part replacement are always a safer bet than those that disappear after purchase.
Compatibility Isn’t Just Fit—It’s Long-Term Stability
A tent “fitting” your Crosstrek doesn’t mean it’s compatible.
Real compatibility means:
- Weight sits within safe limits
- Crossbars handle load without flex
- Mounting points stay secure over time
- Driving feels stable, not top-heavy
If your setup feels off—even slightly—it usually is.
And ignoring that early leads to bigger issues later.
The One Decision That Actually Matters
At the end of the day, don’t choose based on specs alone.
Choose based on this:
Will this setup feel easy, stable, and stress-free every time I drive and camp?
Because once that answer is yes, everything else—comfort, features, performance—starts to make sense.
And that’s when a rooftop tent stops being a “purchase”…
and becomes something you actually use.
FAQs About Subaru Crosstrek Rooftop Tents
Can a Subaru Crosstrek realistically handle a hard shell rooftop tent long-term without damage?
Short answer—yes, but only if you respect the setup. The Crosstrek itself isn’t weak, but its factory roof system is not built for heavy constant loads. Most issues people face (noise, flex, long-term rail stress) don’t come from the tent—they come from pushing stock crossbars beyond their comfort zone.
If you’re running anything above ~150 lbs, upgrade your crossbars and mount it properly once. Do that, and the car handles it just fine. Ignore it, and even a “good” tent will feel like a bad decision within months.
Which rooftop tent actually feels right on a Subaru Crosstrek for daily driving—not just camping?
This is where most guides lie. They talk about features, not how it feels on the car.
On a Crosstrek, the right tent is the one that doesn’t constantly remind you it’s there. Lightweight options (like ILANDER-type builds) keep your drive smooth, quiet, and efficient. Heavier tents? You’ll feel them—on turns, acceleration, even braking.
If your car is your daily driver, don’t chase the most “feature-loaded” option. Pick the one that keeps your Crosstrek feeling normal Monday to Friday—and useful on weekends.
Is fuel economy actually affected with a rooftop tent on a Crosstrek, or is that overhyped?
It’s real—but not always dramatic. The impact depends more on aerodynamics than weight.
Low-profile tents (like slim hard shells) barely change your driving experience. But taller, bulkier setups catch wind and increase drag at highway speeds, which is where you’ll notice fuel drop.
Real-world truth:
- City driving → almost no difference
- Highway driving → noticeable if the tent is bulky
So if you care about mileage, don’t just look at weight—look at closed height and shape.
What’s the biggest mistake people make after installing a rooftop tent on their Crosstrek?
They treat it like a “set it and forget it” upgrade.
In reality, rooftop tents need periodic checks—especially on a smaller vehicle like the Crosstrek. Bolts loosen slightly over time, seals collect dust, and crossbars take stress you don’t notice immediately.
The smartest users:
- Recheck mounting after the first trip
- Inspect hardware every few weeks
- Keep the tent clean and dry
The ones who skip this? They’re the ones who complain later about noise, instability, or wear.
Is it better to remove the rooftop tent when not in use, or leave it mounted full-time?
Depends on how often you actually use it—and this is where honesty matters.
If you camp regularly (every few weeks), leave it mounted. The convenience outweighs the minor downsides.
But if your trips are occasional, removing it makes more sense:
- Better fuel efficiency
- Less stress on roof components
- Cleaner driving feel
Real talk—most people think they’ll use it every weekend. Few actually do. So choose based on your real habits, not ideal plans.
Final Thoughts: What Actually Matters Once It’s on Your Roof
By now, you’ve probably realized this isn’t just about picking the “best rooftop tent.” It’s about picking one that feels right on a Subaru Crosstrek without forcing it to be something it’s not.
That’s the difference between a setup you’re proud of… and one you quietly regret after a few trips.
The truth is simple:
If your tent matches your Crosstrek’s weight limits, driving feel, and real usage, everything clicks. Setup feels effortless, driving stays comfortable, and you actually start planning trips instead of second-guessing your purchase.
But if you chase specs without thinking about your car—more features, more weight, more “capability”—you’ll feel it every single time you drive.
What This List Really Gave You (Beyond Just Products)
- If you want zero stress and daily usability → lightweight options like ILANDER just make sense
- If you want comfort in harsh weather → JOYINRUTE or ARCTWONDER deliver, but demand proper setup
- If you want balanced real-world usability → SanHima or HEYFUN hit that middle ground
- If you want simple durability without overthinking → WildFinder does the job
None of these are “perfect” for everyone. But one of them will feel perfect for you—and that’s the only one that matters.
The Reality Most Guides Won’t Tell You
A rooftop tent doesn’t change your life because of features.
It changes it because it makes things easier.
Easier to stop anywhere and sleep.
Easier to take spontaneous trips.
Easier to turn your Crosstrek into something more than just a daily driver.
And when your setup is right, you stop thinking about gear completely.
You just go.
Pick the one that fits your car—and your routine.
That’s the decision you won’t regret six months later.
Also Check: