6 Best Fender Flares for Jeep Gladiator in 2026: Perfect Fit, No-Drill, Zero Hassle Picks
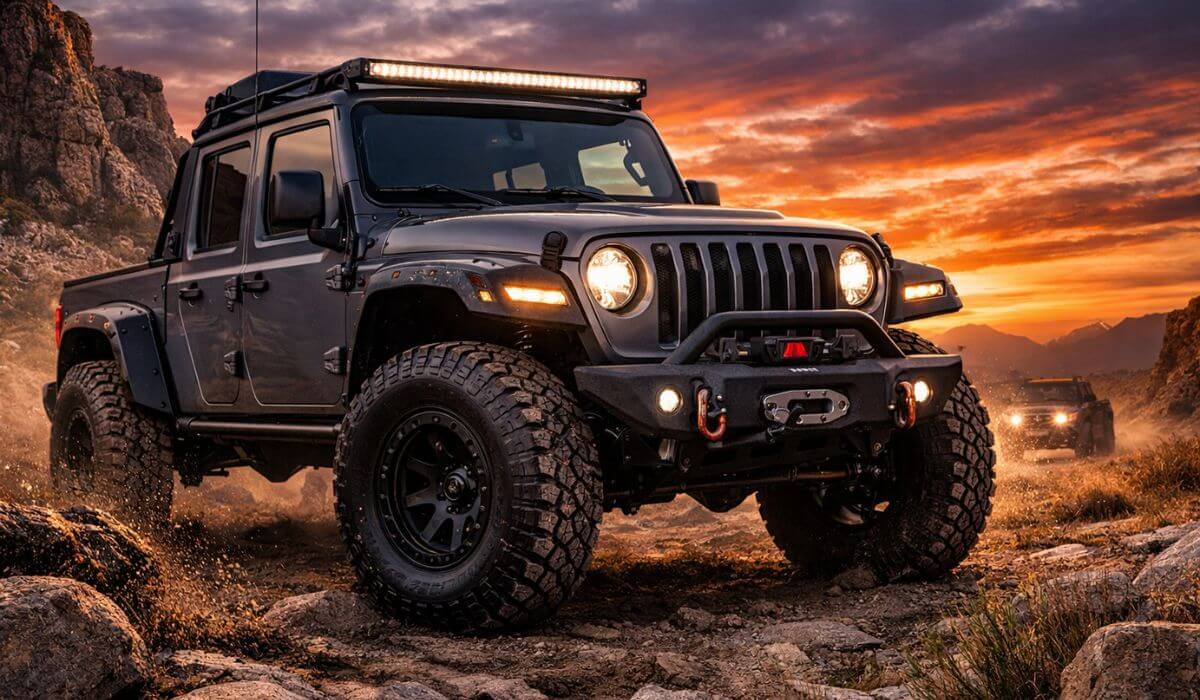
If you’ve spent even a week driving a Jeep Gladiator, you already know—stock fender flares don’t cut it once you start pushing bigger tires or hitting rough trails. The moment your wheels start throwing mud up the doors or poking out past the body, you realize this isn’t just about looks anymore—it’s about coverage, fit, and long-term durability.
I’ve gone through enough Gladiator builds (and seen plenty on trails and forums) to tell you this: most fender flares either don’t fit clean, rattle over time, or make installation a headache. And with so many newer brands popping up, it’s honestly hard to tell what’s actually worth bolting onto your truck.
So instead of listing random options, this guide focuses on fender flares that actually make sense for a 2020–2026 Jeep Gladiator—solid steel builds, proper fitment, usable lighting, and installs that won’t eat your entire weekend. Some of these don’t have years of reviews yet—but on paper, build quality, and real-world usability, they stand out where it matters.
If you want something that fits right, installs without drama, and holds up off-road, these are the ones worth your attention.
Best Jeep Gladiator Fender Flares: Top 2026 Picks (High Clearance, Strong Build)
#1. DV8 Offroad Slim Fender Flares — Premium Slim Steel Fender Flares for Jeep Gladiator (No-Drill Fit, LED DRL & Turn Signals)
#2. Hooke Road Flat Style Fender Flares — Budget Steel Fender Flares for Jeep Gladiator (Flat Style, Easy Install, LED Signals)
#3. YZONA Flat Fender Flares Kit — Heavy-Duty Wide Fender Flares for Jeep Gladiator (Full Coverage, Steel Build, Turn Signals)
#4. MONOKING Flat Fender Flares Set — High-Clearance Off-Road Fender Flares for Jeep Gladiator (Bolt-On, Paintable Steel, LED Signals)
#5. EYOUHZ Fender Flares Kit — Affordable Steel Fender Flares for Jeep Gladiator (Mud Guard Protection, Turn Signals, Easy Fit)
#6. ROXX Front Fender Flares — Alloy Steel Fender Flares for Jeep Gladiator (LED DRL Design, Clean Fit Replacement)
Expert Tip (from someone who’s actually dealt with these builds)
If you’re running bigger tires or planning to, don’t just chase the most aggressive-looking flares—focus on how they sit against the body and how solid the mounting feels once installed. A flare that looks great in photos but flexes or leaves gaps will start to rattle, trap dirt, and loosen over time, especially off-road.
From what I’ve seen across Gladiator setups, steel flares with proper bolt alignment and clean edge fitment always hold up better than anything flashy but poorly designed. And if you can get integrated lighting that actually lines up and works out of the box, that’s one less headache you’ll deal with later.
How We Chose These Fender Flares
This isn’t a random list pulled from product pages. Every option here was filtered based on what actually matters once these are on a real Jeep Gladiator—not just how they look online.
First thing we looked at was fitment consistency for 2020–2026 Gladiator JT. A lot of newer brands claim compatibility, but the real test is whether the flares sit flush with factory lines without awkward gaps or forced alignment. The ones included here are designed specifically around the Gladiator’s body shape, not generic “fits most Jeep” designs.
Then comes material strength. Every product here uses steel construction, not thin plastic that starts fading or flexing after a few months. On trails or even rough daily roads, rigidity matters more than anything, especially when debris hits or when tires throw constant pressure against the edges.
Installation was another major filter. We avoided anything that turns into a full-day project. These picks lean towards bolt-on or no-drill setups, where hardware lines up properly and doesn’t require modification just to make things fit. Because realistically, most people don’t want to cut into their truck for something that should’ve been designed better in the first place.
We also paid attention to functional features, not gimmicks. Integrated LED turn signals and DRLs aren’t just for looks—they help with visibility and keep things clean without needing extra wiring hacks. But only when they’re properly built and aligned, which is why those made the cut here.
Lastly, we looked at real-world usability over hype. Some of these are newer in the market, yes—but they stand out because of how they’re built, how they mount, and how they solve actual problems Gladiator owners face—coverage, durability, and clean fitment.
End of the day, this list is about one thing: fender flares that won’t give you regret after installation. That’s the standard everything here had to meet.
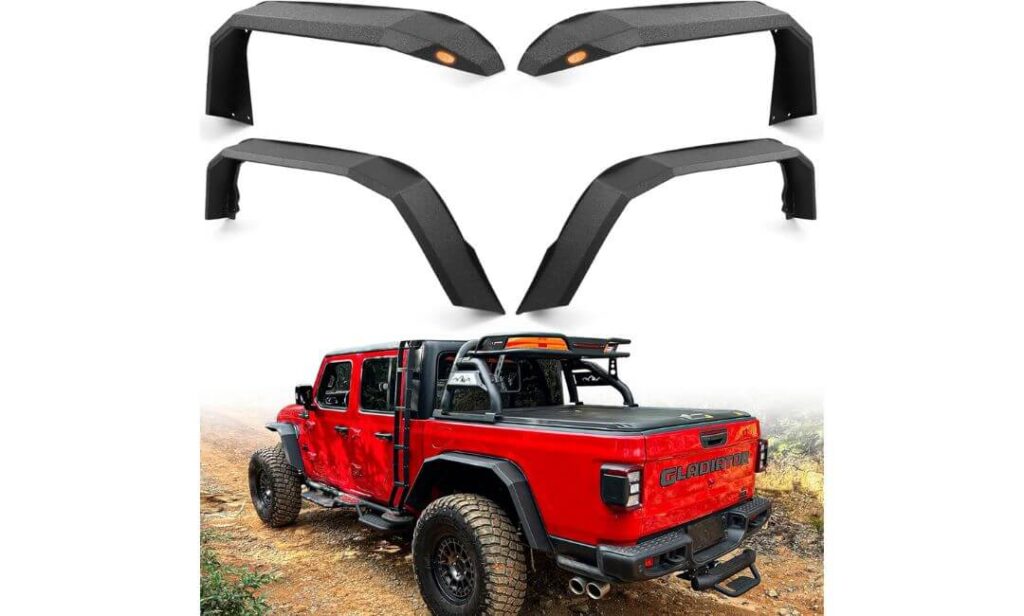
#1. DV8 Offroad Slim Fender Flares
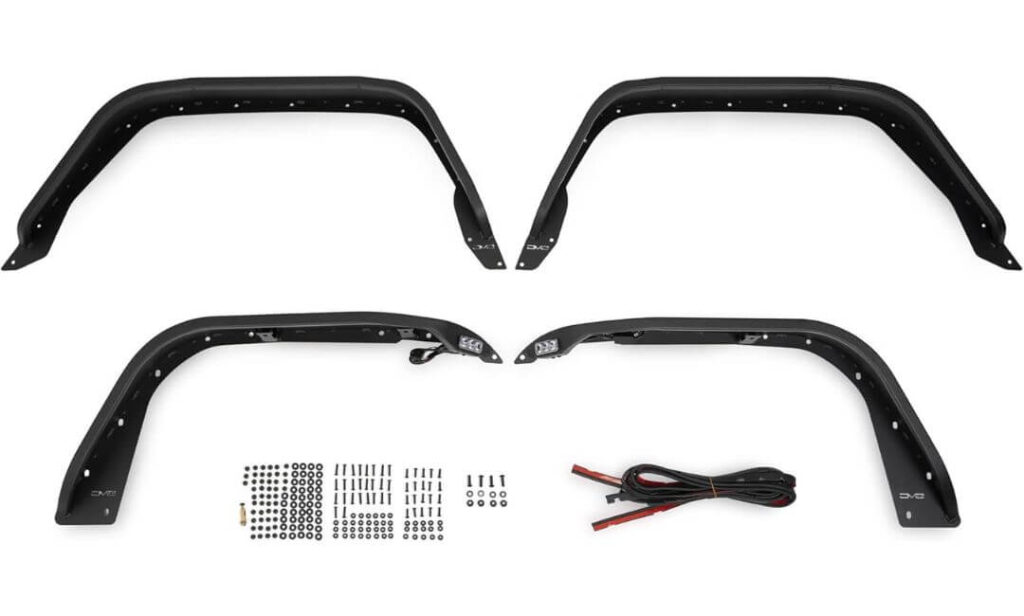
Quick Specs:
- Steel build (not plastic) — holds shape under trail stress, no flex nonsense
- Micro-texture black powder coat — hides scratches, stays clean longer
- Dual-stage LED lights — white DRL + amber turn signal (plug & play, no wiring drama)
- Slim profile design — tighter clearance for trails, less bulk sticking out
- Full set (front + rear) — matched look, no mix-and-match headache
- Rubber edge seal — stops dust, pebbles, and paint damage at contact points
The first thing you notice isn’t the look—it’s how solid these feel the moment you pick them up. Proper steel, not that lightweight stuff brands try to pass off as “durable.” Once mounted, they sit tight against the body, no weird spacing, no forced alignment. That slim profile actually makes a difference when you’re squeezing through tight trails (you’re not catching edges or worrying about unnecessary width).
The lighting setup is where this gets practical. Those dual-stage LEDs (white DRL + amber turn signals) aren’t just for show—they’re visible, clean, and actually integrate well without looking like an afterthought. And since it’s plug & play, you’re not stuck figuring out wiring diagrams or dealing with flickering issues later.
Protection-wise, this setup does what most stock flares can’t. The steel structure + rubber seal combo keeps debris from creeping into panel gaps, and over time, that’s what saves your paint and prevents that annoying buildup along the edges. It’s built for people who actually drive their Gladiator, not just park it.
(you’ll feel the difference the first time your tires throw mud and nothing hits your doors)
What Stood Out in Real Use
- True steel construction — no flex, no cheap feel even under pressure
- Clean body alignment — sits flush, doesn’t look bolted-on as an afterthought
- Functional LED setup — visible, reliable, and properly integrated
- Slim trail-friendly design — better clearance without losing coverage
- Rubber sealing detail — small thing, but makes a big difference long-term
Where It Might Not Suit Everyone
- Optional cutting recommended for best fit — not mandatory, but if you want that perfect finish, you’ll need to be okay with it
Jeep Gladiator Fitment Reality
These are properly designed for 2020–2026 Gladiator JT, so alignment isn’t something you fight with. Mounting points line up the way they should, and once installed, the flares follow the truck’s natural body lines instead of sitting awkwardly on top.
One thing to note—these don’t work with OEM inner fenders, so you’re either removing or replacing that setup. Not a dealbreaker, but something you plan before starting instead of figuring out mid-install.
Installation Notes (What to Expect)
This is one of those installs where you can tell if a product was engineered properly. It’s fully bolt-on, hardware lines up, and one person can realistically handle it in around 2–3 hours if you take your time.
Now the honest part—cutting is recommended if you want the cleanest finish and proper articulation. It’s not forced, but skipping it means you’re not getting the full benefit of the design. If you do cut, just make sure you seal the exposed steel properly (paint it, don’t ignore it).
Take your time aligning everything before tightening, and once it’s done, it feels like it belongs there—not like something you added later.
#2. Hooke Road Flat Style Fender Flares
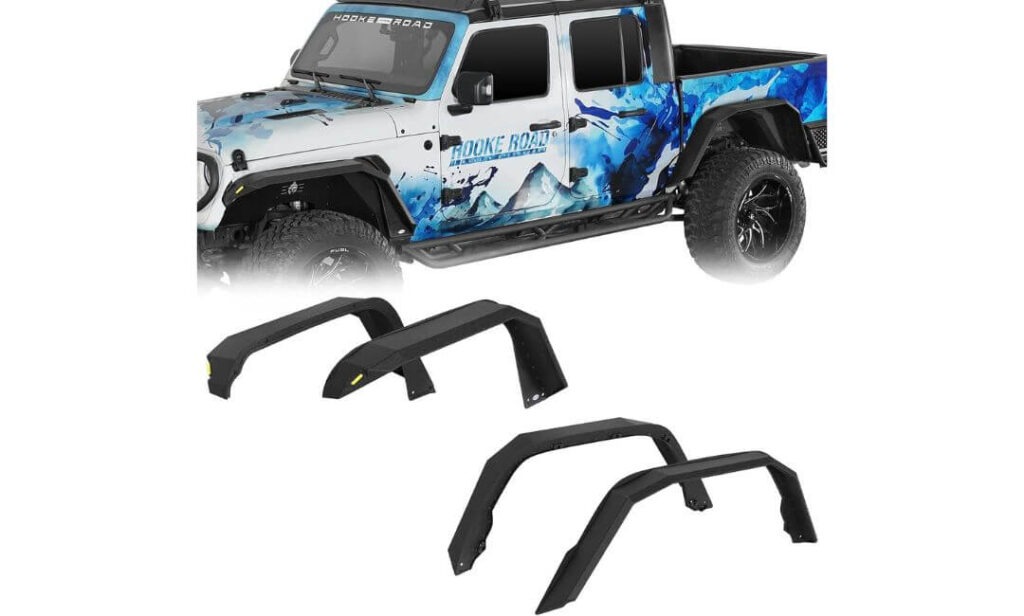
Quick Specs:
- 16-gauge + 11-gauge carbon steel — thick, layered strength where it counts
- Textured matte black + E-coating inside — real corrosion protection, not surface-level
- Wide coverage (6.0″ front / 5.4″ rear) — proper tire poke control
- Integrated amber LED turn signals (front) — functional visibility upgrade
- ~50 lbs total weight — heavy-duty feel, not hollow or flimsy
- Bolt-on setup with rivet nuts — secure mounting, not clip-based shortcuts
This is where things start getting serious. The moment you handle these, you realize they’re not trying to be “lightweight” or easy—they’re built to take hits and stay in place. That 16 + 11 gauge steel combo gives them a dense, planted feel once mounted, and on a Gladiator, that matters when you’re running wider setups or pushing into rough terrain.
The extra width is not just a number on paper. That 6-inch front coverage actually solves one of the biggest Gladiator annoyances—tire poke throwing mud and debris all over the sides. With these on, you immediately get better shielding without sacrificing articulation, so your suspension still moves freely off-road.
Lighting is simple but effective. The amber LED turn signals are cleanly integrated into the front flares, not awkwardly stuck on. Wiring is required, yes—but once done, it feels like a factory-level upgrade rather than an aftermarket add-on. And that textured finish? It hides abuse better than smooth coatings, which you’ll appreciate after a few trail runs.
(this is the kind of setup that looks better after use, not worse)
What Actually Holds Up Here
- Thick steel construction — you feel the strength immediately, no flex issues
- Real tire coverage — noticeably reduces mud spray and road debris
- Corrosion-resistant coating system — inside + outside protection
- Integrated LED signals — clean, usable, not just decorative
- Secure rivet nut mounting — once installed, it stays put
Where It Might Not Suit Everyone
- Requires removing factory inner liners + minor wiring — not difficult, but not a plug-and-play job either
Jeep Gladiator Fitment Reality
Designed specifically for 2020–2026 Gladiator JT, and it shows in how the flares line up once installed. The flat style gives a more aggressive, squared-off look that actually complements the Gladiator’s body instead of fighting it.
But here’s the honest part—factory inner liners have to go. These are built to work with their own setup (or aftermarket liners), so you need to be okay making that switch. Once done, though, the fit looks intentional and complete, not patched together.
Installation Notes (What You’re Getting Into)
This isn’t a “throw it on in an hour” kind of install—but it’s not complicated either if you’re comfortable with basic tools. The main step that needs patience is the rivet nut installation. Do it right, and the whole structure becomes rock solid.
You’ll also need to handle basic wiring for the LED signals, nothing advanced, just follow the guide properly. Plan around 2 hours, maybe a bit more if it’s your first time.
Take your time with alignment before tightening everything down, and once it’s locked in, you’ll feel the difference—it mounts like a permanent upgrade, not a temporary add-on.
#3. YZONA Flat Fender Flares Kit
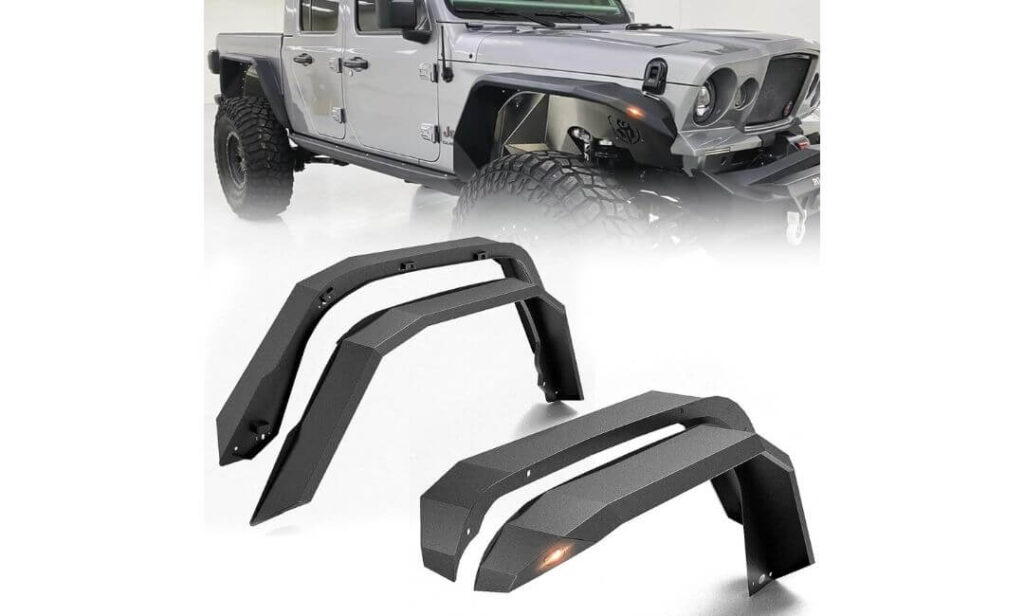
Quick Specs:
- Stainless steel construction — stronger than typical carbon steel, better rust resistance
- Black powder-coated finish — protects against scratches, mud, and weather exposure
- Full set (2 front + 2 rear) — complete coverage out of the box
- Bolt-on design (mostly no-drill) — installs using supplied hardware
- Integrated turn signal lights — included but may need extra setup
- Wide coverage design — better shielding from debris, sand, and road spray
This is the kind of setup people usually go for when they want maximum coverage without spending top-tier money—and honestly, it delivers more than you’d expect at this level. The stainless steel build gives it an edge right away. It doesn’t just feel strong—it feels like something that won’t start rusting out after one monsoon season or a few muddy trail runs.
Once mounted, the coverage is what stands out. These aren’t slim or subtle—they’re designed to catch everything your tires throw out, especially if you’re running wider setups. Mud, sand, small stones—this setup actually blocks it instead of letting it creep up your doors and side panels.
Now the honest part—the lights and install. You do get turn signals integrated, but they’re not always a straight plug-and-play situation depending on your Gladiator’s wiring. Some setups work clean, others need a bit of adjustment. Same with install—it’s marketed as bolt-on, and mostly it is, but depending on alignment, you might need to tweak things a bit to get that perfect sit.
(if you’re okay putting in a little effort, this punches way above its price)
What Actually Makes It Worth Considering
- Stainless steel advantage — better long-term durability and rust resistance
- Strong debris protection — noticeably better coverage than slim designs
- Complete kit included — no missing parts, everything in the box
- Clean aggressive stance — fills out the Gladiator’s body properly
- Good value for heavy-duty build — solid balance between price and strength
Where It Might Not Suit Everyone
- Turn signal wiring can be inconsistent — may need extra effort or adjustment depending on setup
Jeep Gladiator Fitment Reality
Built specifically for 2020–2026 Jeep Gladiator JT, and it generally lines up well with factory mounting zones. Once installed correctly, the flares follow the wheel arch properly and don’t look out of place.
That said, not every install is identical. Some users report perfect bolt-on alignment, others need minor adjustments or even small drilling depending on their vehicle condition or previous mods. Nothing extreme—but worth knowing before you start.
Installation Notes (What You Should Know Before Starting)
This sits in the middle ground—not overly complex, but not completely effortless either. Expect around 1–2 hours per side if you’re doing it carefully.
The key is alignment and patience. Don’t rush tightening bolts—get everything seated first, then lock it down evenly. For the lights, test before final install so you don’t have to reopen everything later.
If wiring or fitment feels even slightly off, getting a professional to handle it isn’t a bad move. Done right, though, this setup feels solid and looks like it belongs on the truck—not something you added as an afterthought.
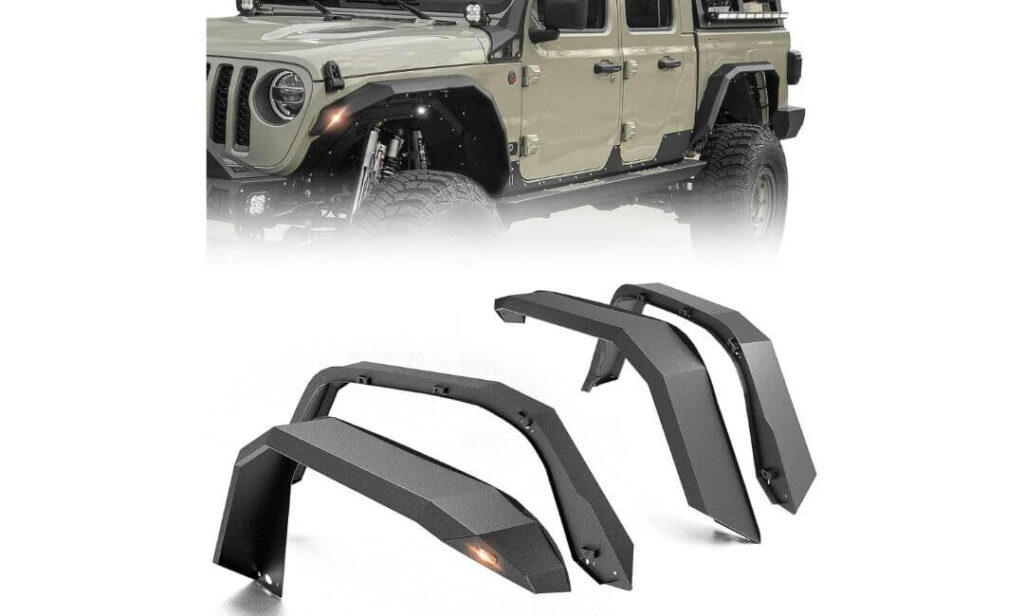
#4. MONOKING Flat Fender Flares Set
Quick Specs:
- Heavy-duty carbon steel — built for impact, not just appearance
- True no-drill bolt-on design — uses factory mounting points only
- High-clearance flat profile — supports 35″–37″ tires without rubbing
- Integrated LED turn signals — added safety with clean wiring setup
- Textured black paintable finish — ready for custom color match
- Full set (4PCS) — front + rear complete upgrade
Here’s the difference you feel immediately—this setup is built for people who don’t want to deal with installation drama but still want serious off-road capability. The moment it goes on, you notice how clean everything lines up. No forcing, no adjusting endlessly—it actually uses the factory mounting points the way it should have from the start.
The biggest advantage here is clearance. That flat, slim profile opens up space inside the wheel well, which matters if you’re stepping up to 35s or even 37s. No rubbing, no awkward trimming, just proper articulation when the suspension moves. It’s one of those upgrades where you don’t realize how restricted your stock setup was until you switch.
Then there’s durability. The carbon steel construction feels solid without being overcomplicated, and the finish gives you flexibility—you can leave it as-is or paint it to match your build. Add in the integrated LED turn signals, and it doesn’t just perform better, it actually looks like a well-thought-out upgrade instead of a random add-on.
(this is the kind of setup you install once and don’t think about again)
What Actually Makes It Stand Out
- Genuine no-drill install — no cutting, no extra steps, just clean fitment
- High tire clearance — handles bigger setups without rubbing issues
- Strong carbon steel build — reliable under off-road pressure
- Paintable finish — lets you match your build instead of settling
- Integrated lighting — improves visibility without extra wiring clutter
Where It Might Not Suit Everyone
- Wiring for LED signals still required — simple, but not fully plug-and-play
Jeep Gladiator Fitment Reality
Designed specifically for 2020–2026 Jeep Gladiator JT, and the fit reflects that. The flares follow the body lines naturally, and because they use factory mounting points, they don’t sit awkwardly or feel like an add-on.
The high-clearance design also means they’re ideal if you’re running or planning bigger tires. Instead of adjusting your setup to fit the flares, these actually adapt to your build goals, which is how it should be.
Installation Notes (What You’ll Experience)
This is one of the few setups that actually delivers on the “no-drill” claim without hidden complications. Everything bolts into place using existing mounting points, and alignment is straightforward if you take your time.
Expect a smooth install, but don’t rush tightening—get everything seated properly first. For the LED wiring, just follow the guide and test before final tightening so you don’t have to reopen anything.
Once installed, it feels factory-level secure—no movement, no gaps, no second guessing.
#5. EYOUHZ Fender Flares Kit
Quick Specs:
- Stainless / alloy steel build — solid feel with better resistance to wear and rust
- Black powder-coated finish — handles scratches, mud, and daily abuse
- Full 4-piece kit (front + rear) — complete setup, nothing extra to buy
- Bolt-on design with rivet nuts — secure mounting, not clip-based
- Integrated turn signal lights — added function with basic wiring
- Wide mud guard coverage — protects panels from debris and tire spray
This is one of those setups where you don’t expect much at first—but once installed, it actually surprises you in a good way. The steel construction feels solid in hand, not thin or hollow, and once mounted, it gives the Gladiator a full, filled-out stance instead of that exposed wheel look.
Coverage is where it earns its place. These flares are built to block mud, sand, and road debris properly, especially if you’re running wider tires. You’ll notice the difference after your first drive—less mess on the doors, less buildup around the edges, and overall cleaner body lines even after rough use.
Now the honest side—installation is straightforward, but not completely effortless. You’ll need to remove factory liners and deal with rivet nut mounting + light wiring. The included tool works, but it’s not the smoothest experience if you’ve never used one before. Once everything is secured though, it feels stable and does exactly what it’s supposed to.
(this is the kind of budget setup that actually holds up instead of falling apart after a few months)
What Actually Makes It Worth It
- Strong steel construction — doesn’t feel cheap even at this price point
- Proper debris protection — noticeably reduces mud and spray
- Complete kit included — everything needed comes in the box
- Clean aggressive look — improves stance without overdoing it
- Good value for money — balance between price and durability
Where It Might Not Suit Everyone
- Included rivet nut tool can be frustrating — works, but not the easiest to handle
Jeep Gladiator Fitment Reality
Built for 2020–2026 Jeep Gladiator JT, and overall fitment is solid once installed correctly. The flares align well with the body lines and don’t look oversized or out of proportion.
That said, small alignment differences can happen depending on your vehicle’s condition or previous mods. Nothing major—but taking your time during install makes all the difference in how clean the final result looks.
Installation Notes (What You Should Expect)
Plan for around 1–2 hours, depending on how comfortable you are with tools. The main step that needs attention is the rivet nut installation—take your time here, because that’s what determines how secure everything feels later.
You’ll also need to handle basic wiring for the turn signals and remove factory liners before starting. If you want a smoother experience, using a better rivet nut tool can save time and frustration.
Once installed properly, though, it feels locked in place—no looseness, no movement, just a solid upgrade that does its job.
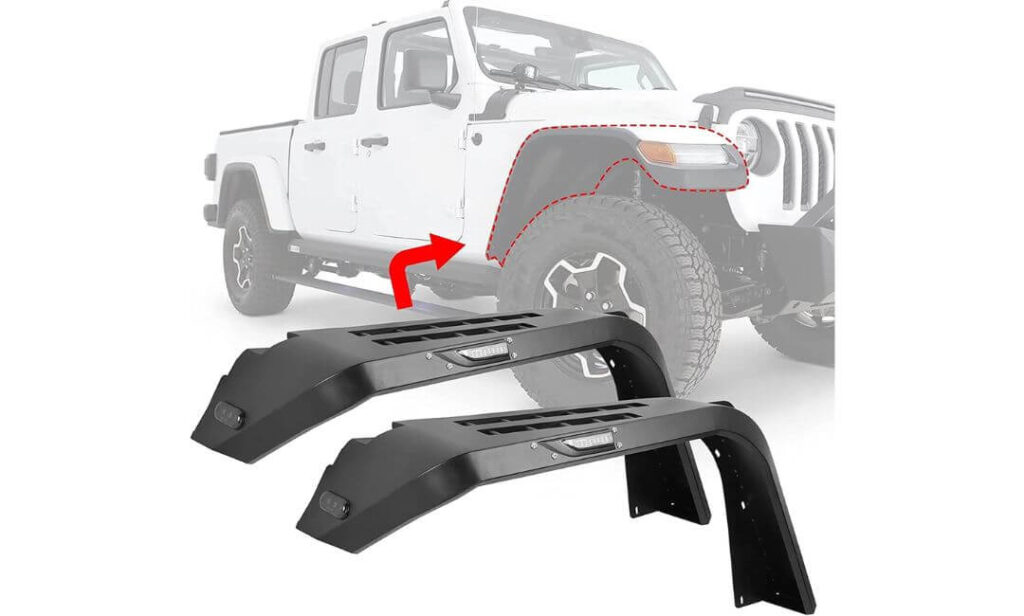
#6. ROXX Front Fender Flares
Quick Specs:
- Alloy / stainless steel build — solid protection without excessive weight
- Sequential LED turn signals + DRL — modern lighting, clearly visible
- True bolt-on install (no drill) — mounts using factory points
- ~15-minute install time — one of the quickest setups available
- Powder-coated textured finish — handles mud, debris, and daily wear
- Front-only setup — focused upgrade for front-end protection & style
This is the kind of product you go for when you want a quick, noticeable upgrade without turning your garage into a workshop. Within minutes of installing, the front end of the Gladiator looks sharper, more aggressive, and honestly more complete than stock.
The standout here is the lighting. Those sequential turn signals with DRL aren’t just a gimmick—they’re bright, smooth, and give a clean, modern look at night or in low visibility. It’s the kind of detail that makes people actually notice your truck, not just glance at it.
Build quality is solid for what it is. The steel construction + coated finish does its job—protects against mud, debris, and daily abuse without overcomplicating things. And because it’s a front-only setup, it works well if you’re not ready to commit to a full flare replacement but still want better protection and styling up front.
(this is one of those upgrades you install fast and immediately feel the difference)
What Actually Makes It Stand Out
- Extremely quick install — genuinely one of the easiest upgrades here
- Sequential LED signals + DRL — clean, modern, and highly visible
- Solid steel protection — handles everyday debris without issue
- Clean front-end upgrade — improves look without going overboard
- No drilling needed — simple, factory-style mounting
Where It Might Not Suit Everyone
- Front-only coverage — doesn’t upgrade rear wheel protection
Jeep Gladiator Fitment Reality
Designed for 2019–2026 Jeep Gladiator JT, and the fit reflects that. It aligns directly with factory mounting points, so there’s no guesswork or adjustment needed during install.
Because it’s focused on the front, it blends well with both stock and aftermarket rear setups. It doesn’t throw off the overall look—it just enhances the front where most people notice first.
Installation Notes (What You’ll Experience)
This is as straightforward as it gets. You’re looking at around 15 minutes total, basic tools, and no cutting or drilling involved.
Just align, bolt, and tighten evenly—done. The only extra step is connecting the LED wiring, which is simple if you follow the guide. Test the lights before finishing, and you’re set.
Once installed, it feels secure and sits clean—no gaps, no movement, no unnecessary effort.
Best Jeep Gladiator Fender Flares Comparison (No-Drill, Steel, LED Options)
| Product | Build Quality | Installation | Coverage & Clearance | Lighting | Best For |
|---|---|---|---|---|---|
|
DV8 Offroad Slim
Top Pick
Premium slim steel setup
|
Heavy-duty steel + micro-texture coat | Bolt-on (optional cutting for perfect finish) | Slim design, tight trail clearance | Dual-stage DRL + turn signals | Clean fit + premium build lovers |
|
Hooke Road Flat Style
Heavy Duty
Wide aggressive stance
|
16 & 11 gauge carbon steel | Bolt-on + rivet nuts + wiring | Wide (6” front), strong coverage | LED turn signals | Off-road builds needing max protection |
|
YZONA Flat Kit
Best Value
Budget steel combo
|
Stainless steel + powder coat | Mostly bolt-on (some adjustment needed) | Wide coverage, solid shielding | Turn signals (fit varies) | Budget buyers wanting full coverage |
|
MONOKING Flat Set
Easy Install
True no-drill setup
|
Heavy-duty carbon steel | True bolt-on (factory points) | High clearance (35”-37” tires) | LED turn signals | Big tire builds + hassle-free install |
|
EYOUHZ Fender Kit
Budget Pick
Affordable full set
|
Steel + coated finish | Bolt-on + rivet tool + wiring | Good coverage for daily + trail | LED turn signals | Value-focused upgrades |
|
ROXX Front Flares
Style Upgrade
Front-only quick mod
|
Steel with textured finish | Ultra easy (15-min bolt-on) | Front protection only | Sequential LED + DRL | Quick visual upgrade lovers |
Jeep Gladiator Fender Flares Buying Guide (What Actually Matters Before You Buy)
Buying fender flares for a Jeep Gladiator isn’t just about picking the most aggressive-looking option or the cheapest kit you can find. Once these are on your truck, they directly affect fitment, tire clearance, long-term durability, and even how your Gladiator holds up in daily use or off-road conditions. And this is exactly where most people get it wrong—they buy based on looks, then deal with gaps, rattling, or poor coverage later.
Let’s break this down the way someone who’s actually dealt with these setups would.
Start with Fitment, Not Features
Everything begins with how the flares sit on your Gladiator. If the alignment isn’t right, nothing else matters. Poor fitment leads to gaps, uneven pressure on mounting points, and eventually looseness over time.
A proper setup should:
- Sit flush against body lines
- Match the wheel arch curve exactly
- Not require forcing bolts or bending metal to align
Most of the better options (like the ones listed above) are designed specifically for 2020–2026 Gladiator JT, which makes a huge difference. Avoid anything that claims “universal Jeep fit”—that’s where problems usually start.
Material Quality Isn’t Optional
This is one area where you shouldn’t compromise. Fender flares take constant abuse—rocks, mud, water, and heat cycles. Cheap materials might look fine on day one but won’t hold up.
Here’s the reality:
- Steel (carbon or stainless) = best for durability and long-term use
- Powder coating + inner coating = prevents rust from inside out
- Thin plastic = fades, cracks, and flexes under pressure
If you’re actually driving your Gladiator and not just parking it, go with solid steel construction. It’s heavier, yes—but it’s also what keeps your setup intact over time.
Coverage vs Clearance (Know Your Build Goal)
This is where most buyers don’t think ahead.
If you’re running stock or slightly upgraded tires, you want flares that provide:
- Wider coverage → keeps mud and debris off your doors
If you’re planning 35” or 37” tires, then:
- You need high-clearance flat-style flares
- Otherwise, you’ll deal with rubbing or restricted suspension movement
You can’t have both maximum coverage and maximum clearance in the same design—it depends on how you plan to use your Gladiator.
Installation Reality (Don’t Fall for “Easy Install” Claims)
Almost every brand says “easy install,” but the reality varies.
Here’s what actually matters:
- True bolt-on (factory mounting points) = cleanest and easiest
- Rivet nut setups = strong but require patience and proper tools
- Cutting required = not bad, but you need to be prepared
If you want a no-hassle experience, go for setups that genuinely align with factory points without modification. If you’re okay putting in a bit of work, more heavy-duty options are worth it—but go in prepared.
Lighting Isn’t Just for Looks
A lot of these newer flares come with LED turn signals or DRLs, and most people treat it like a styling feature—but it’s actually practical.
- Better visibility in low light and bad weather
- Cleaner look without adding separate lighting kits
- Improves overall road presence
That said, not all lighting systems are equal. Some are plug & play, others require wiring adjustments. Always check this before buying so you’re not surprised mid-install.
Finish & Long-Term Wear
This is something you’ll only notice months later if it’s done poorly.
A good finish should:
- Resist chips, scratches, and fading
- Handle mud, water, and UV exposure
- Not peel or bubble over time
Textured finishes usually hold up better than smooth ones, especially if you’re using your Gladiator regularly.
Budget vs Value (Don’t Chase Cheap)
There’s a difference between affordable and cheap.
- Cheap flares → poor fit, weak mounting, short lifespan
- Value flares → solid build, acceptable install effort, good durability
- Premium flares → best fitment, better finish, fewer long-term issues
If you’re planning to keep your Gladiator long-term, it’s always better to spend once on something that fits right and lasts, instead of replacing a bad setup later.
Final Thought (What Actually Matters Most)
At the end of the day, the best fender flares aren’t the ones with the most features—they’re the ones that:
- Fit clean without gaps
- Stay tight after months of driving
- Handle real-world use without breaking down
Everything else—style, lights, finish—comes after that.
If you keep those basics right, you won’t regret your choice. And that’s really the whole point of this guide.
Jeep Gladiator Fender Flares Installation Guide (No-Drill Setups Done Right)
If you’re going with a no-drill fender flare setup, the expectation is simple—clean install, no cutting, no permanent changes. But the reality is, even “no-drill” installs can go wrong if you rush or don’t prep properly. The difference between a setup that looks factory-installed and one that feels like an add-on comes down to alignment, mounting pressure, and patience during install.
This isn’t complicated work—but it does need to be done the right way.
What a Proper No-Drill Installation Actually Looks Like
A true no-drill install means the flares are designed to use existing factory mounting points, with hardware that lines up without forcing anything into place. You’re not modifying the truck—you’re replacing and upgrading parts using what’s already there.
The process should feel natural:
- Flares sit in position without needing pressure
- Bolts thread in smoothly (not forced)
- Edges align with body lines before tightening
If you’re having to push, bend, or re-angle parts just to get bolts in—that’s usually where future problems start.
Step-by-Step Installation Flow (High-Level, Real-World)
Start by removing your factory fender flares and inner liners carefully. This is where most time goes, not the actual installation. Take your time here—don’t break clips or rush removal, because clean removal makes the rest easier.
Once the area is clear, do a dry fit first. Place the new flare against the body without bolting anything down. This helps you understand how it naturally sits and whether any alignment adjustments are needed before committing.
After that, begin with hand-tightening the bolts. Don’t fully tighten anything yet. Work around the flare evenly, letting it settle into position. This avoids uneven pressure and prevents gaps along the edges.
Once everything is aligned, go back and tighten gradually in sequence, not all at once in one spot. This ensures even mounting and a flush finish.
If your setup includes lighting, connect and test the wiring before final tightening. It sounds obvious, but skipping this step means reopening everything if something doesn’t work.
Tools You’ll Actually Need (No Guesswork Setup)
You don’t need a full workshop, but having the right basics makes a big difference:
- Socket set (metric sizes for Jeep bolts)
- Wrench set for tighter spots
- Trim removal tools (for factory flare removal)
- Screwdrivers (flat + Phillips)
- Torque wrench (recommended for even pressure)
- Rivet nut tool (only if your kit uses it—some do, some don’t)
A clean workspace and proper lighting matter more than people think. You don’t want to be guessing alignment because you can’t see properly.
Common Mistakes That Ruin an Otherwise Good Install
The biggest mistake is tightening bolts too early. Once you lock one side down before aligning everything else, you force the flare out of position—and that’s how gaps and uneven edges happen.
Another common issue is ignoring mounting pressure balance. If bolts aren’t tightened evenly, the flare can sit slightly twisted. It might look fine at first, but over time it leads to looseness or rattling.
Rivet nut installs (if included) are another area where people struggle. If they’re not seated properly, the entire mounting becomes unreliable. This isn’t something to rush—steady pressure and correct placement matter more than speed.
And one more thing—not checking fitment before install. Always test-fit first. It saves time and avoids rework.
When It’s Better to Let a Professional Handle It
If your setup involves wiring, rivet nuts, or optional cutting, and you’re not confident with tools, there’s no downside to getting it installed professionally. It’s a one-time job, and a clean install makes a noticeable difference long-term.
Also, if you’re someone who cares about perfect alignment and finish, a professional install ensures everything sits exactly how it should—no second guessing, no re-adjustments later.
Final Thought (What Makes an Install Feel “Right”)
A properly installed fender flare doesn’t look installed—it looks like it came with the truck. No gaps, no movement, no noise over bumps.
That only happens when you take your time, align everything correctly, and don’t rush the process. Because once it’s done right, you won’t have to touch it again—and that’s exactly how it should be.
Jeep Gladiator Fender Flares Maintenance & Care (Keep Them Tight, Clean, and Looking Right)
Most people install fender flares and forget about them—but that’s exactly how you end up with faded finishes, loose mounts, and dirt buildup that slowly damages your paint underneath. The truth is, these parts take constant abuse—sun, mud, water, road salt, and heat cycles. If you want them to look good and stay solid for years, a little consistent care goes a long way.
This isn’t complicated maintenance—it’s just about doing the right things at the right time.
Cleaning Them the Right Way (Not Just a Quick Wash)
A basic rinse isn’t enough, especially after muddy drives or dusty roads. Dirt doesn’t just sit on the surface—it gets trapped around edges, seams, and rubber seals, and over time that’s what causes wear.
Use a proper car shampoo and a soft brush or microfiber cloth to clean:
- Around mounting edges and bolt areas
- Under the flare lip where debris collects
- Along the rubber seals (if included)
Avoid harsh chemicals or strong degreasers—they can strip the coating and fade the finish faster, especially on textured black surfaces. A gentle clean done regularly keeps the coating intact and prevents buildup that’s harder to remove later.
Protecting the Finish (What Keeps Them Looking New)
Textured or powder-coated finishes are durable, but they’re not invincible. Constant UV exposure and dirt friction can slowly dull the surface.
To maintain that deep black look:
- Use a plastic/trim restorer or protectant occasionally
- Avoid parking long-term under direct harsh sunlight if possible
- Clean off mud quickly—don’t let it dry and sit for days
If your flares are paintable or painted, treat them like body panels—wash properly and consider a light protective layer to prevent fading.
Checking Mounting Hardware (This Is Where Most People Slip)
Even a perfectly installed flare can loosen over time if you never check it. Vibration, off-road movement, and temperature changes can slowly affect bolt tension.
Every few weeks (or after rough driving), take a minute to:
- Check if any bolts feel loose or uneven
- Look for slight gaps forming along edges
- Re-tighten evenly if needed (don’t over-tighten)
This simple check prevents small issues from turning into rattling or misalignment later.
Rubber Seals & Edge Protection (Small Detail, Big Impact)
If your setup includes rubber seals, don’t ignore them. These are what prevent dust, moisture, and small debris from getting trapped between the flare and body panel.
Over time, seals can:
- Shift out of position
- Collect dirt underneath
- Dry out or lose flexibility
Clean them gently and make sure they’re seated properly. If they move or wear out, replacing them early saves your paint from long-term damage.
How They Hold Up Over Time (Real Expectations)
With proper care, steel fender flares with good coating can easily last years without major issues. But there are a few things to keep in mind:
- UV exposure will slowly fade untreated finishes
- Temperature changes (heat/cold cycles) can affect bolt tension
- Mud and moisture left untreated can lead to corrosion in hidden areas
The difference between flares that look new after a year and ones that look worn out comes down to how often they’re cleaned and checked.
After Off-Road Use (What You Should Always Do)
After any serious trail run:
- Rinse off mud, sand, and debris immediately
- Check for loose bolts or shifted alignment
- Inspect the underside and inner edges where buildup hides
This is where most damage starts—not from one big hit, but from dirt and debris sitting in places you don’t see.
Final Thought (What Actually Keeps Them Solid Long-Term)
Fender flares don’t need constant attention—but they do need consistent, basic care. Clean them properly, check the mounting once in a while, and don’t ignore small signs like gaps or dirt buildup.
Do that, and they’ll stay tight, look clean, and keep doing their job without giving you problems later.
FAQs About Jeep Gladiator Fender Flares
Are steel fender flares actually worth it on a Jeep Gladiator, or just a visual upgrade?
If you’re driving a Jeep Gladiator the way it’s meant to be driven—even occasionally—steel flares stop being a cosmetic choice and start becoming a functional upgrade. Stock plastic flares are fine until you step into bigger tires or rough terrain, then you start seeing flex, fading, and small cracks over time. Steel doesn’t just look tougher—it absorbs impact, holds shape, and keeps your setup intact when things get rough.
The real difference shows up after a few months, not day one. Steel flares don’t loosen their structure, don’t warp under heat, and don’t start looking worn after repeated abuse. So yeah, they look aggressive—but more importantly, they protect your build and save you from replacing cheap parts later.
Do no-drill fender flares on a Jeep Gladiator actually stay secure long-term?
A properly designed no-drill setup can stay just as secure as factory-installed parts—but only if everything lines up the way it should. When flares use factory mounting points with correct hardware, they distribute pressure evenly and don’t rely on shortcuts like clips or weak brackets. That’s why some setups feel rock solid, while others start rattling—it comes down to design and install quality.
The key is not rushing the install. If bolts are tightened unevenly or alignment is off even slightly, you’ll feel it later as vibration or minor gaps. But when done right, they hold firm through daily driving and off-road use. Just check them occasionally, especially after rough terrain—it’s normal maintenance, not a flaw.
Will wider fender flares actually reduce mud and debris on a Jeep Gladiator?
Yes—but only if the width is properly designed, not just visually wide. On a Jeep Gladiator, tire throw is real, especially with aggressive tread patterns. Wider flares that extend far enough out will redirect mud, sand, and debris downward instead of letting it spray across your doors and side panels.
That said, they don’t completely eliminate the mess—they control it. You’ll still get dirt, but it won’t be hitting your truck the same way. The difference is noticeable after the first drive in wet or muddy conditions—less cleanup, less buildup, and less long-term paint wear.
Are integrated LED lights in fender flares actually useful or just hype?
Good LED setups are more than just styling—they improve visibility and communication on the road, especially in low-light or bad weather conditions. Integrated turn signals and DRLs help your Gladiator stand out more clearly to other drivers, which is something you don’t think about until you’re actually in those situations.
The catch is, not all lighting systems are equal. Some are true plug-and-play and work perfectly out of the box, while others need wiring adjustments to function properly. When done right, they feel like a factory upgrade—not an aftermarket add-on. When done wrong, they become something you ignore or disconnect later.
How do you know if a fender flare will actually fit properly before buying?
The safest way is to look beyond “fits 2020–2026” claims and focus on how the product is designed for the Gladiator’s body lines. Real fitment shows in how the flare follows the wheel arch, how the mounting points align, and whether users report clean installs without forcing adjustments.
If a product consistently requires bending, drilling, or reworking just to sit right, that’s not proper fitment—it’s compromise. A good flare should sit naturally during test fit, align with minimal effort, and tighten down without shifting. That’s the difference between something that feels factory and something that always feels added on.
Final Verdict (What Actually Makes Sense for Your Jeep Gladiator)
At this point, it really comes down to one thing—what kind of Gladiator you’re building. Not what looks good on a product page, not what sounds aggressive in a title, but what actually fits your usage once you’re out on the road or trail.
If you want something that installs clean and just works without second-guessing, the no-drill, factory-aligned setups are the safest move. If your focus is bigger tires and real off-road articulation, then high-clearance flat flares make more sense than anything else. And if your priority is coverage—keeping mud, debris, and daily wear off your body panels—then going wider isn’t optional, it’s necessary.
What most people don’t realize is that fender flares aren’t a one-time visual upgrade—they’re something you’ll notice every single time you drive. When they fit right, you forget about them. When they don’t, you’ll keep seeing the gaps, hearing the movement, and dealing with the mess they fail to control.
Every option in this list was chosen around that idea—fit, strength, and real usability over hype. Some are easier to install, some require a bit more effort. Some give you cleaner looks, others give you maximum protection. But none of them are here just to fill space—they’re here because they solve actual problems Gladiator owners deal with.
So don’t overthink it—just pick the one that matches how you actually use your truck. Because once it’s installed properly, the right set of fender flares doesn’t just change how your Gladiator looks… it changes how it holds up over time.
Also Check: